Connectors are the integration layer between your AI agents and the external SaaS tools your workforce uses every day. Each connector represents a link to a third-party service — such as Slack, Jira, GitHub, Google Calendar, or Salesforce — and exposes a set of tools that AI agents can invoke on behalf of your users.
By enabling connectors, you give AI agents the ability to read, write, and interact with your organization's business applications. Combined with policies, connectors form the foundation of Agen for Work's governed AI access model: connectors define what tools are available, while policies define who can use them and under what conditions.
To access the Connectors page, click the Connectors icon in the left sidebar.
The Connectors page is organized into two tabs: My connectors and Marketplace.
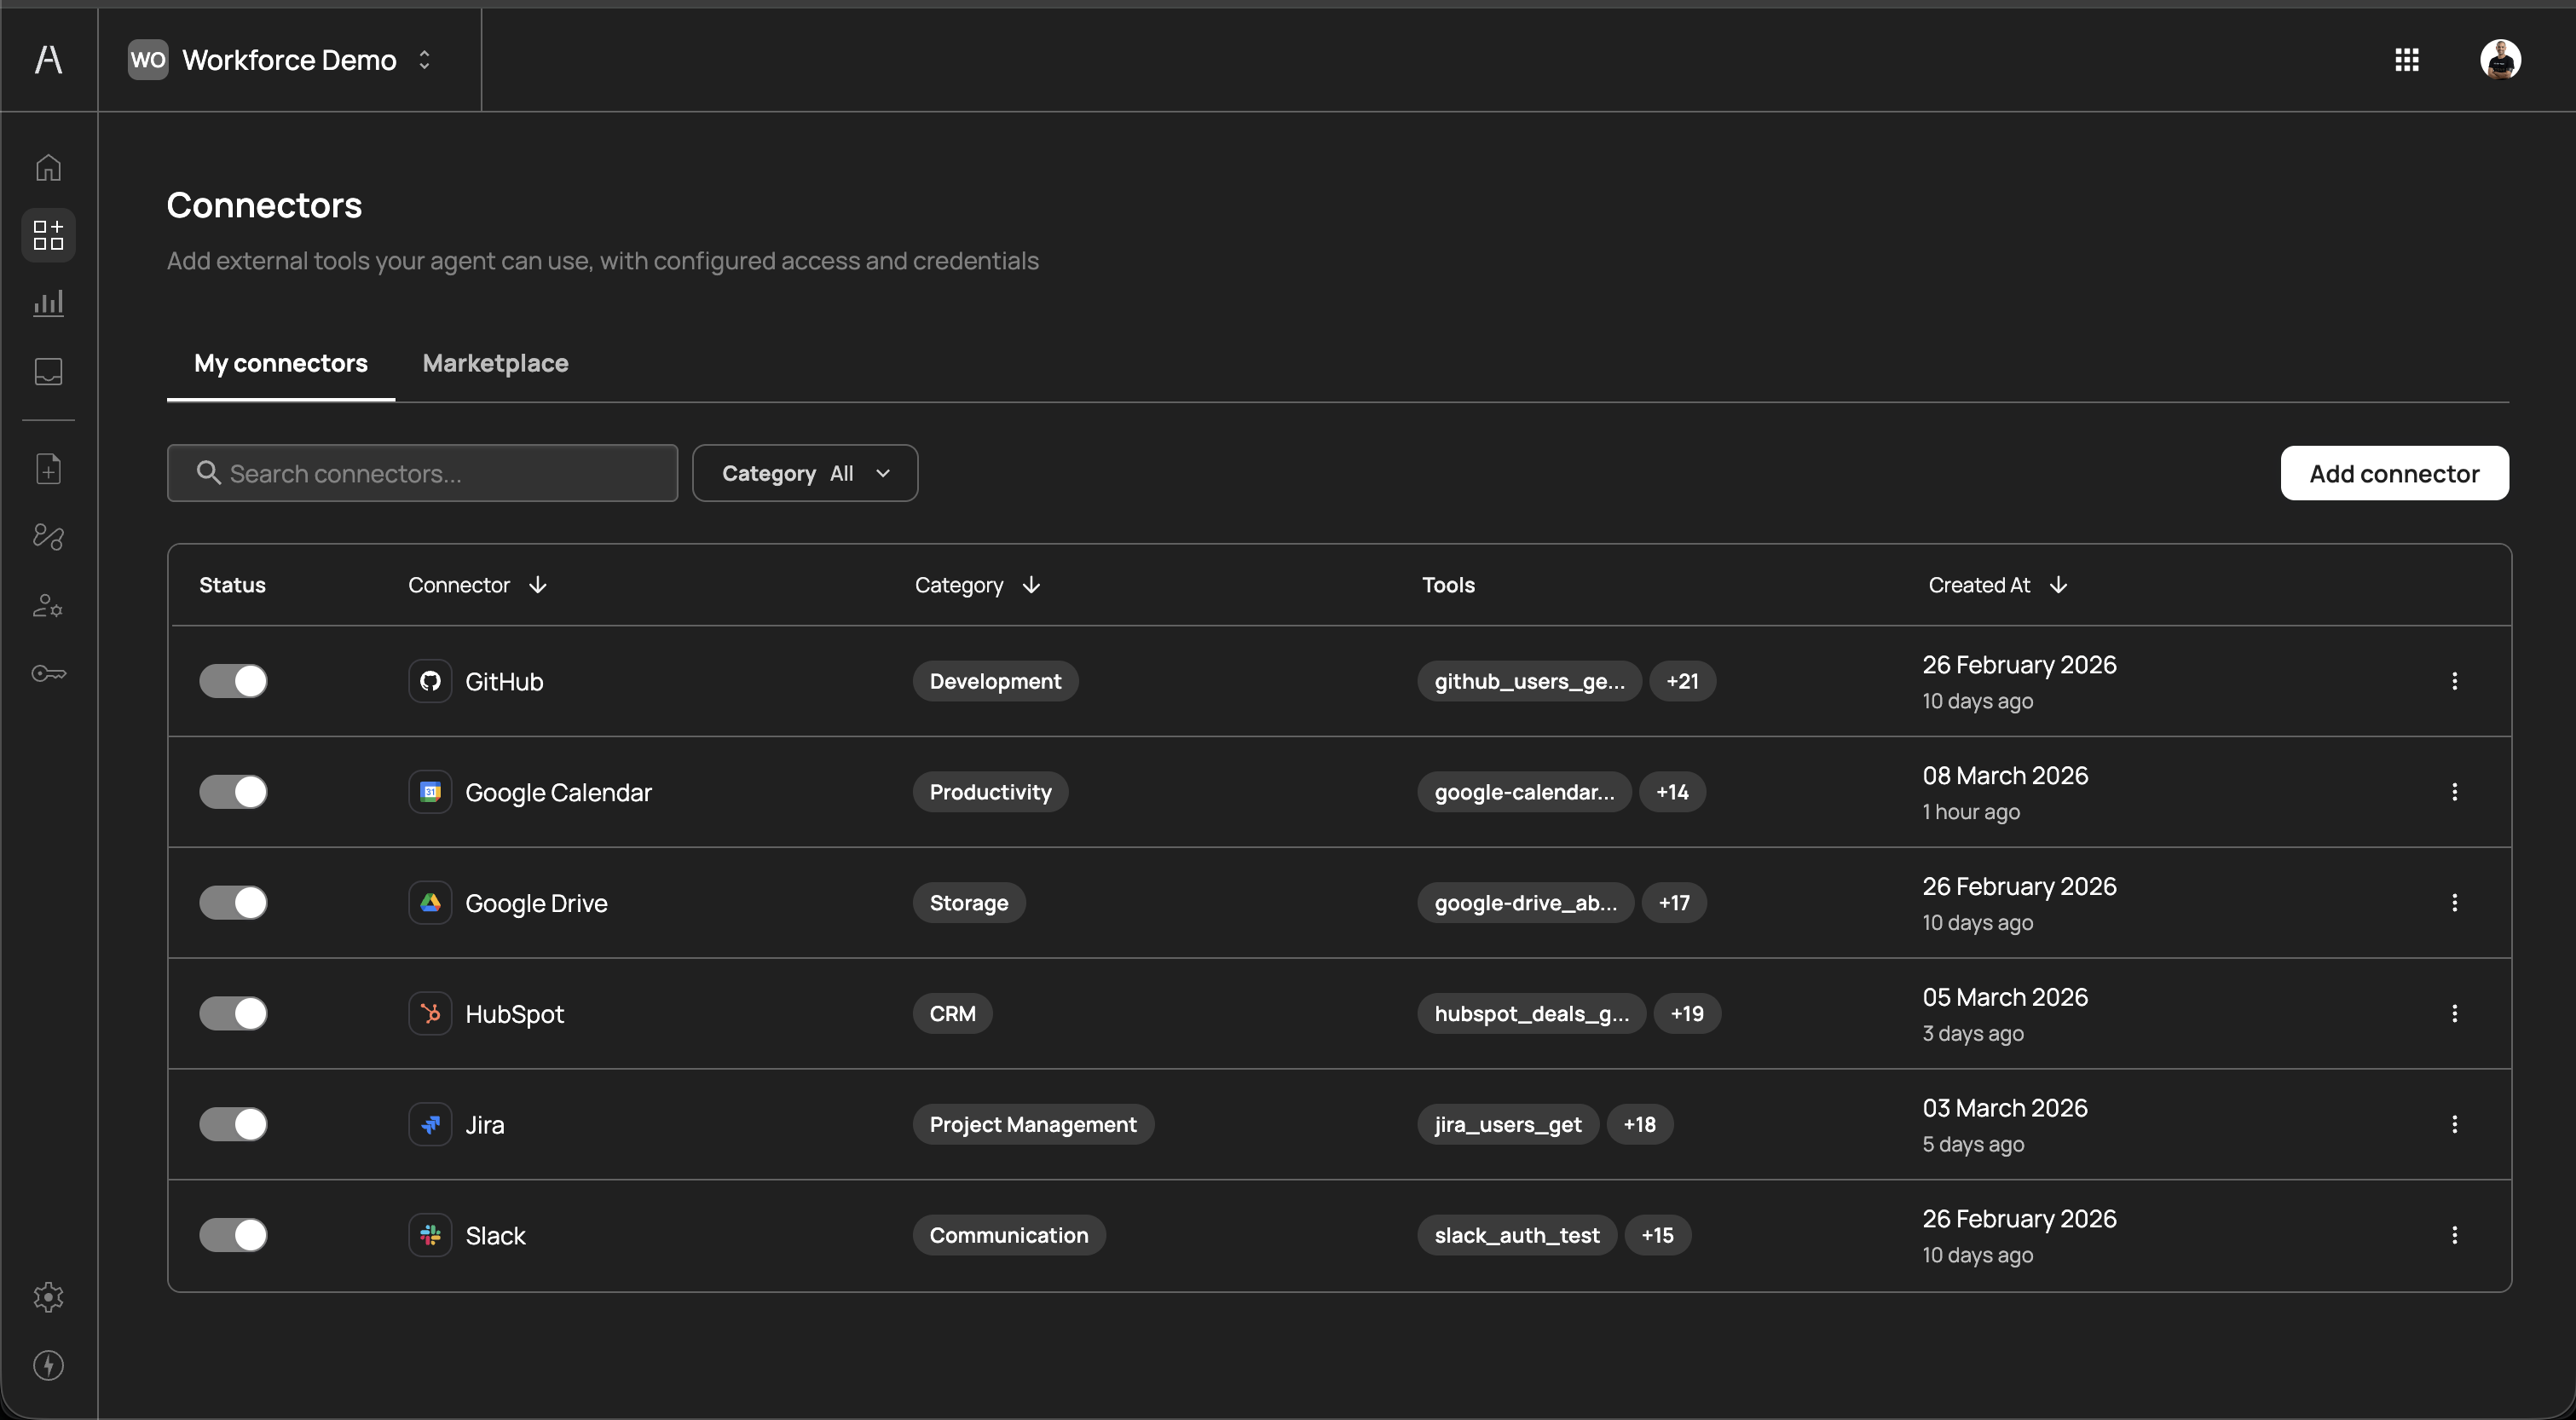
The My connectors tab displays all connectors that have been added to your organization. This is your primary view for managing active integrations. The table includes the following columns:
| Column | Description |
|---|---|
| Status | A toggle switch that enables or disables the connector. When disabled, AI agents cannot use any tools from this connector, regardless of policy configuration. |
| Connector | The name and icon of the connected service (e.g., GitHub, Google Calendar, Slack) |
| Category | The functional category the connector belongs to (e.g., Development, Productivity, Storage, CRM, Project Management, Communication) |
| Tools | A preview of the tools exposed by this connector and a count of additional tools (e.g., github_users_ge... +21) |
| Created At | The date the connector was added and the relative time since creation |
You can sort the table by clicking on the Connector or Created At column headers. Use the Search connectors field to filter by name, and the Category dropdown to narrow the list to a specific category.
Each connector has a status toggle in the leftmost column. Toggling a connector off immediately prevents AI agents from invoking any of its tools. This is useful for:
- Temporary maintenance - Disable a connector while the underlying service undergoes maintenance or migration, without removing your configuration
- Incident response - Quickly cut off AI agent access to a specific service if suspicious activity is detected
- Staged rollouts - Add and configure a connector in advance, then enable it when your team is ready
Toggling a connector back on restores access according to your existing policies. No reconfiguration is needed.
Click the three-dot menu icon on the right side of any connector row to access additional actions such as editing the connector configuration or removing the connector entirely.
Removing a connector deletes its configuration and revokes all AI agent access to that service. Any policies that reference the removed connector will no longer have a valid target. Review your policies before removing a connector to avoid unintended access gaps.
The Marketplace tab is where you discover and add new connectors to your organization. It displays the full catalog of available integrations, organized by category.
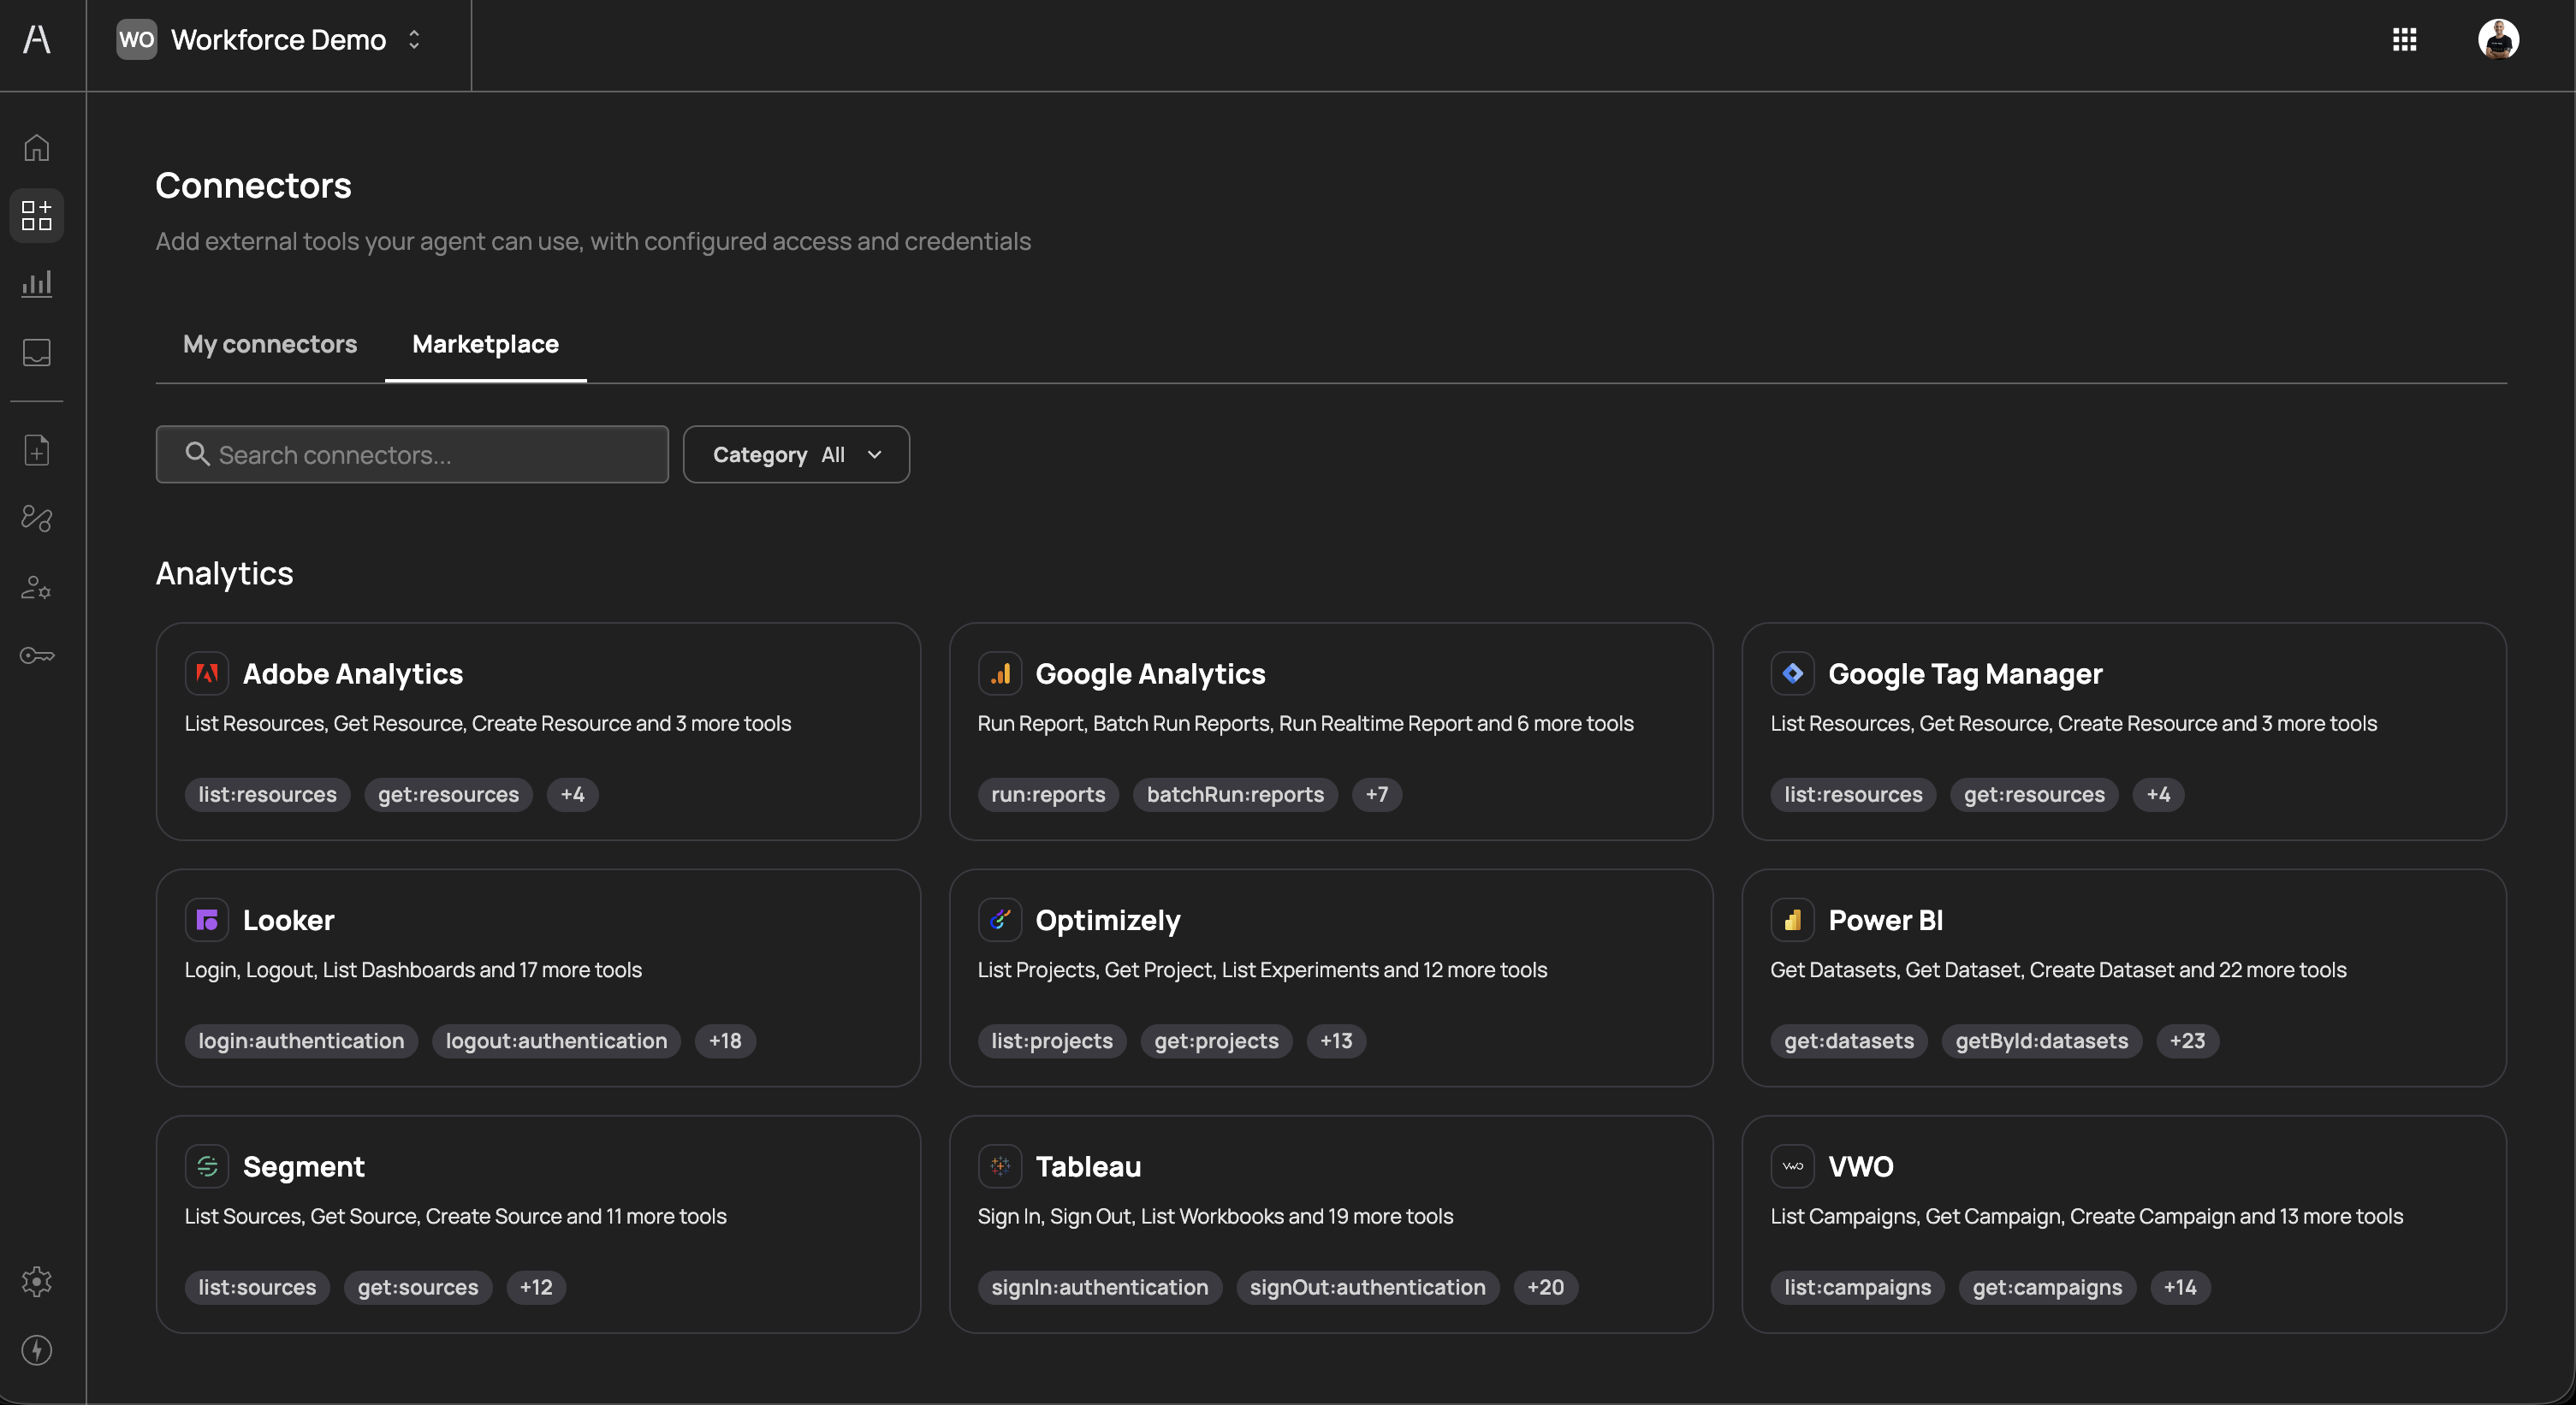
The marketplace provides two ways to find connectors:
- Search - Use the search field to find a connector by name
- Category filter - Use the Category dropdown to filter by functional area
Each connector card in the marketplace displays:
- Connector name and icon - The service name and its brand icon
- Description - A summary of the tools available (e.g., "List Resources, Get Resource, Create Resource and 3 more tools")
- Tool tags - Preview tags showing specific tool names exposed by the connector (e.g.,
run:reports,batchRun:reports) - Additional tool count - A badge indicating how many more tools are available beyond those shown in the preview (e.g.,
+7)
Connectors are grouped into the following categories:
| Category | Description | Examples |
|---|---|---|
| Analytics | Business intelligence and data analytics platforms | Adobe Analytics, Google Analytics, Google Tag Manager, Looker, Optimizely, Power BI, Segment, Tableau, VWO |
| Automation | Workflow automation and orchestration tools | Make, Microsoft Power Automate, n8n |
| Communication | Messaging and team communication platforms | Slack |
| CRM | Customer relationship management systems | HubSpot, Salesforce |
| Development | Software development and version control tools | GitHub |
| Productivity | Calendars, email, and workplace productivity tools | Google Calendar |
| Project Management | Task tracking and project planning tools | Jira |
| Storage | File storage and document management platforms | Google Drive |
The connector marketplace is continuously expanding. New connectors are added regularly to support additional SaaS tools and categories. If you need a connector that is not currently available, contact Frontegg support.
To add a new connector, click Add connector on the My connectors tab or select a connector card from the Marketplace tab. A side panel opens with the Select connector view.
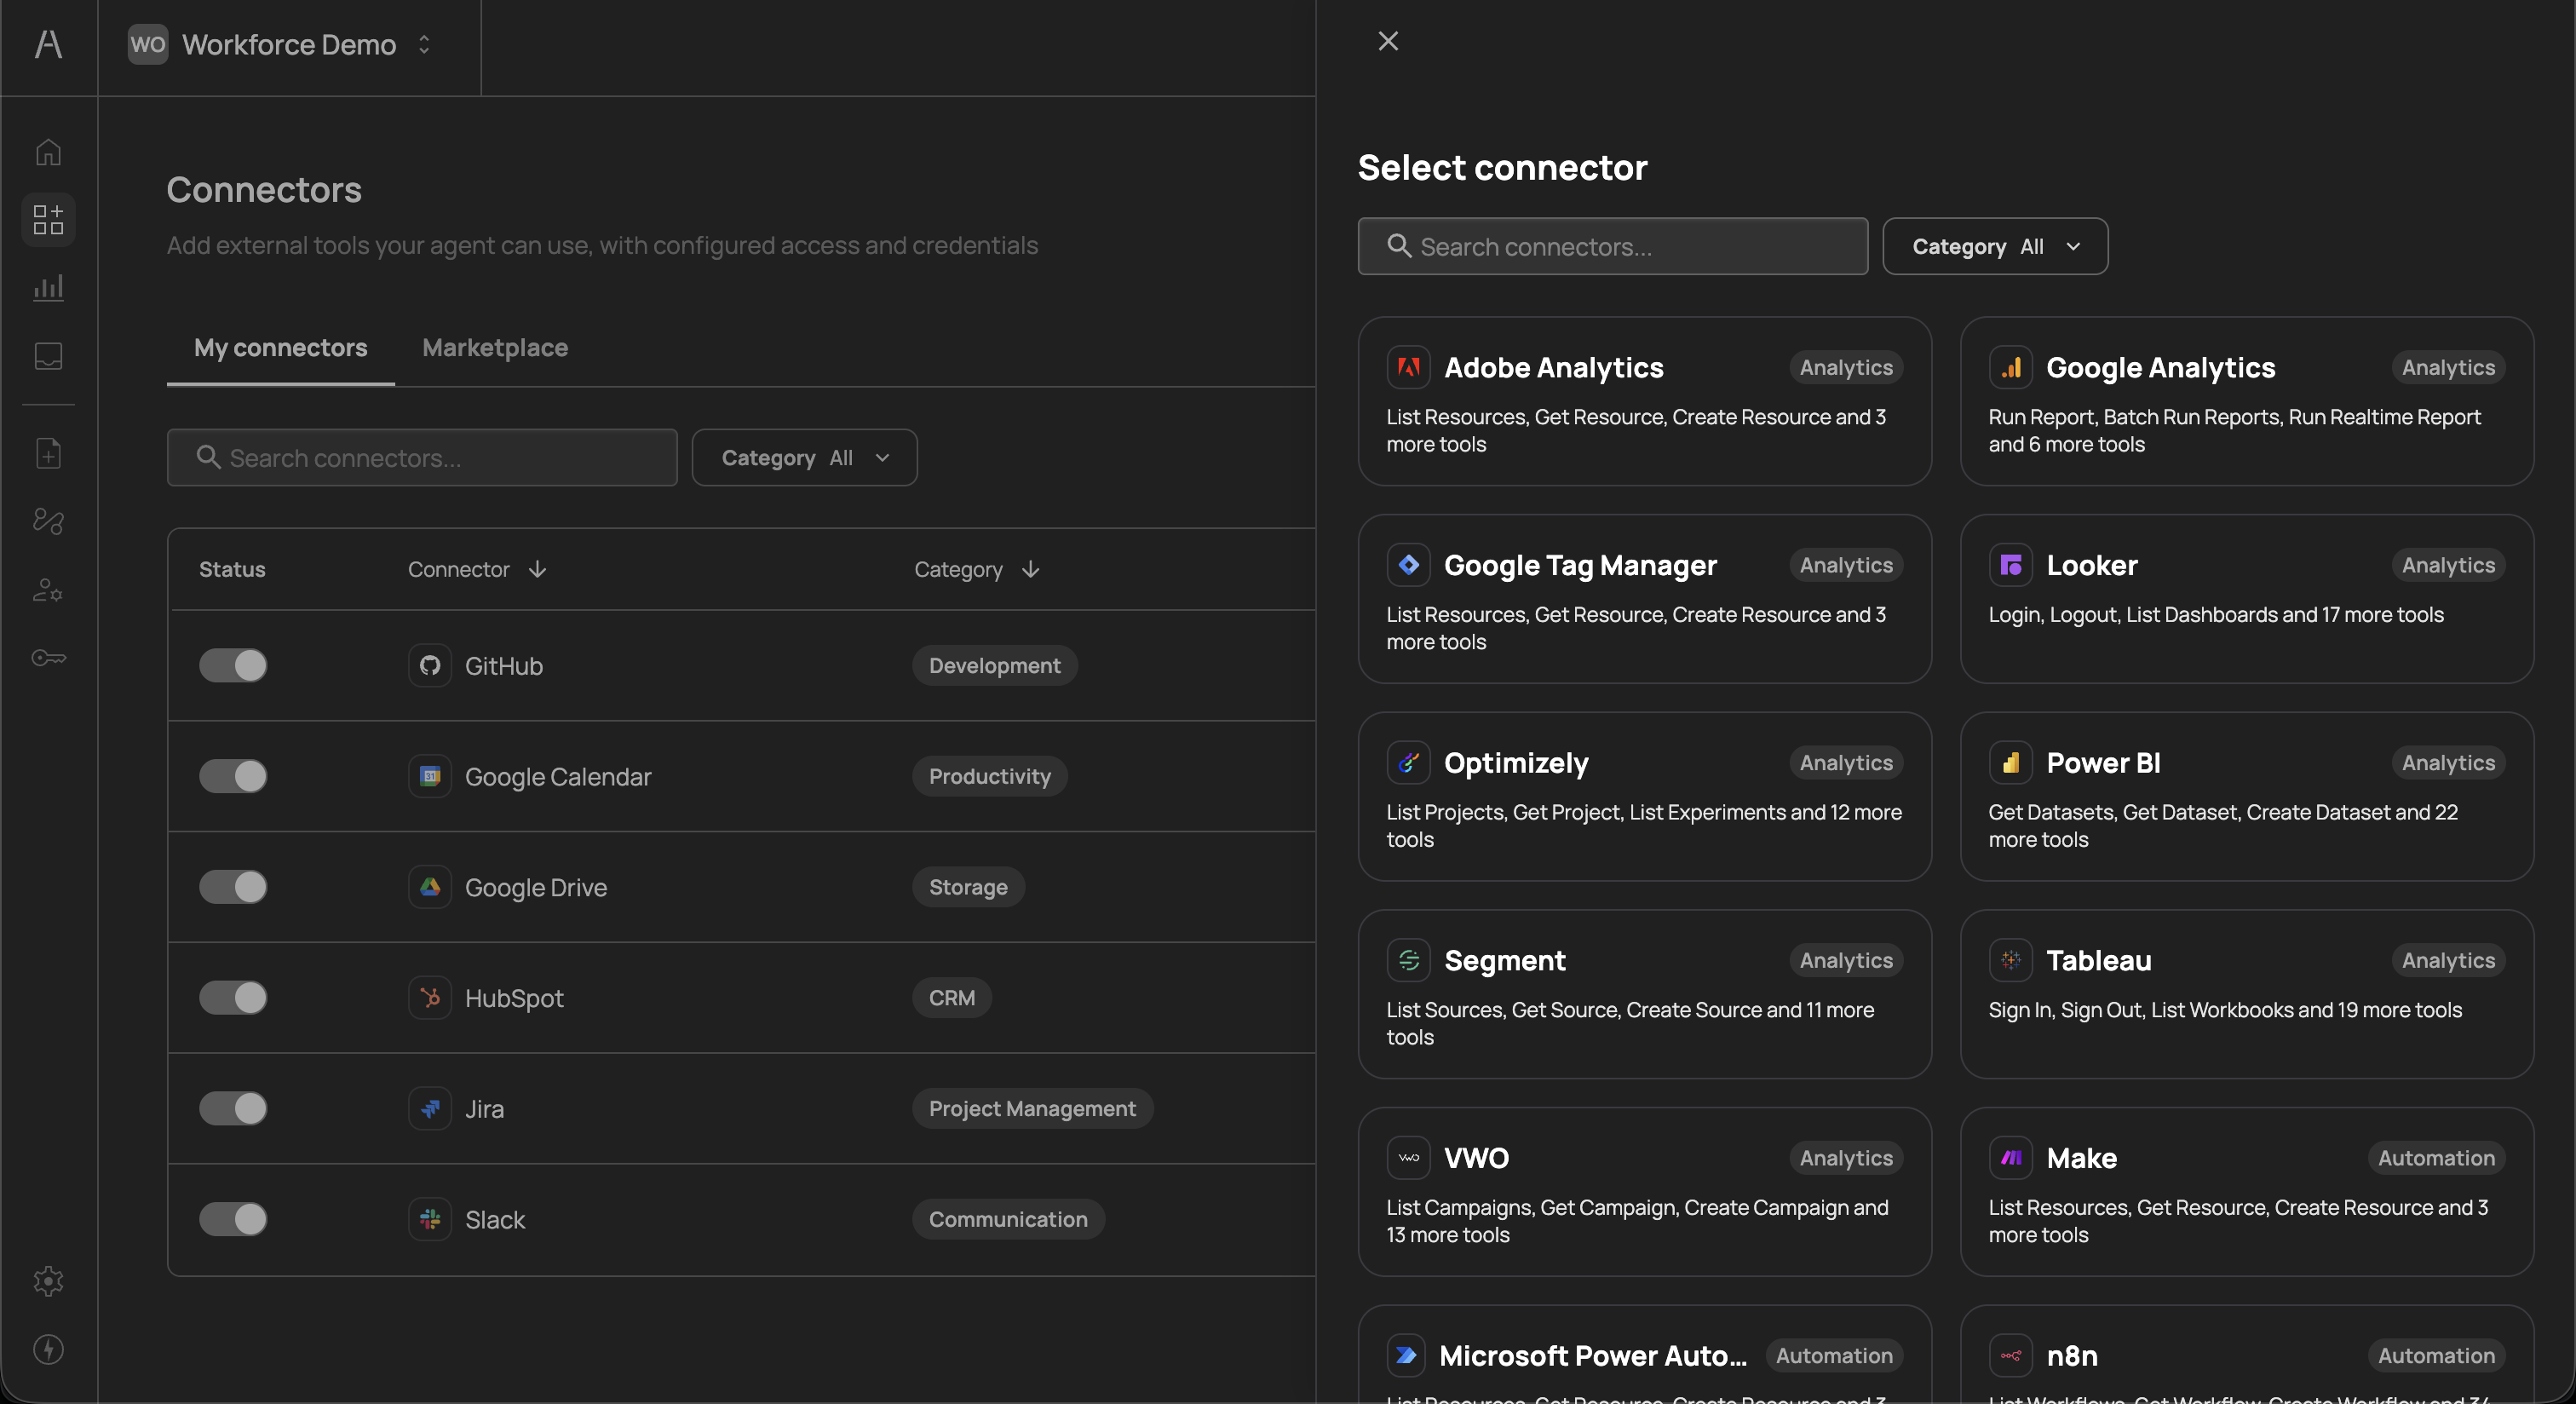
Use the search field or category filter to locate the connector you want, then click on it to proceed to the configuration step.
After selecting a connector, the configuration panel presents two authentication options:
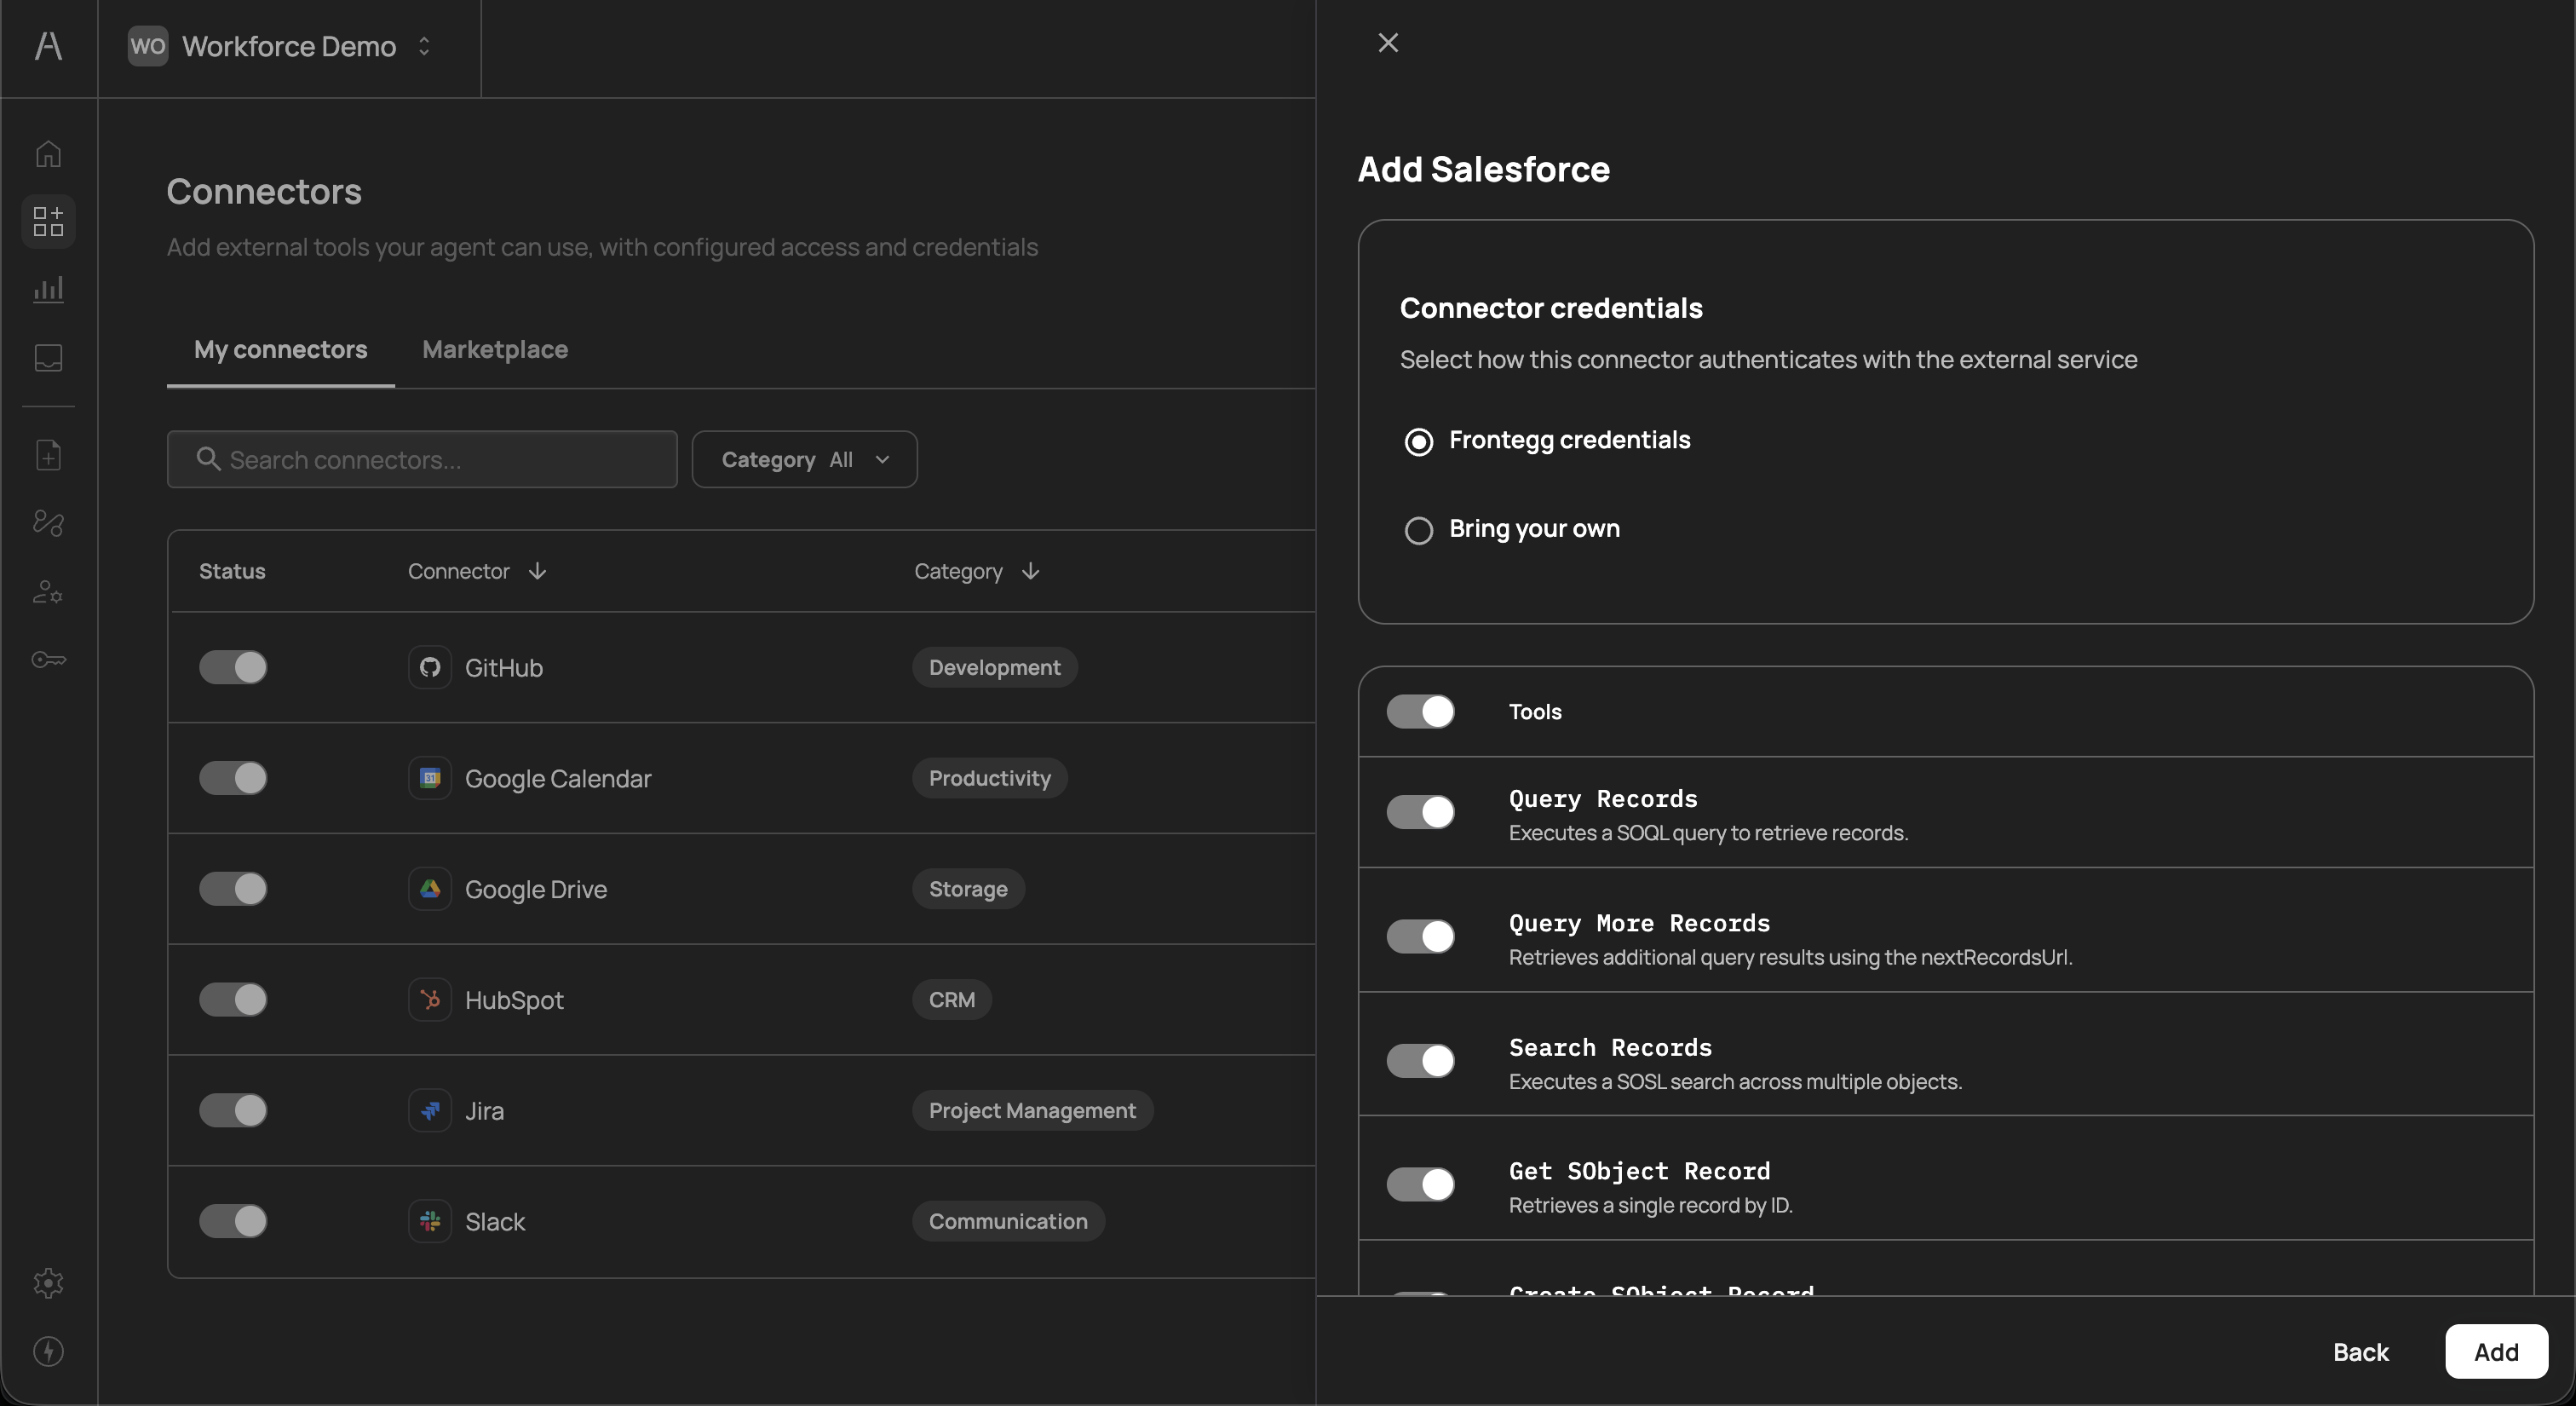
Frontegg credentials
This is the default and recommended option. Frontegg manages the OAuth credentials on your behalf, which means:
- No manual credential setup is required
- OAuth tokens are securely stored and rotated by Frontegg
- Users authenticate through a Frontegg-managed consent flow when they first interact with the connector
Select this option when you want a fast, zero-configuration setup and are comfortable with Frontegg handling the OAuth integration with the third-party service.
Bring your own
This option allows you to provide your own OAuth application credentials. When selected, three additional fields appear:
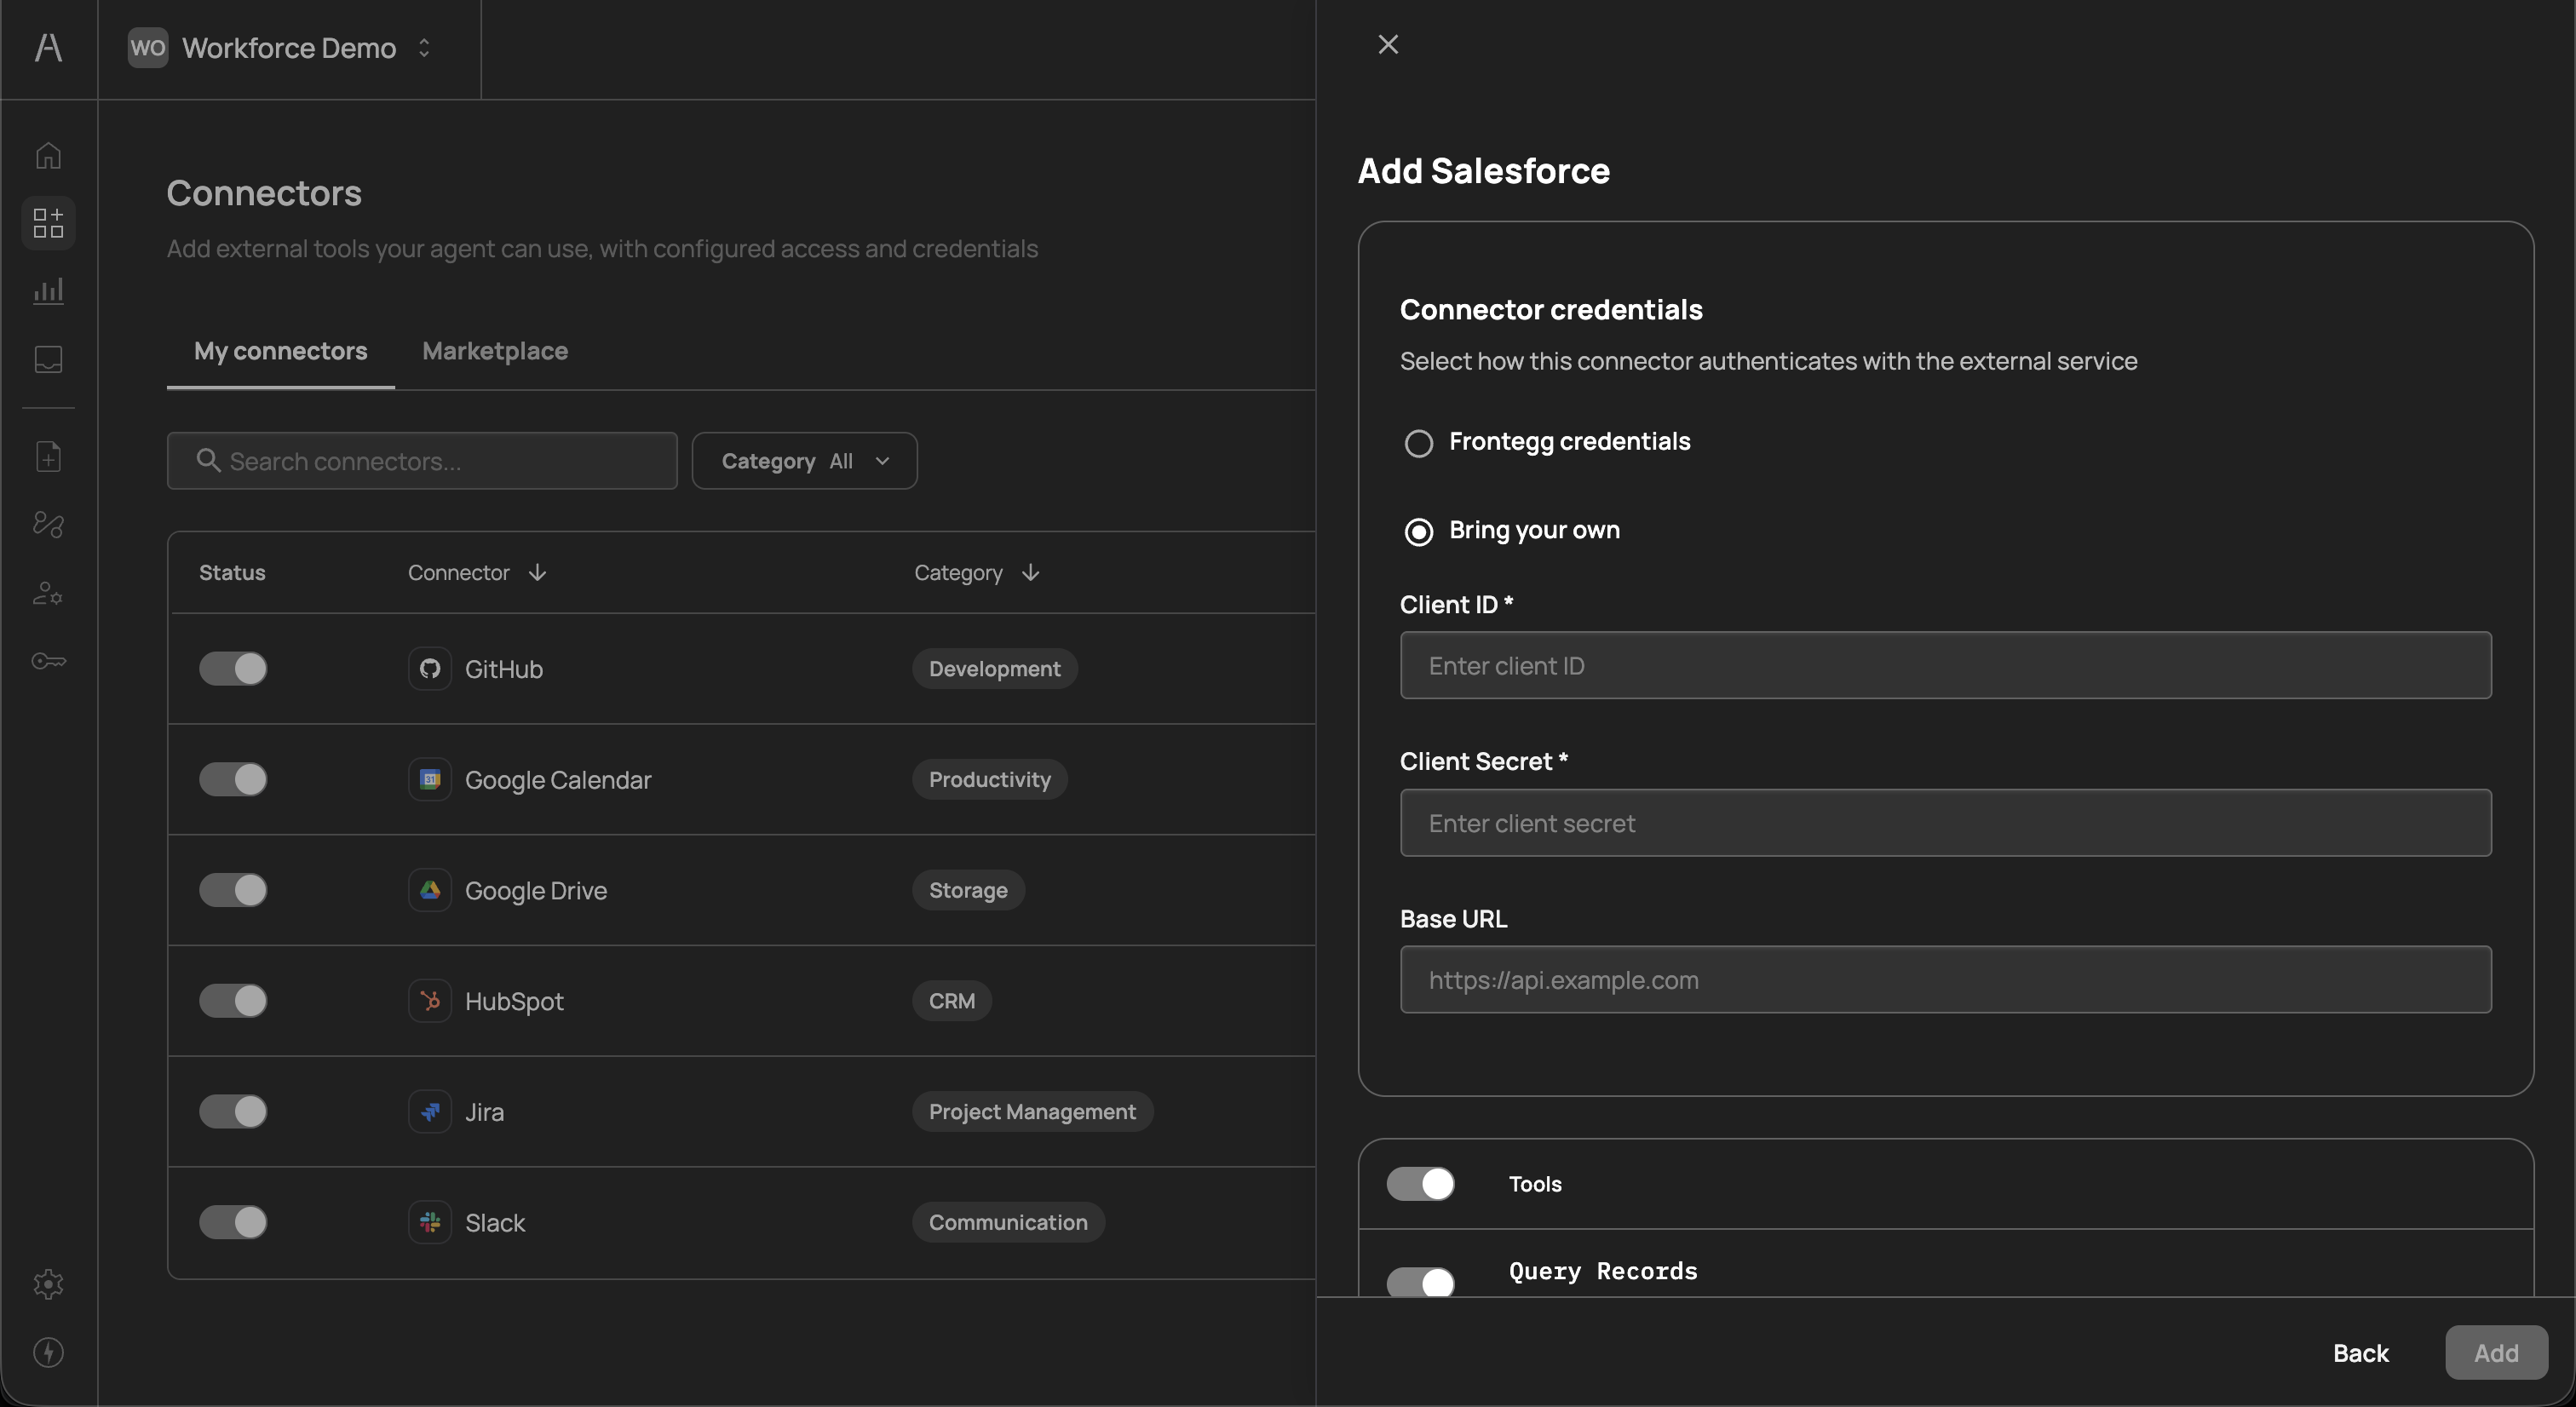
| Field | Required | Description |
|---|---|---|
| Client ID | Yes | The OAuth client ID from your service provider's developer console or admin portal |
| Client Secret | Yes | The OAuth client secret associated with your client ID |
| Base URL | No | The base API URL for your service instance. Use this when connecting to a custom or self-hosted instance rather than the service's default API endpoint (e.g., https://your-instance.salesforce.com) |
Select this option when:
- Your organization's security policy requires using internally managed OAuth credentials
- You need to connect to a custom or self-hosted instance of the service
- You want to control the OAuth scopes and permissions at the application level
- You have an existing OAuth application registered with the service provider
Credential security
Credential security
Both credential options use industry-standard OAuth 2.0 protocols. Credentials are encrypted at rest and in transit. When using Bring your own credentials, ensure your Client Secret is kept confidential and rotated according to your organization's security policies.
Below the credentials section, the configuration panel displays a Tools section with a master toggle and a list of all tools the connector exposes. Each tool includes:
- Tool name - The API-level identifier for the tool (e.g.,
Query Records,Search Records,Get SObject Record) - Description - A brief explanation of what the tool does (e.g., "Executes a SOQL query to retrieve records", "Retrieves a single record by ID")
- Individual toggle - A switch to enable or disable the specific tool
The master toggle at the top of the Tools section enables or disables all tools at once. When the master toggle is on, you can selectively disable individual tools that you do not want AI agents to access.
This granular control is important for maintaining the principle of least privilege. For example, you might enable read-only tools (such as querying and searching records) while keeping write tools (such as creating or deleting records) disabled until you have appropriate approval policies in place.
After configuring credentials and selecting your desired tools, click Add to finalize the connector. The connector immediately appears in your My connectors list. If you selected Frontegg credentials, users will be prompted to authorize the connector through an OAuth consent flow the first time their AI agent interacts with the connected service.
Click Back to return to the connector selection step without saving, or close the panel to cancel the process.
Once a connector is added, you can modify its configuration at any time by clicking the three-dot menu on its row in the My connectors table. This allows you to:
- Edit credentials - Switch between Frontegg credentials and Bring your own, or update your Client ID, Client Secret, and Base URL
- Modify tools - Enable or disable individual tools as your requirements change
- Remove the connector - Delete the connector and revoke all associated AI agent access
Changes to tool availability take effect immediately. If you disable a tool that is actively being used by AI agents, any in-progress actions using that tool will be blocked.
Connectors and policies work together to form the access control model in Agen for Work:
- Connectors define the tool surface - By adding a connector and enabling specific tools, you determine which actions are technically available to AI agents
- Policies govern access - Policies then determine which users or groups can use those tools, and what enforcement action applies (Allow, Deny, Step up, or Request approval)
- Both layers must permit access - For an AI agent to successfully invoke a tool, the connector must be enabled, the specific tool must be toggled on, and a policy must explicitly allow the user to use that tool
This two-layer model ensures that accidentally enabling a connector does not automatically grant unrestricted access. Without a corresponding policy, the tools remain inaccessible to users.
Default behavior
Default behavior
When a connector is added but no policies reference it, the tools within that connector are not accessible to any users. You must create at least one policy targeting the connector to grant access.
- Start with read-only tools - When adding a new connector, consider enabling only read-only tools first. Once you have validated the integration and created appropriate policies, gradually enable write and delete tools.
- Use Frontegg credentials for speed - Unless your security team requires custom OAuth credentials, the Frontegg-managed option significantly reduces setup time and maintenance overhead.
- Review tools before enabling - Each connector may expose dozens of tools. Review the full list and enable only those tools that align with your team's workflows. This reduces the attack surface and simplifies policy management.
- Pair connectors with policies immediately - After adding a connector, create at least one policy to govern access. This prevents a gap between tool availability and access control.
- Audit connector usage regularly - Use the Dashboard to monitor which connectors and tools are actively used. Disable unused connectors to reduce your integration surface.
- Policies - Create access control rules for your connectors and tools
- Getting started - Return to the setup guide for a walkthrough of the complete onboarding flow
- Dashboard - Monitor connector usage and AI agent activity