Integrating Google Calendar with Frontegg allows your application to create and manage calendar events, list and update calendars, query free/busy information, and access user settings — all through Frontegg's integration layer using Google OAuth 2.0.
Prerequisites
Prerequisites
- A Google account with access to Google Cloud Console
- A Google Cloud project (you can create one during setup)
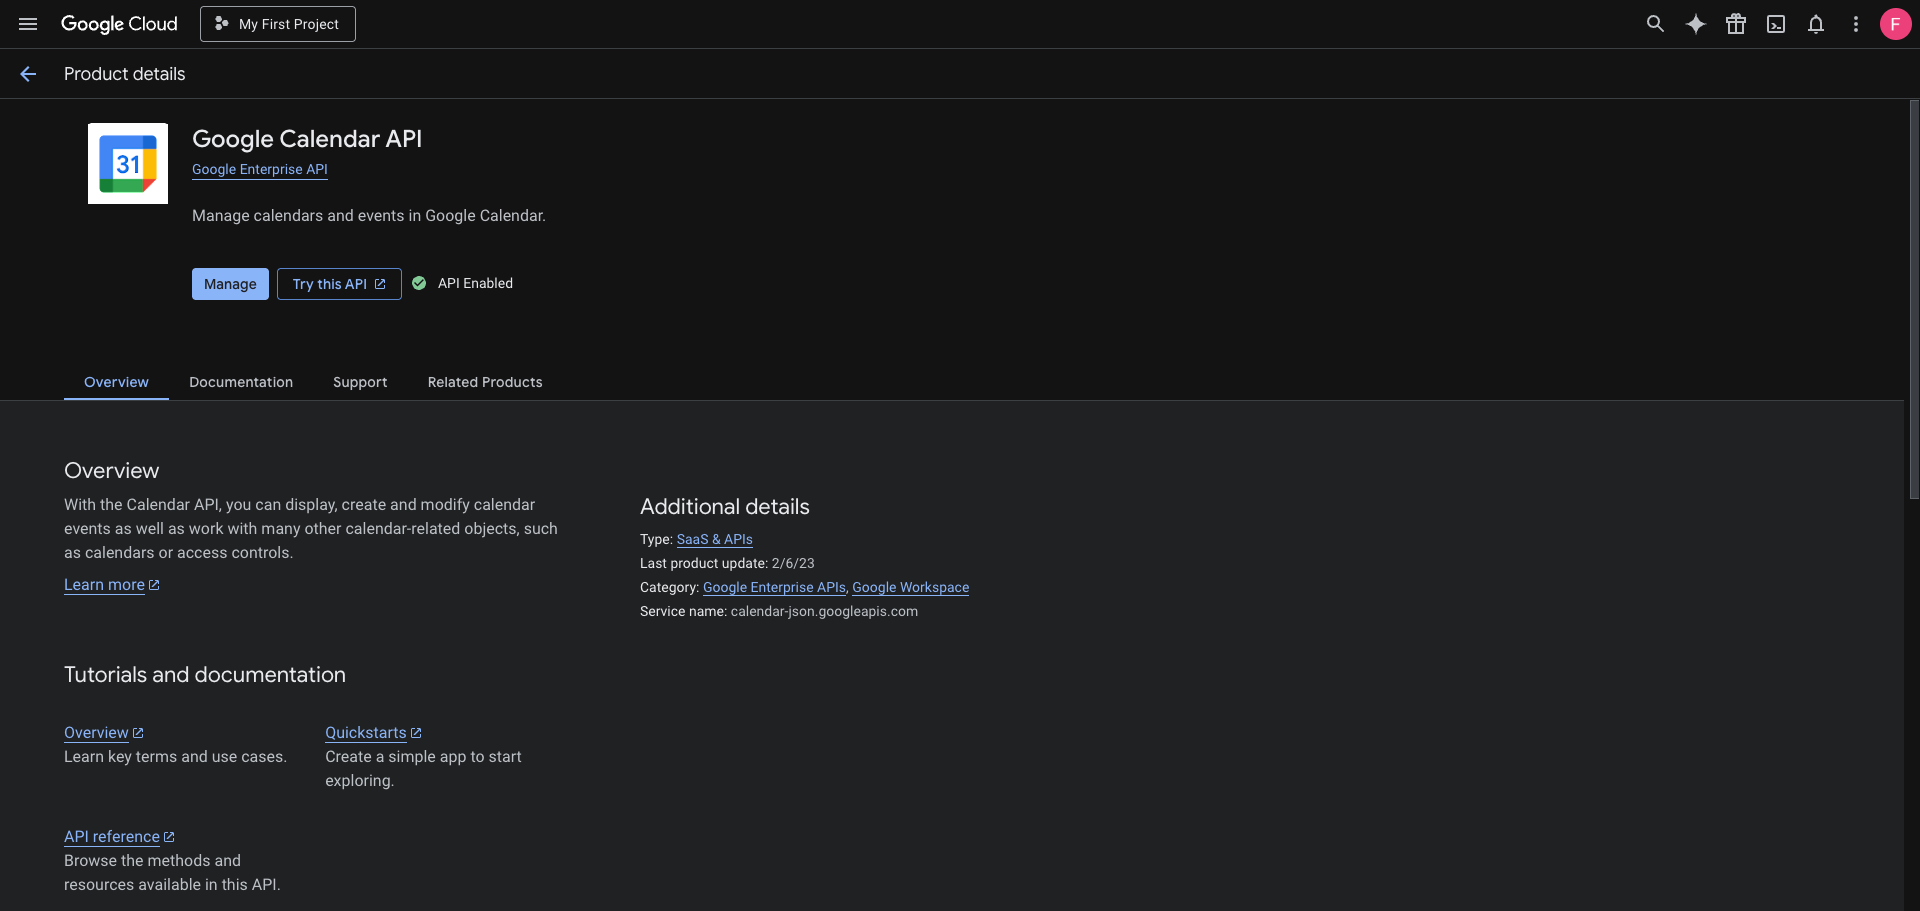
Go to the Google Calendar API page in the Google Cloud Console. Select your project from the top navigation, then click Enable if the API is not yet enabled. If you see Manage and API Enabled, the API is already active.
In the left sidebar, navigate to APIs & Services → Credentials. Click Create credentials.
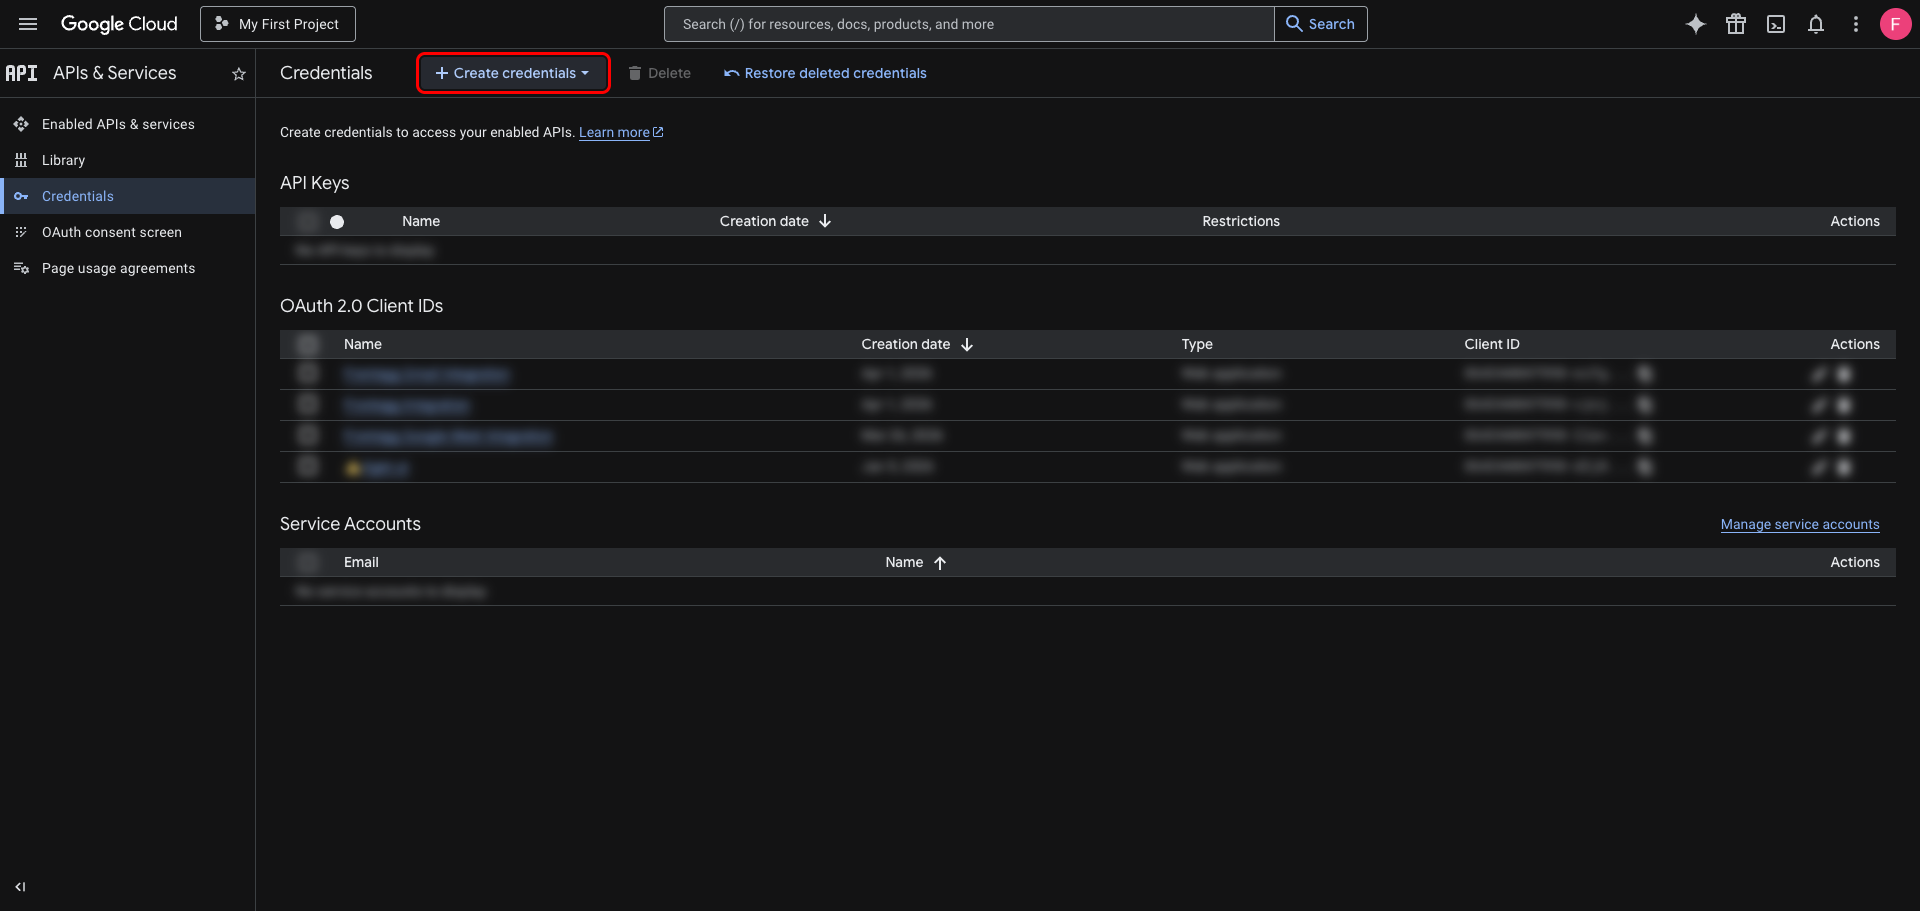
From the dropdown, select OAuth client ID.

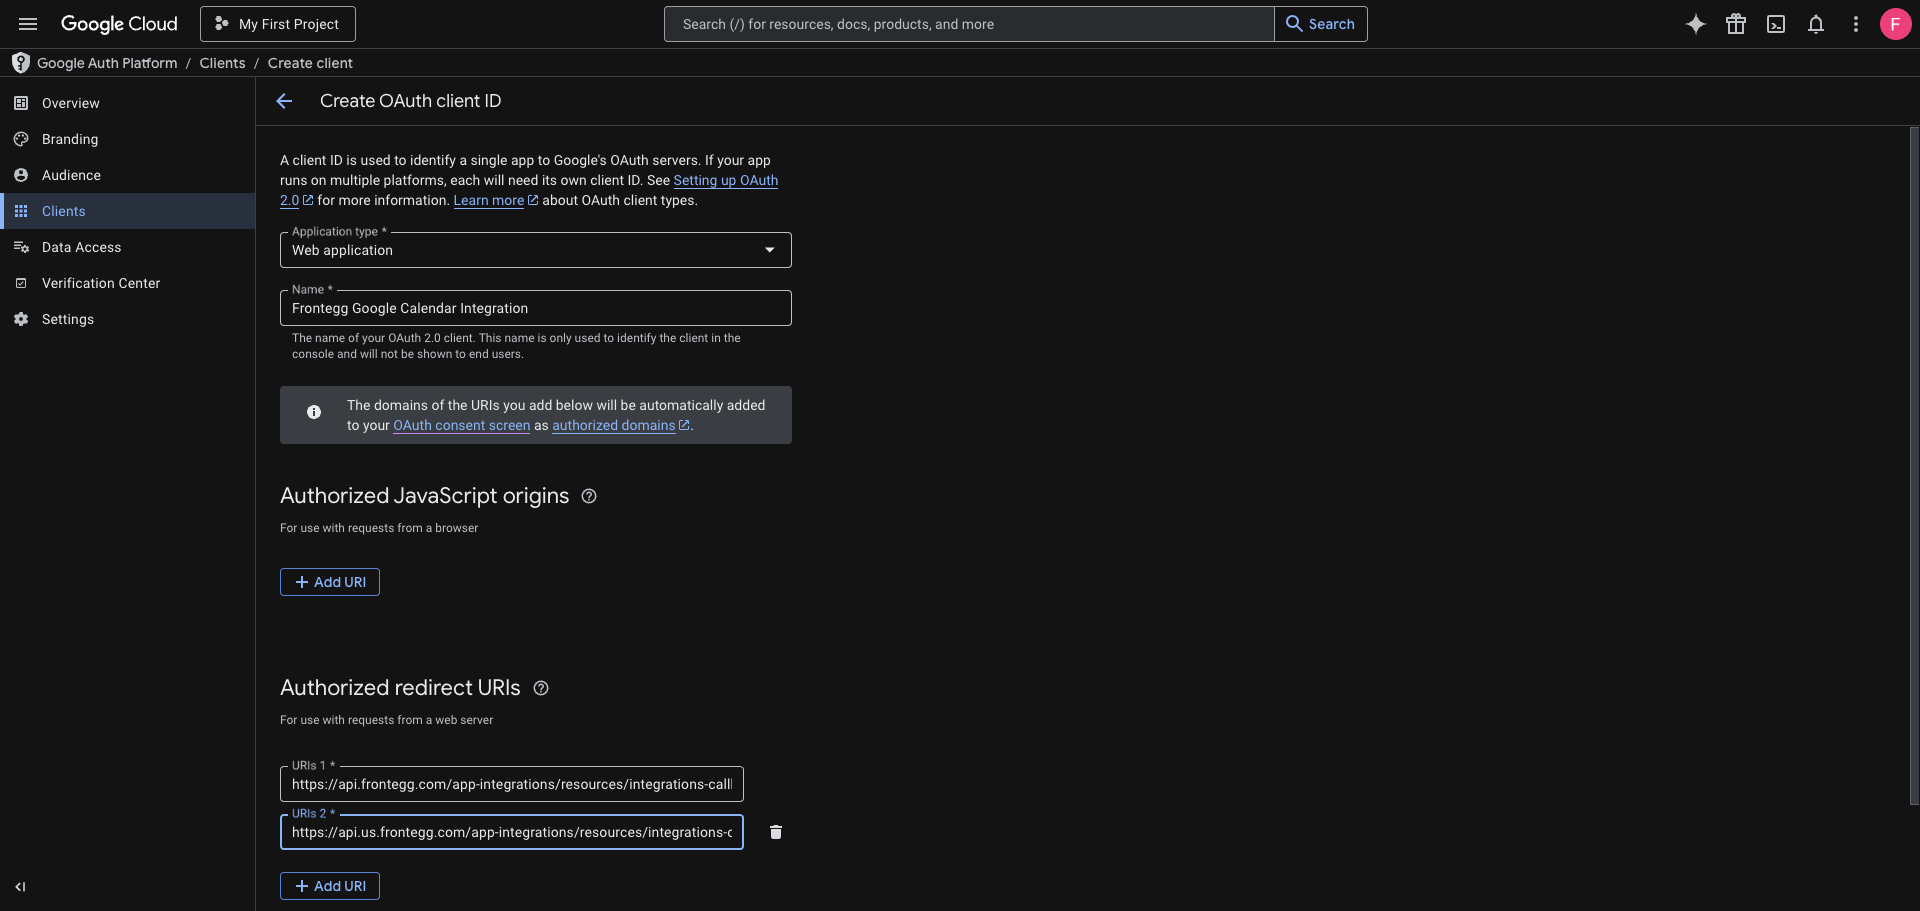
On the Create OAuth client ID page:
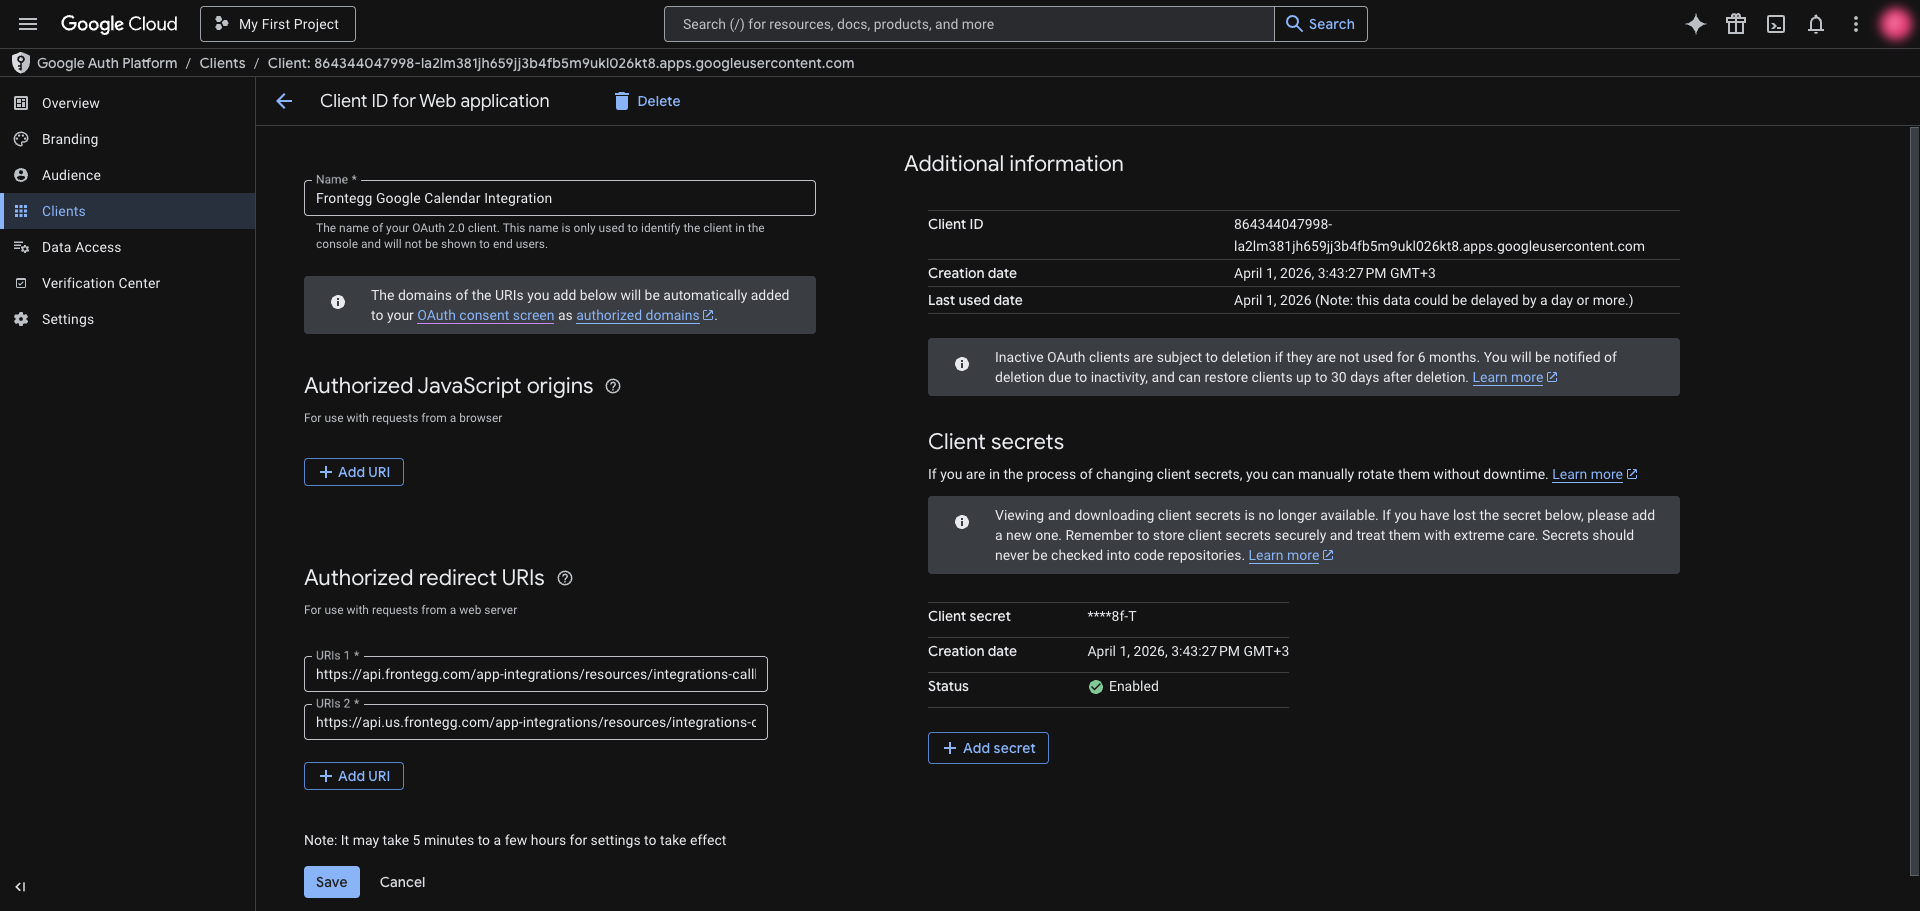
- Set Application type to Web application.
- Enter a name for the client (for example,
Frontegg Google Calendar Integration). - Under Authorized redirect URIs, click Add URI and add both of the following:
https://YOUR_MCP_GATEWAY_URL/integration-callback
Click Create to save the OAuth client. A dialog will display your Client ID and Client Secret — copy both values and store them securely.
Save your Client Secret now
Save your Client Secret now
The Client Secret is only shown once in this dialog. After you close it, you cannot retrieve it again — you can only create a new secret.
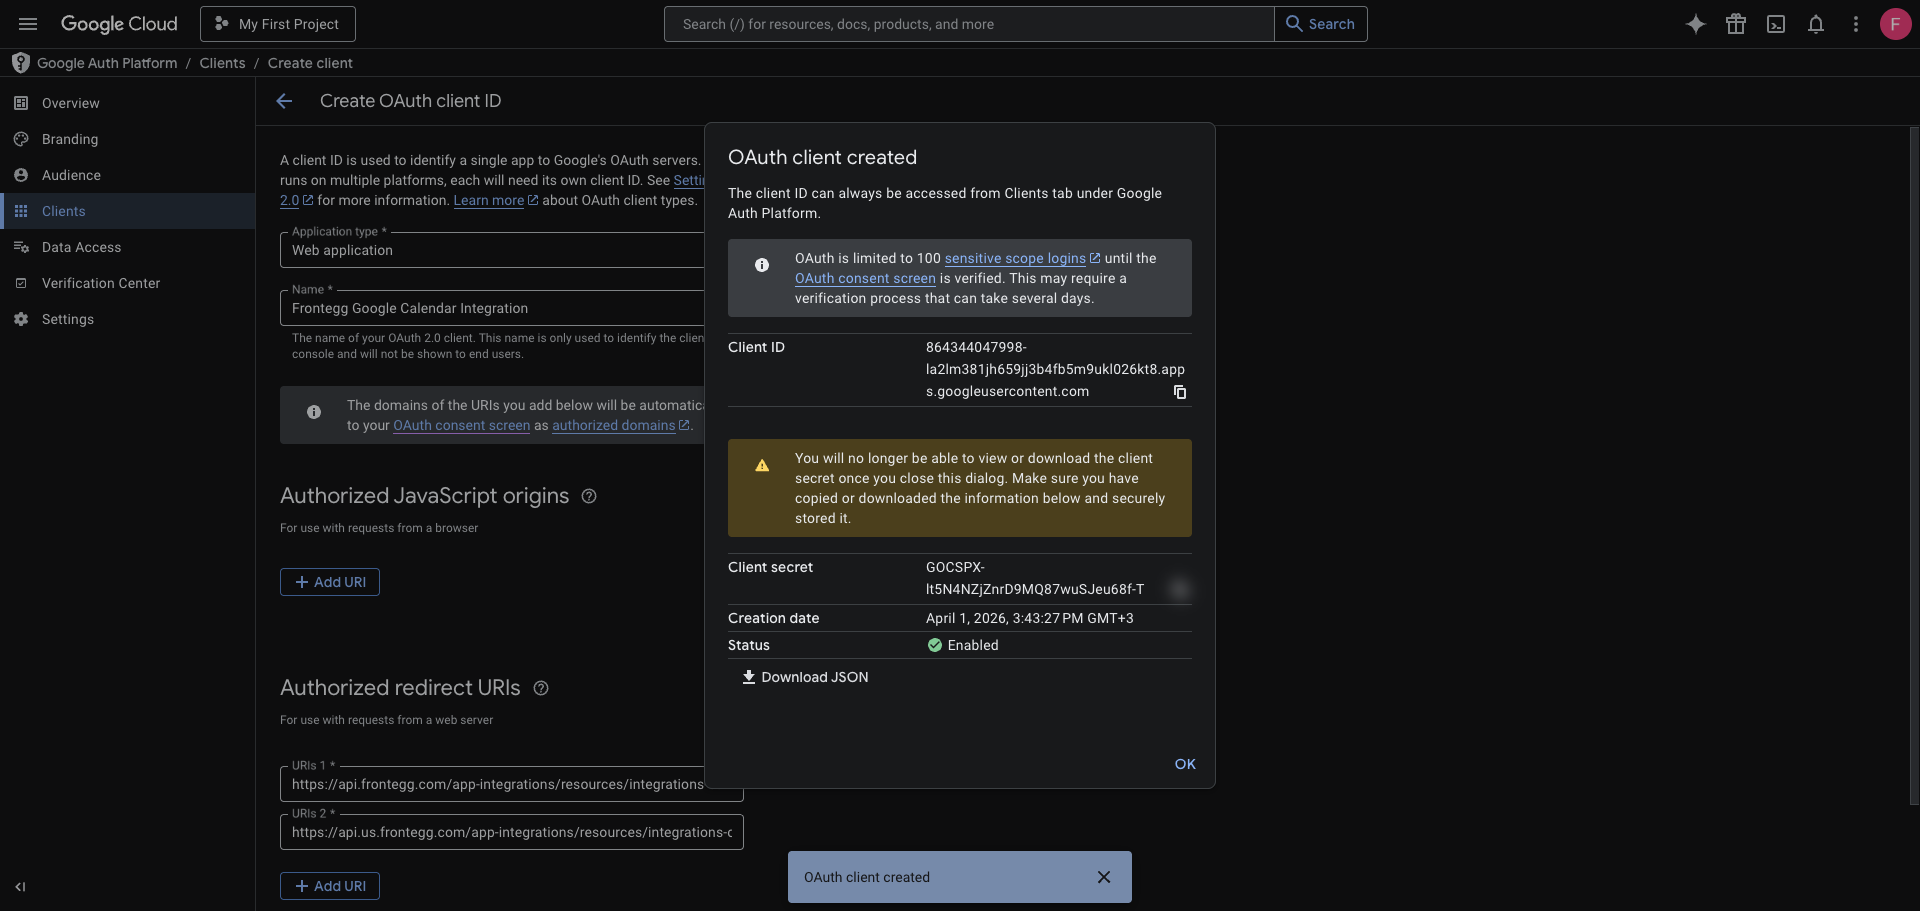
After closing the dialog, your new client appears at the top of the OAuth 2.0 Client IDs list on the Credentials page.
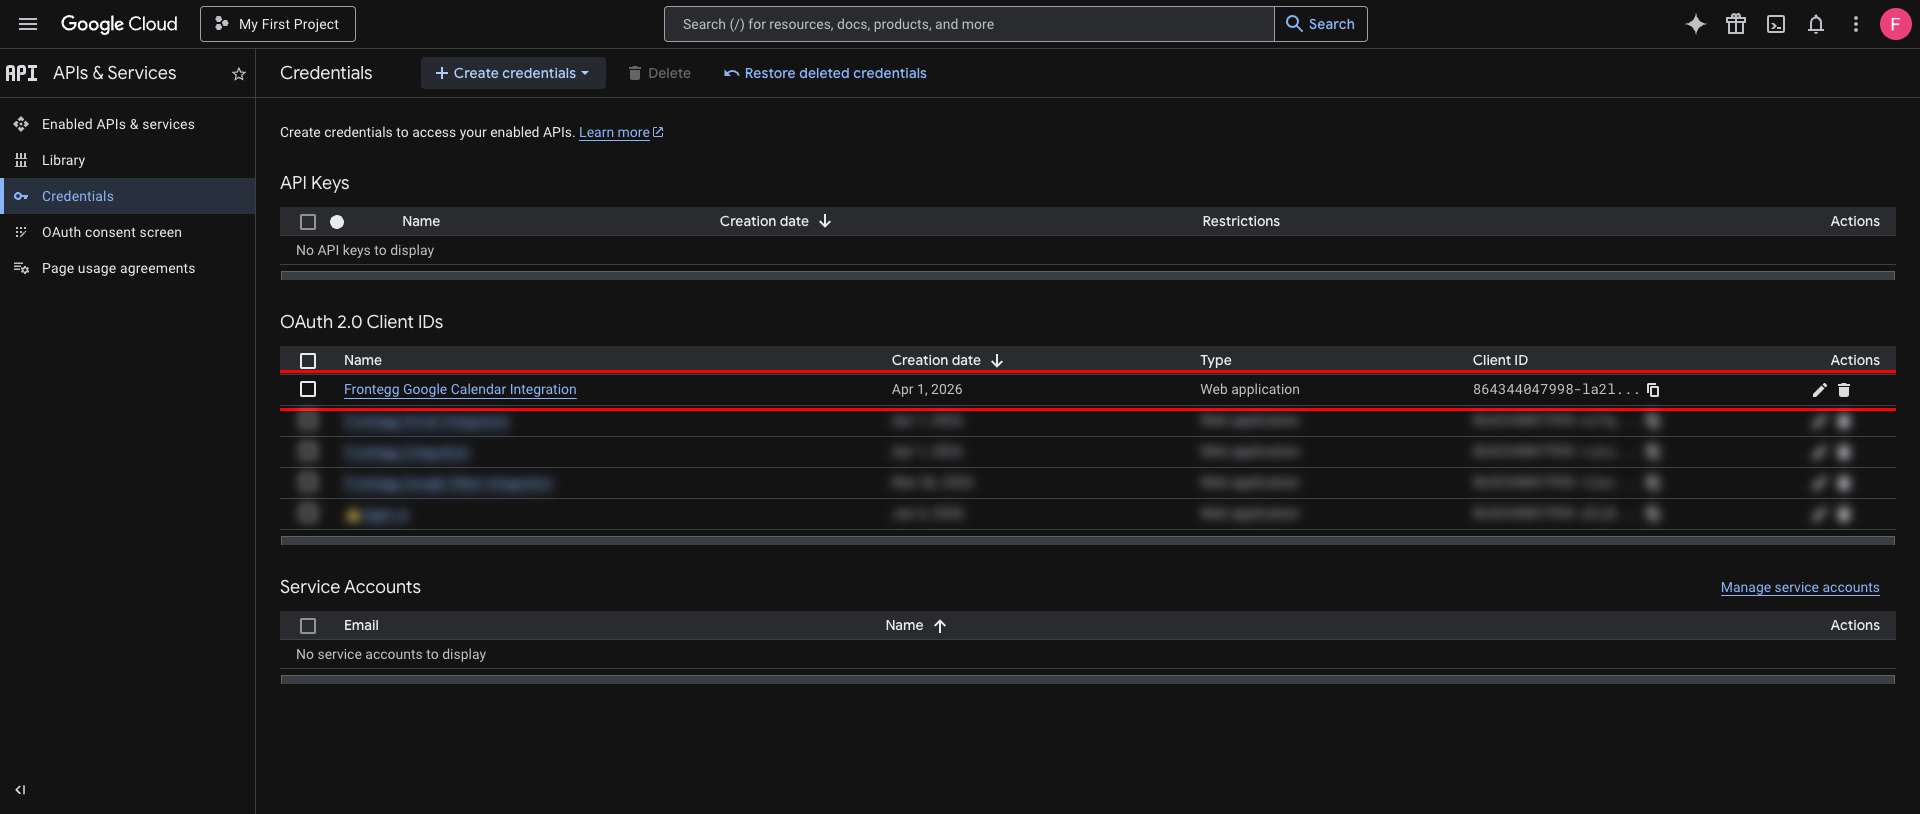
Click the client name to open its detail page. You can view and copy the Client ID at any time from the Additional information section.
Once you have your Client ID and Client Secret, enter them in the Frontegg portal:
- Open the Frontegg portal and navigate to [ENVIRONMENT] → Integrations → Google Calendar.
- Enter the Client ID and Client Secret in the corresponding fields.
- Select the required scopes:
| Scope | Description |
|---|---|
https://www.googleapis.com/auth/calendar.readonly | Read-only access to calendars and events |
https://www.googleapis.com/auth/calendar.events | Create, read, update, and delete events |
https://www.googleapis.com/auth/calendar.events.readonly | Read-only access to events |
https://www.googleapis.com/auth/calendar | Full access to calendars and events |
https://www.googleapis.com/auth/calendar.settings.readonly | Read-only access to calendar settings |
- Click Save.
Keep your credentials secure
Keep your credentials secure
Never share or commit your Client Secret to version control.