Integrating Google Docs with Frontegg allows your application to read, create, and edit Google Docs documents — inserting and replacing text, applying heading and paragraph styles, building tables and lists, inserting images, page and section breaks, and working with headers, footers, and footnotes.
Google Docs supports two authentication methods. OAuth 2.0 asks each user to grant access to their own documents and is described first. A service account with domain-wide delegation acts on behalf of a chosen Workspace user without an interactive consent screen — see Connect with a service account below.
Prerequisites
Prerequisites
- A Google account with access to Google Cloud Console
- A Google Cloud project (you can create one during setup)
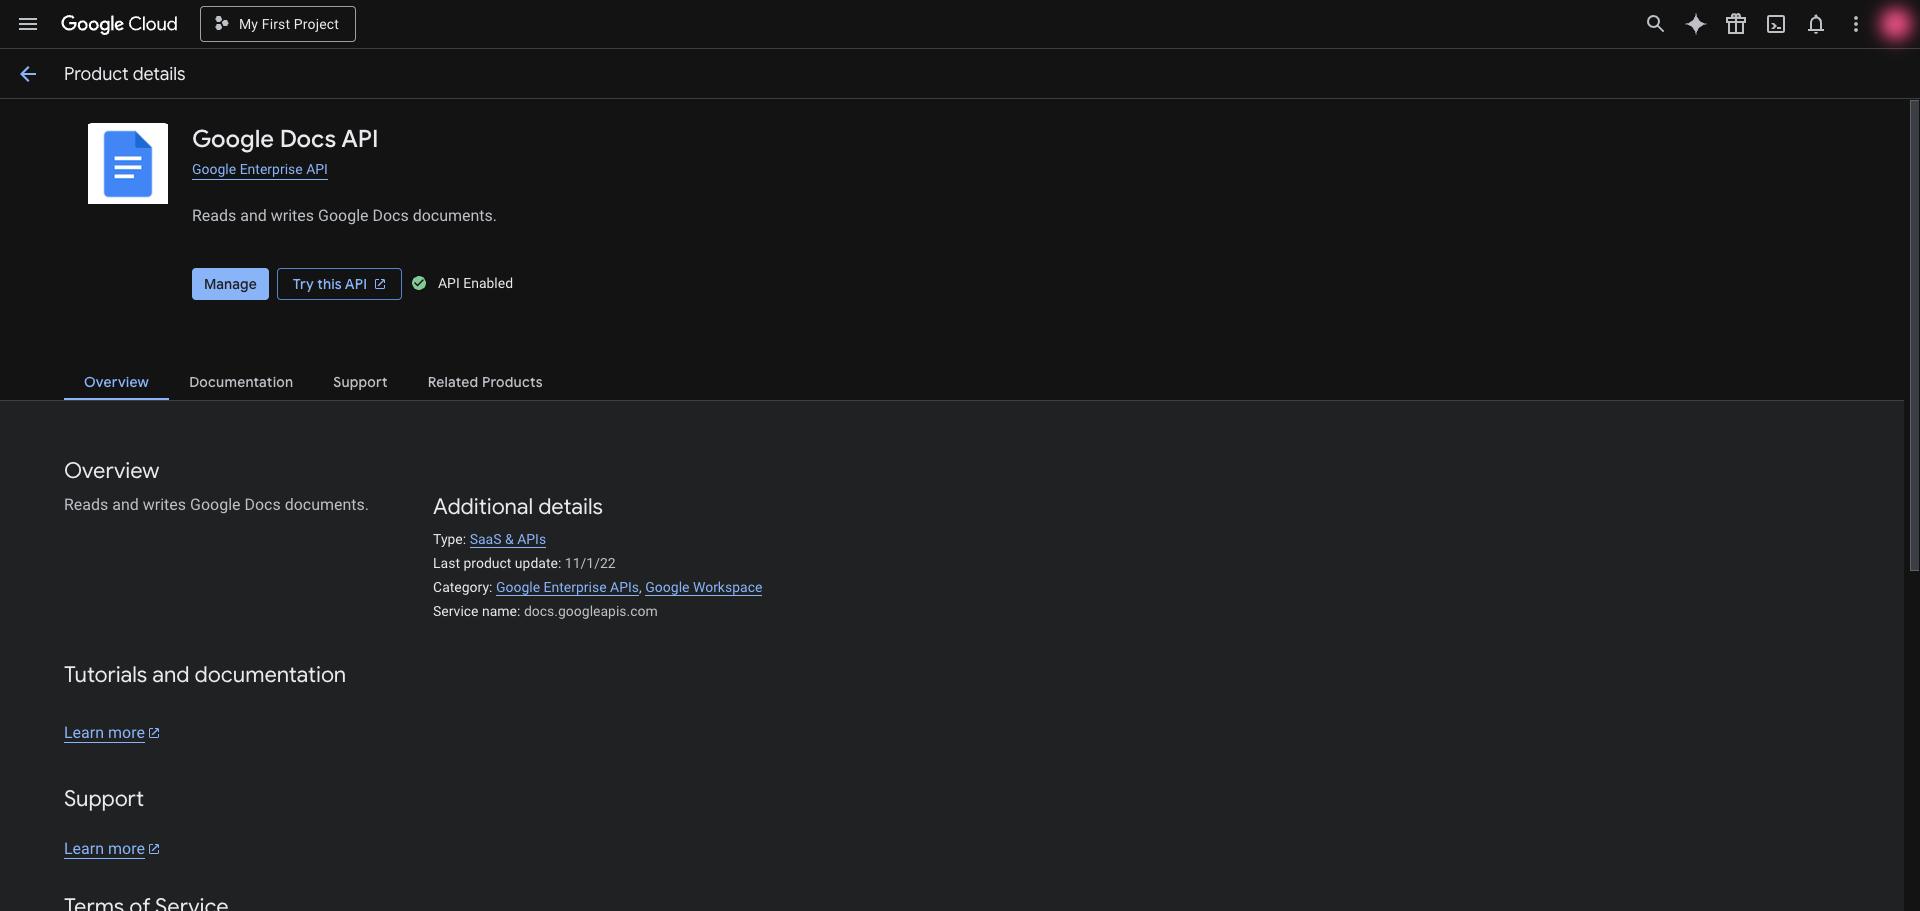
Go to the Google Docs API page in the Google Cloud Console. Select your project from the top navigation, then click Enable if the API is not yet enabled. If you see Manage and API Enabled, the API is already active.
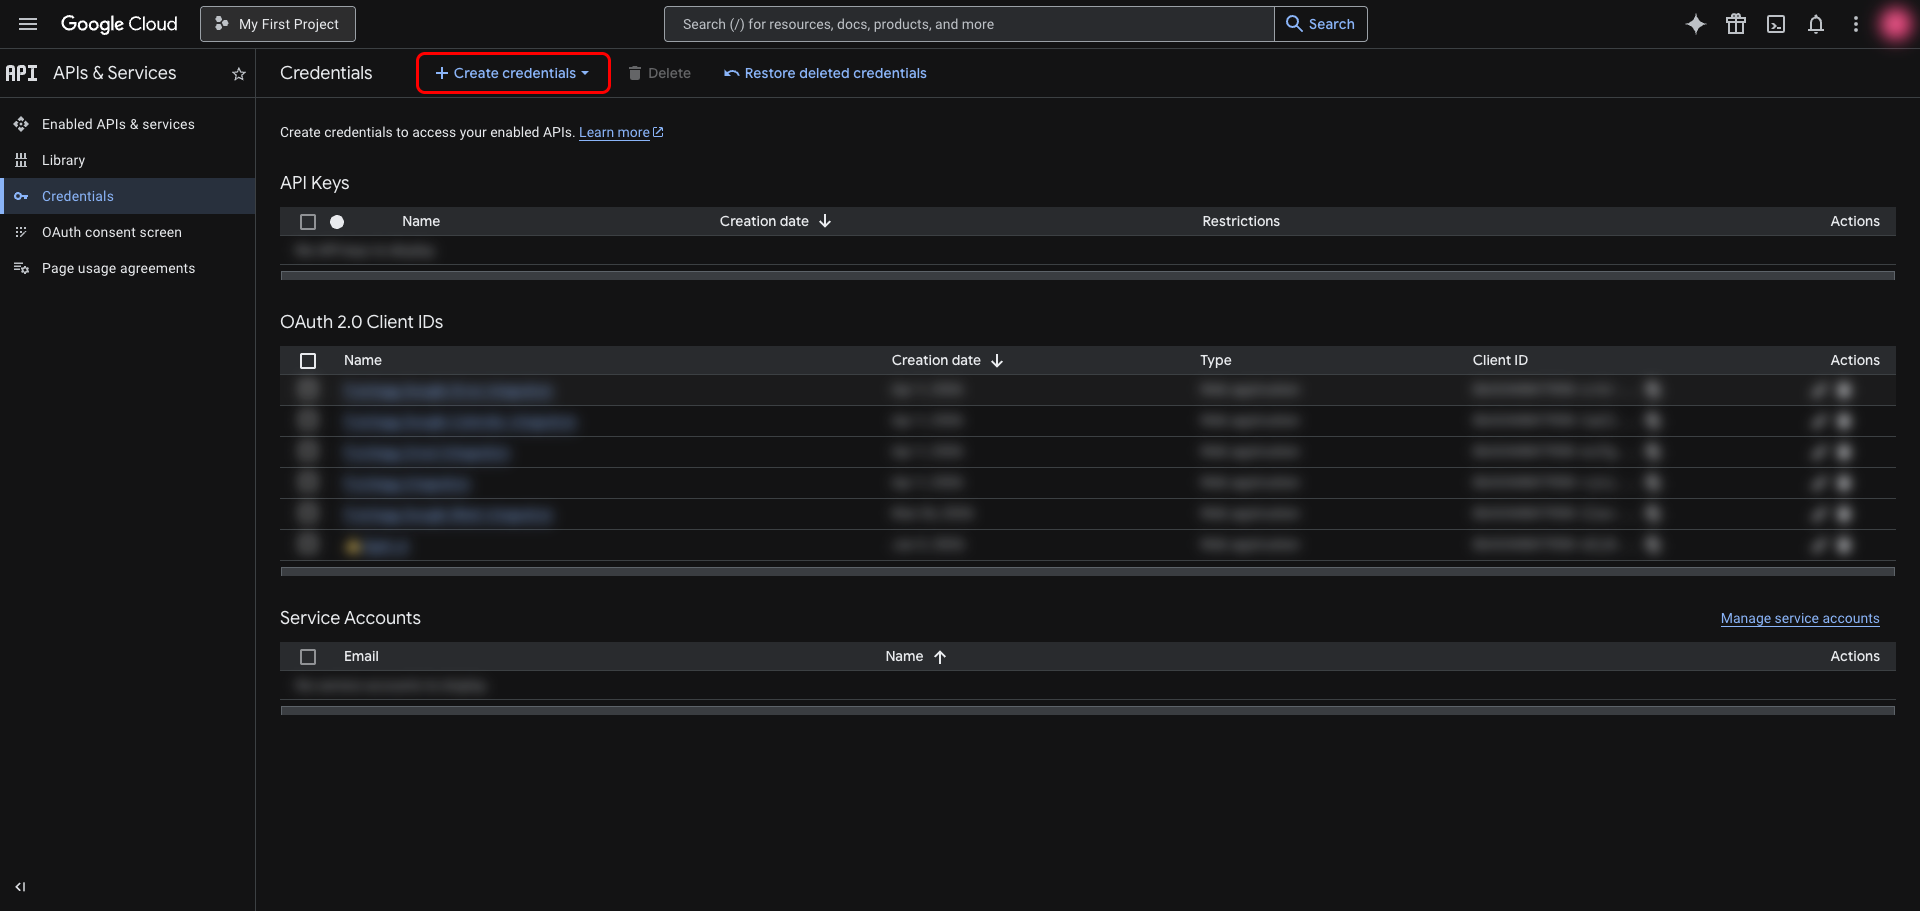
In the left sidebar, navigate to APIs & Services → Credentials. Click Create credentials.
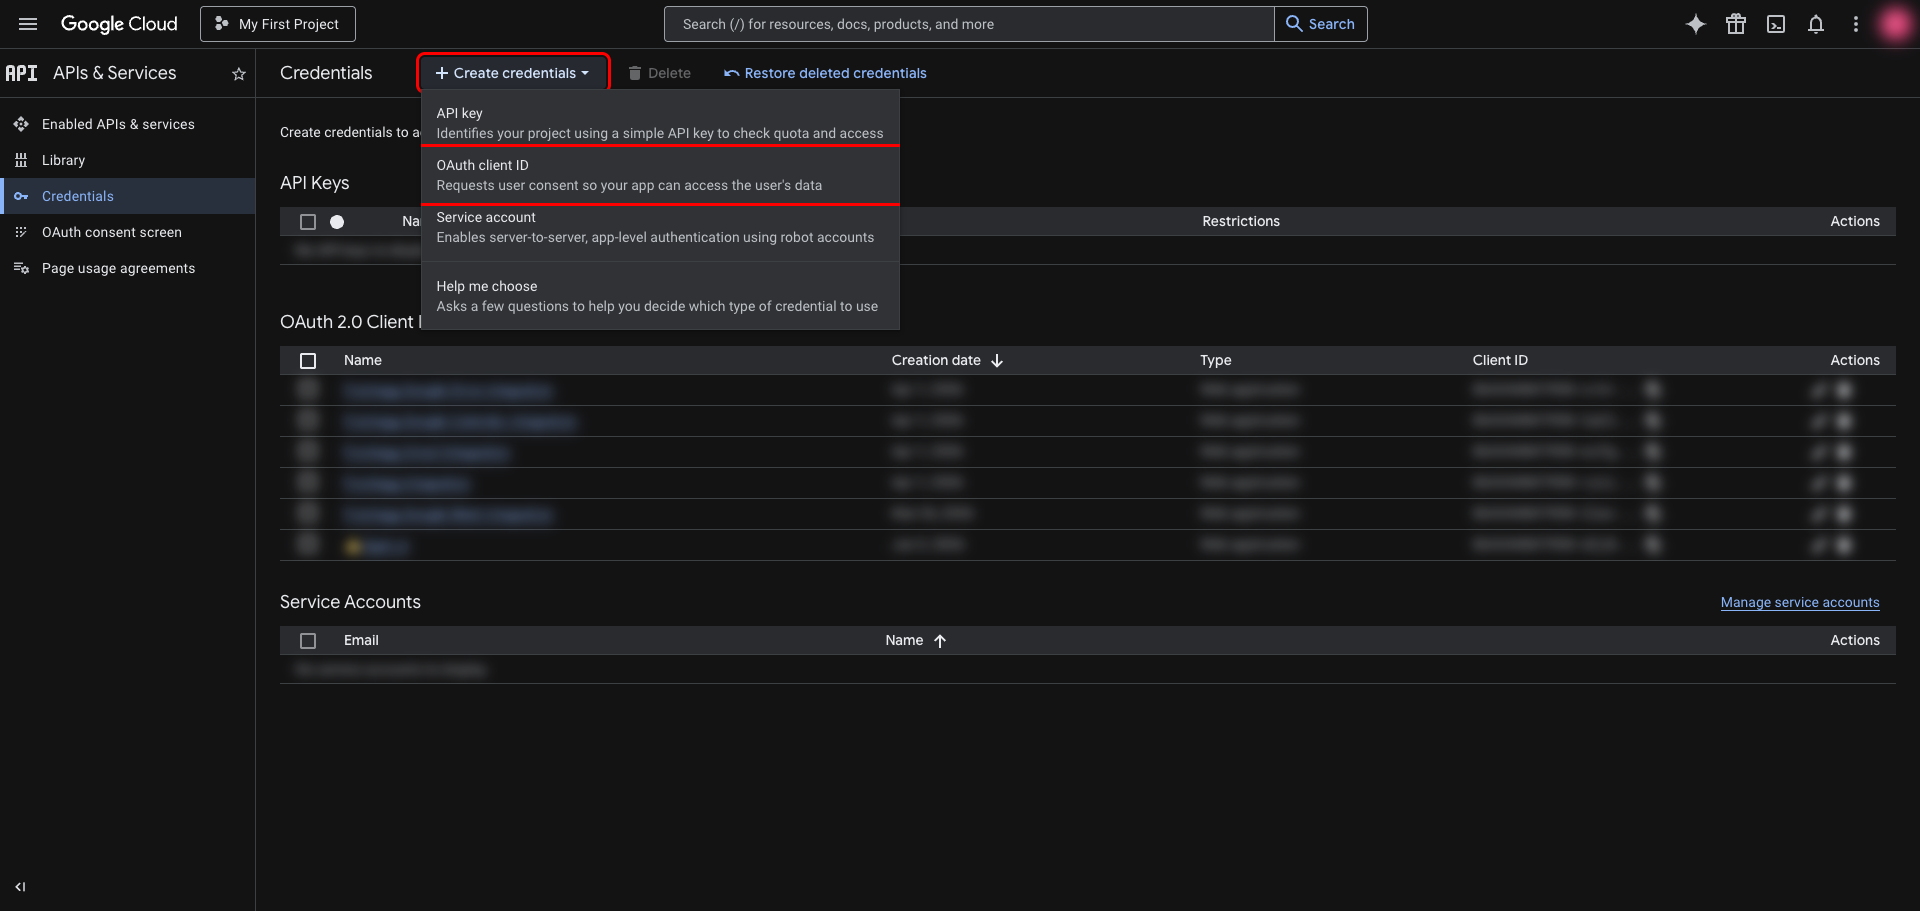
From the dropdown, select OAuth client ID.
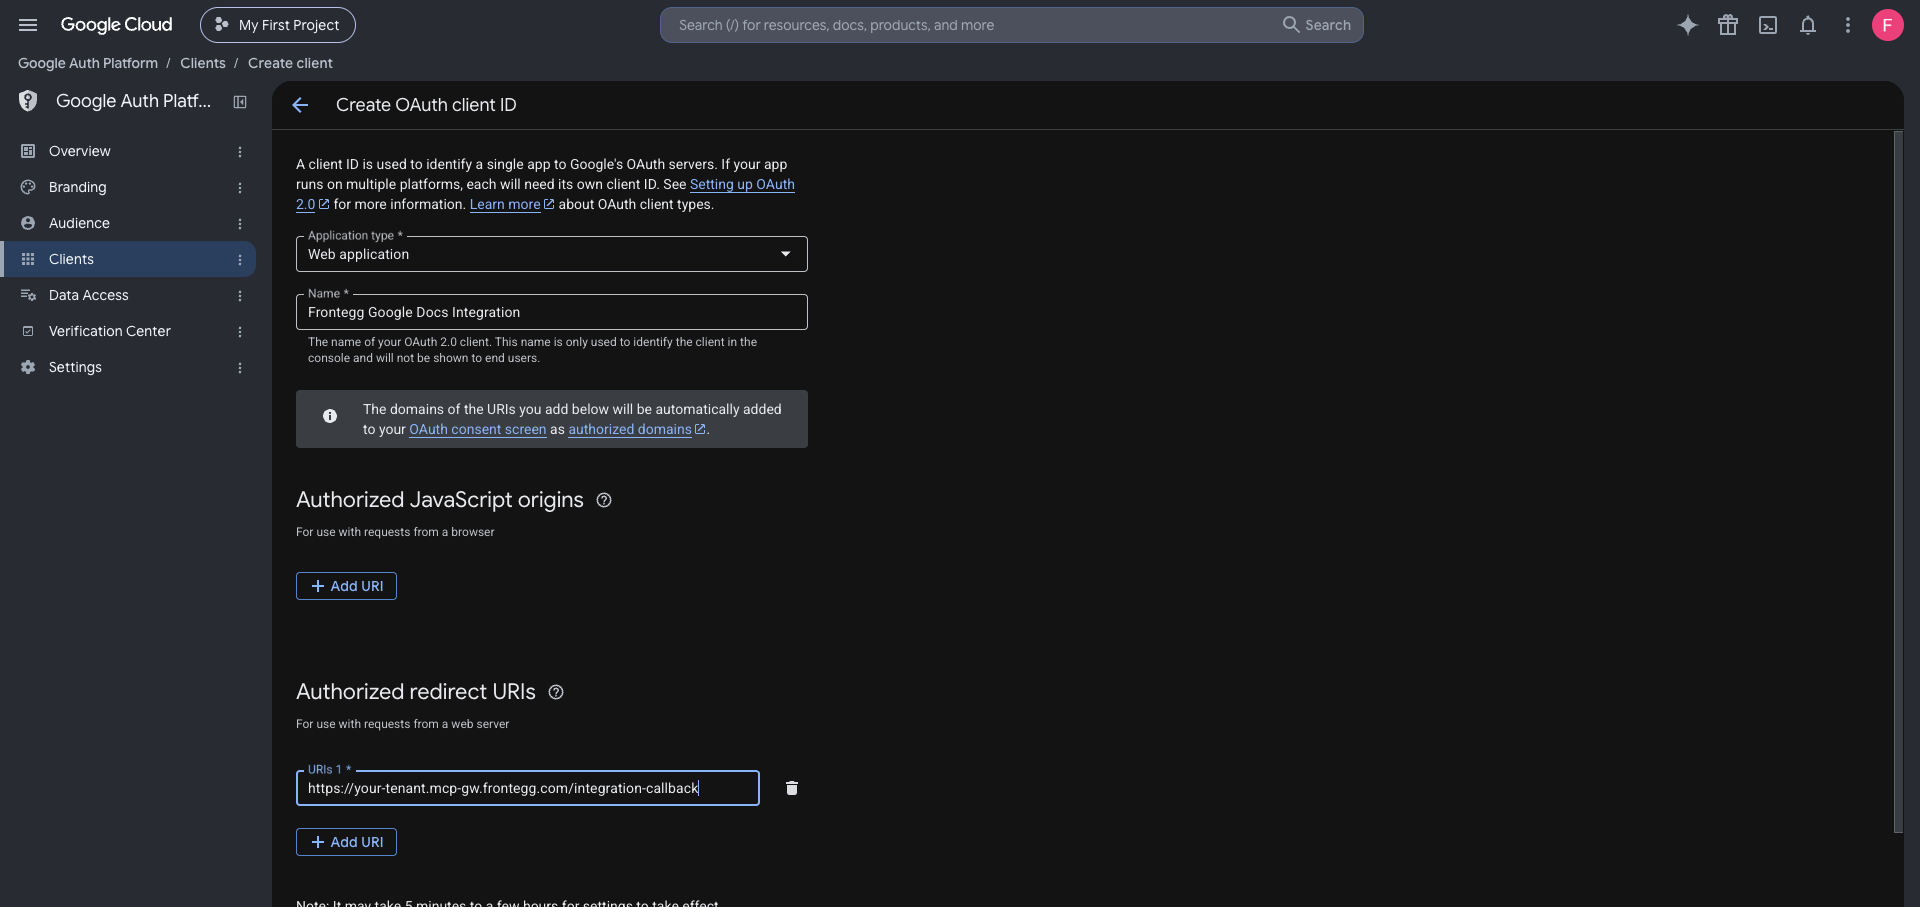
On the Create OAuth client ID page:
- Set Application type to Web application.
- Enter a name for the client (for example,
Frontegg Google Docs Integration). - Under Authorized redirect URIs, click Add URI and add the redirect URL shown in the Frontegg portal for this integration — copy it whole, including the path. See How to get your Redirect URL.
The value has this shape, but take the real one from the portal rather than assembling it:
https://YOUR_MCP_GATEWAY_URL/integration-callback
Click Create.
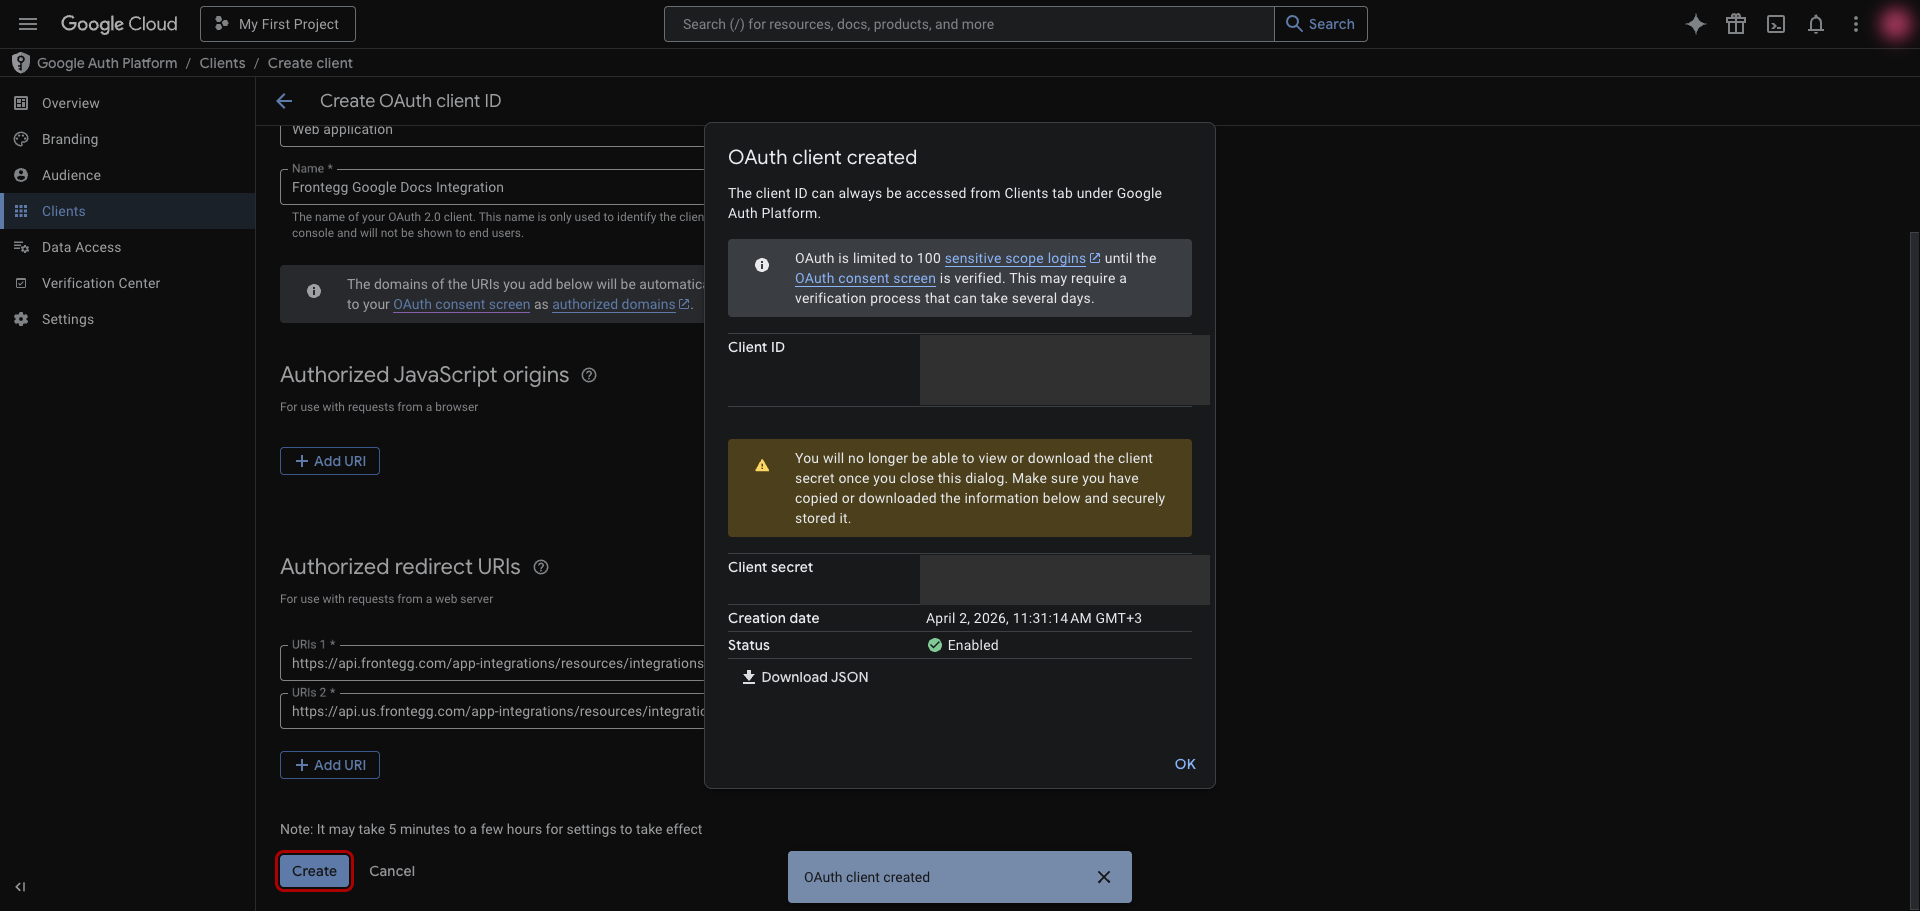
After clicking Create, a dialog displays your Client ID and Client Secret — copy both values and store them securely.
Save your Client Secret now
Save your Client Secret now
The Client Secret is only shown once in this dialog. After you close it, you cannot retrieve it again — you can only create a new secret.
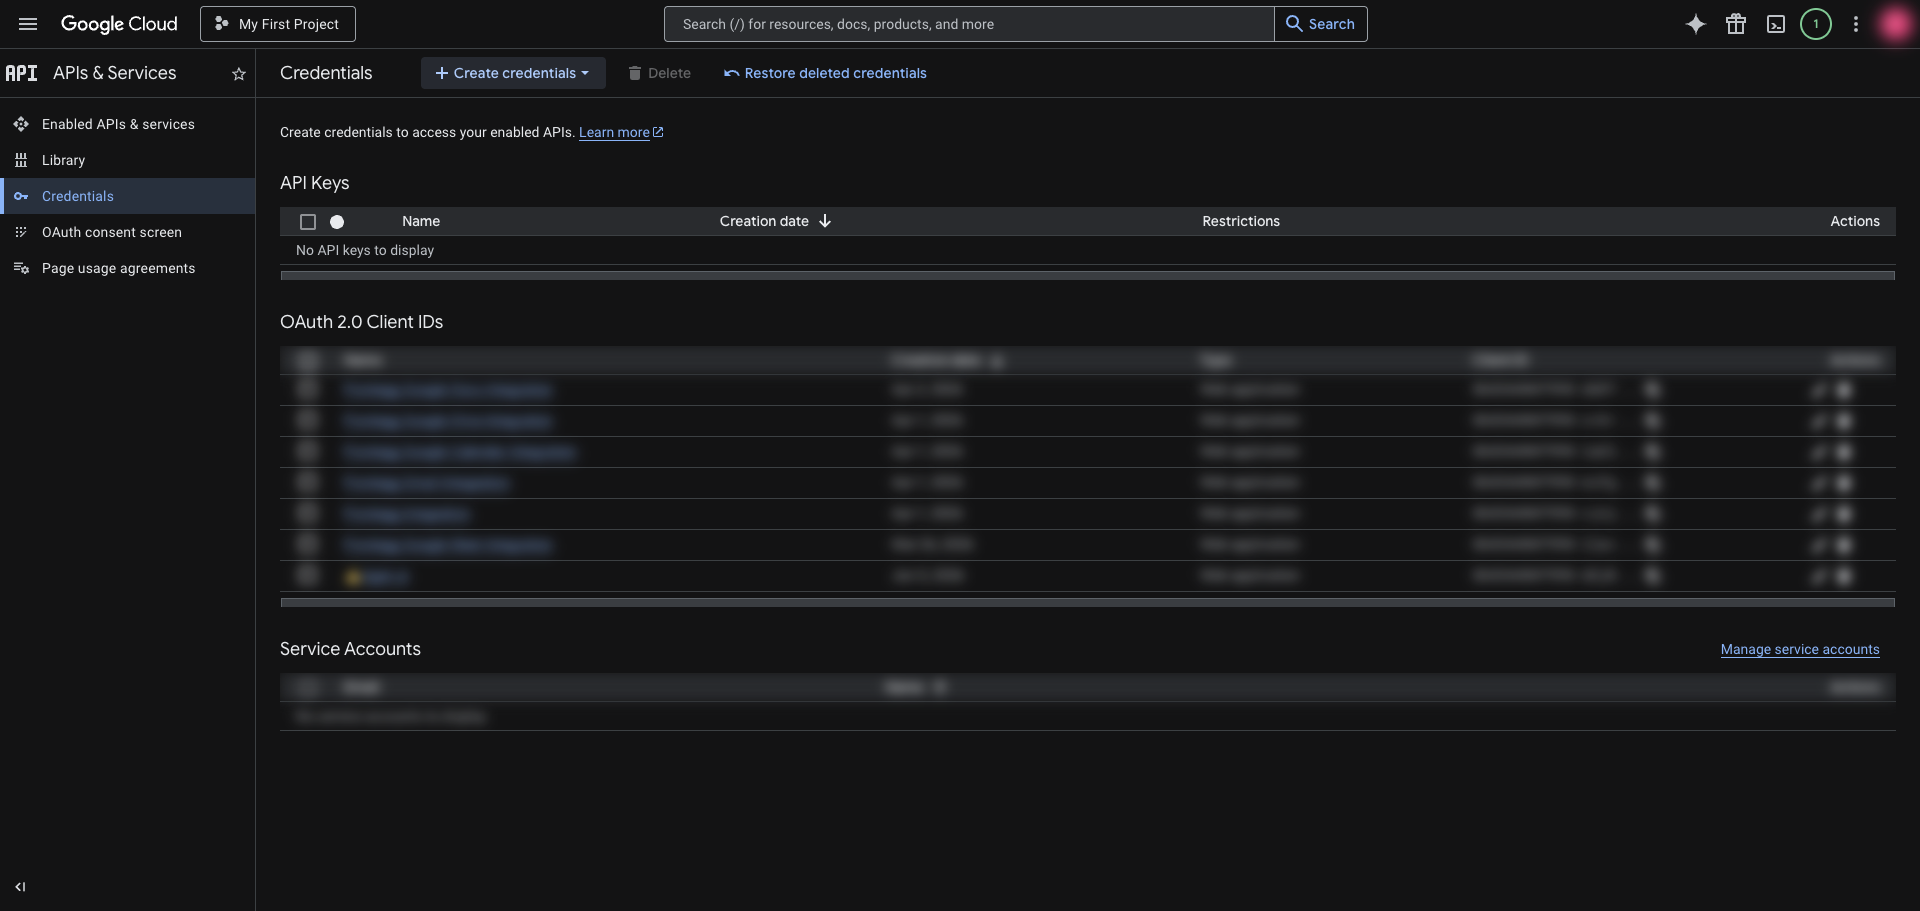
After closing the dialog, your new client appears at the top of the OAuth 2.0 Client IDs list on the Credentials page.
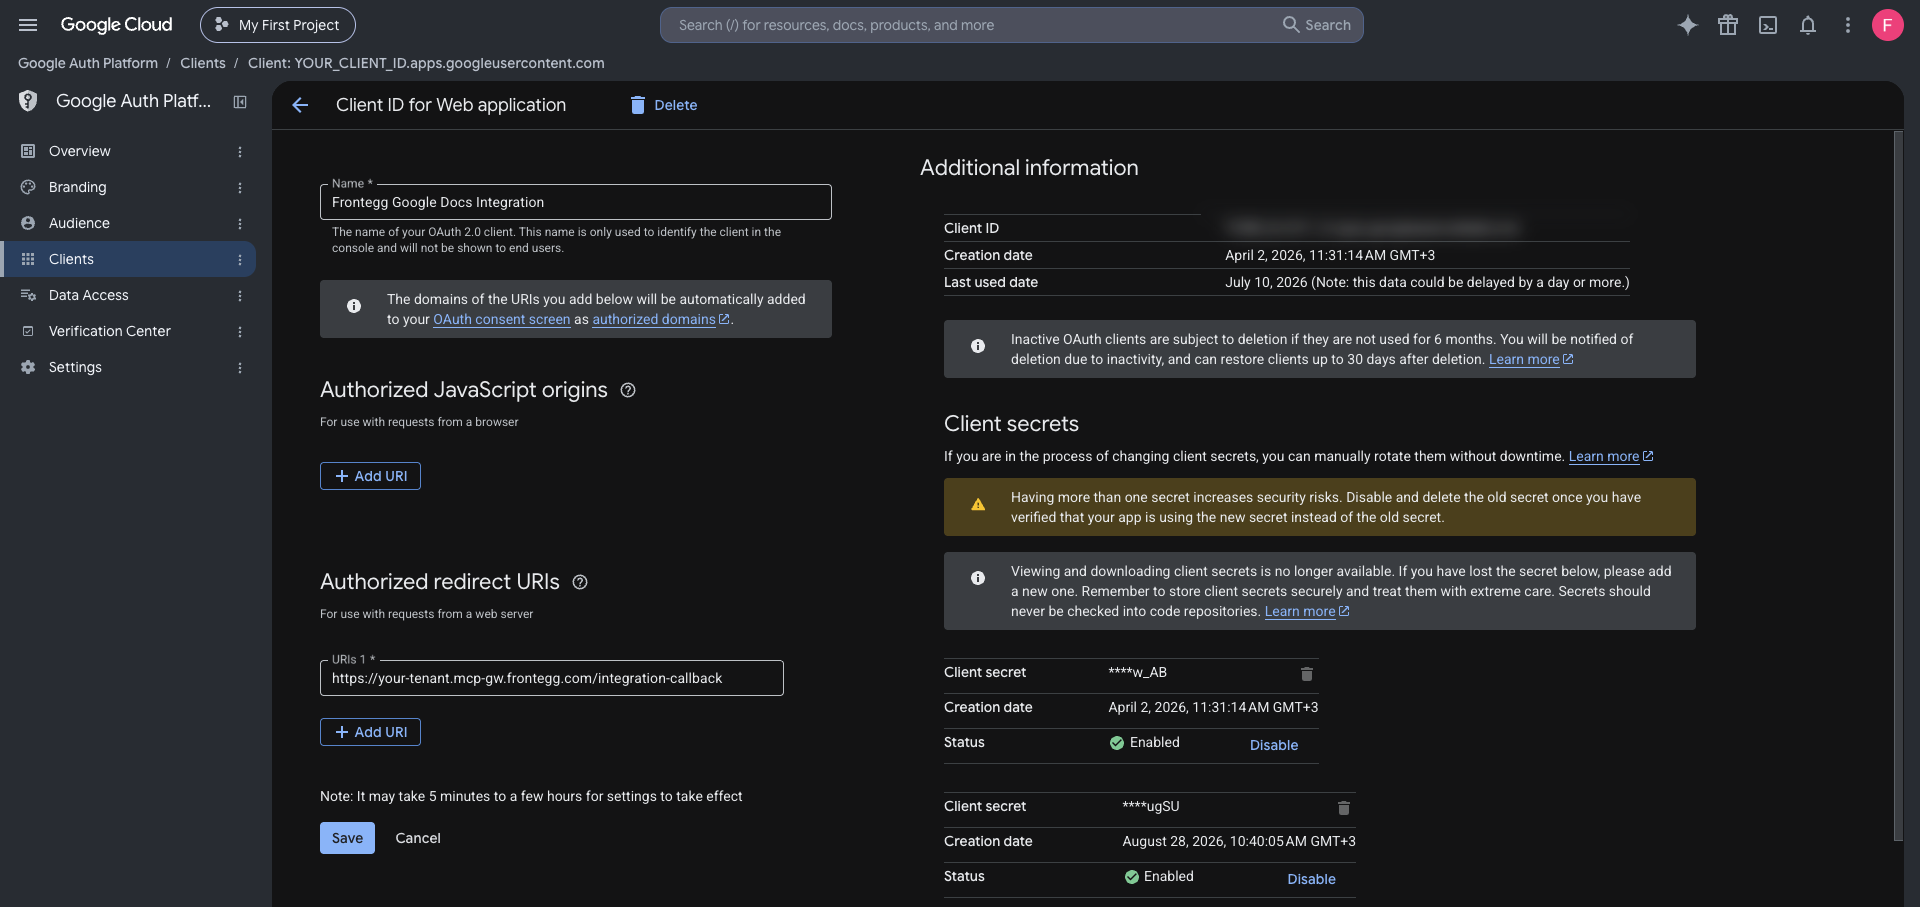
Click the client name to open its detail page. You can view and copy the Client ID at any time from the Additional information section.
Once you have your Client ID and Client Secret, enter them in the Frontegg portal:
- Open the Frontegg portal and navigate to [ENVIRONMENT] → Integrations → Google Docs.
- Enter the Client ID and Client Secret in the corresponding fields.
- Select the required scopes:
| Scope | Description |
|---|---|
https://www.googleapis.com/auth/documents.readonly | Read a document |
https://www.googleapis.com/auth/documents | Create a document, and batch-update its content |
- Click Save.
Keep your credentials secure
Keep your credentials secure
Never share or commit your Client Secret to version control.
Use this method instead of OAuth when the integration should act on behalf of a fixed Google Workspace user without an interactive consent screen. It requires a Workspace domain you administer — it does not work with personal Google accounts.
In the Google Cloud Console, go to IAM & Admin → Service Accounts and click Create service account. Give it a name, then open the new account, select the Keys tab, and choose Add key → Create new key → JSON. The key file downloads once — store it securely, as Google does not keep a copy.
Copy the service account's Client ID (the numeric OAuth 2.0 client ID shown on its details page). In the Google Workspace Admin console, go to Security → Access and data control → API controls → Domain-wide delegation, click Add new, paste the Client ID, and enter the Docs scopes the integration needs, for example https://www.googleapis.com/auth/documents.
- Open the Frontegg portal and navigate to [ENVIRONMENT] → Integrations → Google Docs.
- Select the Service account authentication method.
- Paste the full contents of the JSON key file into Service Account JSON.
- In User to impersonate, enter the email of the Workspace user the service account acts on behalf of, for example
jane@acme.com. - Click Save.
Delegation grants broad access
Delegation grants broad access
A service account with domain-wide delegation can act as any user in the domain for the scopes you authorize. Grant only the scopes the integration needs, and treat the JSON key file like a password — never commit it to version control.
- Edits are applied in batches, and the whole batch is validated before anything is written. If one edit in the batch is invalid, nothing is applied — the document is never left half-edited.
- Find-and-replace runs across the whole document in a single edit, with an optional case-sensitive match, and reports how many occurrences it changed.
- Headings applied as named styles populate the document's outline pane, rather than only looking like headings.
- Edits target positions in the document by index, so a document usually has to be read first to find the position to edit. Indexes shift as content is inserted or deleted, which is why edits meant to apply together belong in one batch.
- Document tabs are not available: content can be read with tabs populated, but tab-level operations are not exposed.
- Smart chips — inserting a date, a person, or a rich link — are not available, and document-level and section-level style changes are not exposed either.
- Table cell row and column spans cannot be set directly; cells are spanned by merging them and separated by unmerging them.
- A paragraph's heading identifier and its tab stops are assigned by Google and cannot be set.
- An edit naming a property Google does not recognize is rejected with a validation error naming the property, rather than being silently dropped.