The Identity provider page lets you connect your corporate directory to Agen for Work so that AI access policies are enforced using your existing user and group structure. When a user joins, leaves, or changes teams, their connector permissions update automatically — eliminating the need for manual user management.
To access the Identity provider page, click the Identity provider icon in the left sidebar.
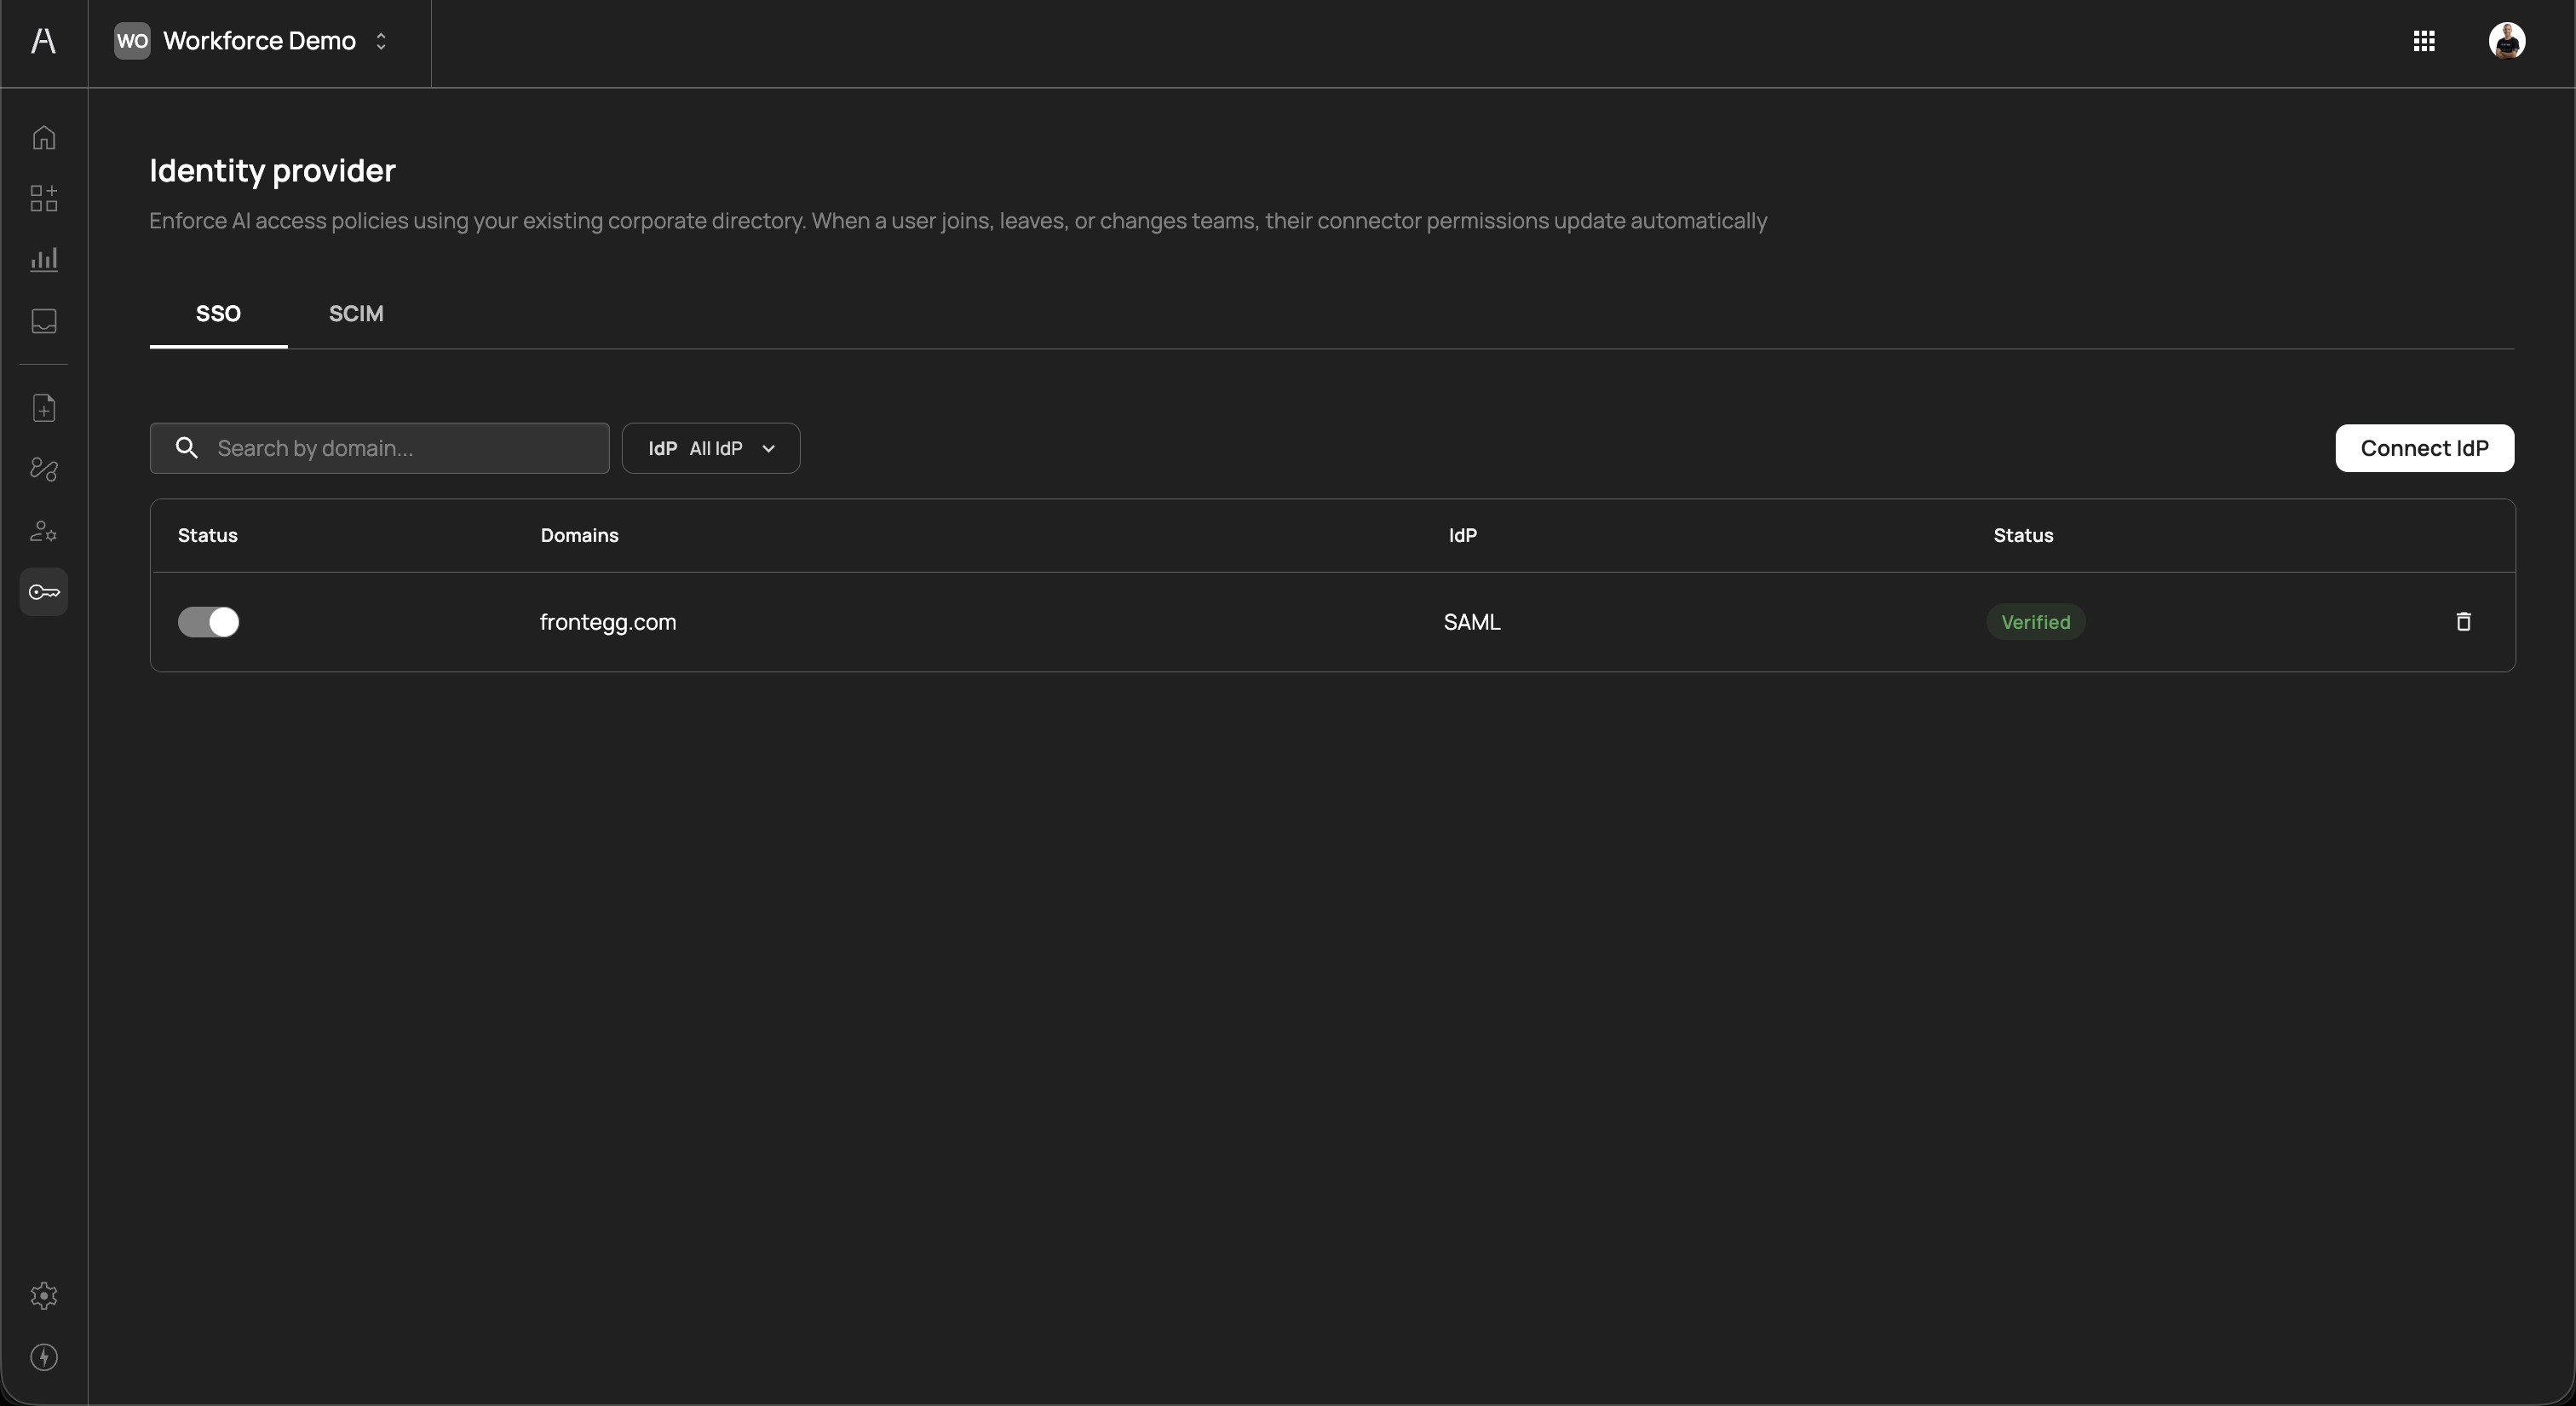
The page header reads "Enforce AI access policies using your existing corporate directory. When a user joins, leaves, or changes teams, their connector permissions update automatically" and is organized into two tabs: SSO and SCIM.
The SSO tab displays your single sign-on connections. SSO enables your employees to authenticate into Agen for Work using their existing corporate credentials, ensuring that only verified directory members can interact with AI agents.
The SSO tab includes a Search by domain field, an IdP filter dropdown to narrow by provider type, and a Connect IdP button.
The connections table includes the following columns:
| Column | Description |
|---|---|
| Status | A toggle switch that enables or disables the SSO connection. When disabled, users can no longer authenticate through this identity provider. |
| Domains | The email domain associated with the connection (e.g., frontegg.com). Users with matching email domains are routed to this IdP for authentication. |
| IdP | The protocol used for the connection (e.g., SAML, OpenID Connect) |
| Status | The verification status of the connection, displayed as a color-coded badge (e.g., Verified in green) |
Each connection row includes a delete icon on the right side to remove the connection.
To connect a new identity provider, click Connect IdP in the top-right corner of the SSO tab. A provider selection screen opens with the prompt "Select your IdP guide to help you do the process quickly and easy."
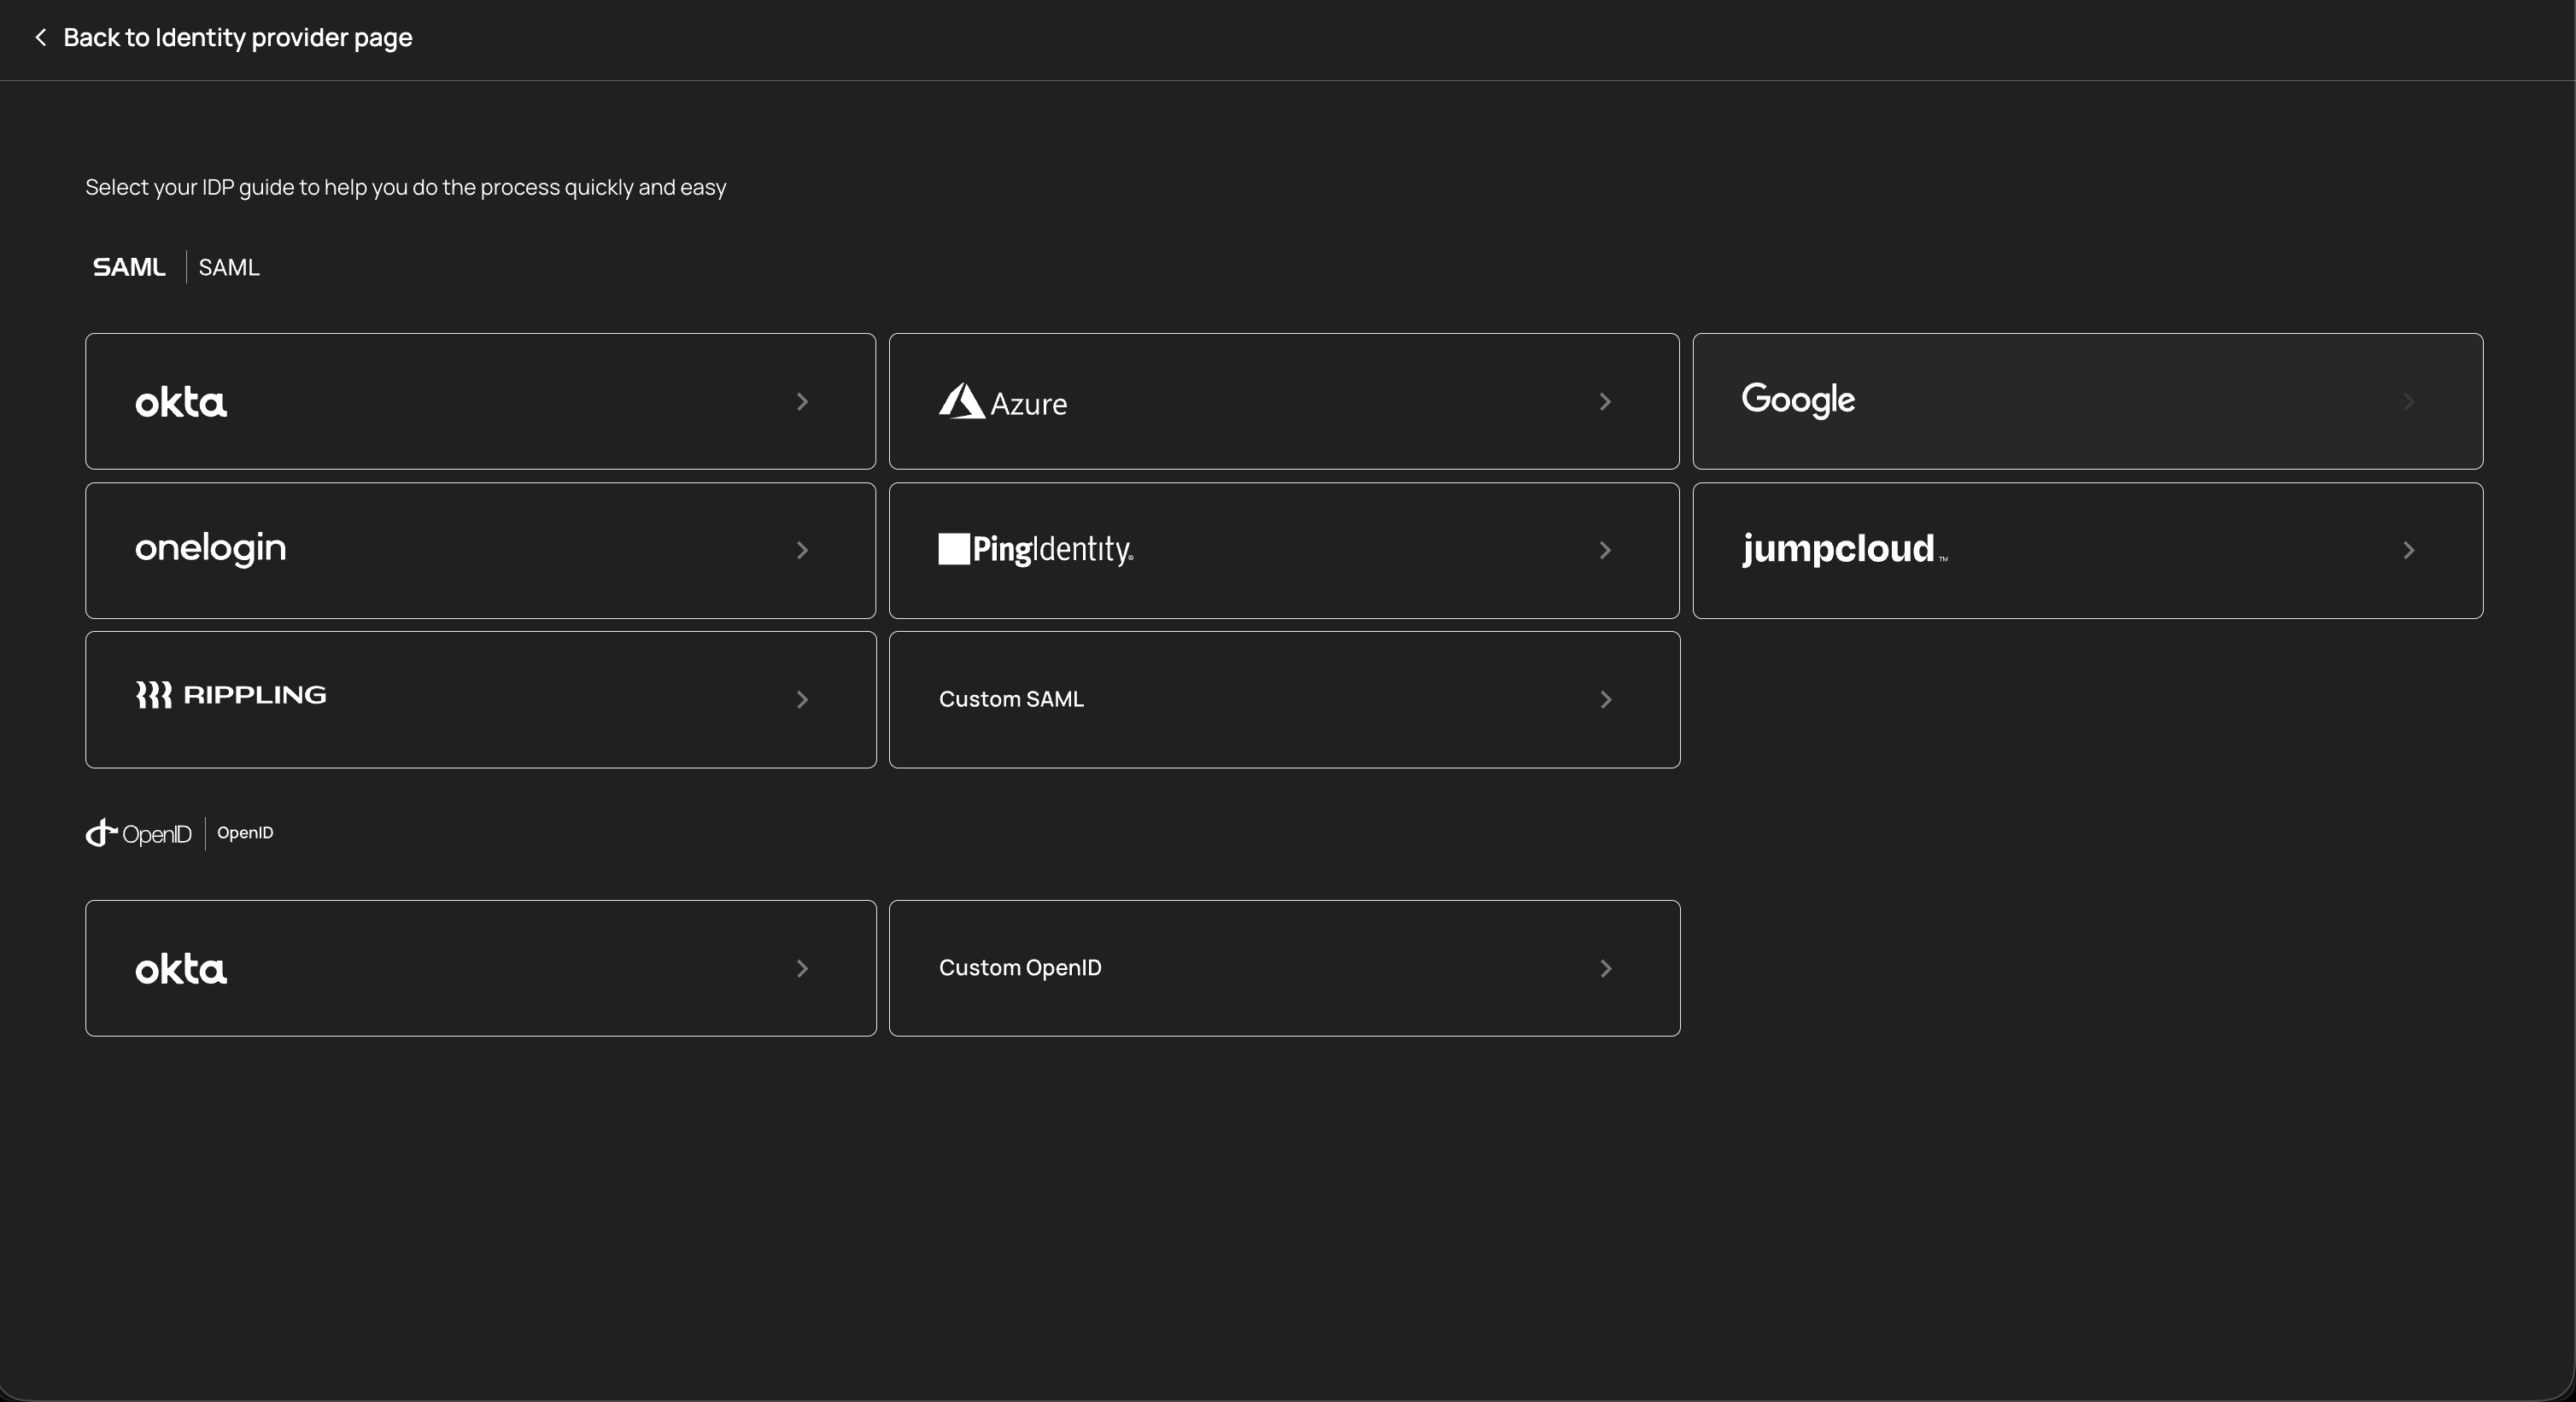
The selection screen is organized by protocol:
SAML providers
| Provider | Description |
|---|---|
| Okta | Enterprise identity management platform with SAML 2.0 support |
| Azure | Microsoft Azure Active Directory (Entra ID) with SAML integration |
| Google Workspace directory with SAML authentication | |
| OneLogin | Cloud-based identity and access management with SAML support |
| Ping Identity | Enterprise identity security platform with SAML federation |
| JumpCloud | Open directory platform with SAML single sign-on |
| Rippling | Workforce management platform with SAML-based SSO |
| Custom SAML | Connect any SAML 2.0-compliant identity provider using manual configuration |
OpenID Connect providers
| Provider | Description |
|---|---|
| Okta | Okta with OpenID Connect protocol for token-based authentication |
| Custom OpenID | Connect any OpenID Connect-compliant identity provider using manual configuration |
Click on a provider card to open its guided setup flow. Each provider includes step-by-step instructions to complete the connection. After successful configuration, the connection appears in the SSO table with a Verified status.
Each provider guide walks you through the configuration steps specific to that identity provider, including where to find the required metadata URLs, certificates, and client credentials. Follow the guide carefully to ensure a successful connection.
Each SSO connection has a status toggle in the leftmost column. Toggling a connection off prevents users from authenticating through that identity provider. This is useful for:
- Maintenance windows — Temporarily disable an IdP connection during provider maintenance without removing the configuration
- Migration — Disable an old IdP connection after migrating users to a new provider
- Incident response — Quickly revoke SSO access if suspicious authentication activity is detected
Toggling the connection back on restores authentication through that provider. No reconfiguration is needed.
The SCIM tab manages automated user and group provisioning through the System for Cross-domain Identity Management (SCIM) protocol. While SSO handles authentication, SCIM handles the ongoing synchronization of user accounts and group memberships between your identity provider and Agen for Work.
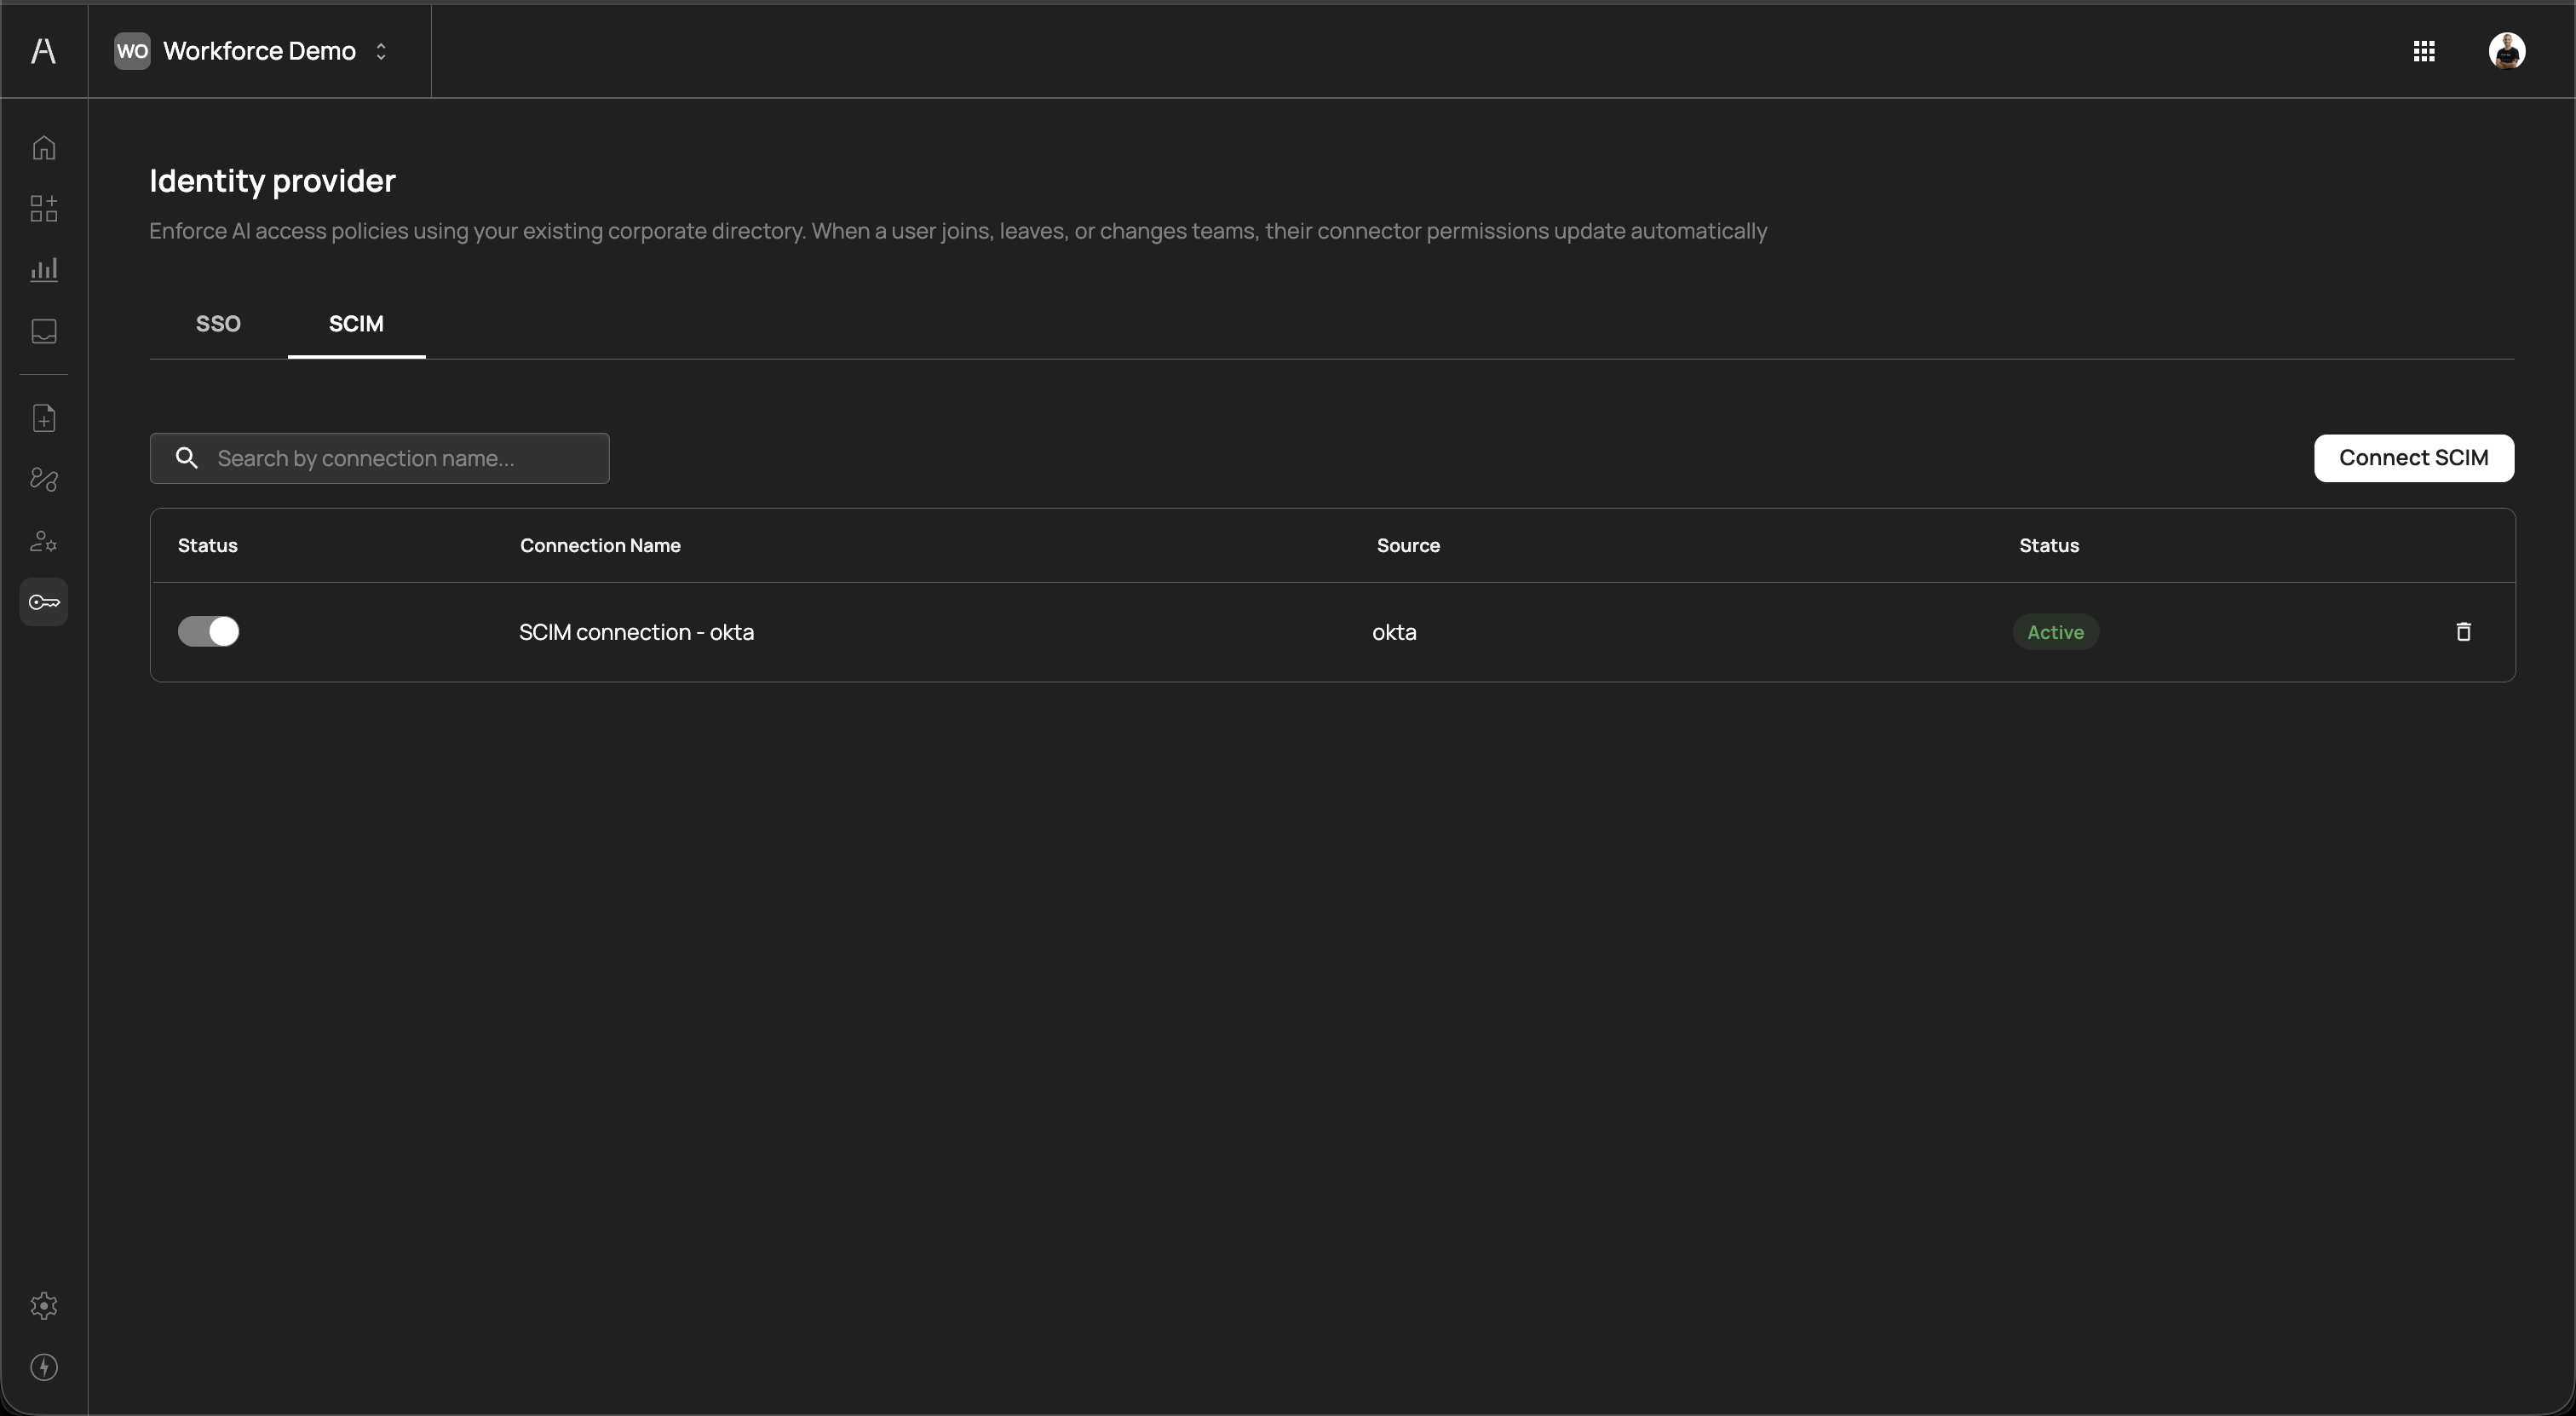
The SCIM tab includes a Search by connection name field and a Connect SCIM button.
The connections table includes the following columns:
| Column | Description |
|---|---|
| Status | A toggle switch that enables or disables the SCIM connection. When disabled, user and group synchronization is paused. |
| Connection Name | The descriptive name of the SCIM connection (e.g., "SCIM connection - okta") |
| Source | The identity provider the connection syncs from (e.g., okta) |
| Status | The connection status, displayed as a color-coded badge (e.g., Active in green) |
Each connection row includes a delete icon on the right side to remove the connection.
To set up SCIM provisioning, click Connect SCIM in the top-right corner of the SCIM tab. A provider selection screen opens with the prompt "Select your provider guide to help you configure SCIM provisioning quickly and easily."
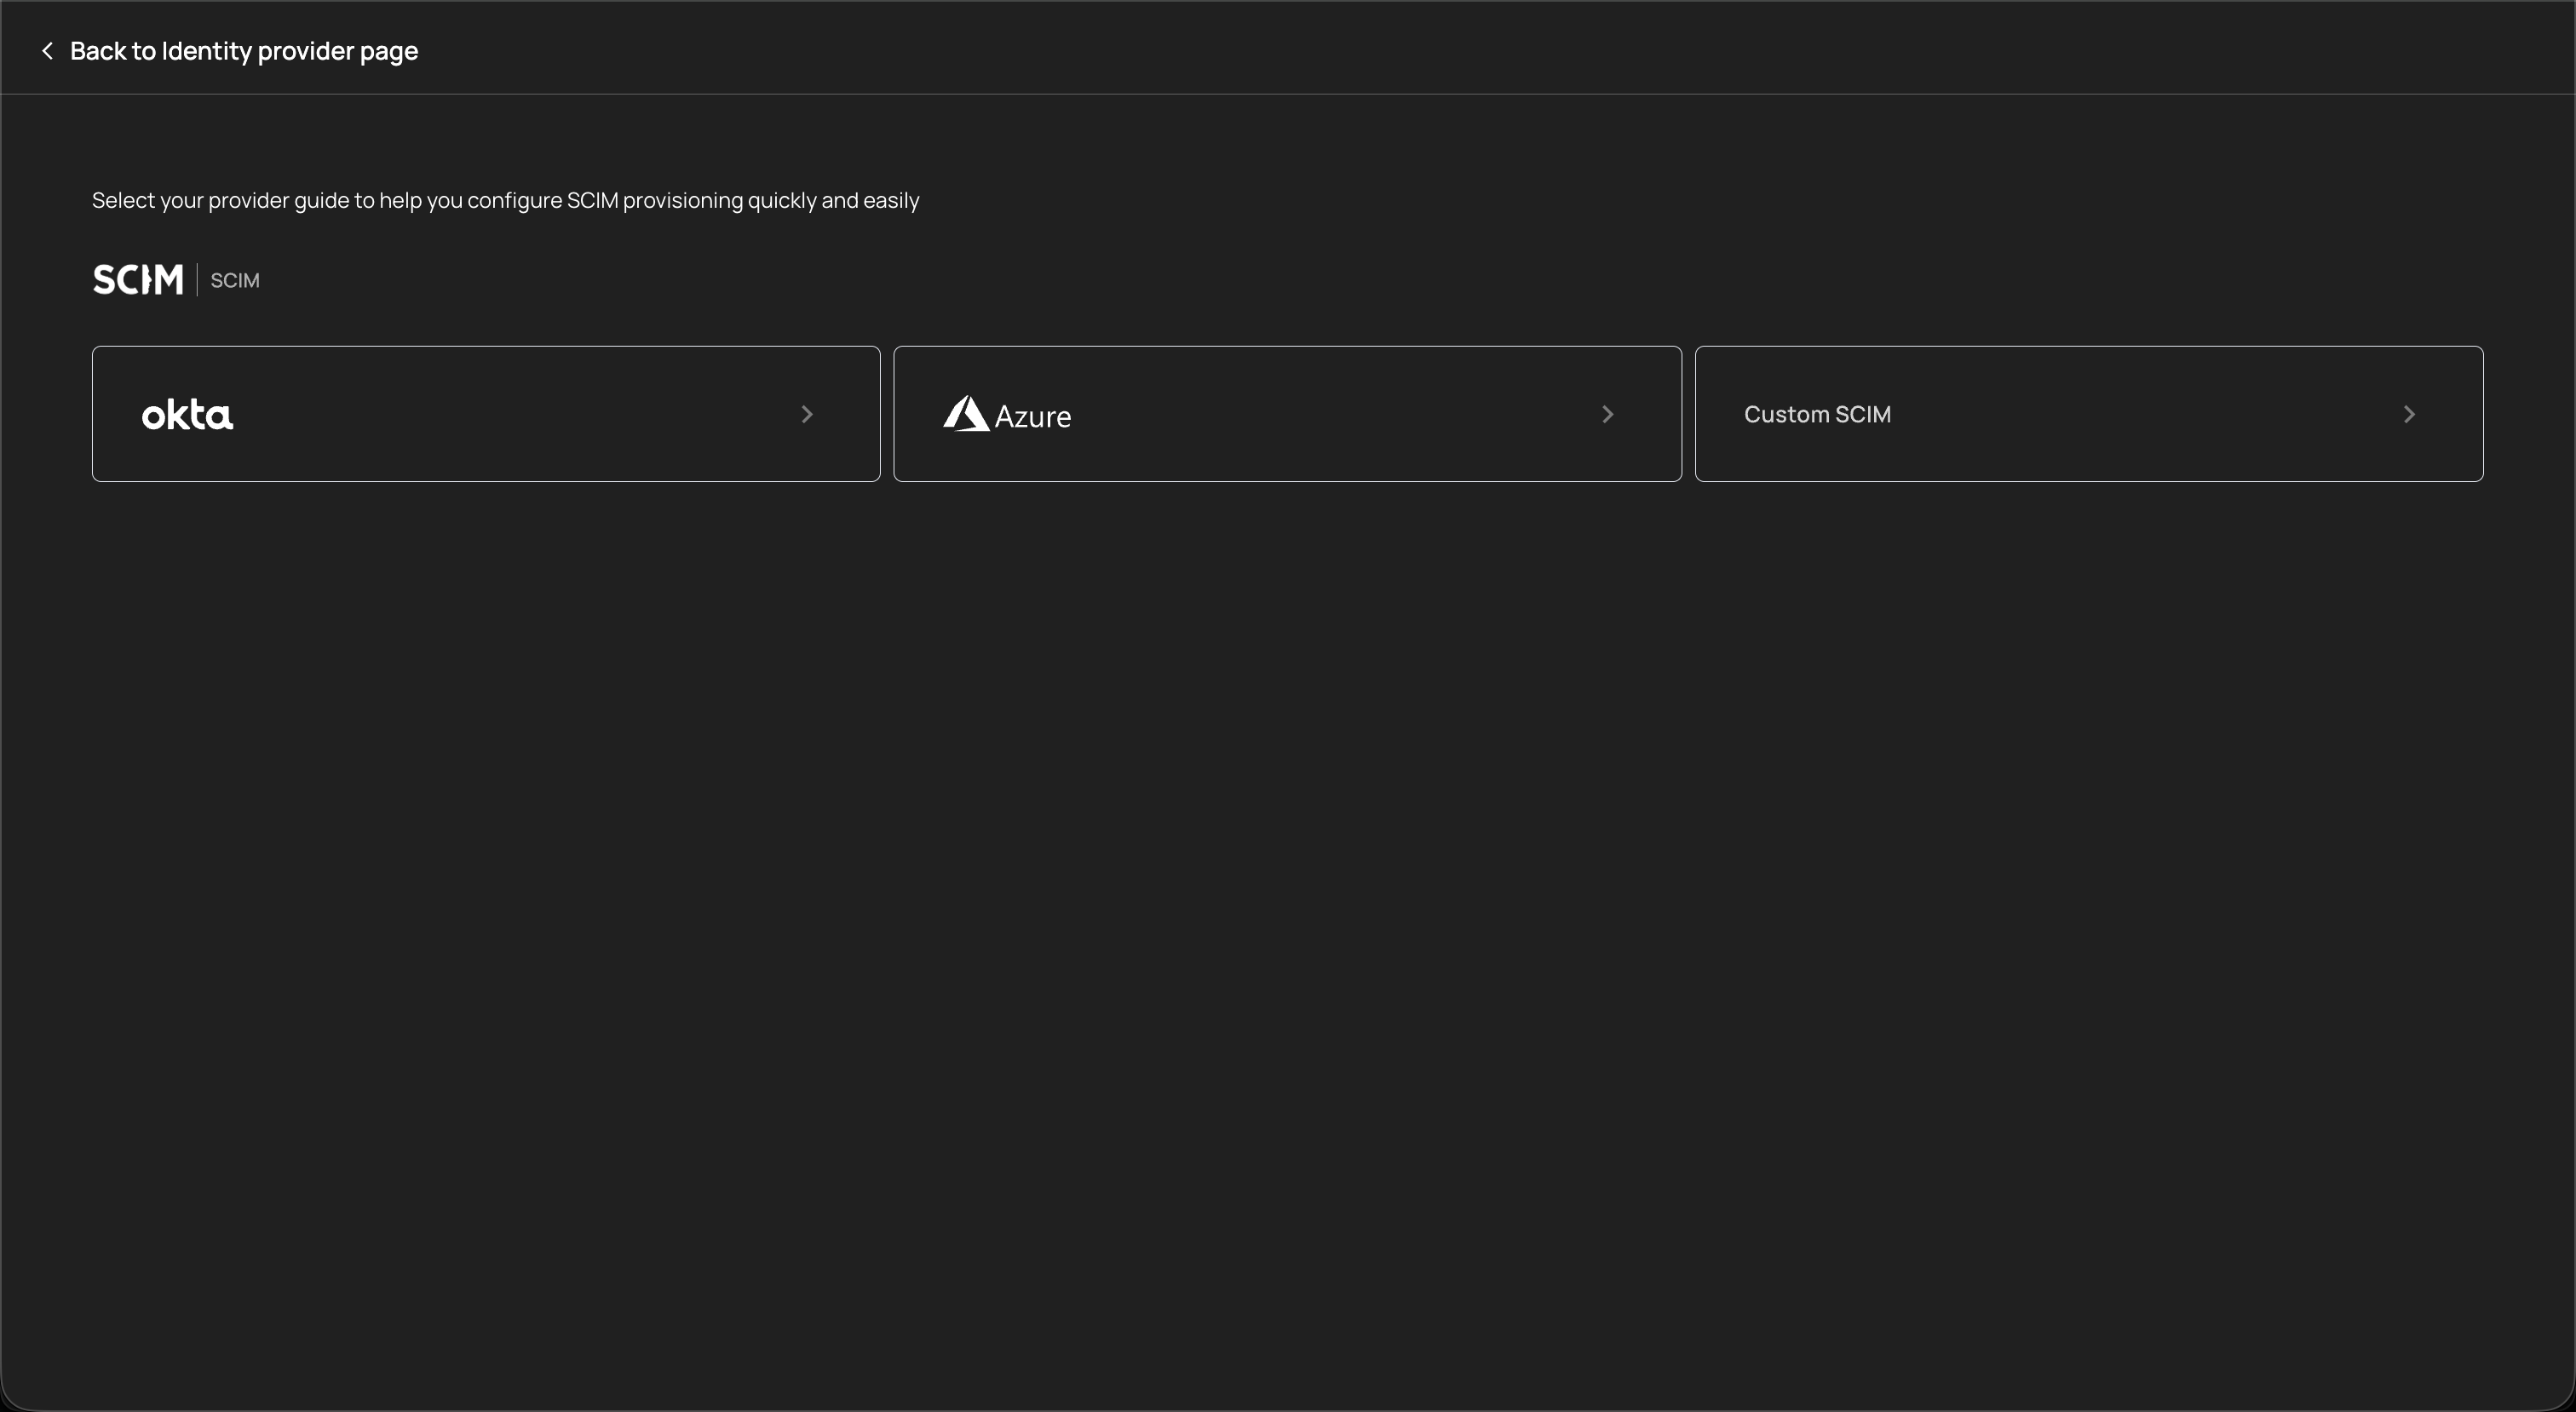
The following SCIM providers are supported:
| Provider | Description |
|---|---|
| Okta | Automated user and group provisioning from Okta's directory |
| Azure | Automated provisioning from Microsoft Azure Active Directory (Entra ID) |
| Custom SCIM | Connect any SCIM 2.0-compliant identity provider using manual configuration |
Click on a provider card to open its guided setup flow. After completing the configuration, the SCIM connection appears in the table with an Active status.
SCIM provisioning automates the following lifecycle events:
| Event | Effect in Agen for Work |
|---|---|
| User created in IdP | A new user account is automatically provisioned. The user inherits AI agent access based on their group memberships and applicable policies. |
| User deactivated in IdP | The user's account is automatically deprovisioned. All AI agent access is immediately revoked. |
| User added to a group | The user inherits any policies assigned to that group, gaining access to the corresponding tools and connectors. |
| User removed from a group | The user loses access granted by that group's policies. If no other policies grant access, the user's AI agent capabilities are restricted accordingly. |
| Group created in IdP | The group appears in Agen for Work's User management page and can be assigned to policies. |
| Group deleted in IdP | The group is removed from Agen for Work. Policies referencing the deleted group no longer apply to its former members. |
Each SCIM connection has a status toggle in the leftmost column. Toggling a connection off pauses synchronization — no new provisioning or deprovisioning events are processed until the connection is re-enabled. Existing users and groups remain in their current state.
Disabling SCIM synchronization means that user lifecycle changes in your identity provider (new hires, departures, team changes) are not reflected in Agen for Work until the connection is re-enabled. During this time, departed employees may retain AI agent access. Re-enable SCIM promptly after any maintenance period.
The identity provider integration forms the foundation of Agen for Work's access control model:
- SSO authenticates users — Employees sign in using their corporate credentials, verifying their identity against your directory
- SCIM syncs users and groups — User accounts and group memberships are automatically provisioned and kept in sync with your directory
- Policies reference users and groups — Access control policies are scoped to individual users or groups synced from your IdP
- Lifecycle changes propagate automatically — When an employee joins, leaves, or changes teams in your directory, their AI agent permissions update without manual intervention
- Connect SSO before adding users — Set up your identity provider connection first to ensure all users authenticate through your corporate directory from the start
- Enable SCIM for automated provisioning — SCIM eliminates the risk of orphaned accounts retaining AI agent access after employees leave your organization
- Use a single source of truth — Manage users and groups in your identity provider rather than manually in Agen for Work. This ensures consistency and reduces administrative overhead.
- Verify connections after setup — Confirm that your SSO connection shows a Verified status and your SCIM connection shows an Active status before relying on them for access control
- Monitor for sync issues — Periodically check the SCIM tab to ensure synchronization is active. A stalled or disconnected SCIM connection can lead to stale user data.
- Plan IdP migrations carefully — When switching identity providers, configure the new connection and verify it before disabling the old one. This avoids a gap where users cannot authenticate.
- User management — View and manage the users and groups synced from your identity provider
- Policies — Create access control policies scoped to users and groups
- Getting started — Return to the setup guide for a complete onboarding walkthrough
- Dashboard — Monitor user adoption and AI agent activity