ServiceNow is an IT service management and workflow automation platform. Integrating ServiceNow with Frontegg allows your application to manage incidents, service requests, and other ITSM workflows on behalf of your users using OAuth 2.0 Authorization Code flow.
Prerequisites
Prerequisites
- A ServiceNow instance (cloud or on-premises)
- Admin role in your ServiceNow instance
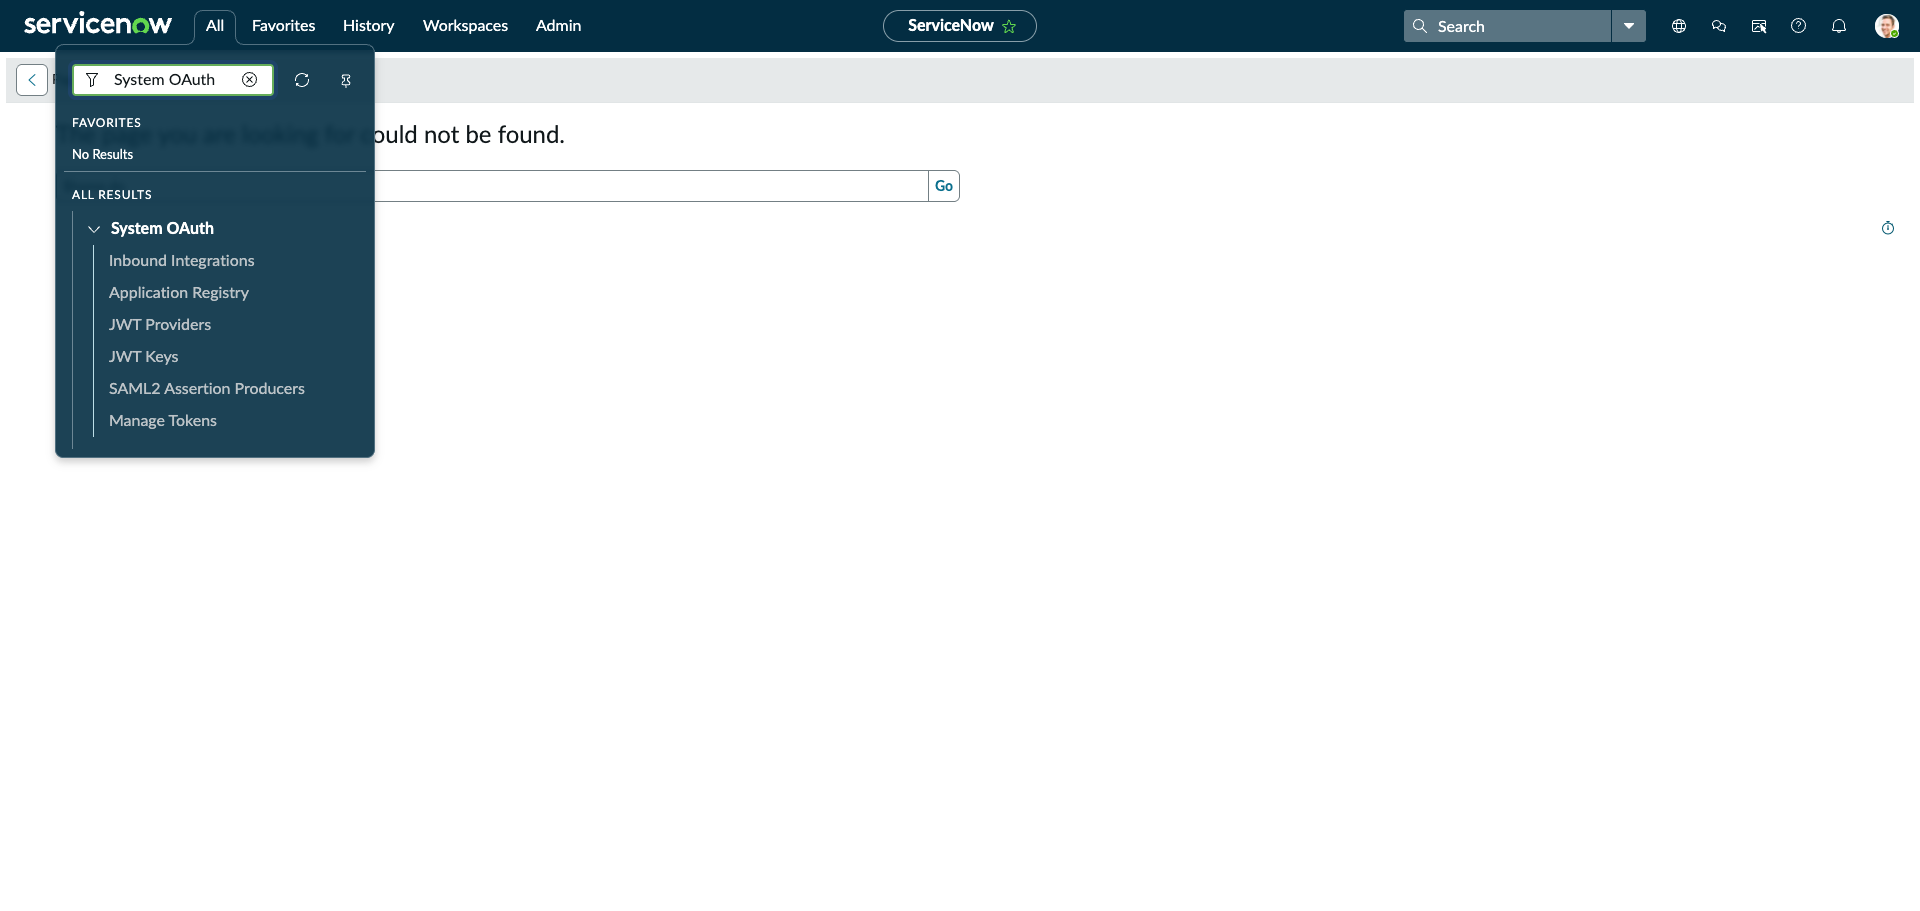
In your ServiceNow instance, click All in the top navigation bar. In the filter box that appears, type System OAuth. Under All Results, expand System OAuth and click Application Registry.
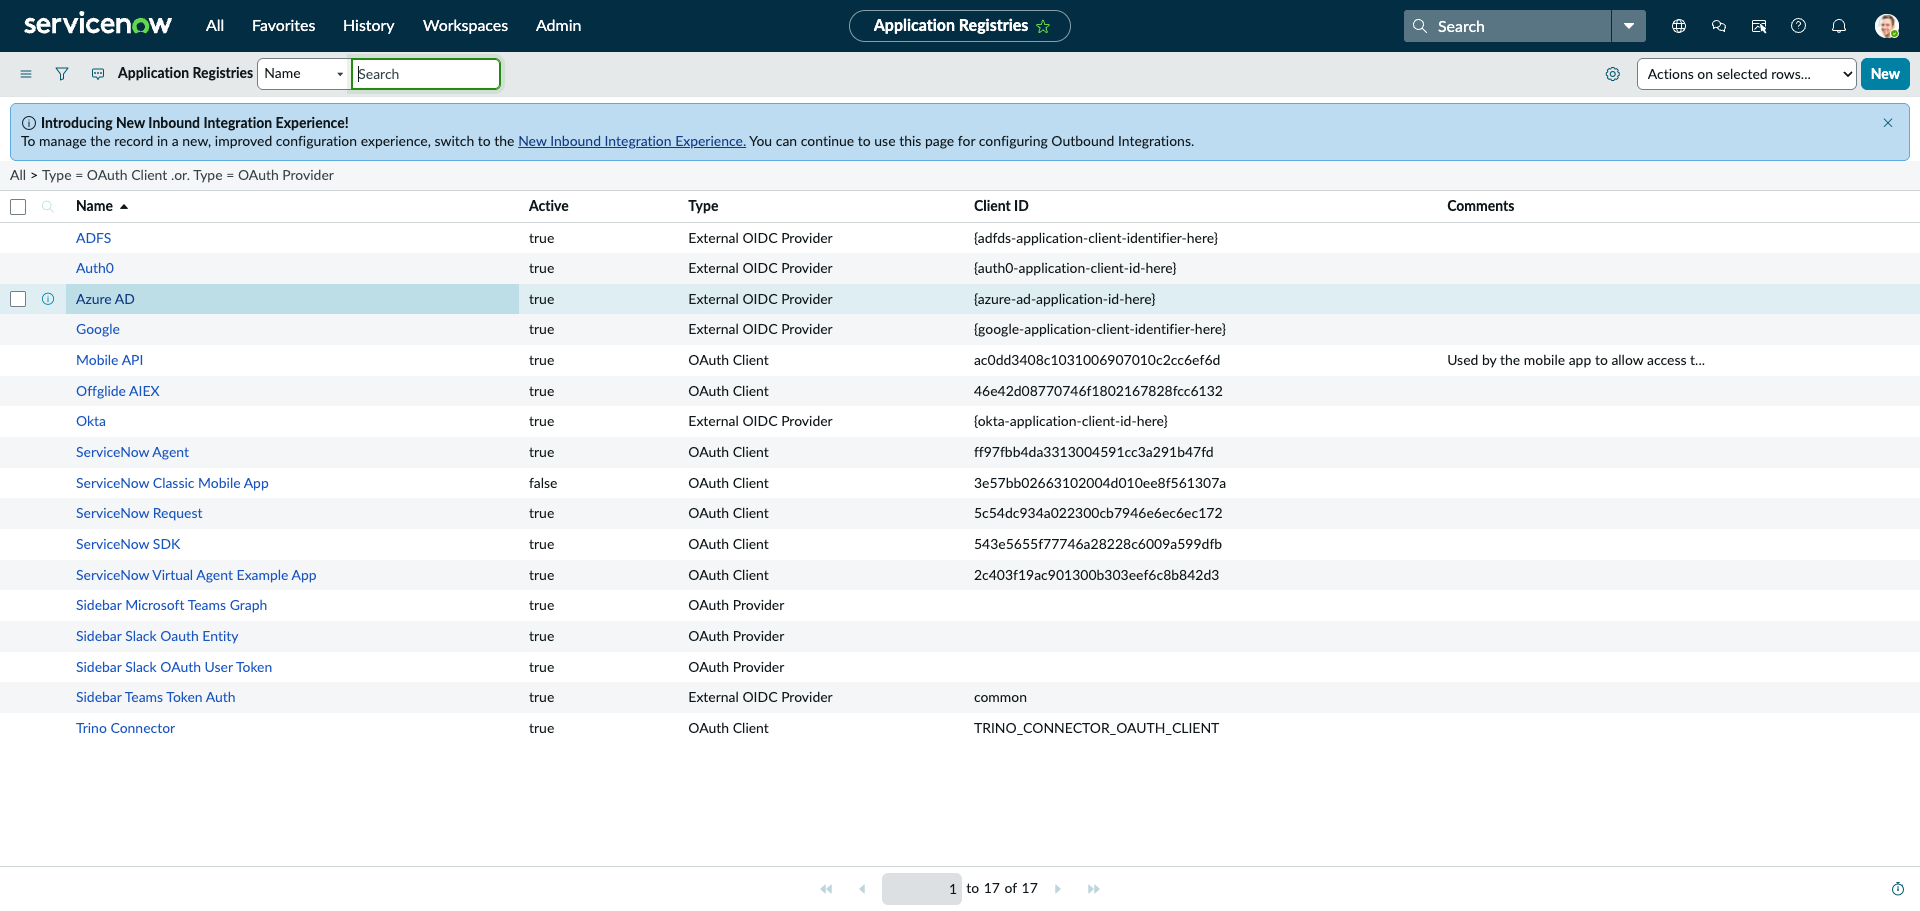
The Application Registries list shows all existing OAuth apps. Click New in the top-right corner to create a new one.
On the What kind of OAuth application? page, click Create an OAuth API endpoint for external clients.

The new OAuth application form opens. ServiceNow automatically generates a Client ID for the application.
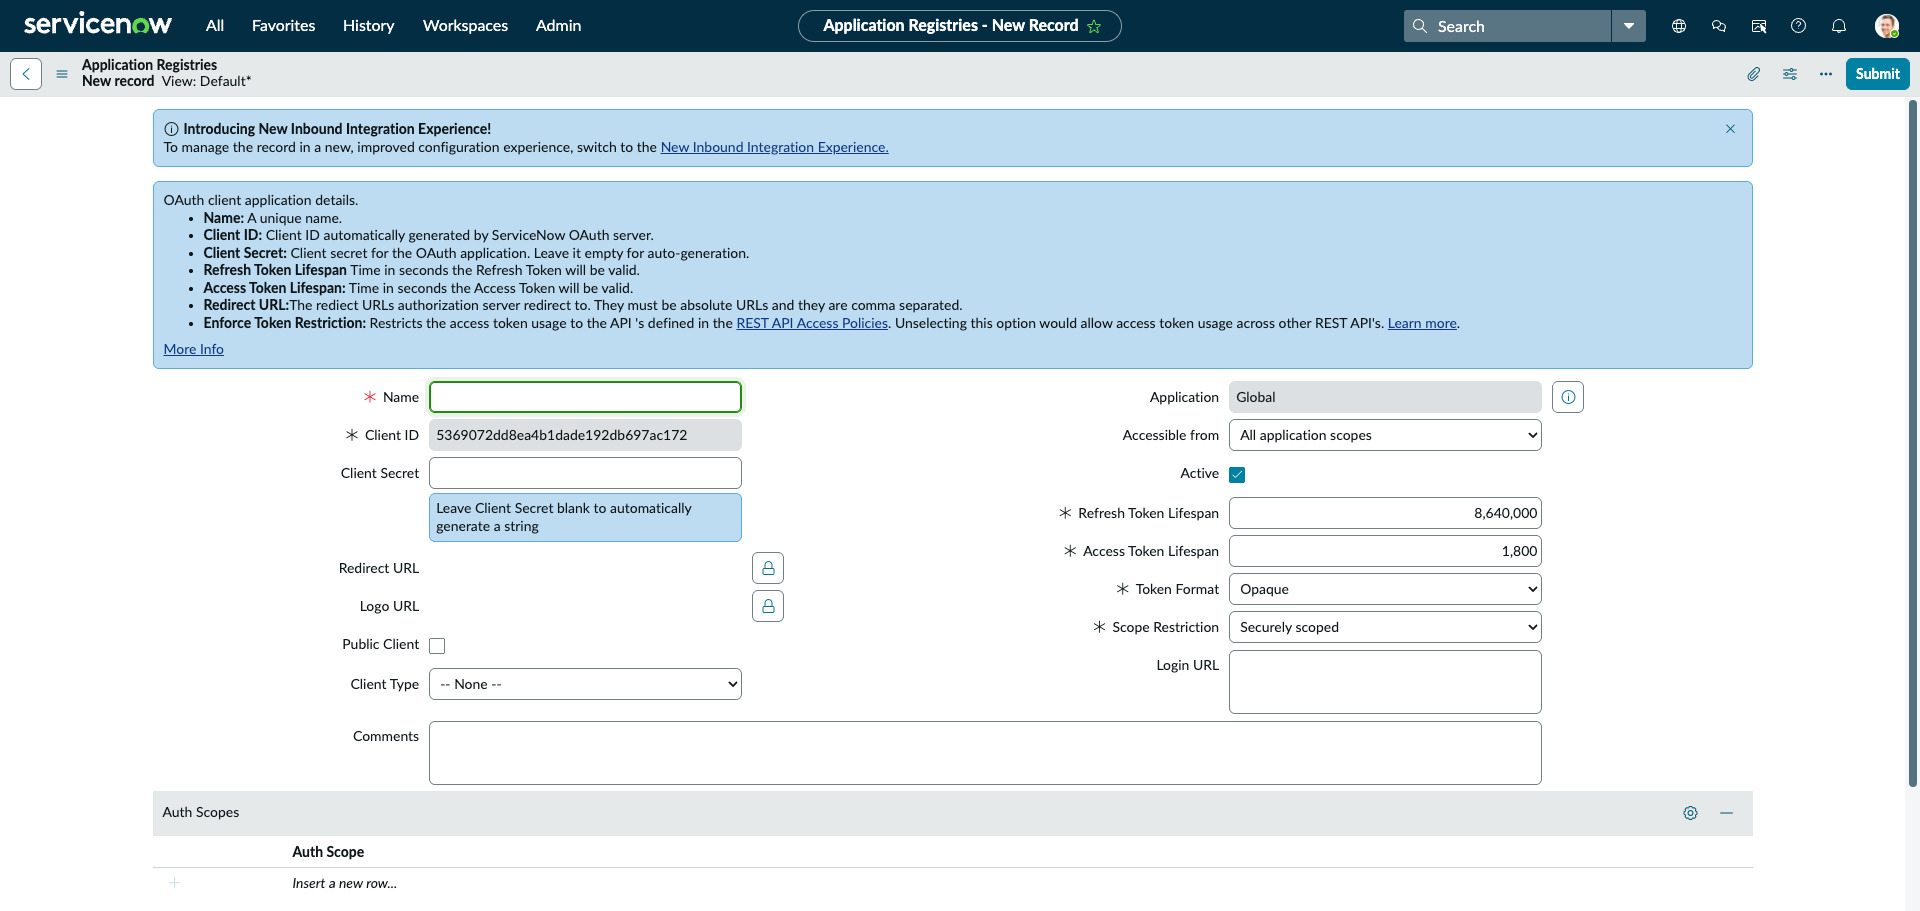
Complete the form with the following values:
- Name — Enter a descriptive name, for example
Frontegg Integration. - Client Secret — Leave blank to let ServiceNow auto-generate a secret.
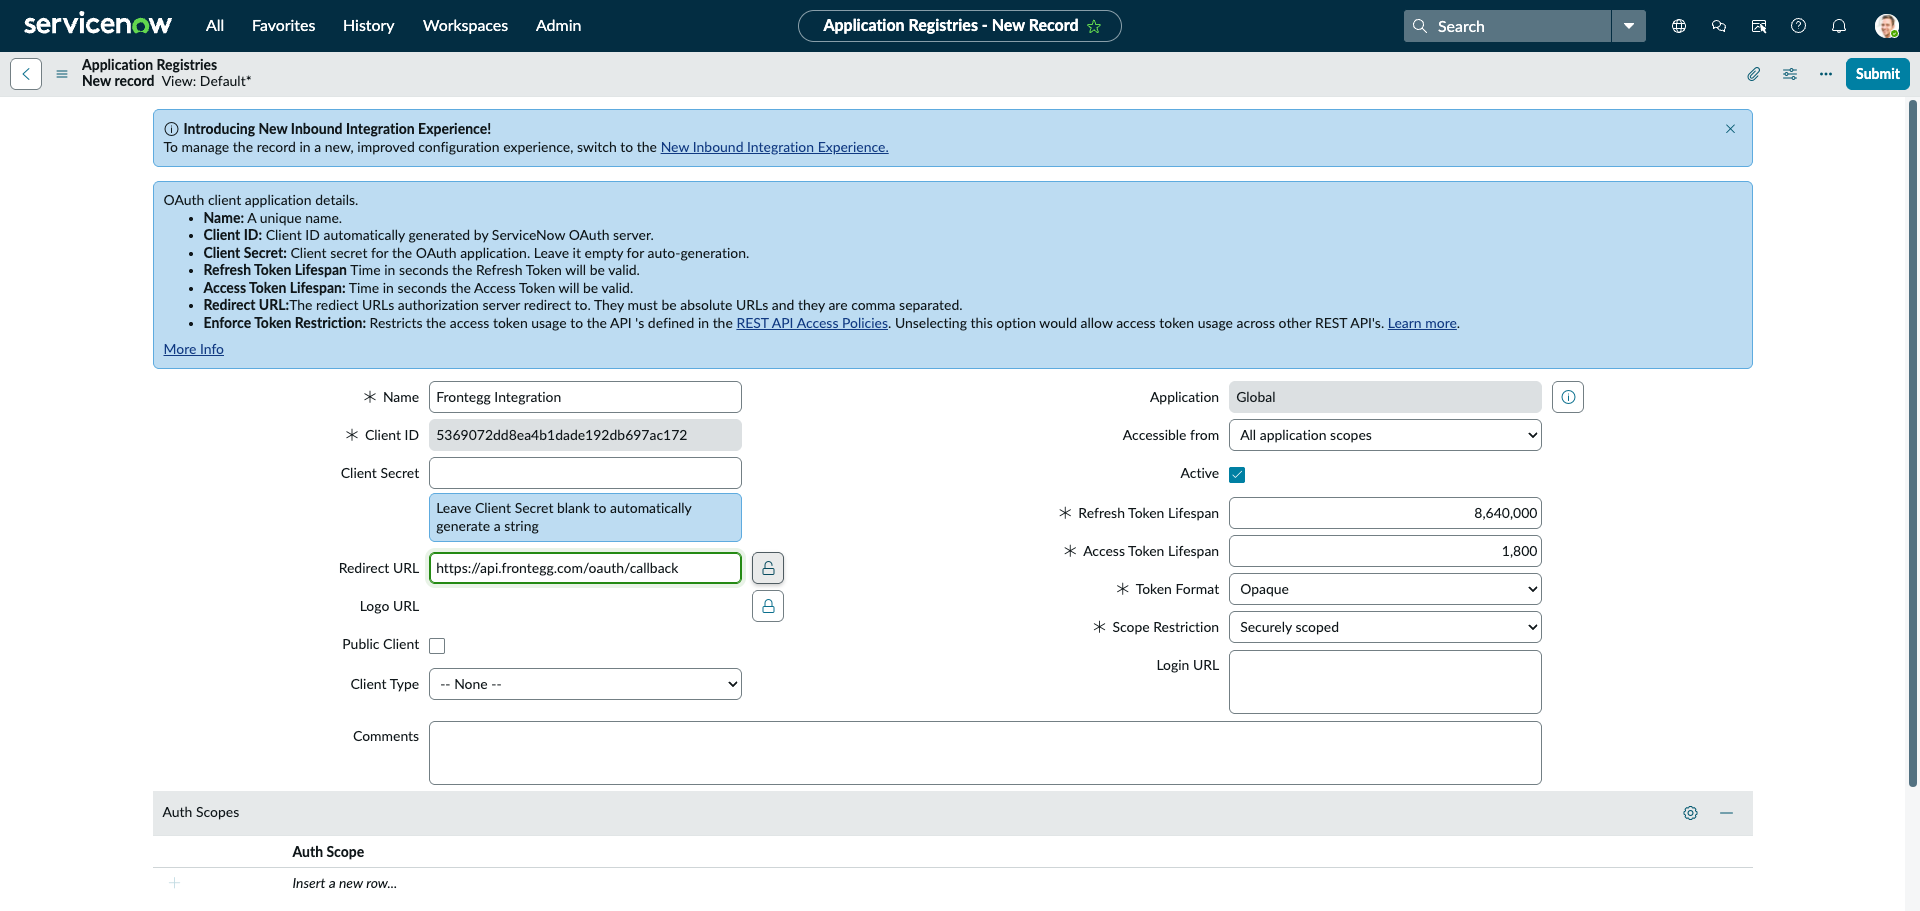
- Redirect URL — Click Edit Redirect URL and enter the callback URL provided by Frontegg:
https://YOUR_MCP_GATEWAY_URL/integration-callback. - Scope Restriction — Scroll down and change the dropdown from Securely scoped to Broadly scoped.
Why change the scope restriction?
Why change the scope restriction?
By default, ServiceNow sets new OAuth apps to "Securely scoped", which blocks access to REST APIs unless explicit OAuth scopes are configured. Changing to "Broadly scoped" allows the integration to access all ServiceNow REST APIs (incidents, users, change requests, CMDB, etc.) without additional scope configuration.
Click Submit to save the application.
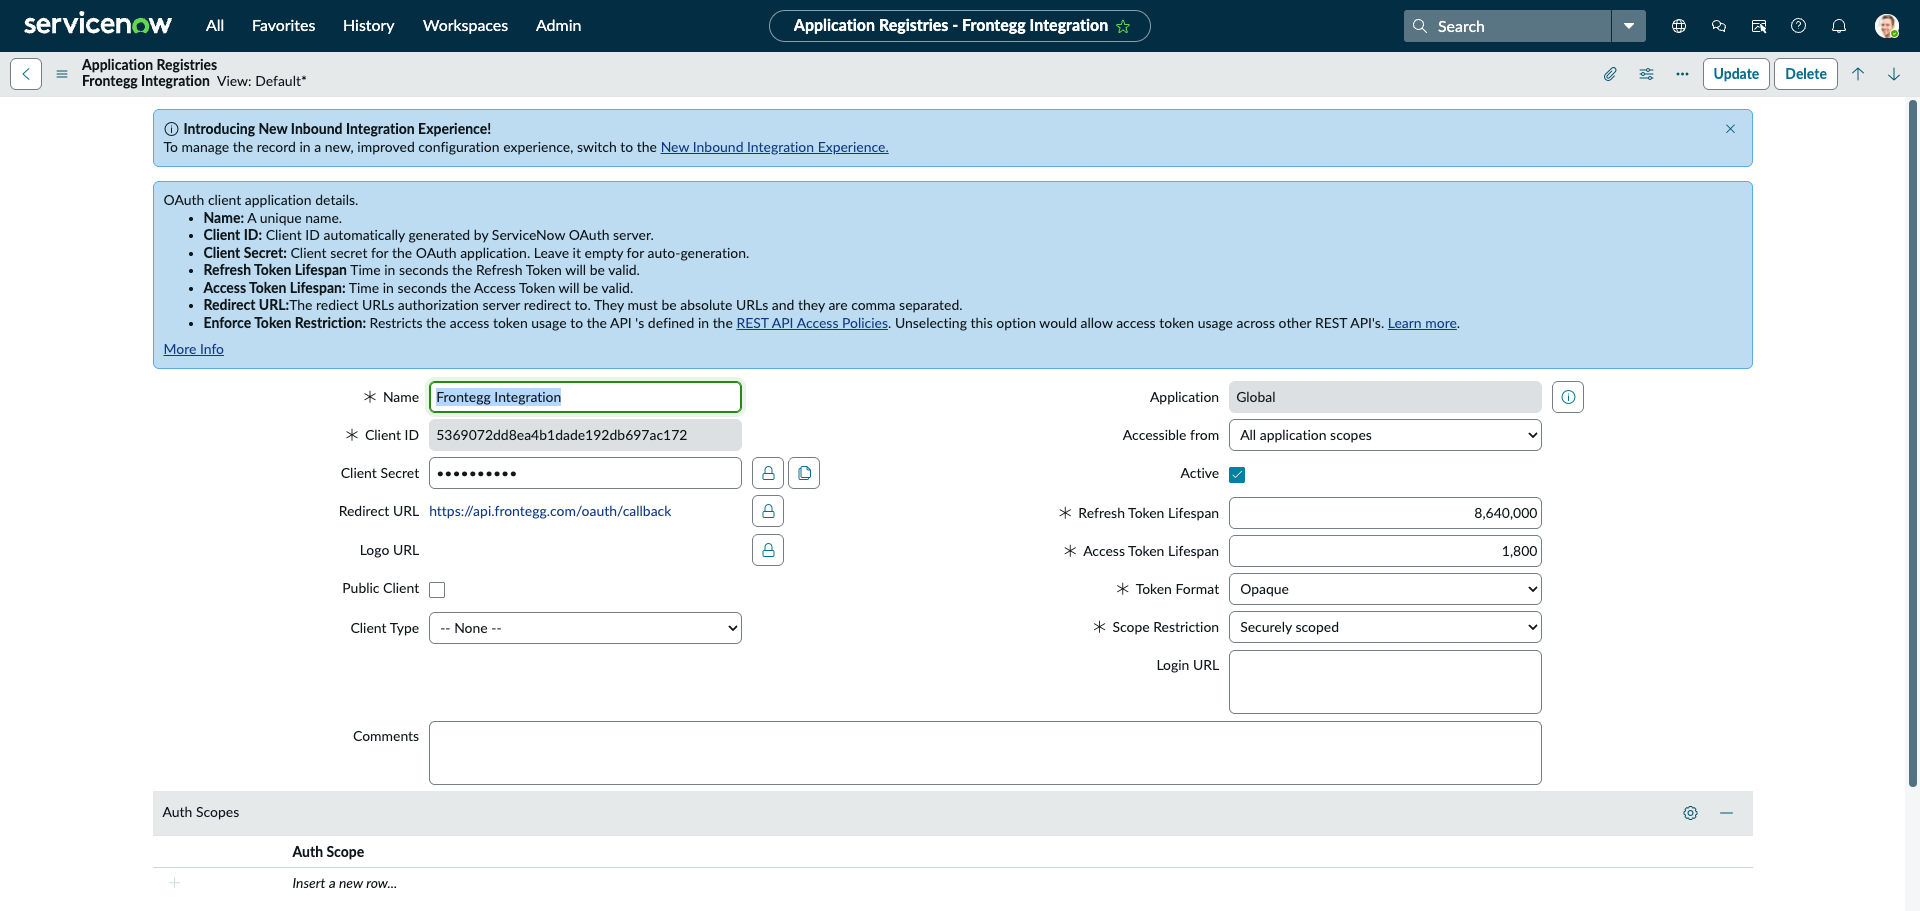
After saving, the Frontegg Integration record opens showing your credentials:
- Client ID — The UUID displayed in the Client ID field.
- Client Secret — Click the eye icon next to the Client Secret field to reveal the auto-generated secret. Copy it immediately.
Copy your Client Secret now
Copy your Client Secret now
The Client Secret is only visible on this page. Copy it before navigating away. If you lose it, open the record again, clear the Client Secret field, and save to generate a new one — this invalidates the previous secret.
Once you have your Client ID, Client Secret, and instance name, configure the integration in the Frontegg portal:
- Open the Frontegg portal and navigate to [ENVIRONMENT] → Integrations → ServiceNow.
- Enter the Client ID.
- Enter the Client Secret.
- Enter your ServiceNow instance — the instance name only (for example,
dev12345fromhttps://dev12345.service-now.com). Do not includehttps://or.service-now.com. - Click Save.
Keep your credentials secure
Keep your credentials secure
Never share or commit your Client Secret to version control.