Agen for Work enables your organization to securely deploy AI agents that interact with your internal SaaS tools and workflows. This guide walks you through the three essential setup steps to get your workforce up and running with AI-powered productivity.
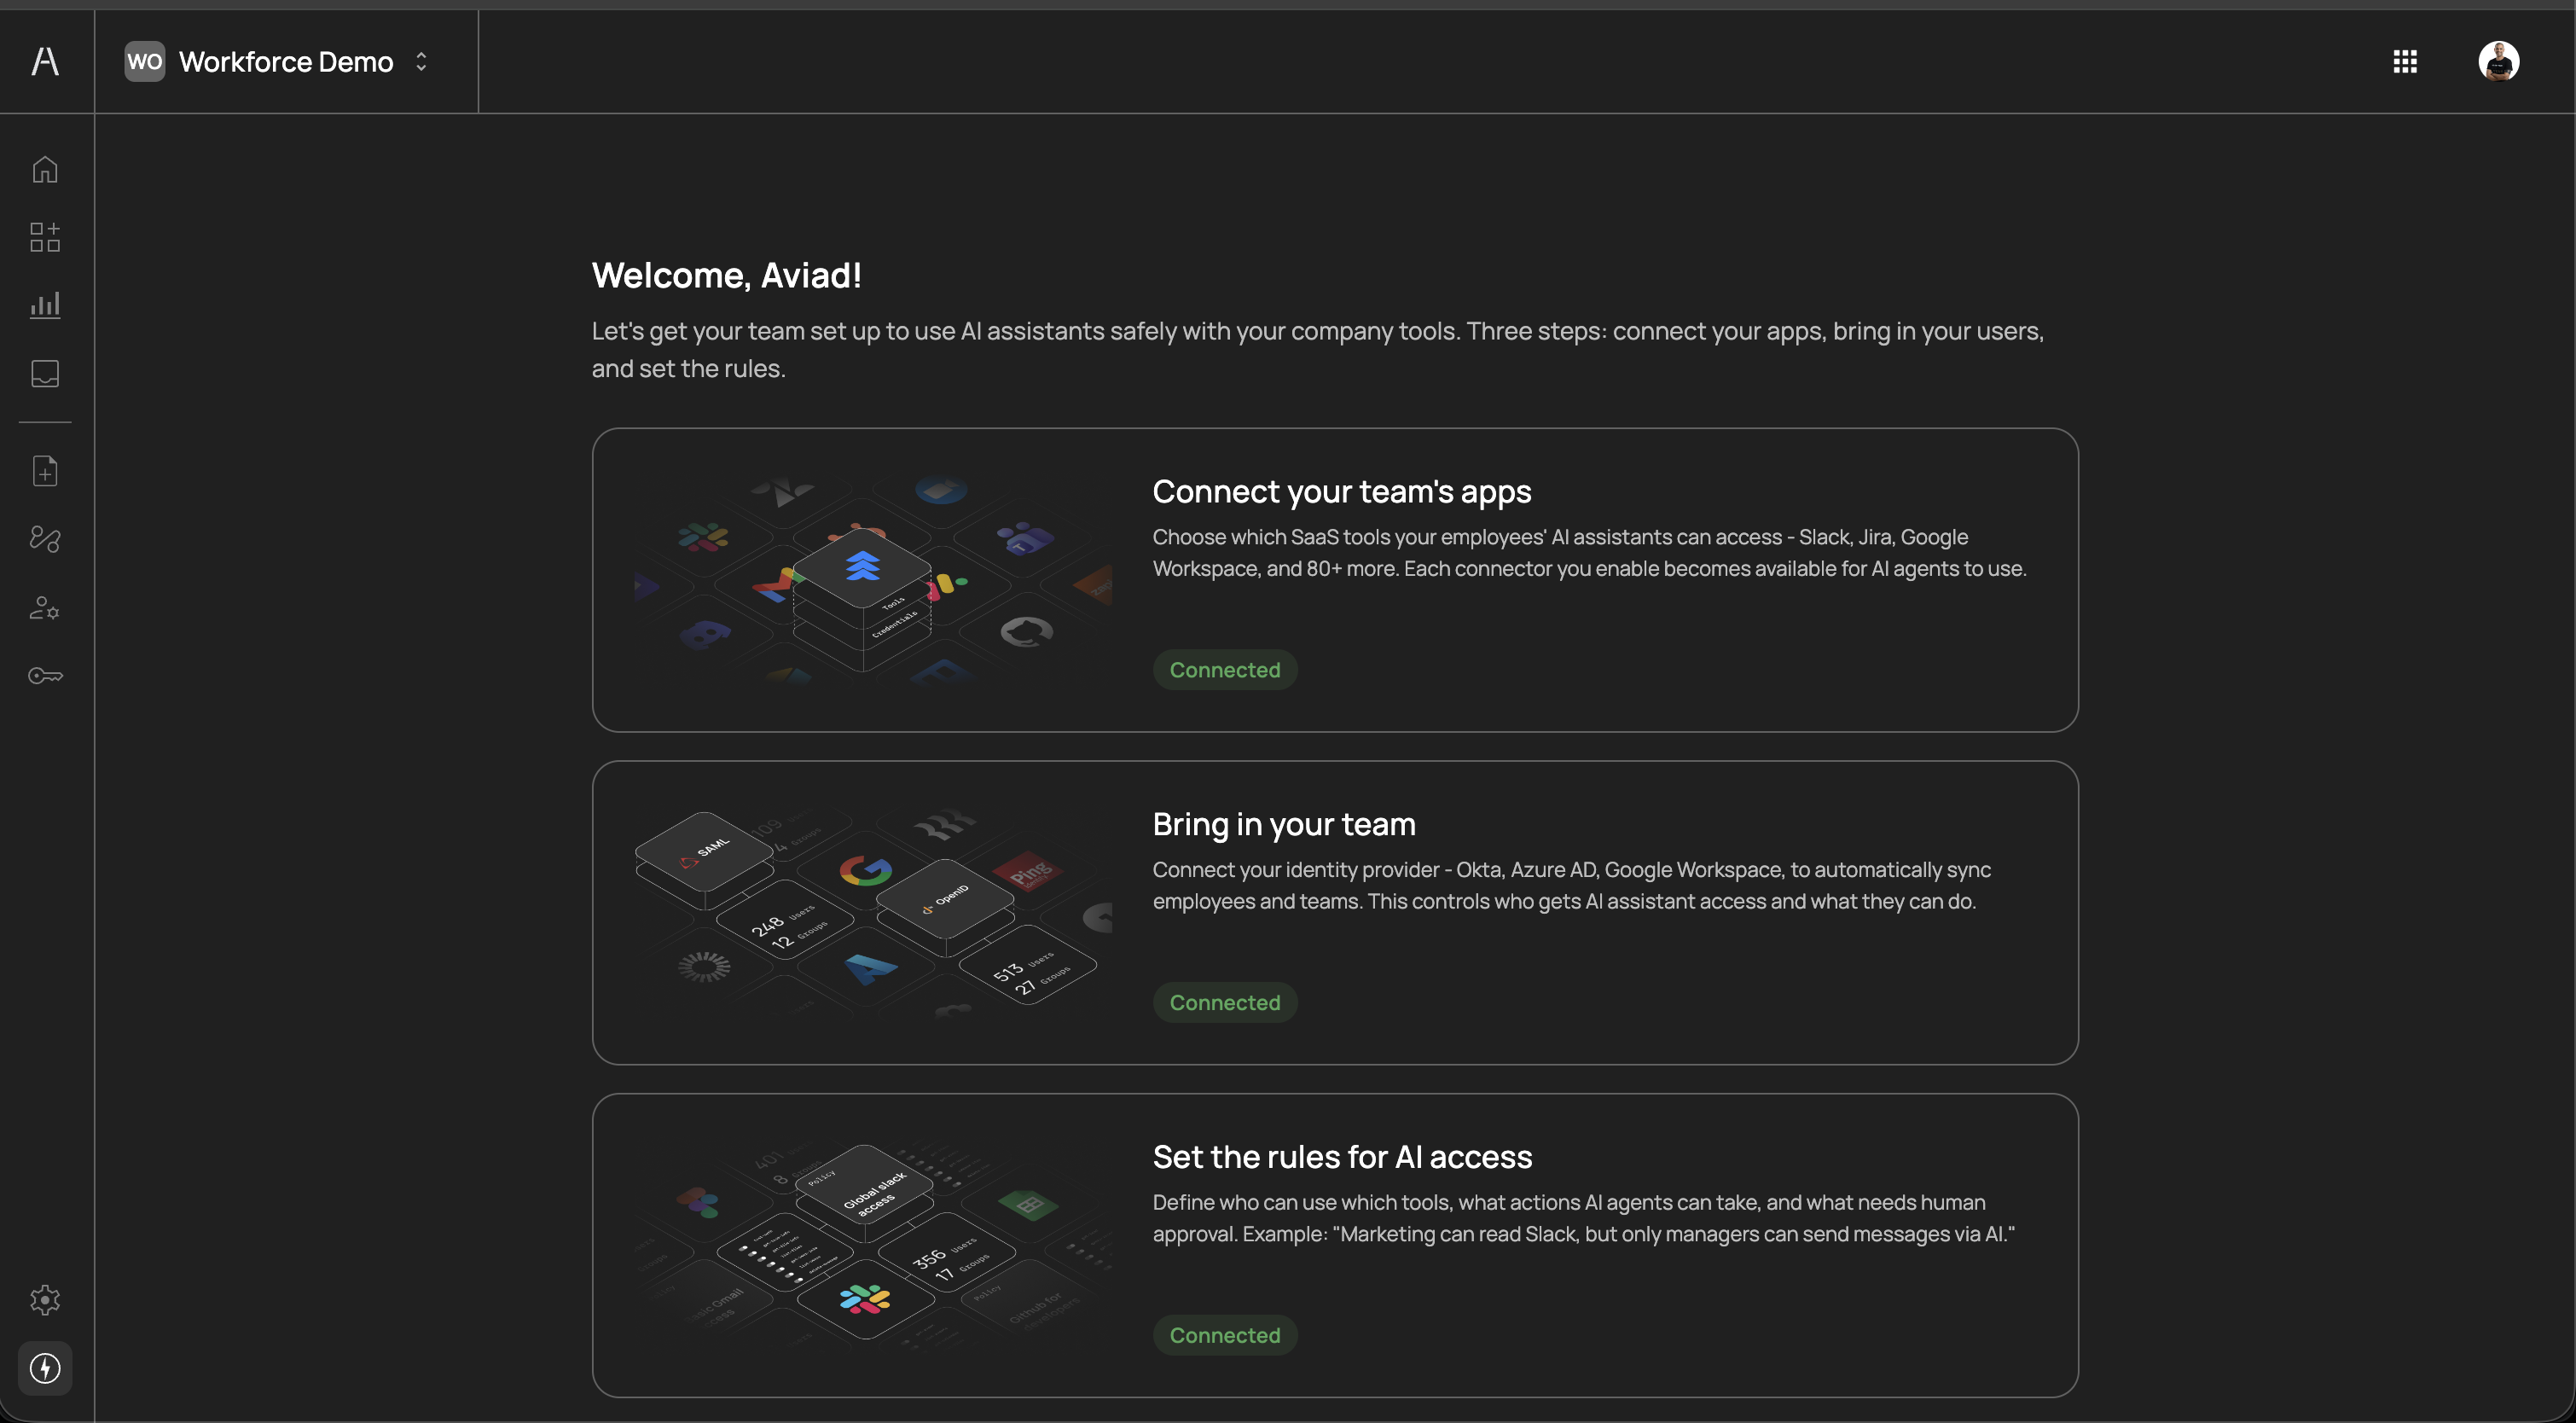
When you first log in to the Agen for Work portal, you are presented with a guided setup wizard that outlines the three core steps required to configure your environment:
- Connect your team's apps - Choose which SaaS tools your employees' AI assistants can access
- Bring in your team - Connect your identity provider to sync employees and teams
- Set the rules for AI access - Define who can use which tools, what actions are allowed, and what requires human approval
Prerequisites
Prerequisites
Before starting, ensure you have:
- An active Agen for Work account with admin privileges
- Admin access to the identity provider you plan to connect (e.g., Okta, Azure AD, Google Workspace)
- Knowledge of which SaaS tools your teams use and the associated admin credentials (if using the Bring your own credentials option)
Connectors are the bridge between your AI agents and the external SaaS tools your workforce relies on. Each connector you enable makes the tools within that application available for AI agents to use on behalf of your employees.
Agen for Work supports a wide range of connectors across categories such as Development, Productivity, Storage, CRM, Project Management, Communication, Analytics, Automation, and more.
Navigate to Connectors in the left sidebar and click the Marketplace tab to explore all available connectors. You can search by name or filter by category to find the tools your team uses.
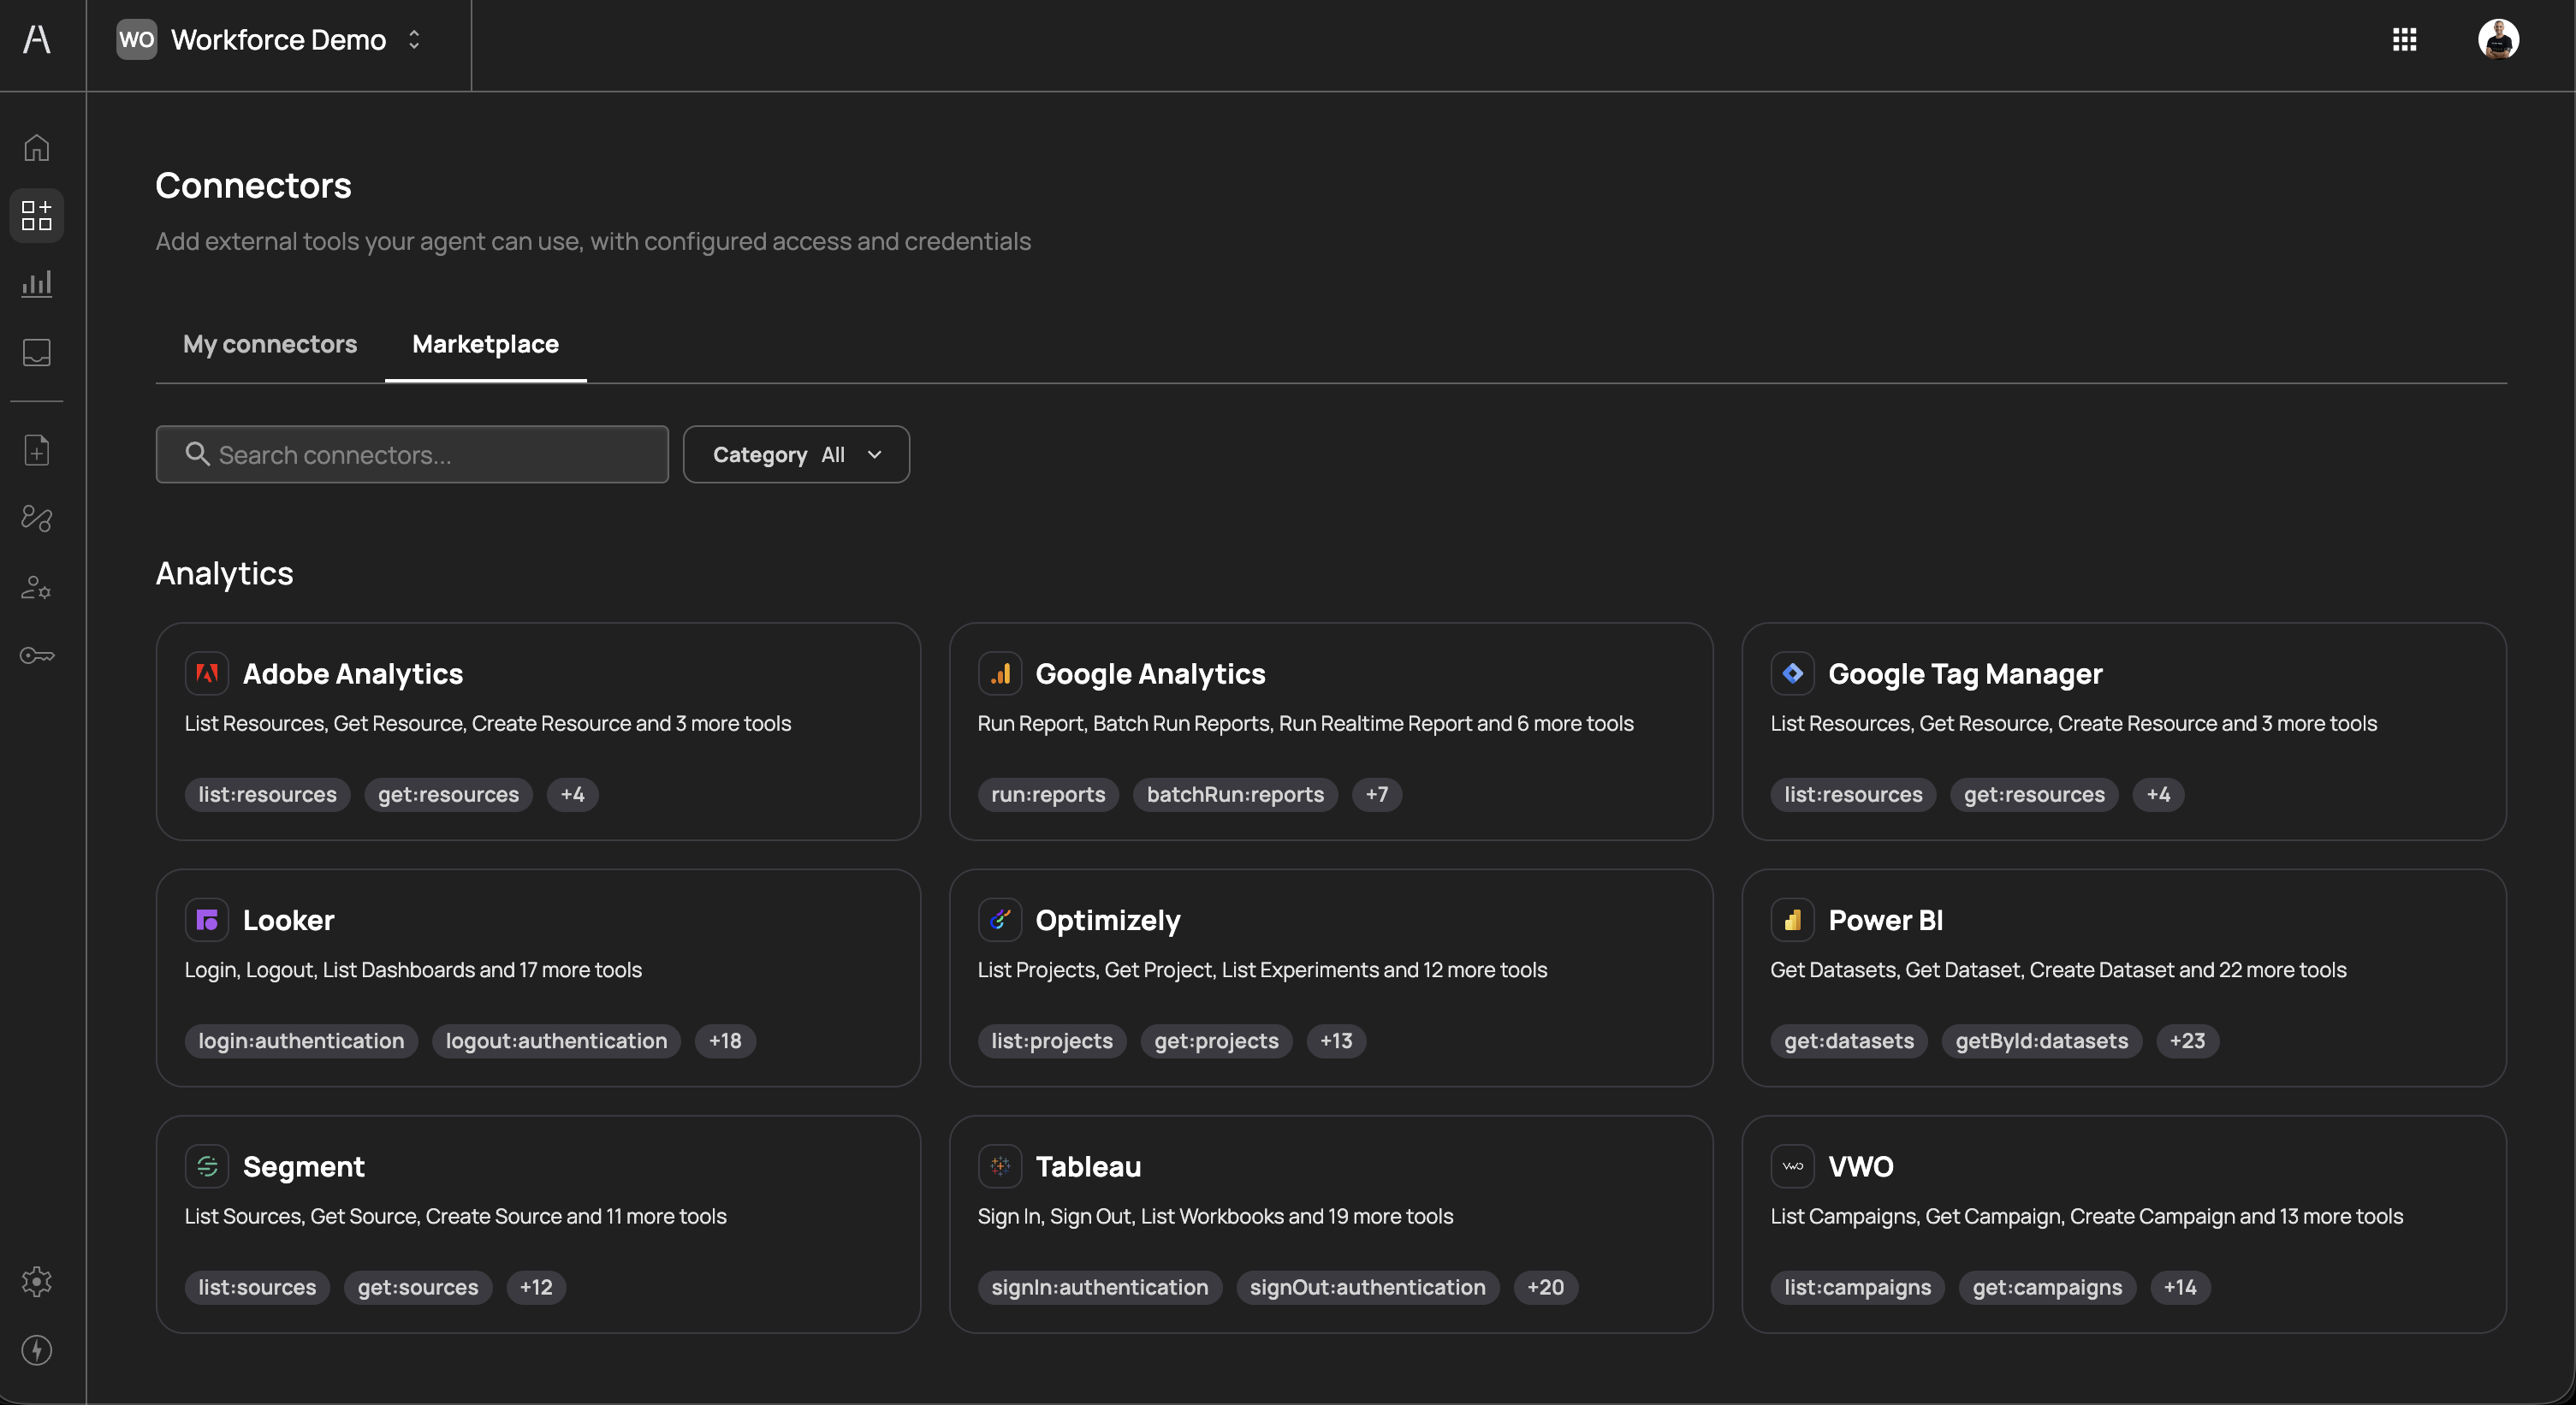
The marketplace includes connectors for popular services such as Slack, Jira, GitHub, Google Calendar, Google Drive, HubSpot, Salesforce, Adobe Analytics, Looker, Tableau, Power BI, and many more. Each connector card displays a description and the tools it exposes.
To add a connector, click Add connector on the My connectors tab, or click on a connector card in the Marketplace. A side panel opens, allowing you to select the connector you want to add.
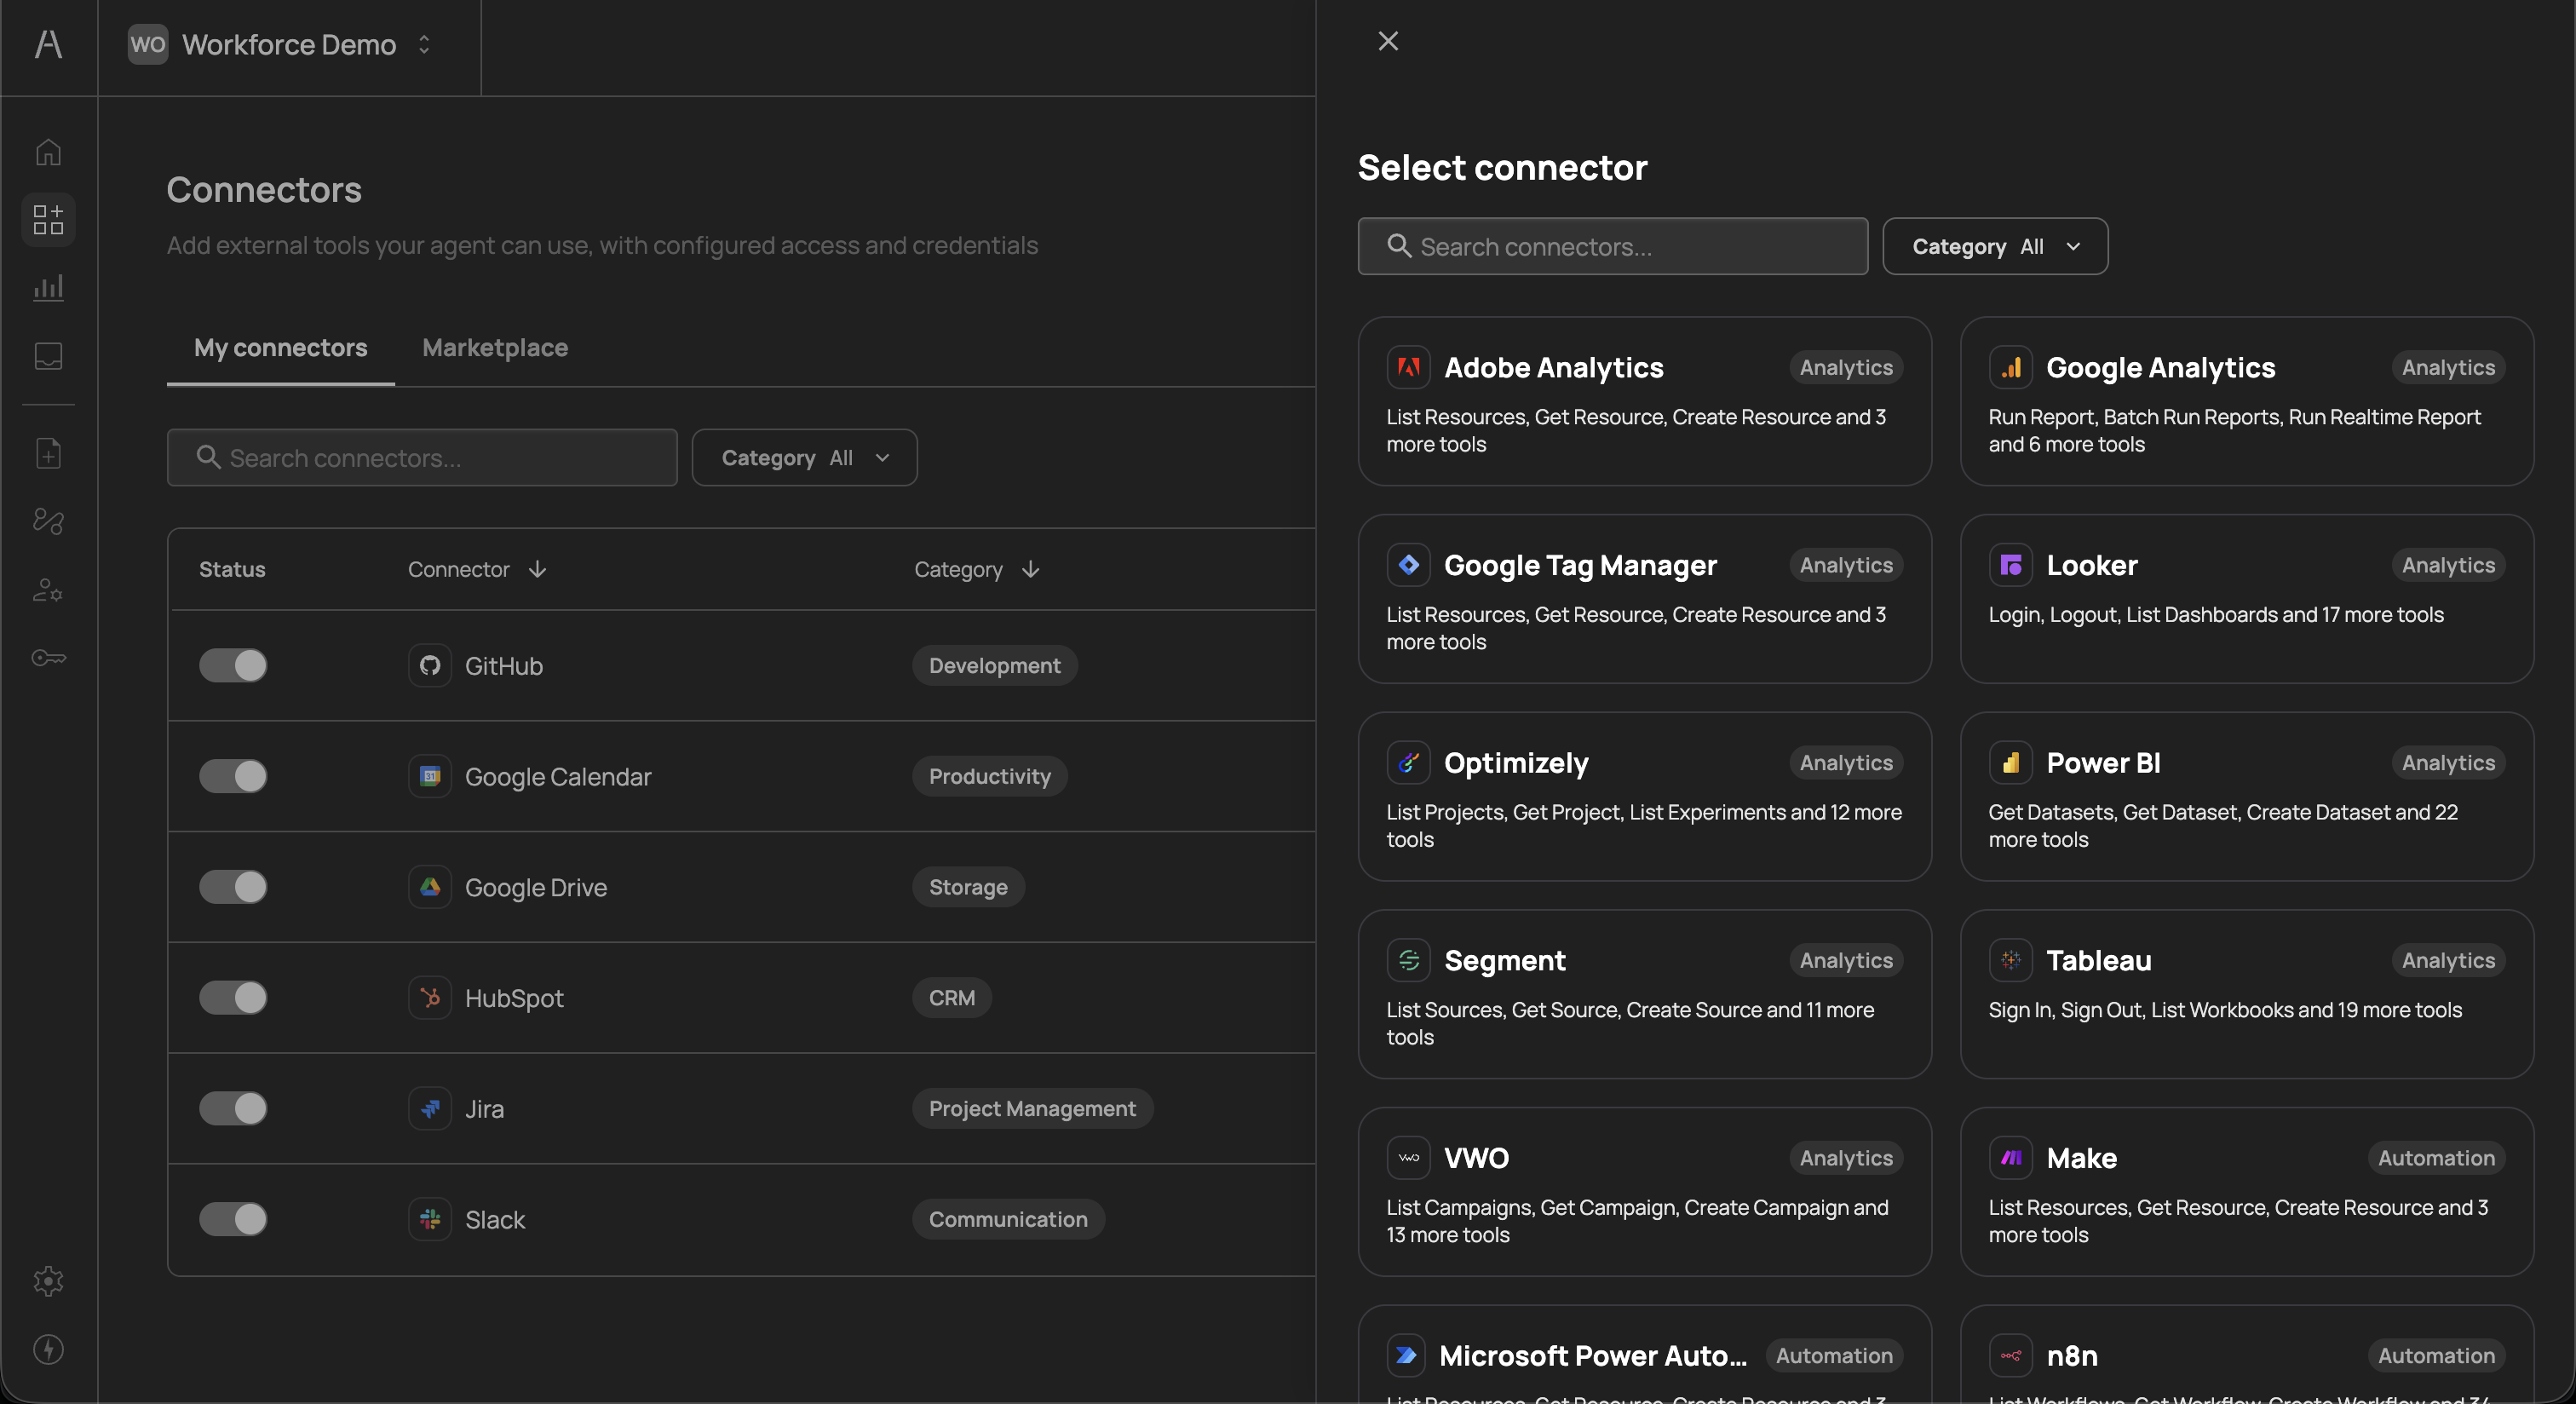
After selecting a connector, you are prompted to configure its credentials and choose which tools to enable.
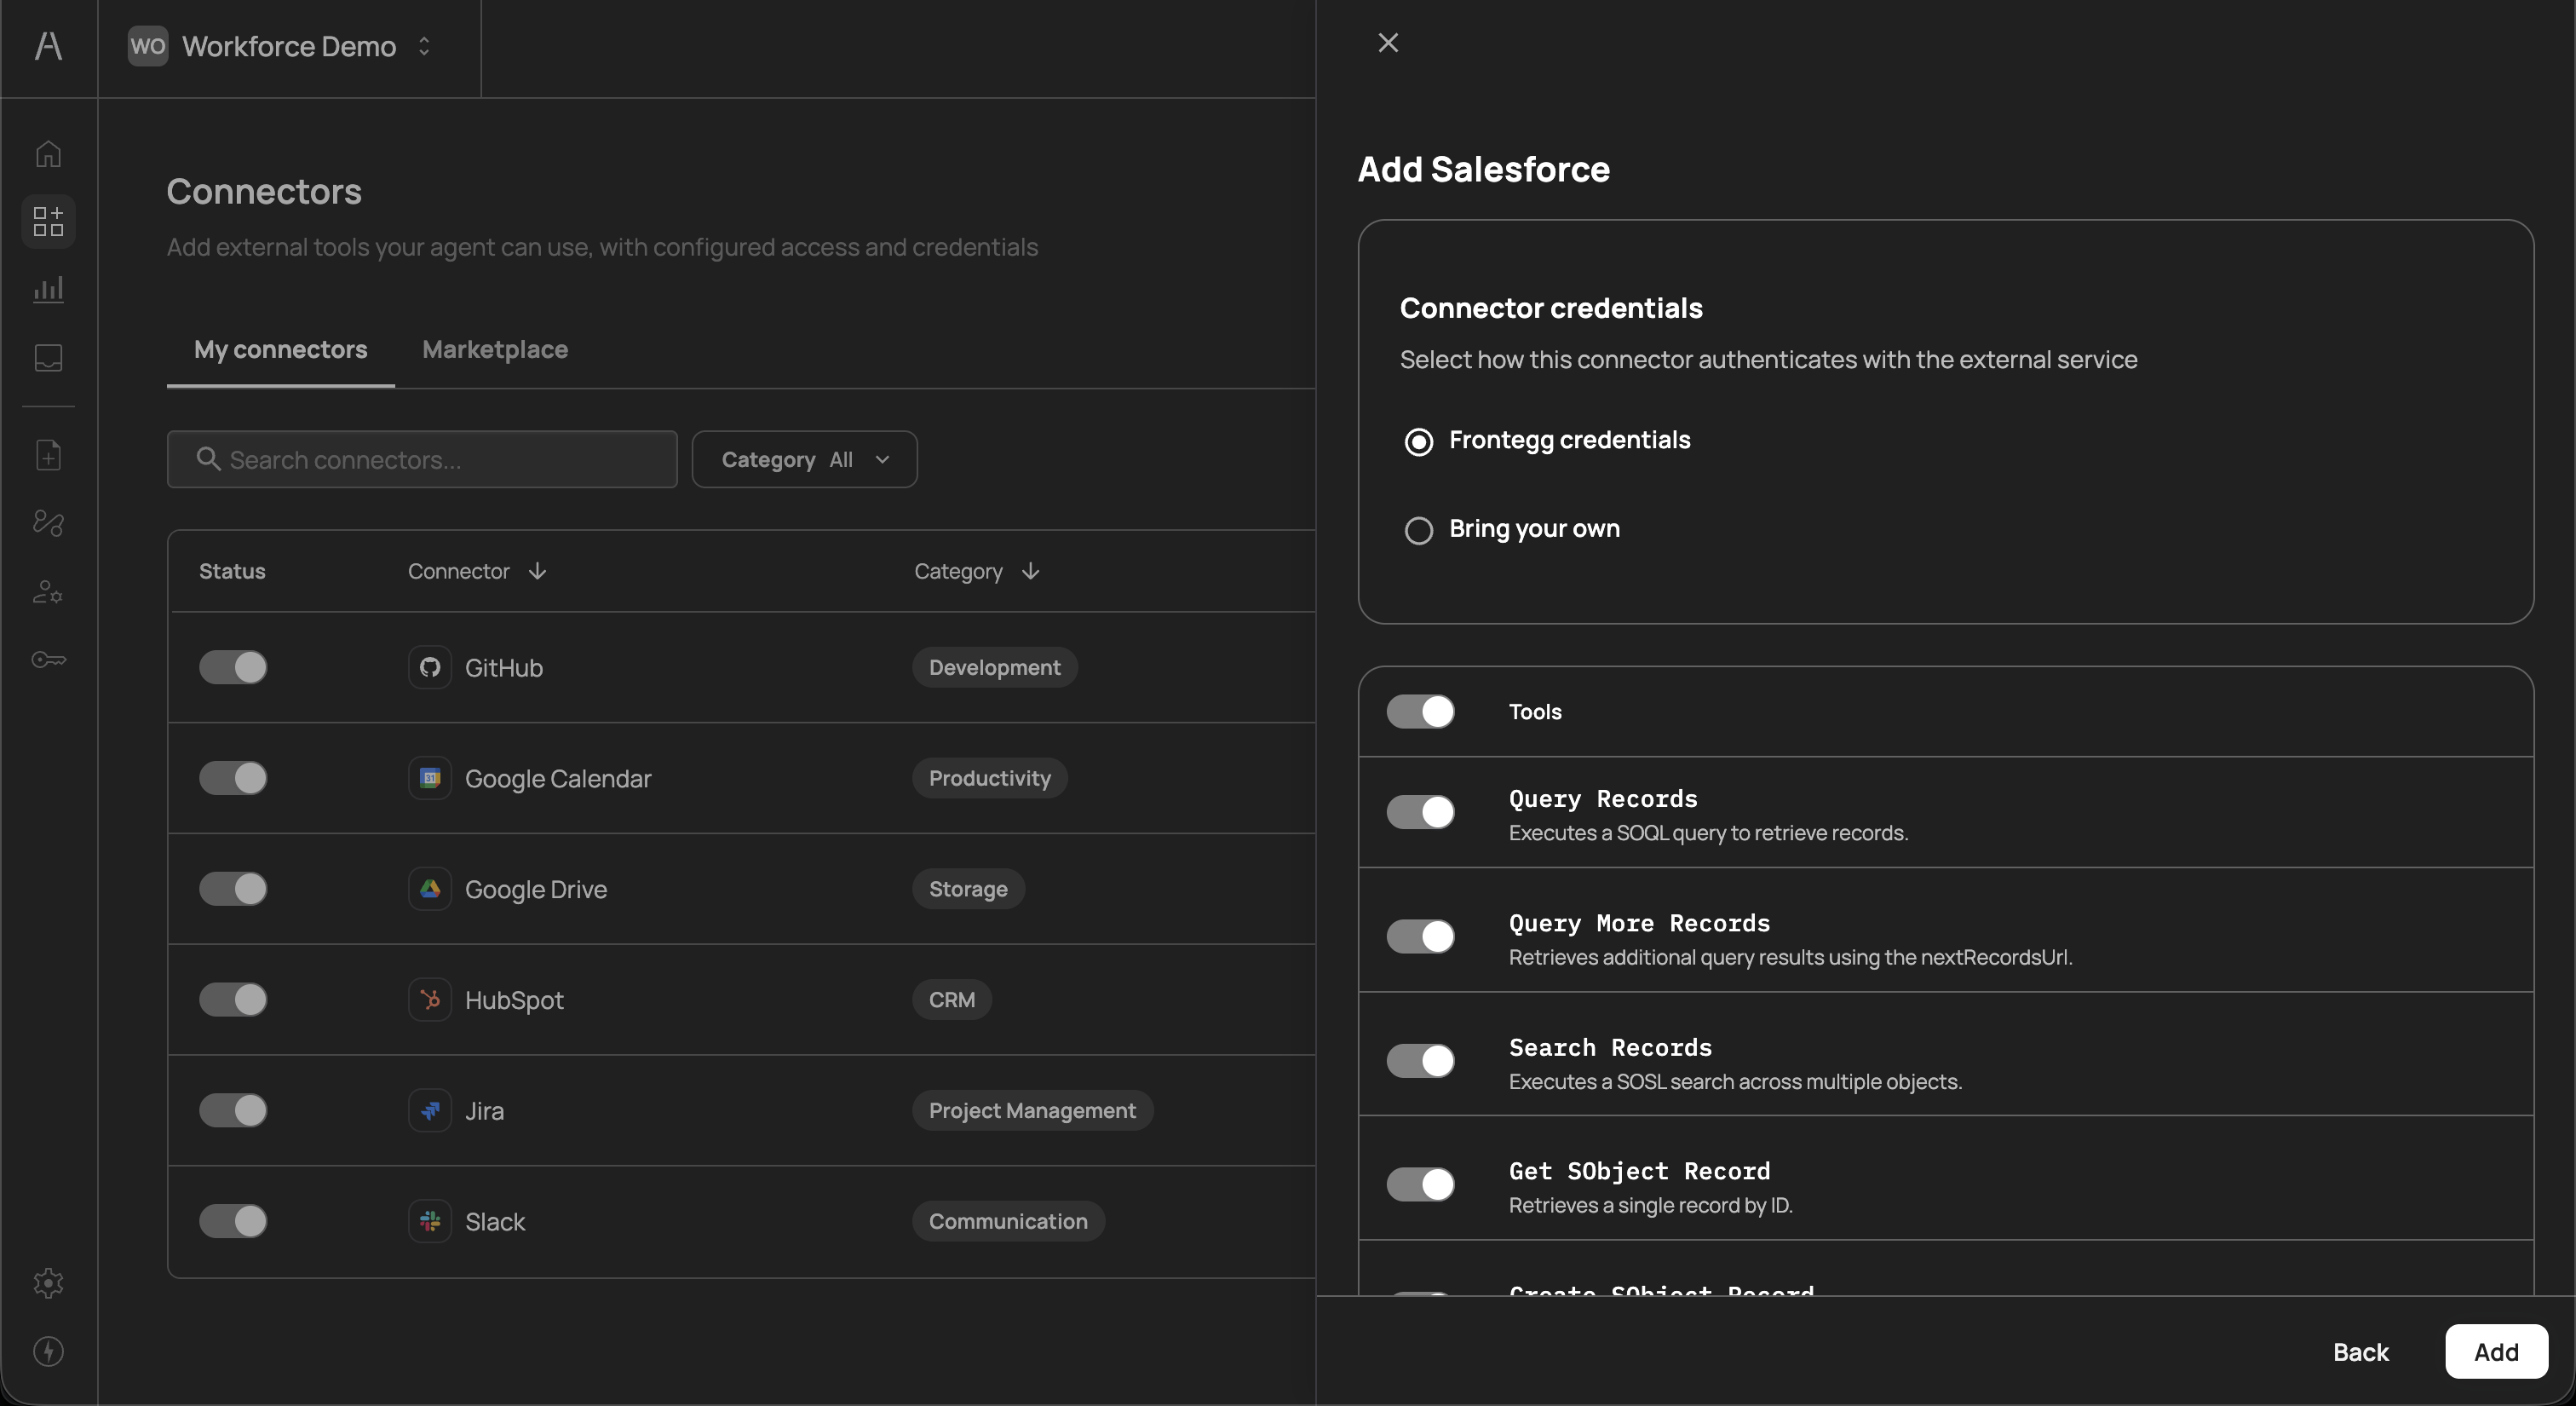
Each connector requires authentication credentials so that AI agents can securely interact with the external service. Agen for Work offers two credential options:
- Frontegg credentials - Use Frontegg-managed OAuth credentials for a quick, streamlined setup. This is the recommended option for most connectors as it requires no additional configuration on your end.
- Bring your own - Provide your own OAuth Client ID, Client Secret, and Base URL. Use this option when your organization has specific security requirements or needs to connect to a custom instance of a service.
If you select Bring your own, you will be required to fill in the following fields:
| Field | Description |
|---|---|
| Client ID | The OAuth client ID from your service provider |
| Client Secret | The OAuth client secret from your service provider |
| Base URL | The base API URL for your service instance (e.g., https://api.example.com) |
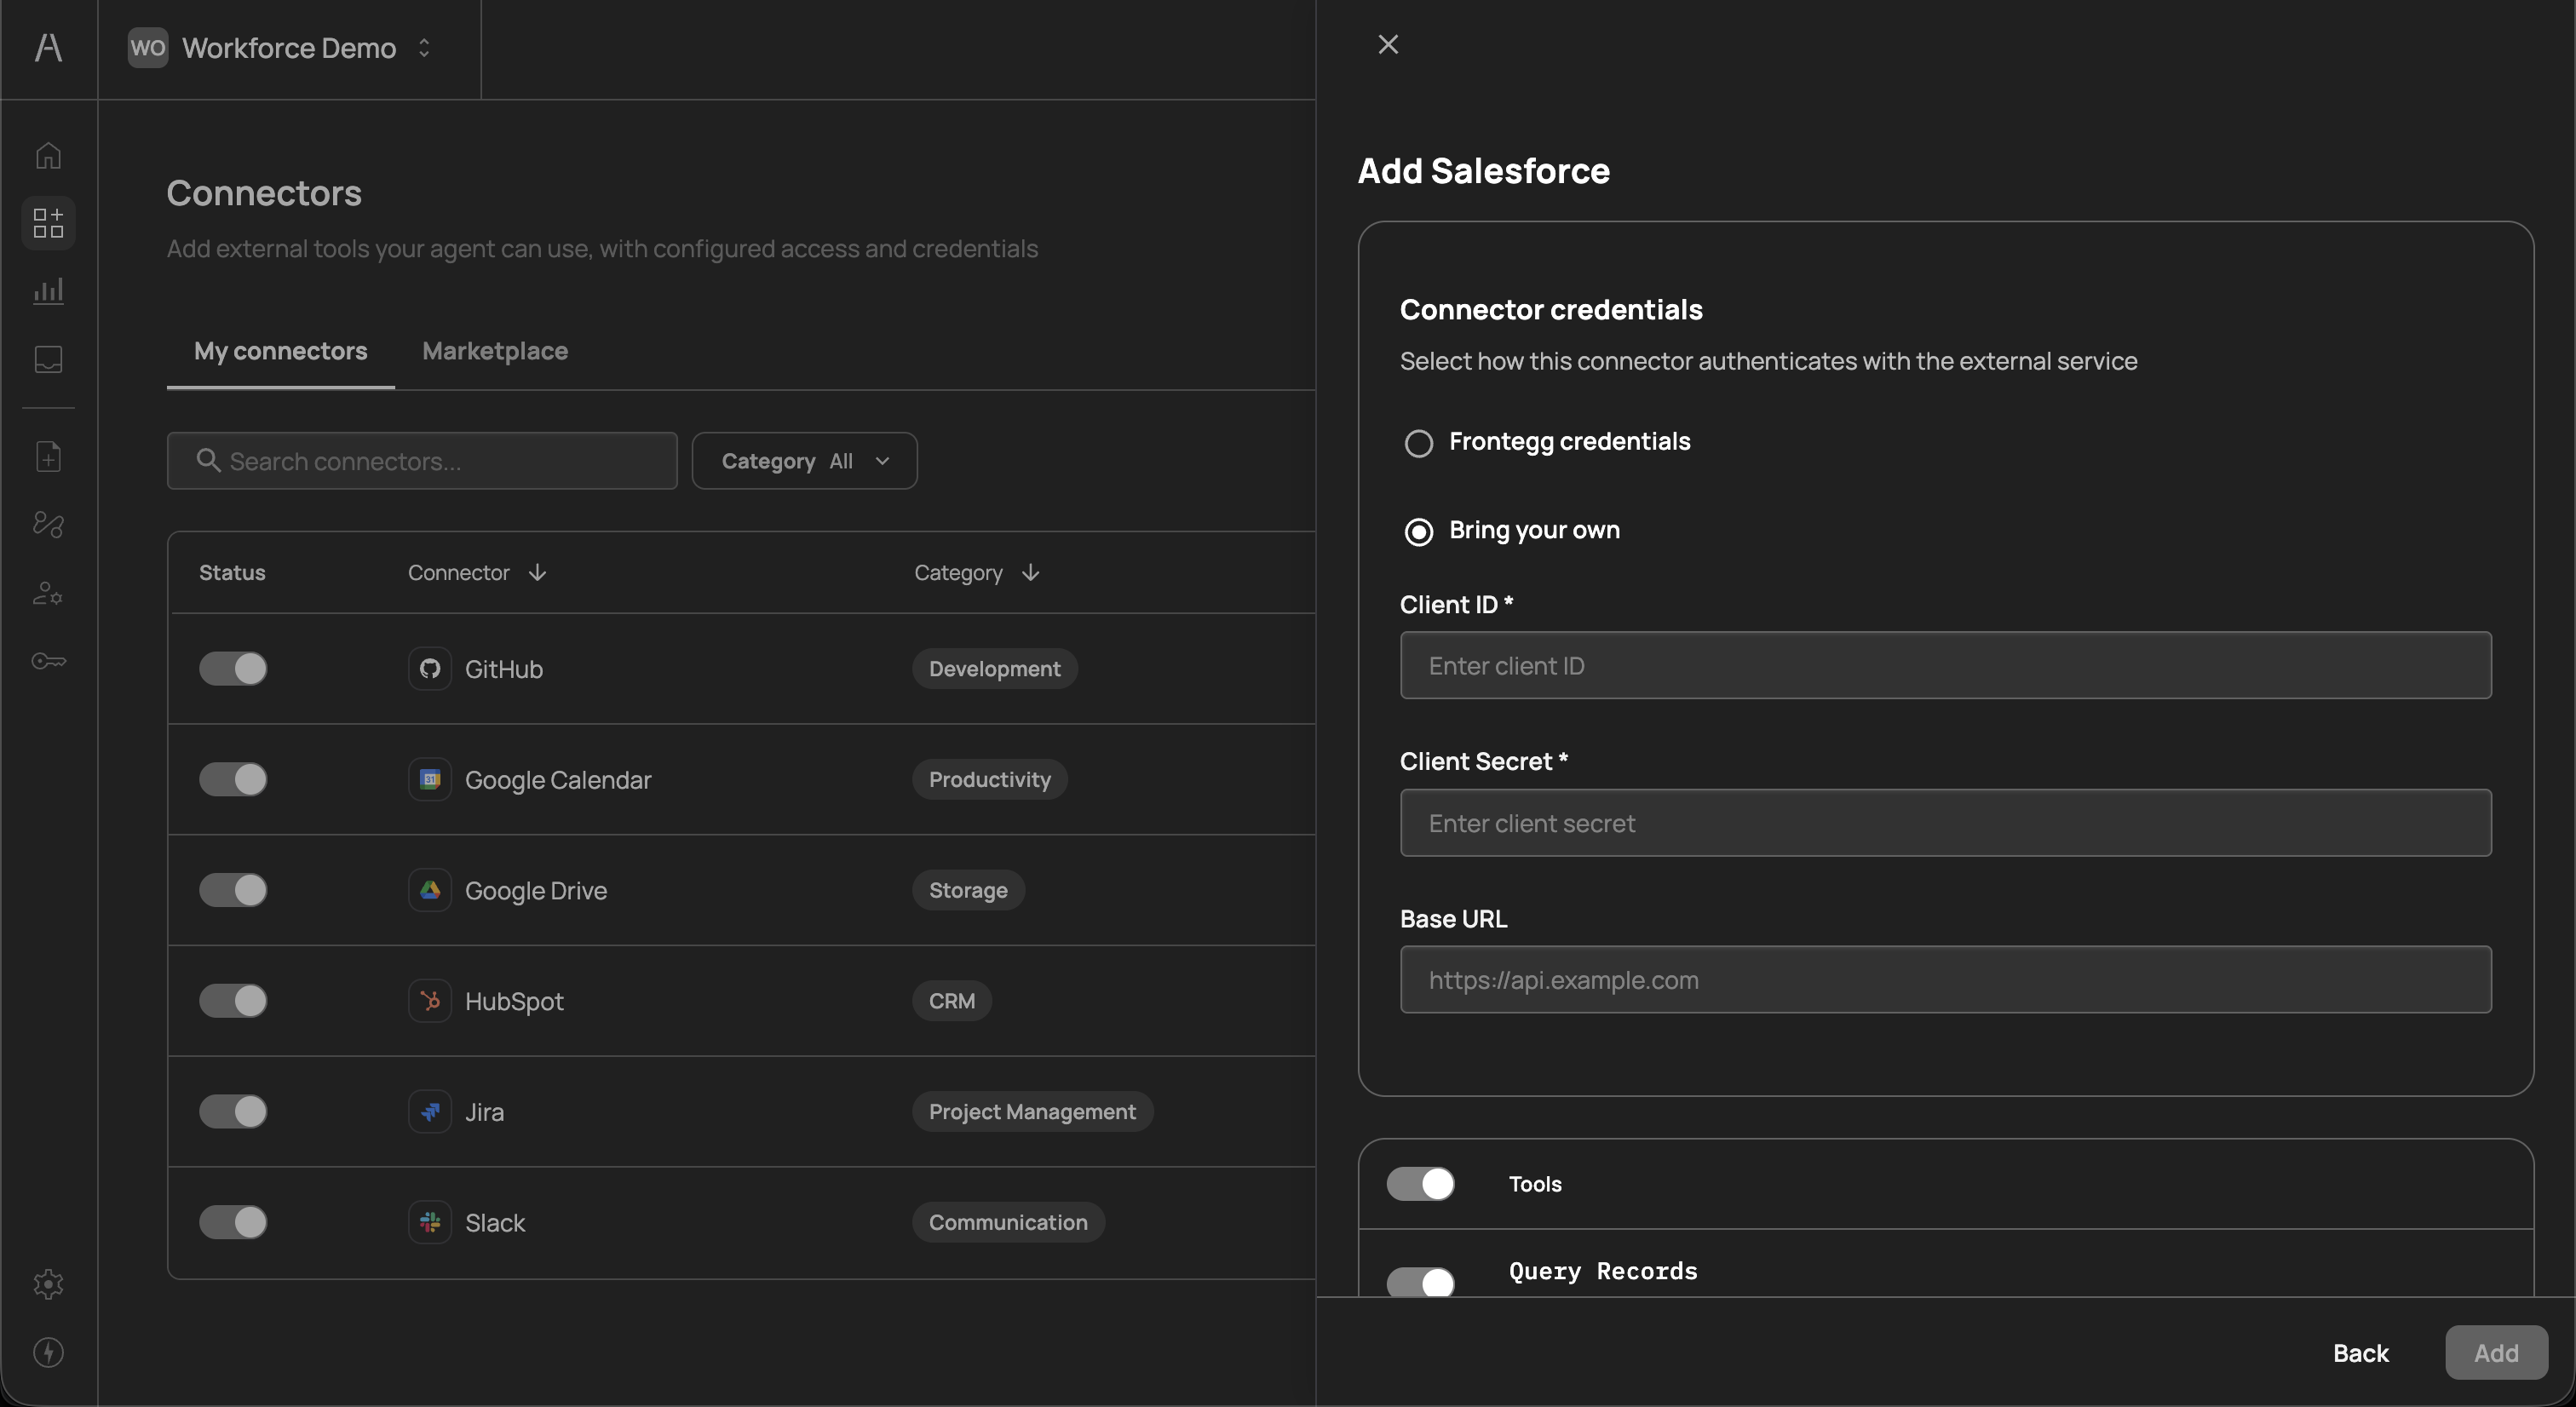
Each connector exposes a set of tools that represent specific actions AI agents can perform within that application. For example, a Salesforce connector may expose tools such as Query Records, Search Records, Get SObject Record, and Create SObject Record.
You can toggle individual tools on or off using the switches next to each tool name. This gives you fine-grained control over exactly which actions AI agents can perform, even within a single connector.
Once you have configured the credentials and selected your desired tools, click Add to finalize the connector setup.
After adding connectors, they appear in the My connectors tab. This view displays each connector's status, category, exposed tools, and the date it was created. Use the toggle in the Status column to enable or disable a connector at any time without removing it.
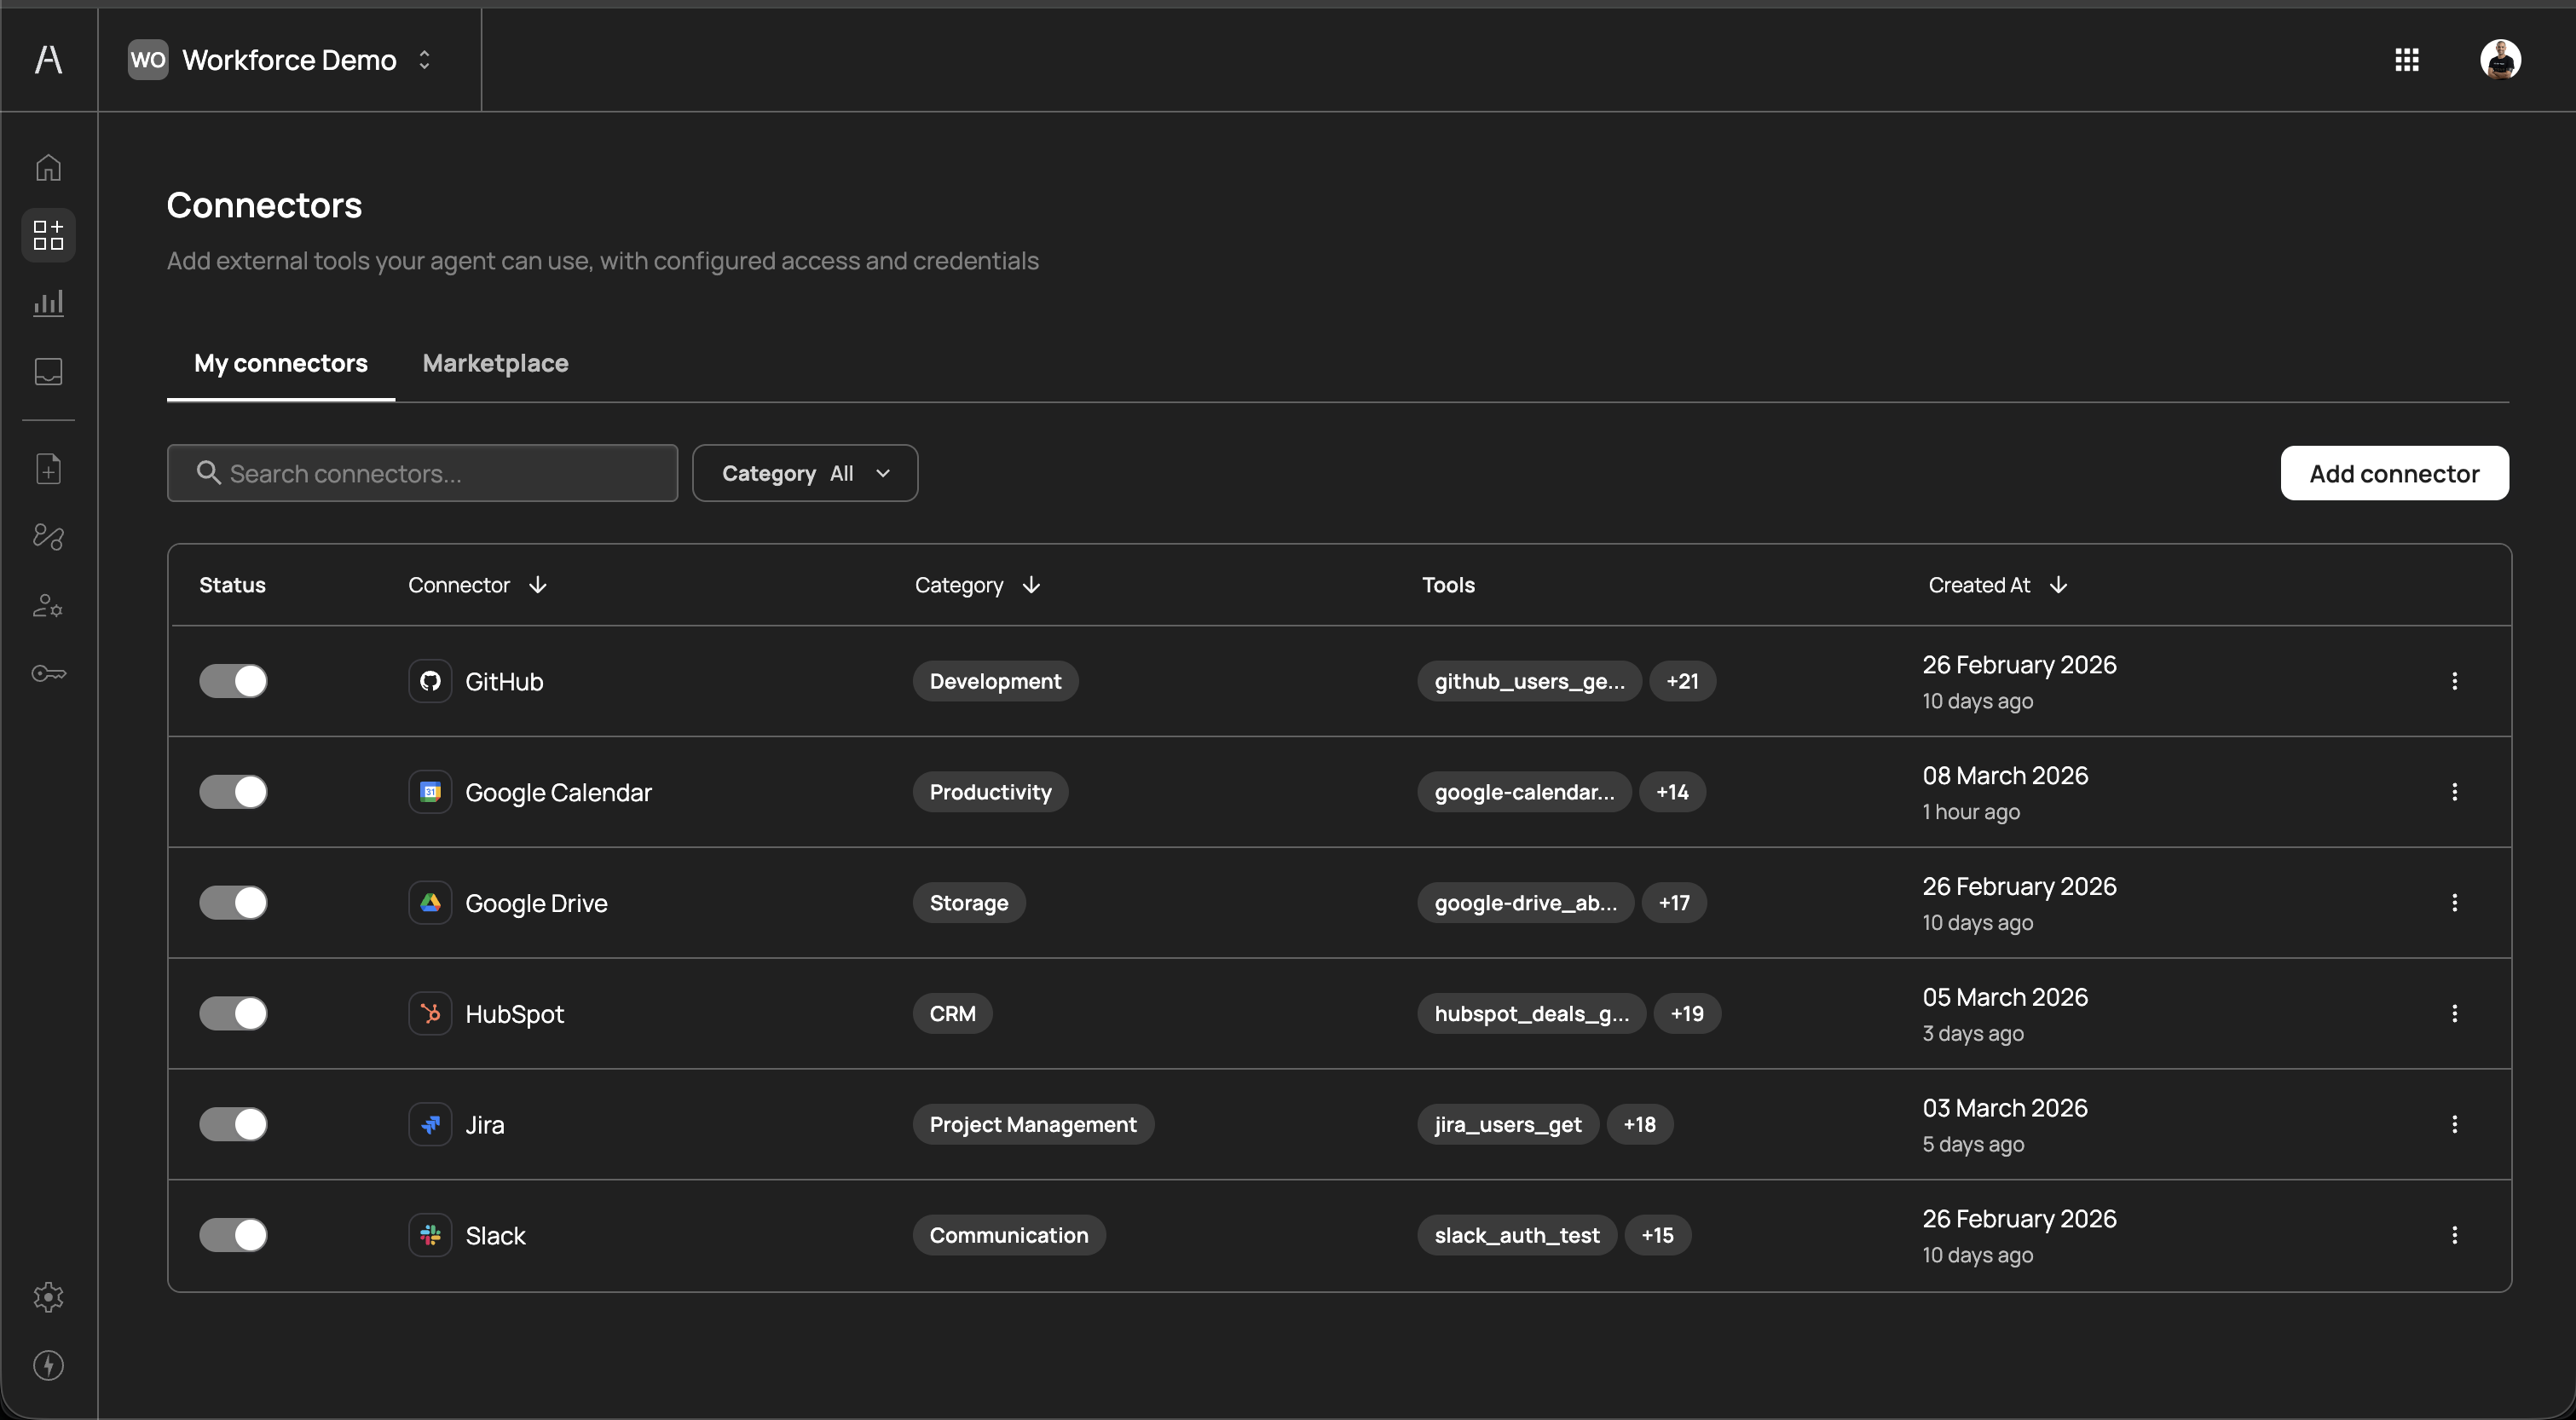
You can add as many connectors as your organization requires. Connectors can be enabled, disabled, or reconfigured at any time without affecting other parts of your setup.
Connecting your identity provider (IdP) allows Agen for Work to automatically sync your employees and teams from your existing corporate directory. This ensures that when a user joins, leaves, or changes teams, their AI agent access permissions update automatically.
Navigate to Identity provider in the left sidebar. The SSO tab displays your current identity provider connections.
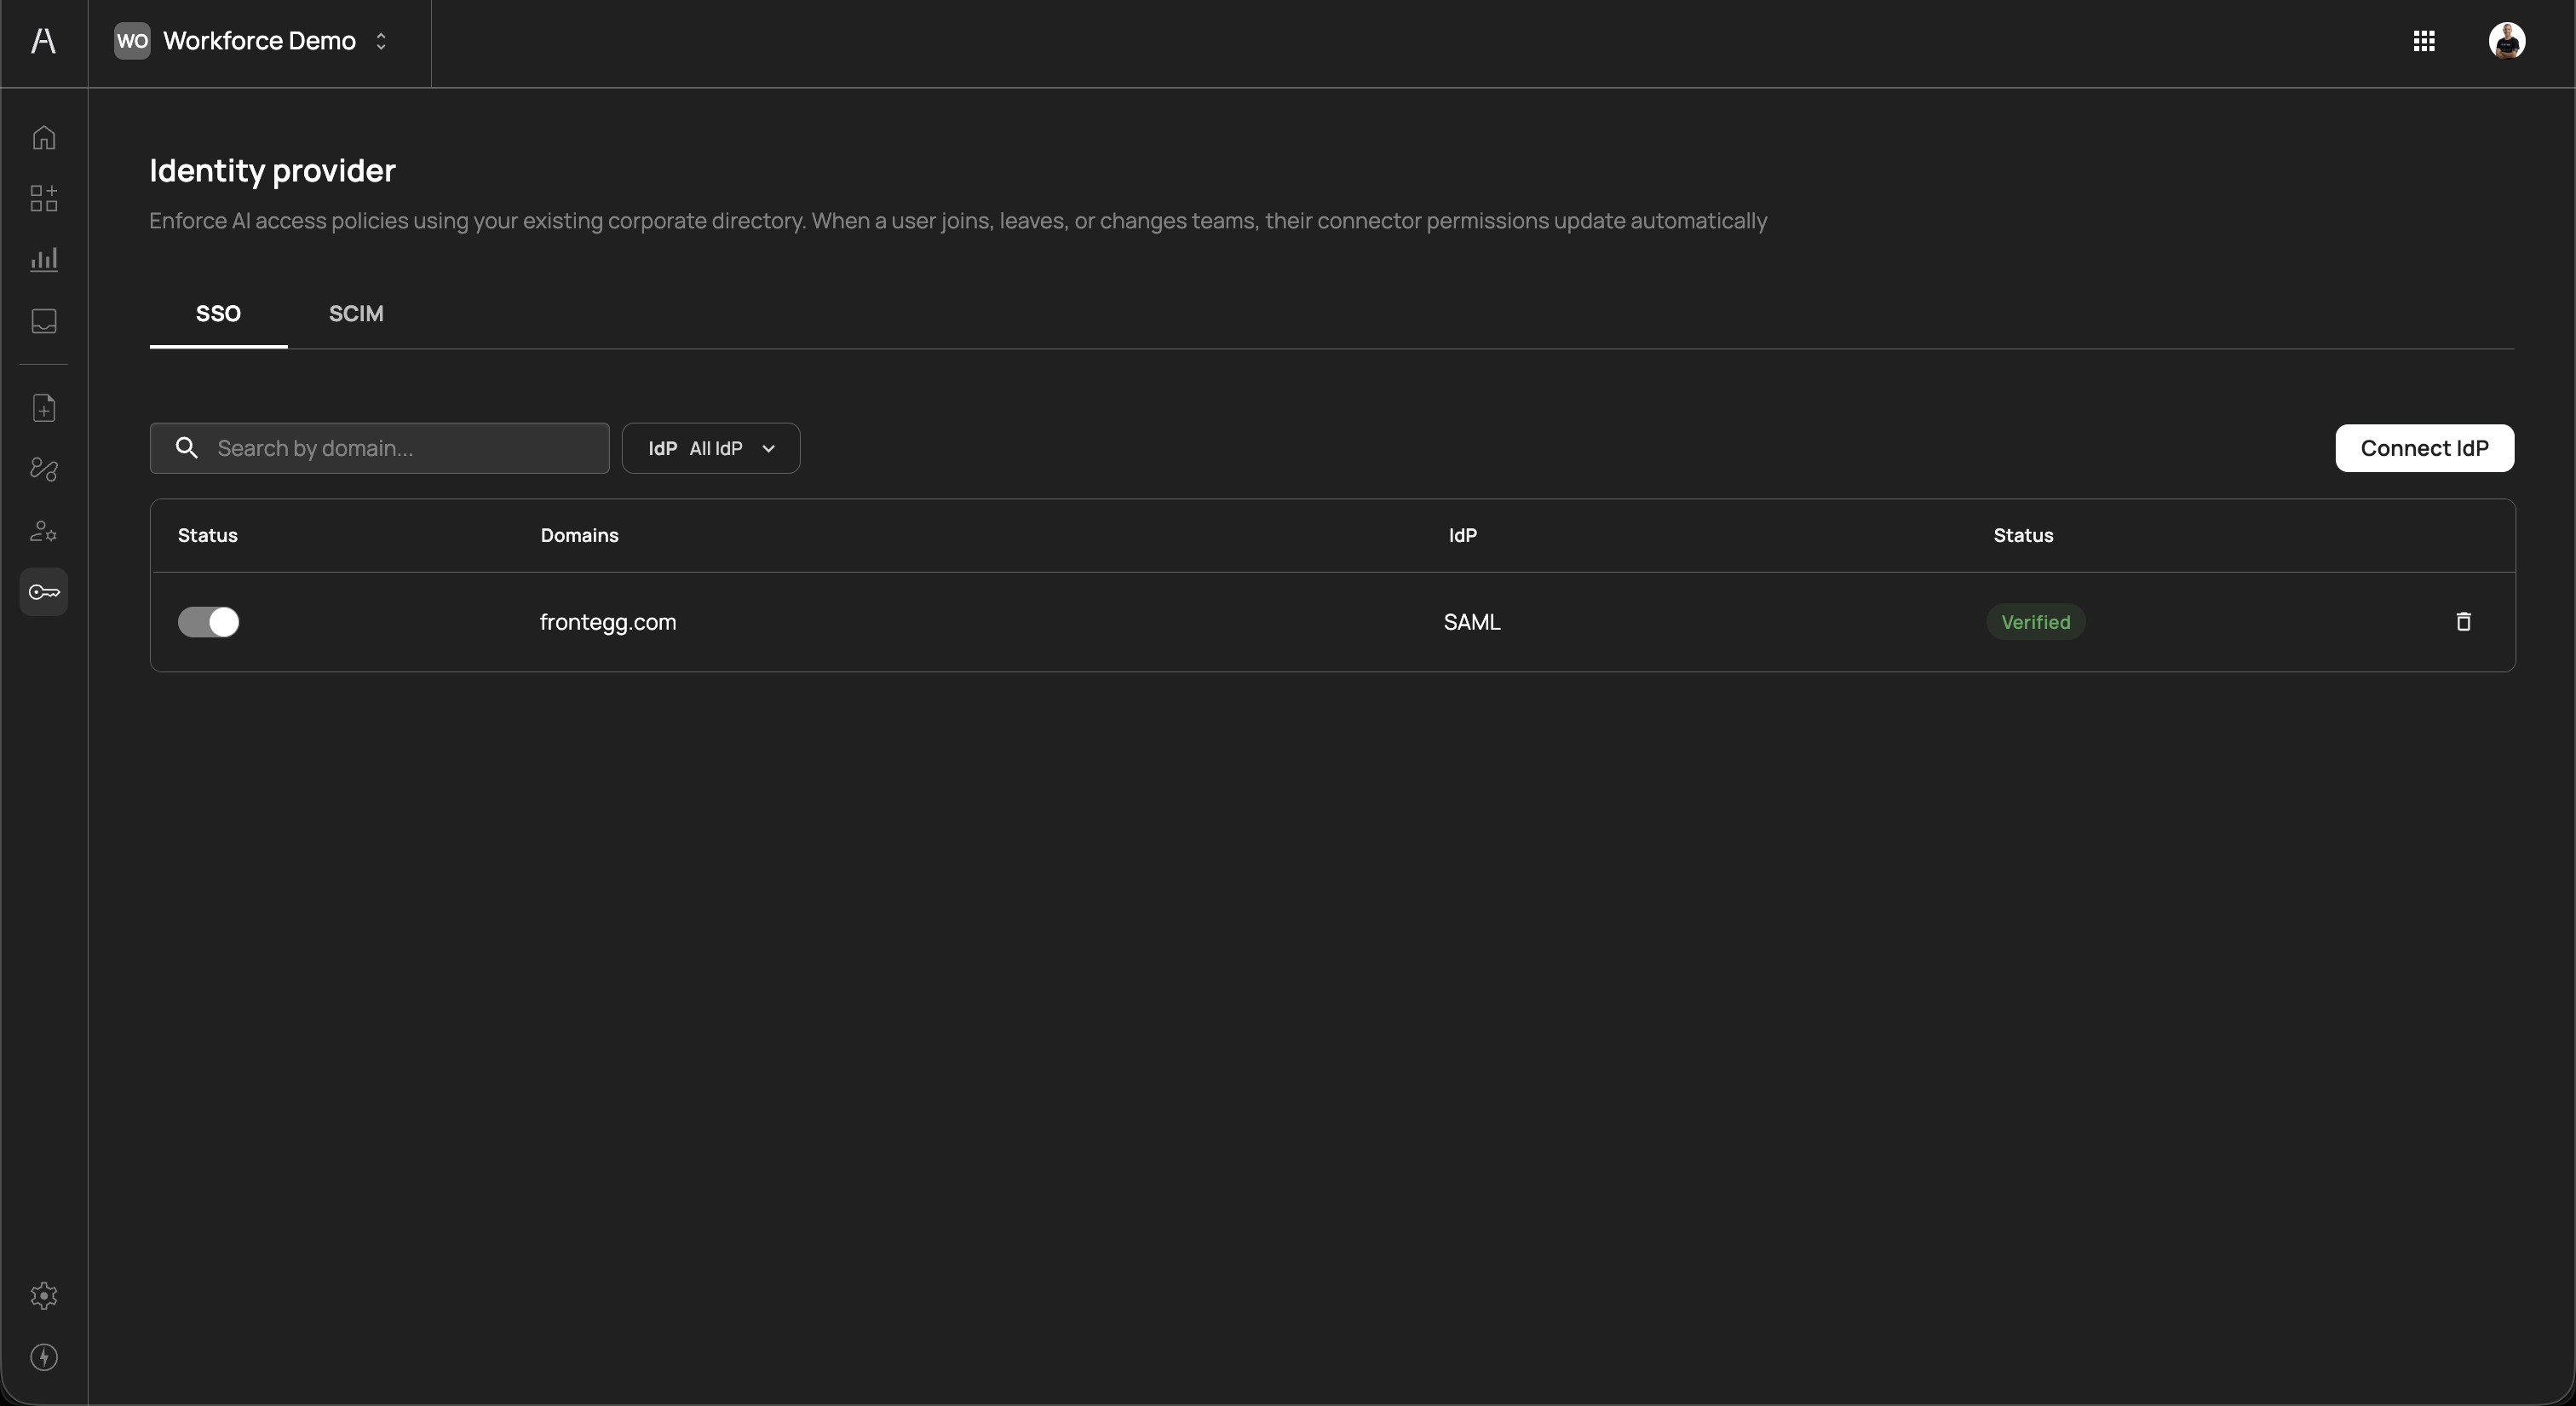
Click Connect IdP to begin the connection process. Agen for Work supports the following identity providers:
SAML providers:
- Okta
- Azure AD
- Google Workspace
- OneLogin
- Ping Identity
- JumpCloud
- Rippling
- Custom SAML
OpenID Connect providers:
- Okta
- Custom OpenID
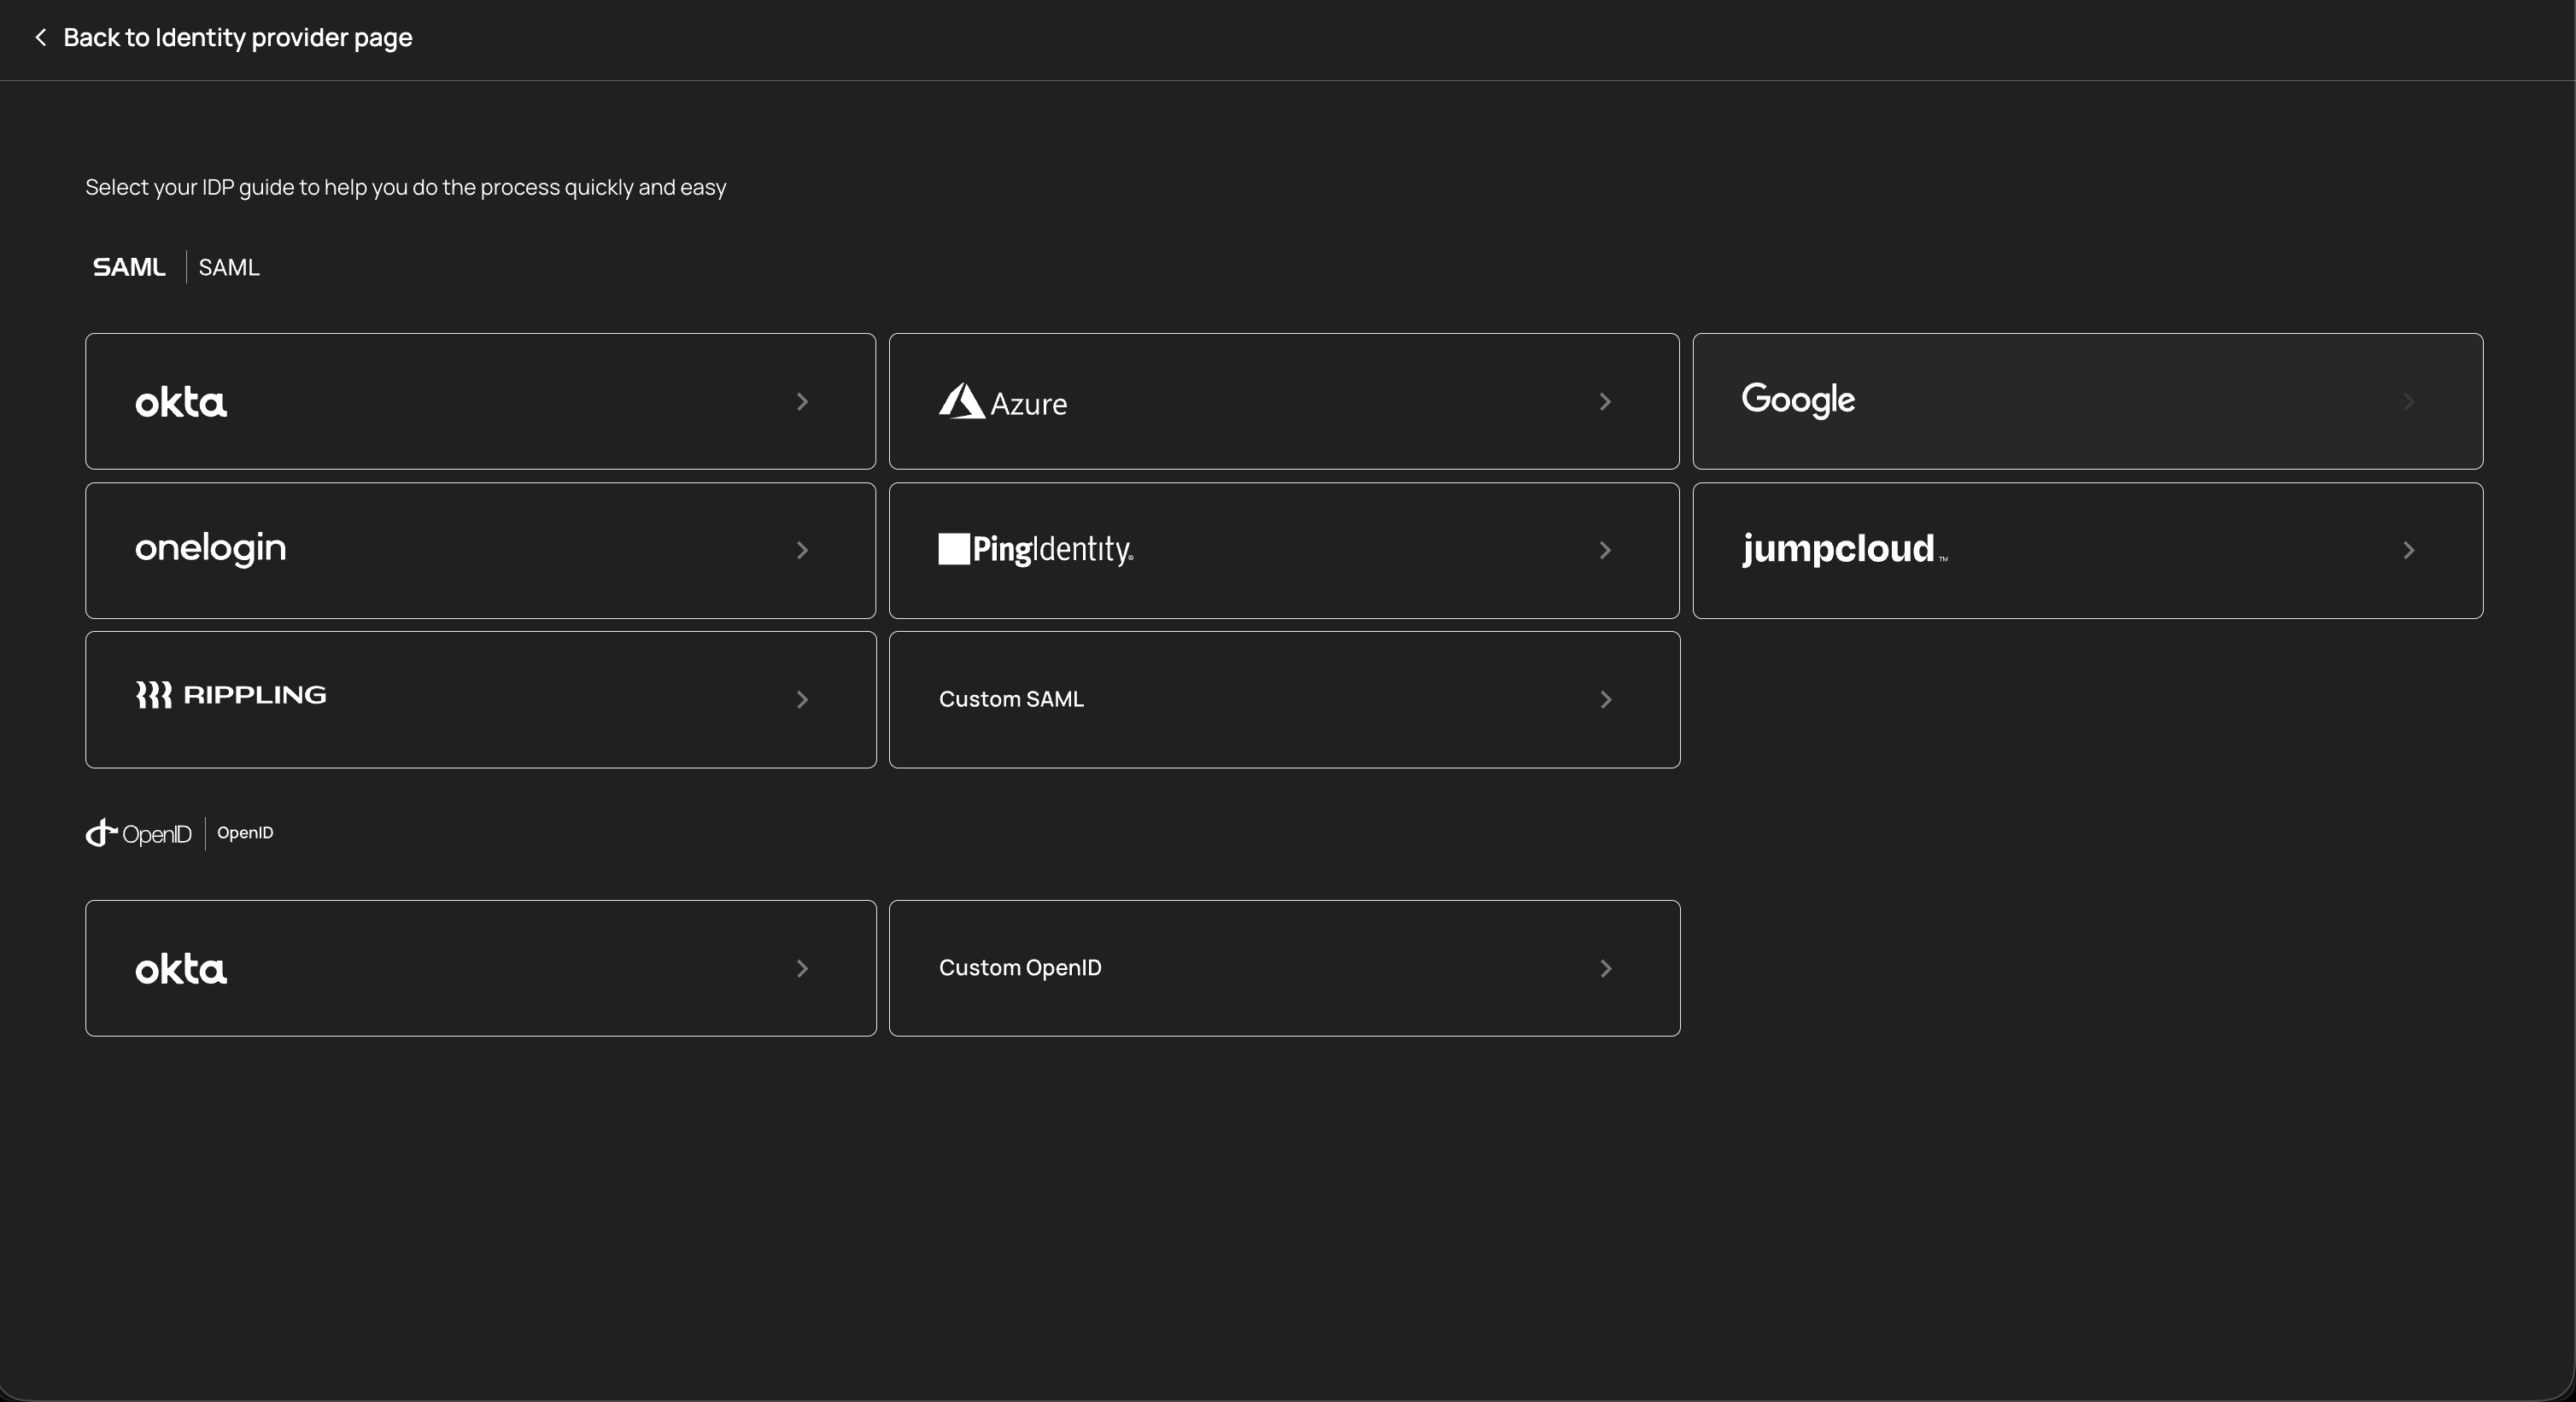
Select your identity provider from the list and follow the guided setup flow. Each provider has a step-by-step guide to help you complete the connection process quickly. After successful configuration, your IdP connection appears in the SSO table with a Verified status.
For automated user and group provisioning, switch to the SCIM tab and configure SCIM (System for Cross-domain Identity Management) with your identity provider. SCIM enables:
- Automatic user provisioning - New employees in your directory are automatically created in Agen for Work
- Automatic deprovisioning - When employees leave your organization, their AI agent access is revoked immediately
- Group sync - Team and group structures from your directory are mirrored in Agen for Work, simplifying policy management
Connecting an identity provider is critical for maintaining secure AI agent access. Without an IdP connection, you must manually manage users, which increases the risk of orphaned accounts retaining AI tool access after employees leave your organization.
Policies are the core mechanism for governing what your AI agents can and cannot do. Each policy defines a set of rules that determine which users or groups can access specific tools within a connector, and what action should be enforced when an AI agent attempts to use those tools.
Navigate to Policies in the left sidebar to view and manage your policies.
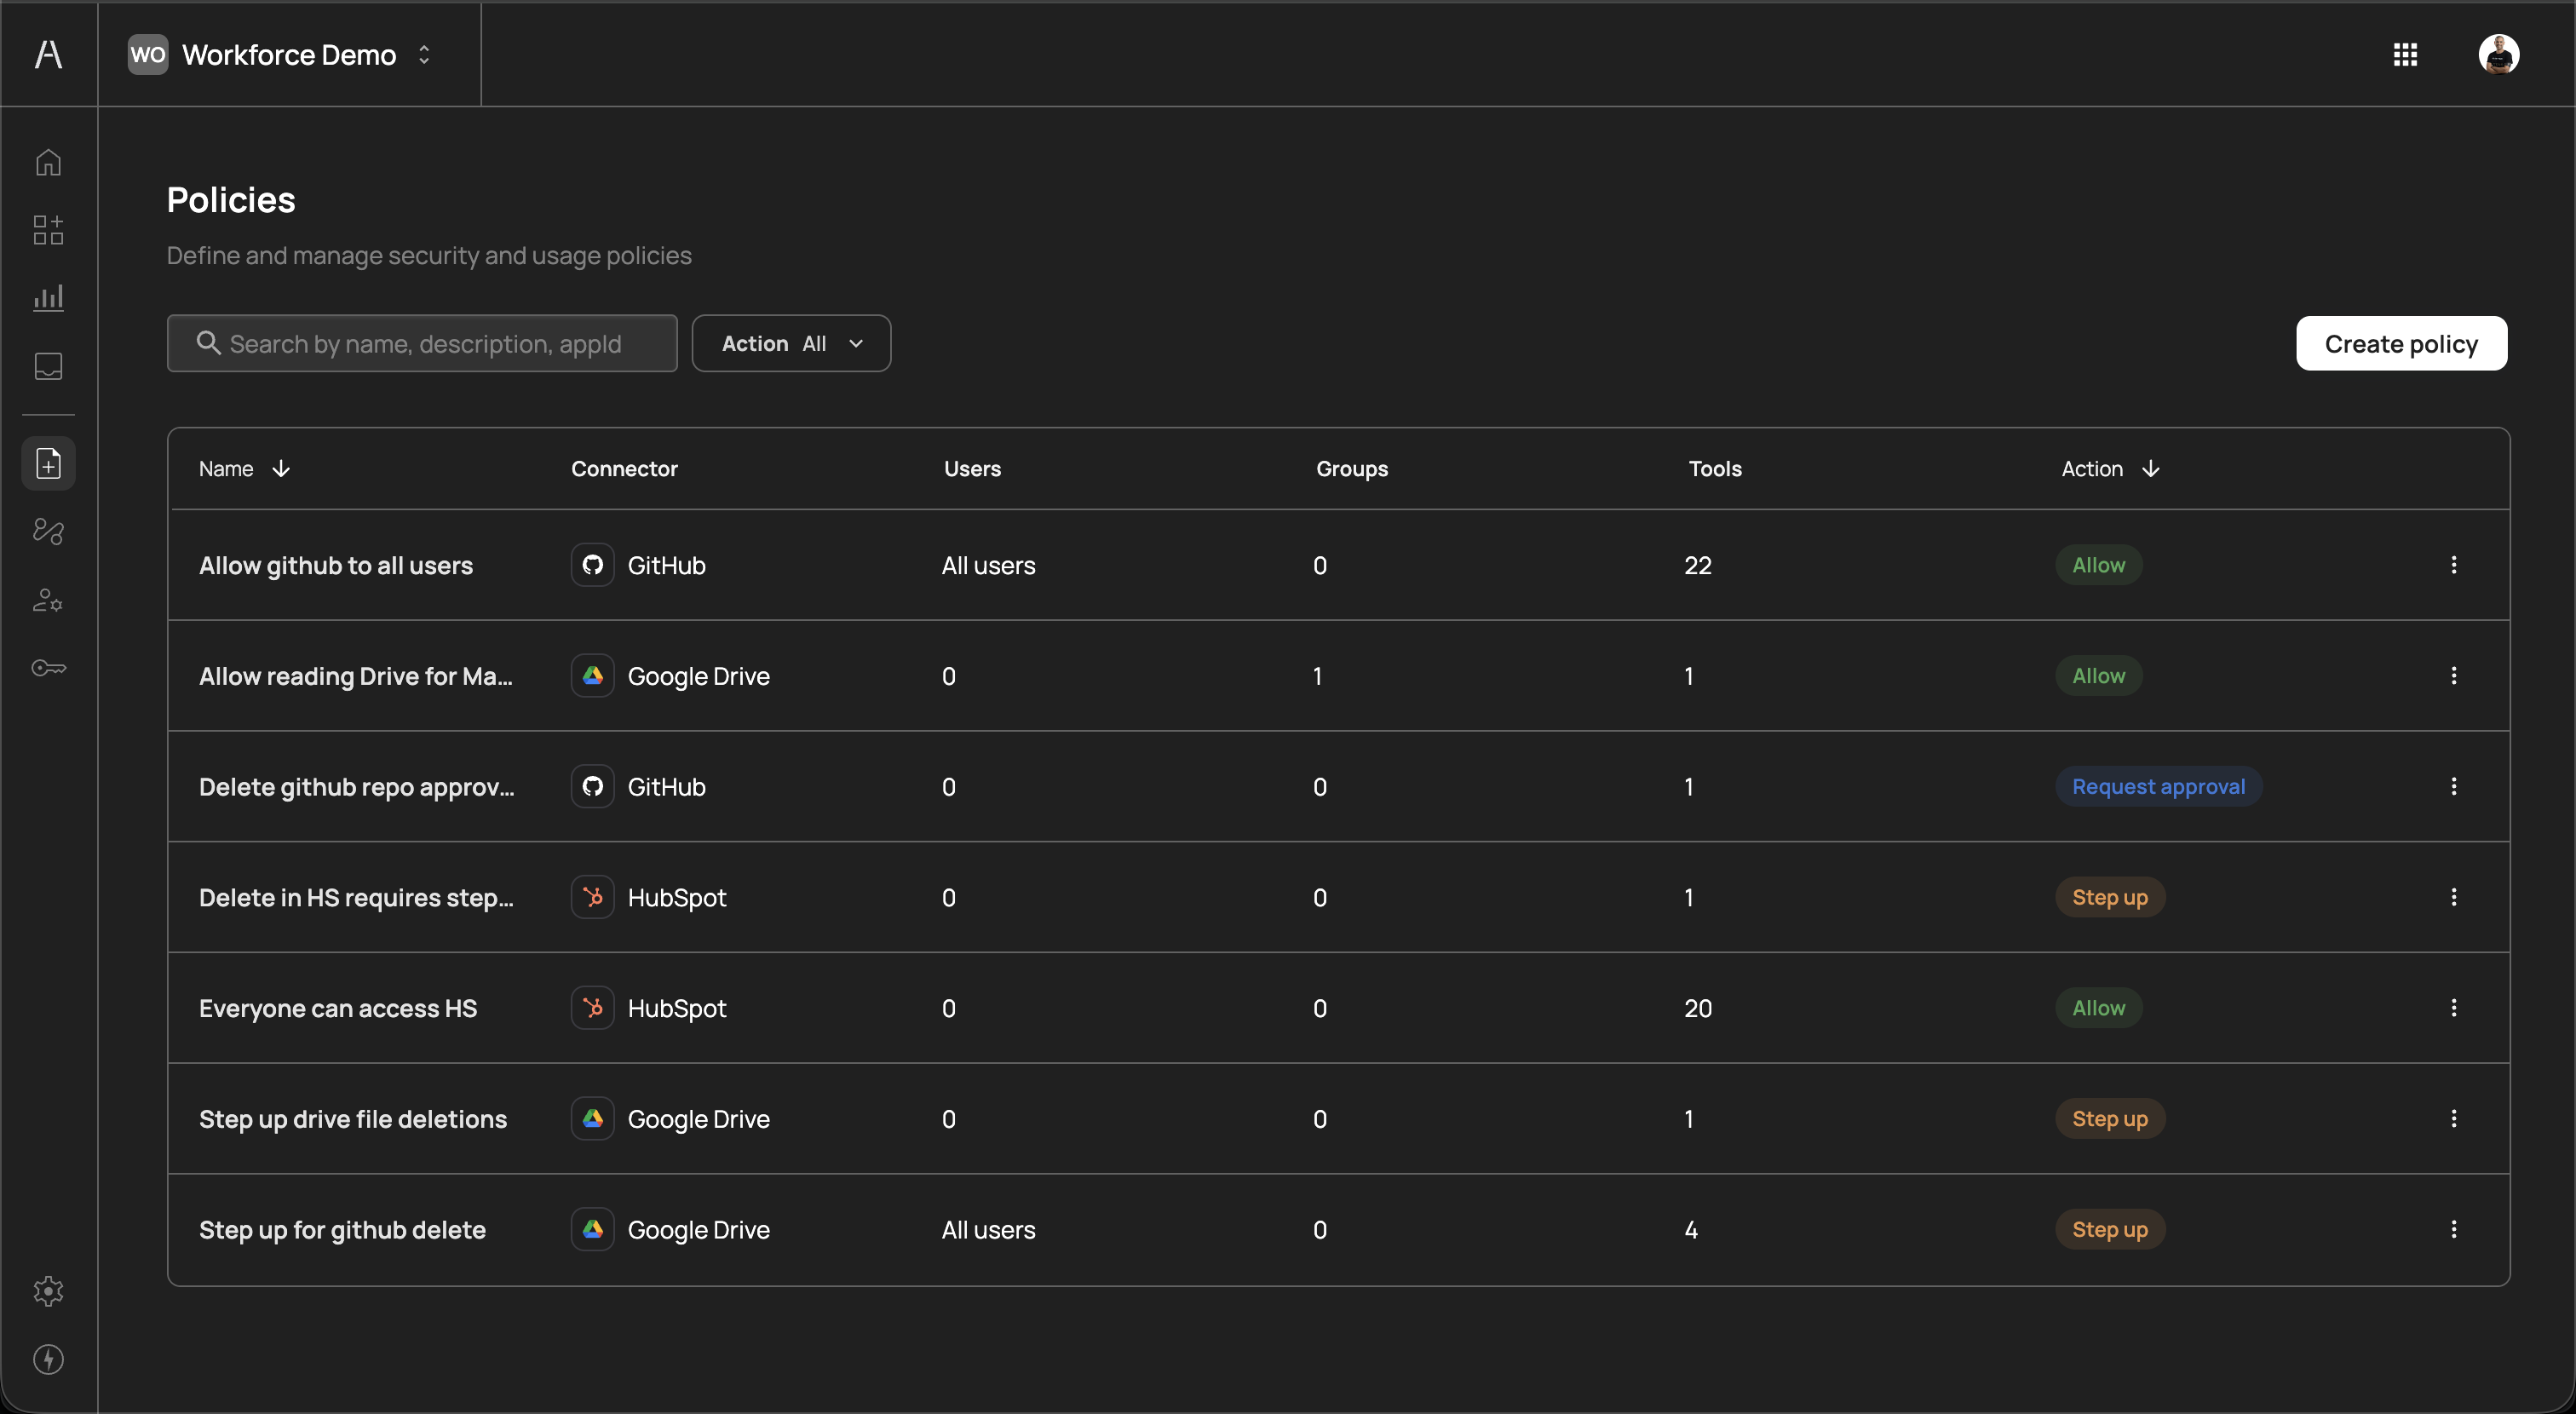
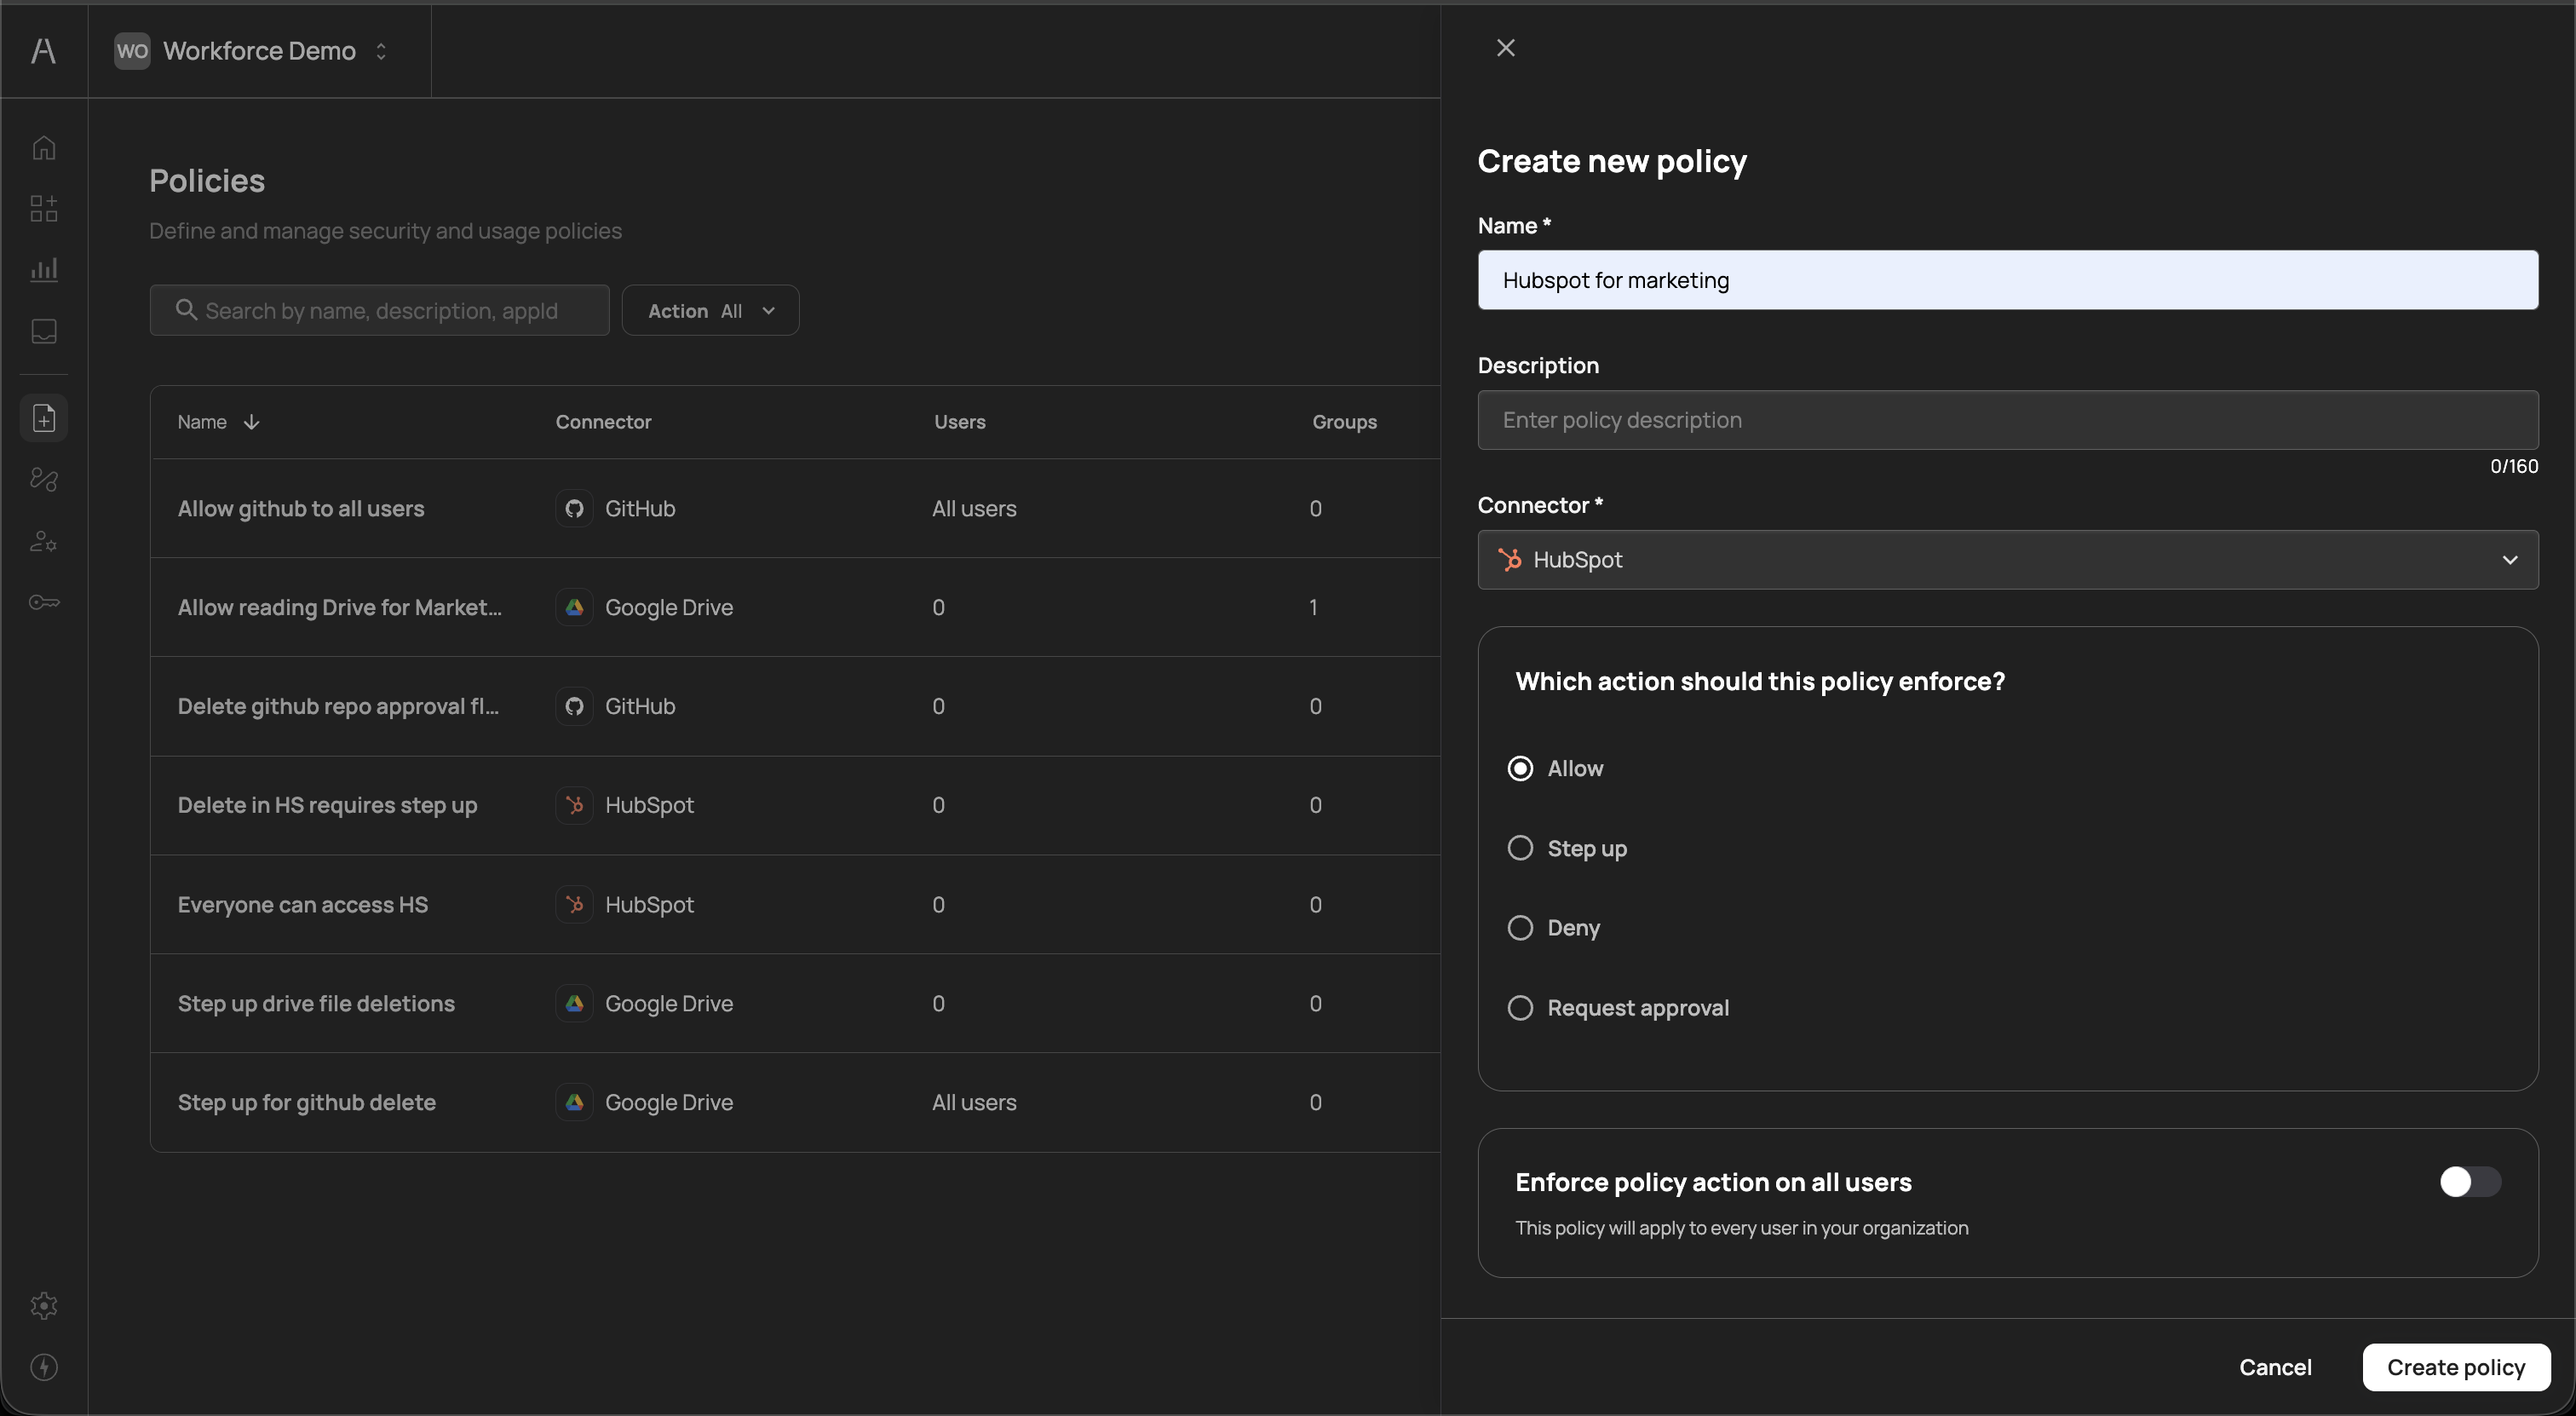
Click Create policy to open the policy creation panel. Each policy requires the following configuration:
| Field | Description |
|---|---|
| Name | A descriptive name for the policy (e.g., "Allow GitHub for all users") |
| Description | An optional description explaining the policy's purpose (up to 160 characters) |
| Connector | The connector this policy applies to (e.g., HubSpot, GitHub, Google Drive) |
Each policy enforces one of the following actions when an AI agent attempts to use the targeted tools:
| Action | Description |
|---|---|
| Allow | The AI agent can use the specified tools without restriction |
| Step up | The user must re-authenticate (step-up authentication) before the AI agent can proceed with the action |
| Deny | The AI agent is blocked from using the specified tools entirely |
| Request approval | The action is paused until a designated approver grants permission, enabling human-in-the-loop oversight for sensitive operations |
After selecting the enforcement action, define who the policy applies to:
- Enforce policy action on all users - Toggle this on to apply the policy to every user in your organization
- Specific users - Select individual users the policy should apply to
- Groups - Apply the policy to specific groups synced from your identity provider
You can also narrow the policy to specific tools within the selected connector, rather than applying it to all tools.
Policy evaluation
Policy evaluation
When multiple policies apply to the same user and tool combination, Agen for Work evaluates them with the most restrictive action taking precedence. For example, if one policy allows a tool and another requires approval for the same tool and user, the approval requirement takes effect.
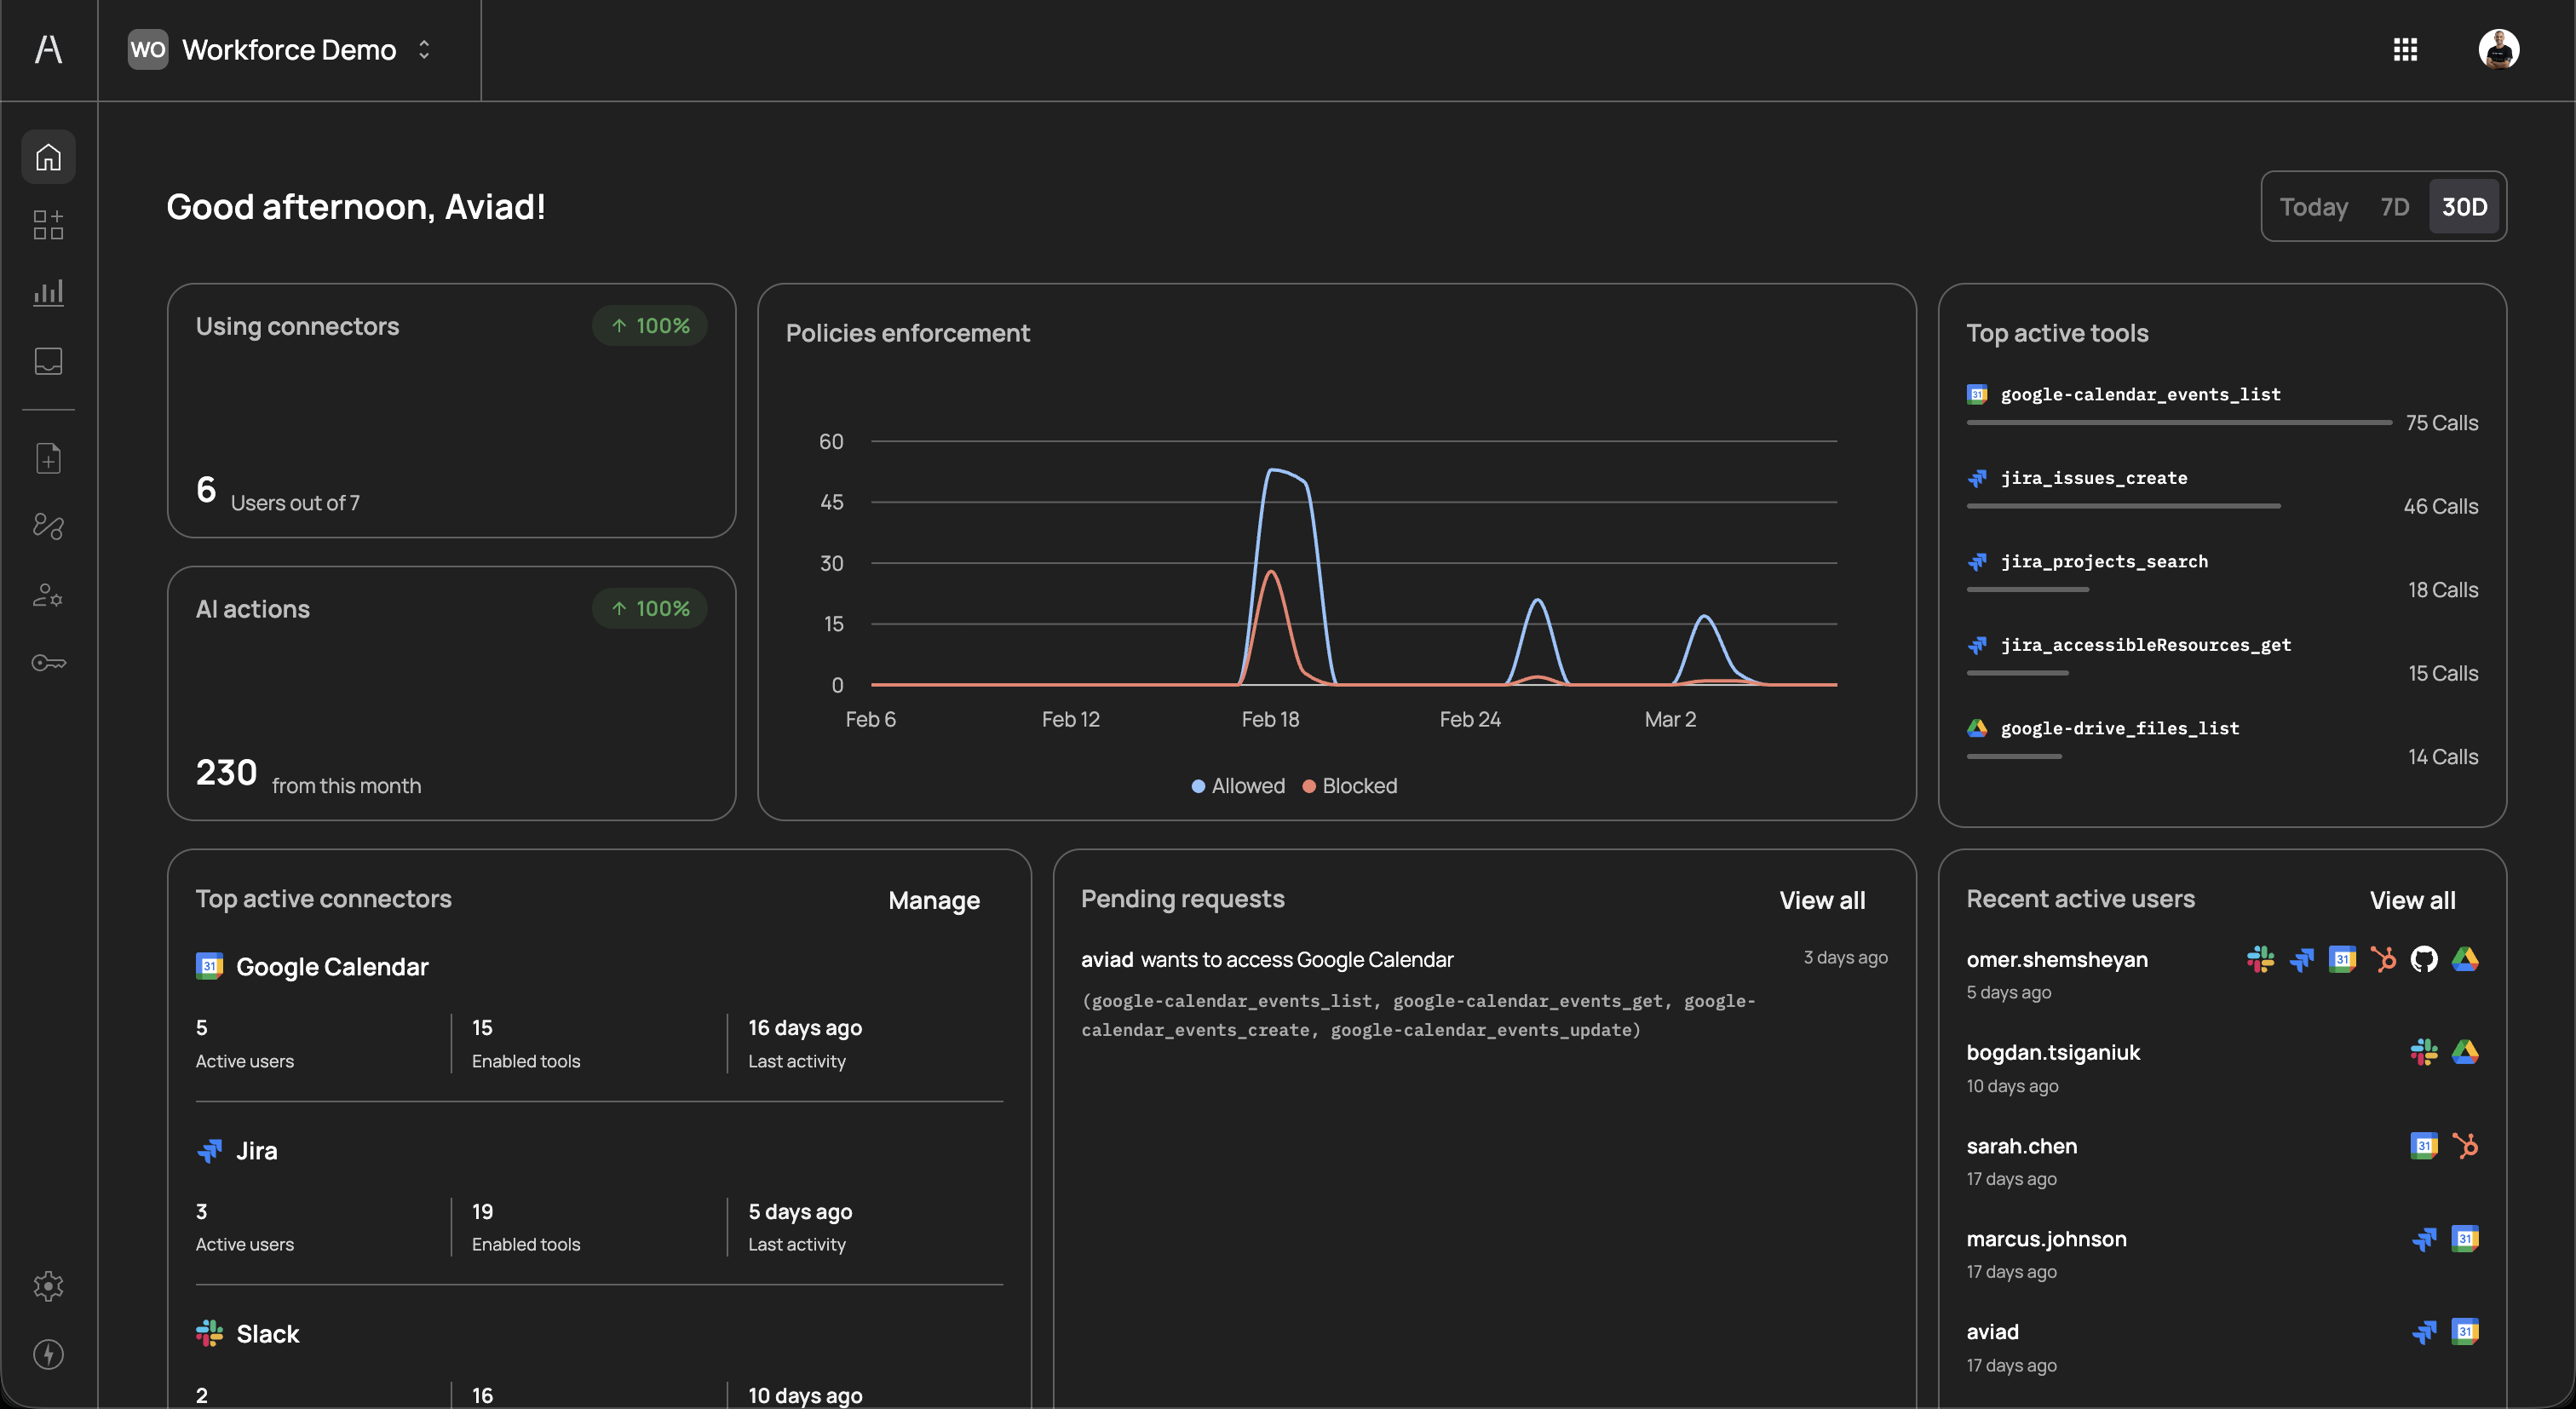
After completing all three setup steps, navigate to the Dashboard to confirm that your environment is properly configured. The dashboard provides a real-time overview of your Agen for Work deployment, including:
- Connector usage - The number of users actively using connectors and total user capacity
- AI actions - Total number of AI agent actions performed
- Policies enforcement - A graph showing allowed vs. blocked actions over time
- Top active tools - The most frequently used tools across all connectors
- Top active connectors - Your most-used connectors with details on active users, enabled tools, and last activity
- Pending requests - Approval requests awaiting review
- Recent active users - Users who have recently interacted with AI agents
With your environment configured, explore the following topics to fine-tune your deployment:
- Connectors - Learn more about managing connectors and the tools they expose
- Policies - Create granular policies for different teams and use cases
- User management - Manage user permissions and group-based access
- Approval flows - Define approver chains for sensitive operations