Aha! is a product management platform that helps teams set strategy, capture ideas, prioritize features, and share visual roadmaps. Integrating Aha! with Frontegg allows your application to access and manage ideas, features, releases, products, epics, goals, and initiatives on behalf of your users through OAuth 2.0 authentication.
Prerequisites
Prerequisites
- An Aha! account with admin access
- Access to the Aha! workspace settings
Log in to your Aha! account. Click your avatar in the top-right corner to open the user menu. Under Settings, click Personal. In the left sidebar, click Developer.
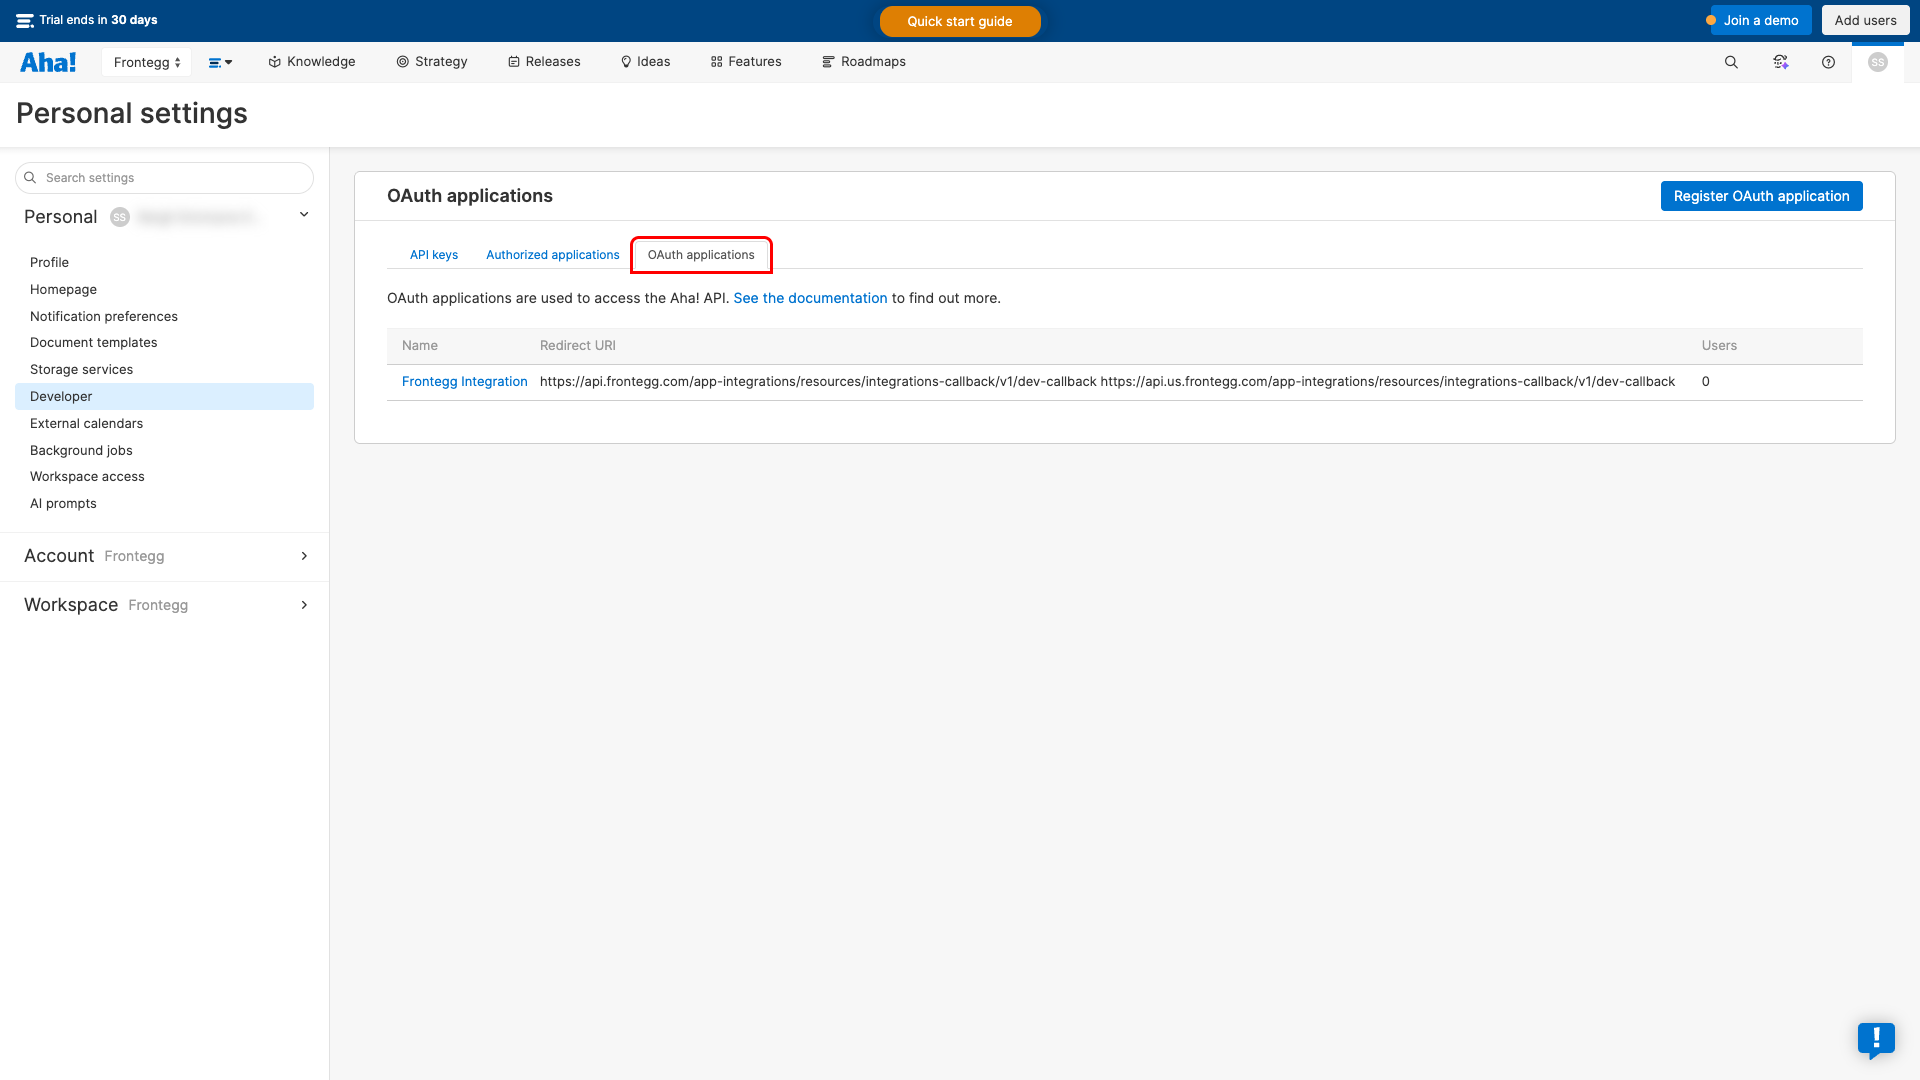
On the Developer page, click the OAuth applications tab. This page lists all registered OAuth applications for your account.
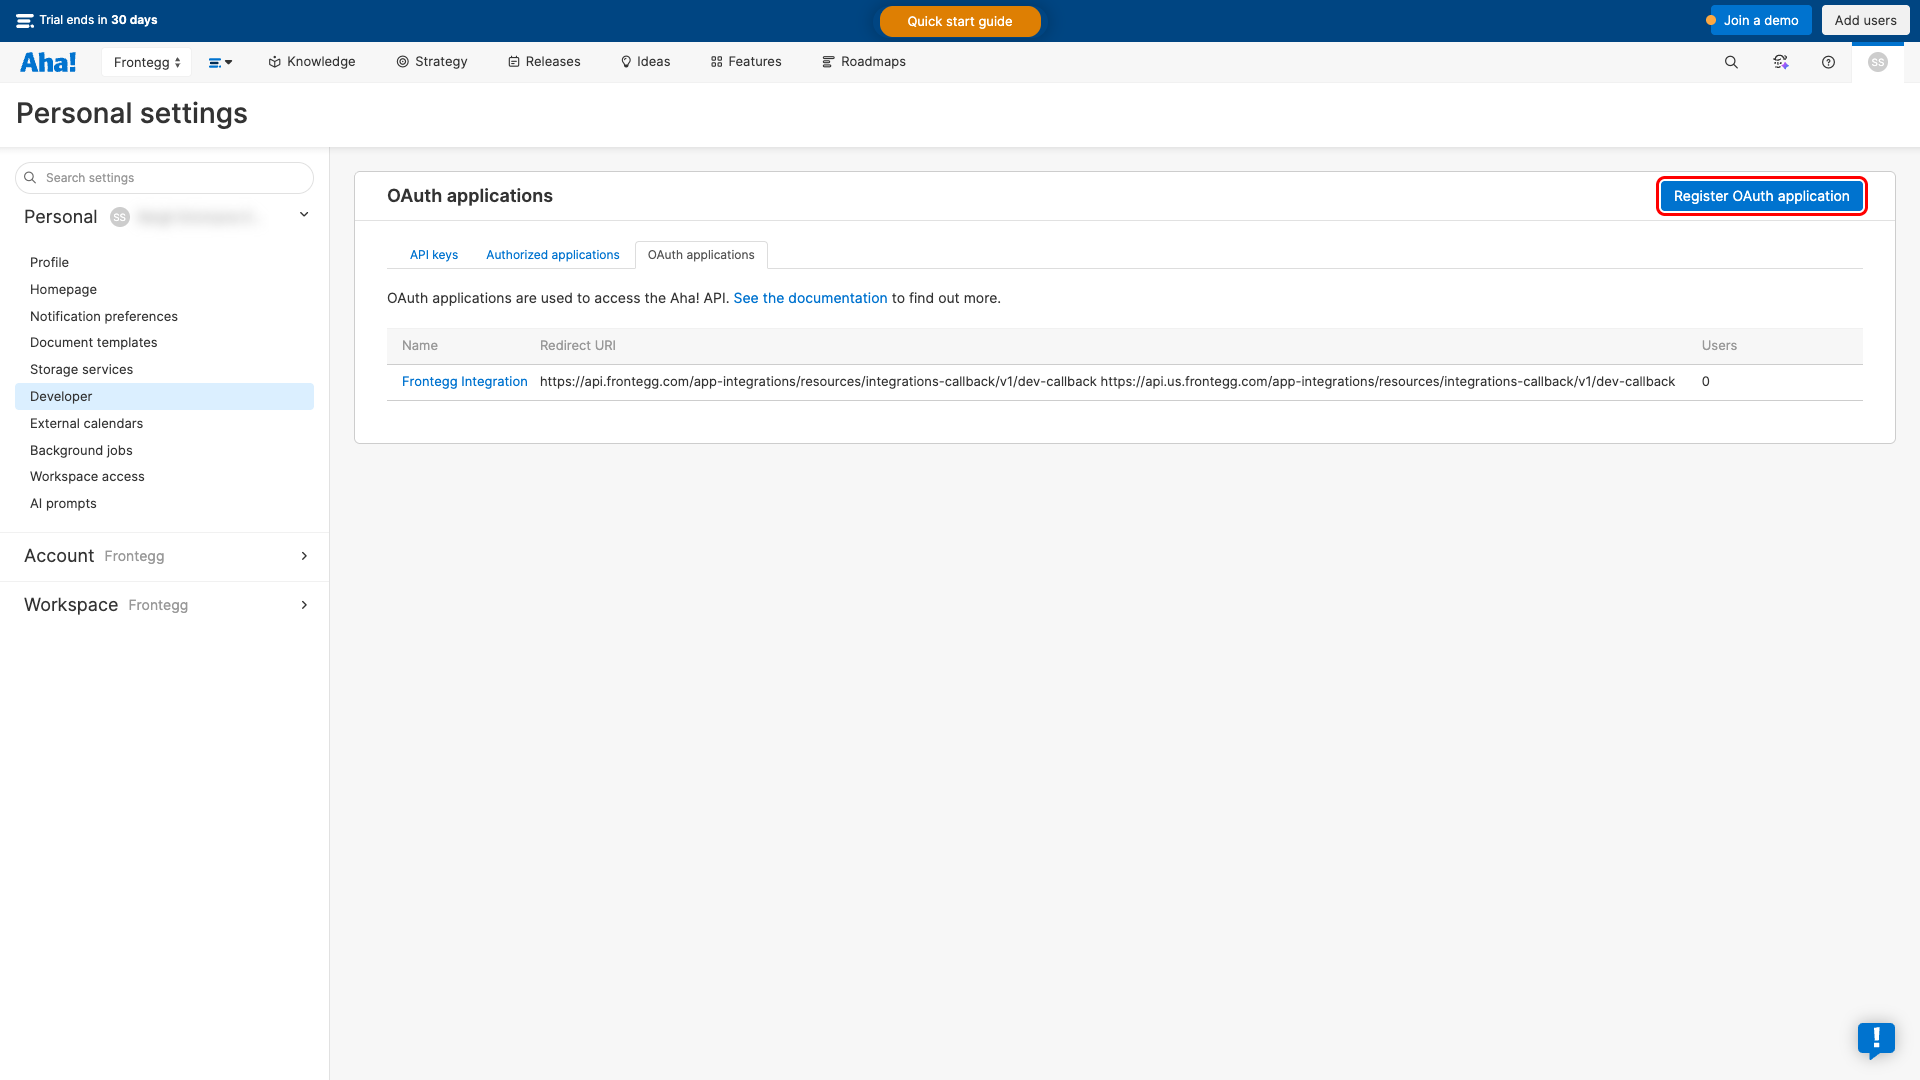
Click the Register OAuth application button.
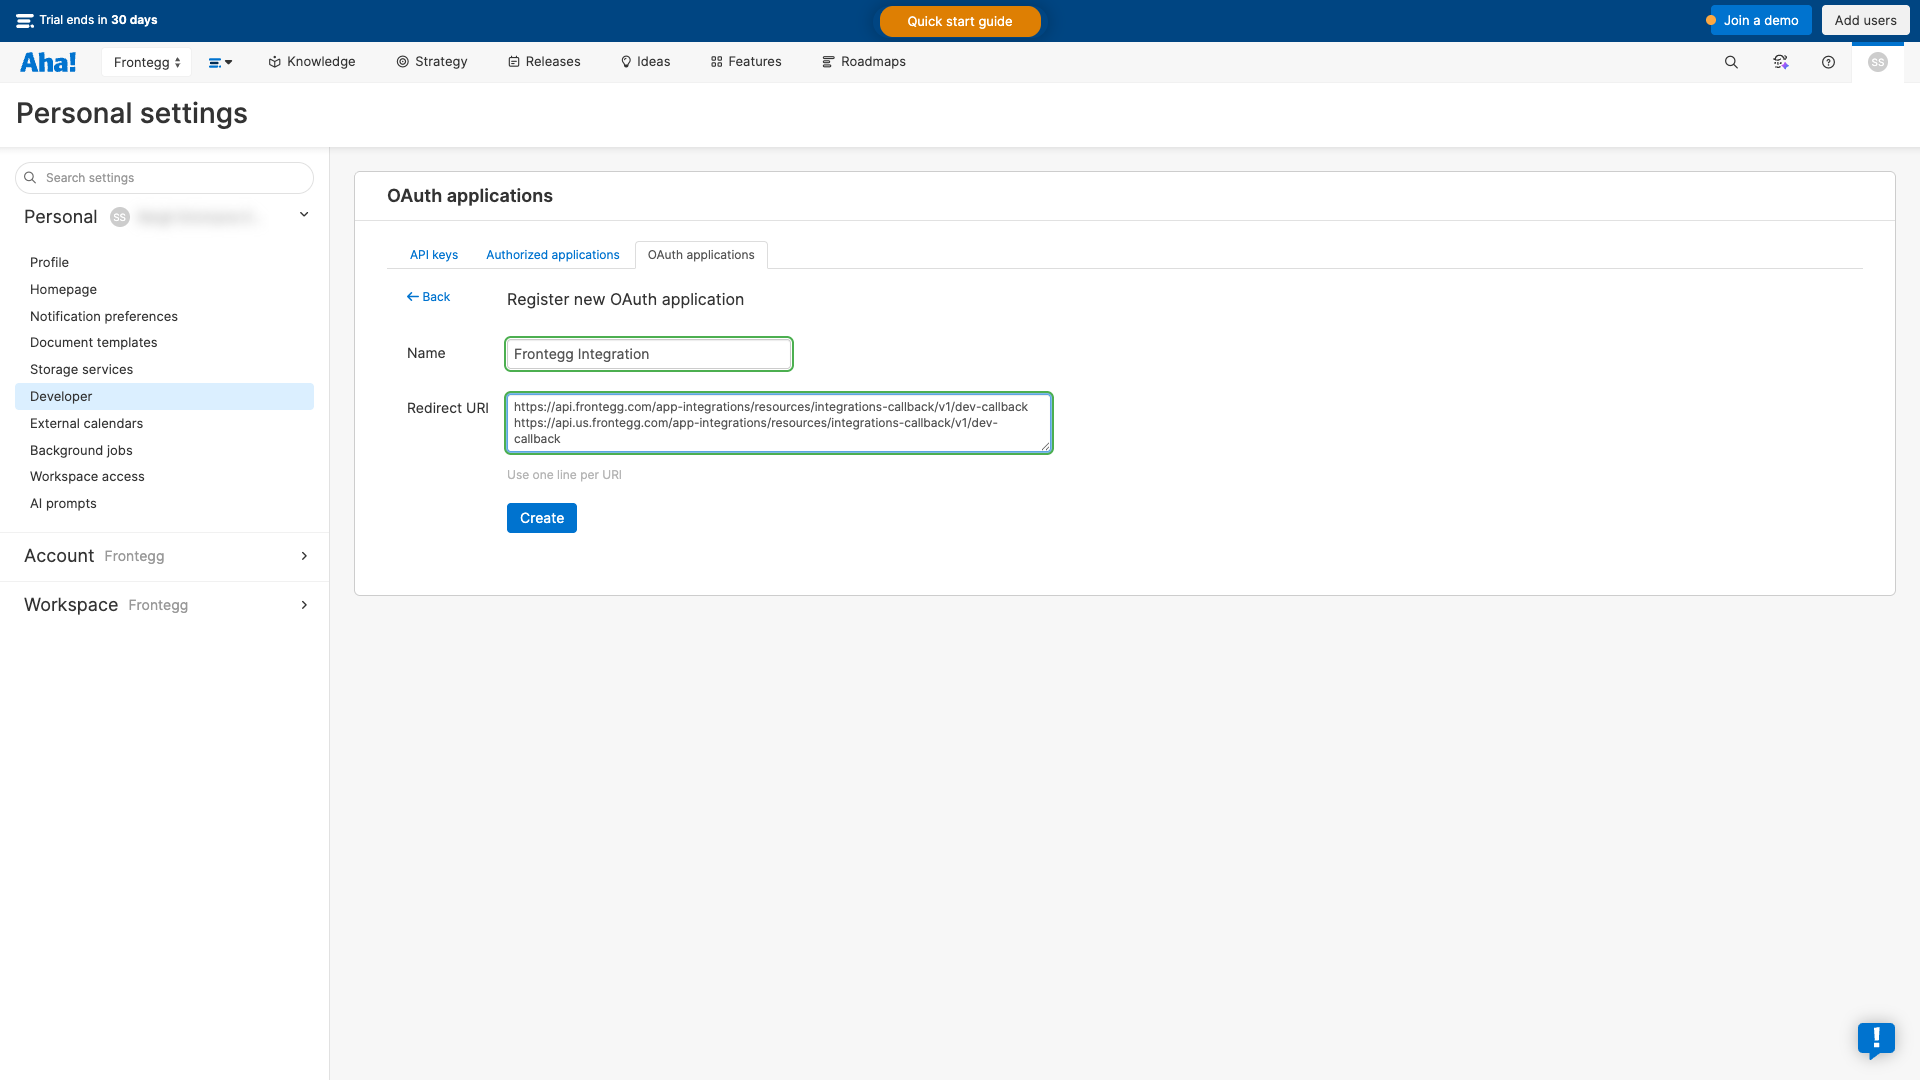
In the Register new OAuth application form, fill in the following fields:
- Name — Enter a descriptive name (e.g., "Frontegg Integration")
- Redirect URI — Enter the following redirect URIs, each on a new line:
https://YOUR_MCP_GATEWAY_URL/integration-callback
Click the Create button to register the application.
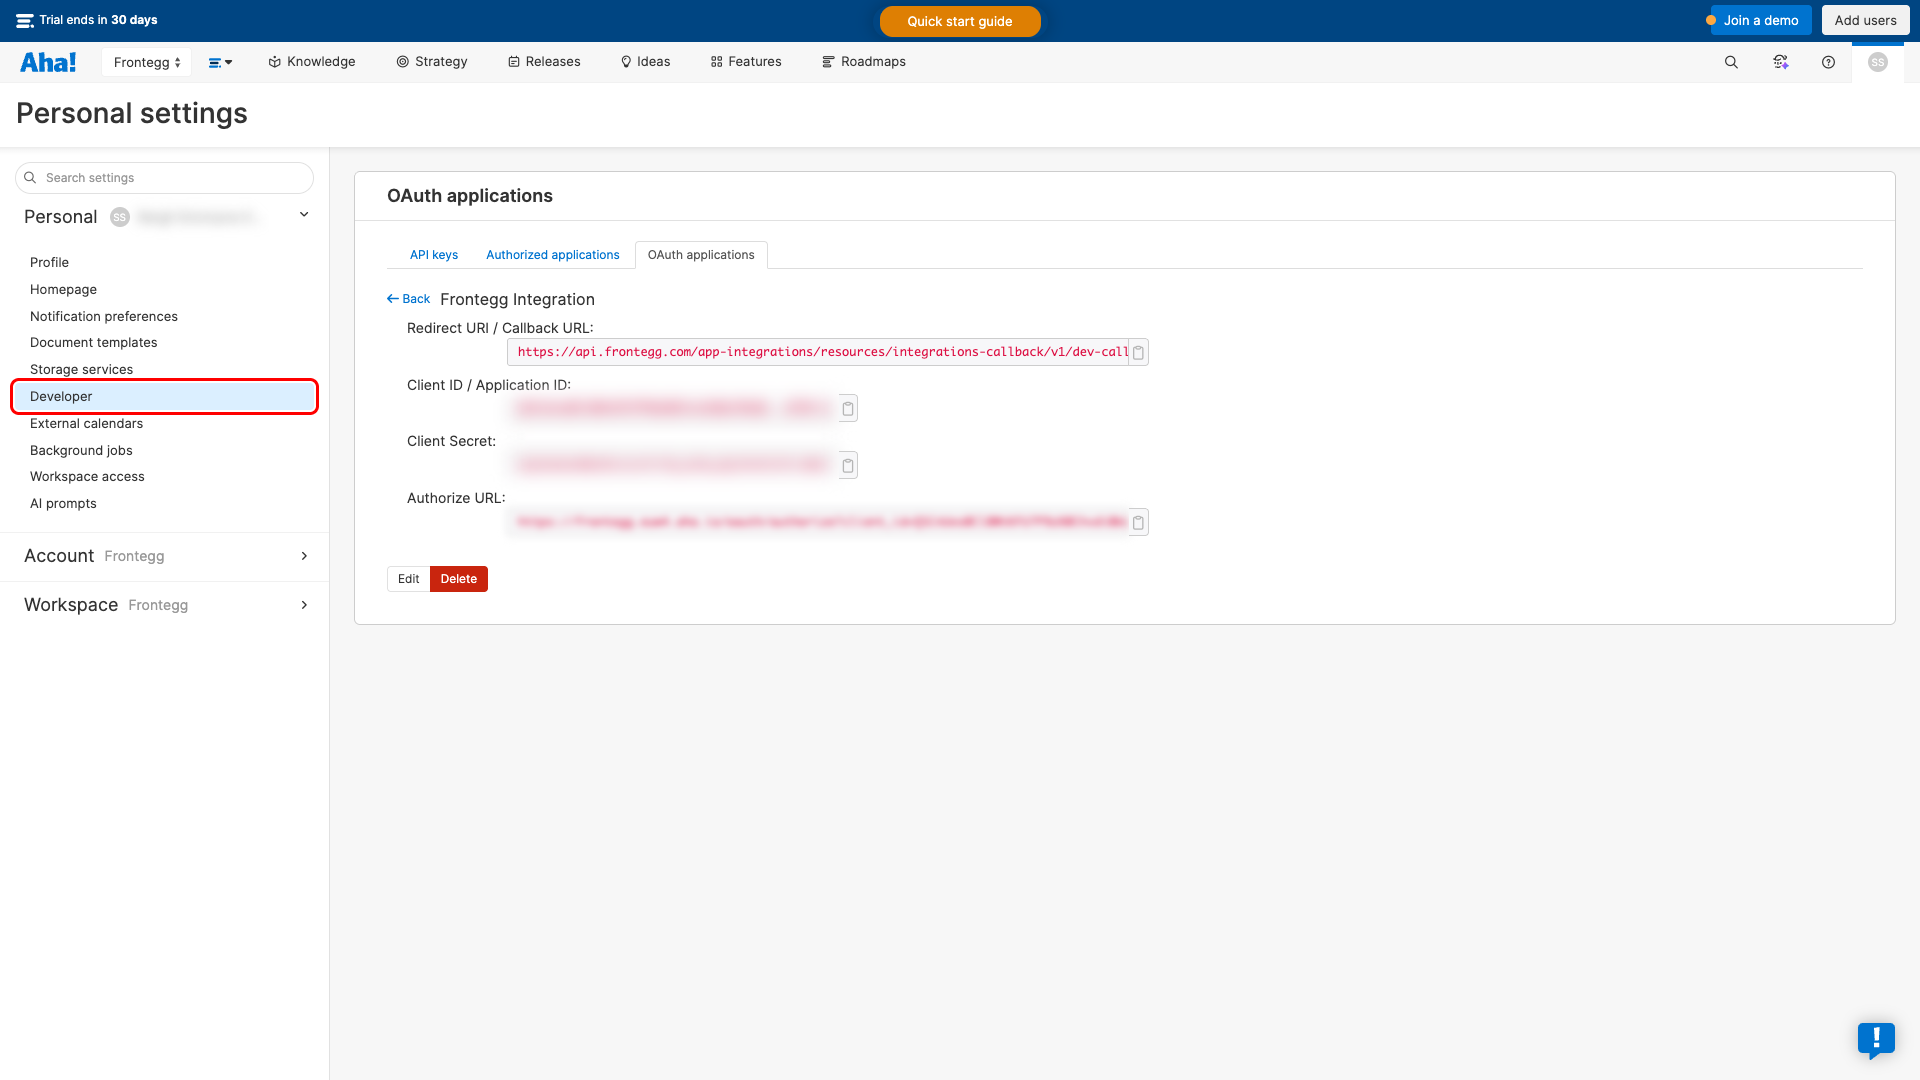
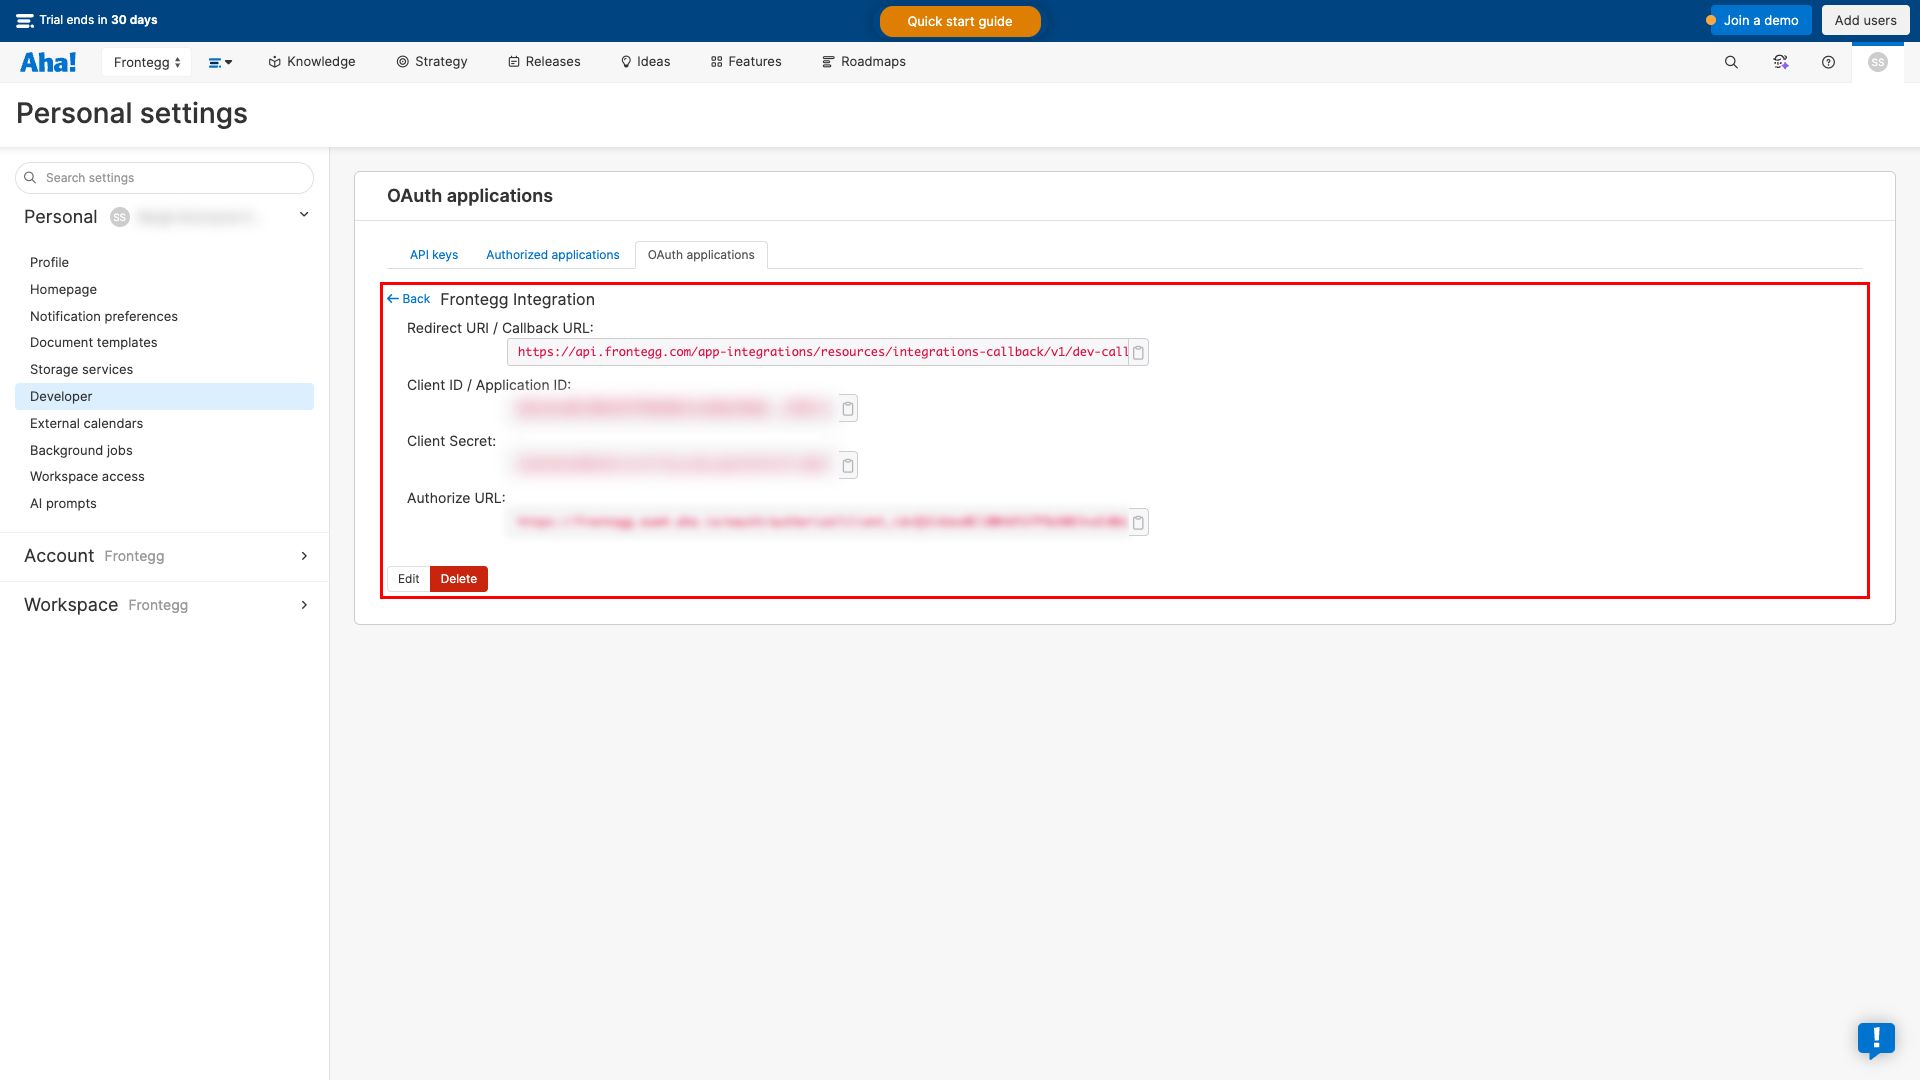
After creating the application, you are redirected to the application details page. Here you can find the Client ID / Application ID and Client Secret.
Copy the Client ID and Client Secret values. You will need them to configure the integration in the Frontegg portal.
Keep your credentials secure
Keep your credentials secure
Never share or commit your Client Secret to version control.
Aha! supports the following OAuth scopes that define the level of access your application requests:
| Scope | Description |
|---|---|
read | Read access to Aha! resources |
write | Write access to Aha! resources |
Minimum required scopes
Minimum required scopes
For basic read-only functionality, you need: read.
Once you have obtained your Client ID and Client Secret from the steps above, enter them in the integration configuration page of the Frontegg portal:
- Open the Frontegg portal and navigate to [ENVIRONMENT] → Integrations → Aha!.
- Enter the Client ID and Client Secret in the corresponding fields.
- Select the required scopes.
- Click Save.