Fastly is an edge cloud platform that delivers content, applications, and APIs through a global CDN with real-time caching, purging, and security controls. The Fastly integration allows your application to connect to Fastly through Frontegg, enabling users to list and inspect services, read account information, and purge cached content — all through a secure API token connection.
Prerequisites
Prerequisites
- A Fastly account with access to the services you want to manage
- Permission to create personal API tokens (required for the account you are signed in with)
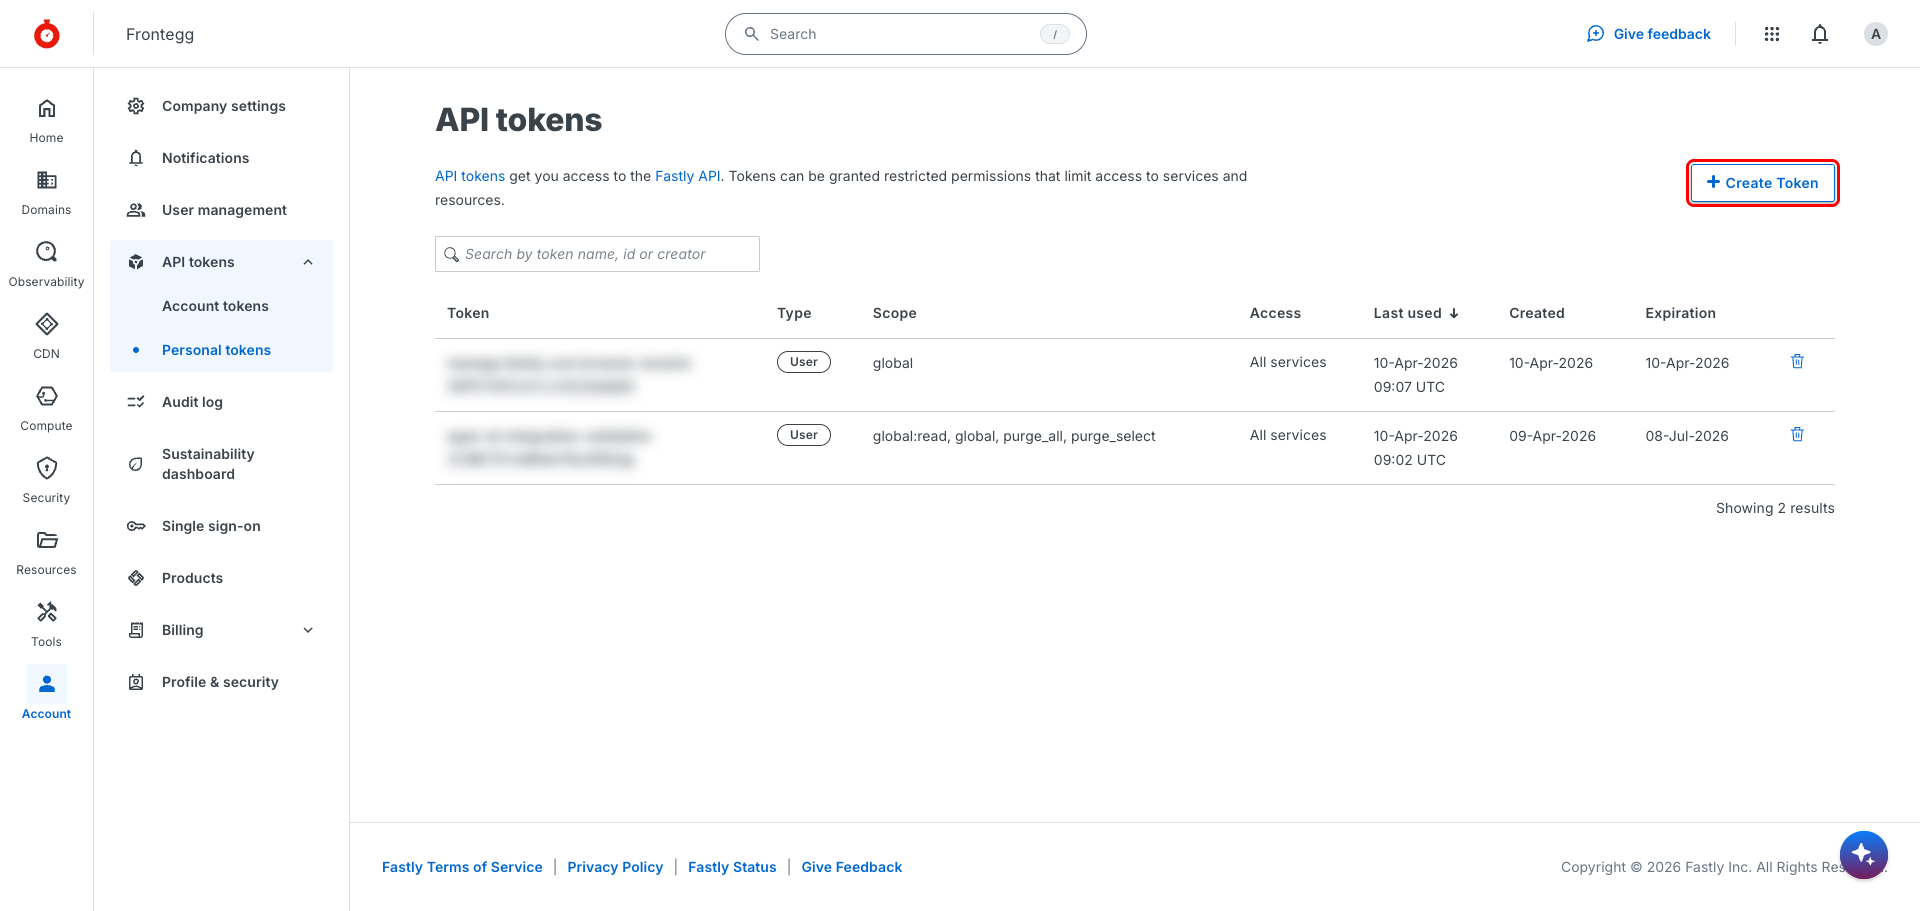
Sign in to the Fastly control panel at manage.fastly.com and navigate to Account → API tokens → Personal tokens, or go directly to manage.fastly.com/account/personal/tokens.
Click Create Token to begin creating a new personal API token.
Re-authentication required
Re-authentication required
Fastly asks you to re-enter your password (sudo mode) before you can create a token. Complete the prompt with the same account you used to sign in.
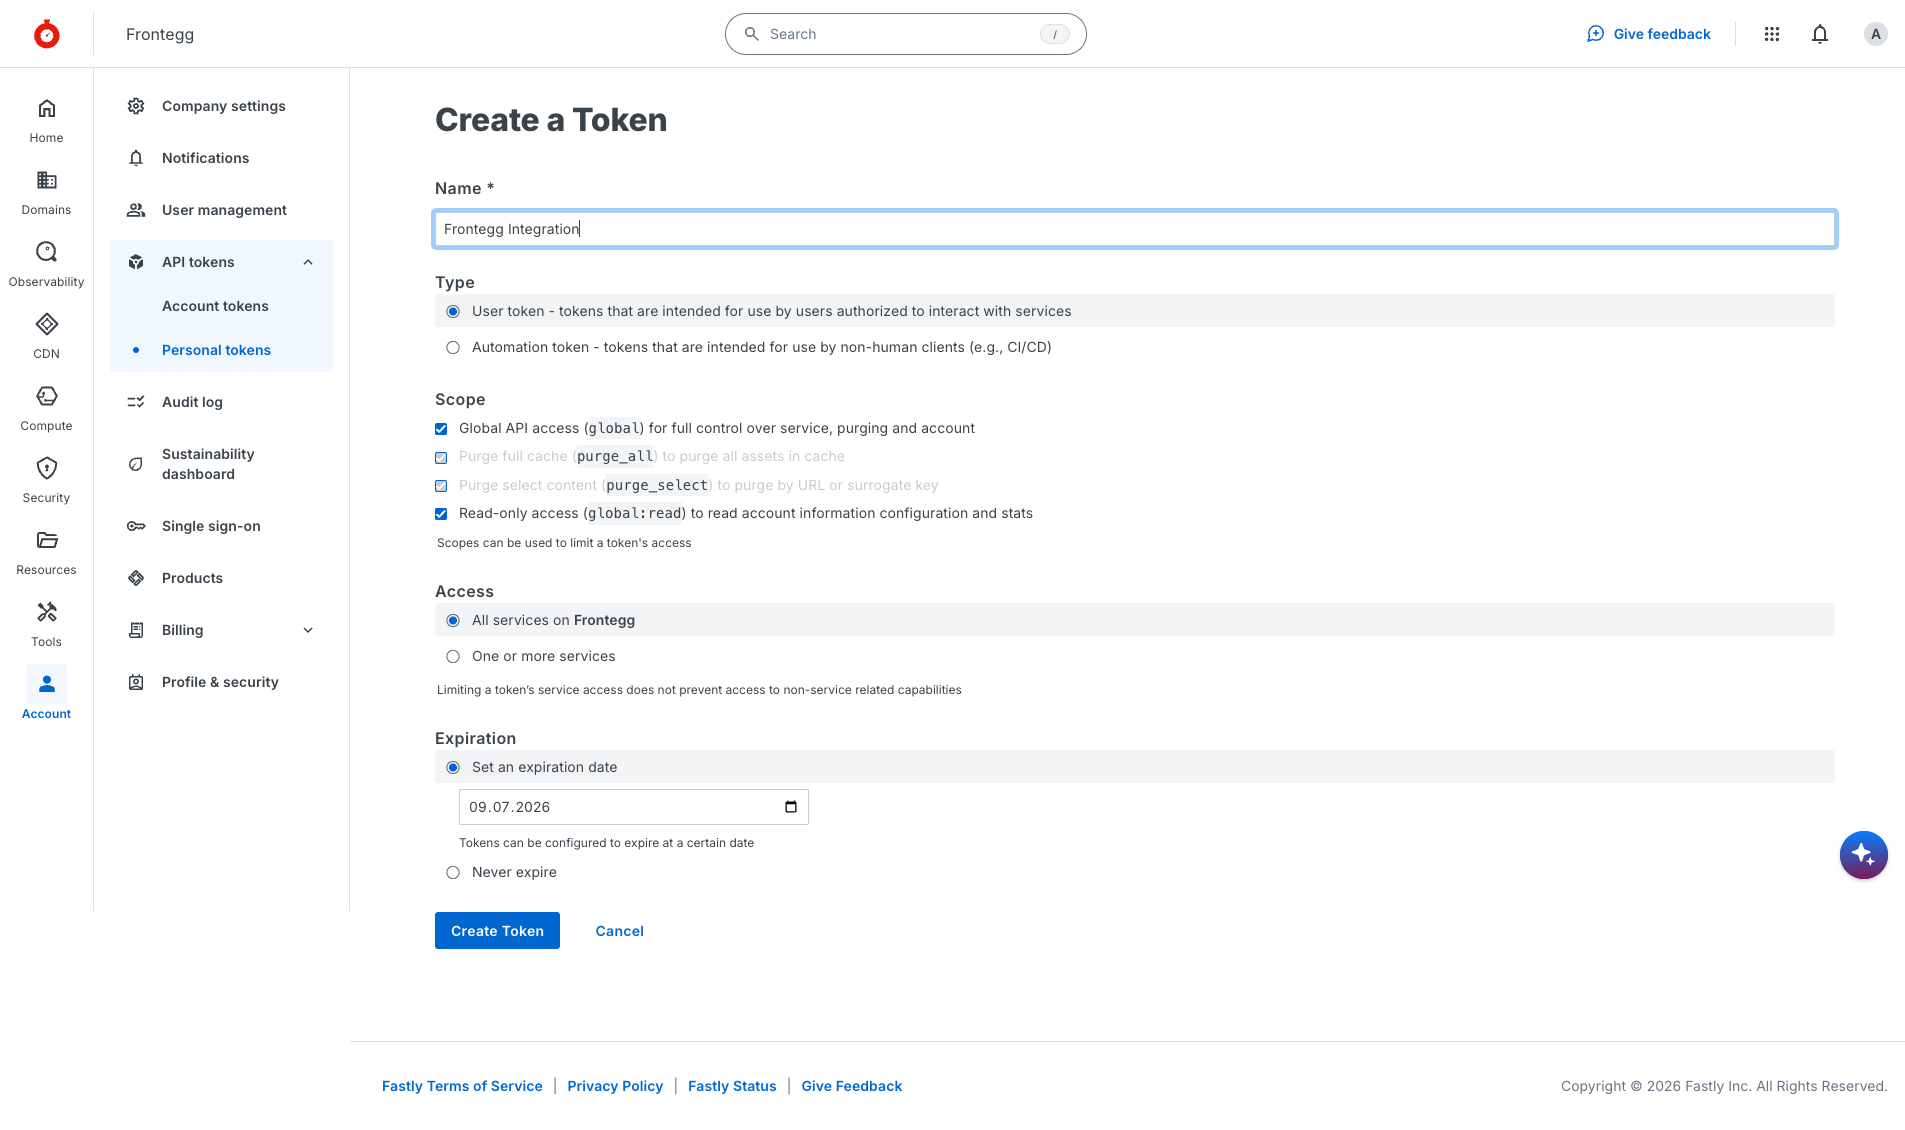
Fill in the Create a Token form with the following values:
- Name — enter a descriptive name such as
Frontegg Integration. - Type — keep User token selected.
- Scope — select the scopes listed in the table below.
- Access — keep All services on your customer account selected, or restrict to specific services if needed.
- Expiration — set an expiration date (recommended) or choose Never expire.
Select the following scopes:
| Scope | Description |
|---|---|
global | Read/write access across users, services, current user, and tokens |
global:read | Read-only access across account resources |
purge_all | Purge all cached content for a service |
purge_select | Purge cached content by URL or surrogate key |
Minimum required scopes
Minimum required scopes
For basic read-only functionality you need global:read. Add global for full service and account access, and purge_all / purge_select if the integration should purge cached content.
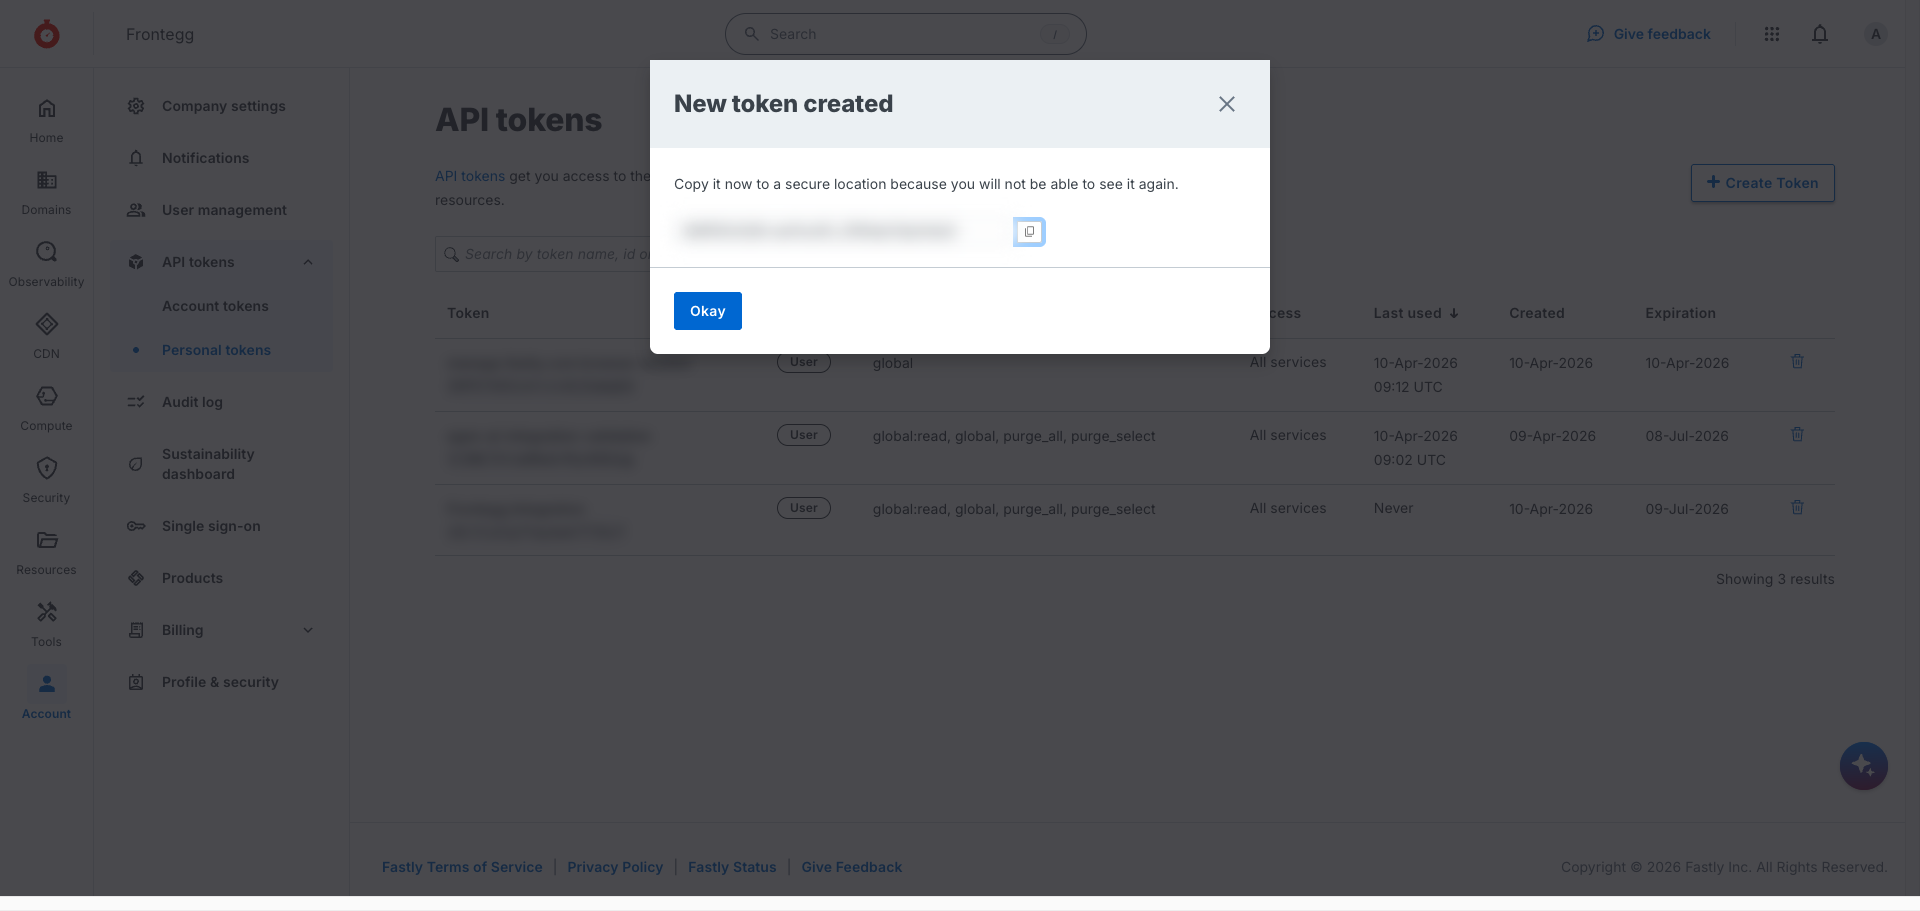
Click Create Token. Fastly displays the token value in a modal only once — copy it immediately and store it securely.
Save your token now
Save your token now
The raw token value is shown only once. If you close the dialog without copying it, you will have to delete the token and create a new one.
Once you have your Fastly API token from the steps above, enter it in the integration configuration page of the Frontegg portal:
- Open the Frontegg portal and navigate to your environment's Integrations section.
- Find Fastly and open its configuration page.
- Enter the API token in the corresponding field.
- Select the required scopes for your integration.
- Click Save.
Keep your token secure
Keep your token secure
Never share or commit your Fastly API token to version control. Tokens inherit the permissions of the user who created them and cannot be programmatically refreshed.