Snowflake is a cloud data platform for data warehousing, data lakes, and data sharing. Integrating Snowflake with Frontegg allows your application to execute SQL queries and access data warehouses on behalf of your users using OAuth 2.0.
Prerequisites
Prerequisites
- A Snowflake account with the ACCOUNTADMIN role (required to create security integrations)
Snowflake OAuth integrations are configured using SQL commands in Snowsight. There is no separate developer portal — you create and manage OAuth clients directly within your Snowflake account.
Navigate to app.snowflake.com and sign in to your Snowflake account.
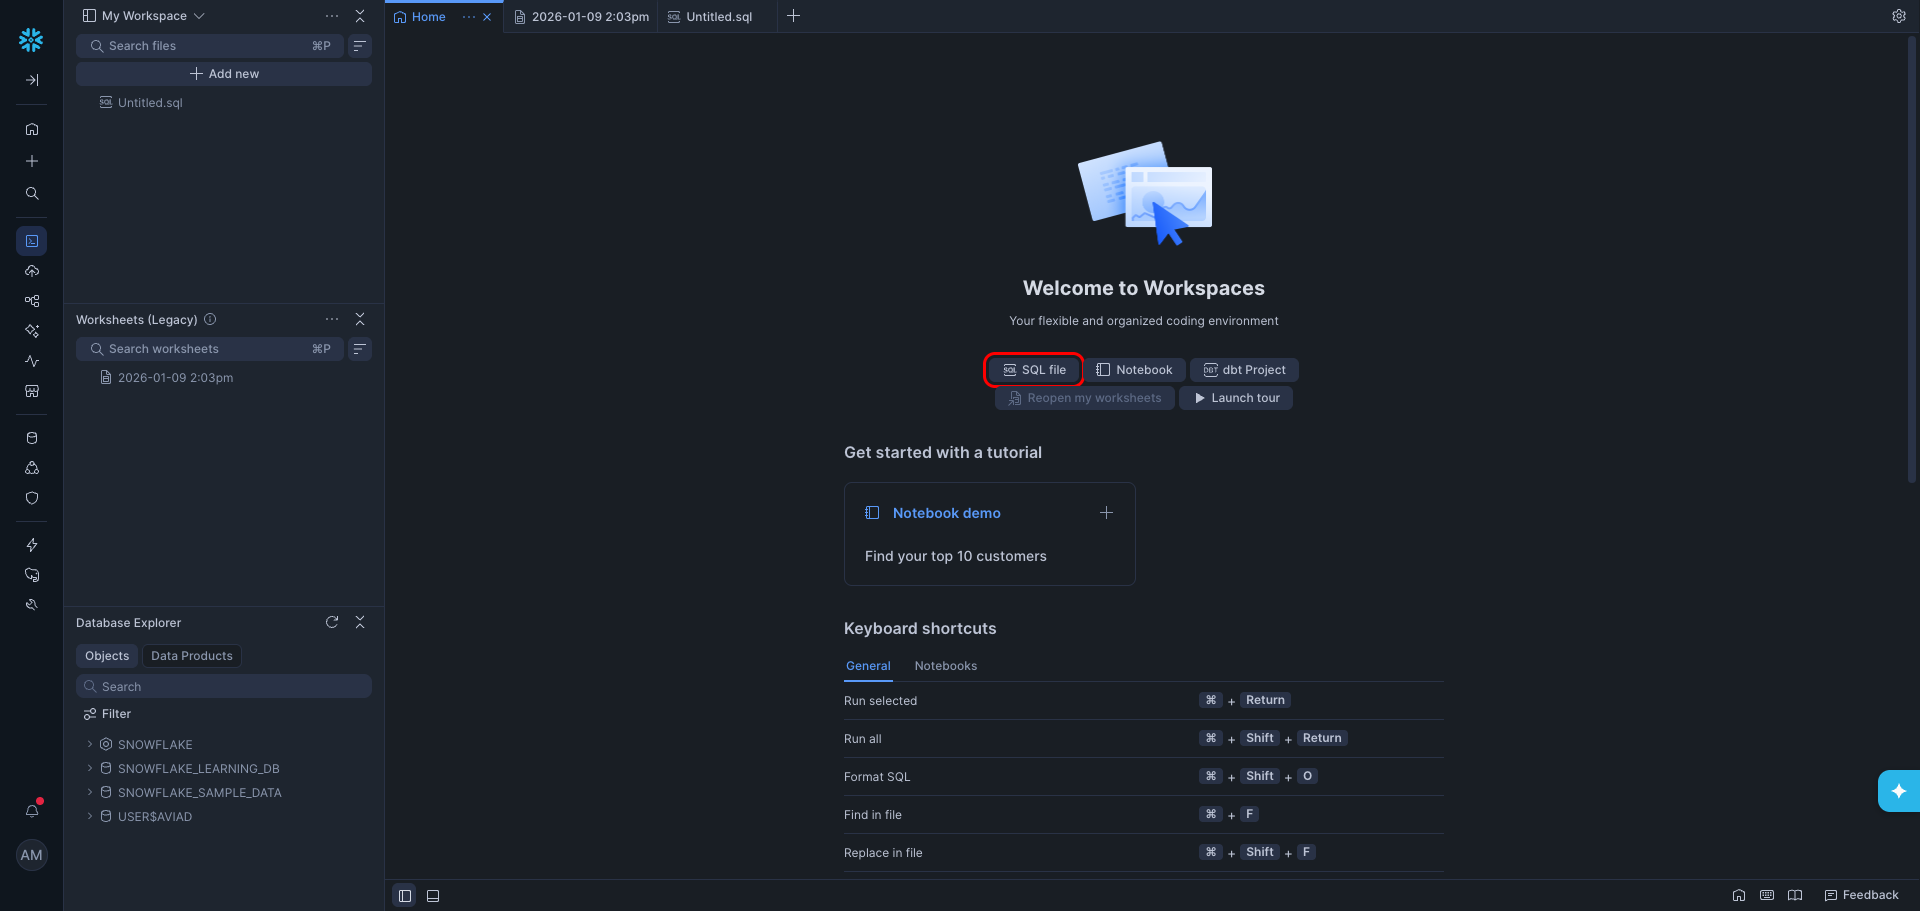
In the left navigation, click Projects. On the Welcome to Workspaces page, click SQL file to create a new SQL worksheet.
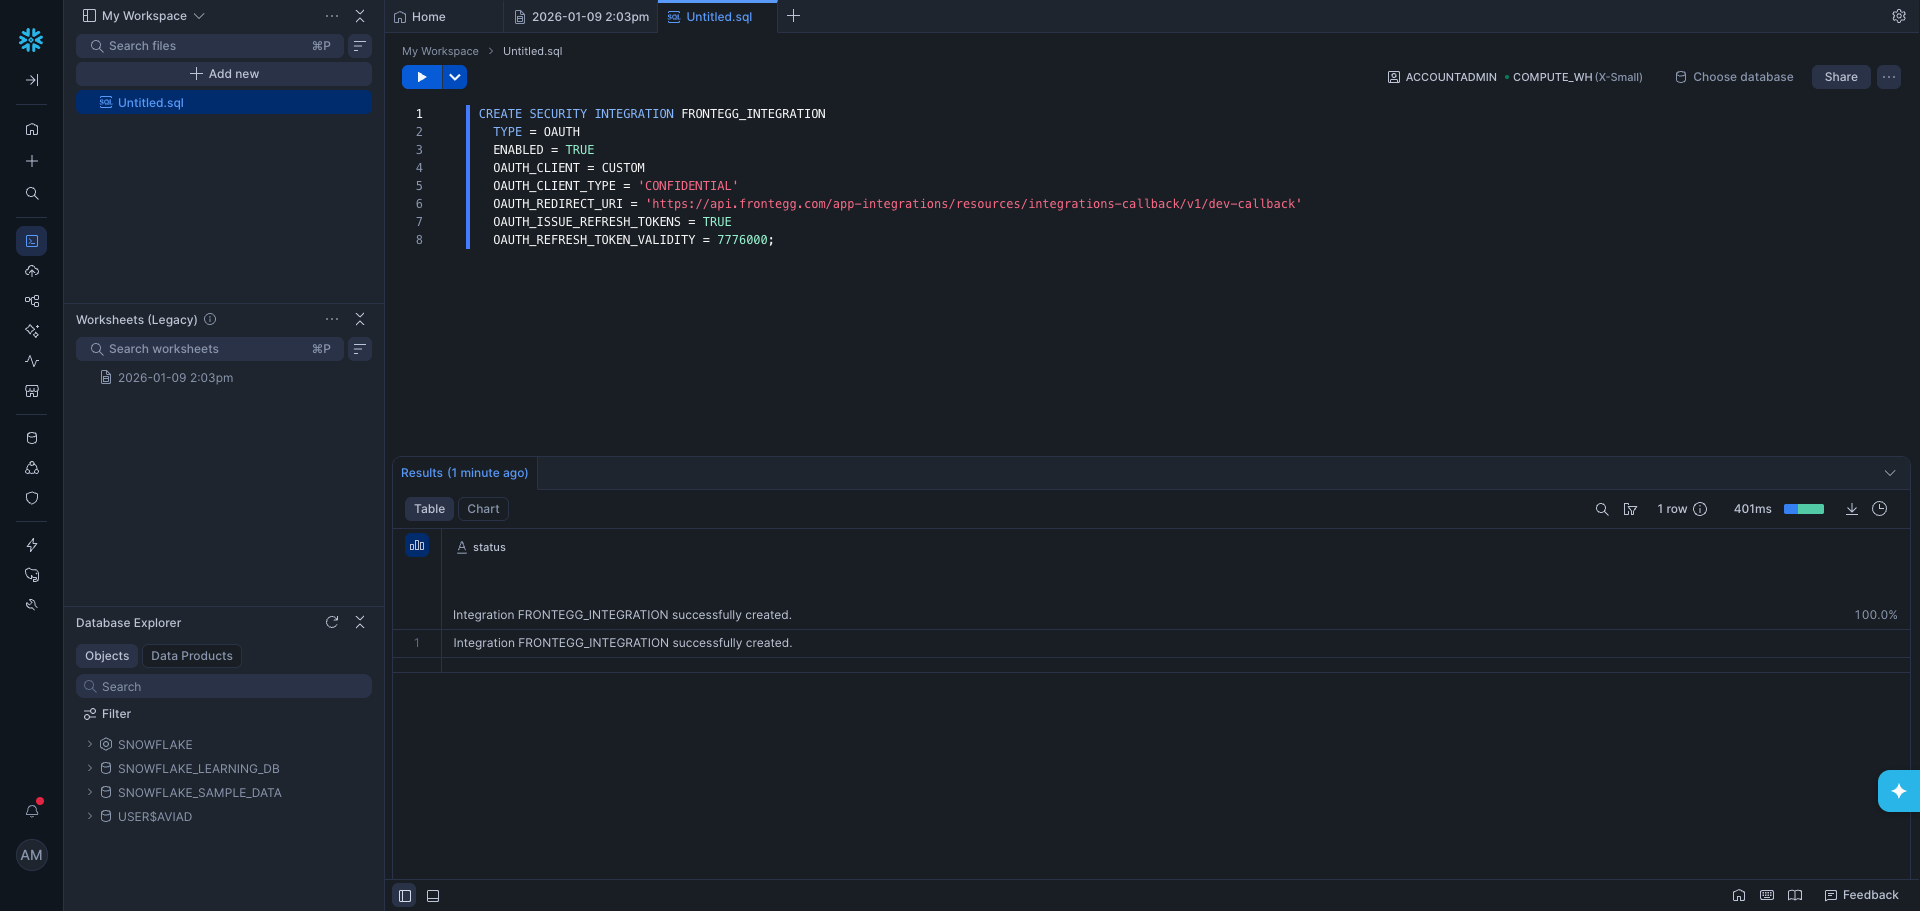
In the SQL worksheet, enter the following command. Replace FRONTEGG_INTEGRATION with your preferred integration name:
CREATE SECURITY INTEGRATION FRONTEGG_INTEGRATION
  TYPE = OAUTH
  ENABLED = TRUE
  OAUTH_CLIENT = CUSTOM
  OAUTH_CLIENT_TYPE = 'CONFIDENTIAL'
  OAUTH_REDIRECT_URI = 'https://YOUR_MCP_GATEWAY_URL/integration-callback'
  OAUTH_ISSUE_REFRESH_TOKENS = TRUE
  OAUTH_REFRESH_TOKEN_VALIDITY = 7776000;
Click Run selected to execute the command.

After running the command, the results panel shows a confirmation message.
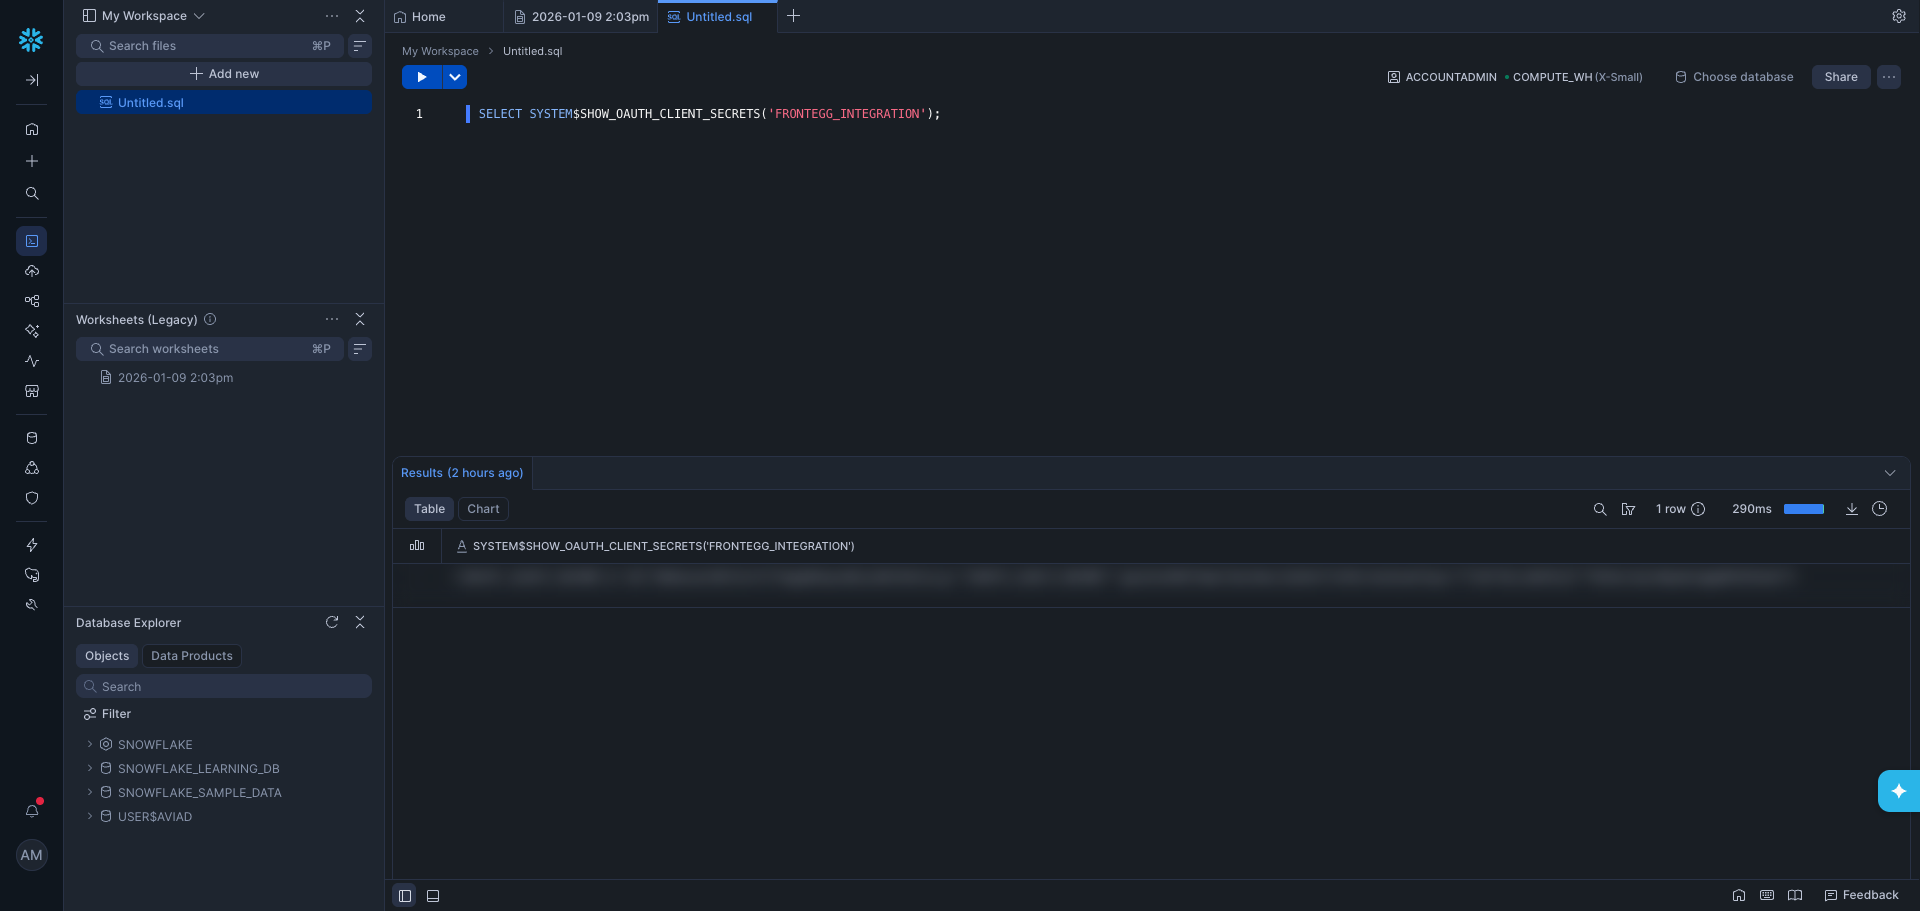
Run the following query to retrieve your OAuth client credentials:
SELECT SYSTEM$SHOW_OAUTH_CLIENT_SECRETS('FRONTEGG_INTEGRATION');The result is a JSON object containing:
| Field | Description |
|---|---|
OAUTH_CLIENT_ID | Your Client ID |
OAUTH_CLIENT_SECRET | Your primary Client Secret |
OAUTH_CLIENT_SECRET_2 | A secondary Client Secret (backup) |
Copy your Client Secret now
Copy your Client Secret now
Copy your Client Secret and store it in a secure location. If you lose it, you must delete the integration and create a new one.
Once you have obtained your credentials, configure the integration in the Frontegg portal:
- Open the Frontegg portal and navigate to [ENVIRONMENT] → Integrations → Snowflake.
- Fill in the four fields described below.
- Click Save.
The subdomain of your Snowflake URL. For example, if your URL is https://xy12345.snowflakecomputing.com, your account identifier is xy12345.
Optional. The Snowflake role activated for the OAuth session.
- Default behavior. When this field is empty, the integration runs under the
PUBLICrole — the role auto-granted to every Snowflake user, with minimal privileges. Existing installations that do not set the field continue to behave as before. - When to set it. Provide a role name to operate under a specific role (for example, a custom data-access role like
DATA_ANALYST). - Must already be granted to the OAuth user. The role must be granted to the Snowflake user who completes the OAuth flow. If it is not granted, OAuth fails.
- Case-sensitive. The value must match the output of
SHOW ROLESexactly. - Pick a non-admin role.
ACCOUNTADMIN,SECURITYADMIN,ORGADMIN, andGLOBALORGADMINare in Snowflake's defaultBLOCKED_ROLES_LISTfor OAuth. Setting any of them causes OAuth to silently fail — the user is bounced back to the login screen with no error message. Use a custom role or another non-blocked role instead. - Changing this field after install. Requires re-authorization. The existing refresh token is bound to the previous role's scope.
Paste the OAUTH_CLIENT_ID and OAUTH_CLIENT_SECRET values returned by the SYSTEM$SHOW_OAUTH_CLIENT_SECRETS query you ran earlier.
Once a role is bound to the OAuth session, Snowflake's standard RBAC applies to every query the integration runs:
- Reads of data tables outside the role's grants return
does not exist or not authorized. - Admin metadata schemas (such as
SNOWFLAKE.ACCOUNT_USAGE) are unreachable. SHOW DATABASES,SHOW WAREHOUSES,SHOW USERS, and similar listings are role-filtered — visibility narrows to what the role can see.- Universal metadata views (
INFORMATION_SCHEMA) andPUBLIC-inherited objects remain visible. This is by Snowflake design, not a leak.
Keep your credentials secure
Keep your credentials secure
Never share or commit your Client Secret to version control.