Airtable is a cloud-based platform that combines the simplicity of a spreadsheet with the power of a database. Integrating Airtable with Frontegg allows your application to access and manage bases, tables, records, and fields on behalf of your users through OAuth 2.0 authentication.
Prerequisites
Prerequisites
- An Airtable account (free or paid plan)
- Access to the Airtable Builder Hub
Log in to your Airtable account. Click your profile icon in the top-right corner and select Builder Hub. In the left sidebar, under Integrations, click OAuth integrations.
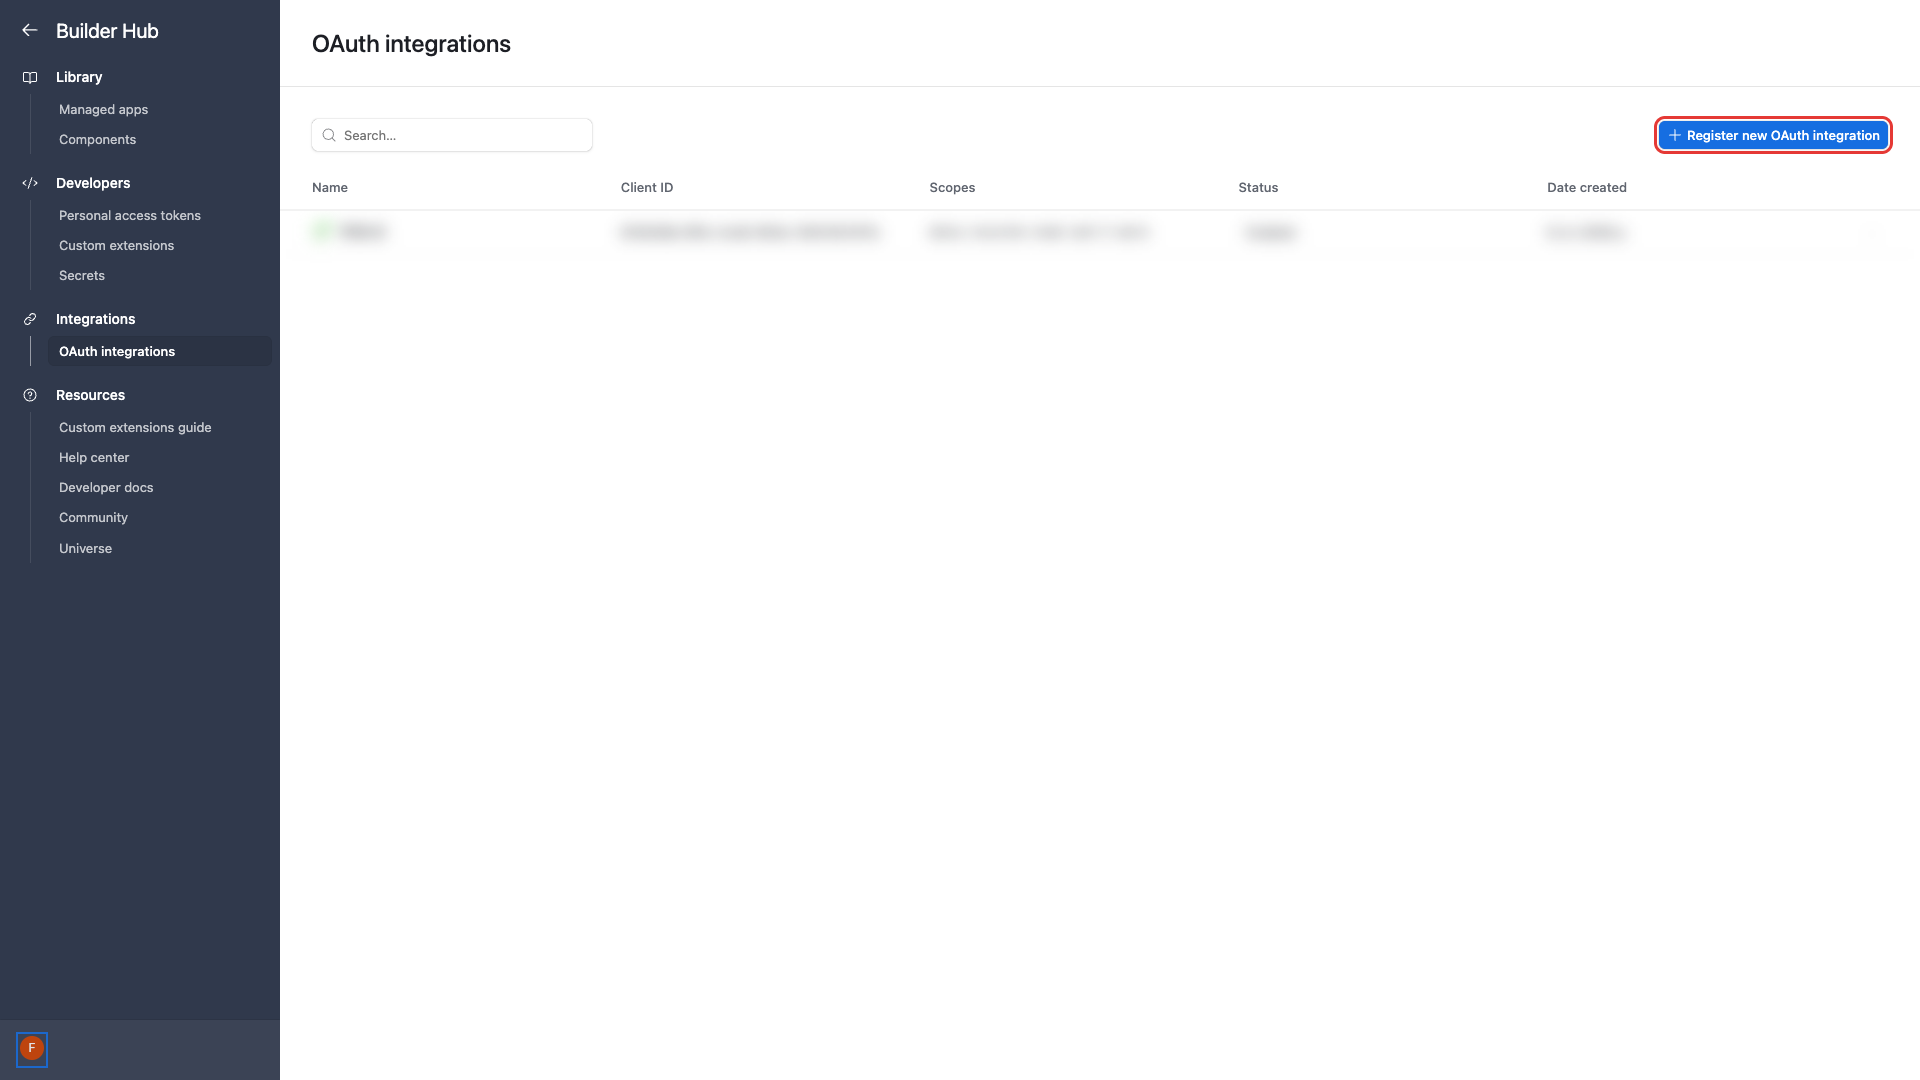
On the OAuth integrations page, click the Register new OAuth integration button.
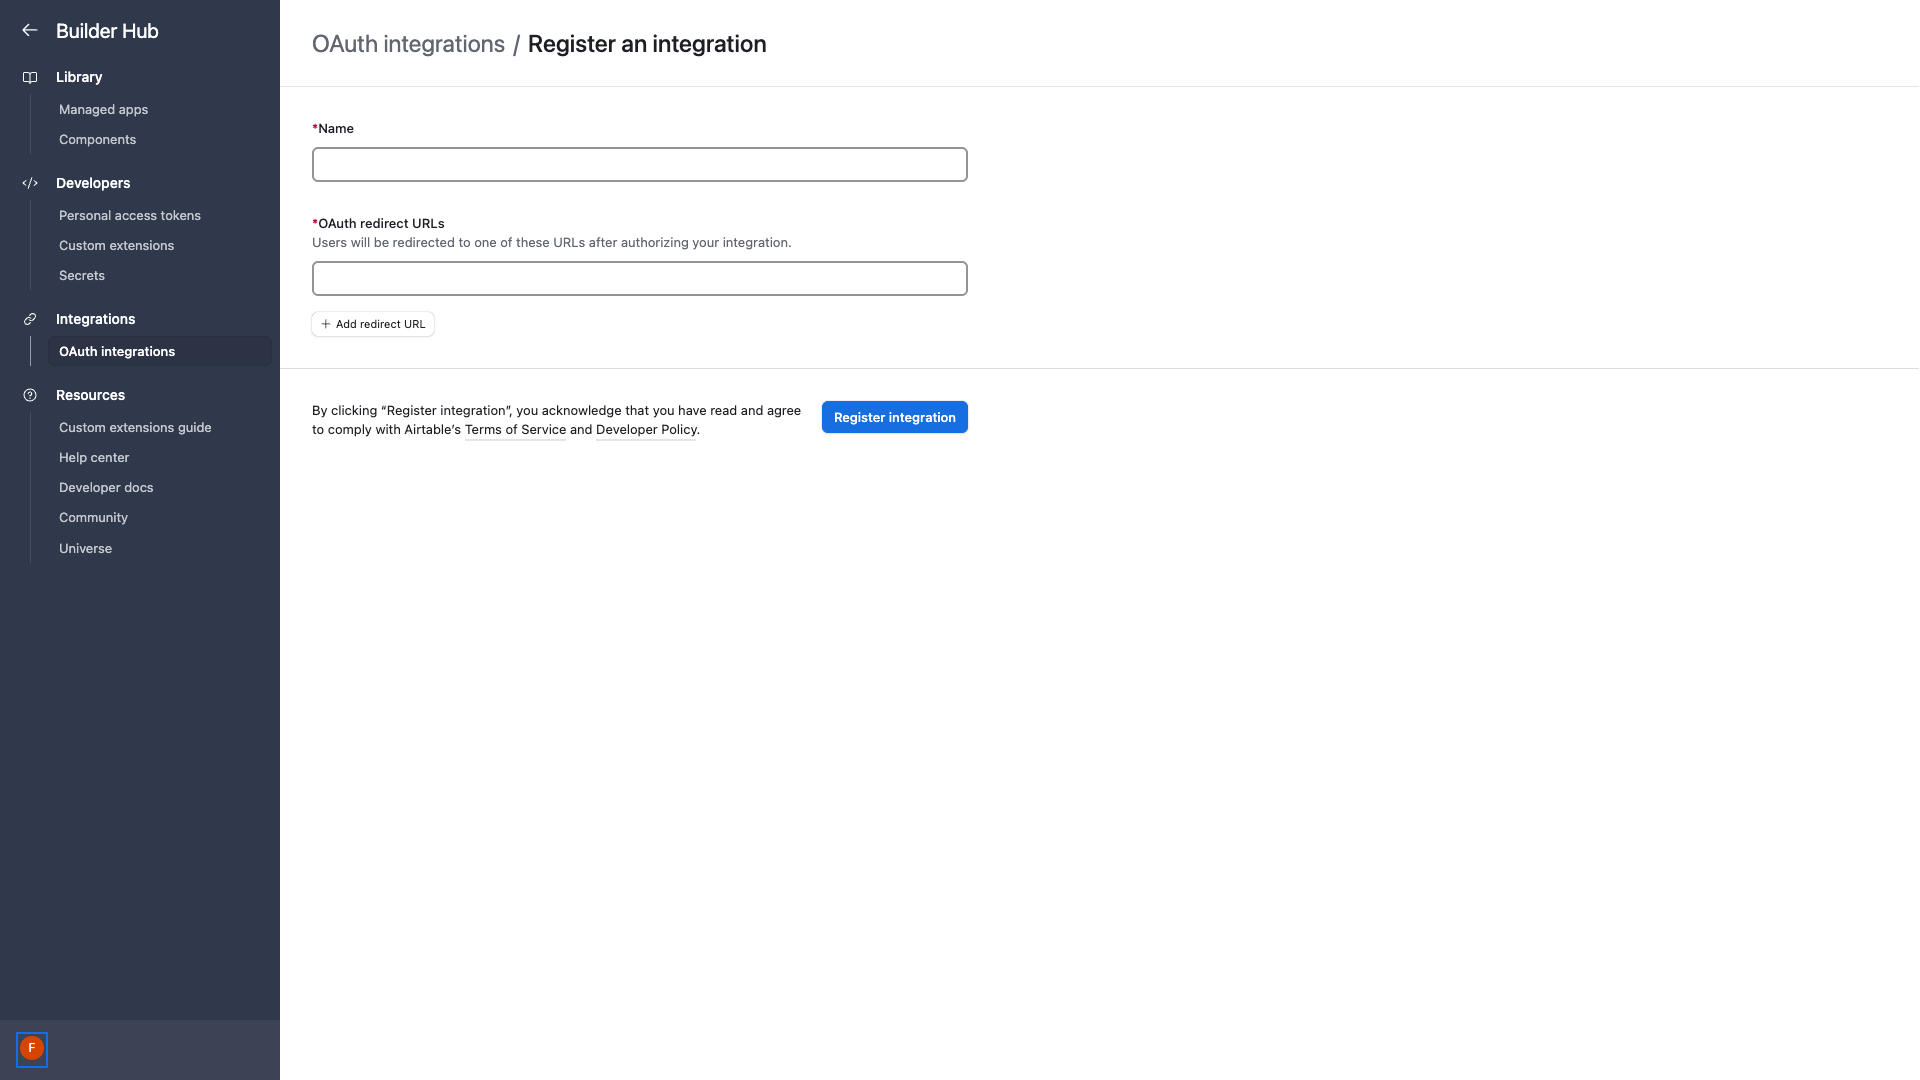
In the registration form, fill in the following fields:
- Name -- Enter a descriptive name (e.g., "Frontegg Integration")
- OAuth redirect URLs -- Enter the redirect URI listed below
Add the following redirect URI:
https://YOUR_MCP_GATEWAY_URL/integration-callback
Click Register integration to create the application.

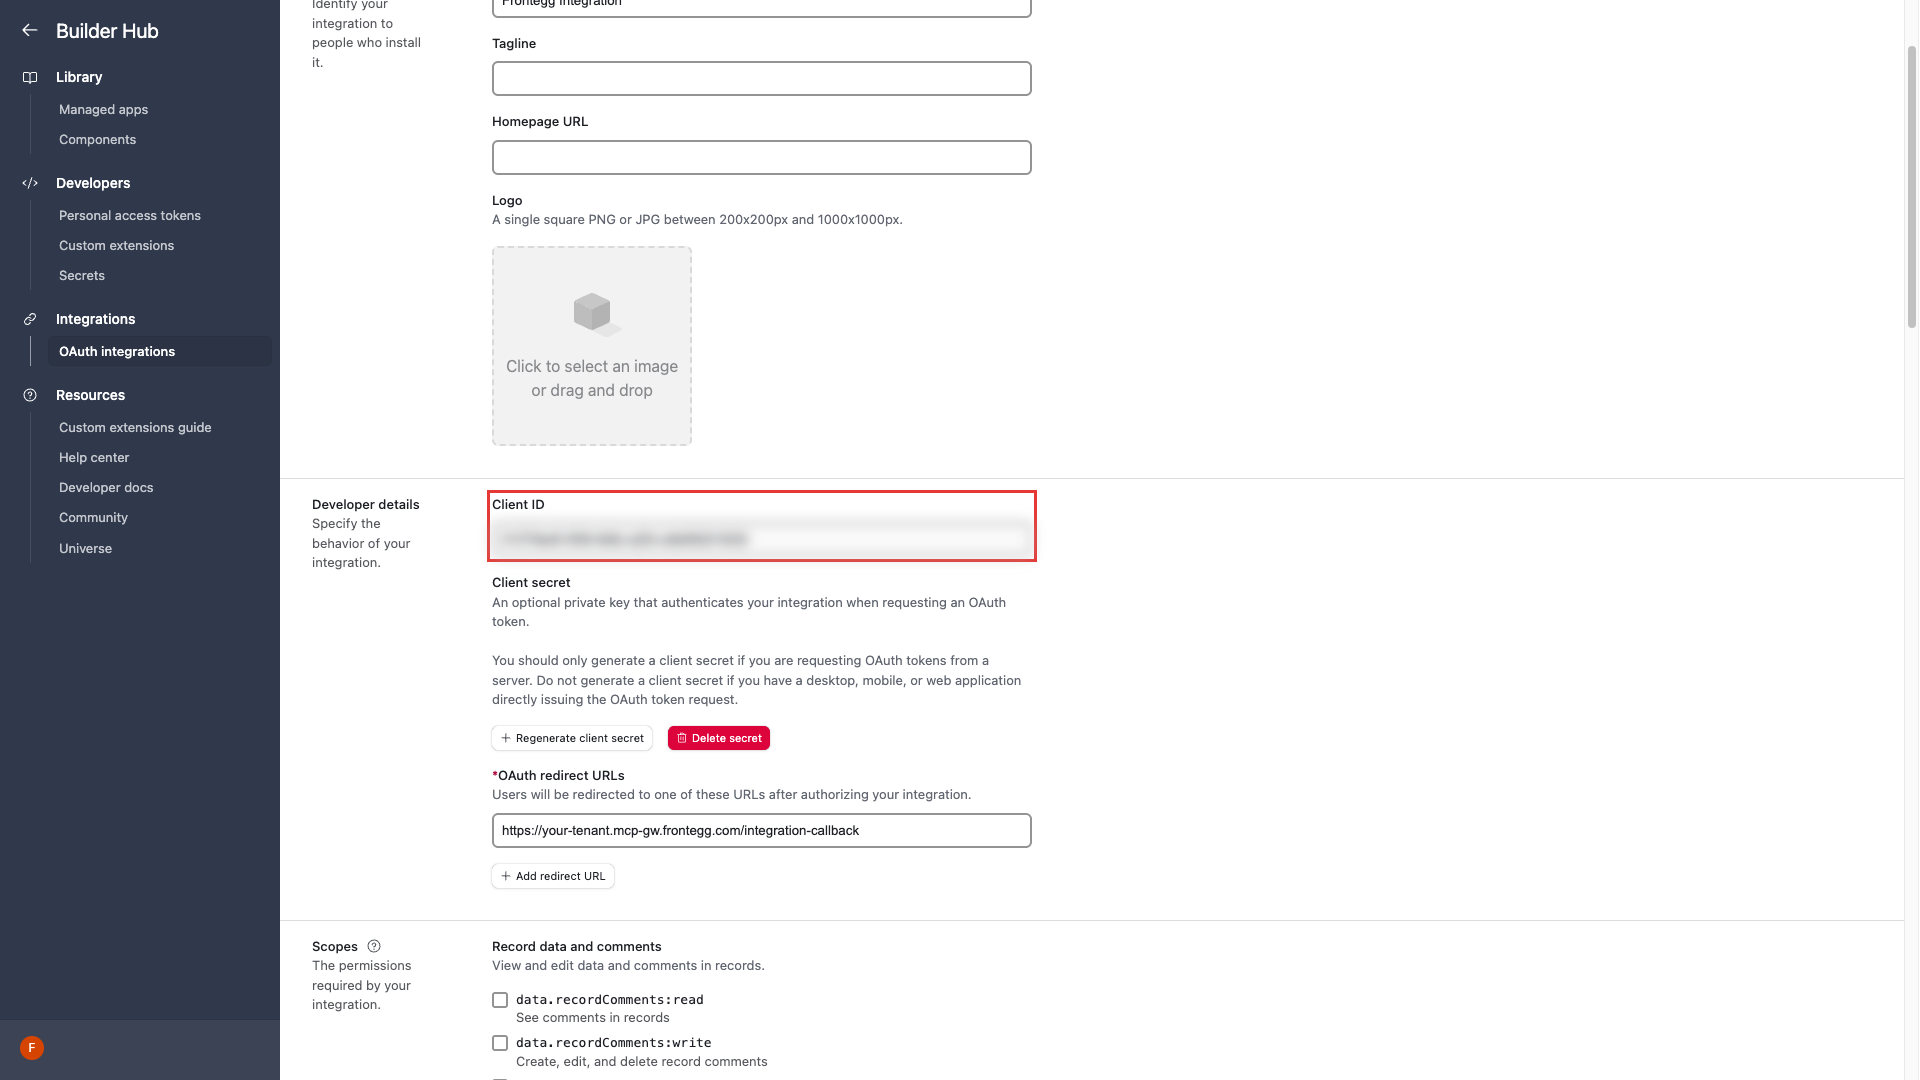
After registration, you are redirected to the application settings page. Here you can configure additional details such as a tagline, homepage URL, and logo.
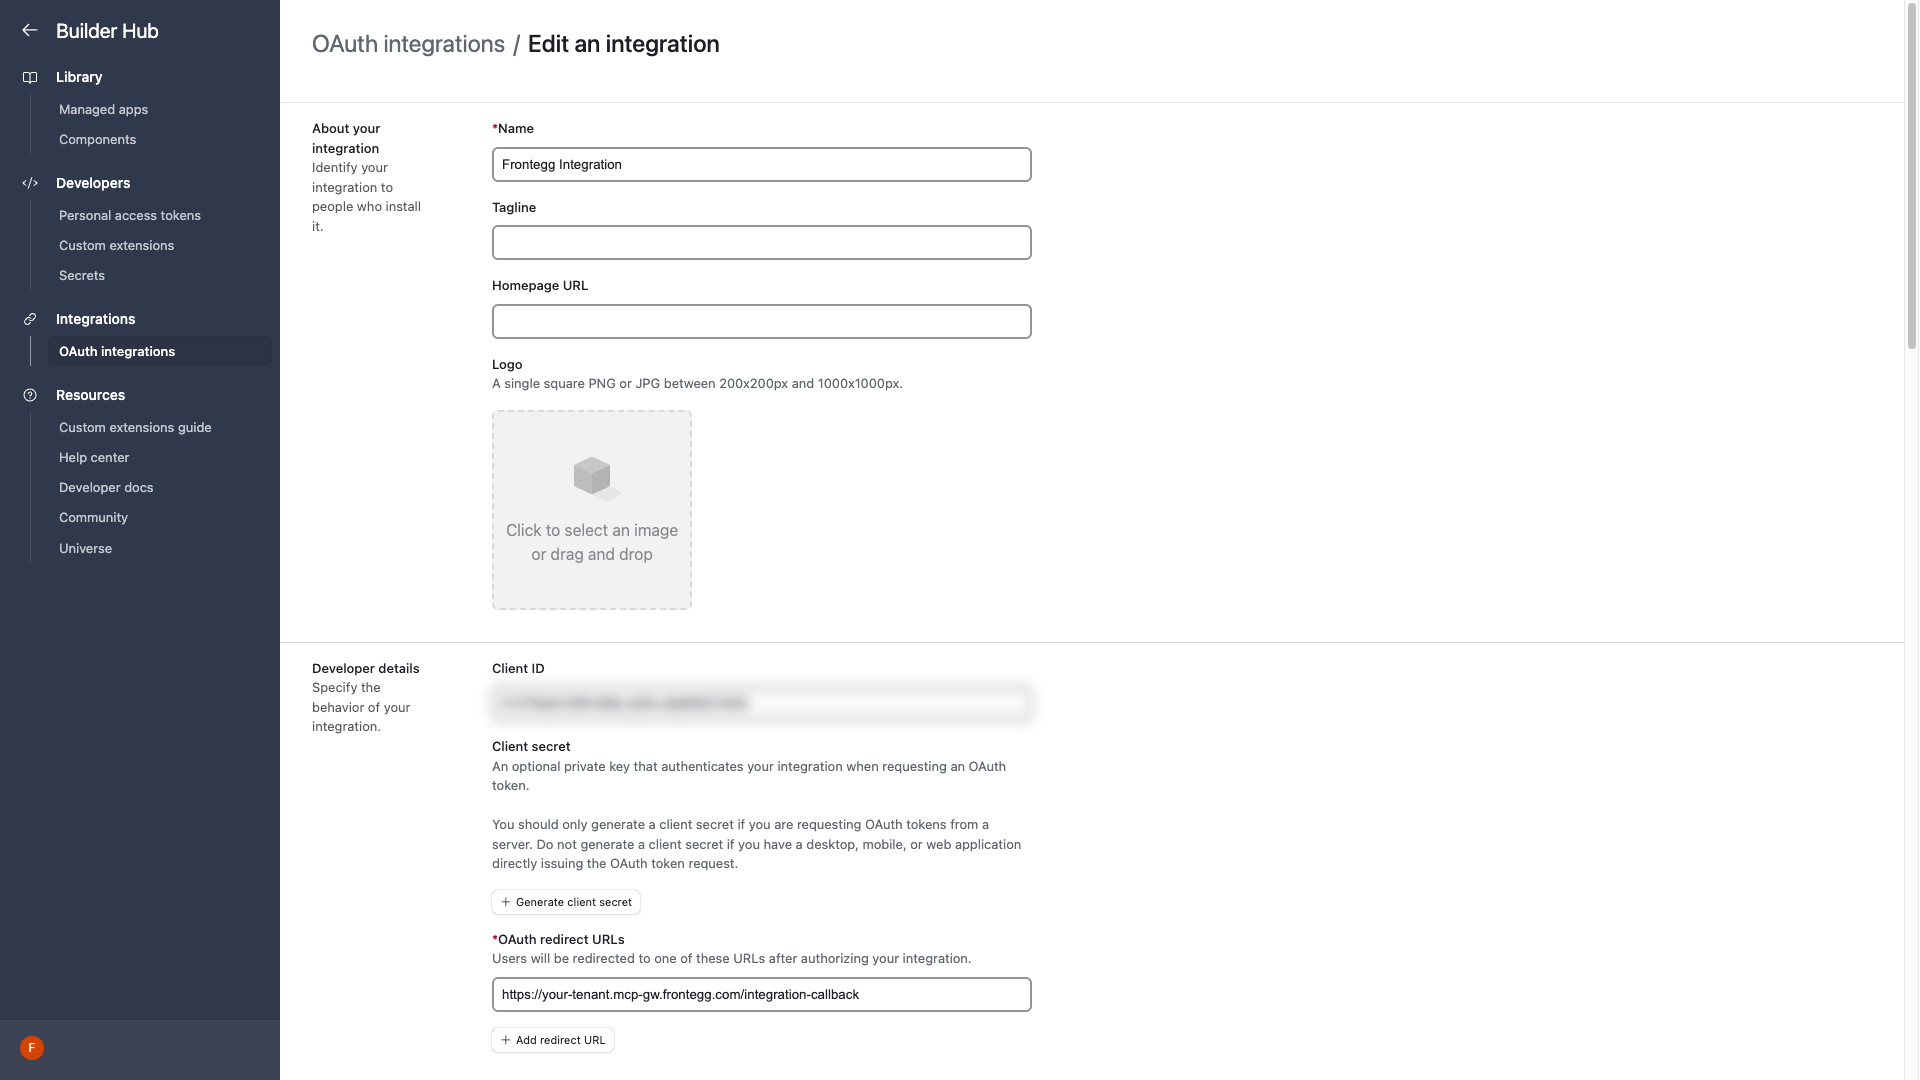
Scroll down to the Developer details section. You can see the Client ID value displayed in a read-only field.
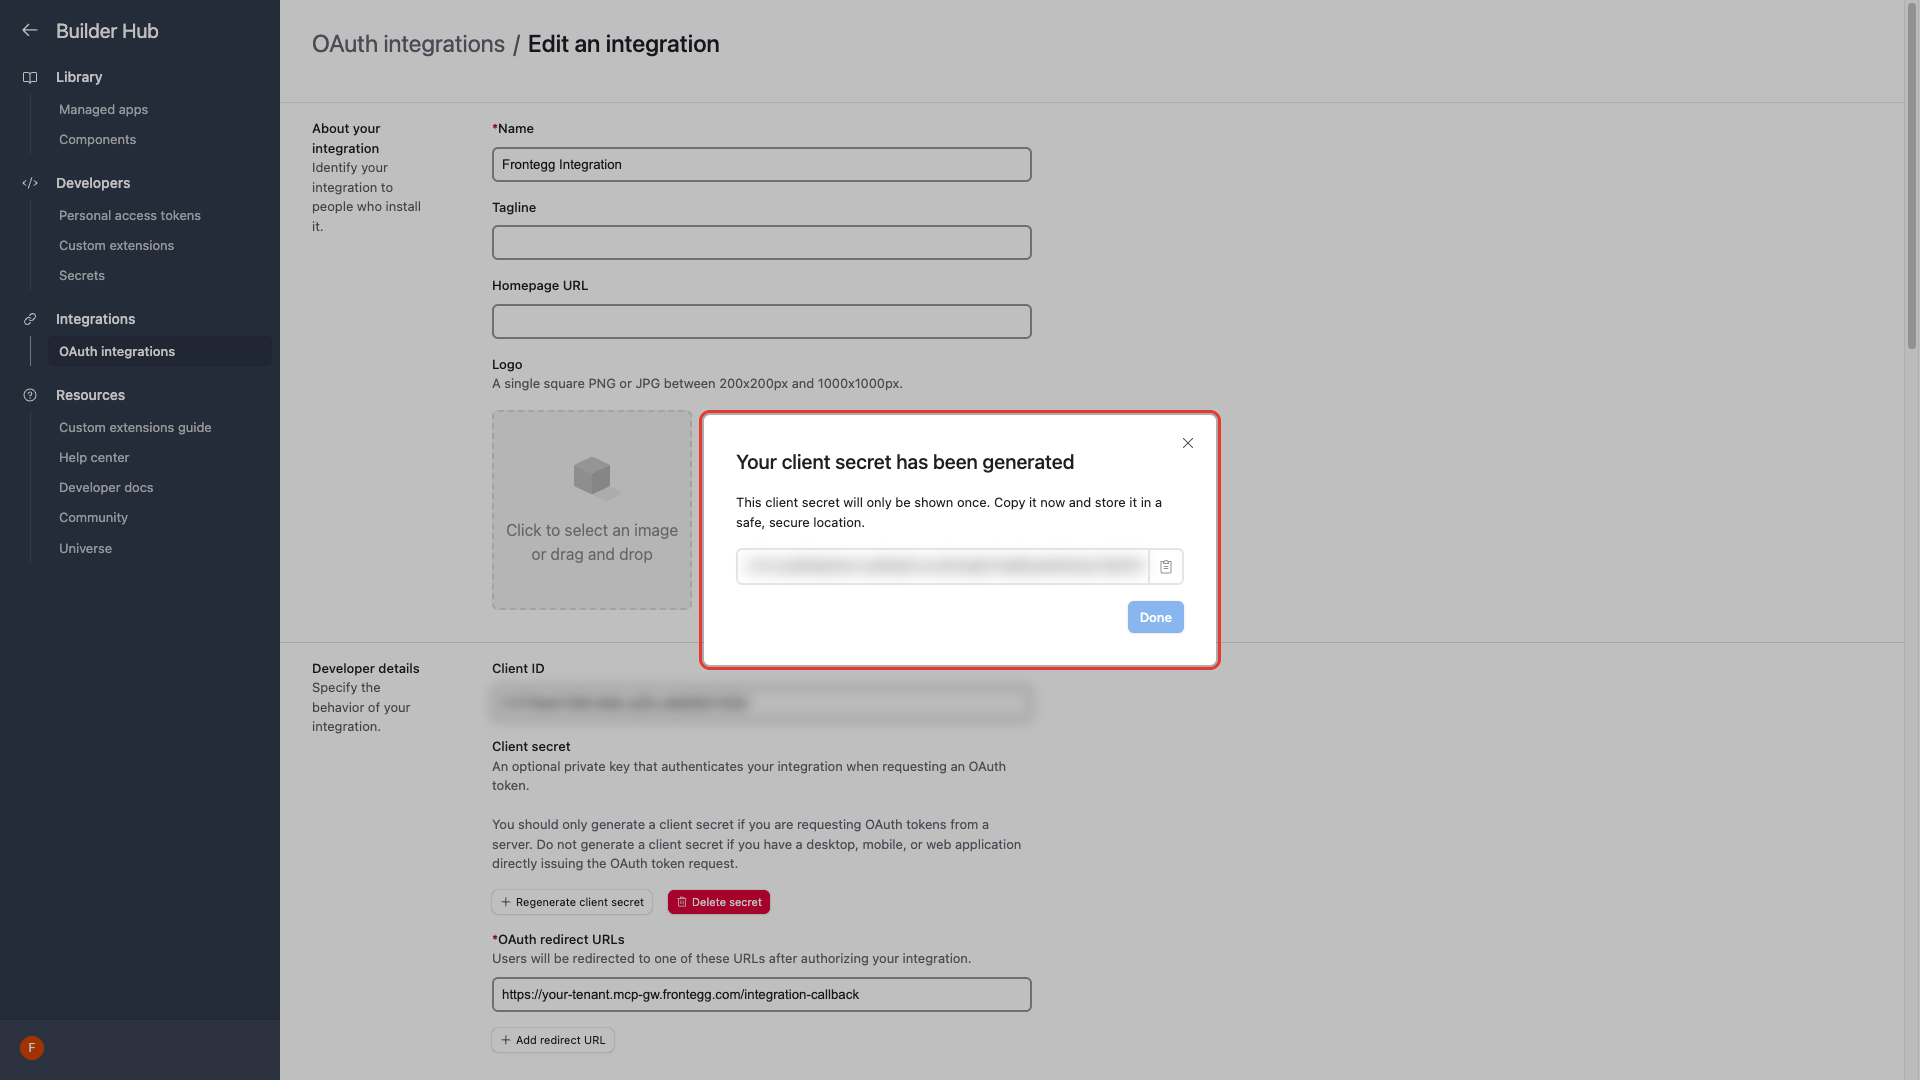
To generate a Client Secret, click the Generate client secret button. A confirmation dialog appears -- click Generate to proceed. Copy the secret immediately and store it in a safe location, as it will only be shown once.
Keep your credentials secure
Keep your credentials secure
Never share or commit your Client Secret to version control. The secret is only displayed once after generation.
In the Developer details section, copy the Client ID value. You will need both the Client ID and Client Secret to configure the integration in the Frontegg portal.
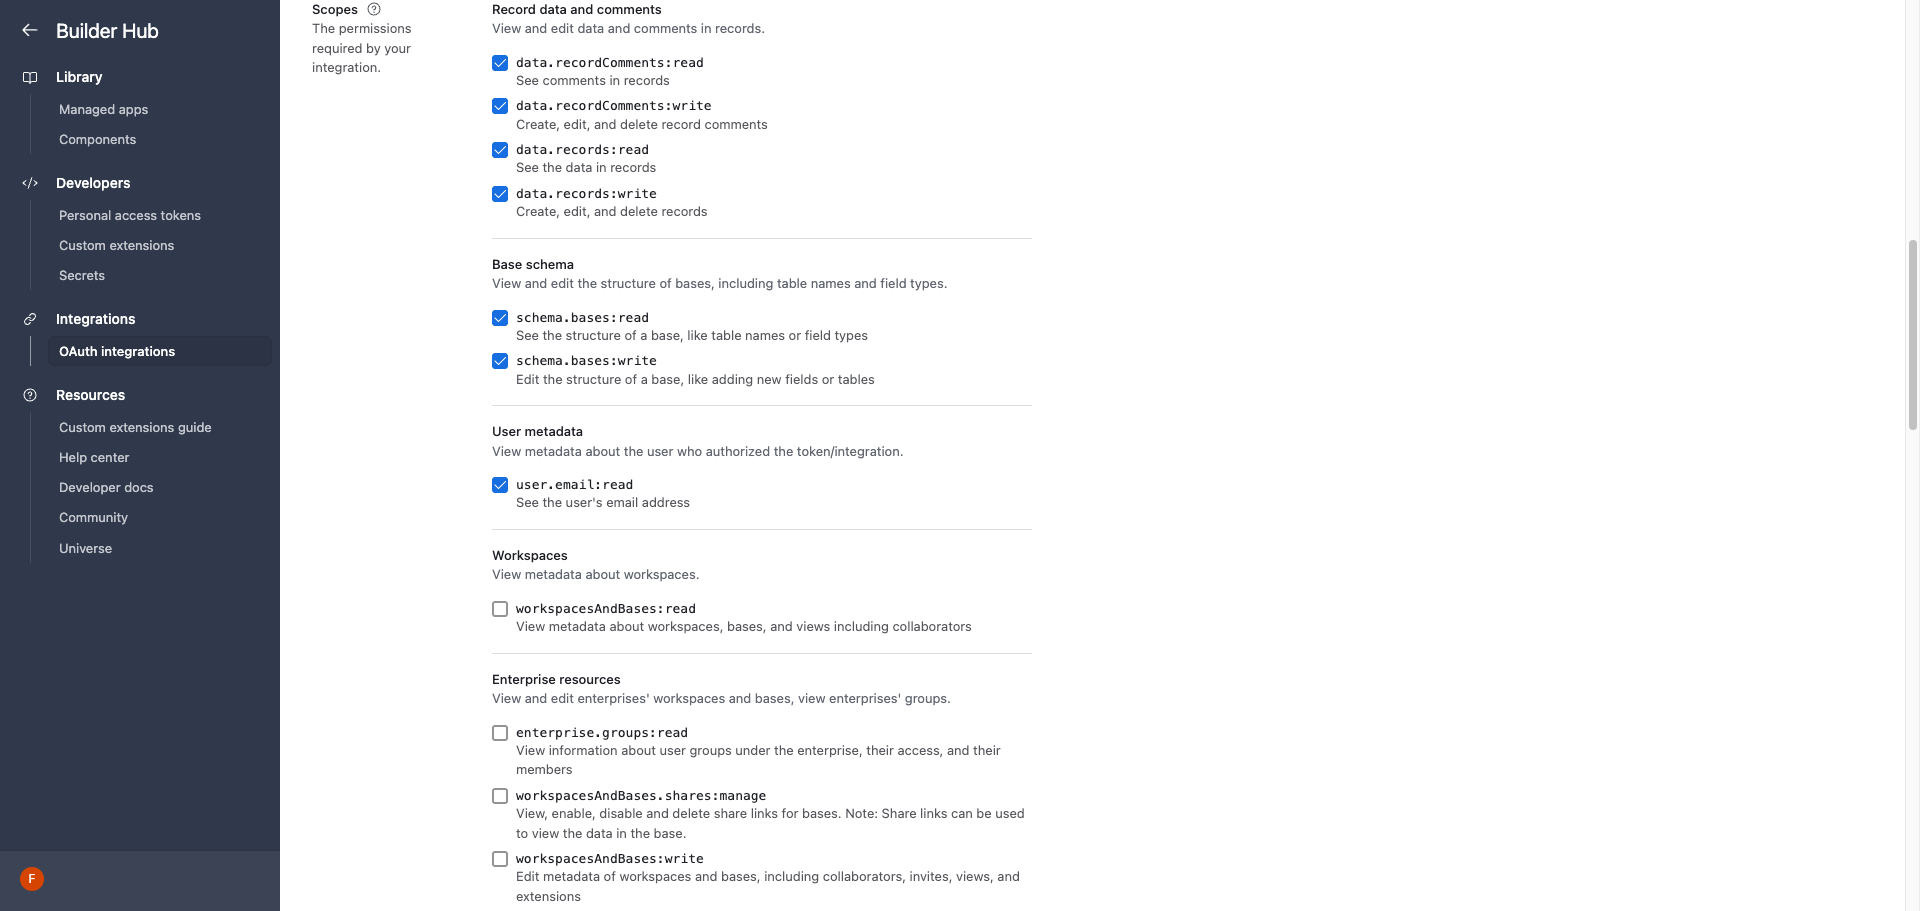
Scroll down to the Scopes section. Select the following scopes required for the integration:
| Scope | Description |
|---|---|
data.records:read | See the data in records |
data.records:write | Create, edit, and delete records |
data.recordComments:read | See comments in records |
data.recordComments:write | Create, edit, and delete record comments |
schema.bases:read | See the structure of a base, like table names or field types |
schema.bases:write | Edit the structure of a base, like adding new fields or tables |
user.email:read | See the user's email address |
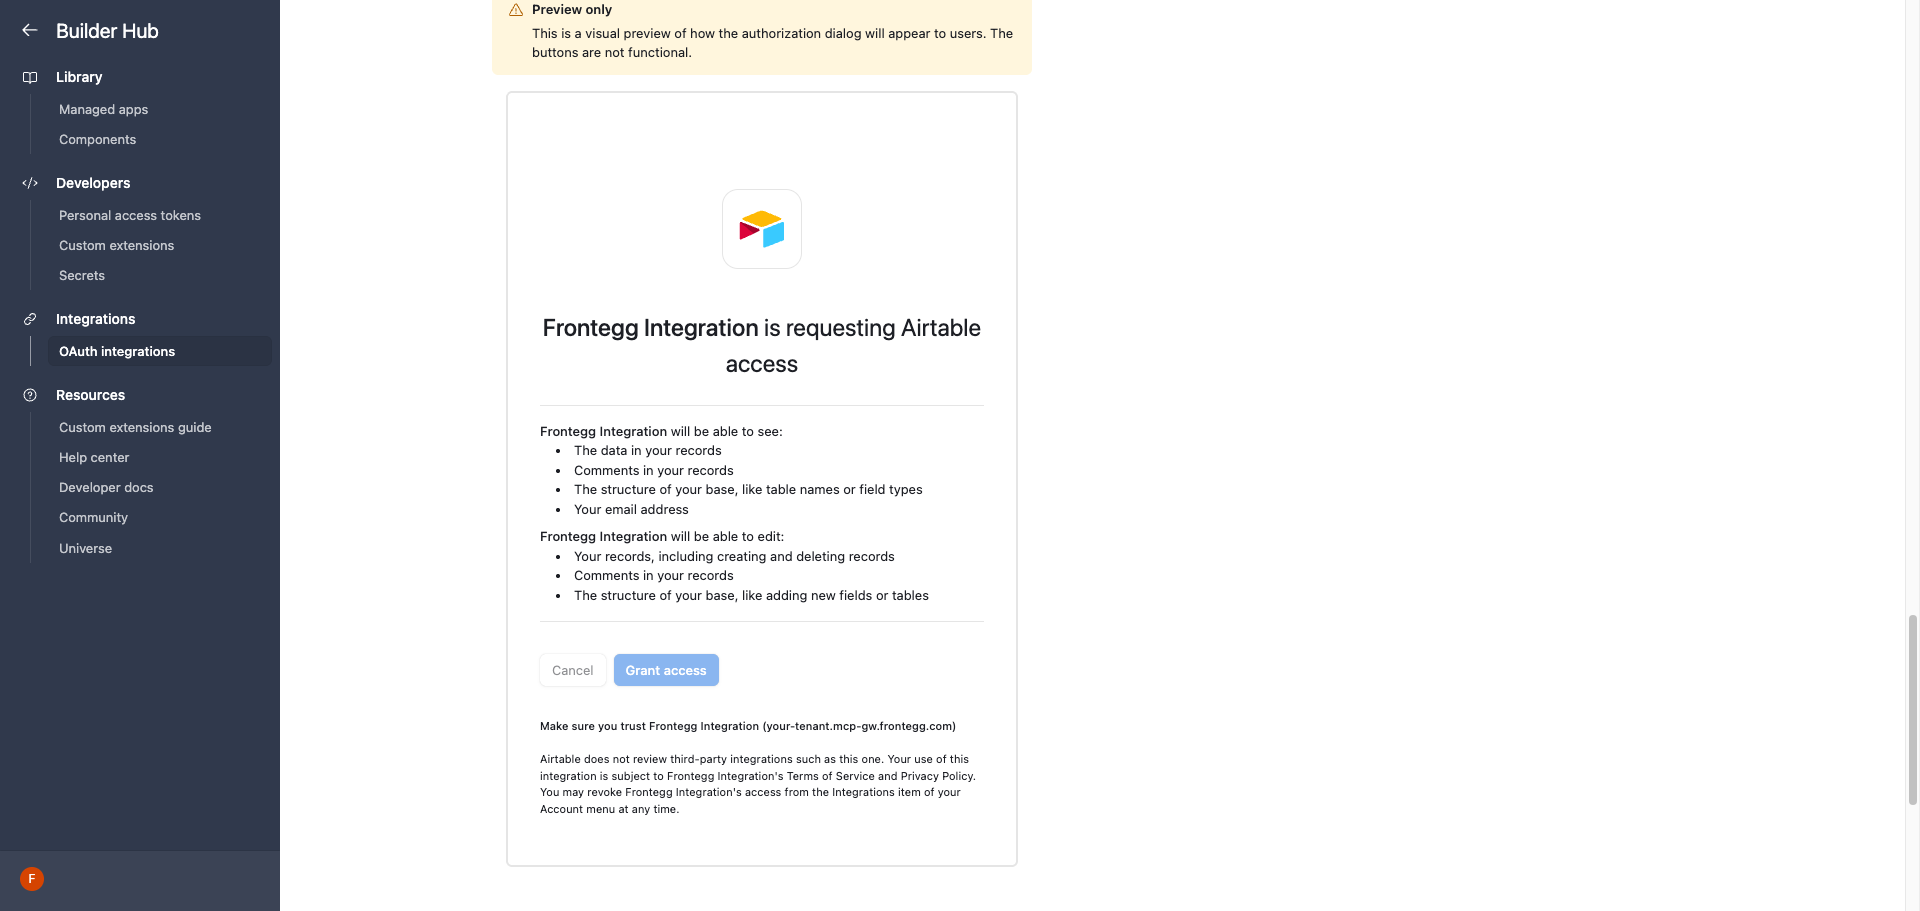
Scroll further down to the Preview only section. Airtable renders a visual preview of the consent screen users will see when they authorize your integration, listing the permissions derived from the scopes you selected. Use it to confirm the integration will request exactly the access you intended.
Scroll back up to the OAuth redirect URLs section and verify that your Frontegg Redirect URL is configured correctly:
https://YOUR_MCP_GATEWAY_URL/integration-callback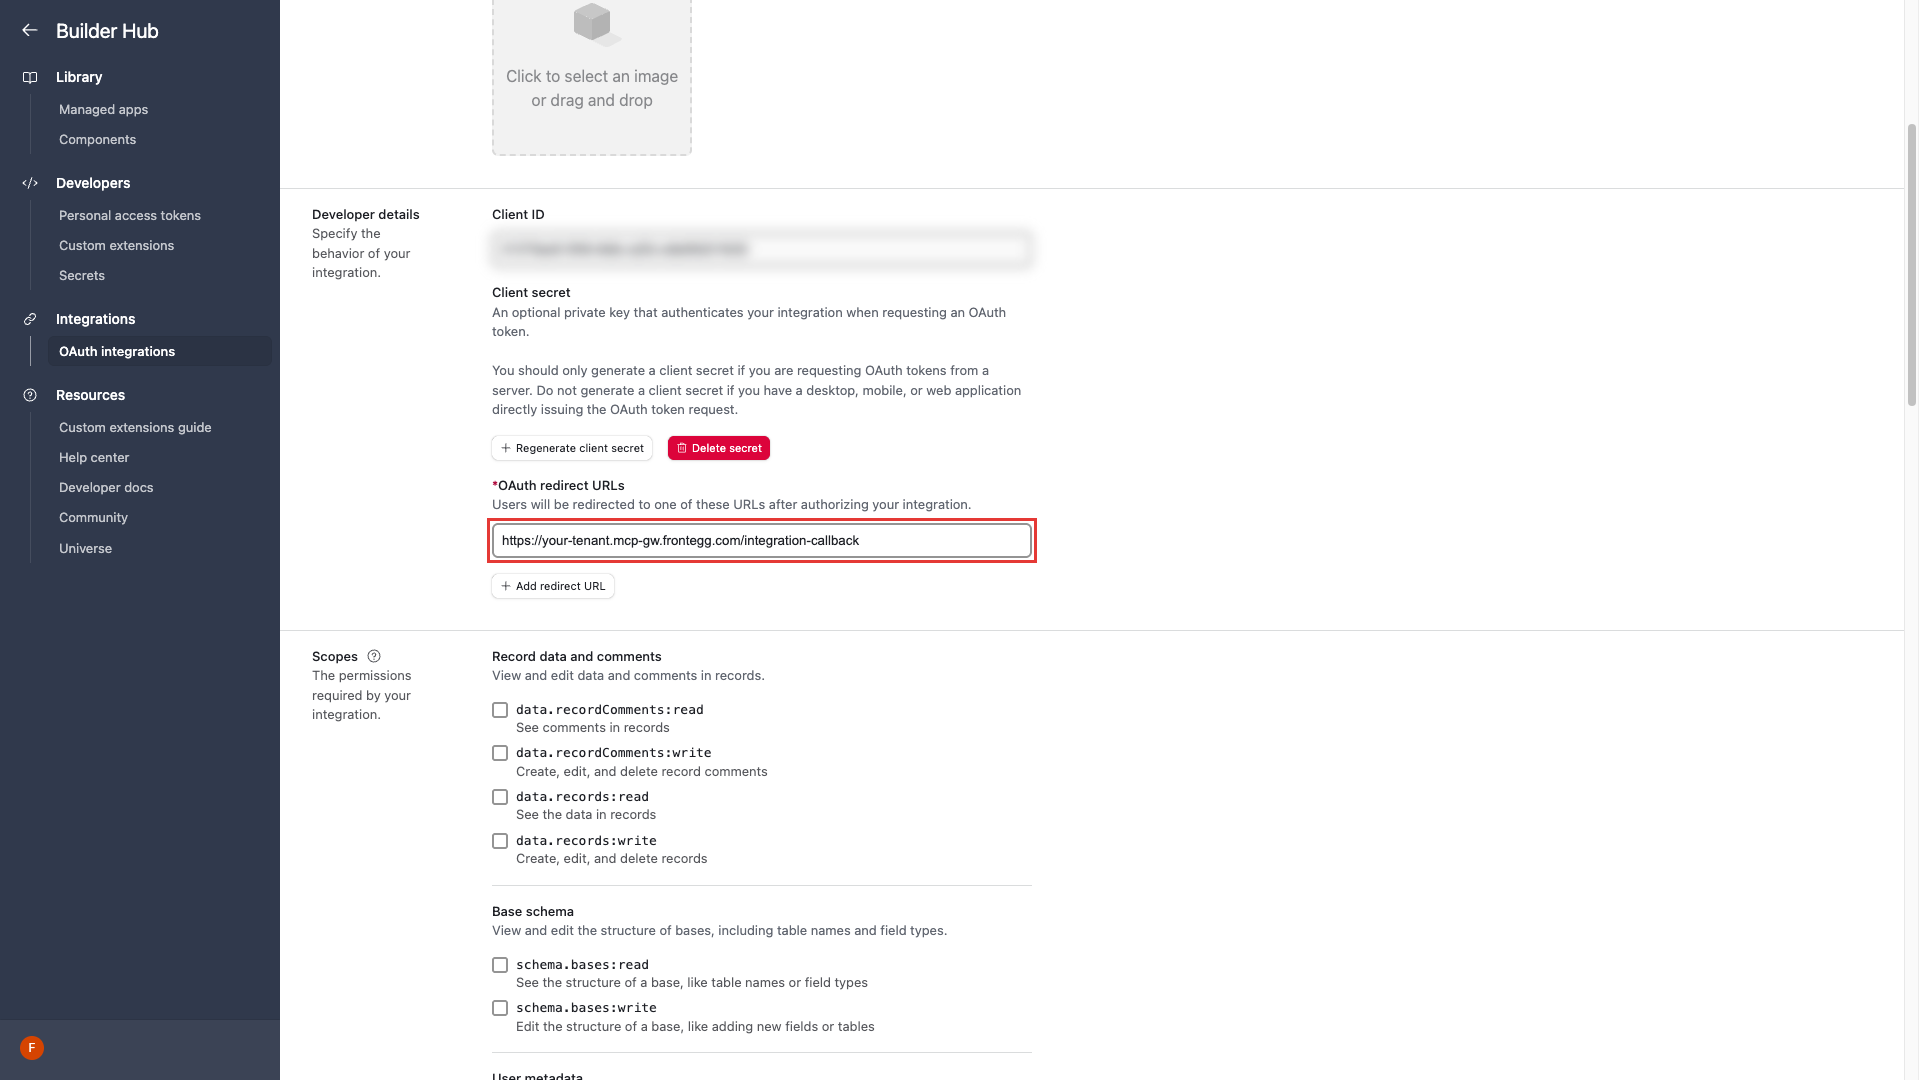
Click Save changes at the bottom of the page to persist your configuration.
Once you have obtained your Client ID and Client Secret from the steps above, enter them in the integration configuration page of the Frontegg portal:
- Open the Frontegg portal and navigate to [ENVIRONMENT] → Integrations → Airtable.
- Enter the Client ID and Client Secret in the corresponding fields.
- Select the required scopes.
- Click Save.