Elasticsearch is a distributed search and analytics engine. The Elasticsearch 8 integration with Frontegg allows your application to search, index, and manage documents, indices, clusters, nodes, snapshots, and security objects in an 8.x cluster on behalf of your users. The connector works with Elastic Cloud Hosted deployments as well as self-hosted Elasticsearch 8.x clusters.
Prerequisites
Prerequisites
- An Elasticsearch 8.x cluster — either an Elastic Cloud Hosted deployment or a self-managed installation reachable from Frontegg
- Administrative access to the cluster (Kibana Stack Management → Security) to create credentials
- The full cluster endpoint URL, including scheme and port (for example,
https://my-deployment.es.us-central1.gcp.cloud.es.io:443)
Two supported authentication methods
Two supported authentication methods
Elasticsearch 8.x supports both API Key and Basic authentication (a native realm username and password). The Frontegg connector accepts either credential in the API Key field. Follow Option A below for API keys (recommended) or Option B for Basic authentication.
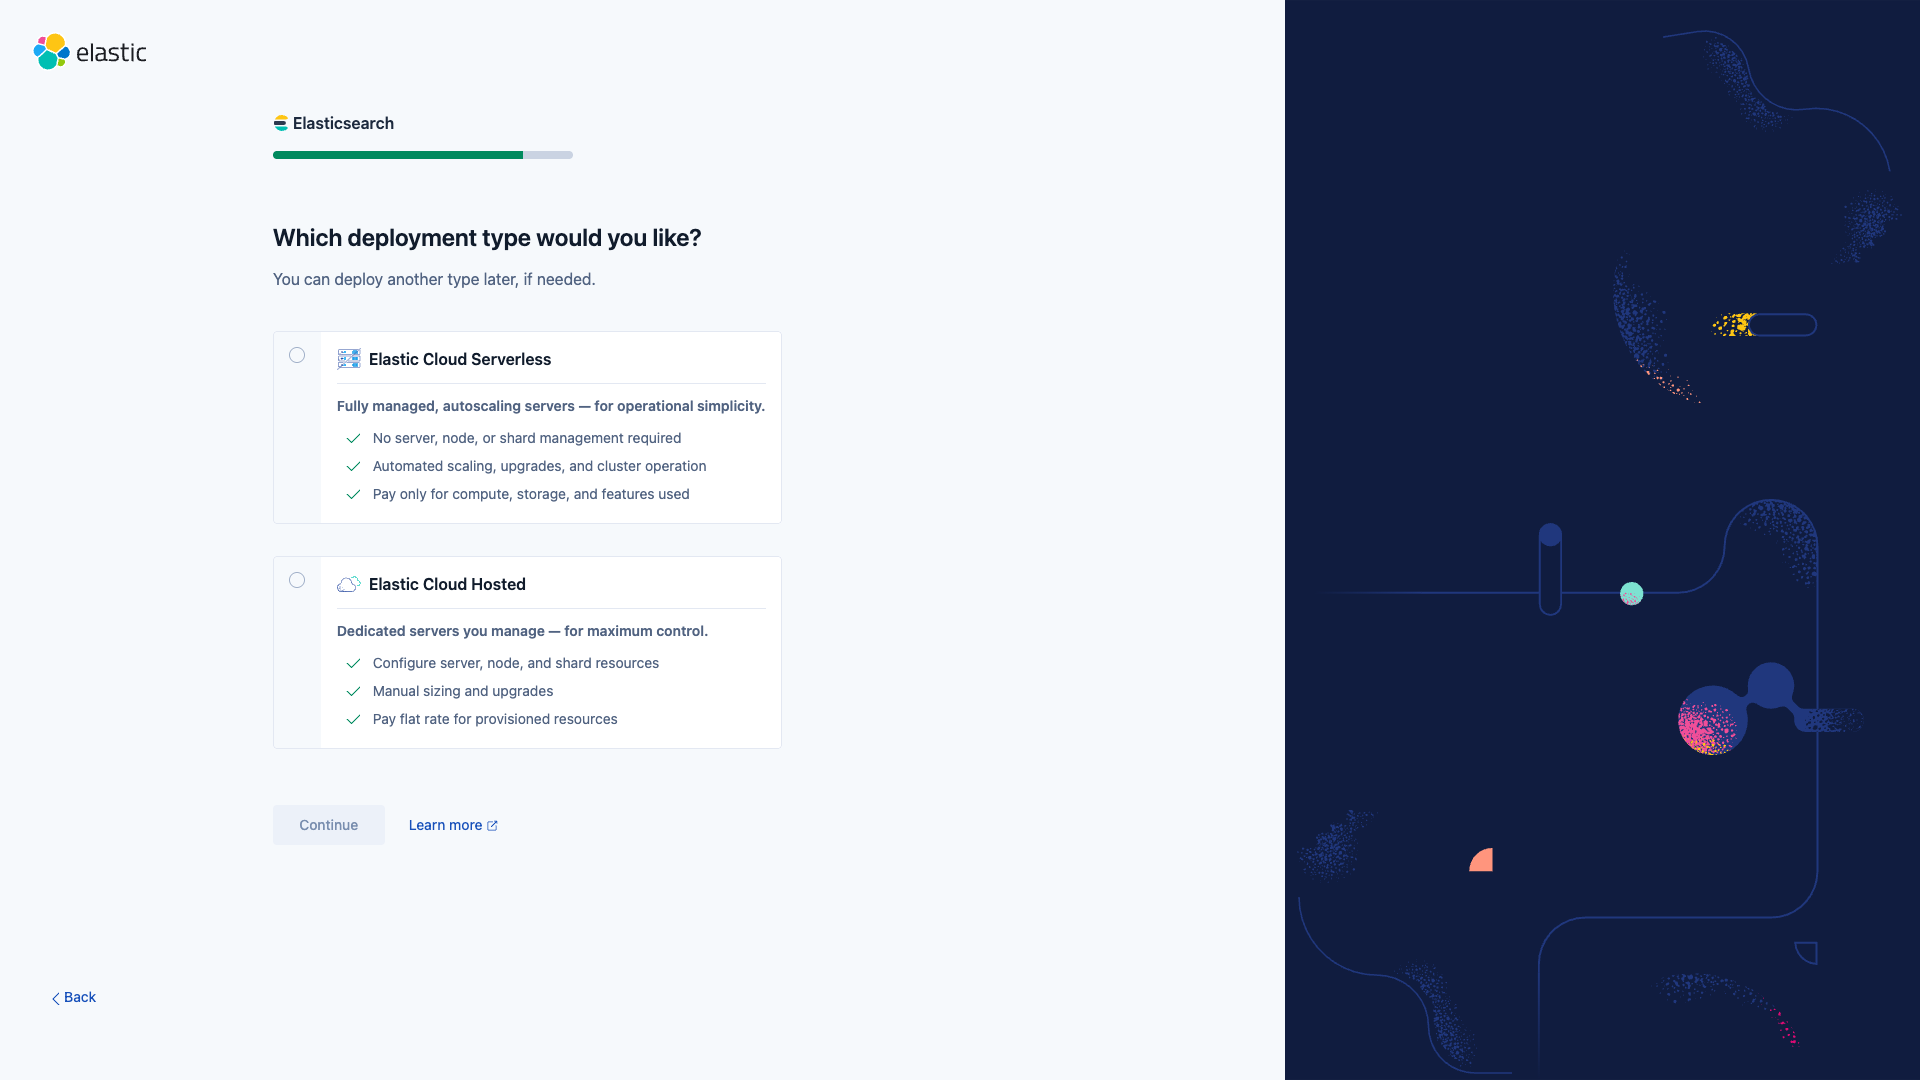
Go to cloud.elastic.co and sign in with your Elastic account, or open the Kibana console of your self-hosted cluster. If you do not have an Elastic Cloud account yet, click Sign up and complete the onboarding flow — the trial includes one free hosted deployment.
When the onboarding wizard asks for a deployment type, choose Elastic Cloud Hosted.
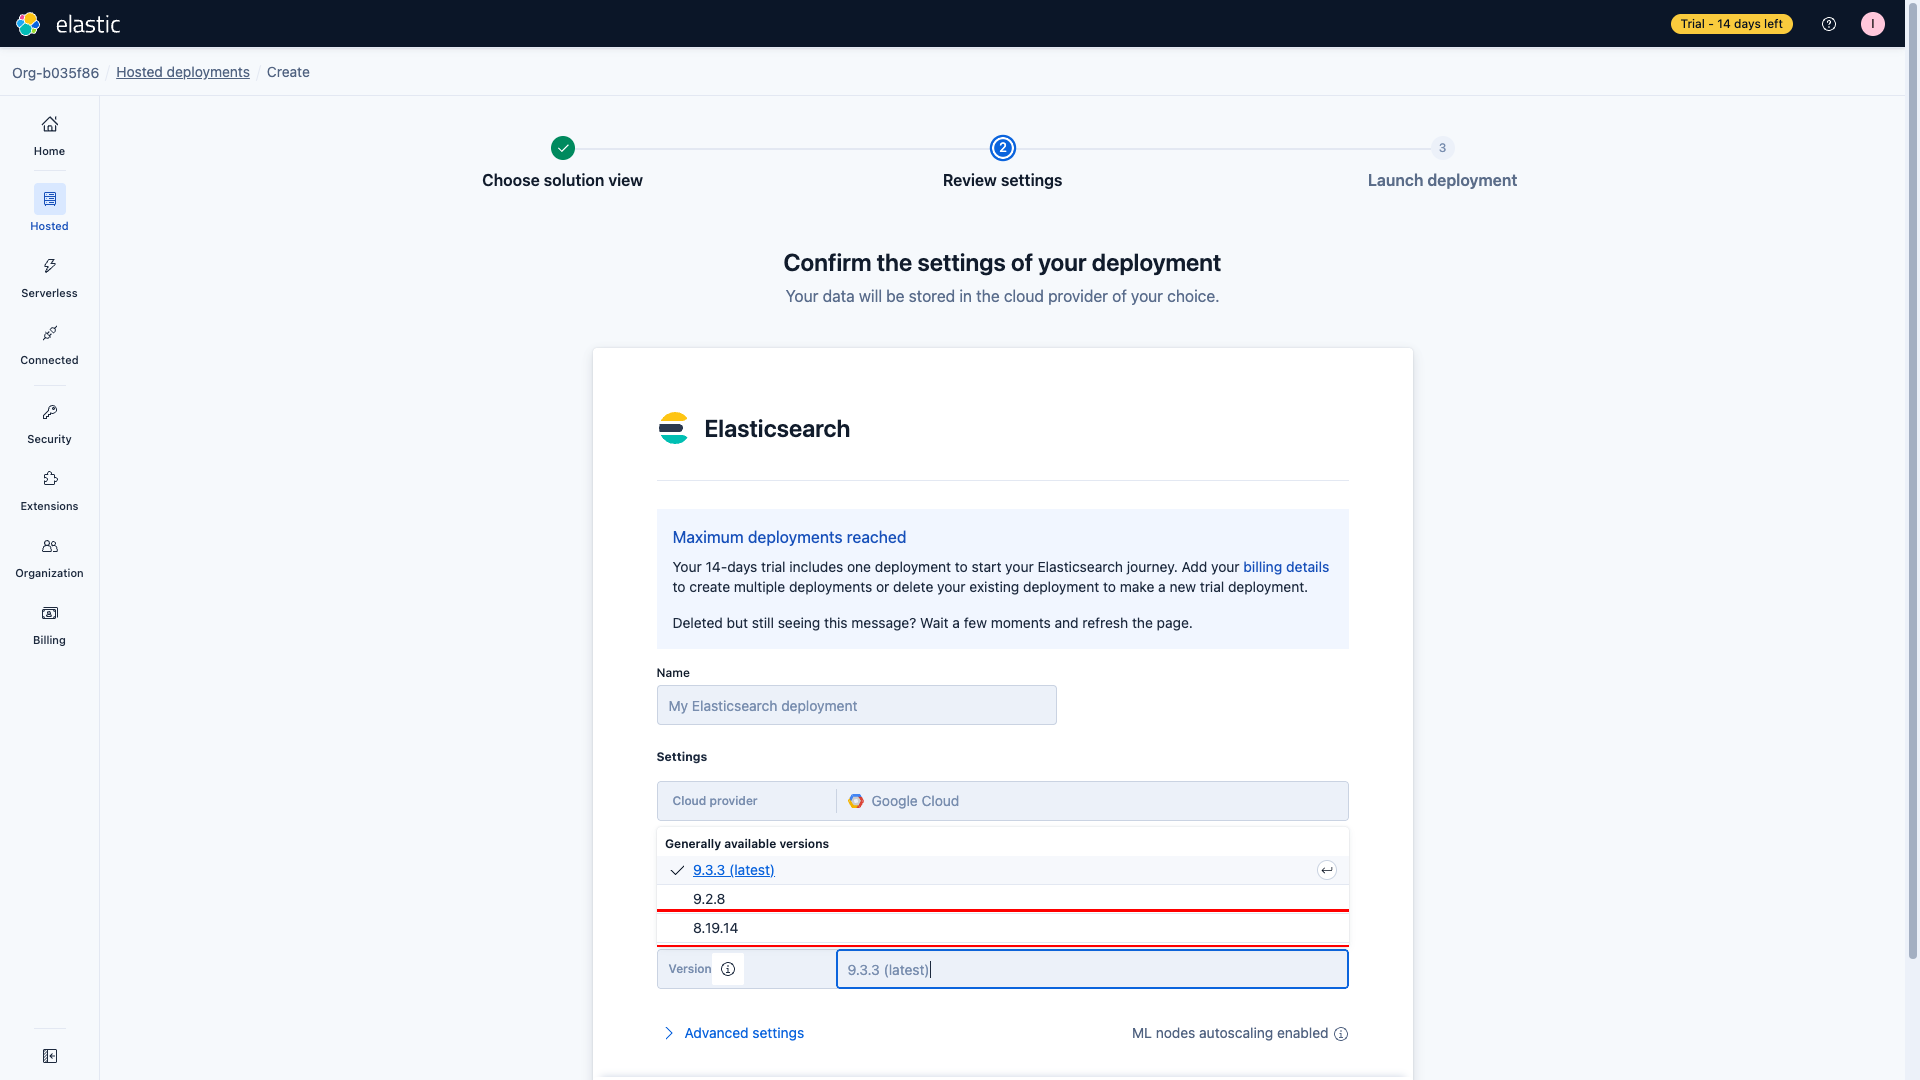
On the Confirm the settings of your deployment step, expand Edit settings and open the Version dropdown. Pick the latest 8.x version (for example, 8.19.14). Keep the other defaults or adjust the cloud provider and region to match your data-residency requirements, then click Launch.
Provisioning usually takes 2–5 minutes. When it completes you are redirected to the Kibana Getting started page of the new deployment.

You need the full Elasticsearch endpoint URL for the Frontegg connector. You can find it in two places:
- On the Kibana Getting started page, next to Elasticsearch endpoint.
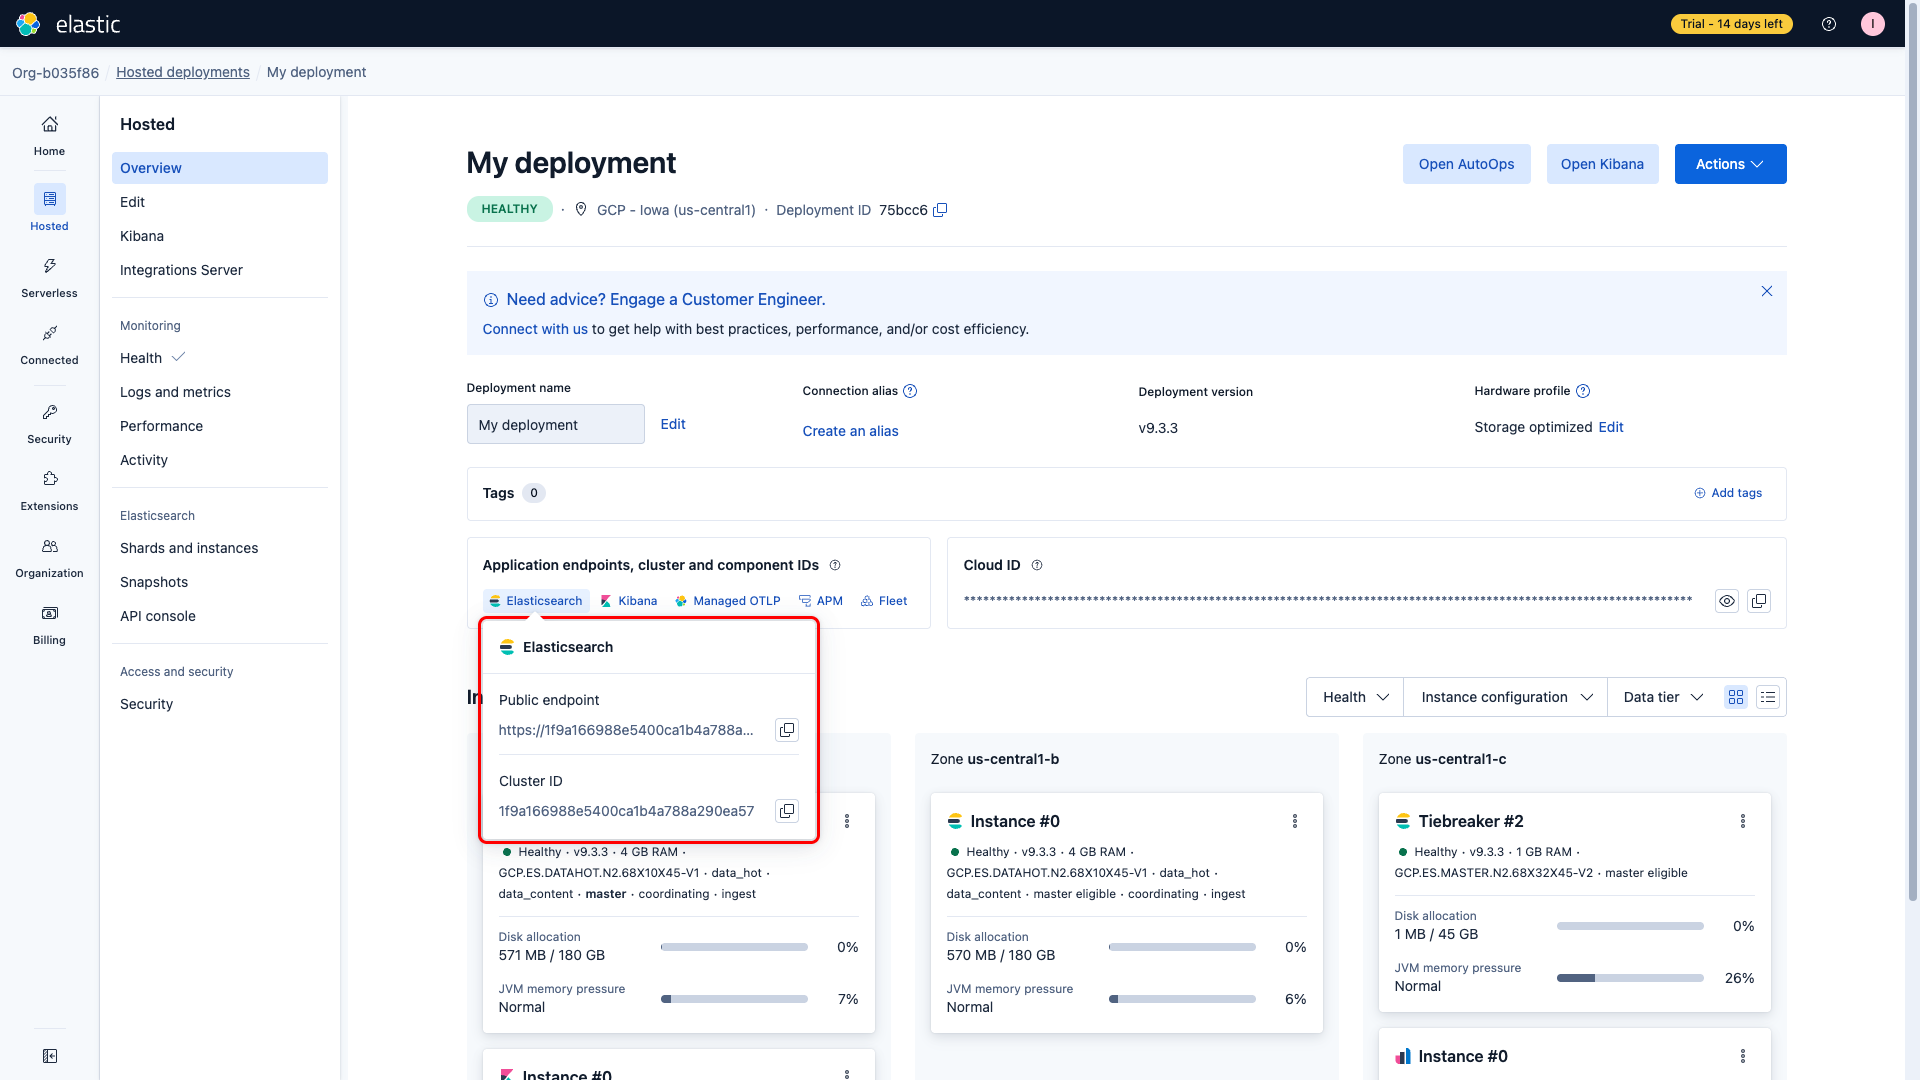
- In the Elastic Cloud admin console, on the deployment overview page. Open the Application endpoints, cluster and component IDs panel and click Open Elasticsearch.
Click the copy icon next to the URL. The value looks like https://<cluster-id>.<region>.<provider>.cloud.es.io:443.
Use this path for production. API keys can be named, scoped to specific indices and APIs, and rotated without touching user accounts.
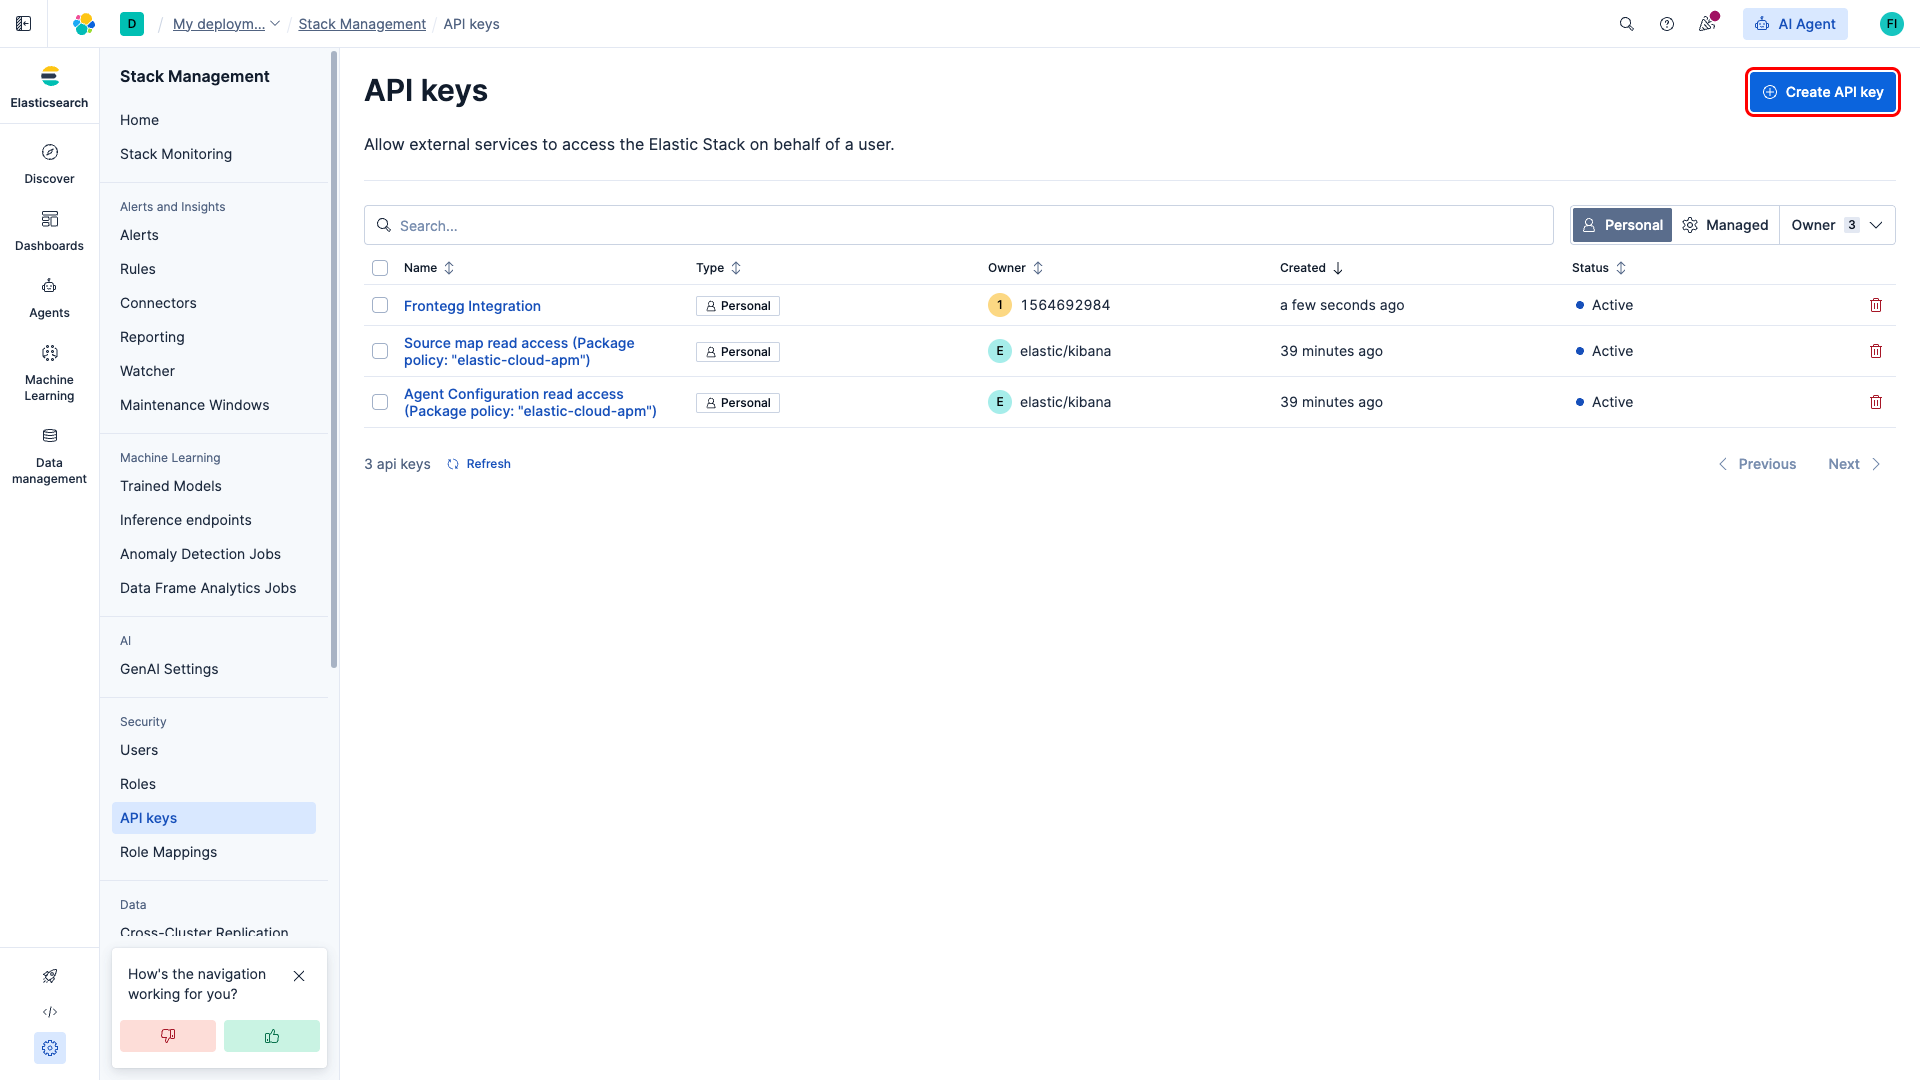
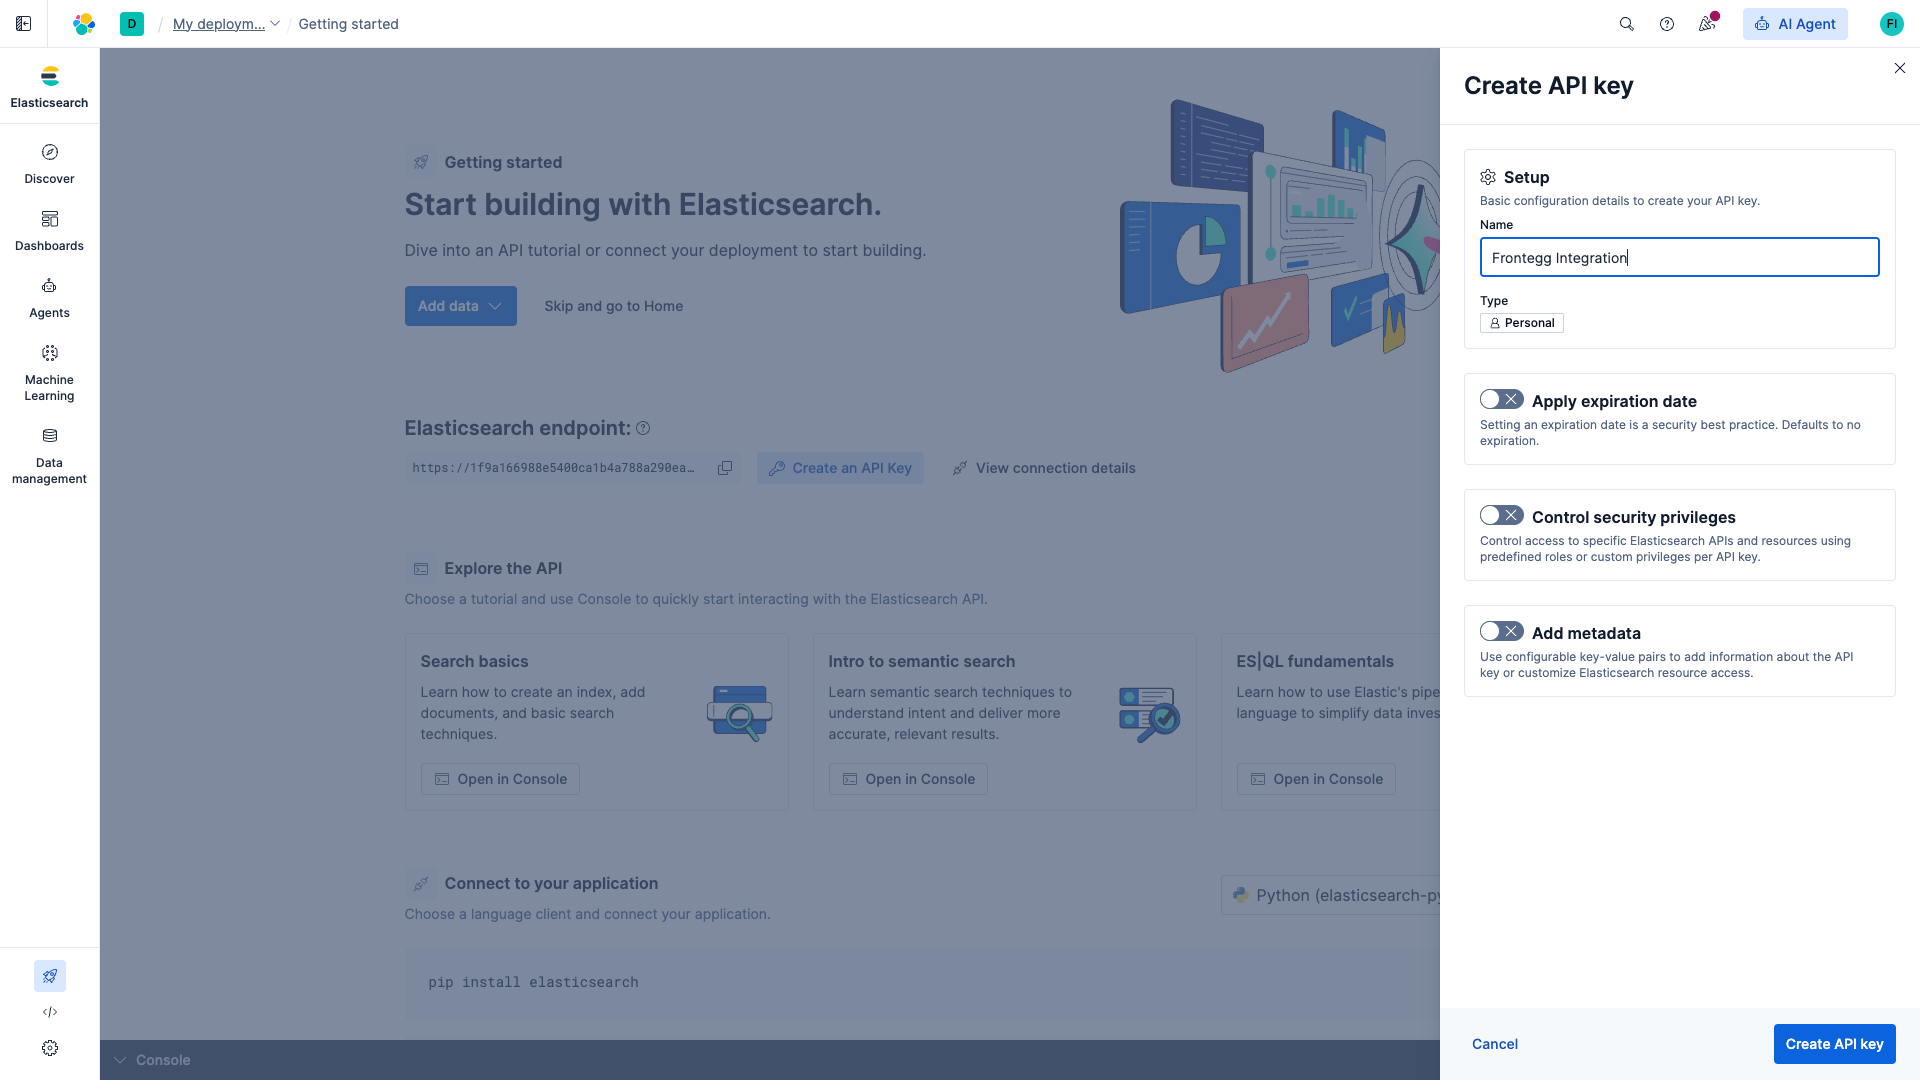
In Kibana, open Stack Management (footer navigation) → Security → API keys. You land on the API keys list for your account. Click Create API key in the top-right corner.
In the Create API key dialog:
- Name:
Frontegg Integration - Type: leave as Personal
- Apply expiration date: leave off for non-expiring keys, or set an expiration if required by your security policy
- Control security privileges: leave off to inherit your account's privileges, or enable it to restrict the key to specific indices and APIs
Click Create API key.
Which privileges does the connector need?
Which privileges does the connector need?
The connector exposes search, documents, indices, cluster, nodes, templates, ingest, scripts, analysis, security, tasks, snapshot, and SQL APIs. For full functionality grant superuser, or build a custom role that covers read/write access to the indices your agents work with.
After clicking Create API key, Kibana displays the generated key once. Switch the output format selector to Encoded and click the copy icon. The encoded key is a single base64 string of the form <id>:<api_key> — this is the value the Frontegg connector expects.
Copy the API key now
Copy the API key now
Kibana does not let you view the encoded value again after closing the dialog. If you lose it, create a new API key and delete the old one from the API keys list.
Use this path if you prefer username and password credentials, already have a native realm user, or cannot use API keys in your environment.
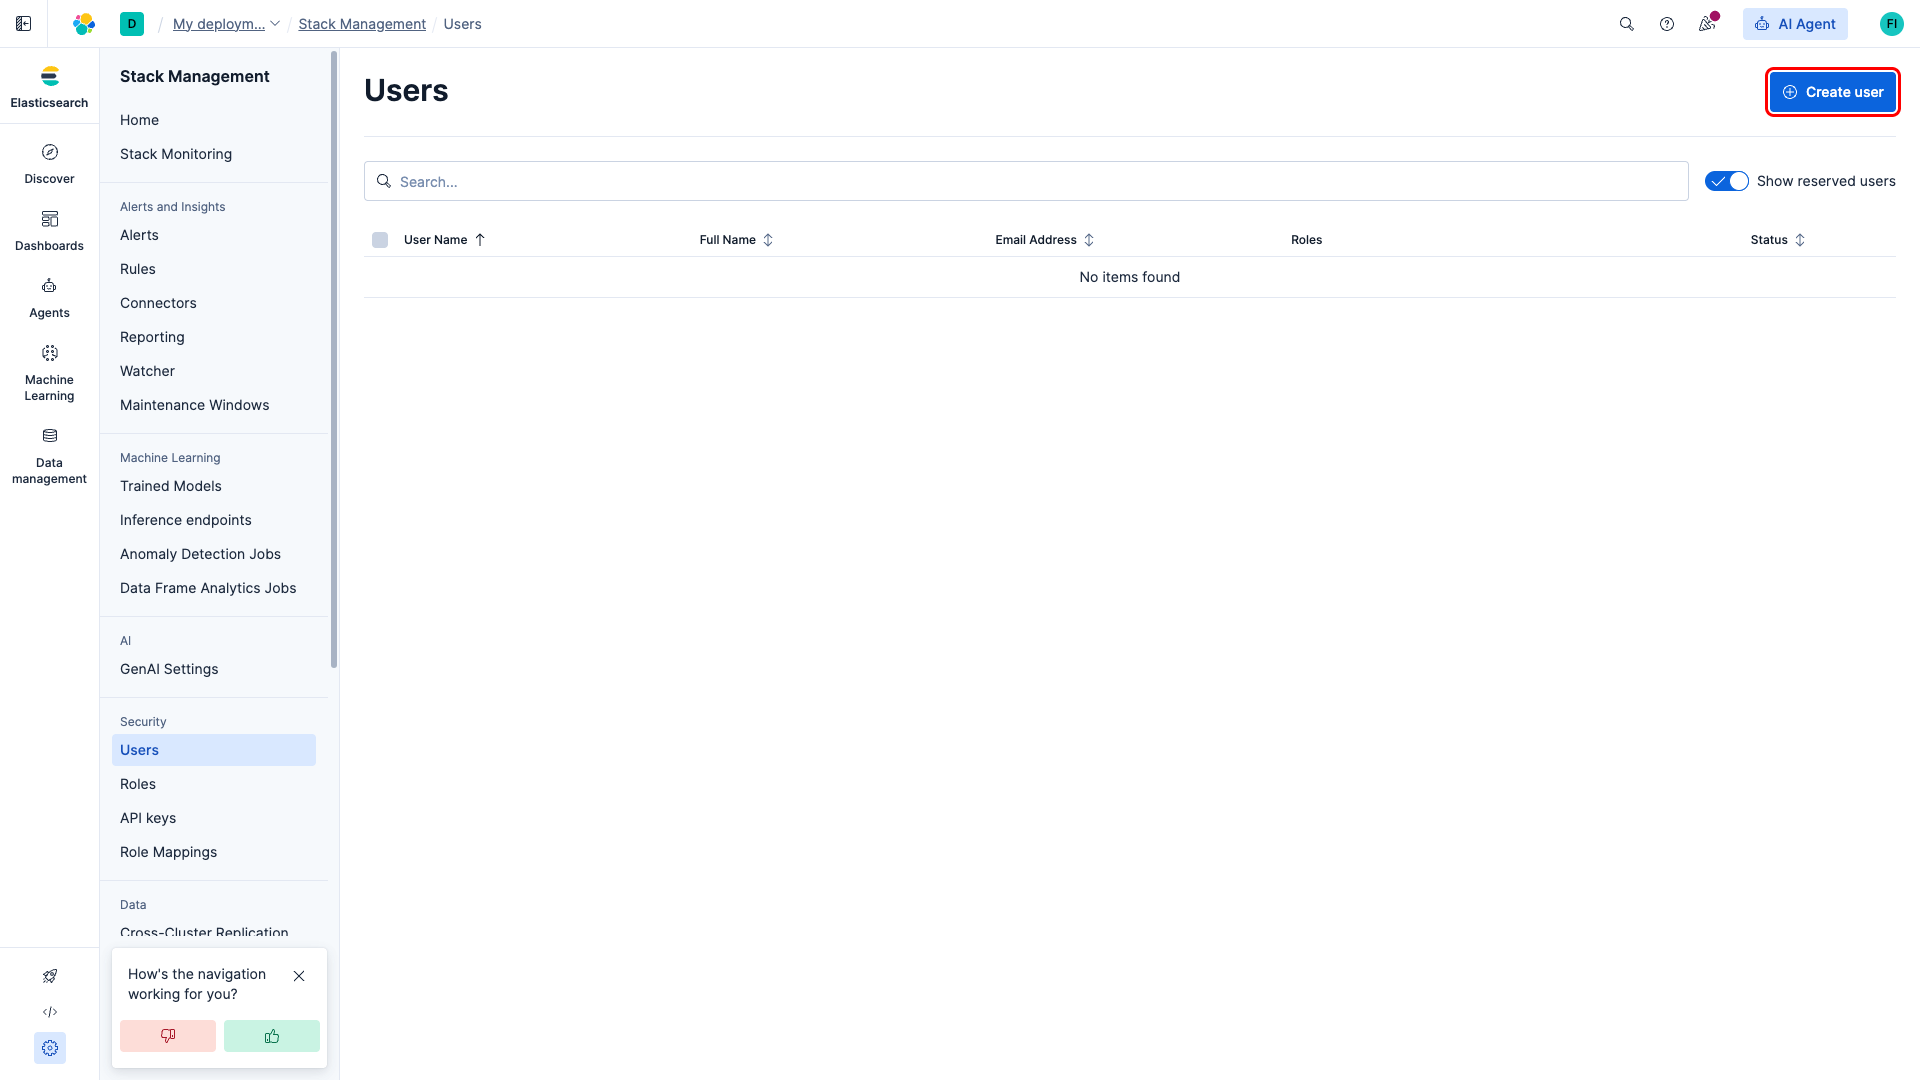
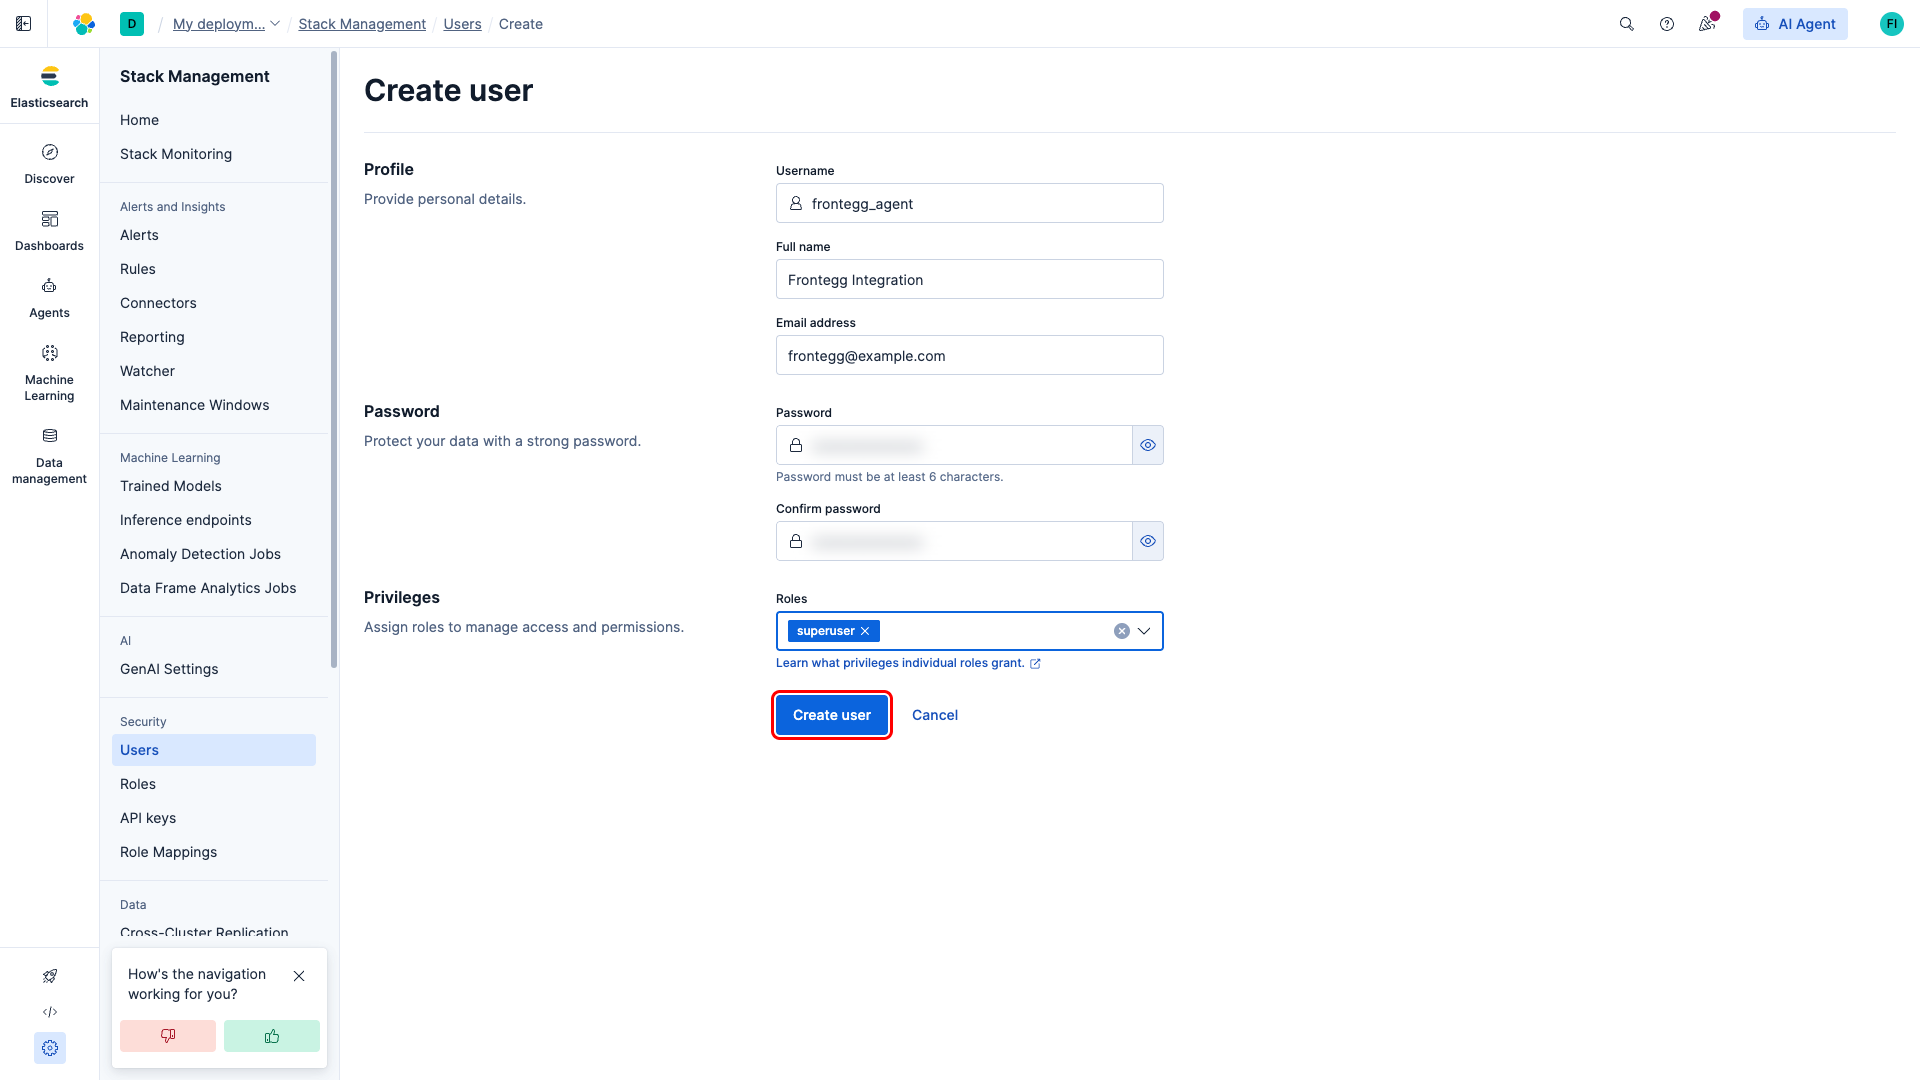
In Kibana, open Stack Management → Security → Users. Click Create user in the top-right corner.
In the Create user form:
- Username: choose a descriptive name such as
frontegg_agent - Full name and Email address: optional
- Password and Confirm password: a strong password with at least 6 characters
- Roles: select
superuserfor full access, or a custom role that grants the indices and APIs your agents need
Click Create user.
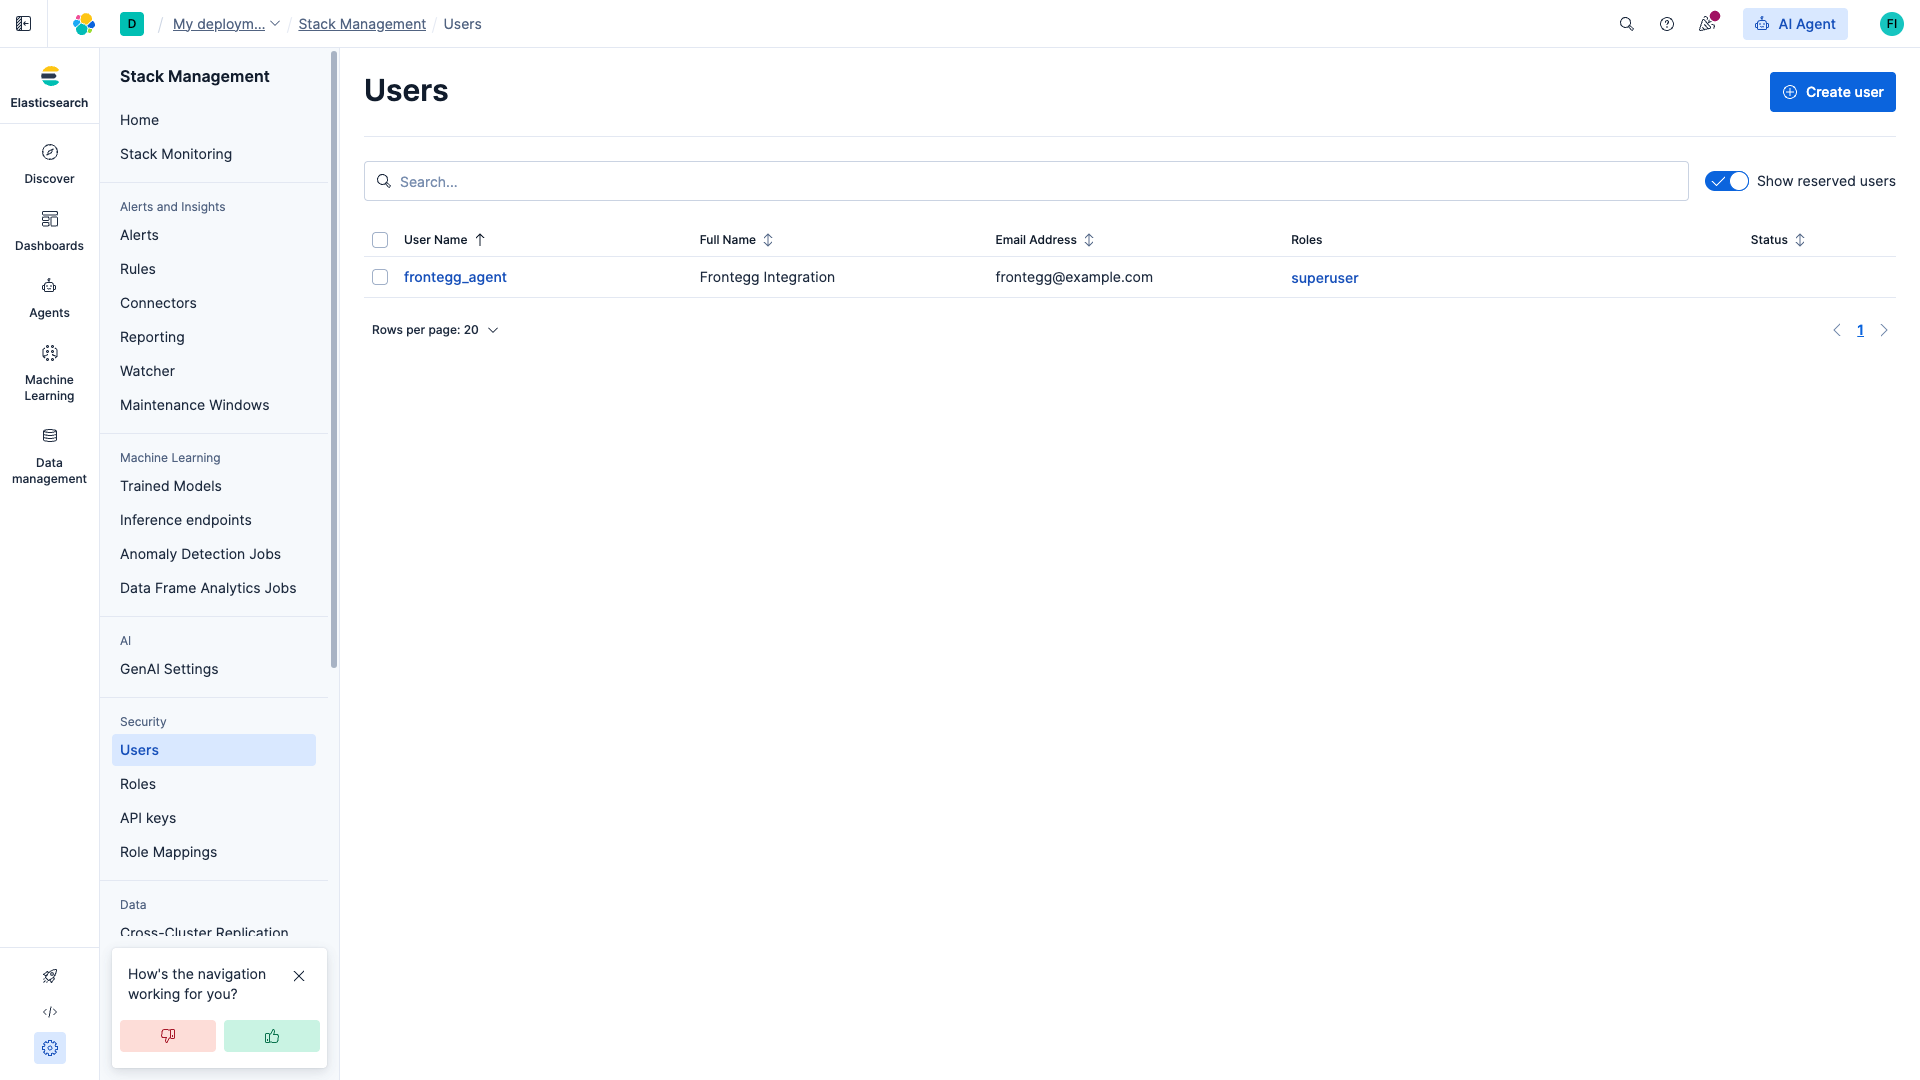
The new user appears in the Users list. Keep the username and password at hand.
Elasticsearch's HTTP Basic authentication expects an Authorization header of the form Basic <base64(username:password)>. To produce the token, base64-encode your username:password string. On macOS or Linux:
echo -n 'frontegg_agent:SecurePass123!' | base64Prefix the result with Basic (including the trailing space) to get the value you will paste into the Frontegg API Key field, for example:
Basic ZnJvbnRlZ2dfYWdlbnQ6U2VjdXJlUGFzczEyMyE=Once you have either an encoded API key or a Basic auth token from the steps above, enter it in the integration configuration page of the Frontegg portal:
- Open the Frontegg portal and navigate to [ENVIRONMENT] → Integrations → Elasticsearch 8.
- Paste the encoded API Key (or the full
Basic <token>value) into the API Key field. - Paste your cluster endpoint URL, including scheme and port, into the Elasticsearch endpoint URL field.
- Click Save.
Keep your credentials secure
Keep your credentials secure
Never share or commit your API key or Basic auth token to version control. Rotate the credential from Kibana if you suspect it has been leaked.