Help Scout is a customer support platform that brings email, live chat, and knowledge base tools into one shared inbox. The Help Scout integration with Frontegg allows your application to access and manage Help Scout mailboxes, conversations, customers, tags, and users on behalf of your users.
Prerequisites
Prerequisites
- A Help Scout account with admin or account owner access
- Access to the My Apps section in your Help Scout profile
Sign in to Help Scout and click your avatar in the top-right corner. Select Your Profile from the dropdown menu, then click My Apps in the left sidebar. The My Apps page displays any existing OAuth applications and provides a Create App button.
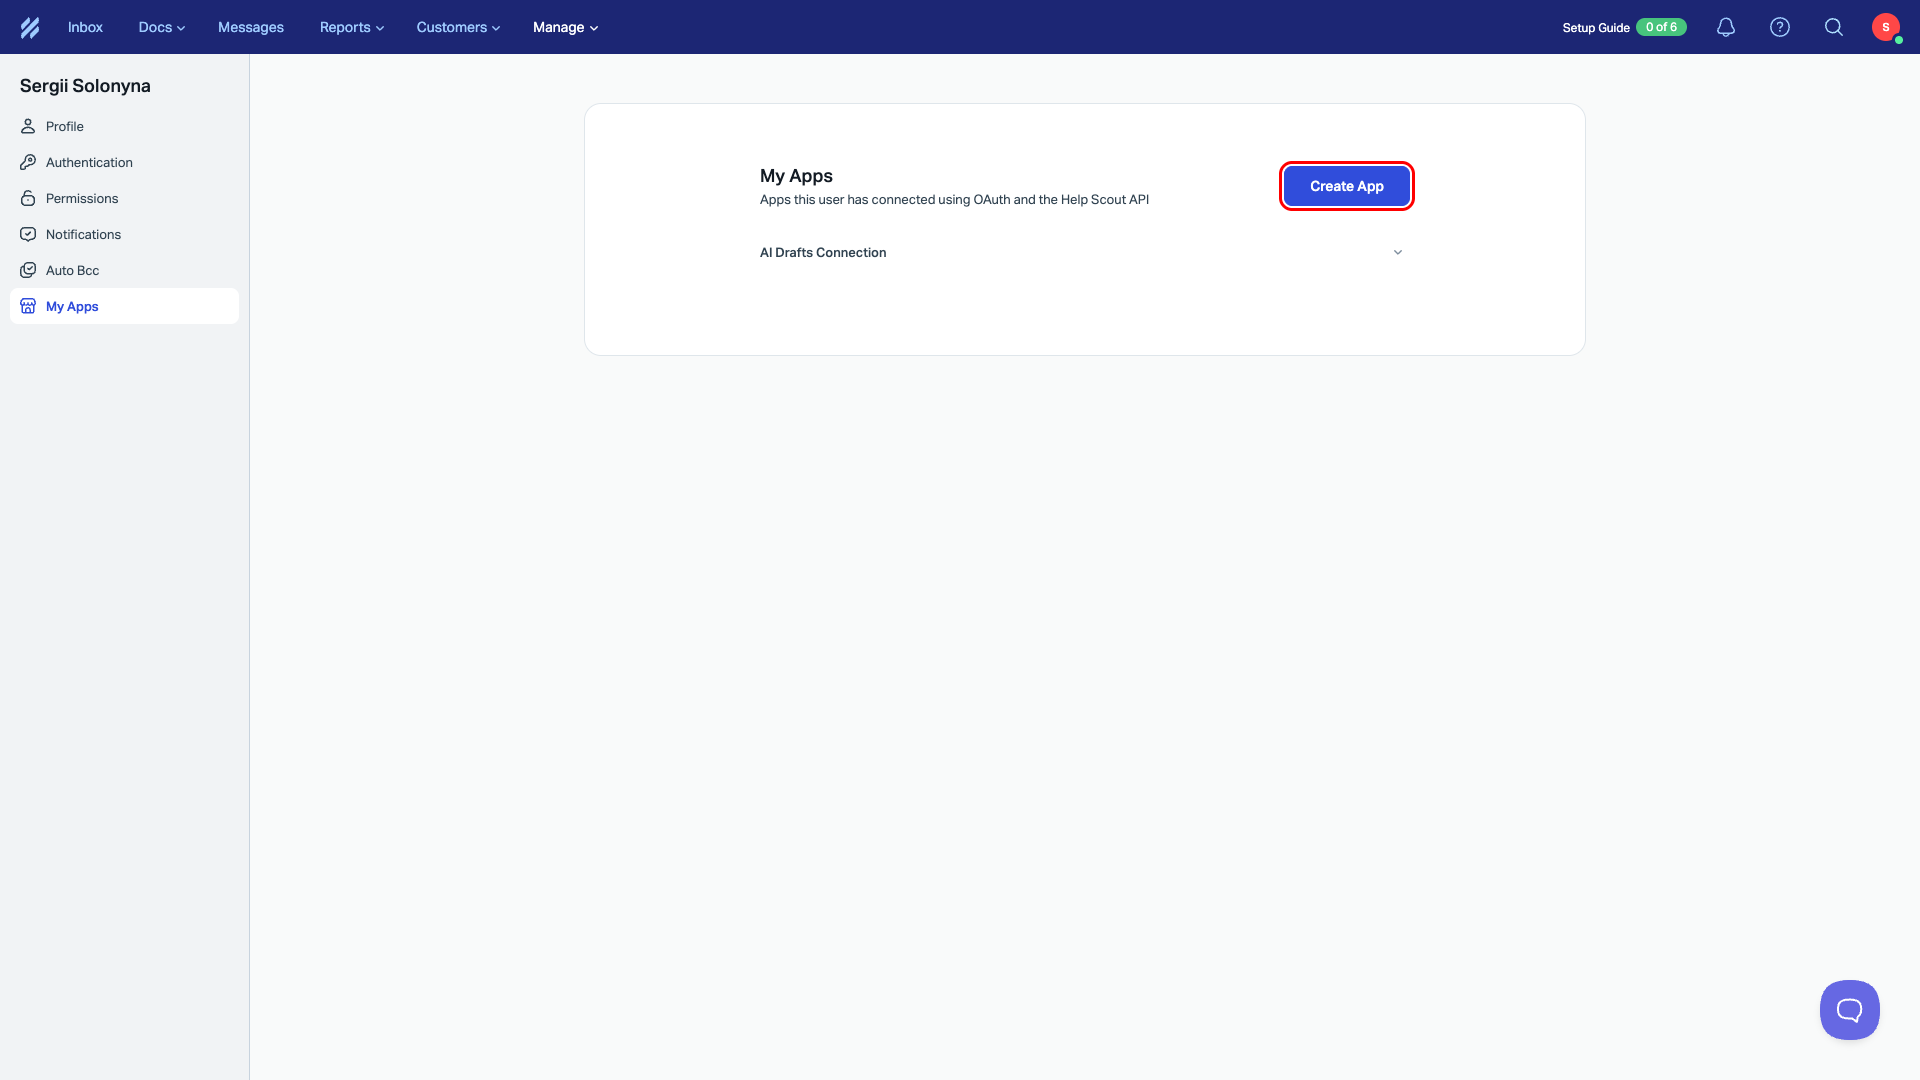
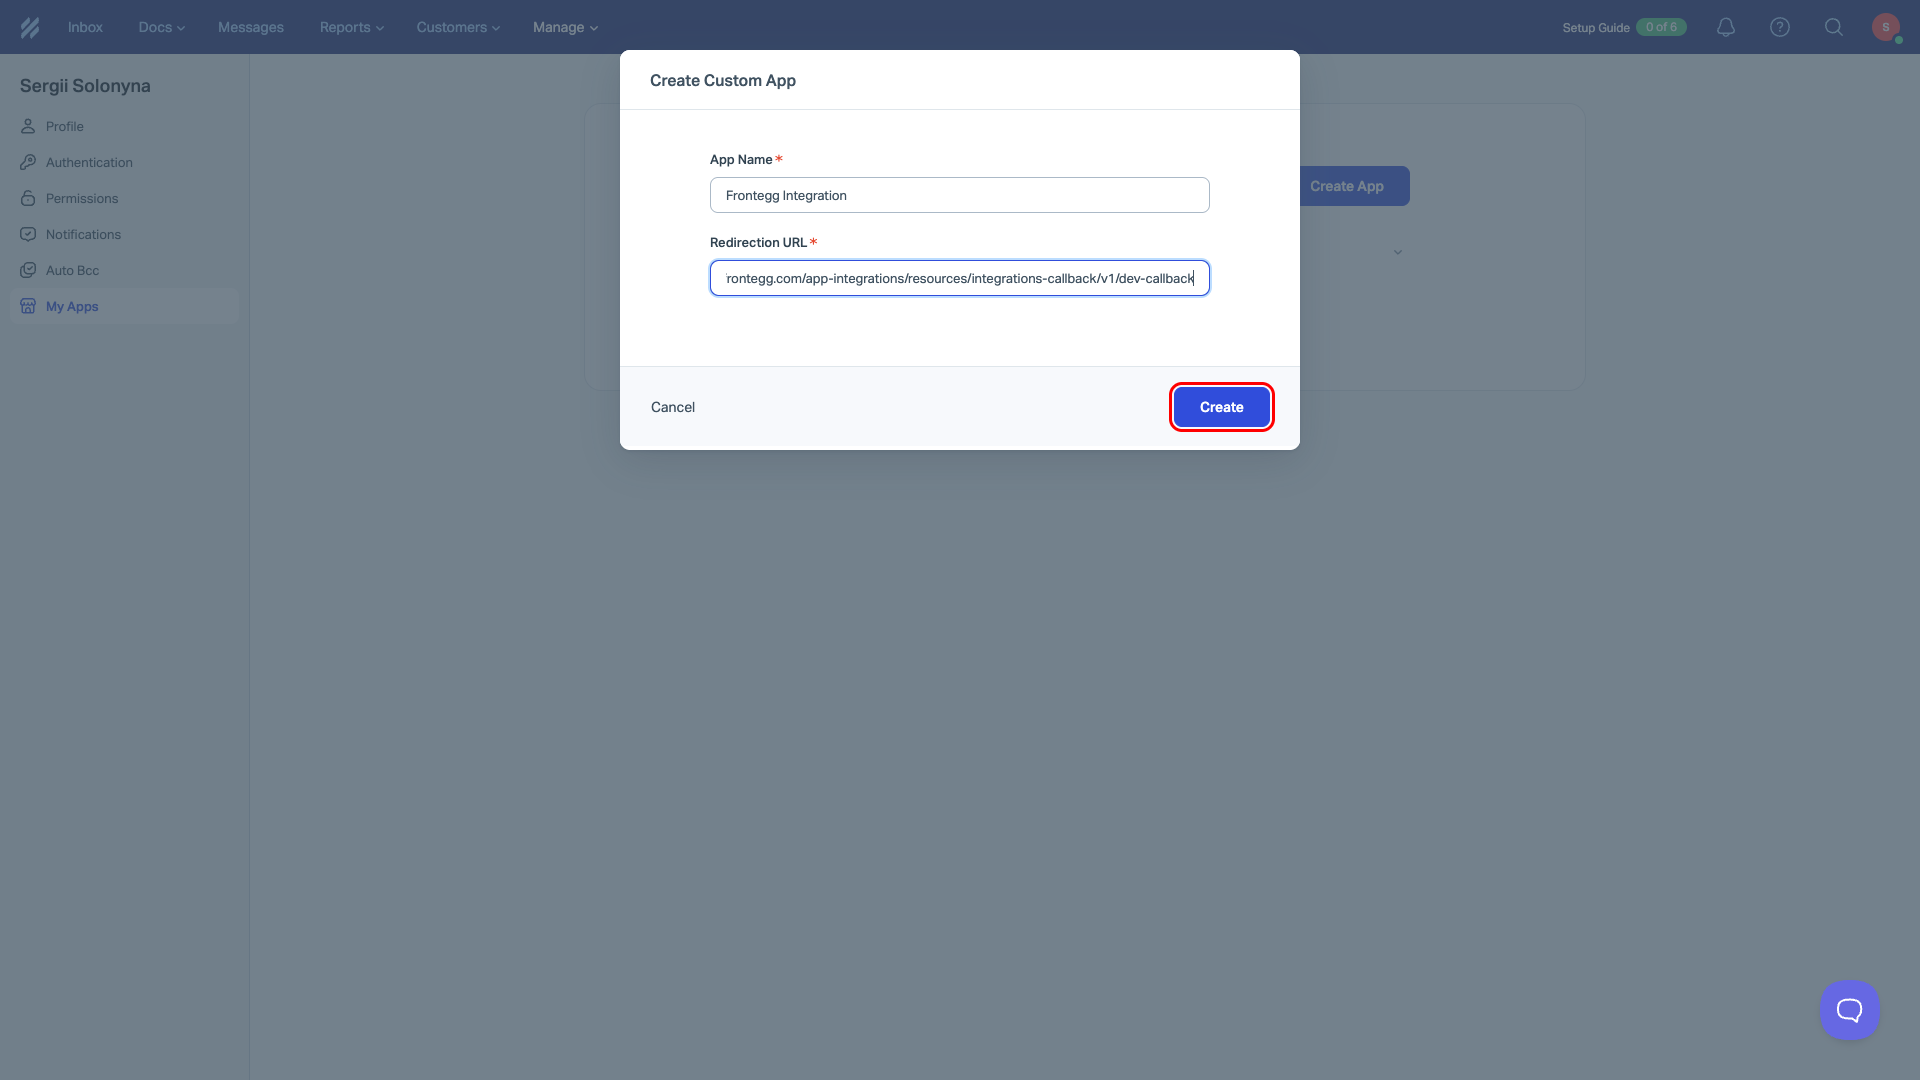
Click Create App. In the dialog that appears, fill in the following fields:
- App Name:
Frontegg Integration - Redirection URL:
https://YOUR_MCP_GATEWAY_URL/integration-callback
Click Create.
After creation, Help Scout displays your App ID and App Secret on the app details page. Copy both values and store them securely.
Save your App Secret
Save your App Secret
Copy your App Secret immediately after creation. You will need it to configure the integration in the Frontegg portal.
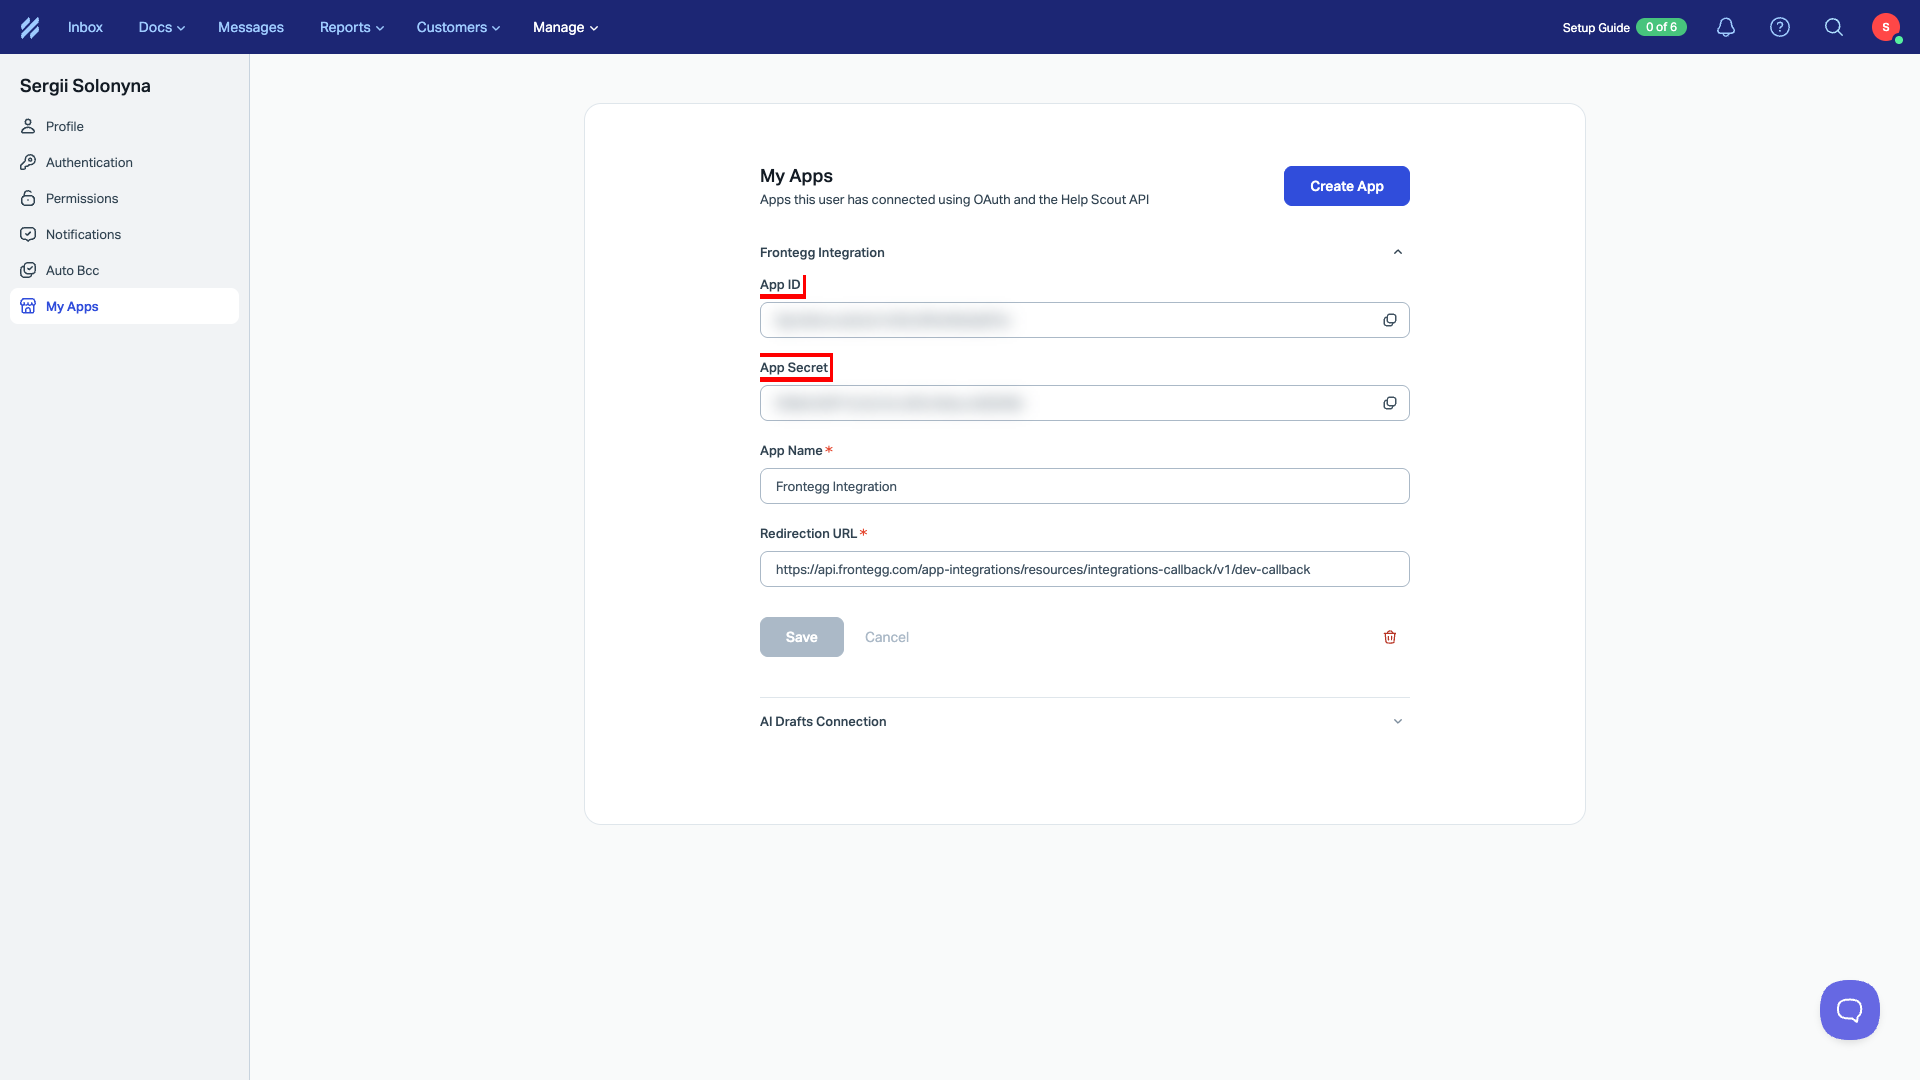
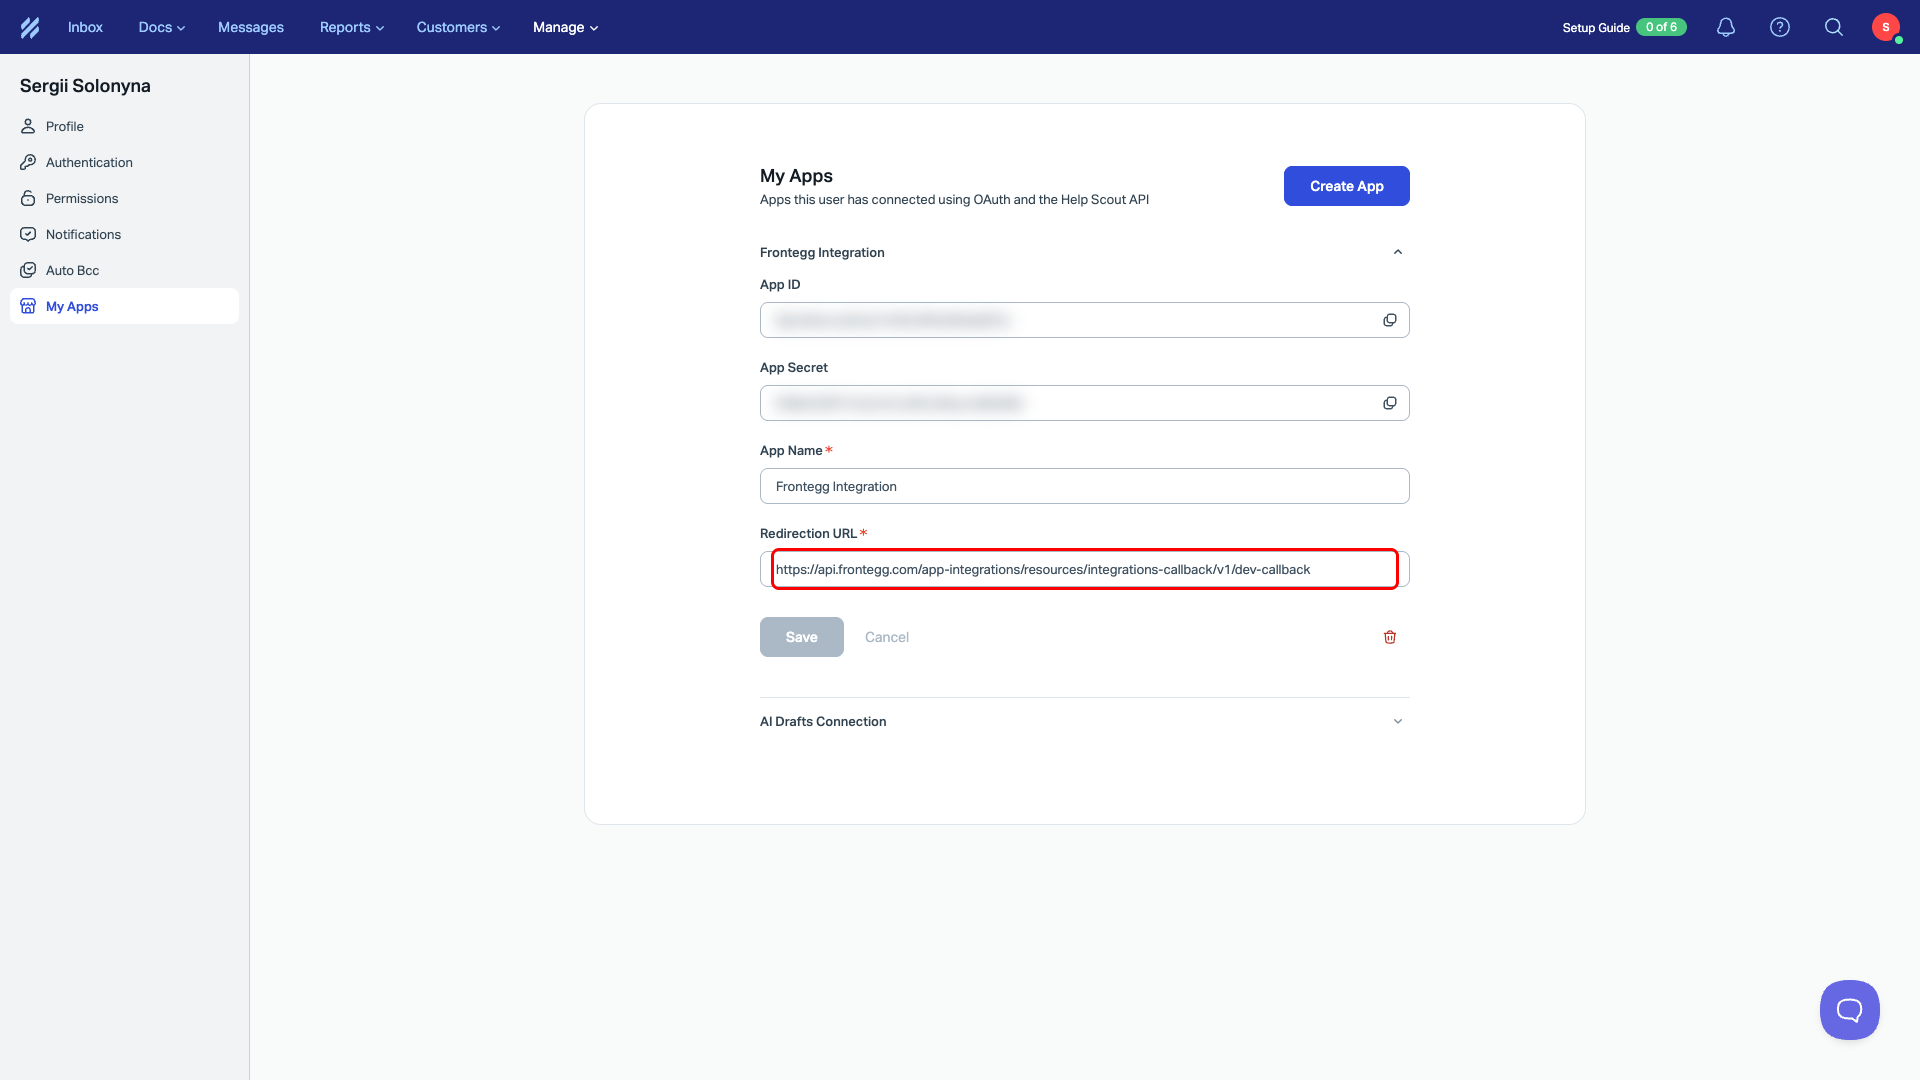
On the same page, confirm that the Redirection URL field contains the correct Frontegg callback URL:
https://YOUR_MCP_GATEWAY_URL/integration-callback
Once you have obtained your App ID and App Secret from the steps above, enter them in the integration configuration page of the Frontegg portal:
- Open the Frontegg portal and navigate to your environment → Integrations → Help Scout.
- Enter the App ID as the Client ID and the App Secret as the Client Secret in the corresponding fields.
- Select the required scopes.
- Click Save.
Available scopes
Available scopes
Help Scout scopes are passed during the OAuth authorization flow, not configured in the developer portal. The following scopes are available:
| Scope | Description |
|---|---|
mailboxes:read | Read mailbox data |
conversations:read | Read conversations |
conversations:write | Create and update conversations |
customers:read | Read customer data |
customers:write | Create and update customers |
reports:read | Read reports |
users:read | Read user data |
tags:read | Read tags |
teams:read | Read team data |
webhooks:write | Manage webhooks |
Keep your credentials secure
Keep your credentials secure
Never share or commit your App Secret to version control.