Intercom is a customer messaging platform that provides live chat, help desk, and customer data tools. Integrating Intercom with Frontegg allows your application to manage contacts, companies, conversations, messages, tags, segments, admins, and teams on behalf of your users through OAuth 2.0 authentication.
Prerequisites
Prerequisites
- An Intercom account with admin access
- Access to the Intercom Developer Hub
Log in to your Intercom account and click Developer Hub in the top navigation bar. This opens the Developer Hub where you can manage your apps.
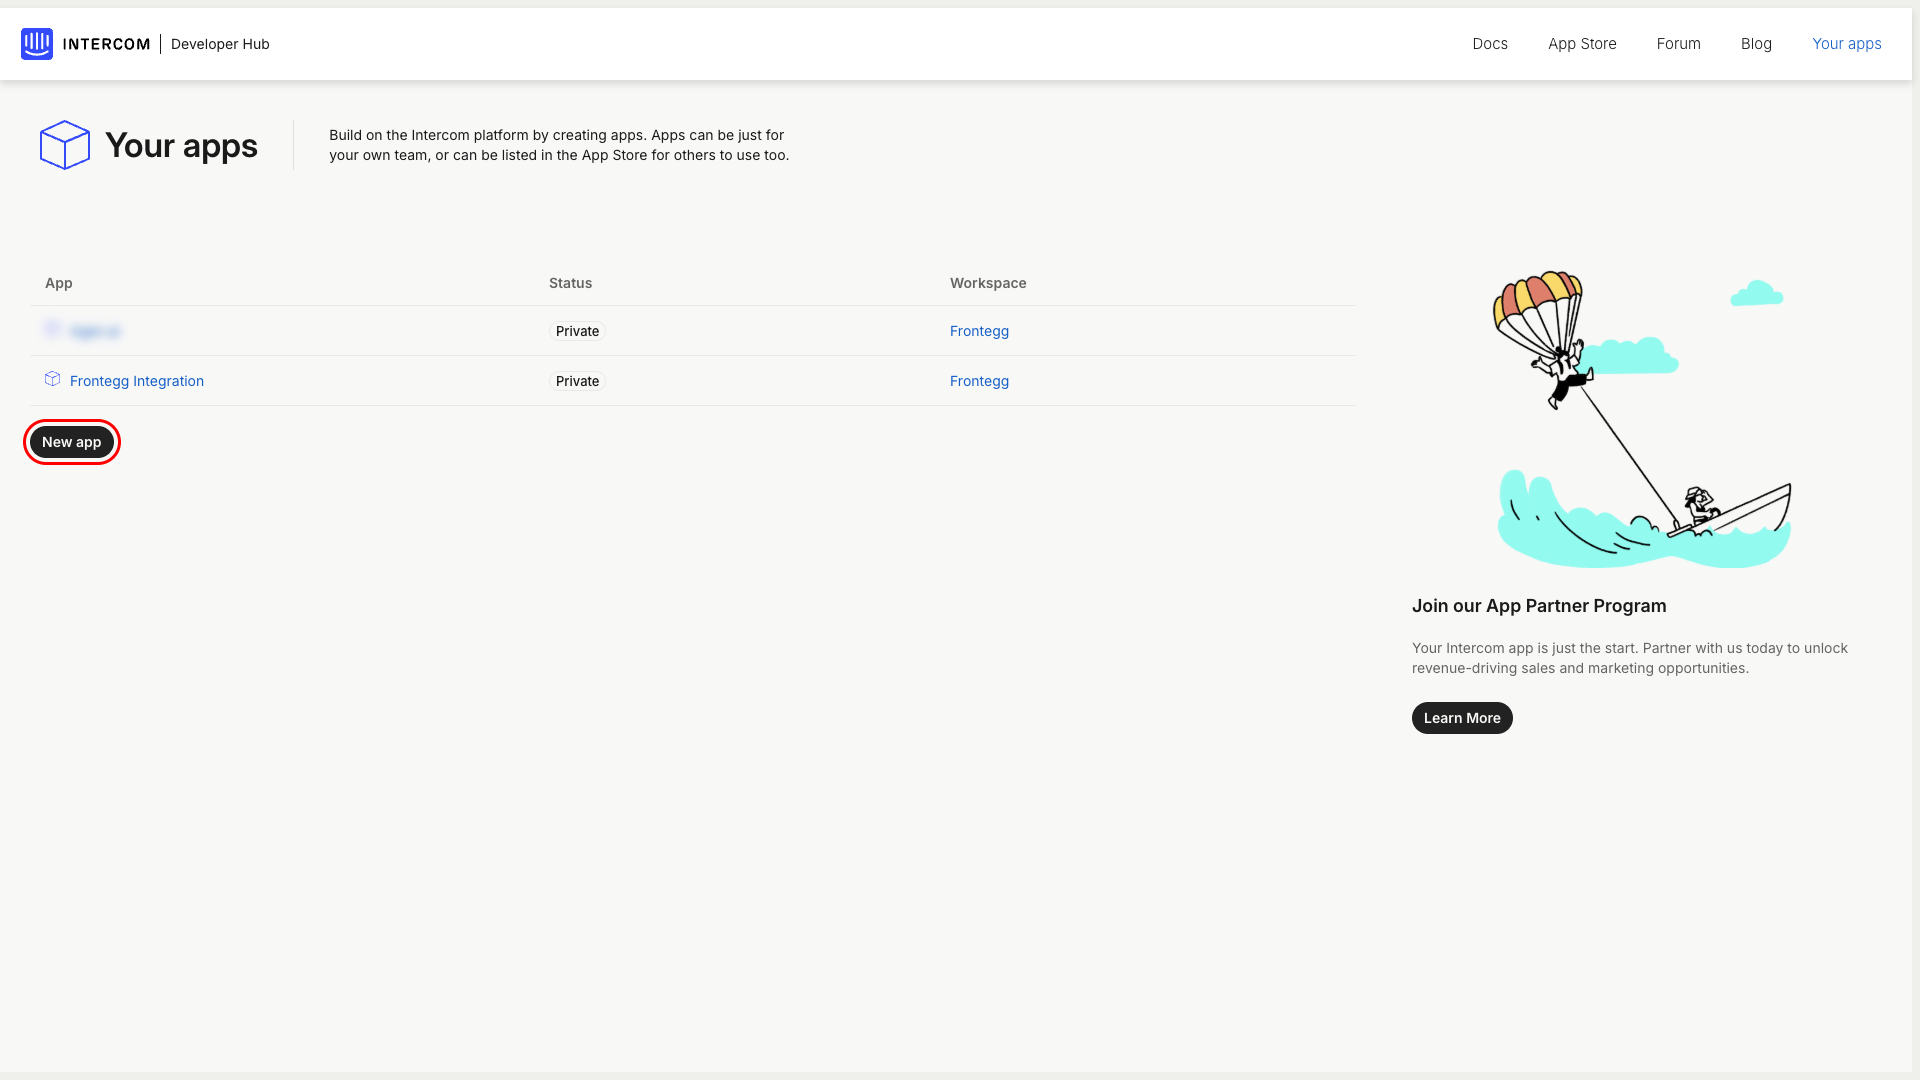
Click the New app button. In the dialog that appears, enter Frontegg Integration as the app name, select your workspace, and click Create app.

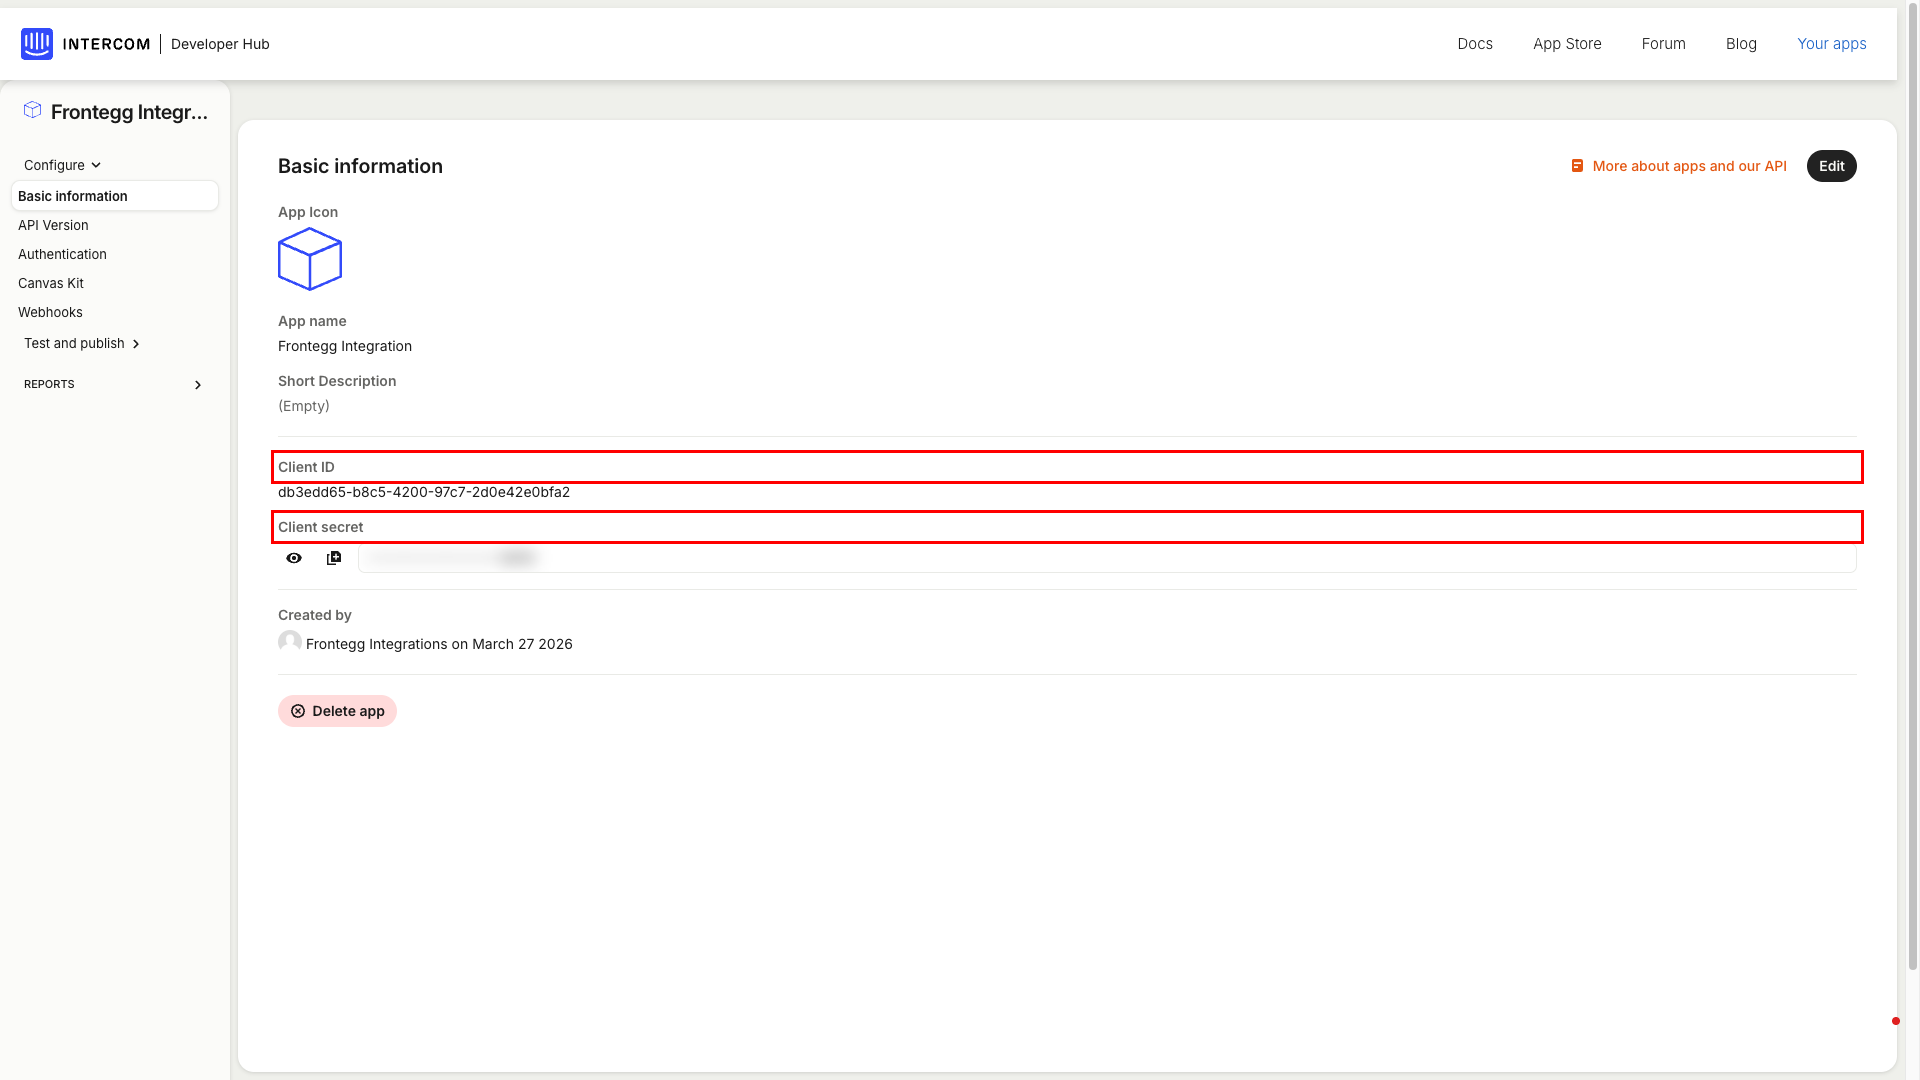
Navigate to Basic information in the left sidebar. On this page you can find your Client ID and Client Secret. Copy both values — you will need them to configure the integration in the Frontegg portal.
Keep your credentials secure
Keep your credentials secure
Never share or commit your Client Secret to version control. You can reveal the secret by clicking the show button next to the masked value.
Navigate to Authentication in the left sidebar, then click the Edit button. Check the Use OAuth checkbox to enable OAuth for your application. This reveals the redirect URL configuration fields.
In the Redirect URLs section, add the following callback URI:
https://YOUR_MCP_GATEWAY_URL/integration-callback
Click Add redirect URL to save the URI.
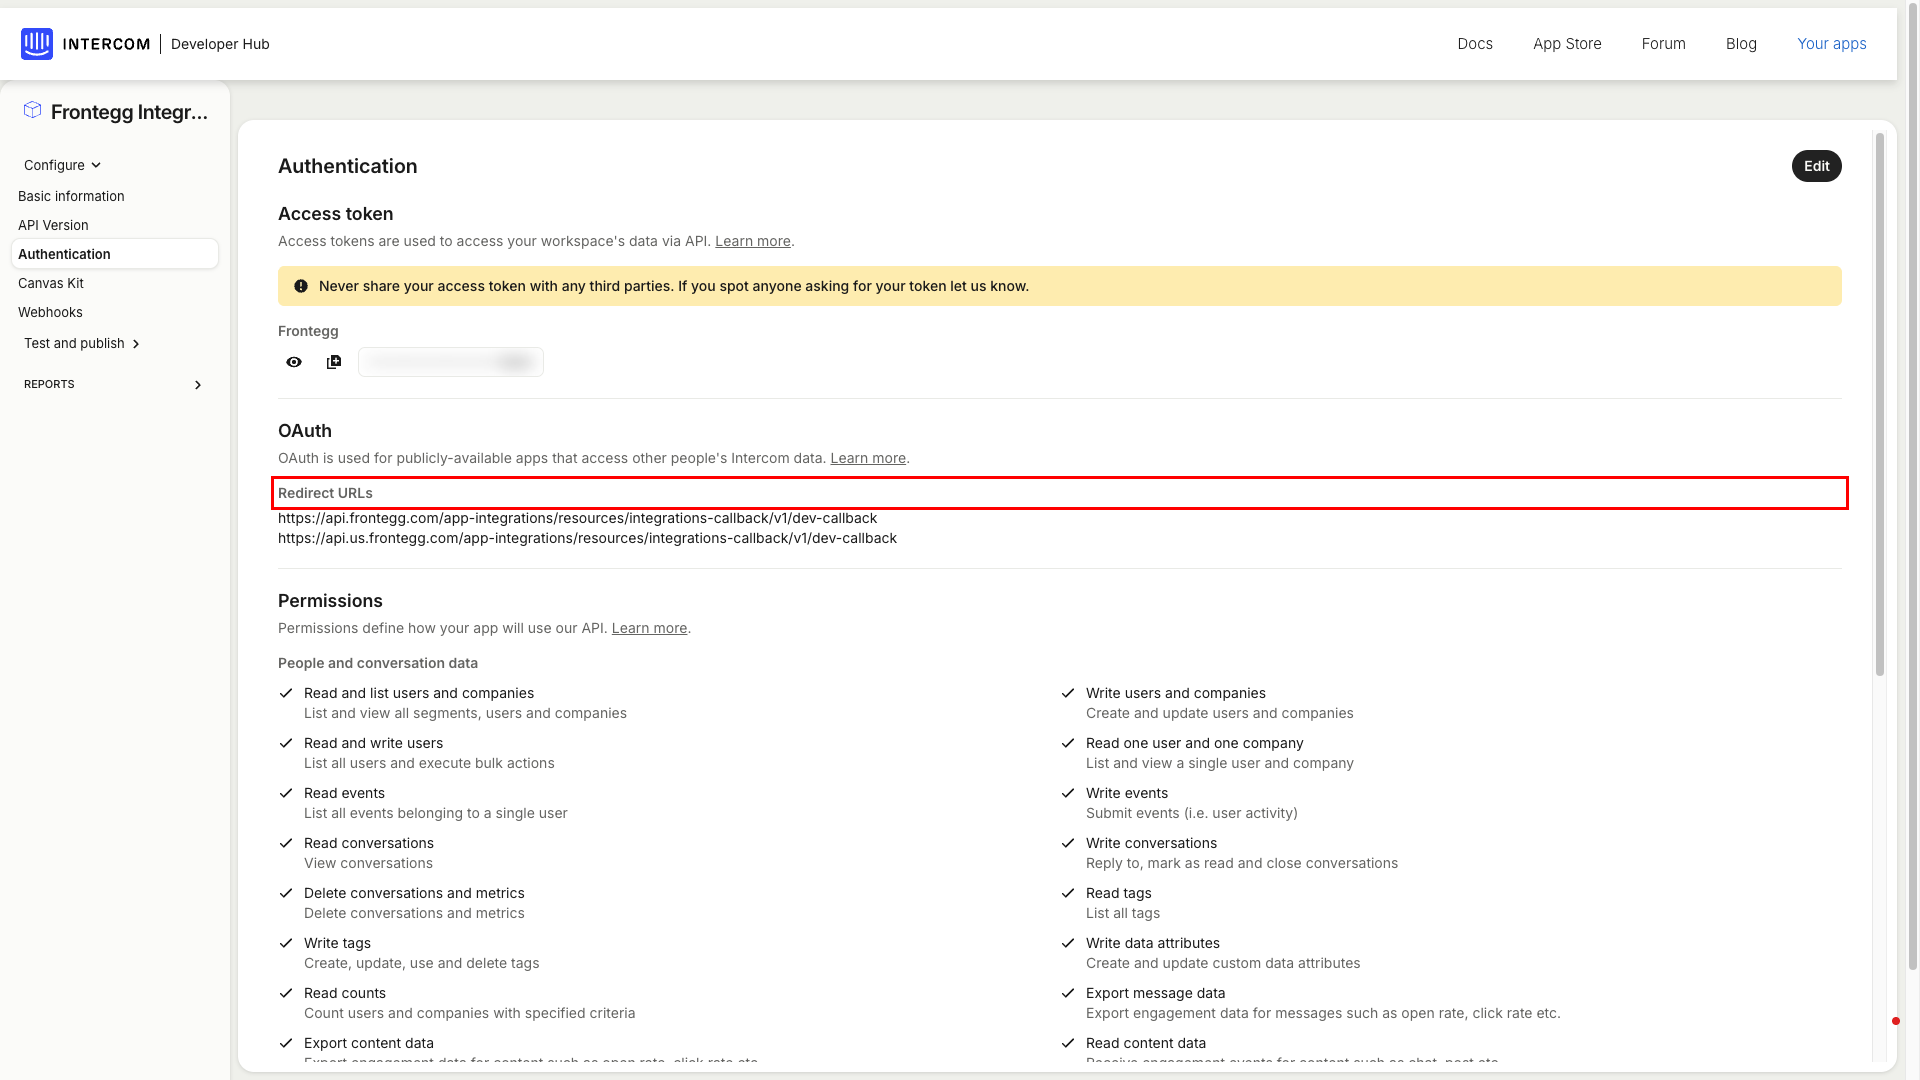
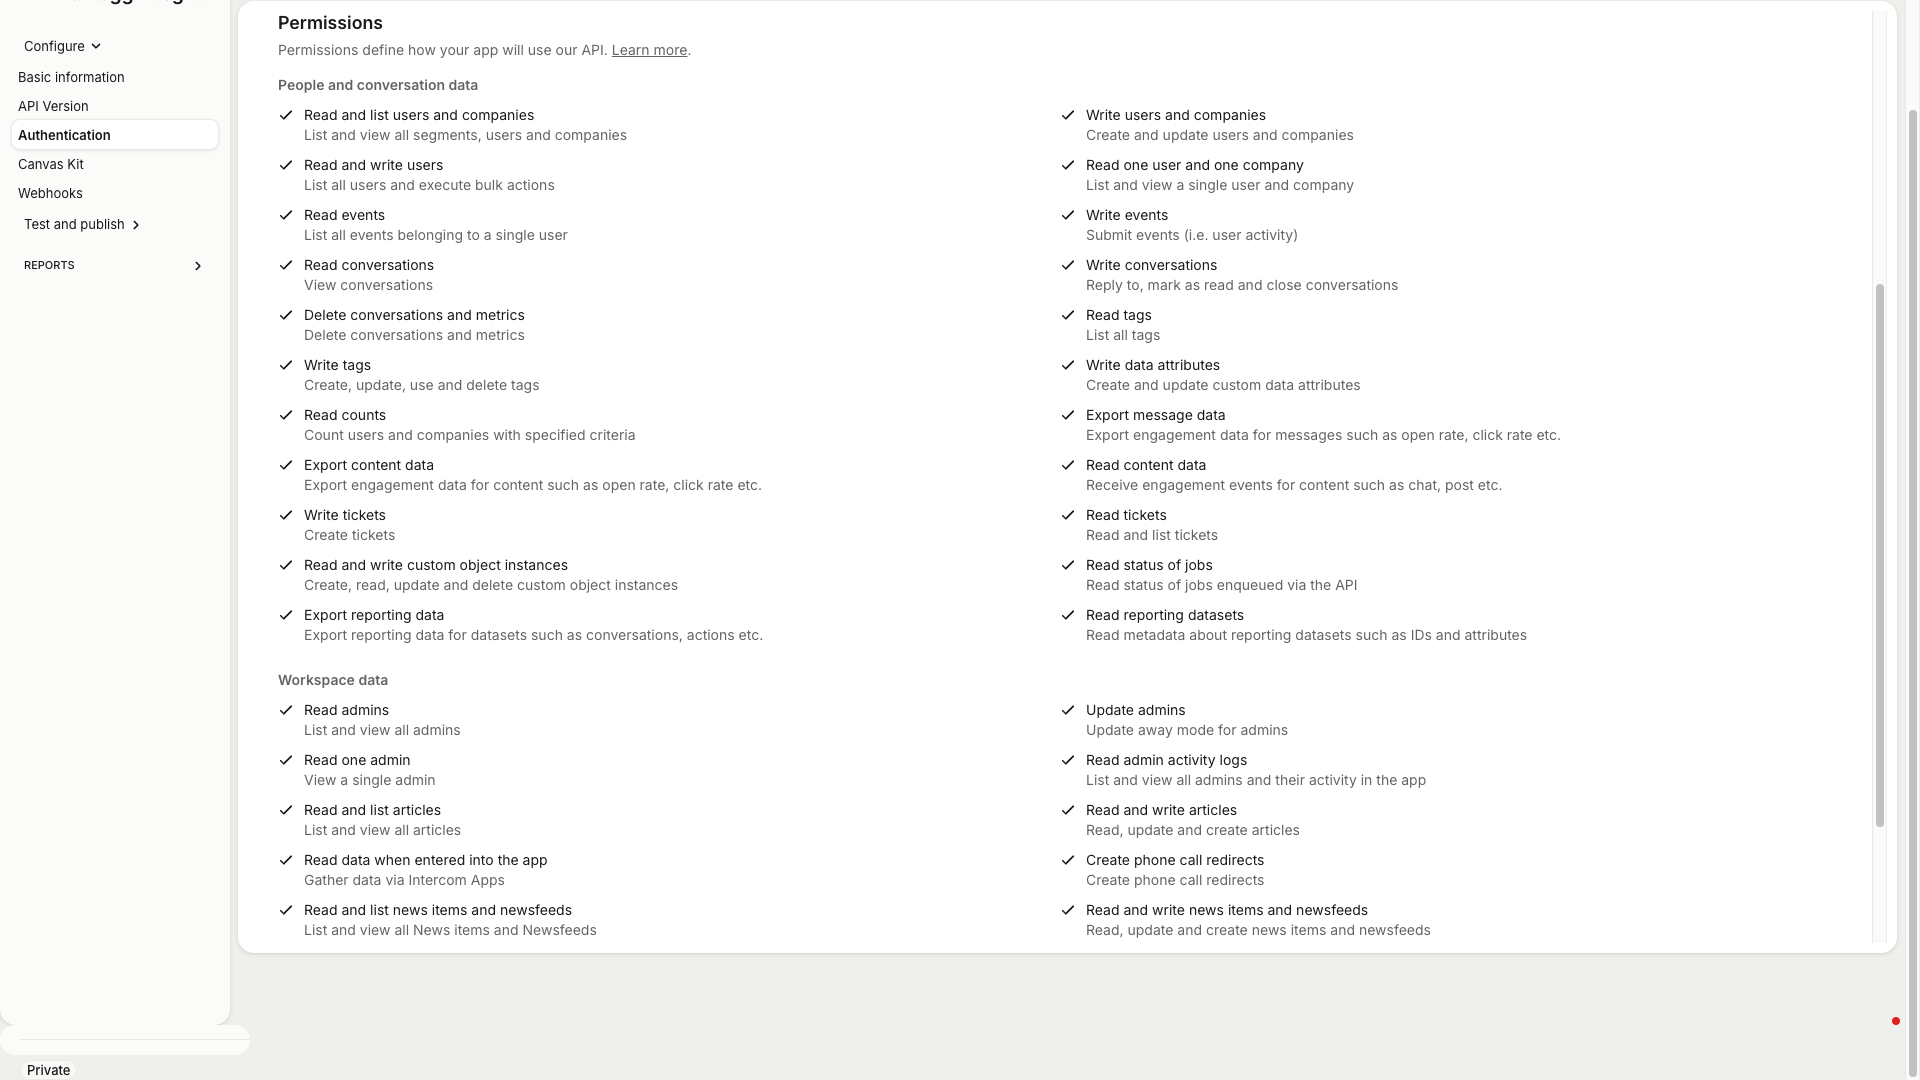
Scroll down to the Permissions section on the same page. Select the permissions your integration requires. The available permissions are grouped into two categories:
People and conversation data
| Permission | Description |
|---|---|
| Read and list users and companies | List and view all segments, users and companies |
| Write users and companies | Create and update users and companies |
| Read conversations | View conversations |
| Write conversations | Reply to, mark as read and close conversations |
| Read tags | List all tags |
| Write tags | Create, update, use and delete tags |
Workspace data
| Permission | Description |
|---|---|
| Read admins | List and view all admins |
Minimum required permissions
Minimum required permissions
For basic contact and conversation management, select at minimum: Read and list users and companies, Write users and companies, Read conversations, and Write conversations.
Click Save at the top of the page. After saving, the Authentication page displays your configured redirect URLs and selected permissions.
Once you have your Client ID and Client Secret from the steps above, enter them in the integration configuration page of the Frontegg portal:
- Open the Frontegg portal and navigate to [ENVIRONMENT] → Integrations → Intercom.
- Enter the Client ID and Client Secret in the corresponding fields.
- Select the required scopes.
- Click Save.