HiBob is a modern HR platform designed for mid-sized businesses, covering employee management, time off, attendance, payroll, and people analytics. The HiBob integration with Frontegg allows your application to access employee data, time-off requests, attendance records, and payroll history via the HiBob REST API using a service user and API token.
Prerequisites
Prerequisites
- A HiBob account with admin access (required to access System Settings)
Go to app.hibob.com and sign in with your HiBob admin credentials.
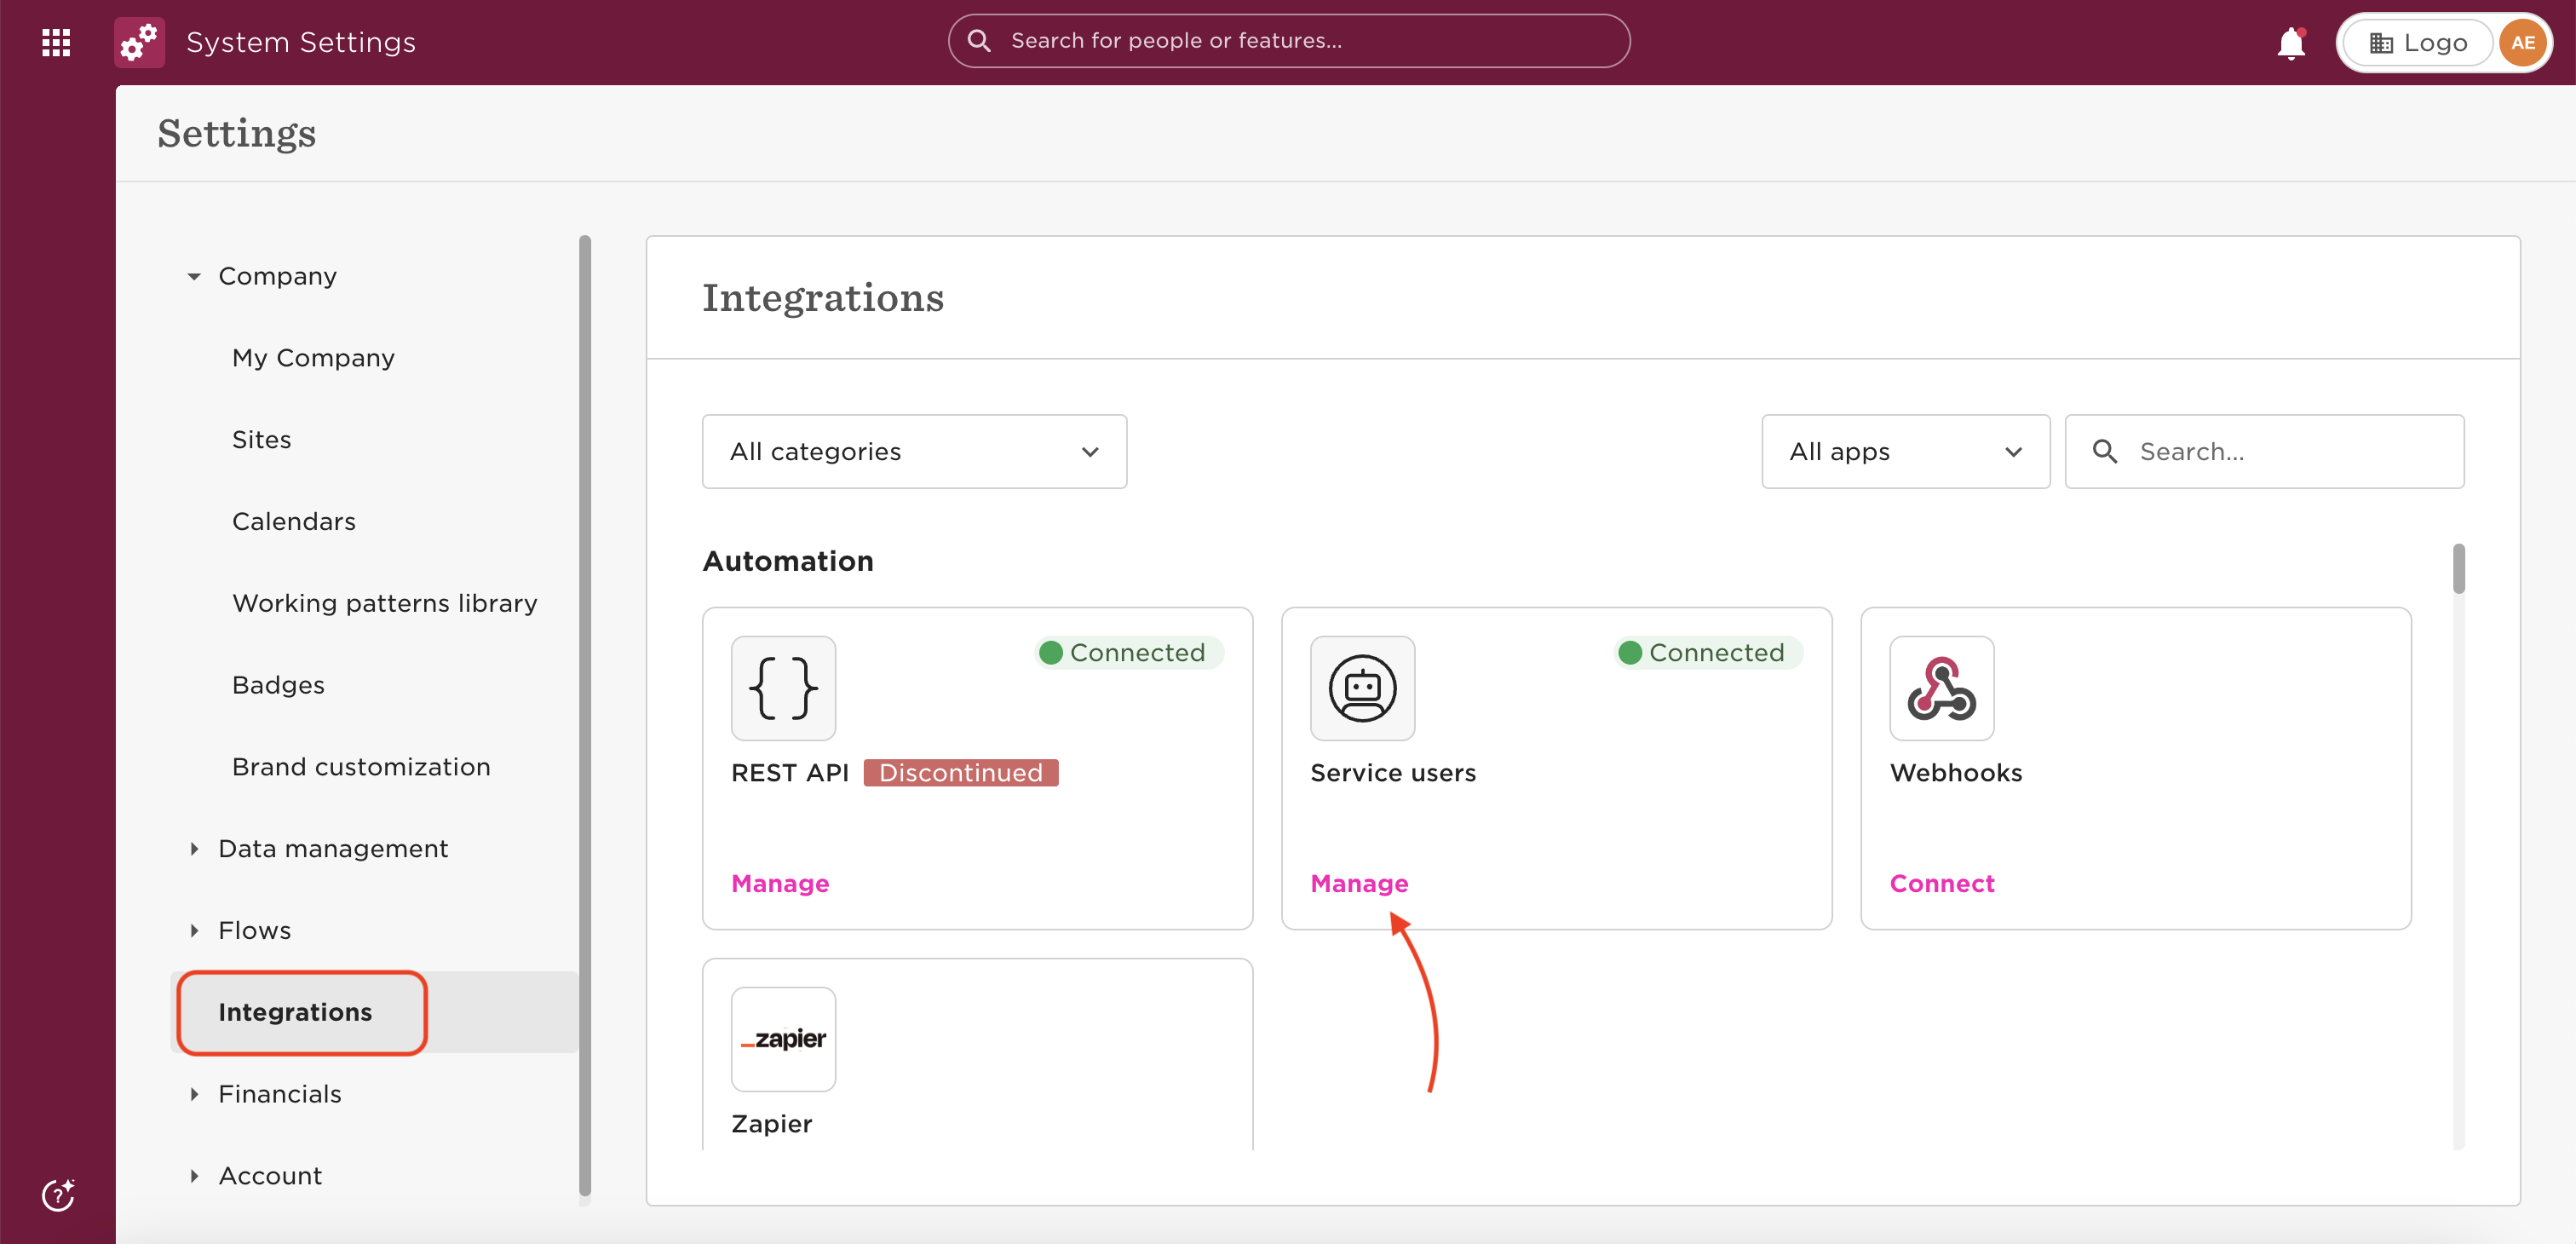
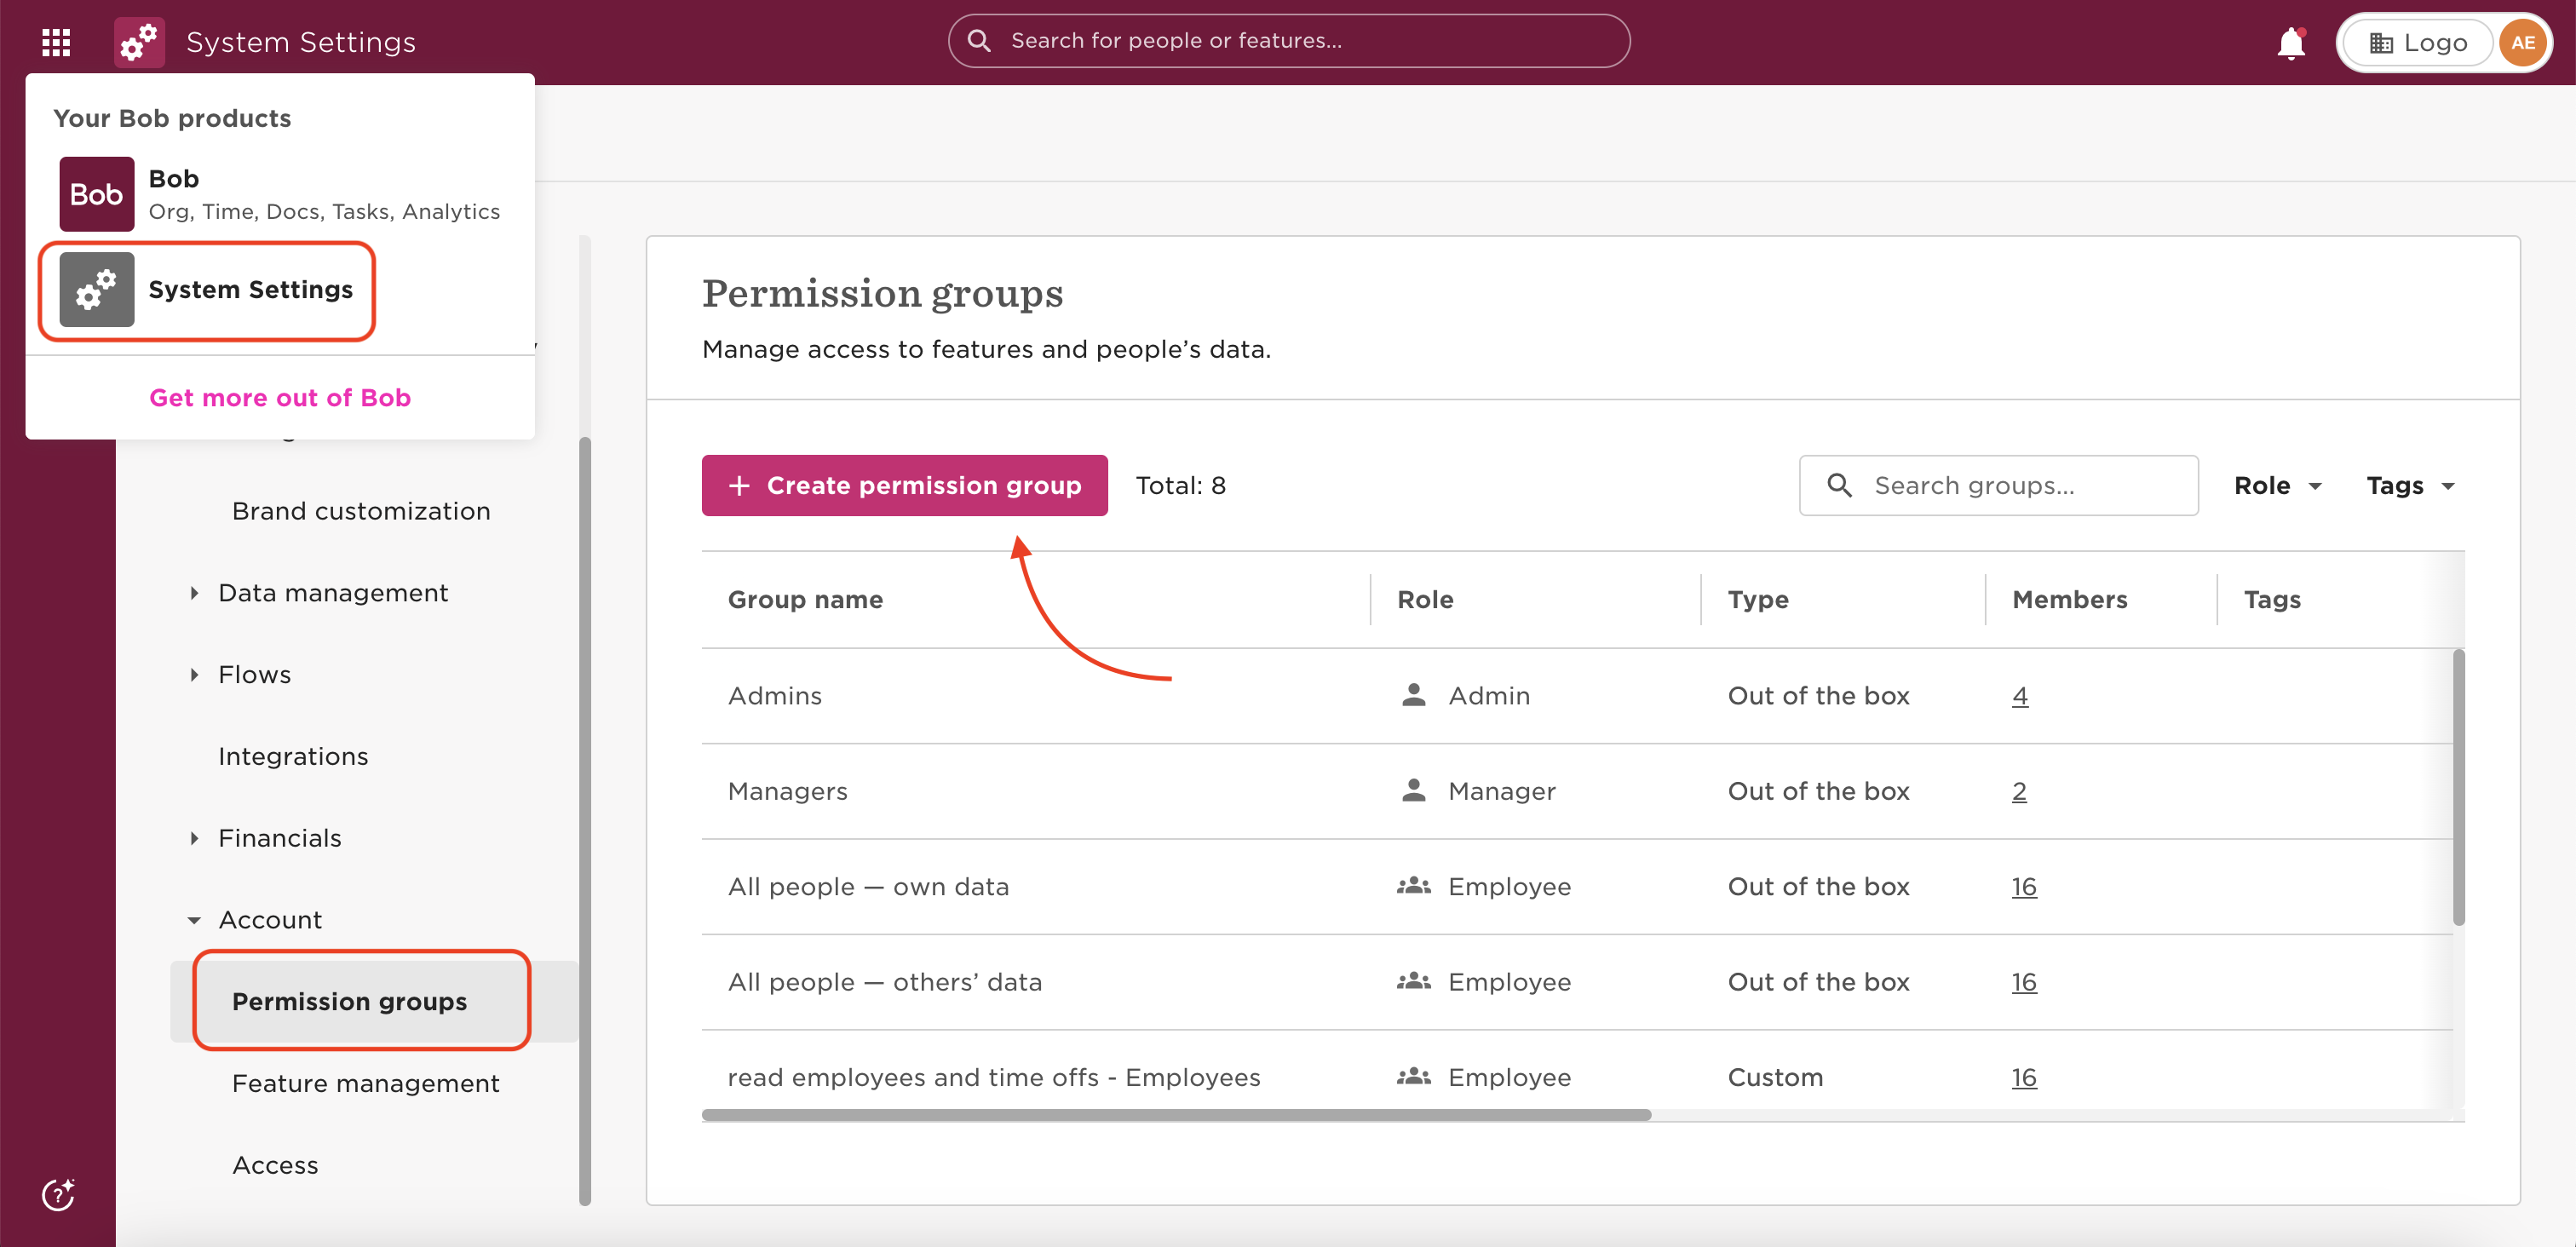
Click the gear icon in the left navigation bar and select System Settings from the dropdown menu.

In the System Settings sidebar, expand Integrations. Locate the Service users tile and click Manage.
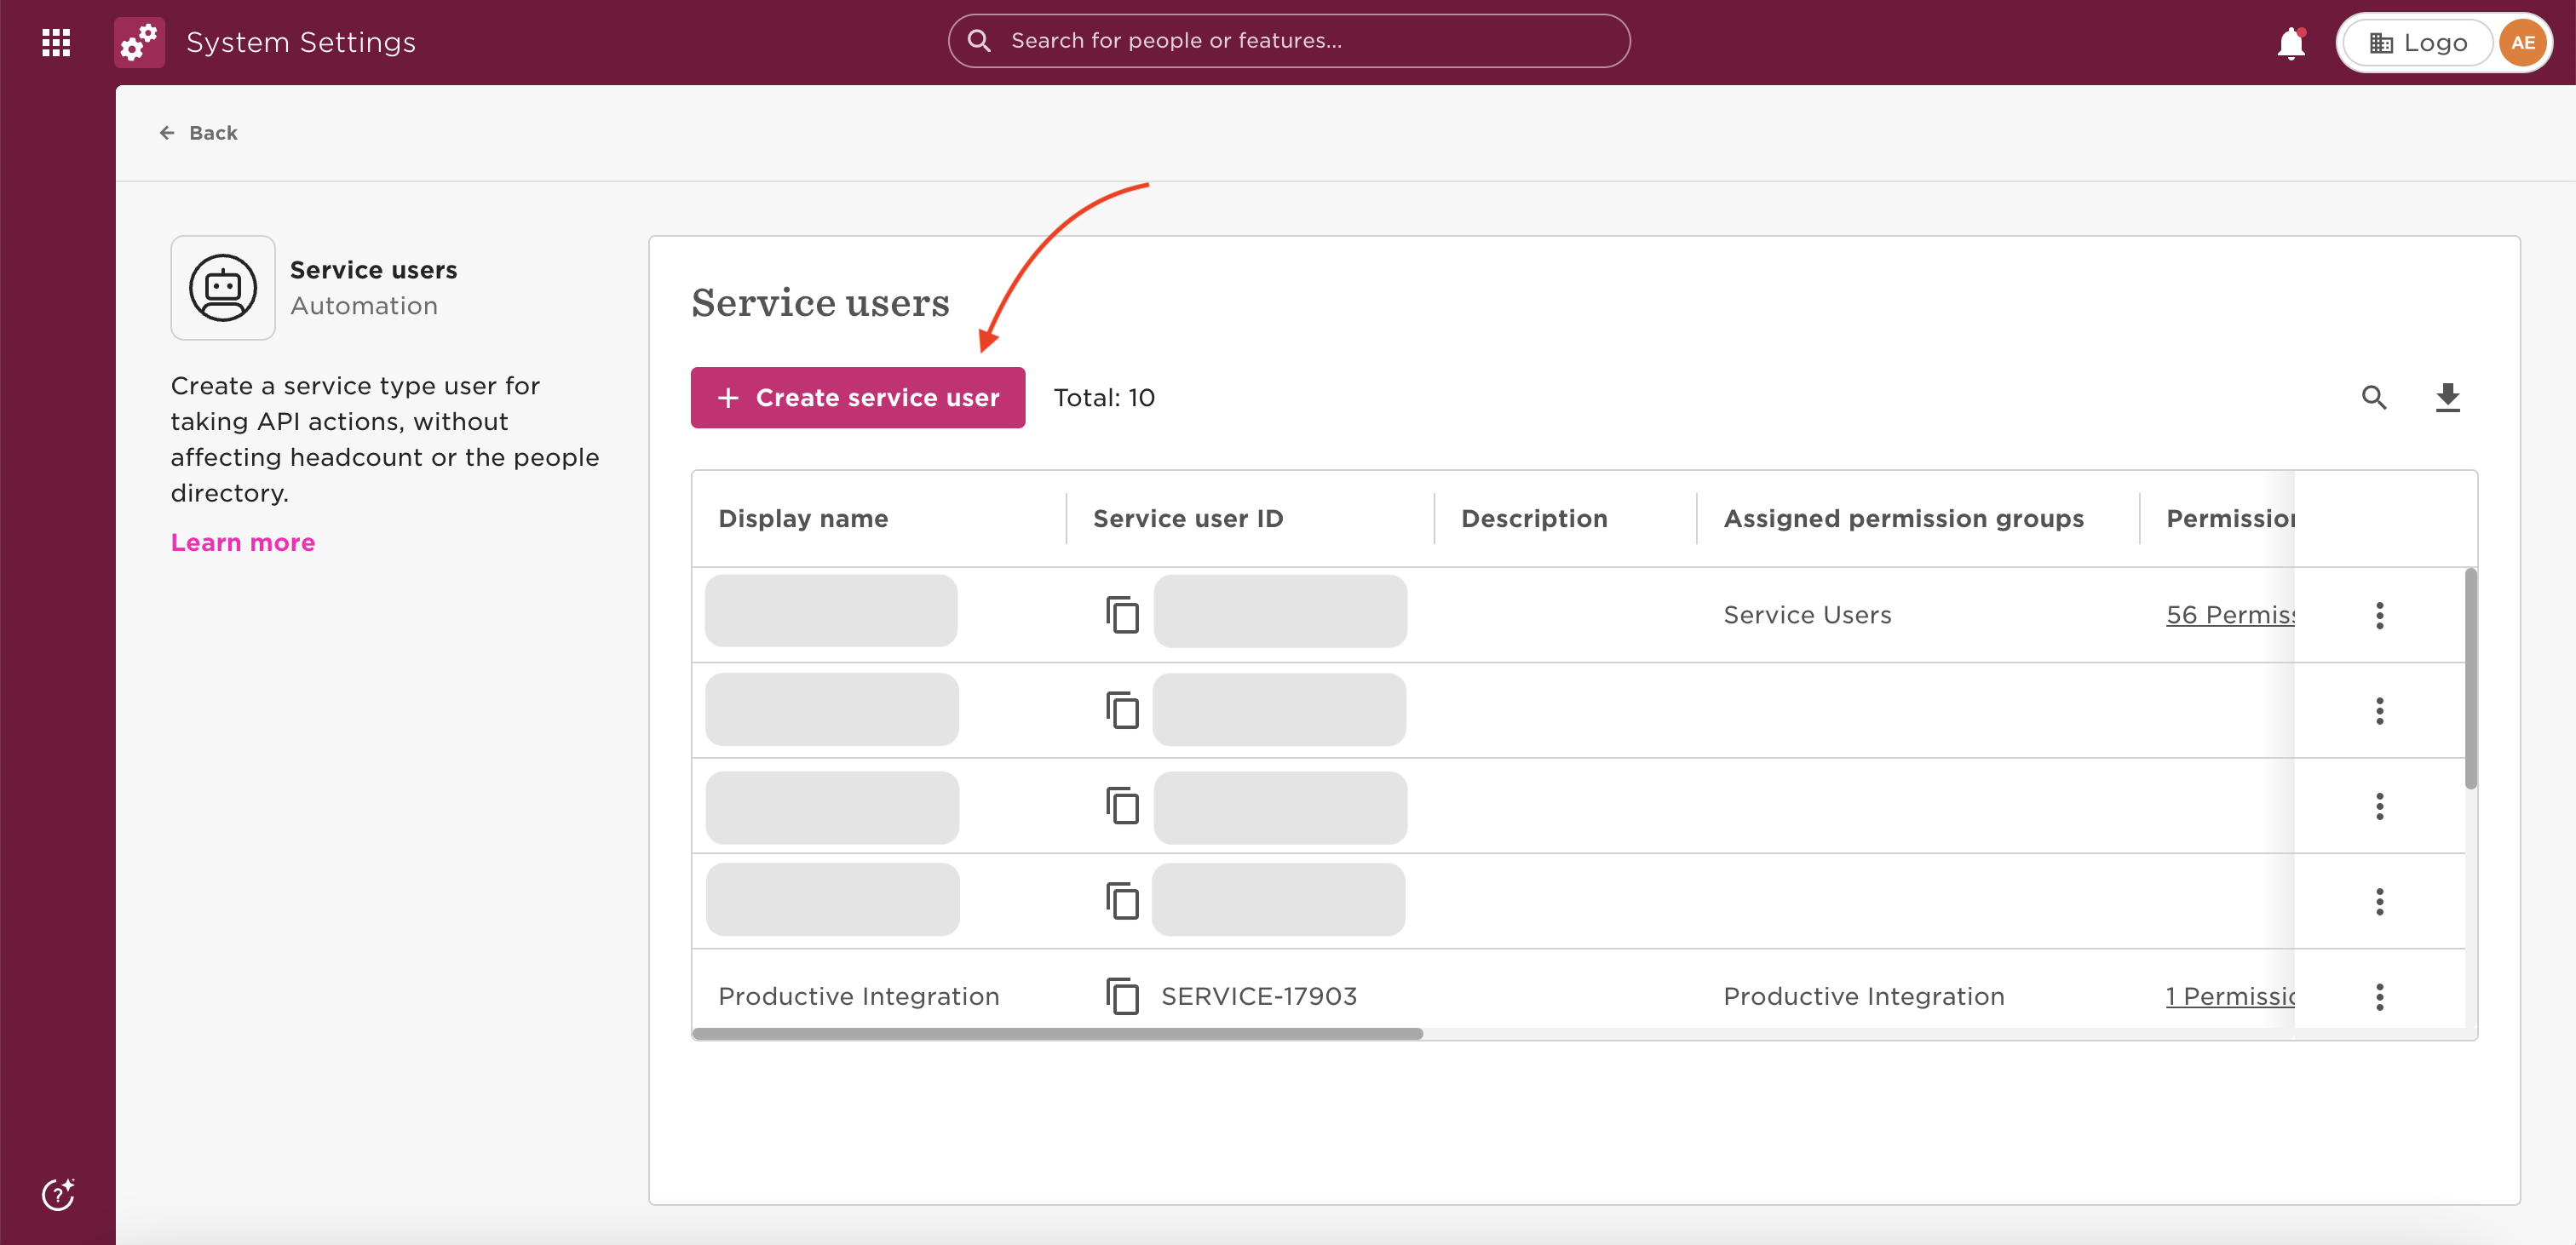
On the Service Users page, click + Create service user.
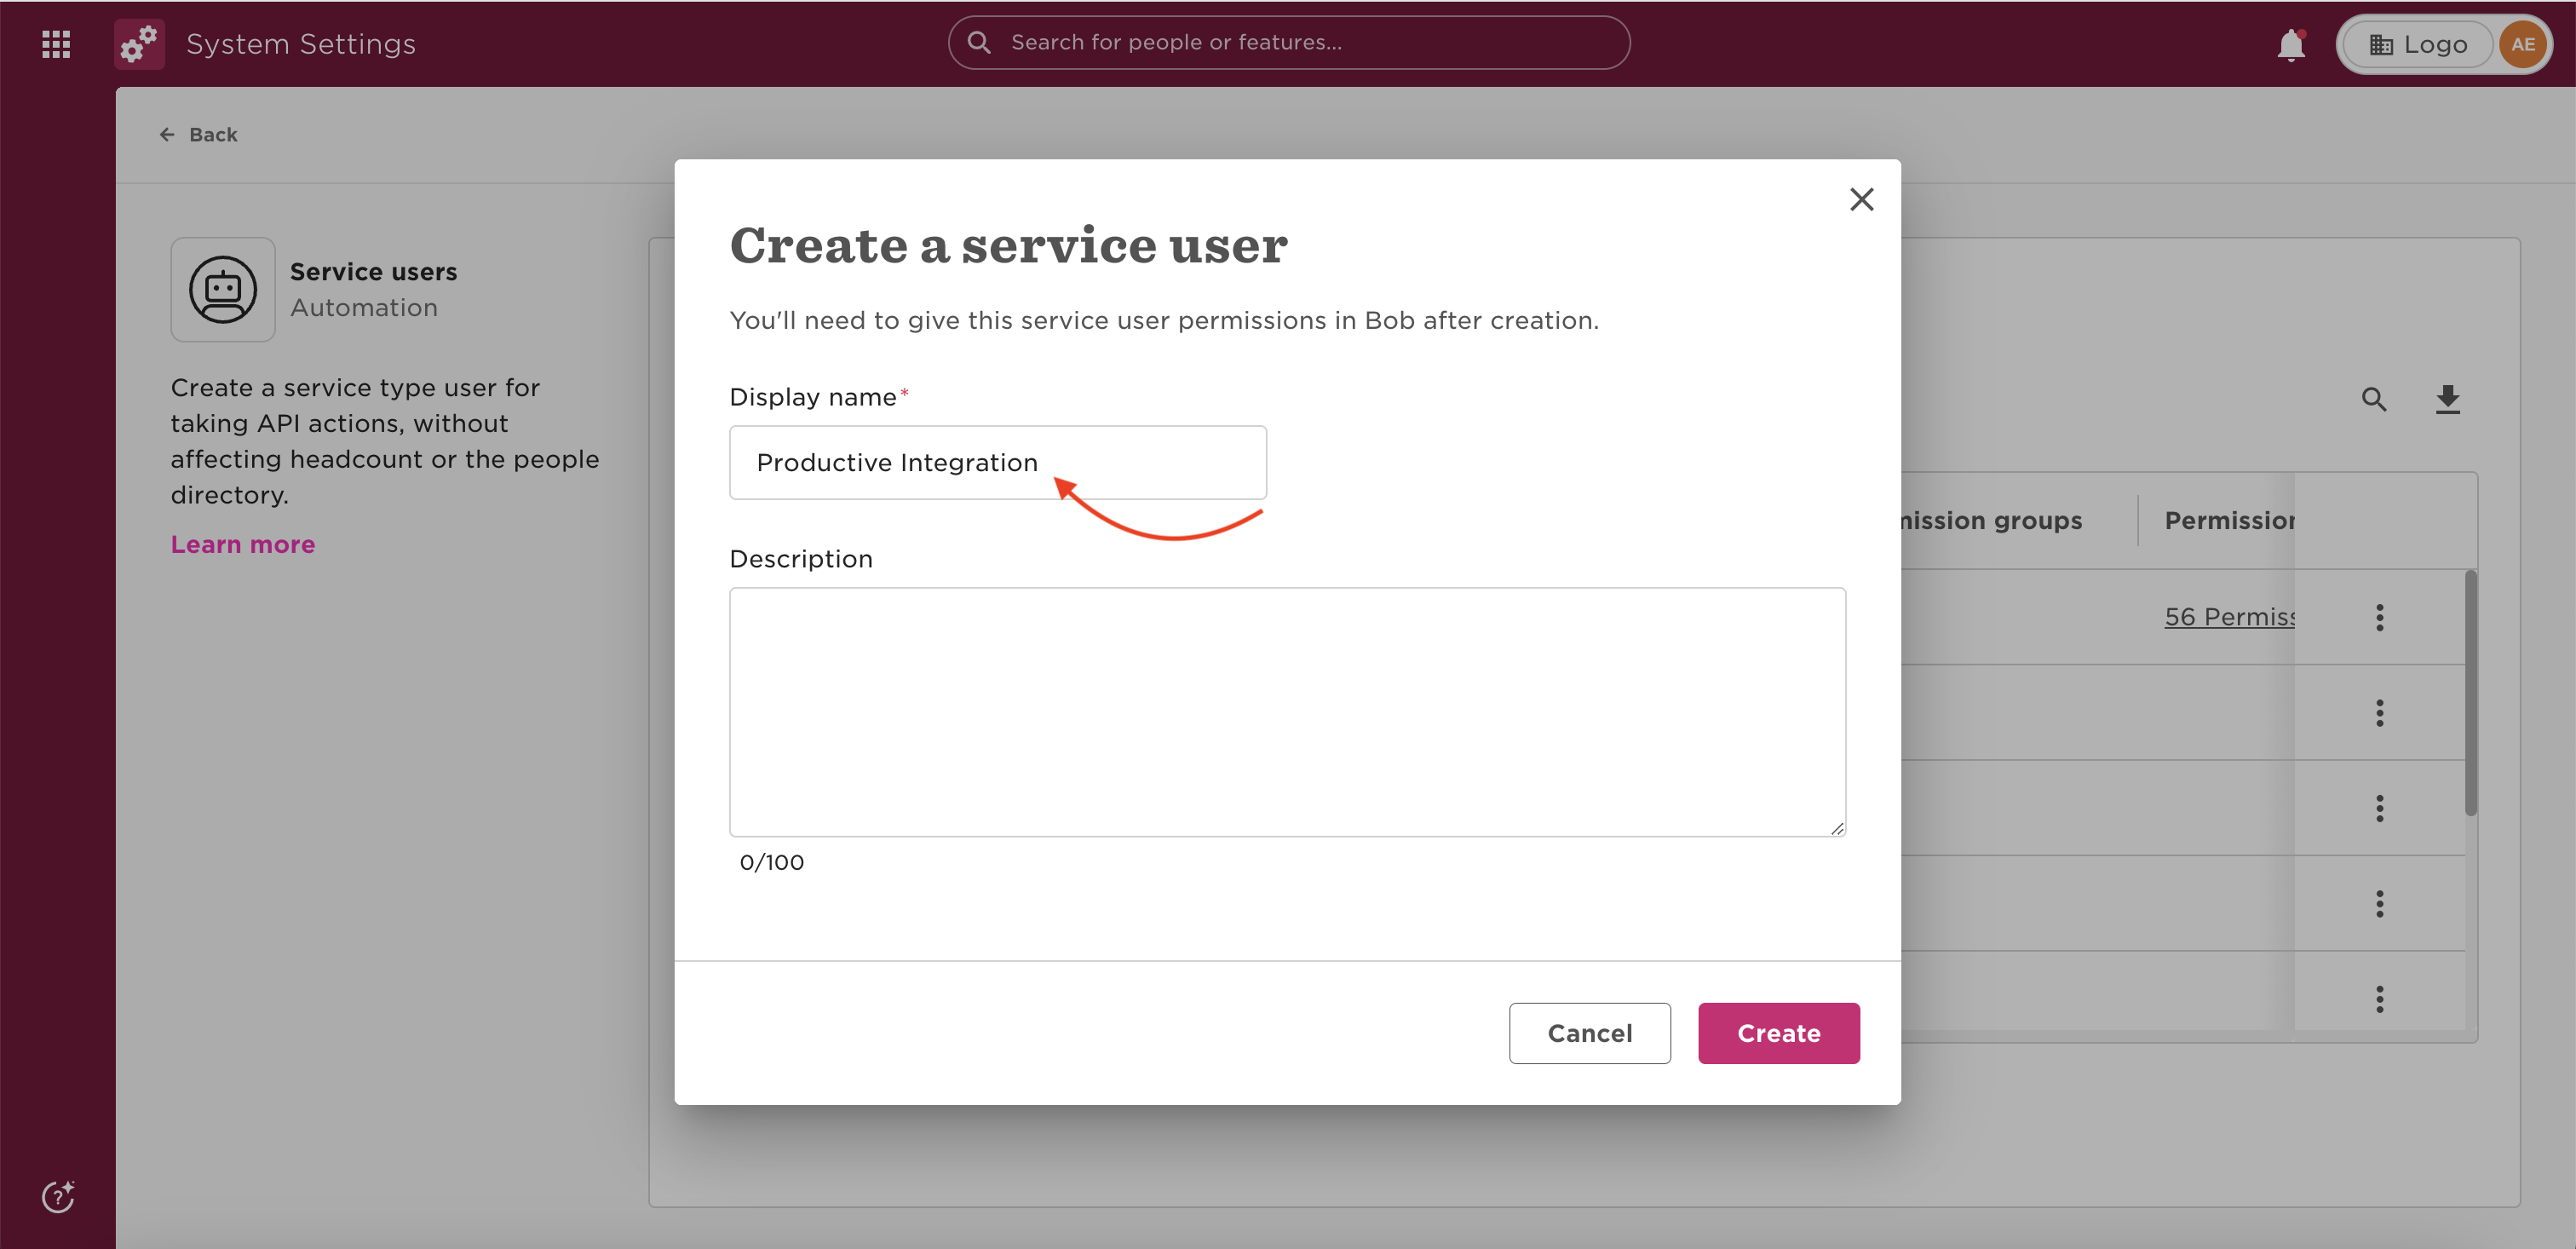
In the Create a service user dialog, enter a display name such as Frontegg Integration, then click Create.
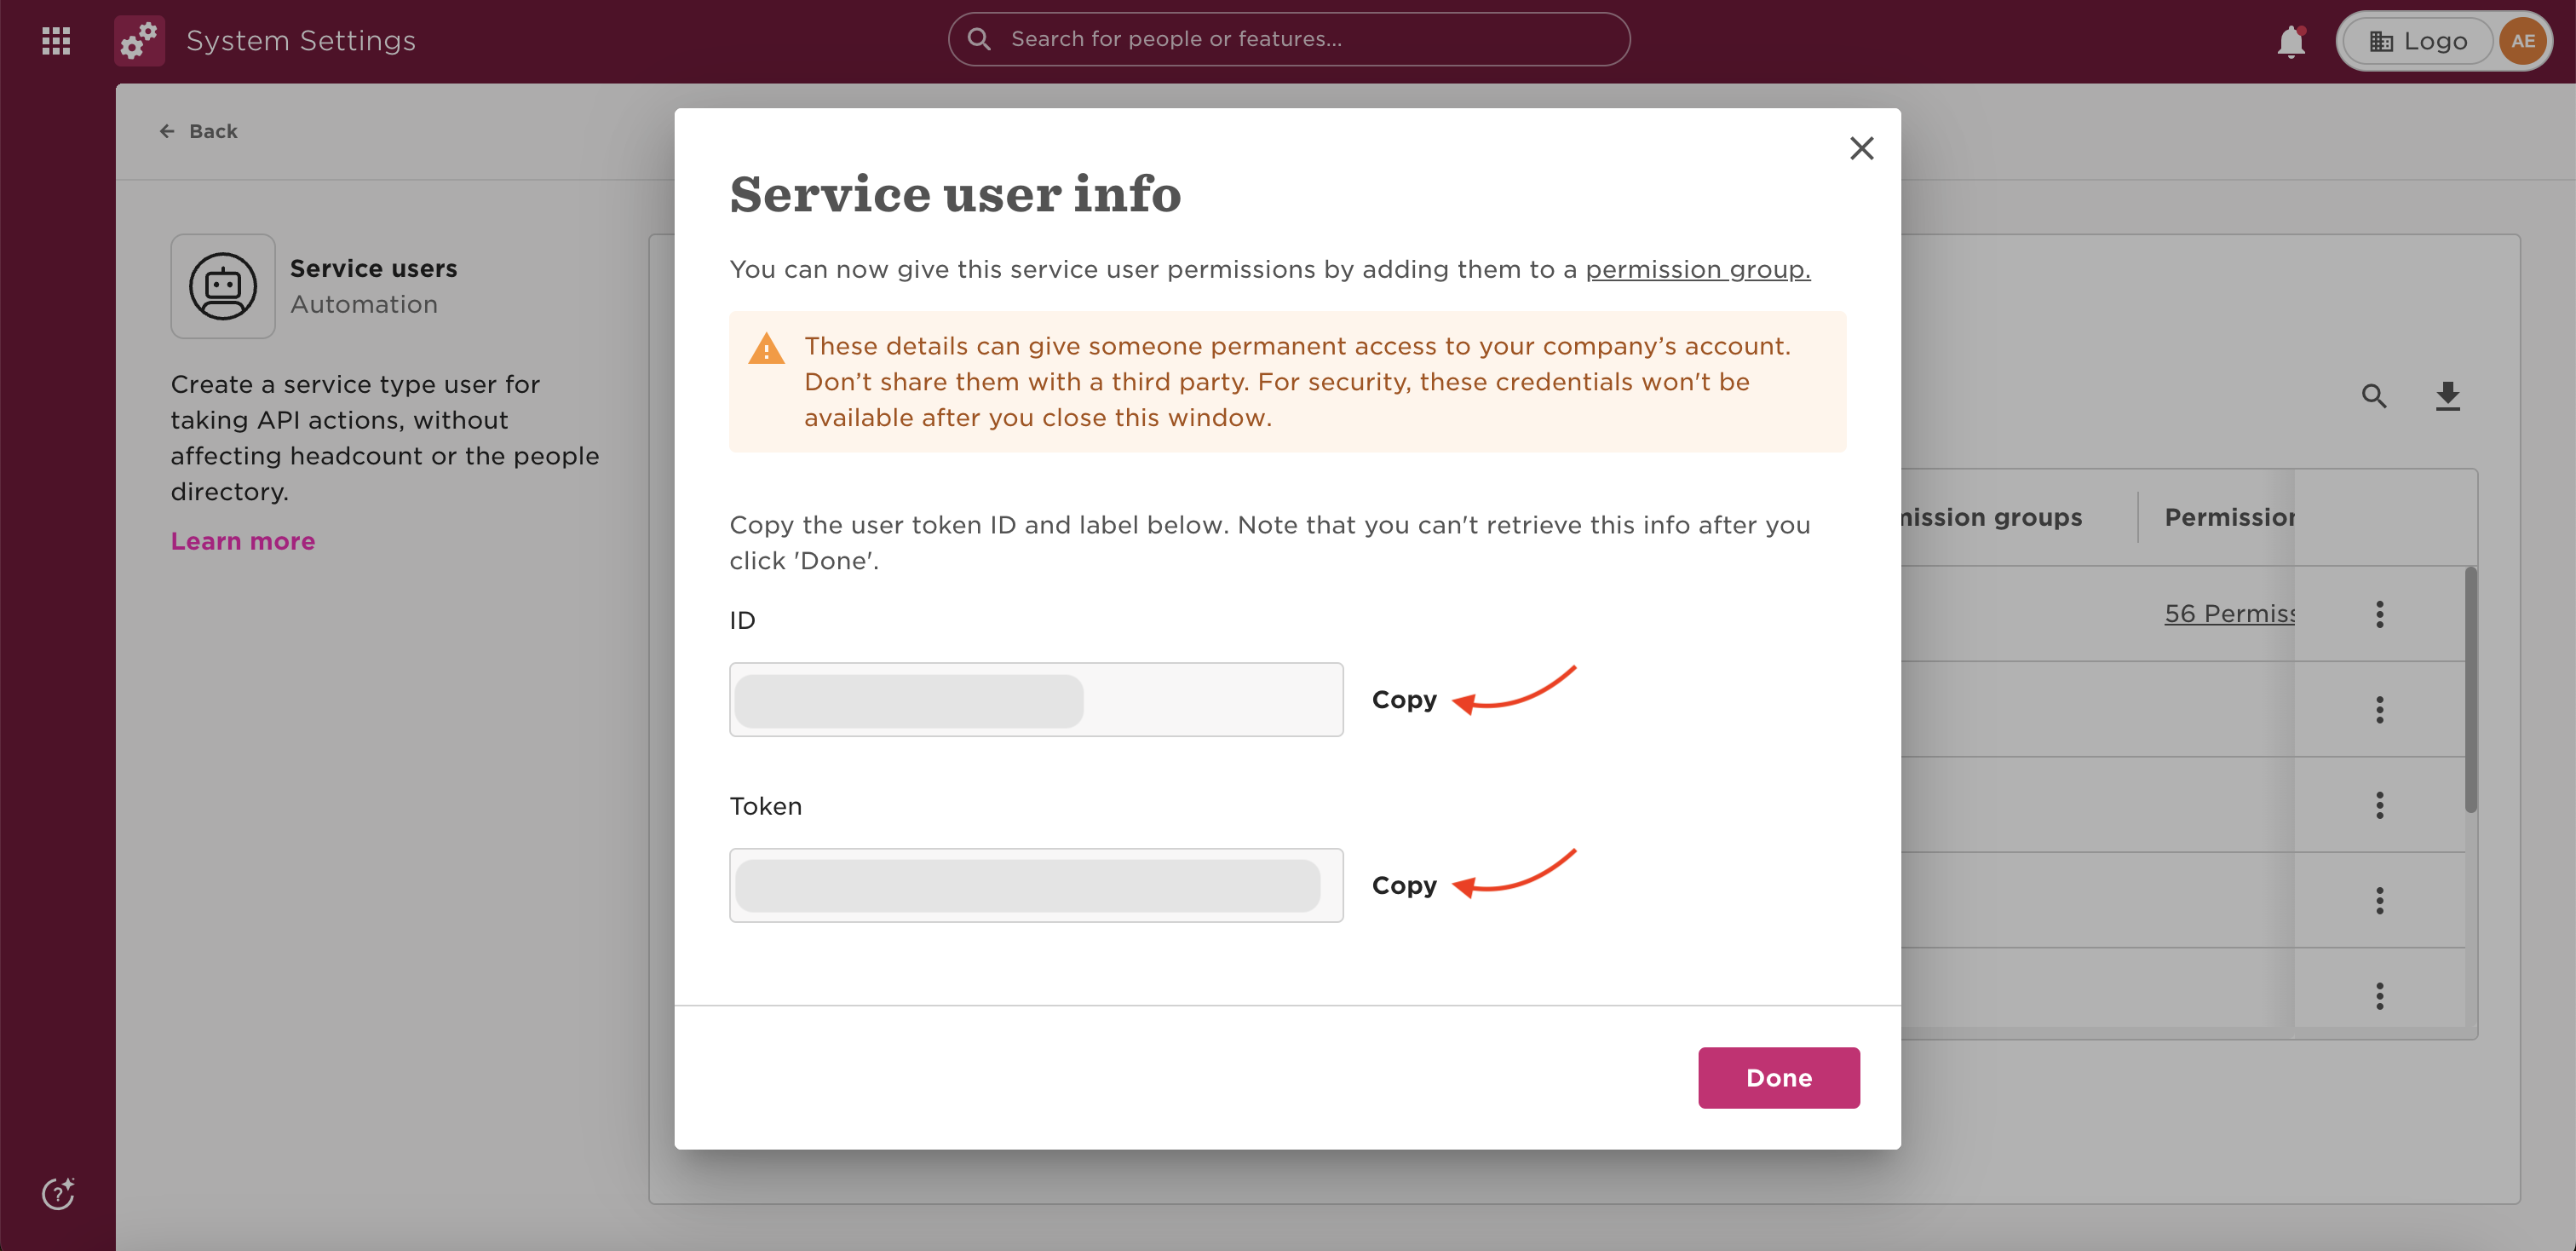
After creation, the Service user info dialog displays the ID and Token. Click Copy next to each value and store them securely.
Save your token immediately
Save your token immediately
The token is only displayed once. If you lose it, you must regenerate a new token from the service user's settings page — the old token will be invalidated.
In the System Settings sidebar, expand Account and click Permission groups. Then click + Create permission group.
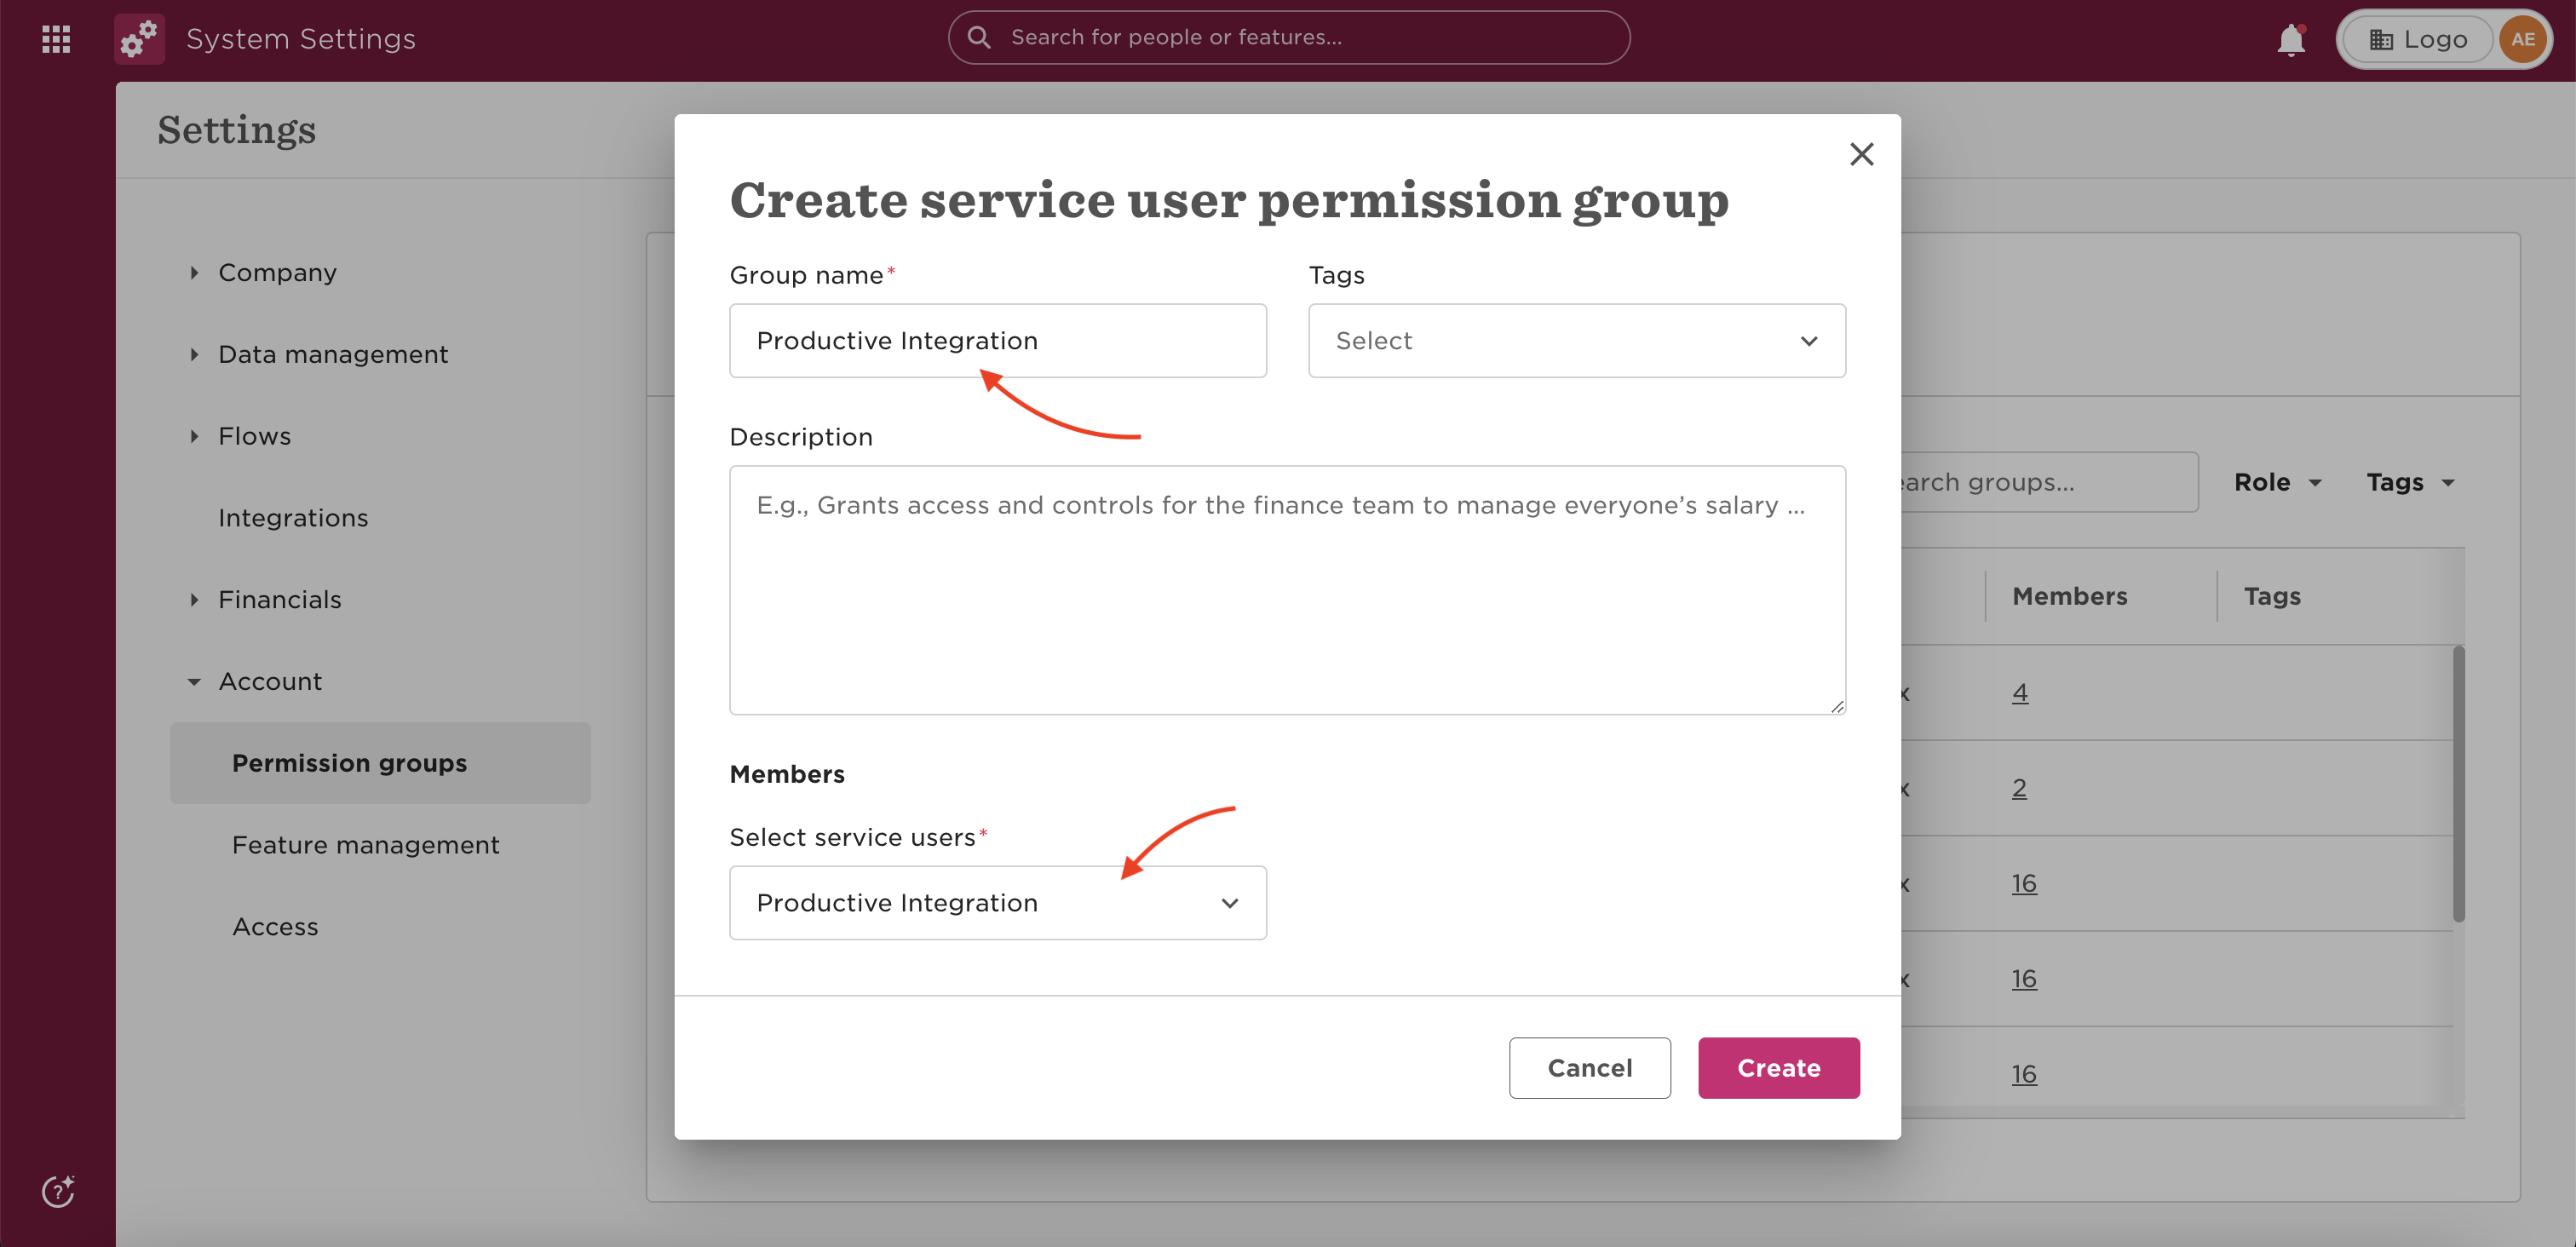
In the Create service user permission group dialog, enter a group name such as Frontegg Integration. Under Members, select the service user you created in Step 5, then click Create.
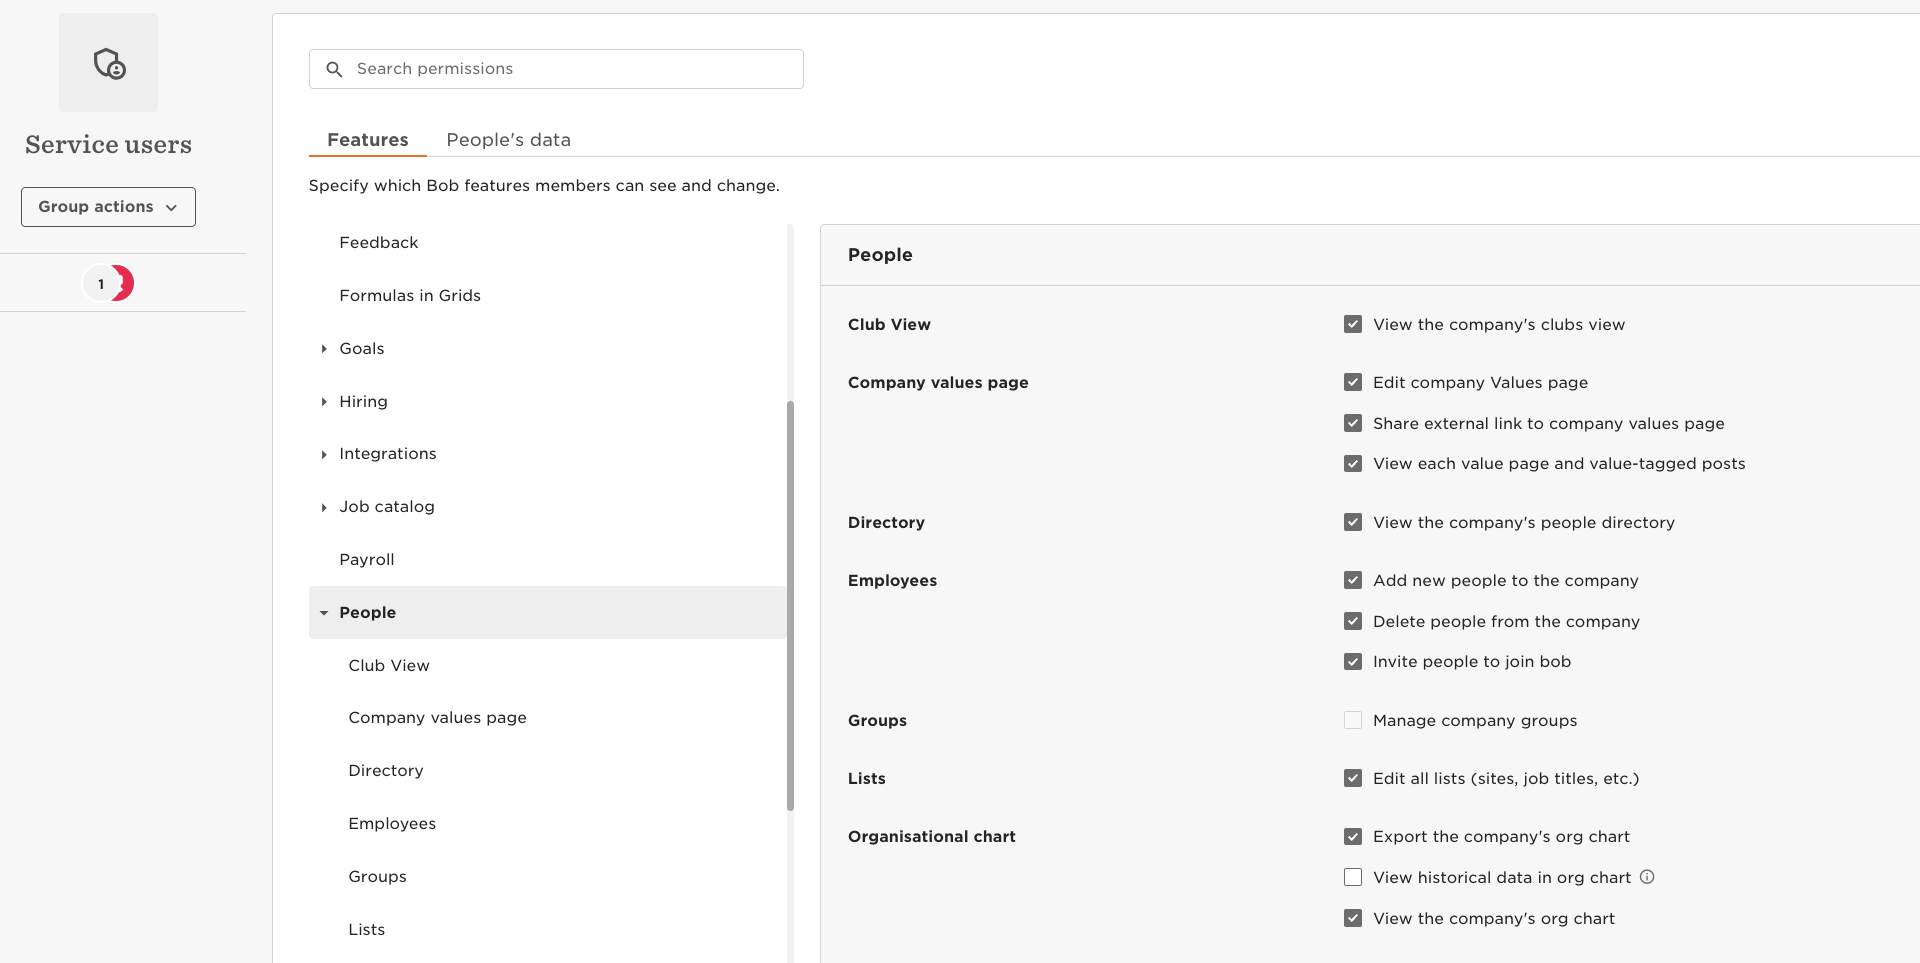
In the permission group settings, open the Features tab and click Edit in the top-right corner. Enable the feature areas that your integration requires. For the Frontegg integration, enable at minimum:
- People → Employees
- People → Directory
Click Save to apply the changes.
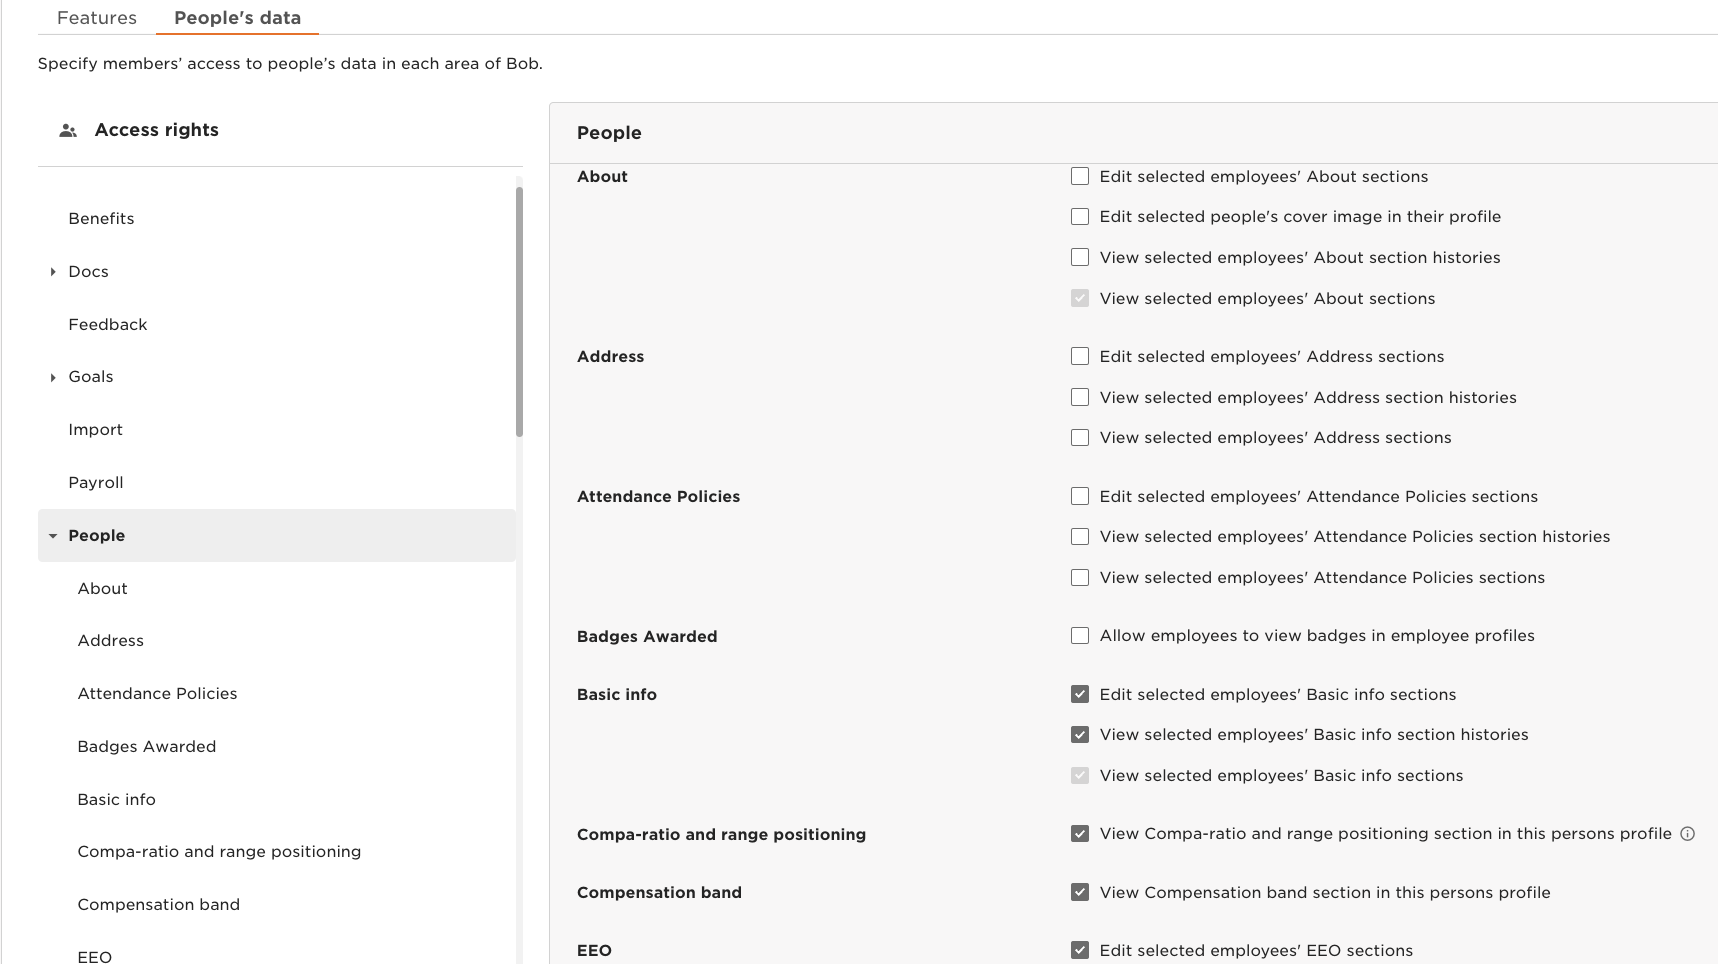
Open the People's data tab and click Edit. Enable view access for each data category your integration needs:
| Category | Minimum permission |
|---|---|
| About | View all employees' About sections |
| Work | View all employees' Work sections |
| Employment | View all employees' Employment sections |
| Time off | View all employees' Time off sections |
| Attendance | View all employees' Attendance Policies sections |
| Payroll | View all employees' Payroll sections |
Click Save and then Apply Changes to activate the permissions.
Once you have obtained your Service User ID and Token from the steps above, enter them in the integration configuration page of the Frontegg portal:
- Open the Frontegg portal and navigate to [ENVIRONMENT] → Integrations → HiBob.
- Enter the Service User ID in the corresponding field.
- Enter the Token in the API Token field.
- Click Save.
Keep your token secure
Keep your token secure
Never share or commit your API Token to version control.