Elastic Cloud Serverless is a fully managed, autoscaling Elasticsearch offering that removes the need to size nodes, shards, or clusters. The Elasticsearch Serverless integration with Frontegg allows your application to search, index, and manage documents, indices, ingest pipelines, scripts, and security objects in a Serverless project on behalf of your users.
Prerequisites
Prerequisites
- An Elastic Cloud account with access to create Serverless projects
- Organization-level permission to manage projects and API keys
- The full project endpoint URL, including scheme and port (for example,
https://my-project-cd40d6.es.us-central1.gcp.elastic.cloud:443)
API keys only
API keys only
Elasticsearch Serverless authenticates with API keys only — native realm users and password-based (Basic) authentication are not supported. The Frontegg connector sends every request with an Authorization: ApiKey <encoded-key> header; pasting a Basic token will not work.
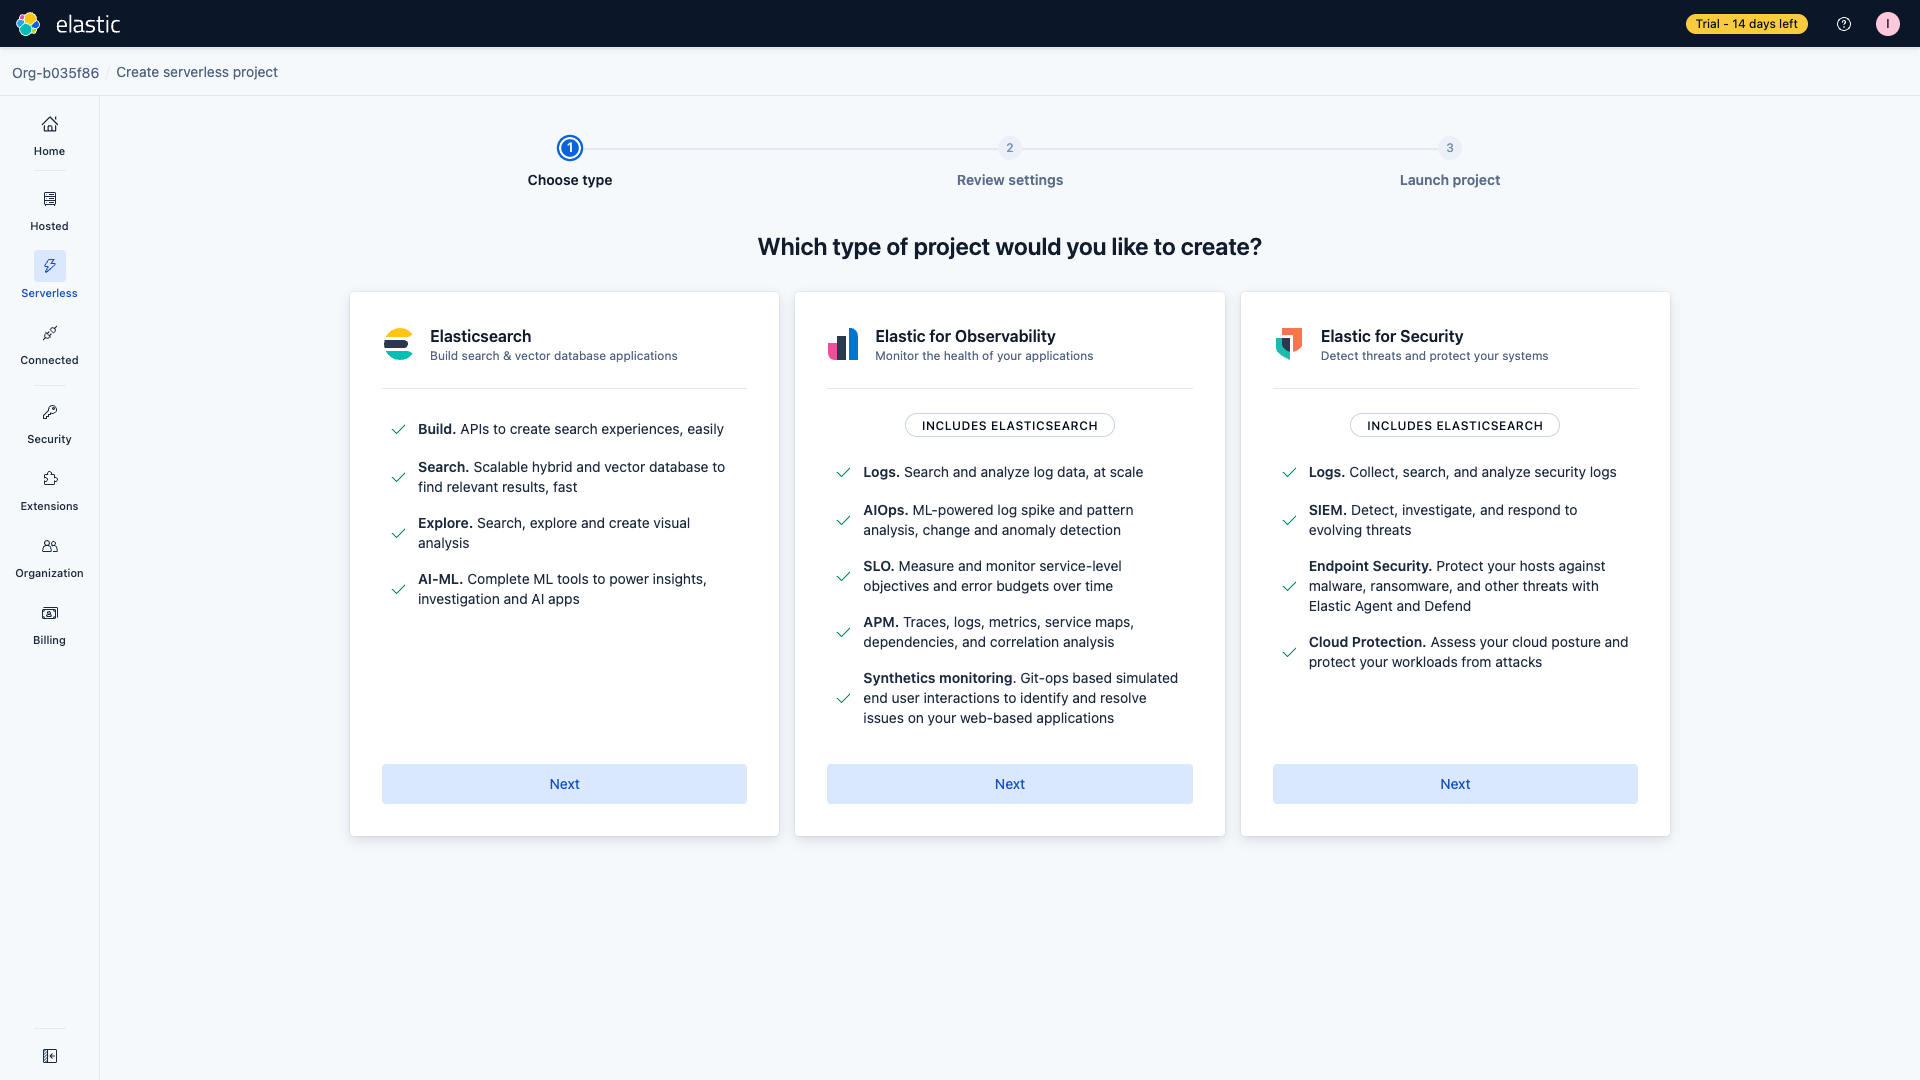
Go to cloud.elastic.co and sign in. In the left navigation, click Serverless. If you have no projects yet, click Create serverless project. On the Which type of project would you like to create? step, pick Elasticsearch and click Next step.
On the Confirm your project settings step:
- Name: enter
Frontegg Integration(or any descriptive name) - Cloud provider: pick the provider closest to your users (AWS, GCP, or Azure)
- Region: pick the region that matches your data-residency requirements
Click Create serverless project. Provisioning usually takes 1–2 minutes.

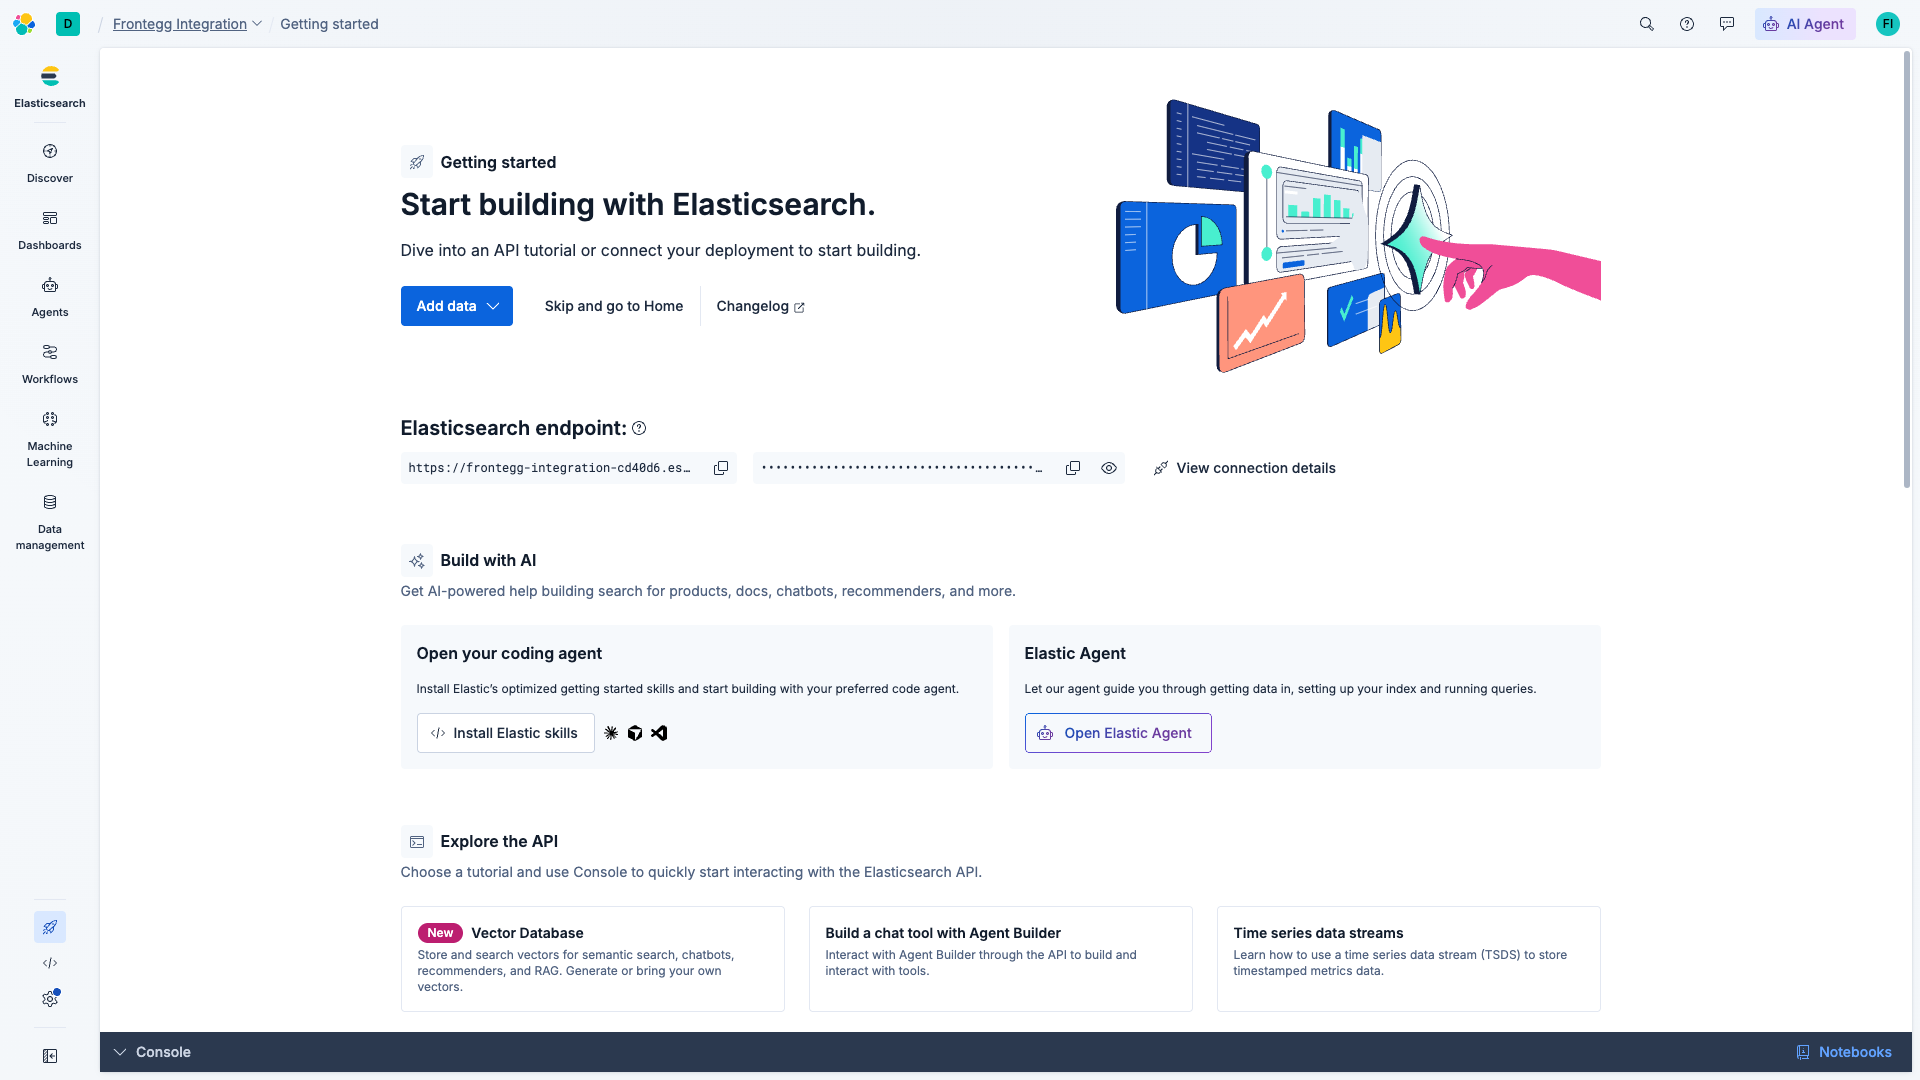
When the project is ready, click Open project. You land on the Kibana Getting started page, which displays the project's Elasticsearch endpoint. Copy that URL — this is the value you will paste into the Frontegg Serverless project endpoint URL field.
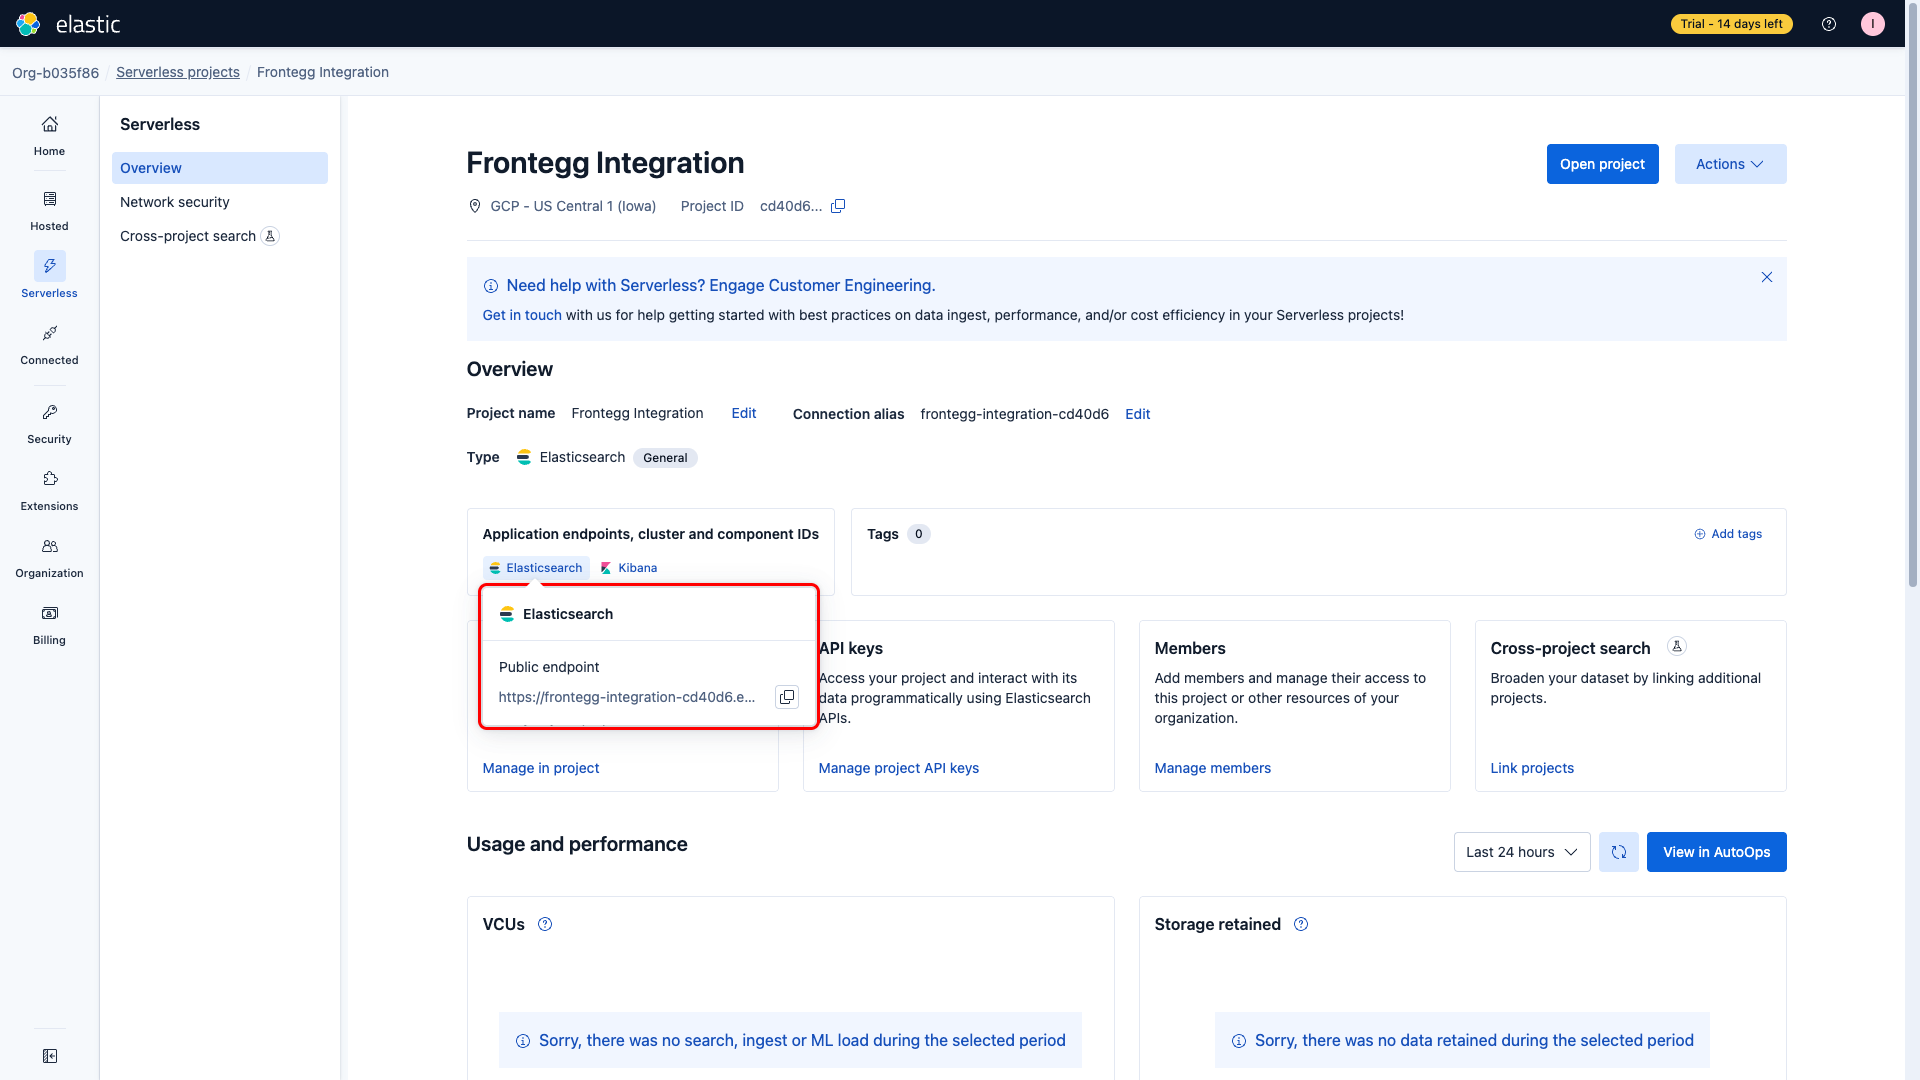
You can also find the endpoint in the Elastic Cloud admin console, on the project overview page under Application endpoints, cluster and component IDs → Open Elasticsearch.
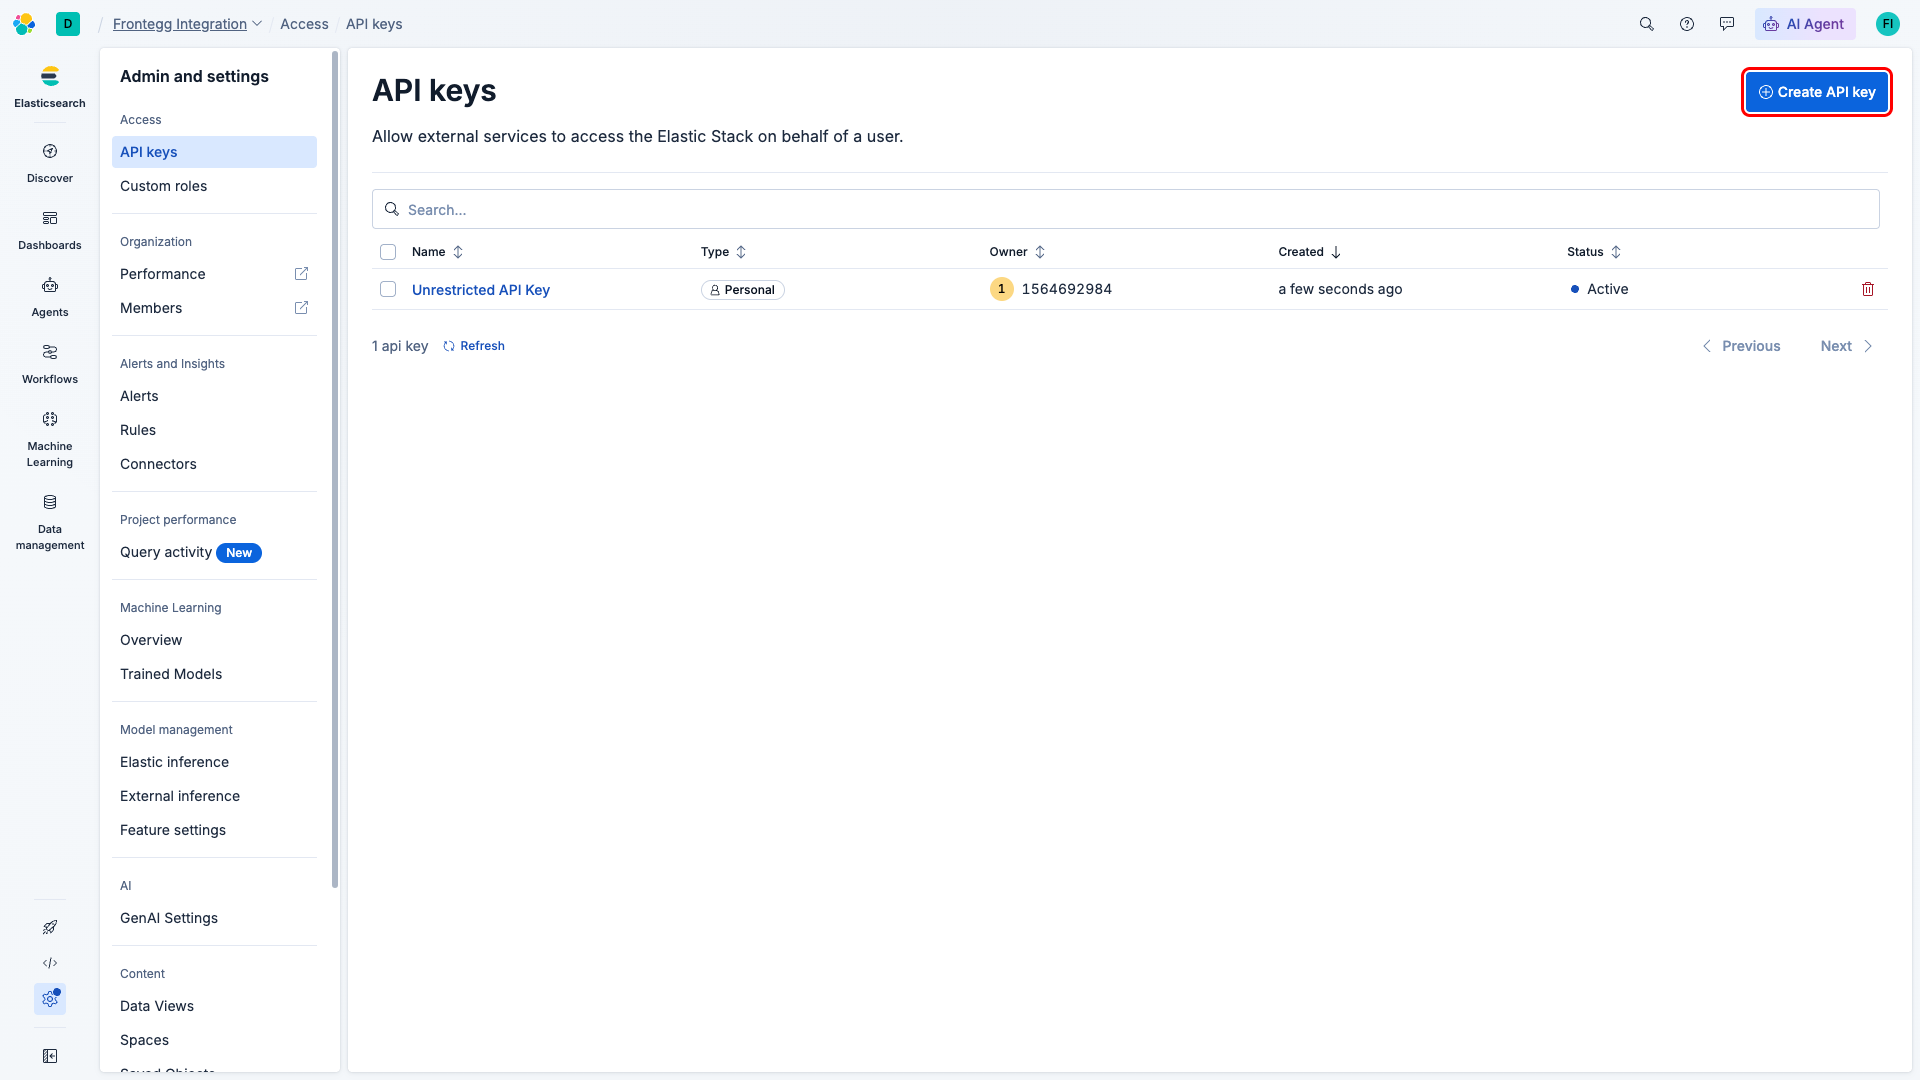
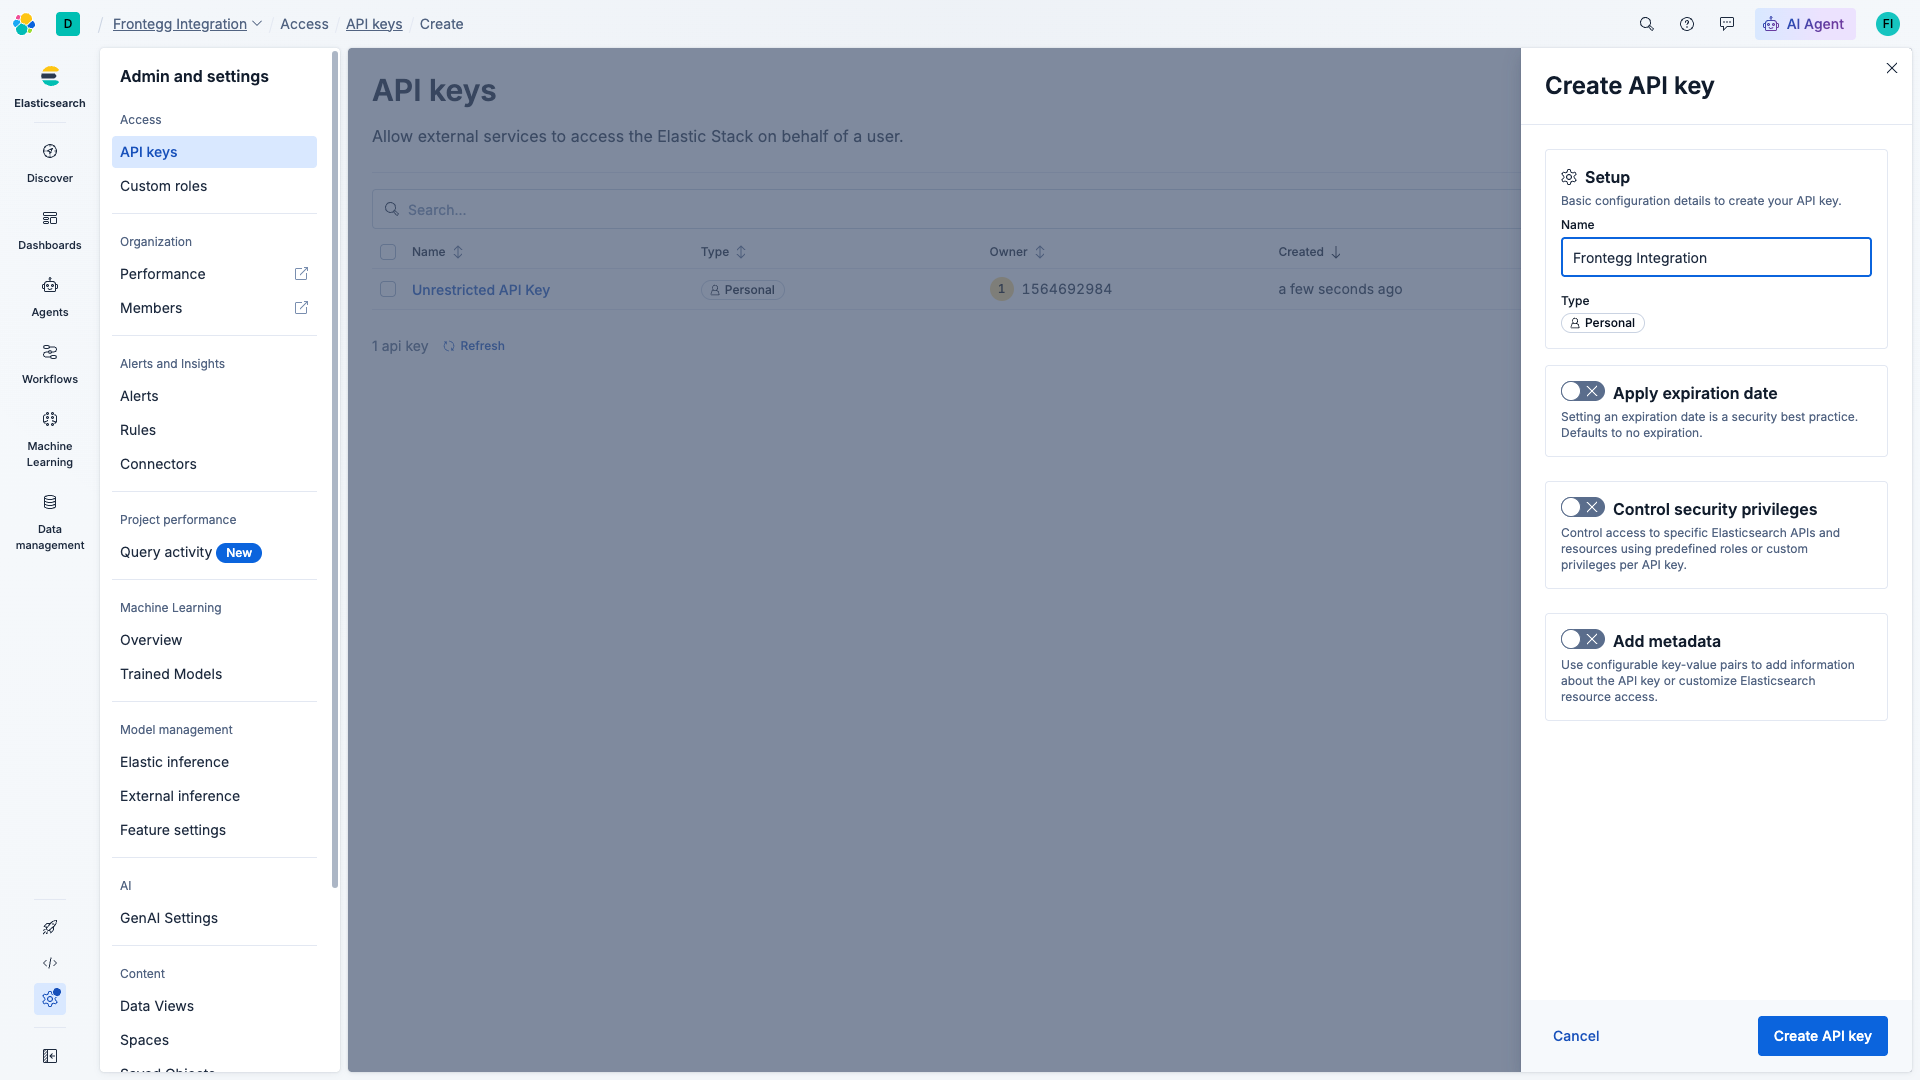
In the Kibana side navigation, open Admin and settings → Access → API keys. You land on the API keys list for your account. Click Create API key in the top-right corner.
In the Create API key dialog:
- Name:
Frontegg Integration - Type: leave as Personal
- Apply expiration date: leave off for non-expiring keys, or set an expiration if required by your security policy
- Control security privileges: leave off to inherit your account's privileges, or enable it to restrict the key to specific indices and APIs
Click Create API key.
Which privileges does the connector need?
Which privileges does the connector need?
The Serverless connector exposes search, documents, a subset of indices and cat endpoints, templates, ingest, scripts, analysis, security, and SQL APIs. Grant the key read/write access to every index your agents will touch. Cluster-level, node-level, snapshot, and tasks APIs are not available on Serverless.
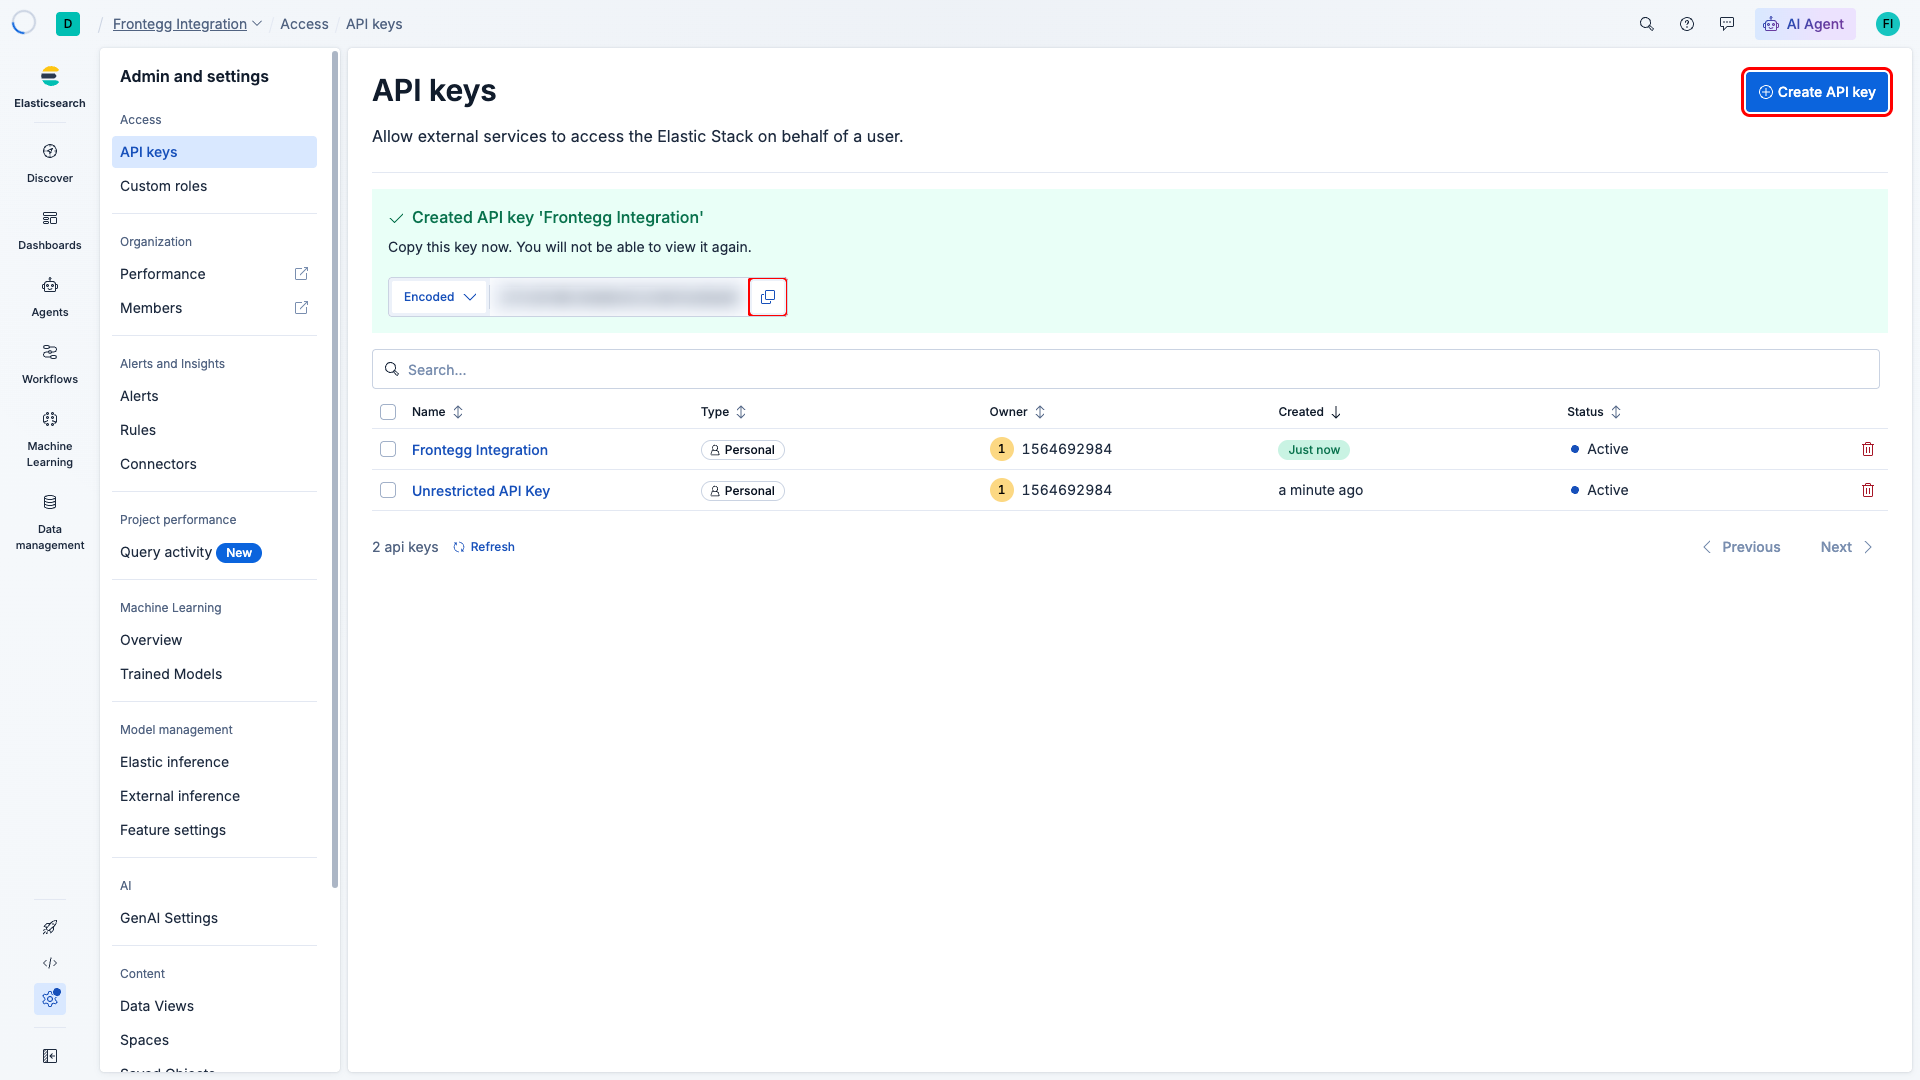
After clicking Create API key, Kibana displays the generated key once. Switch the output format selector to Encoded and click the copy icon. The encoded key is a single base64 string of the form <id>:<api_key> — paste this value into the Frontegg API Key field.
Copy the API key now
Copy the API key now
Kibana does not let you view the encoded value again after closing the dialog. If you lose it, create a new API key and delete the old one from the API keys list.
Once you have the encoded API key from the steps above, enter it in the integration configuration page of the Frontegg portal:
- Open the Frontegg portal and navigate to [ENVIRONMENT] → Integrations → Elasticsearch Serverless.
- Paste the encoded API Key into the API Key field.
- Paste your project endpoint URL, including scheme and port, into the Serverless project endpoint URL field.
- Click Save.
Keep your credentials secure
Keep your credentials secure
Never share or commit your API key to version control. Rotate the credential from the project's API keys page if you suspect it has been leaked.
Elasticsearch Serverless does not expose the full self-managed API surface. The connector preserves the shape of the API, but the following operation groups are unavailable on Serverless and will return an error at execution time:
| Operation group | Notes |
|---|---|
| Cluster APIs | Cluster-level state, settings, and health are managed by Elastic. |
| Node APIs | Nodes are not exposed to the user. |
| Snapshot APIs | Snapshots are handled automatically by Elastic. |
| Tasks APIs | Task management is not available to users. |
_open / _close on indices | Not supported on Serverless. |
cat APIs for nodes, shards, health | Only catIndices, catAliases, and catCount are exposed. |