Webex is a collaboration platform by Cisco for messaging, meetings, and team communication. Integrating Webex with Frontegg allows your application to access messages, rooms, memberships, and meetings on behalf of your users using OAuth 2.0.
Prerequisites
Prerequisites
- A Webex developer account
- Access to the Webex developer portal
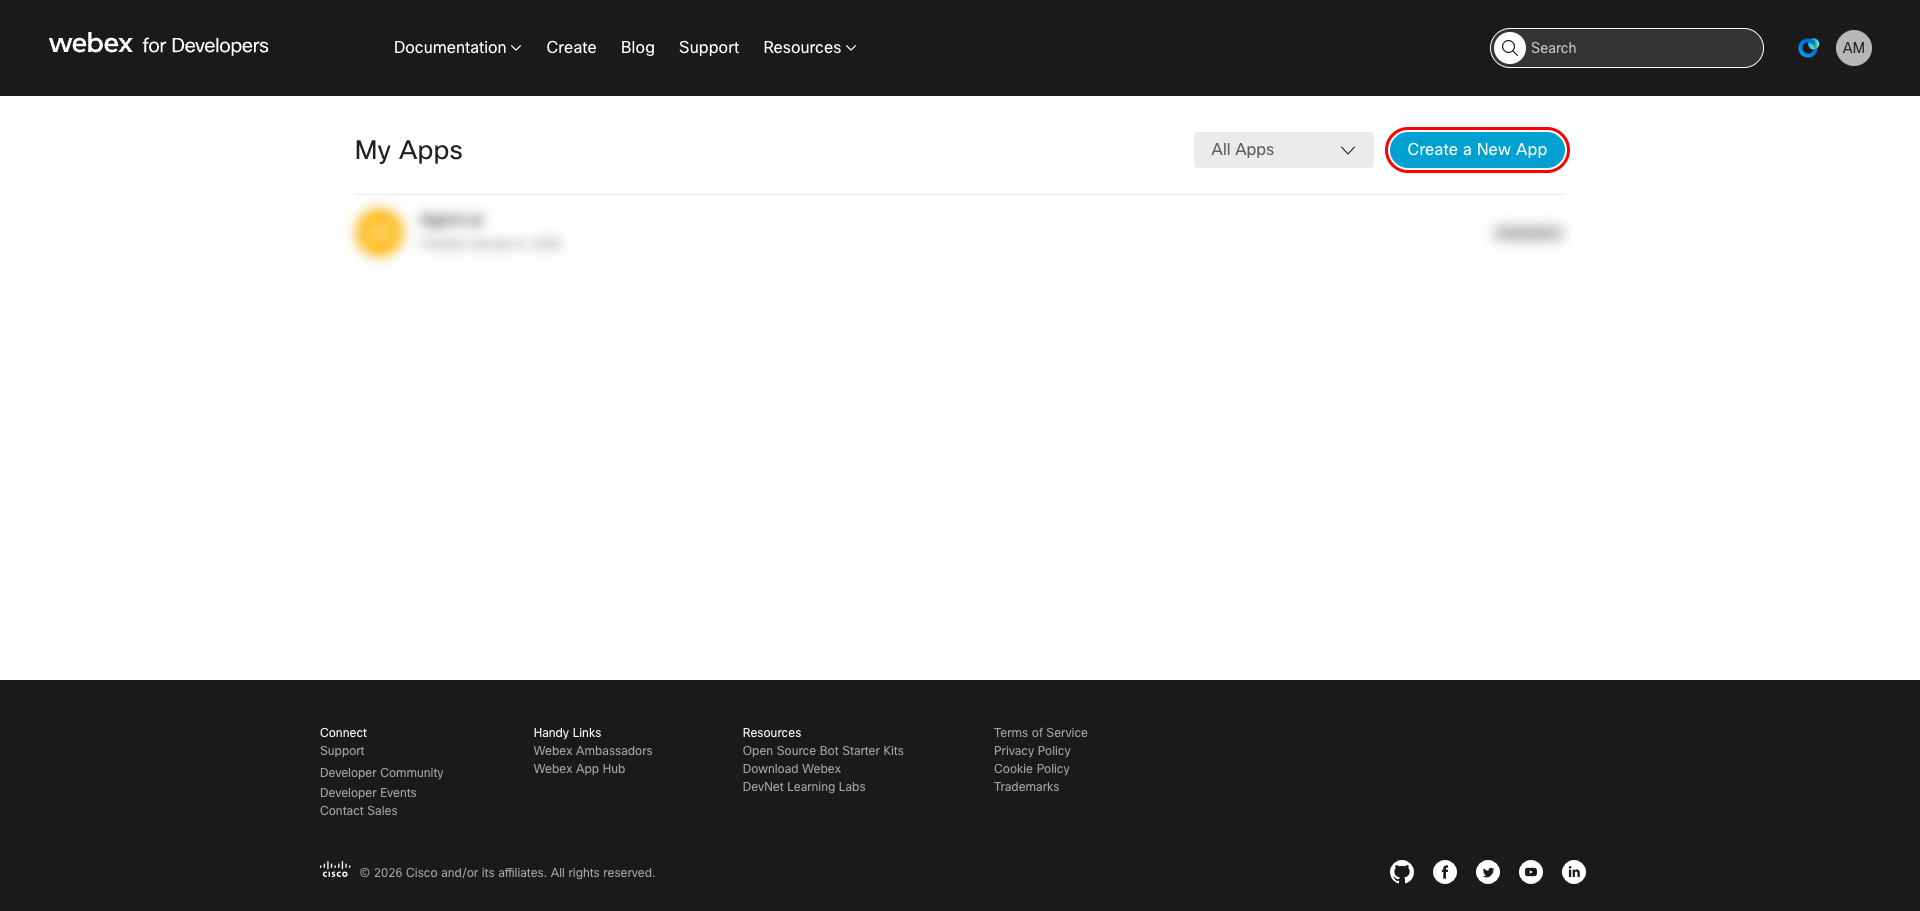
Log in to Webex for Developers and click My Apps in the top navigation. The My Apps page lists all your existing integrations and bots.
Click Create a New App to start creating a new integration.
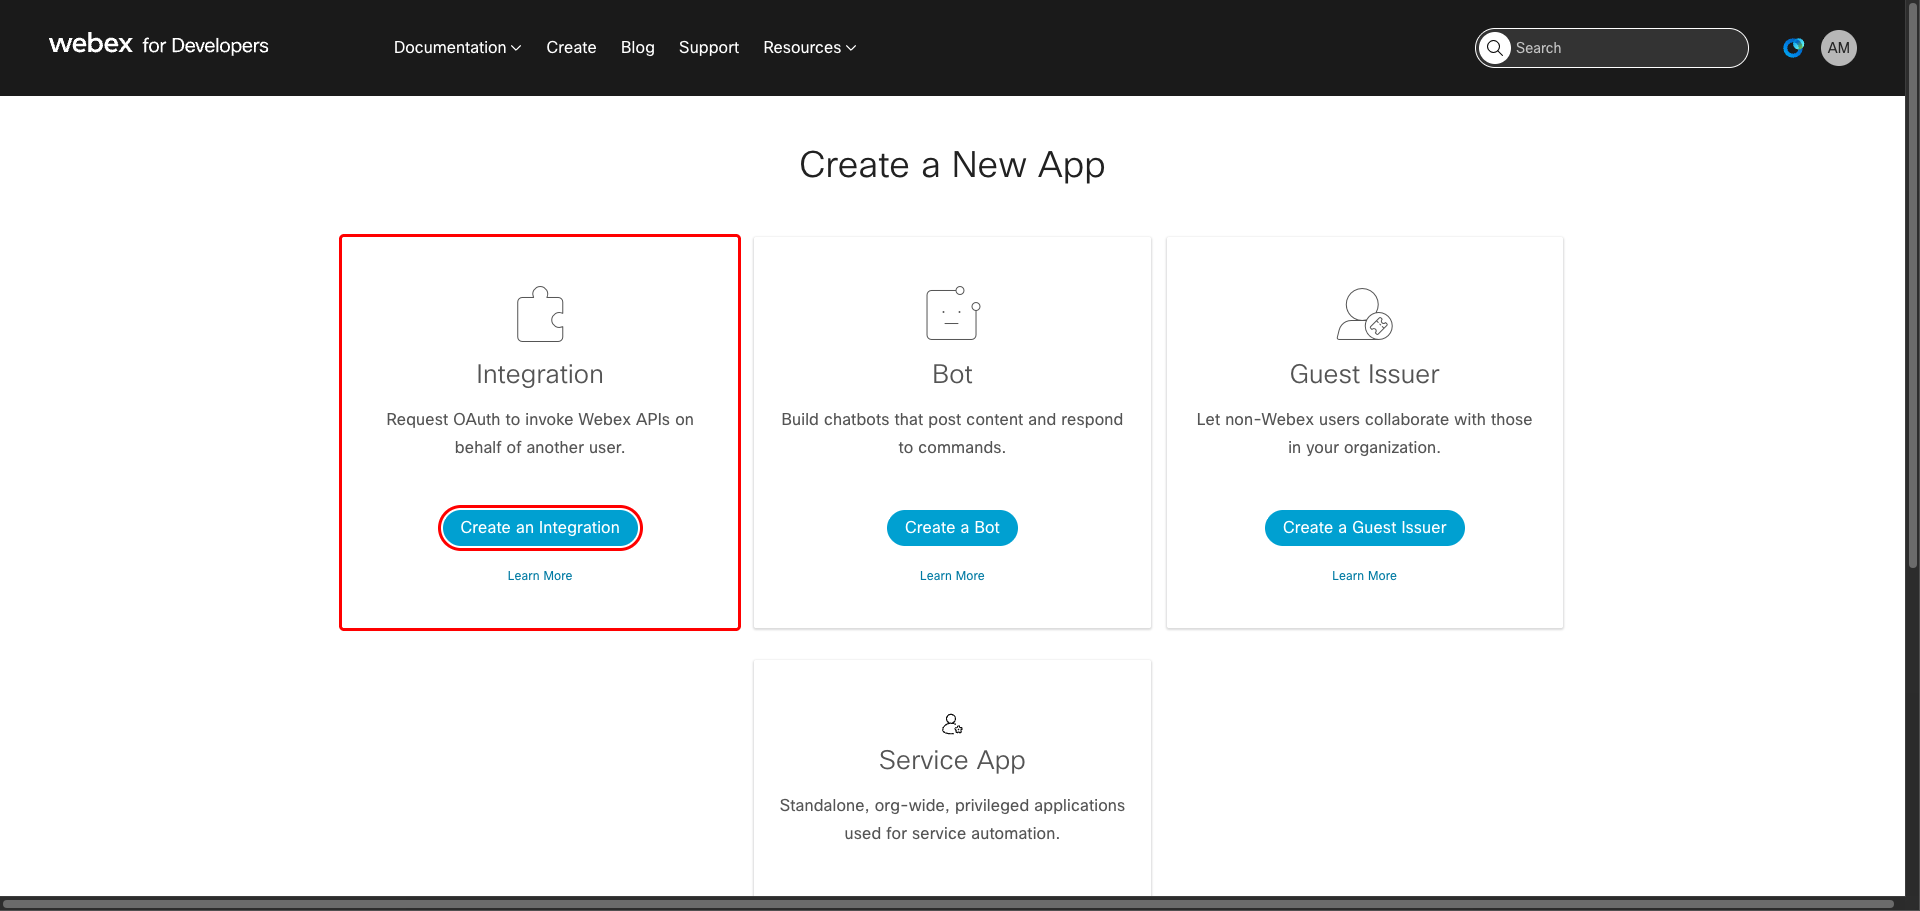
On the Create a New App page, select Integration as the app type. Integrations use OAuth 2.0 to access Webex APIs on behalf of users.
Click Create an Integration.
On the New Integration form, fill in the following fields:
- Will this integration use a mobile SDK? — Select No.
- Integration name — Enter a descriptive name, for example
Frontegg Integration. - Icon — Upload a custom icon or select one of the default options.
- App Hub Description — Enter a brief description of your integration.

Scroll down to the Redirect URI(s) section. Enter the following URI and press Enter:
https://YOUR_MCP_GATEWAY_URL/integration-callback
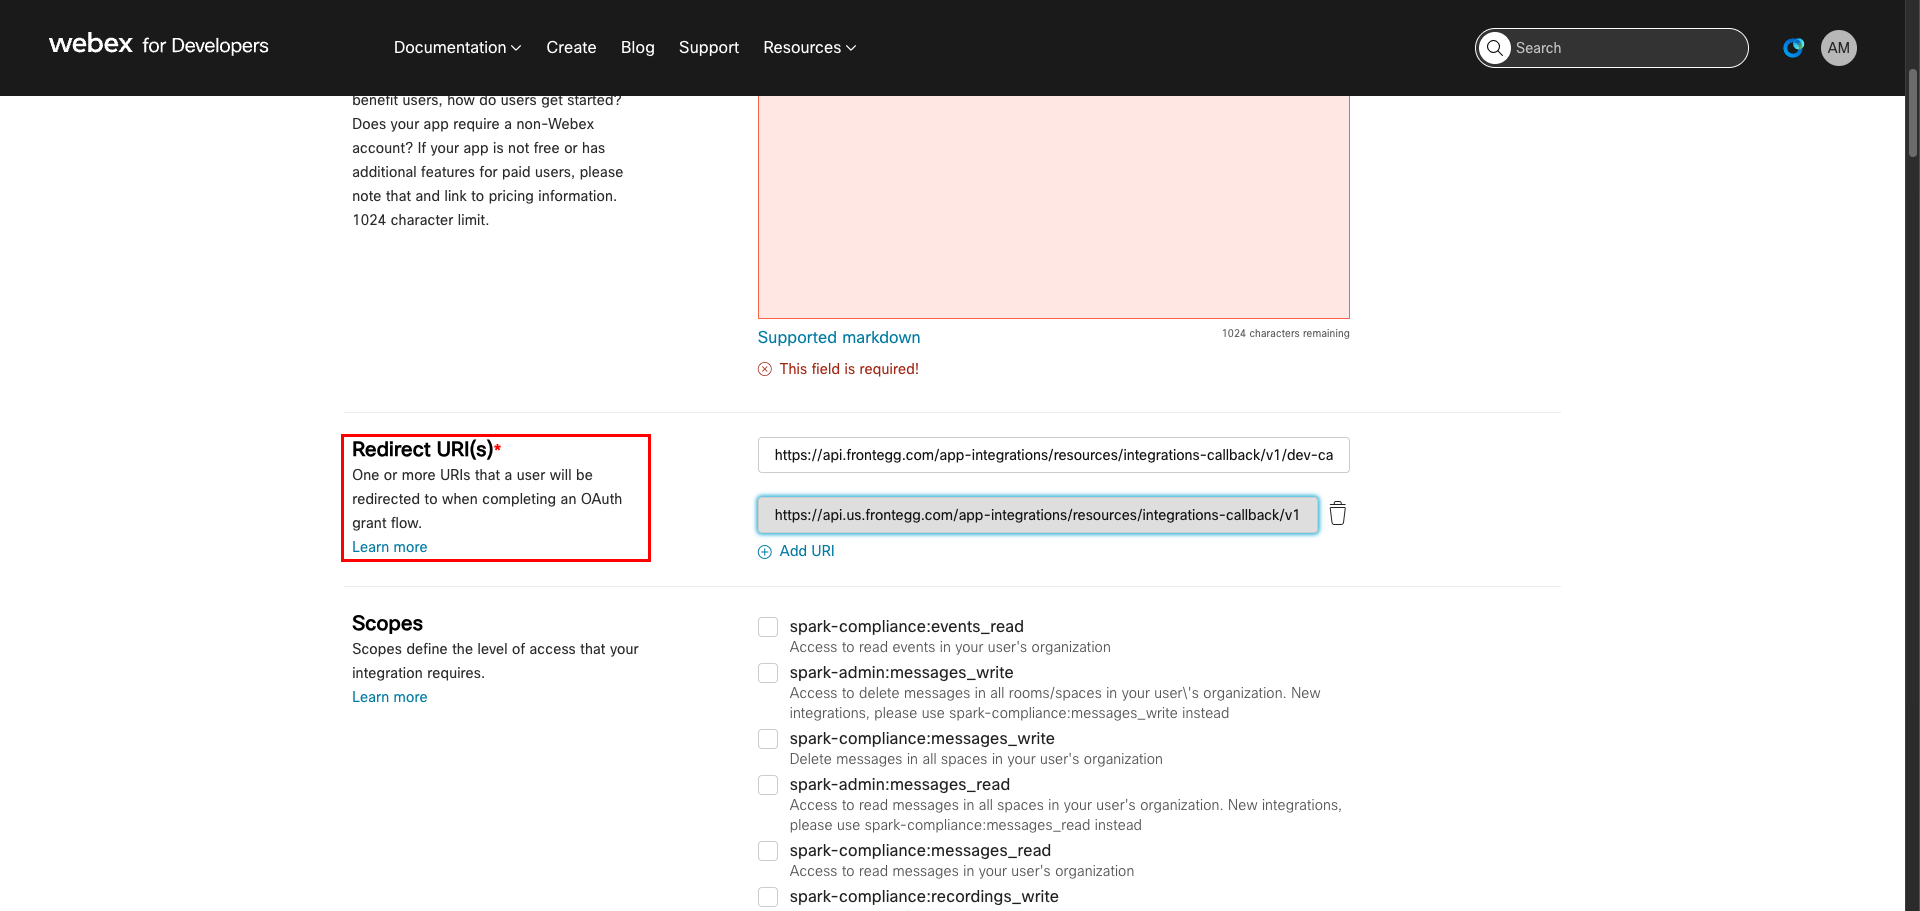
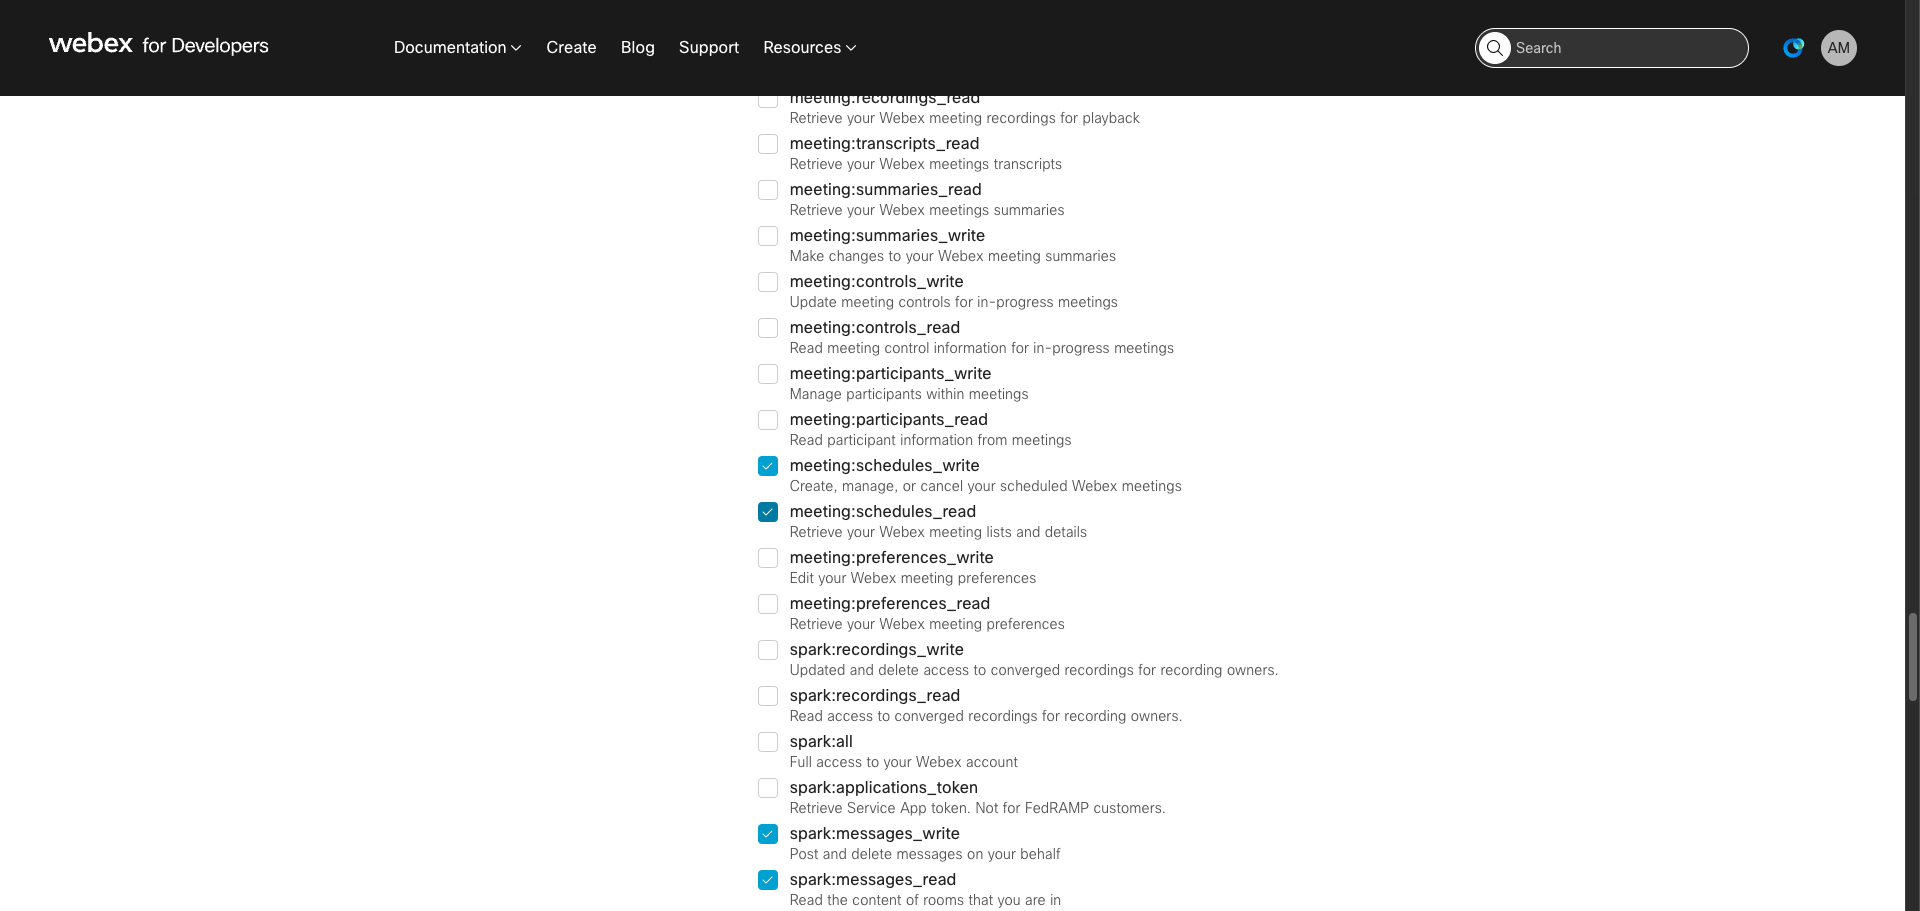
Scroll down to the Scopes section. Select the following scopes required for the integration:
| Scope | Description |
|---|---|
spark:people_read | Read your users' company directory |
spark:rooms_read | List the titles of rooms that you are in |
spark:rooms_write | Manage rooms on your behalf |
spark:messages_read | Read the content of rooms that you are in |
spark:messages_write | Post and delete messages on your behalf |
spark:memberships_read | List people in the rooms you are in |
spark:memberships_write | Invite people to rooms on your behalf |
meeting:schedules_read | Retrieve your Webex meeting lists and details |
meeting:schedules_write | Create, manage, or cancel your scheduled Webex meetings |
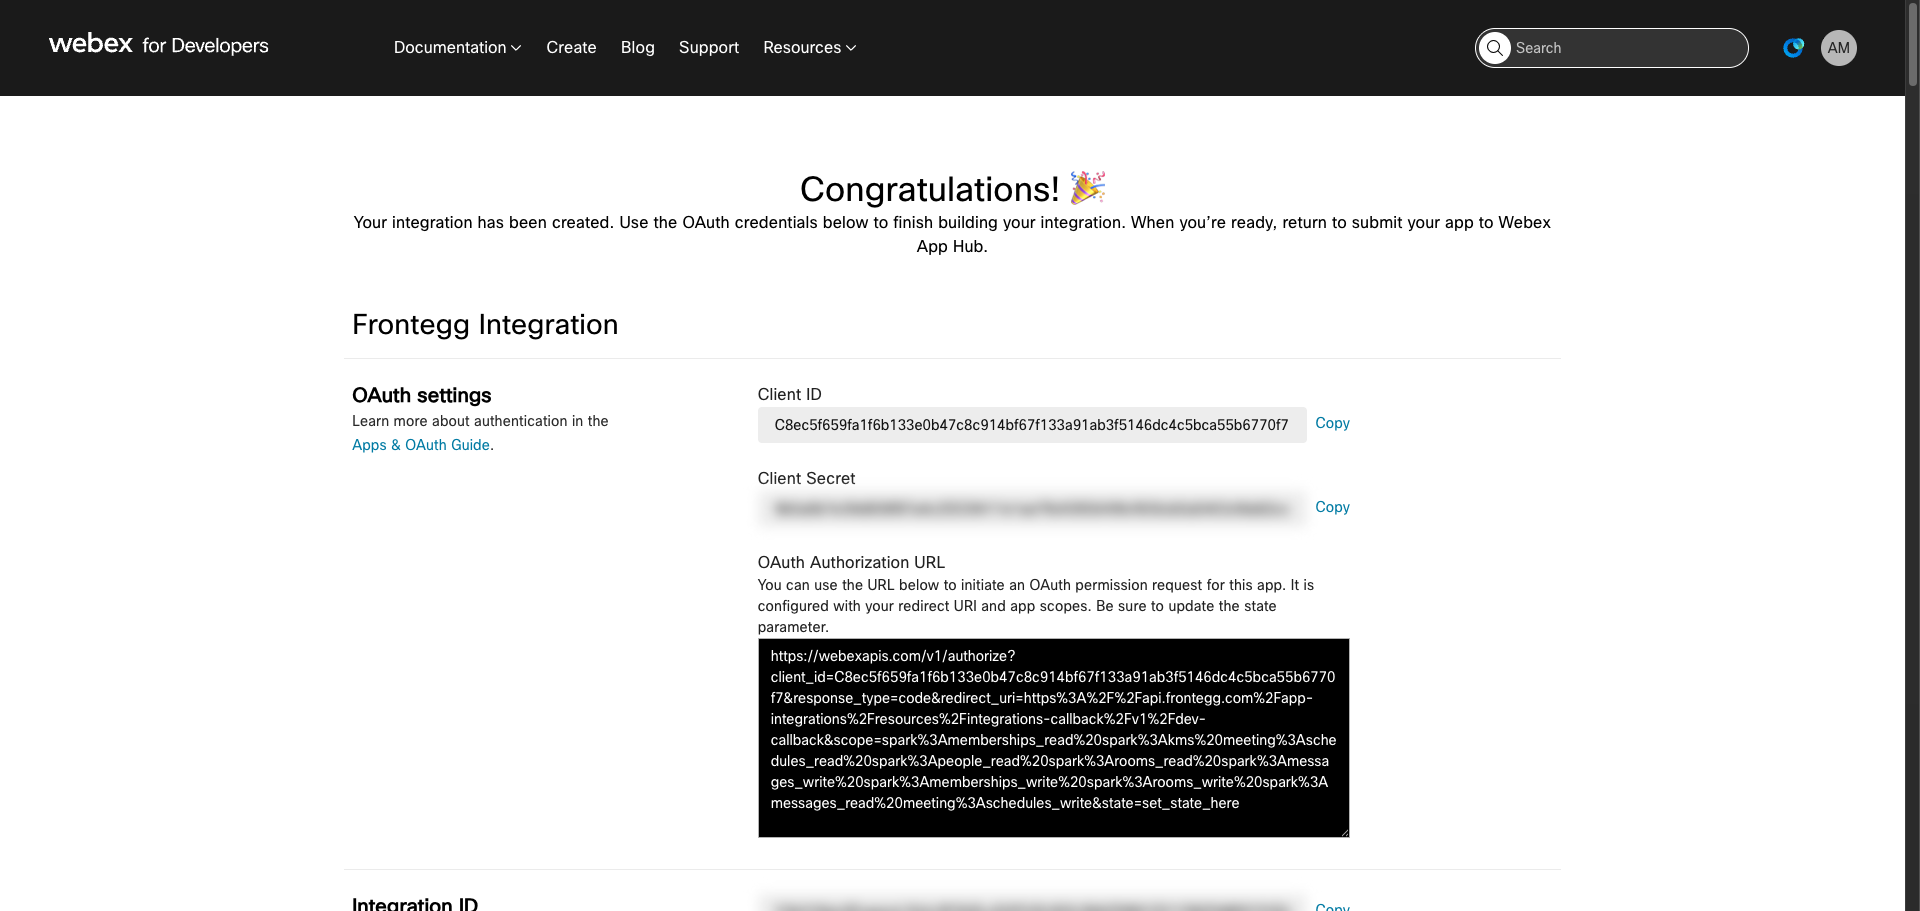
After selecting scopes, click Add Integration at the bottom of the page. The Congratulations page appears with your OAuth credentials.
Copy the Client ID and Client Secret — you will need both when configuring the Frontegg portal.
Copy your Client Secret now
Copy your Client Secret now
The Client Secret is shown only once. Copy it immediately and store it in a secure location. If you lose it, you will need to regenerate it.
Once you have obtained your Client ID and Client Secret from the steps above, enter them in the integration configuration page of the Frontegg portal:
- Open the Frontegg portal and navigate to [ENVIRONMENT] → Integrations → Webex.
- Enter the Client ID and Client Secret in the corresponding fields.
- Select the required scopes.
- Click Save.
Keep your credentials secure
Keep your credentials secure
Never share or commit your Client Secret to version control.