Integrating Zoom with Frontegg allows your application to access and manage Zoom meetings, webinars, and recordings on behalf of your users — all through Frontegg's integration layer using Zoom's OAuth 2.0.
Prerequisites
Prerequisites
- A Zoom account (free or paid)
- Access to the Zoom App Marketplace
Go to marketplace.zoom.us, sign in, then click Develop in the top navigation bar and select Build app from the dropdown.
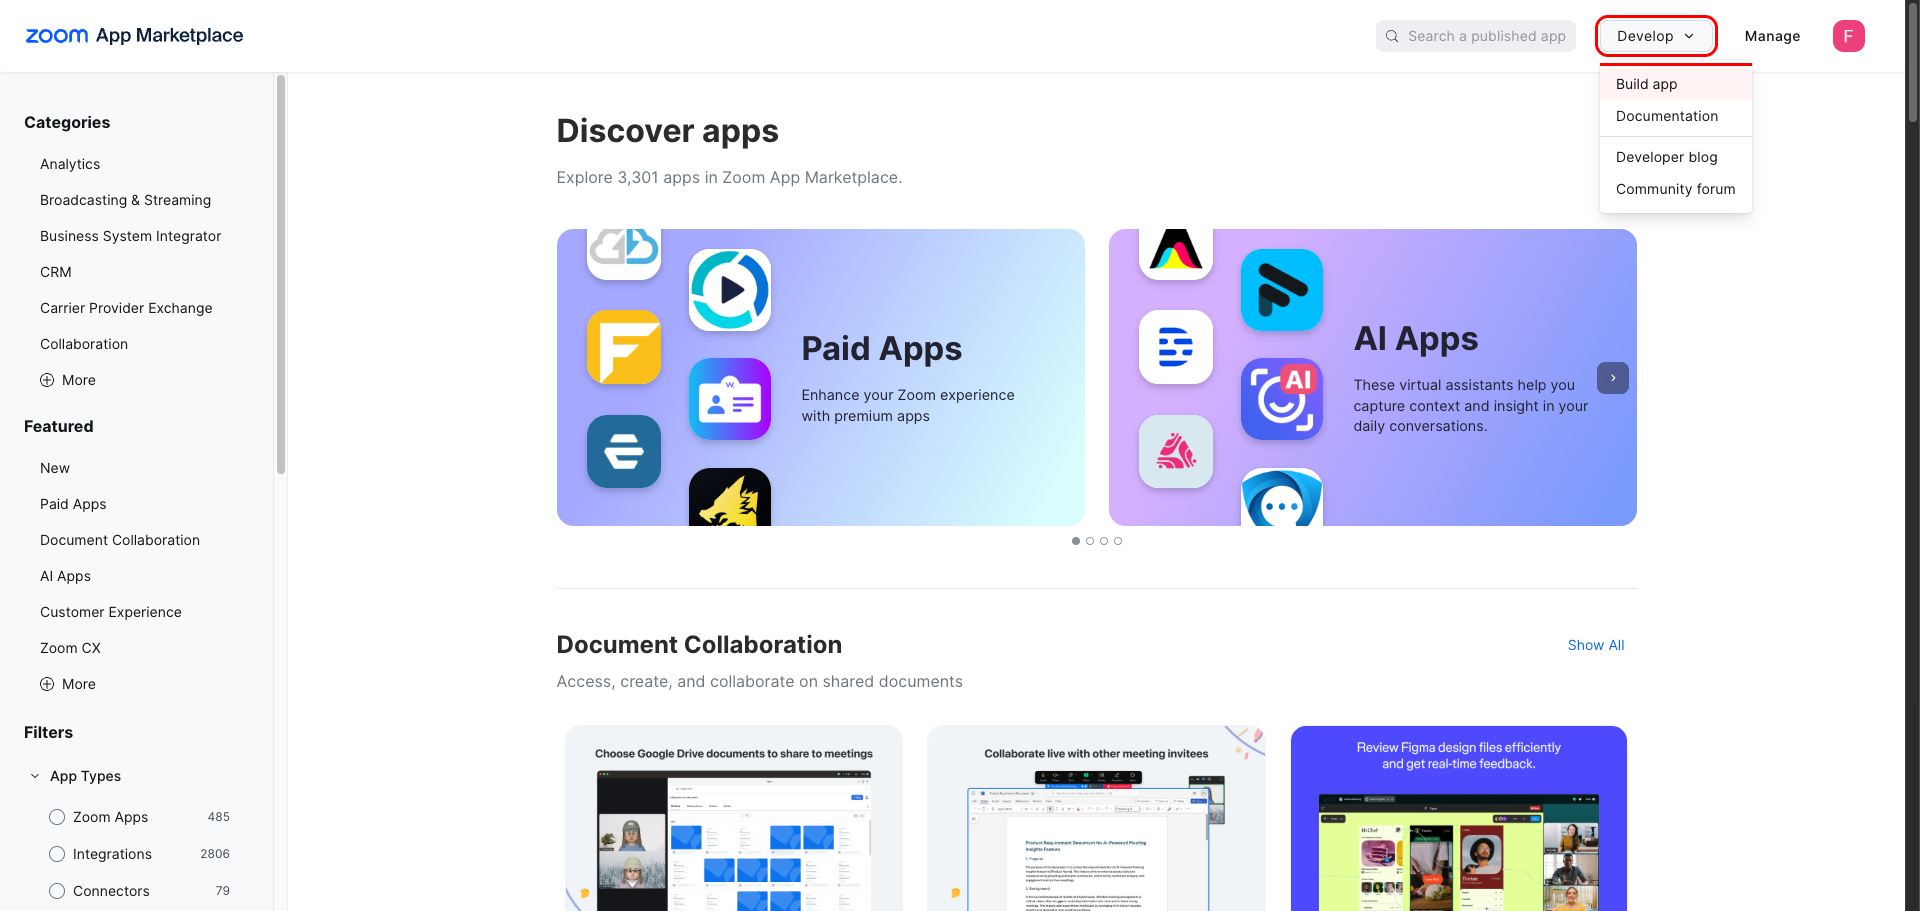
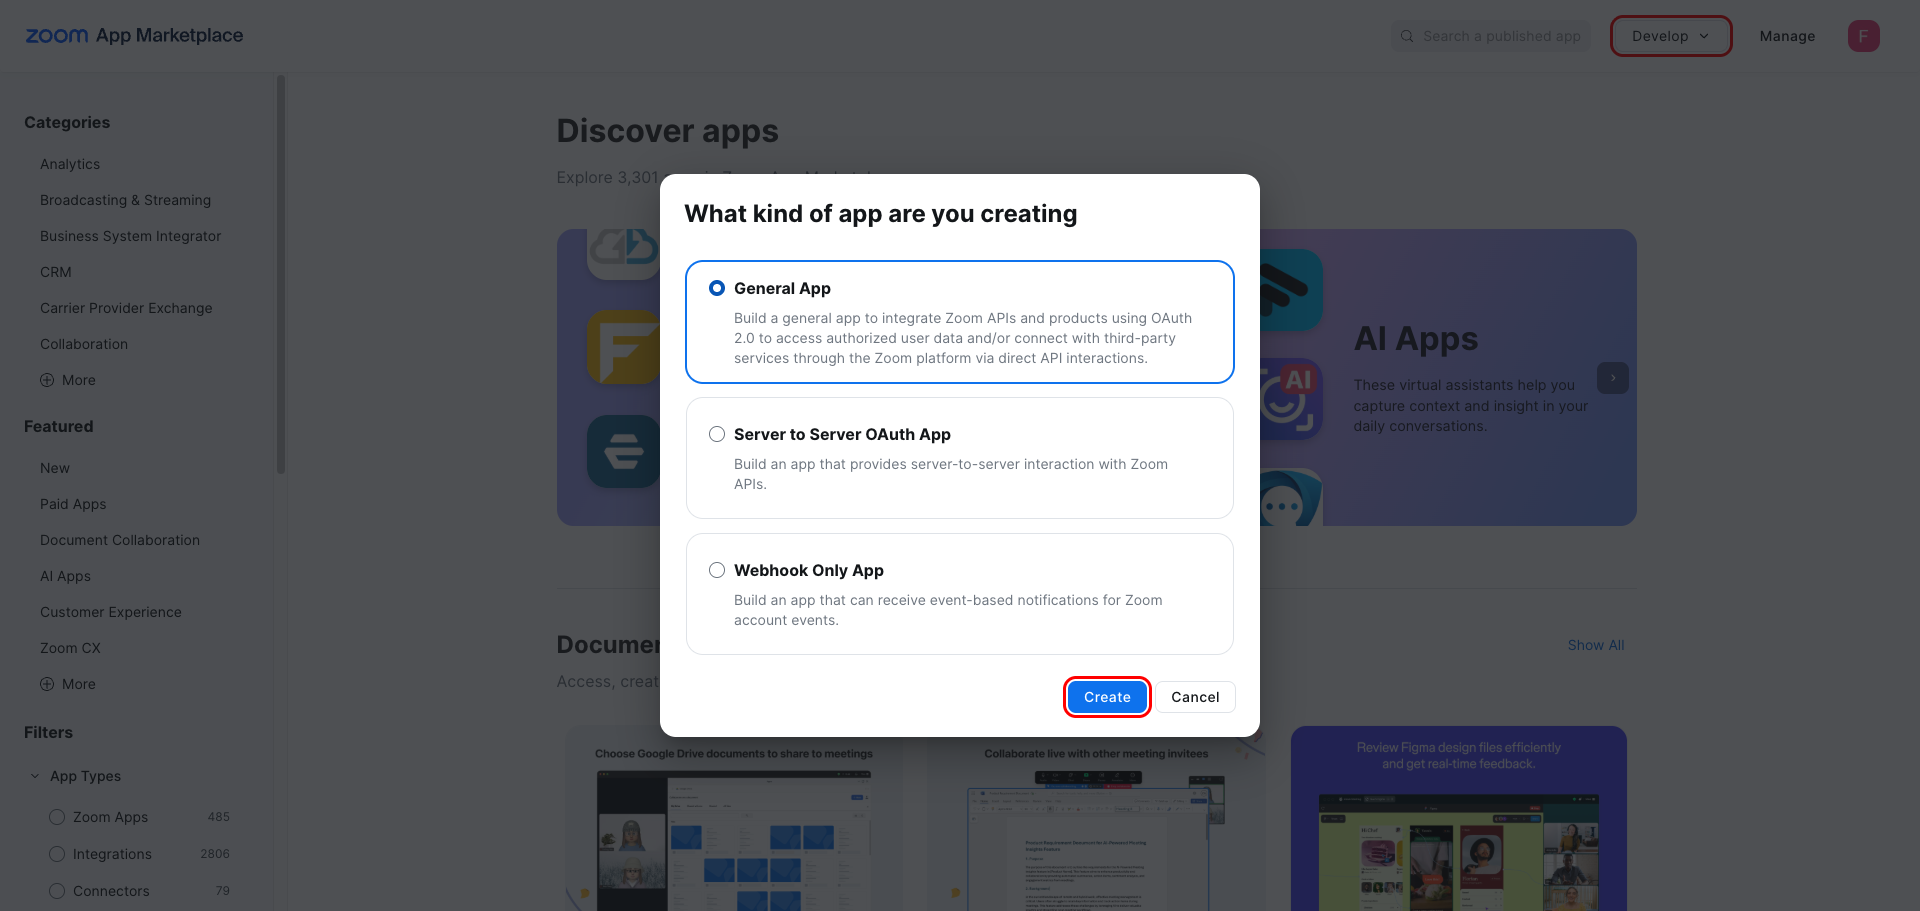
On the What kind of app are you creating dialog, select General App and click Create.
After the app is created, you land on the Basic Information page. Scroll to the App Credentials section to find your Client ID and Client Secret. Copy both values and store them securely.
Save your Client Secret now
Save your Client Secret now
The Client Secret is shown only on this page. Store it securely before navigating away.
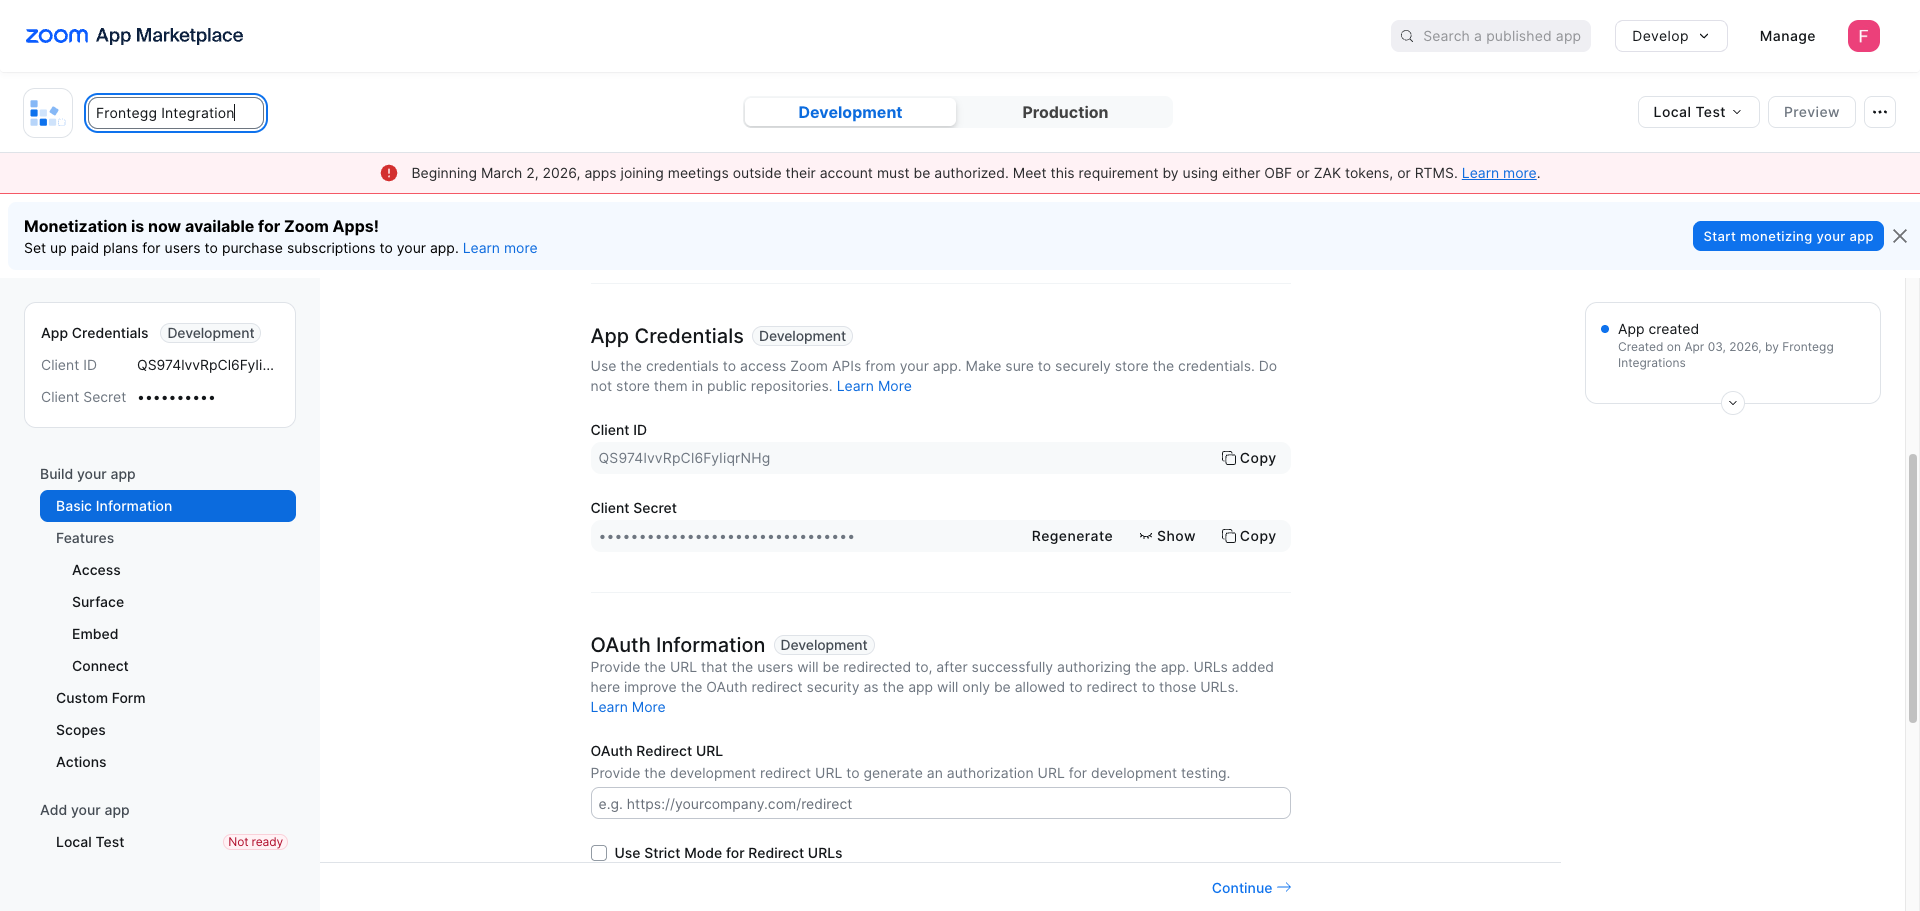
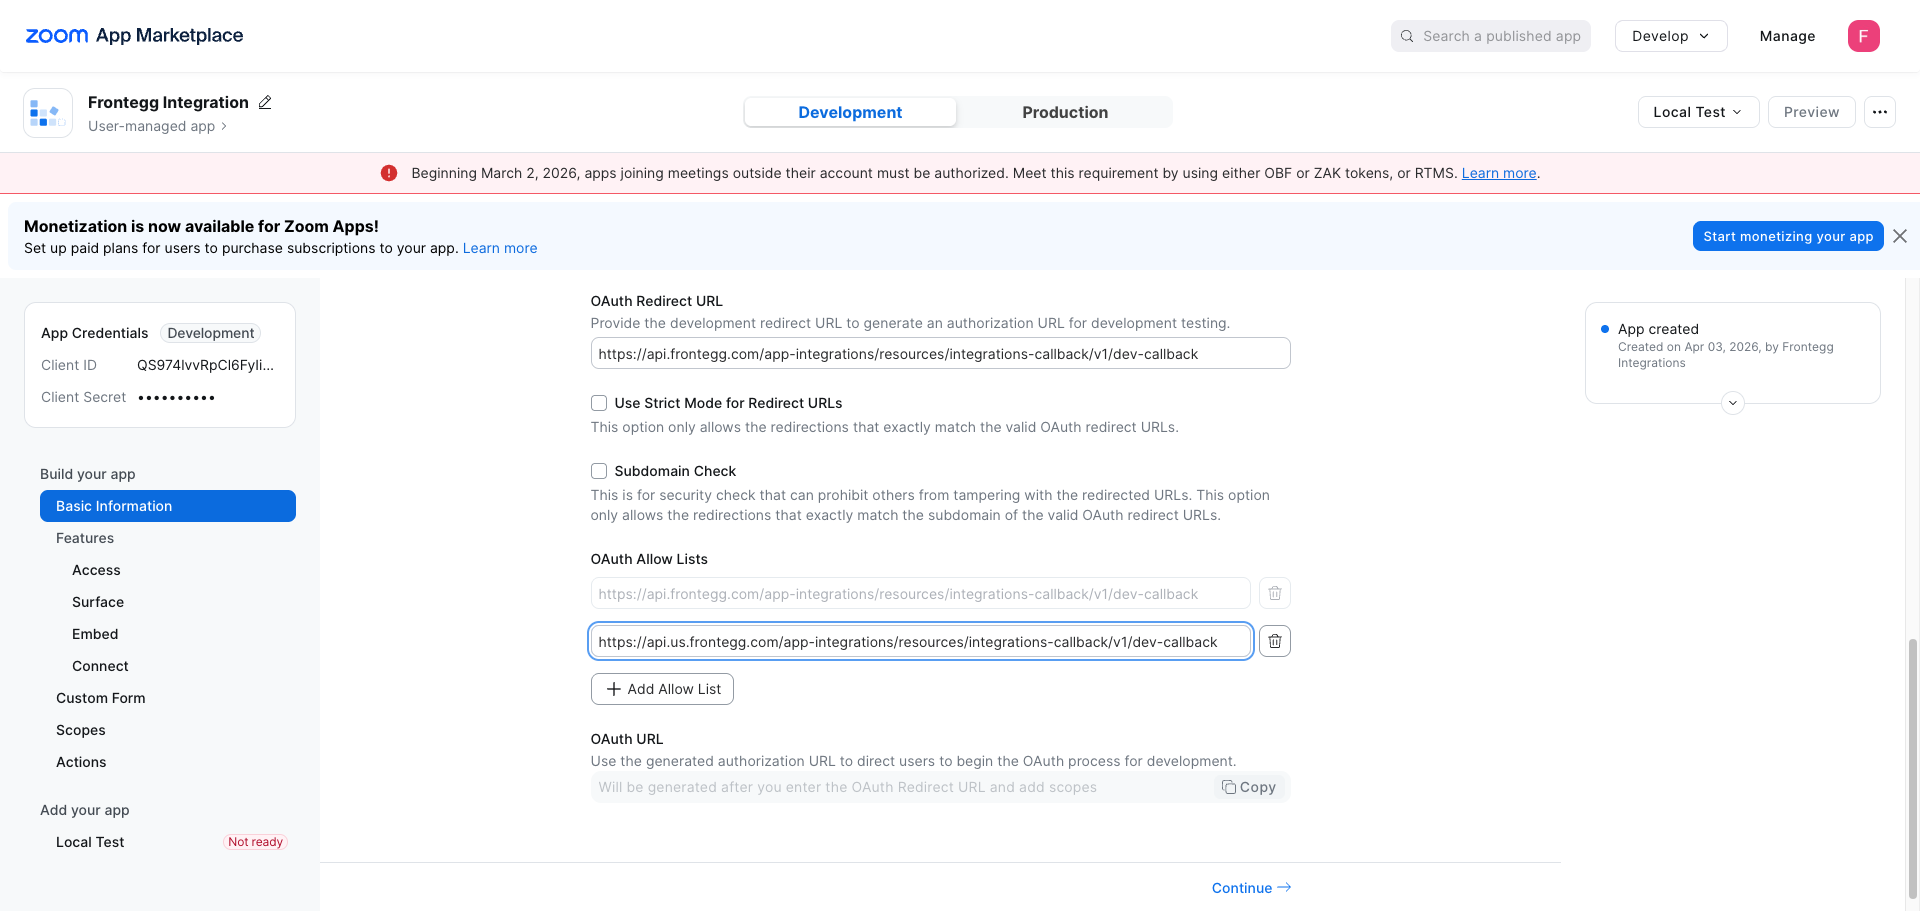
Scroll down to the OAuth Information section on the same page.
- In the OAuth Redirect URL field, enter:
https://YOUR_MCP_GATEWAY_URL/integration-callback - Under OAuth Allow Lists, add the same URI:
https://YOUR_MCP_GATEWAY_URL/integration-callback
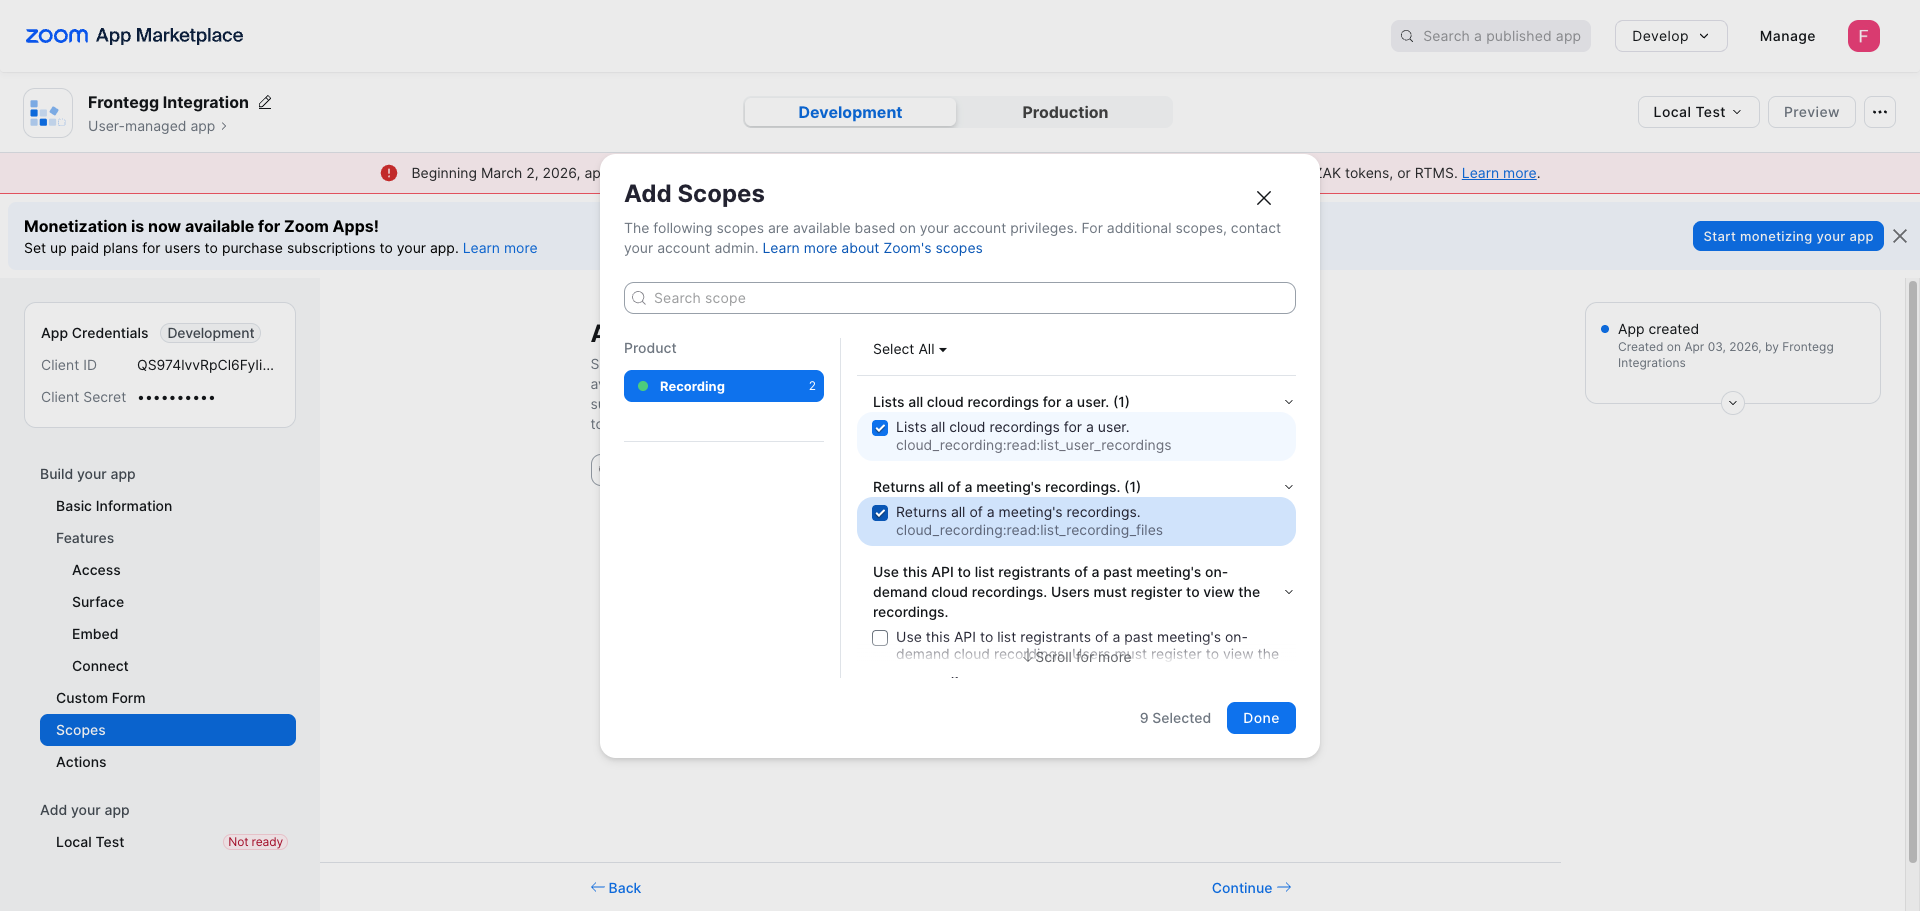
In the left sidebar, click Scopes, then click + Add Scopes. Use the search field or product tabs to find and select the required scopes:
| Scope | Description |
|---|---|
user:read:user | View a user's profile |
user:update:user | Update a user's profile |
user:delete:user | Delete or disassociate a user |
meeting:read:meeting | View a meeting |
meeting:read:list_meetings | View a user's meetings |
meeting:write:meeting | Create a meeting for a user |
meeting:update:meeting | Update a meeting |
meeting:delete:meeting | Delete a meeting |
meeting:read:past_meeting | View a past meeting instance |
meeting:read:list_past_instances | List ended instances of a recurring meeting |
meeting:read:list_past_participants | List participants of a past meeting |
meeting:read:summary | View an AI Companion meeting summary |
meeting:read:list_registrants | List meeting registrants |
meeting:write:registrant | Add a meeting registrant |
webinar:read:webinar | View a webinar |
webinar:read:list_webinars | View a user's webinars |
webinar:write:webinar | Create a webinar for a user |
webinar:update:webinar | Update a webinar |
webinar:delete:webinar | Delete a webinar |
webinar:read:list_registrants | List webinar registrants |
webinar:write:registrant | Add a webinar registrant |
cloud_recording:read:list_user_recordings | List all cloud recordings for a user |
cloud_recording:read:list_recording_files | Return all recordings for a meeting |
cloud_recording:read:meeting_transcript | View an AI Companion meeting transcript |
cloud_recording:delete:meeting_recording | Delete a meeting's cloud recordings |
cloud_recording:update:recover_meeting_recordings | Recover a meeting's recordings from trash |
Click Done to save the selected scopes.

Once you have your Client ID and Client Secret, enter them in the Frontegg portal:
- Open the Frontegg portal and navigate to [ENVIRONMENT] → Integrations → Zoom.
- Enter the Client ID and Client Secret in the corresponding fields.
- Select the required scopes.
- Click Save.
Keep your credentials secure
Keep your credentials secure
Never share or commit your Client Secret to version control.