HubSpot is a CRM platform that helps businesses manage contacts, companies, deals, and customer interactions.
It can be connected to Agen.co two ways, matching the Official / In-house filter in the connector picker:
- Official — Agen.co connects through HubSpot's own hosted MCP server (
https://mcp.hubspot.com), so your AI agents use the same CRM tools HubSpot exposes to MCP clients like Claude. Authorization uses an MCP connector that you create in your HubSpot account. - In-house — Agen.co wraps the HubSpot REST API directly through its own integration layer, using a legacy OAuth app you register in the HubSpot developer portal.
Pick Official if the built-in MCP tools cover what your agents need. Fall back to In-house if you need workflows, ticket pipelines, or property schemas beyond what the MCP server offers.
Prerequisites
Prerequisites
- A HubSpot account where you can create apps.
- A HubSpot account admin. HubSpot requires the account admin to connect first, before other users in the account can connect.
HubSpot does not support dynamic client registration for its MCP server, so you create the MCP connector yourself and give Agen.co its Client ID and Client Secret. The app needs Agen.co's callback URLs, so start in Agen.co.
- In the Agen.co portal, go to Connectors → My connectors and click Add connector.
- Find HubSpot and select it.
- In the Add HubSpot panel, keep the Official tab selected. The panel shows two read-only URLs at the bottom — copy both:
- Callback URL — completes the initial OAuth handshake between Agen.co and your HubSpot app.
- Gateway callback URL — used by the Agen.co MCP gateway for per-user authorization at runtime.
Leave this panel open — you return to it after creating the connector in HubSpot.
- In HubSpot, open More → Development and select MCP Connectors.
- Click Create MCP connector and enter a recognizable name, for example
Agen.co. - Enter the first callback URL in the dialog. On the connector page, click Add redirect URL for the second one, then click Save changes. A URL that is added to the list but not saved is lost when the page reloads.
- Copy the Client ID, and click Show next to Client secret to copy it.
Agen.co does not request scopes itself. HubSpot applies the scopes preconfigured for MCP connectors, and agents can only reach CRM data that the connecting user can access in HubSpot. HubSpot MCP connectors use OAuth 2.1 and require PKCE.
Return to the open Add HubSpot panel and fill in the fields:
| Field | Required | Description |
|---|---|---|
| Instance Slug | Yes | Namespaces this instance — it prefixes each imported tool as slug__tool, so several instances of the same MCP can coexist. Use lowercase kebab-case. You can change it later from the connector's settings. |
| Client ID | Yes | The OAuth client ID from your HubSpot app. |
| Client Secret | Yes | The OAuth client secret from your HubSpot app. |
| Callback URL | — | Read-only. Add it as a redirect URL in your HubSpot app. |
| Gateway callback URL | — | Read-only. Also add it as a redirect URL — the MCP gateway uses it for per-user authorization at runtime. |
- Click Connect. You are redirected to HubSpot to sign in and approve access.
- After you approve, the panel switches to Select the tools to import from HubSpot. Every tool is on by default; turn off any you do not want your agents to see.
- Click Add. The connector is created and the selected tools are imported only when you click Add — if you close the panel first, nothing is saved, even if the HubSpot callback page reported success.
| Area | What it covers |
|---|---|
| CRM objects | Read and write contacts, companies, deals, and tickets |
| Commerce | Products, orders, line items, invoices, quotes, and subscriptions |
| Engagements | Calls, emails, meetings, notes, and tasks |
| Segments | Read and write segments |
| Account context | Read users, teams, and organizational context |
| Marketing content | Read campaigns, landing pages, website pages, and blog posts |
The HubSpot MCP server does not give access to custom Sensitive Data properties, including Personal Health Information. The list above follows HubSpot's MCP documentation (checked 2026-10-05) and can change.
Enabling the HubSpot connector isn't enough on its own. Tool calls remain denied until you create a policy that grants access to the specific tools you want to expose.
Prerequisites
Prerequisites
- A HubSpot account with developer access
Go to developers.hubspot.com and sign in with your HubSpot account.
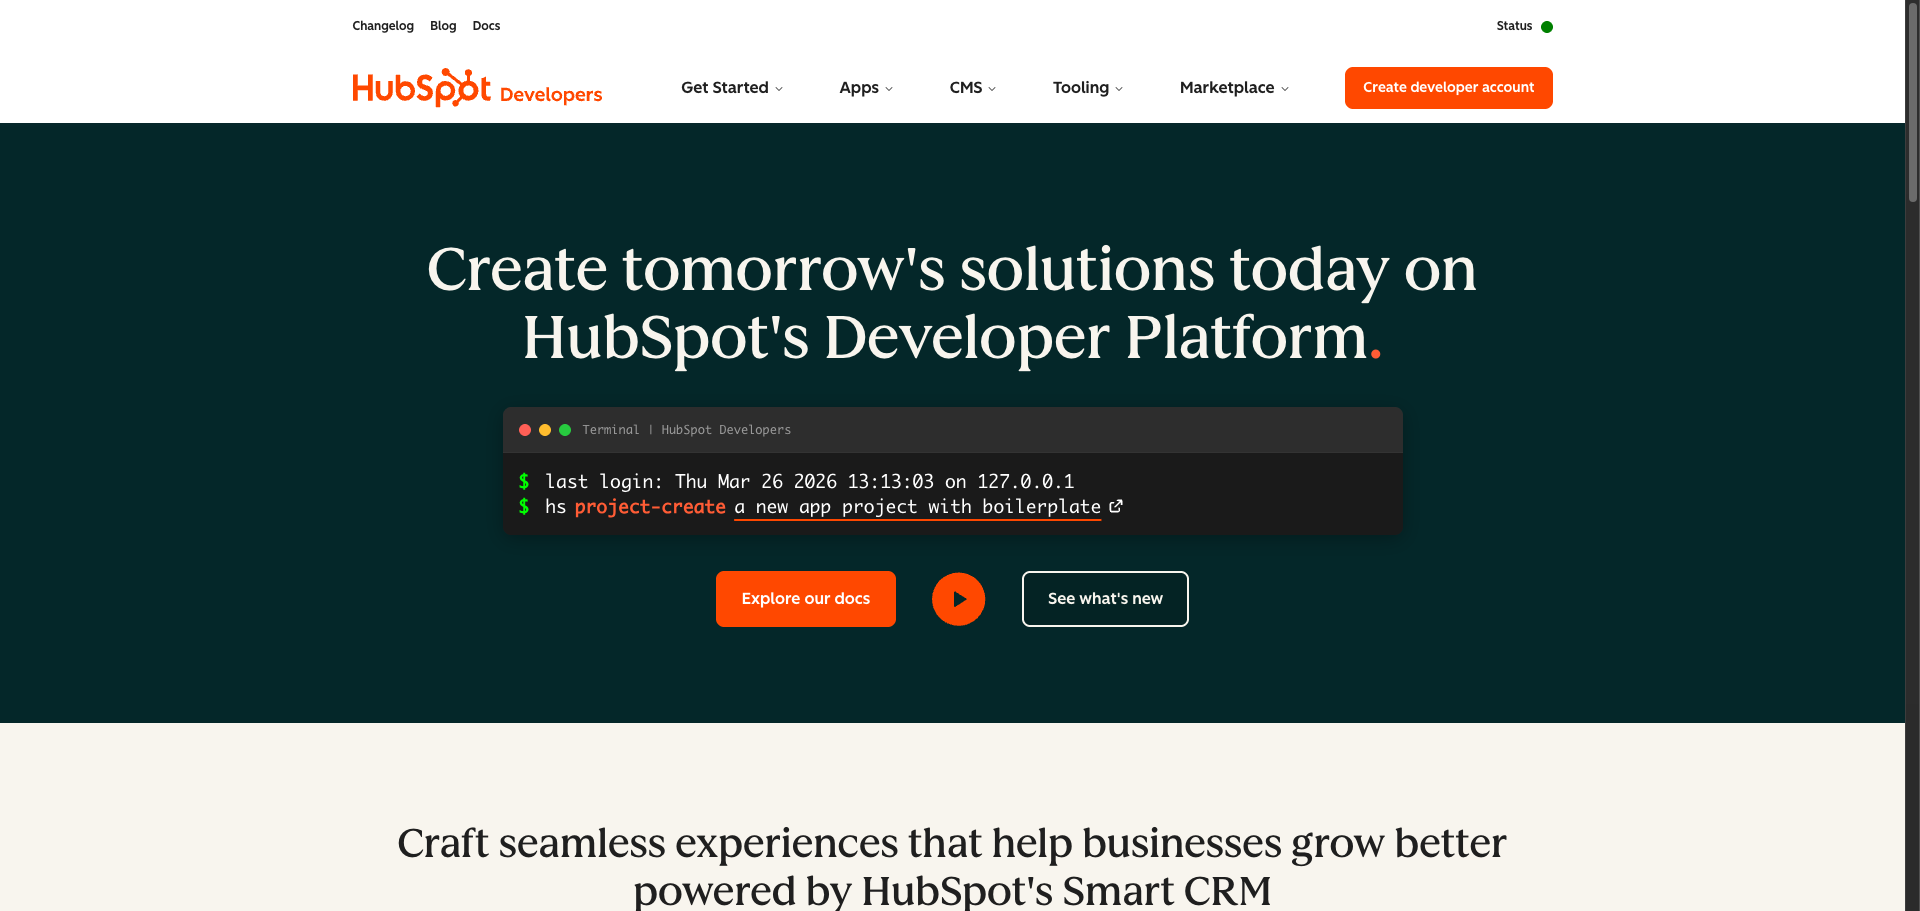
Once signed in, you will be in your HubSpot developer account. In the left sidebar, navigate to Development → Legacy Apps. This page lists all existing applications in your account.
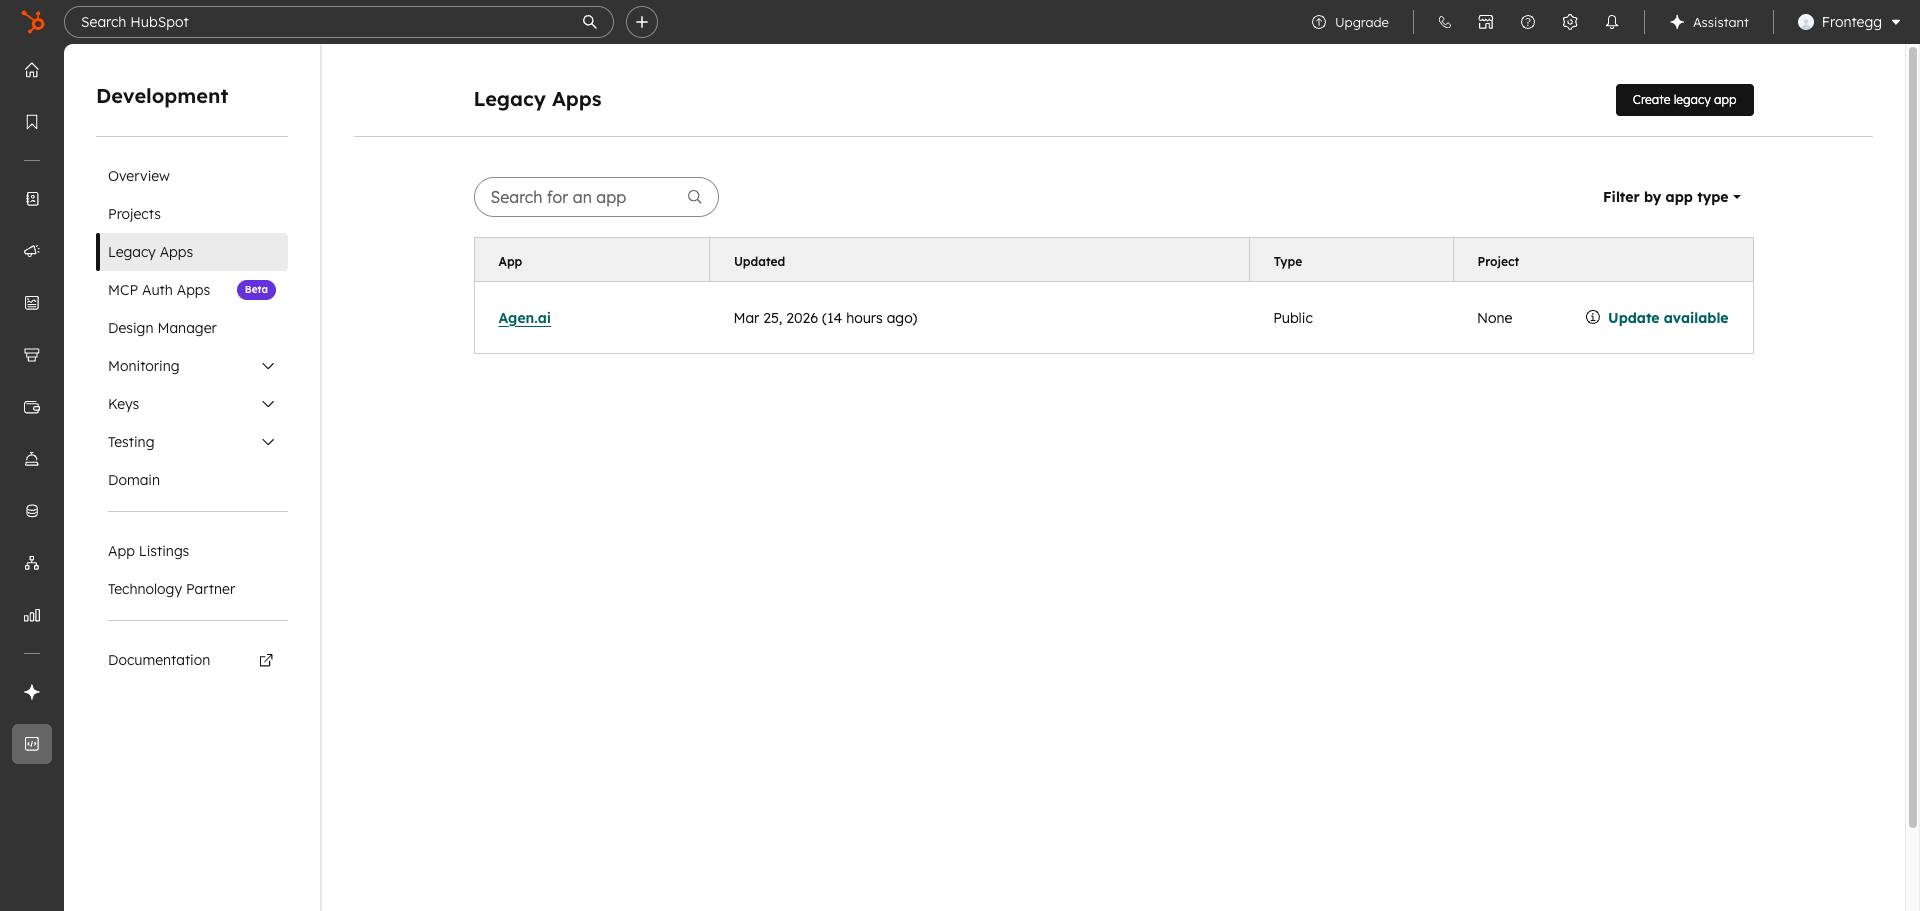
Click Create legacy app in the top right corner.
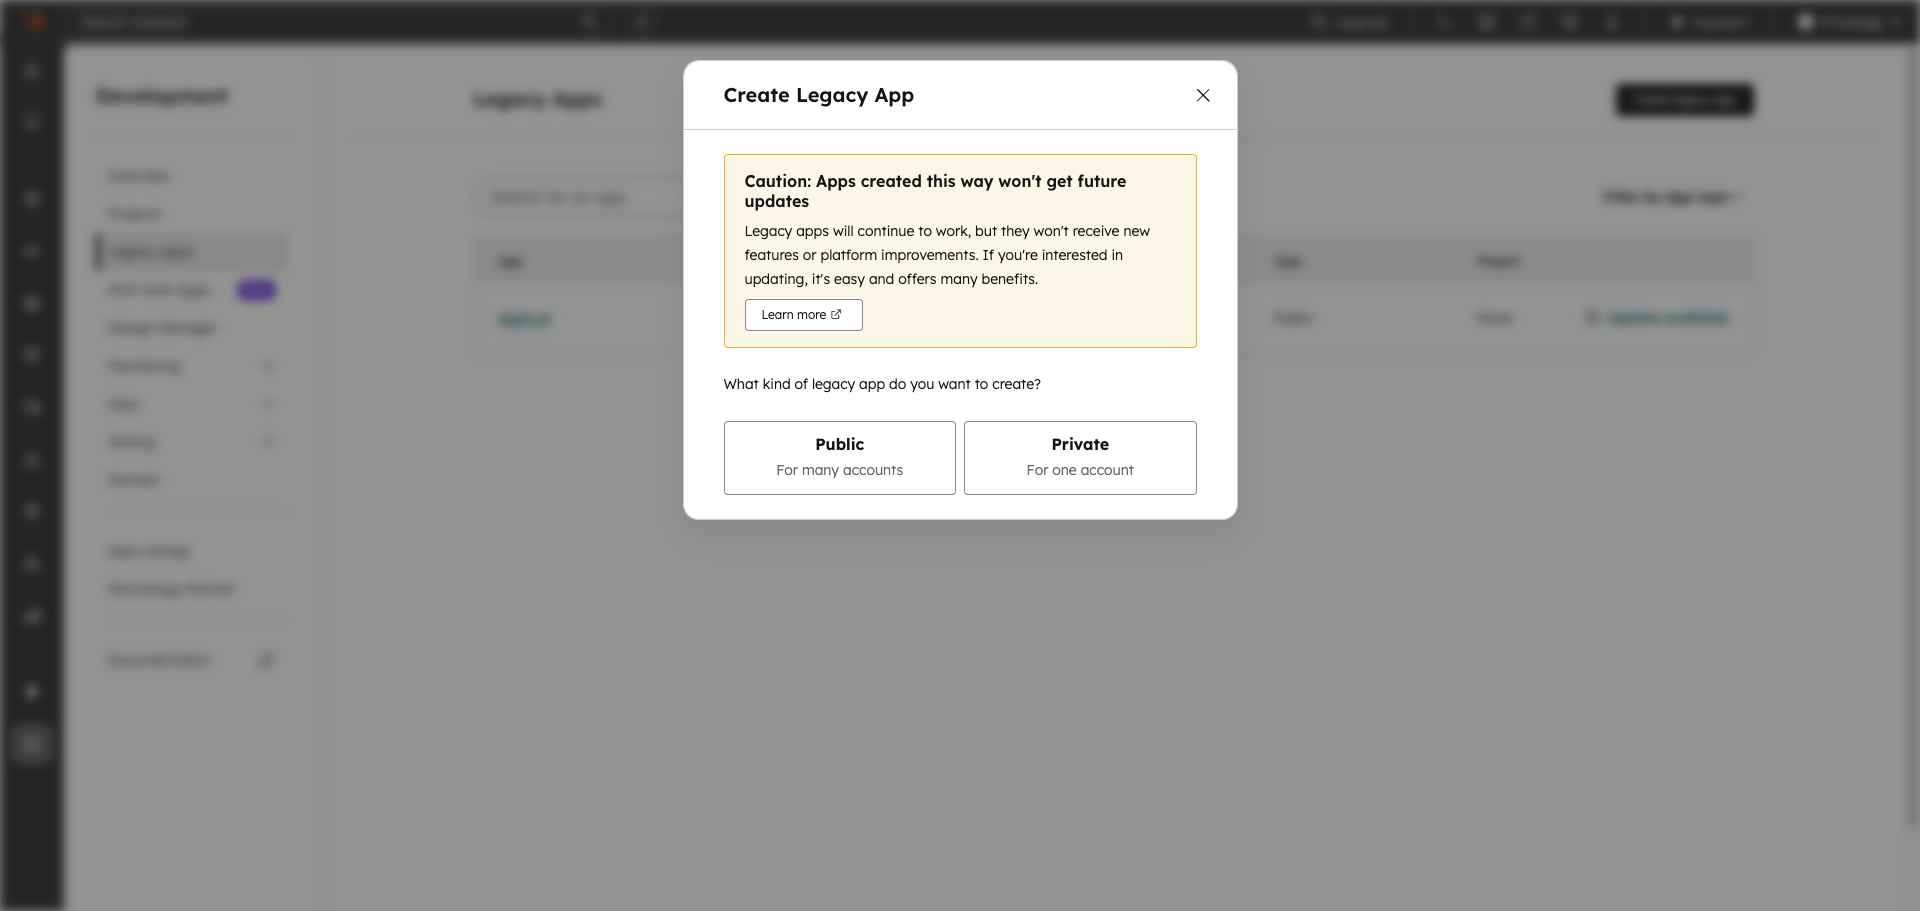
In the dialog that appears, select Public (for apps that can be installed by any HubSpot account) and click Next.
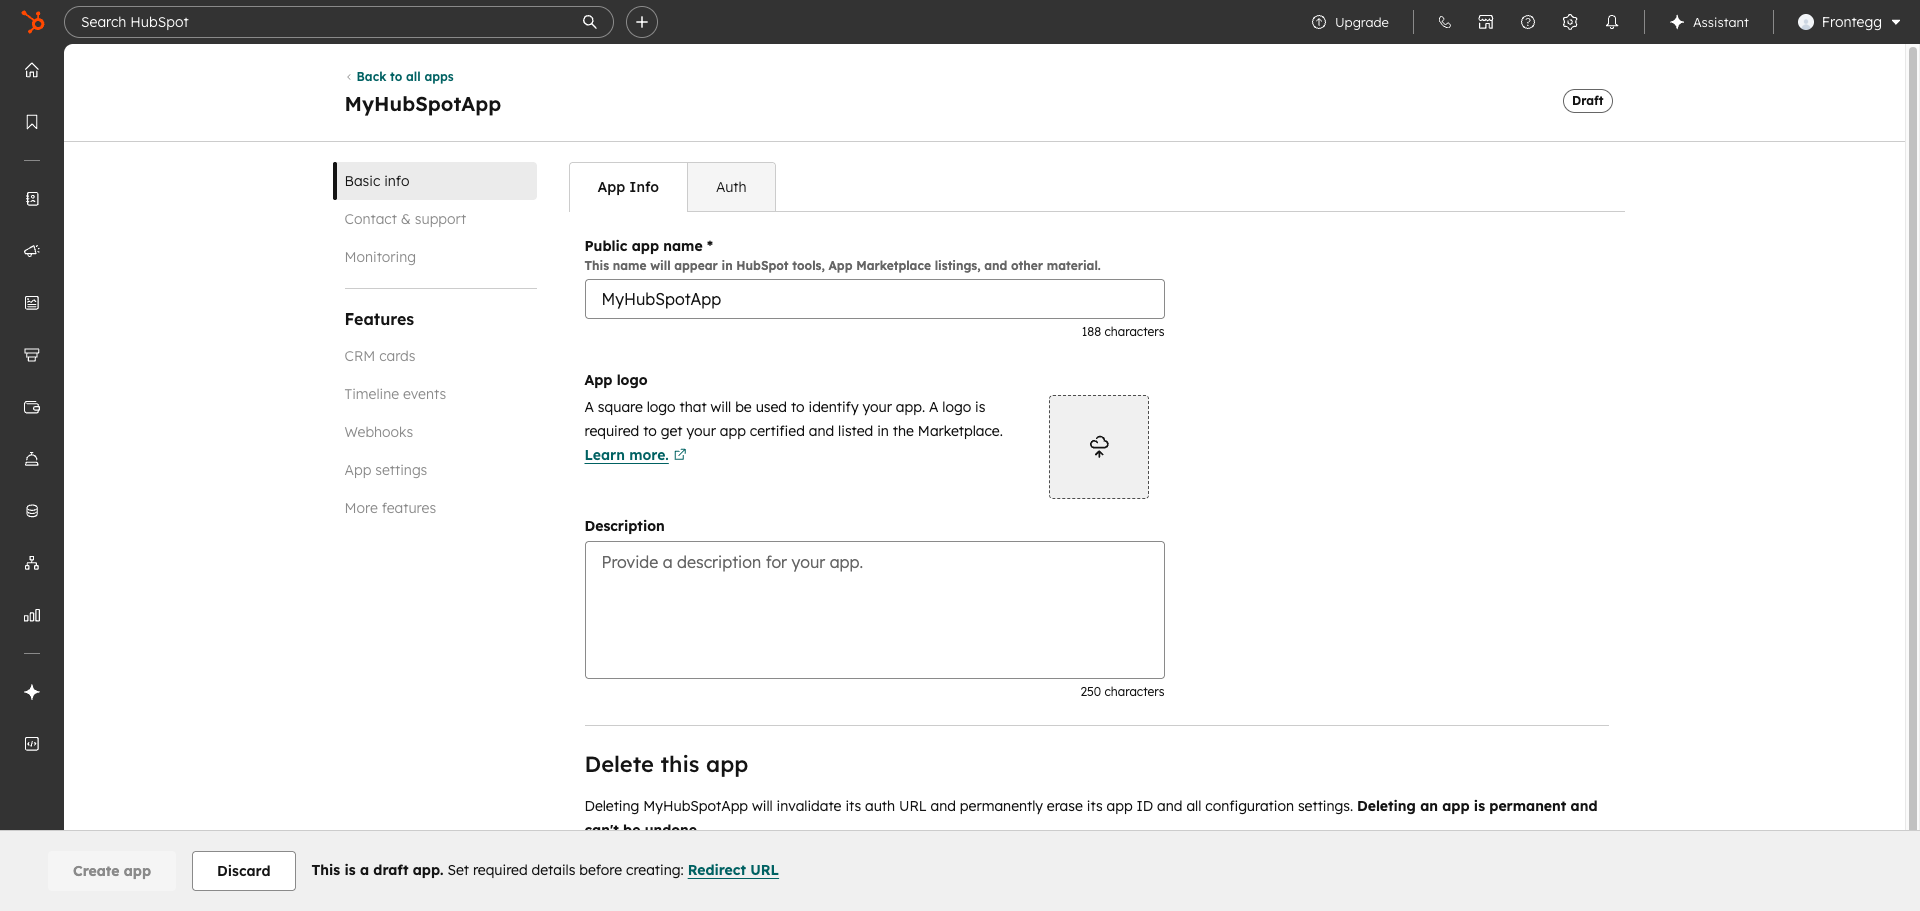
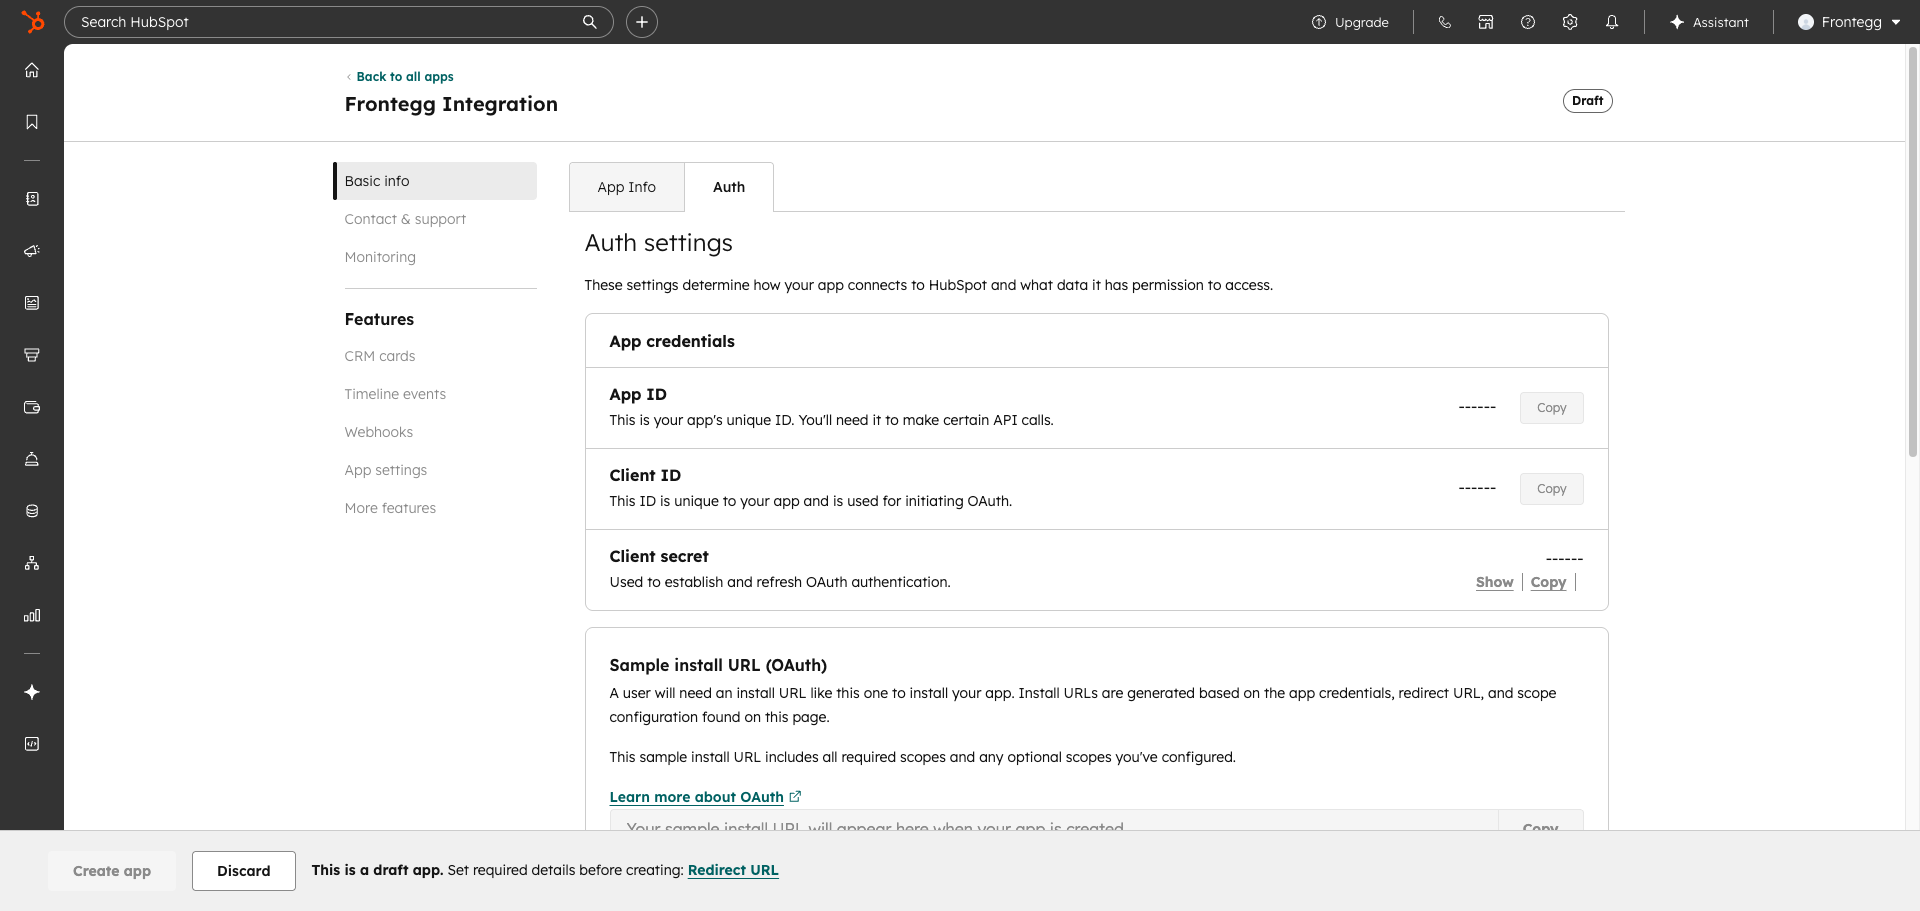
On the App Info tab, enter a name for your application in the Public app name field (for example, "Frontegg Integration"). This name appears in HubSpot tools when users install your app.
Click the Auth tab to open the authentication configuration page.
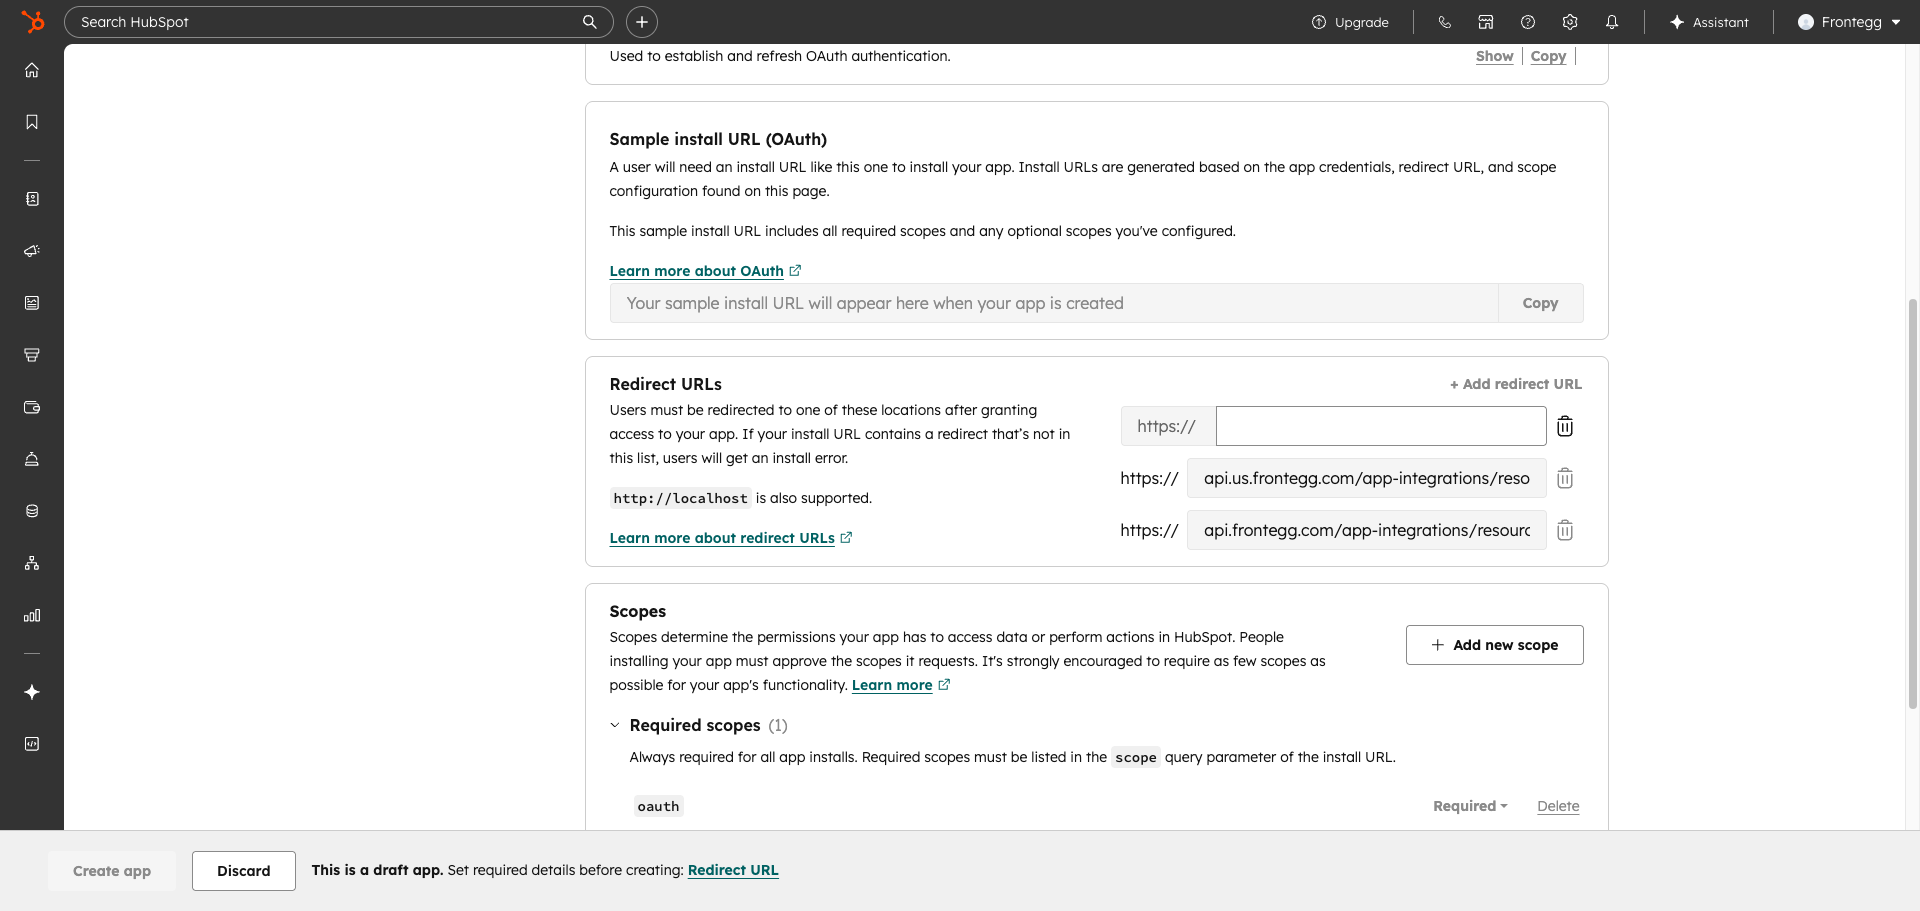
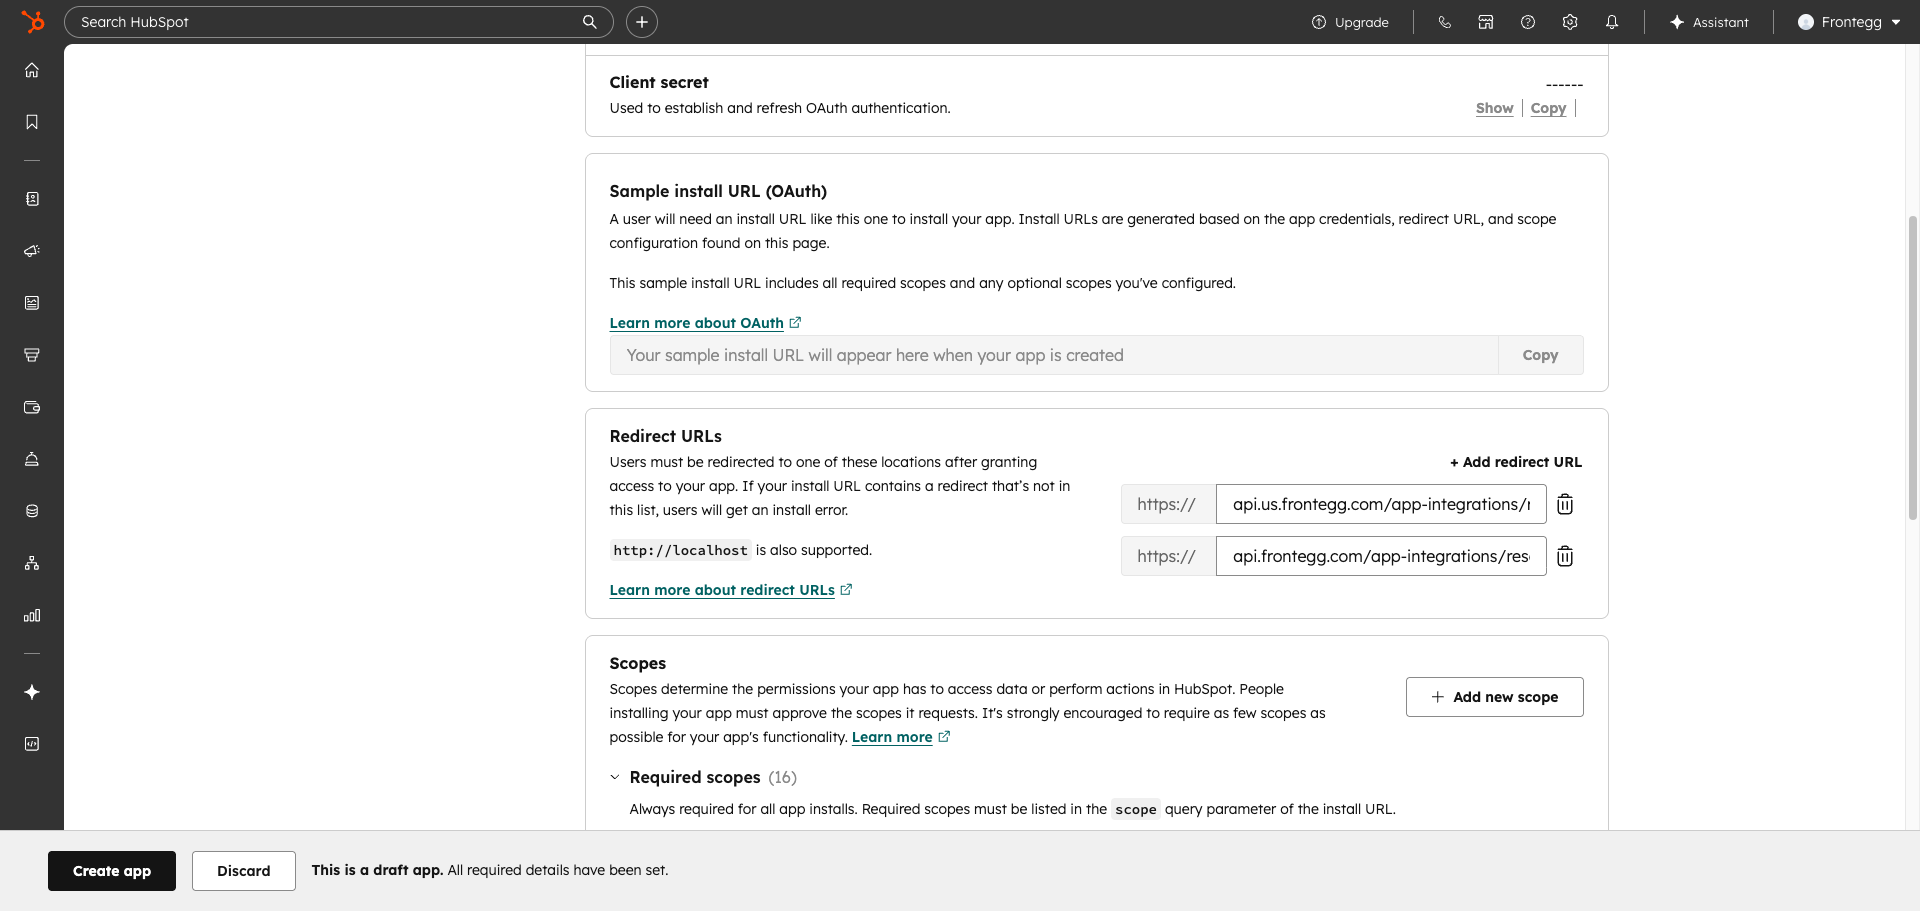
Scroll down to the Redirect URLs section. Enter the following redirect URLs, adding each one separately by typing the URL and clicking + Add redirect URL:
https://YOUR_MCP_GATEWAY_URL/integration-callback
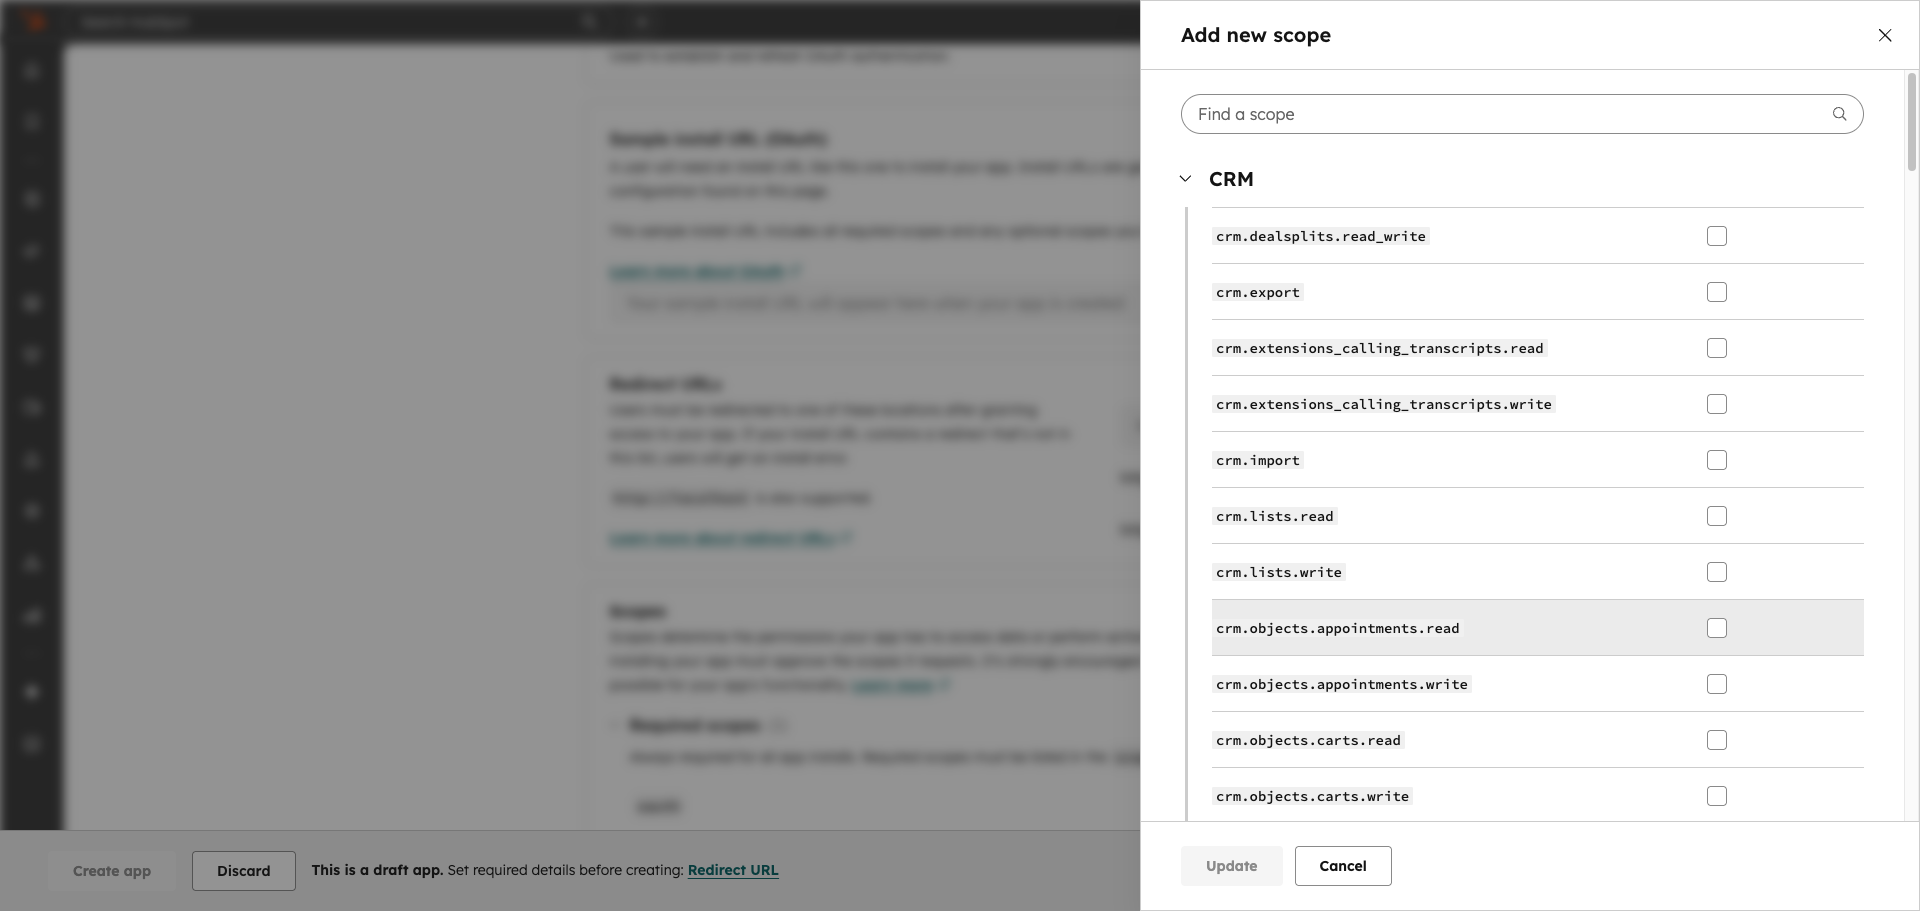
Scroll down to the Scopes section and click Add new scope. Select the required scopes from the list:
| Scope | Description |
|---|---|
crm.objects.contacts.read | Read contact records |
crm.objects.contacts.write | Create and update contact records |
crm.objects.companies.read | Read company records |
crm.objects.companies.write | Create and update company records |
crm.objects.deals.read | Read deal records |
crm.objects.deals.write | Create and update deal records |
crm.objects.owners.read | Read owner (user) records |
tickets | Read and write ticket records, search tickets, and list ticket pipelines and properties |
crm.schemas.contacts.read | Read contact property schemas |
crm.schemas.companies.read | Read company property schemas |
crm.schemas.deals.read | Read deal property schemas |
automation | List and read workflows, and enroll or unenroll contacts in workflows |
Minimum required scopes
Minimum required scopes
For basic CRM functionality, you need: crm.objects.contacts.read, crm.objects.companies.read, crm.objects.deals.read. Add tickets if you work with the ticketing pipeline, and automation if you enroll contacts in workflows.
After selecting all required scopes, click Update.
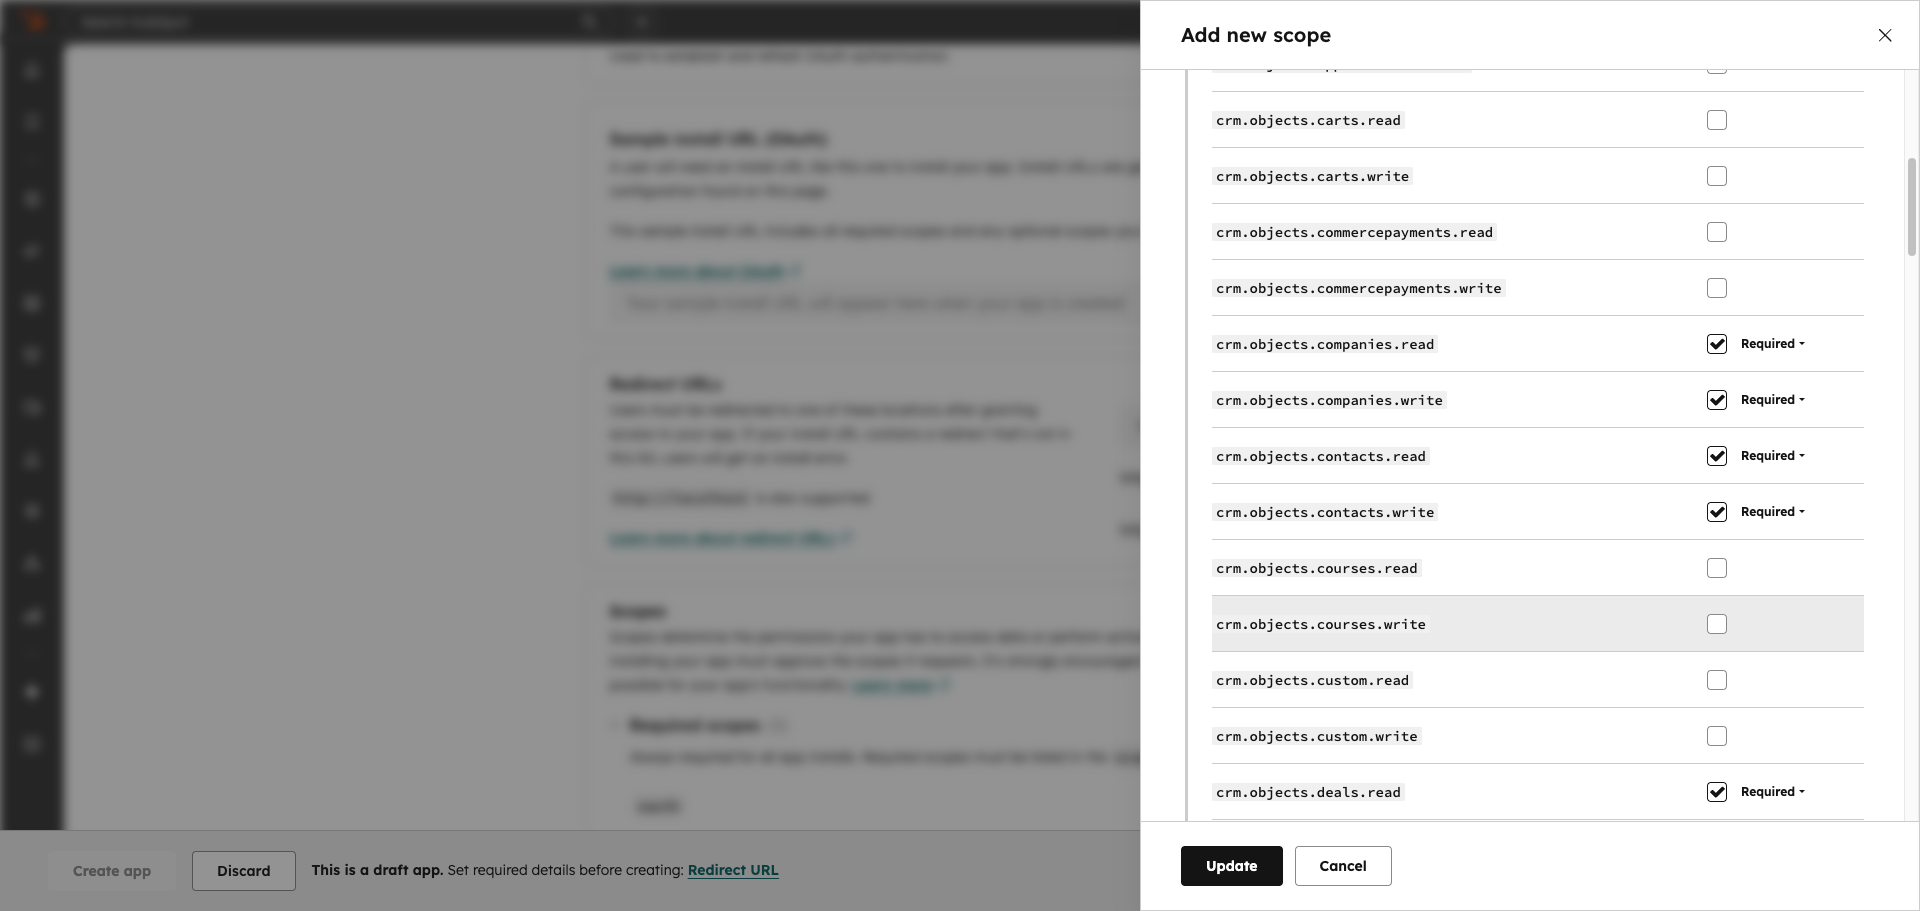
Once all required details are set, click Create app at the bottom of the page.
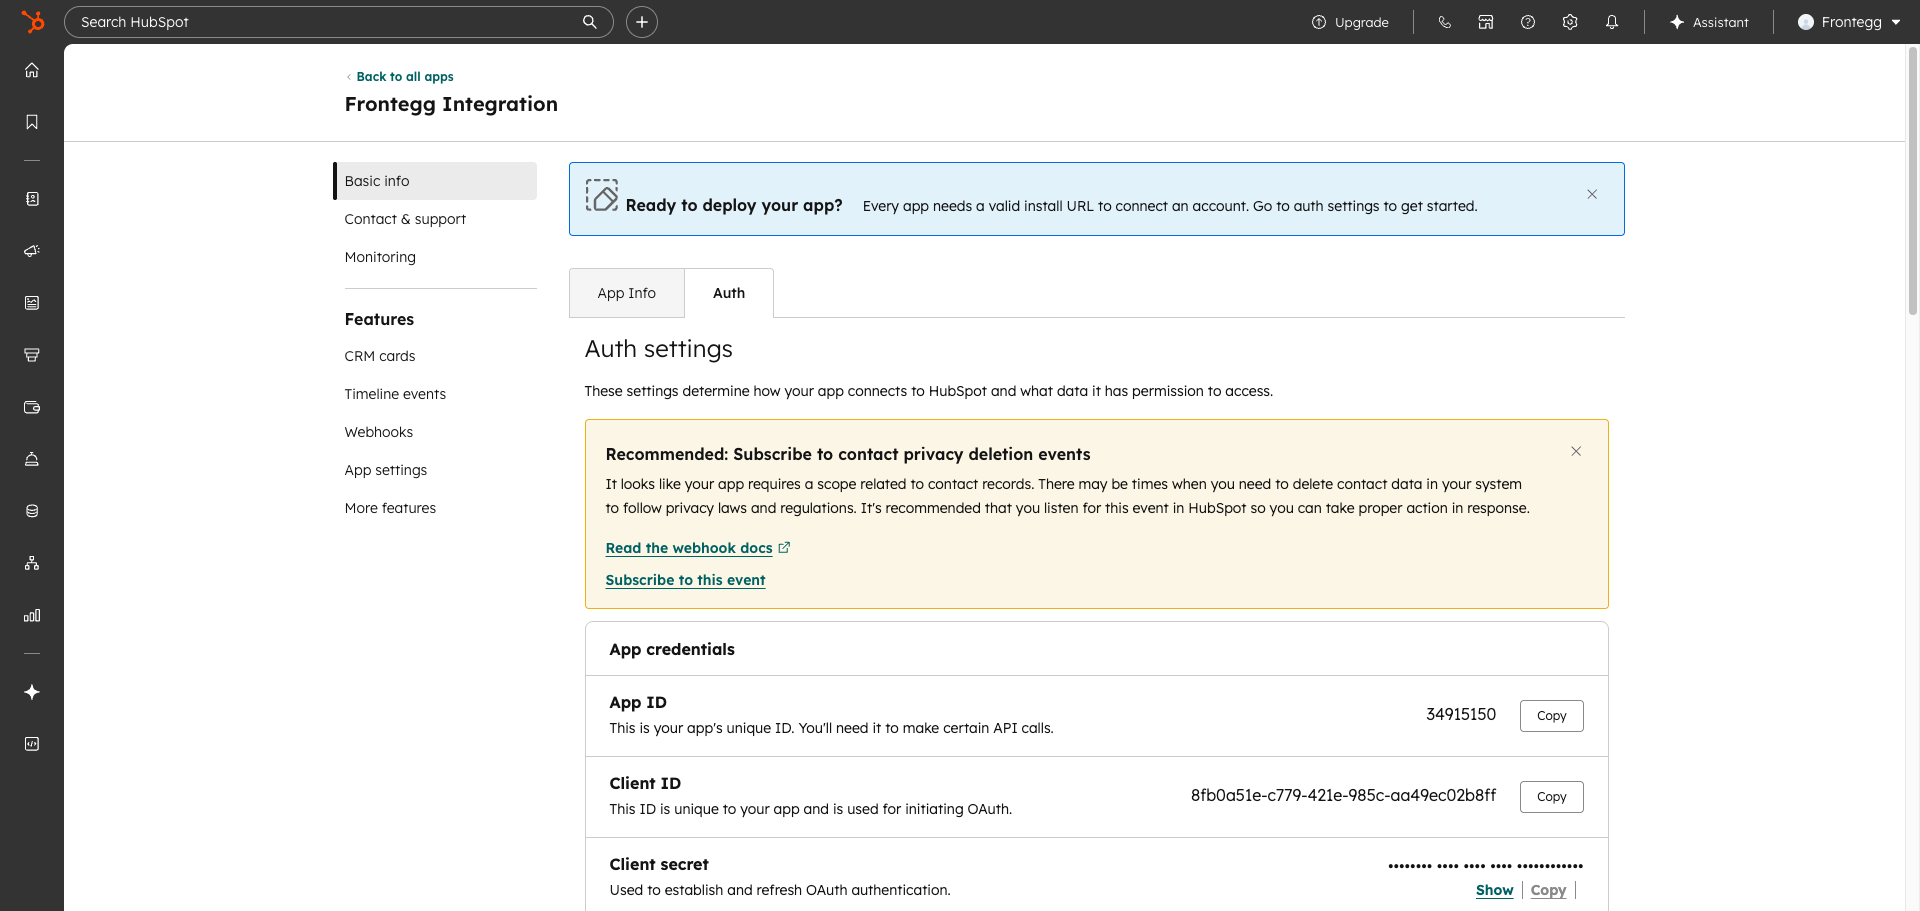
After the app is created, the Auth settings page displays your app credentials:
- Client ID — Your app's unique identifier used to initiate OAuth.
- Client secret — Click Show to reveal the secret. Used to exchange authorization codes for access tokens.
Copy both values and store them securely.
Keep your credentials secure
Keep your credentials secure
Never share or commit your Client secret to version control.
Once you have obtained your Client ID and Client secret from the steps above, enter them in the integration configuration page of the Frontegg portal:
- Open the Frontegg portal and navigate to [ENVIRONMENT] → Integrations → HubSpot.
- Enter the Client ID and Client secret in the corresponding fields.
- Select the required scopes.
- Click Save.