PagerDuty is a digital operations management platform for incident response, on-call scheduling, and real-time alerting. The PagerDuty integration with Frontegg allows your application to access and manage incidents, services, schedules, escalation policies, on-calls, users, teams, and webhook subscriptions on behalf of your users.
Prerequisites
Prerequisites
- A PagerDuty account with admin access
- Access to the App Registration page in your PagerDuty subdomain
Sign in to your PagerDuty account and navigate to Integrations → App Registration, or open https://YOUR_SUBDOMAIN.pagerduty.com/developer/applications directly. The page lists all apps registered under your account and provides a New App button.
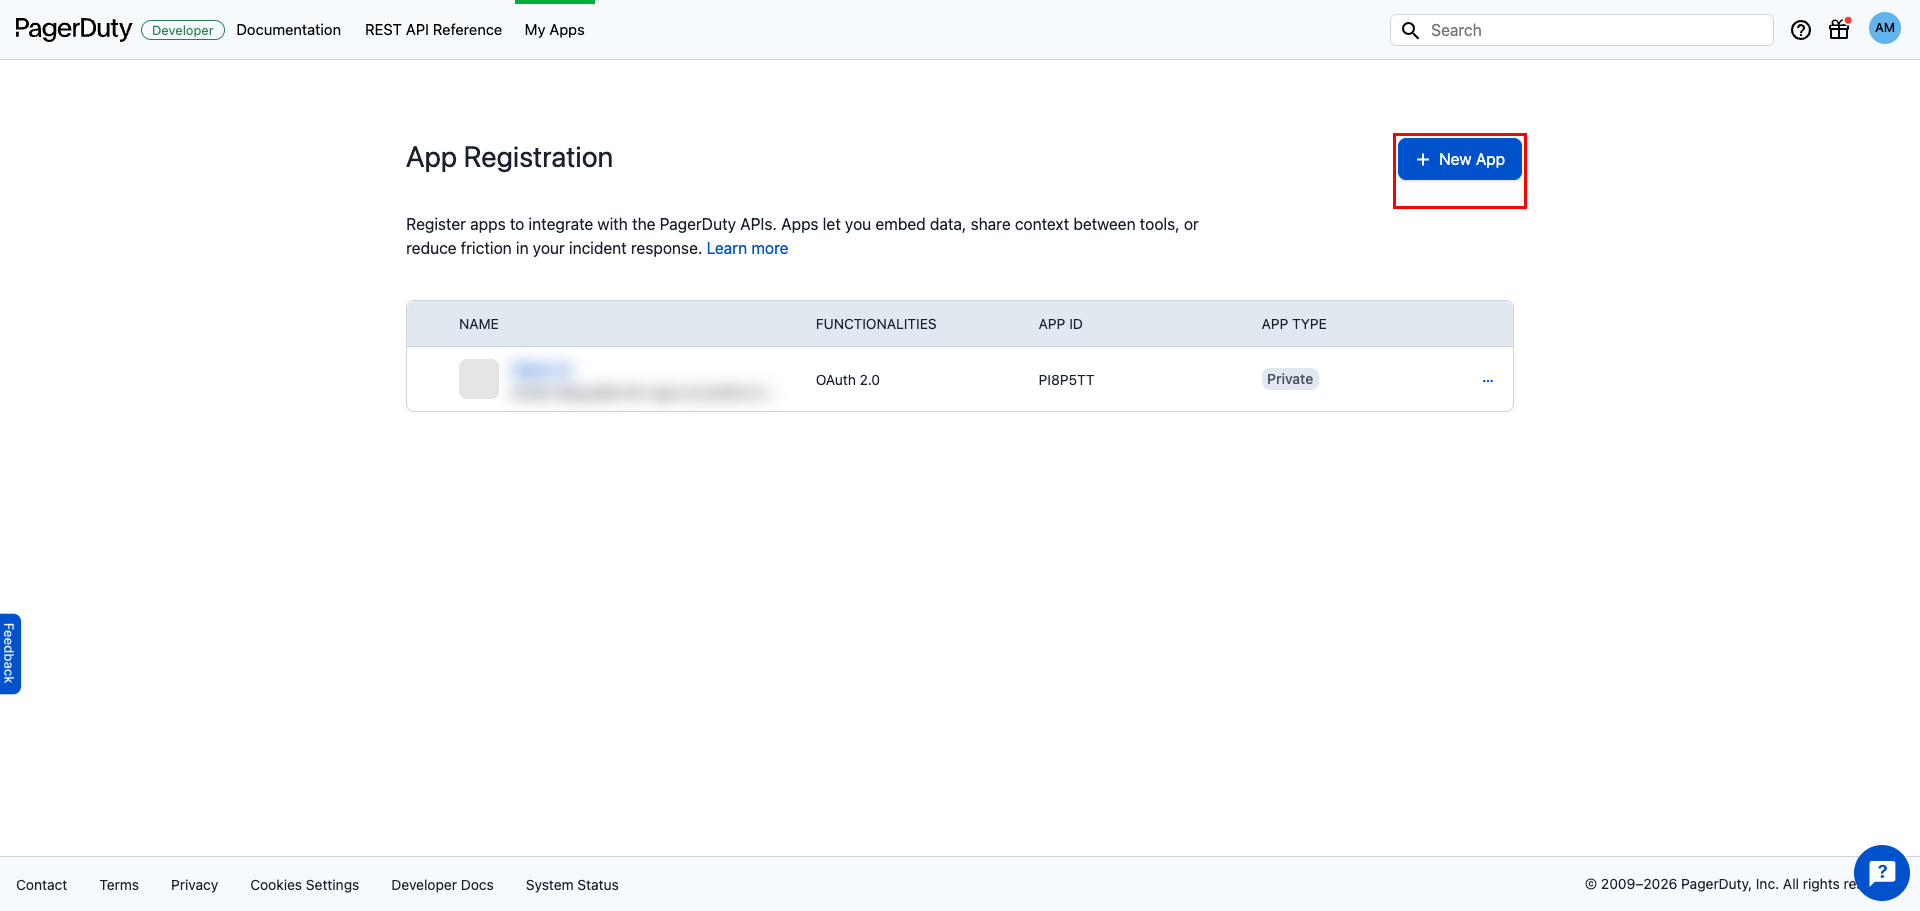
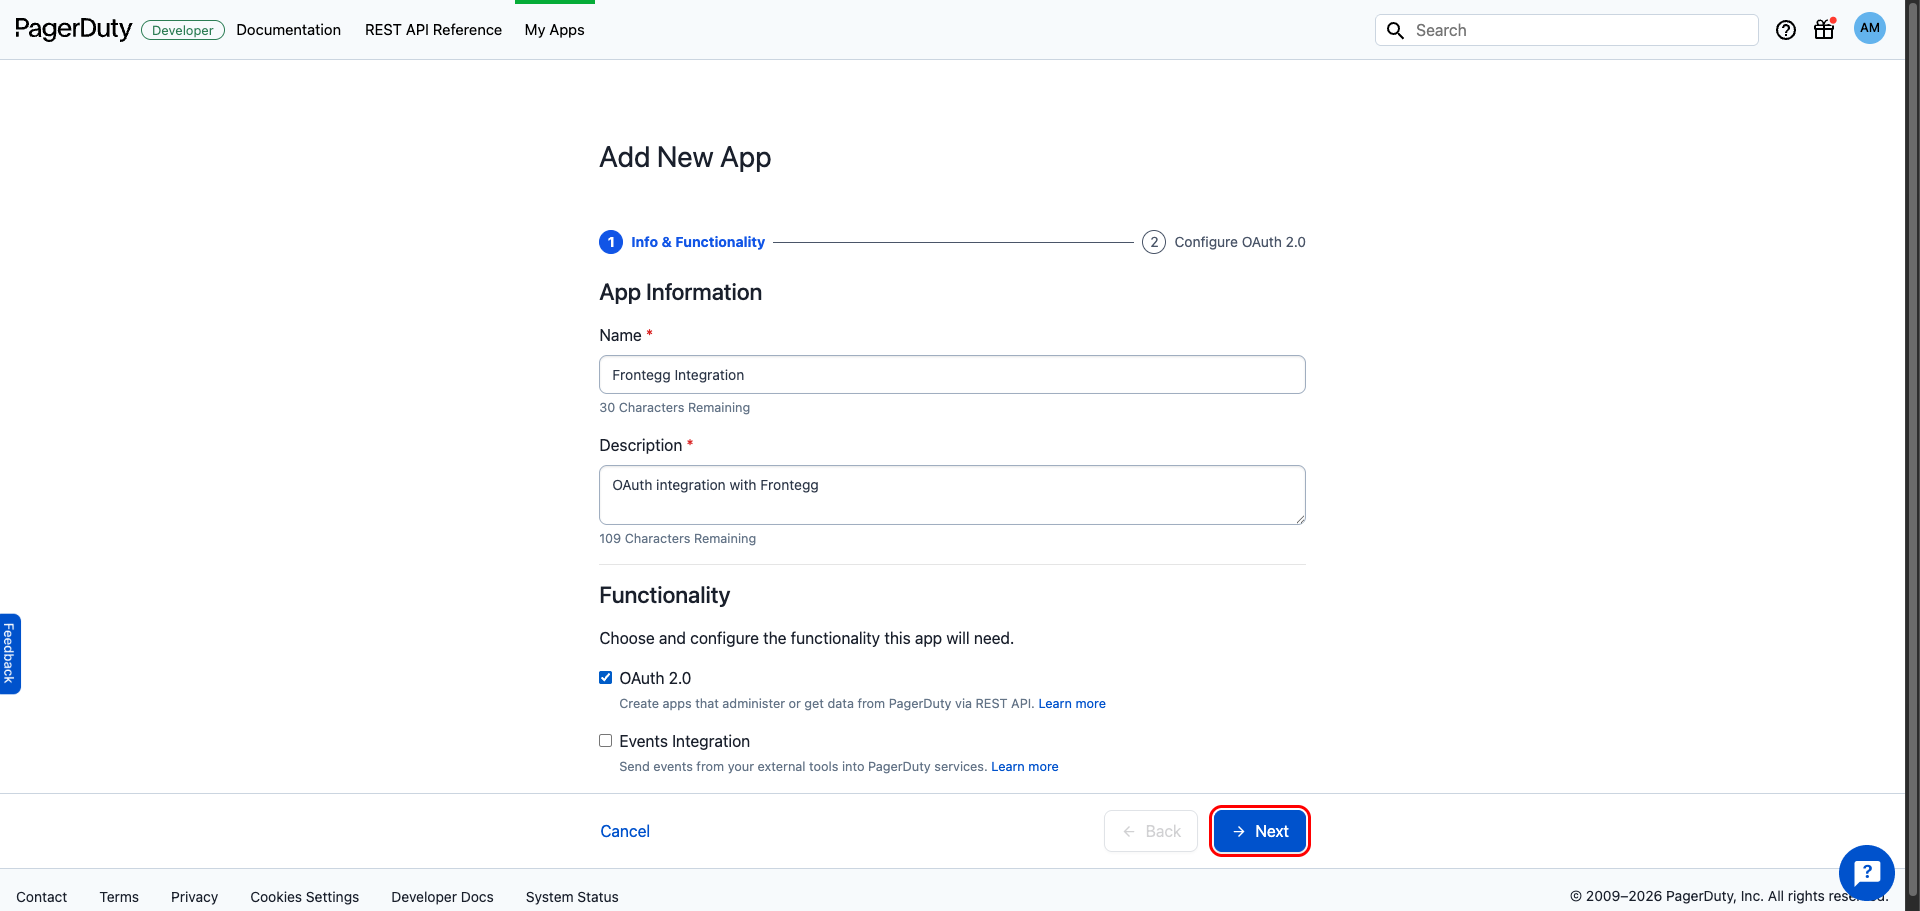
Click New App. Enter the following information:
- Name:
Frontegg Integration - Description: A short description of the integration
Under Functionality, check OAuth 2.0 to enable REST API access via OAuth, then click Next.
On the Configure OAuth 2.0 step, leave Scoped OAuth selected. Scoped OAuth provides granular read and write access to PagerDuty resources and matches the scopes used by Frontegg.
Under Redirect URL, click Add Redirect URL and enter the following URIs:
https://YOUR_MCP_GATEWAY_URL/integration-callback
If only one redirect URL is allowed, use the first one.
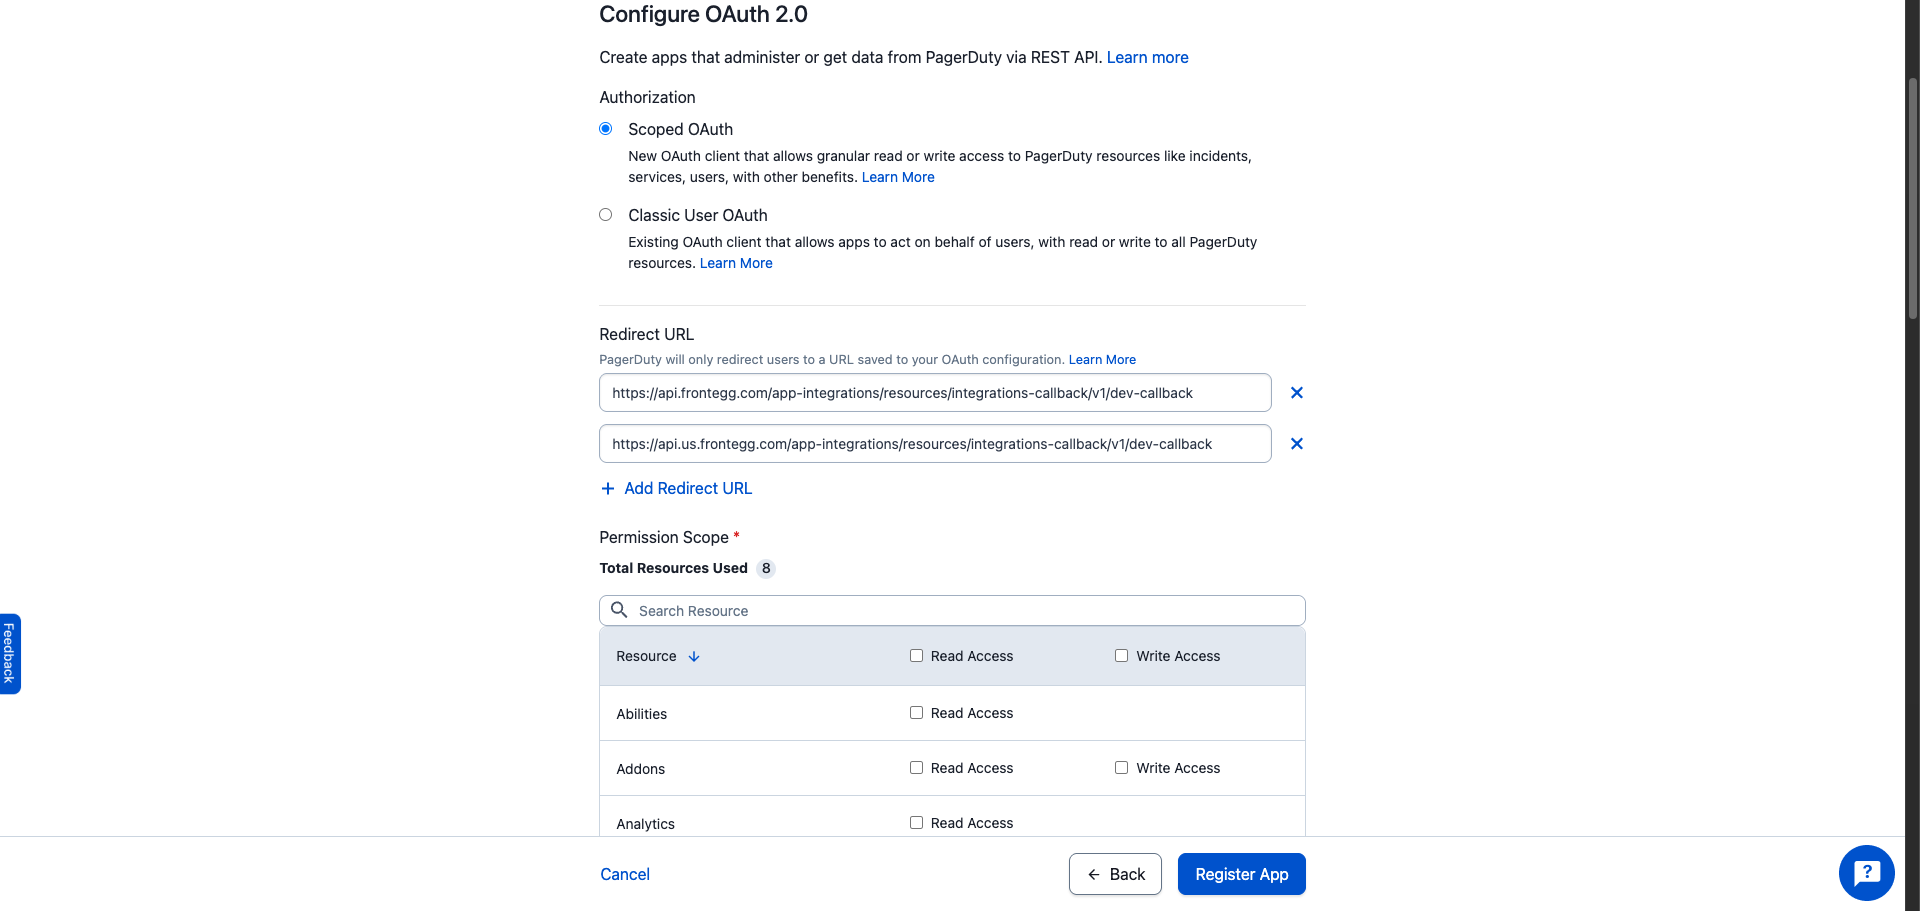
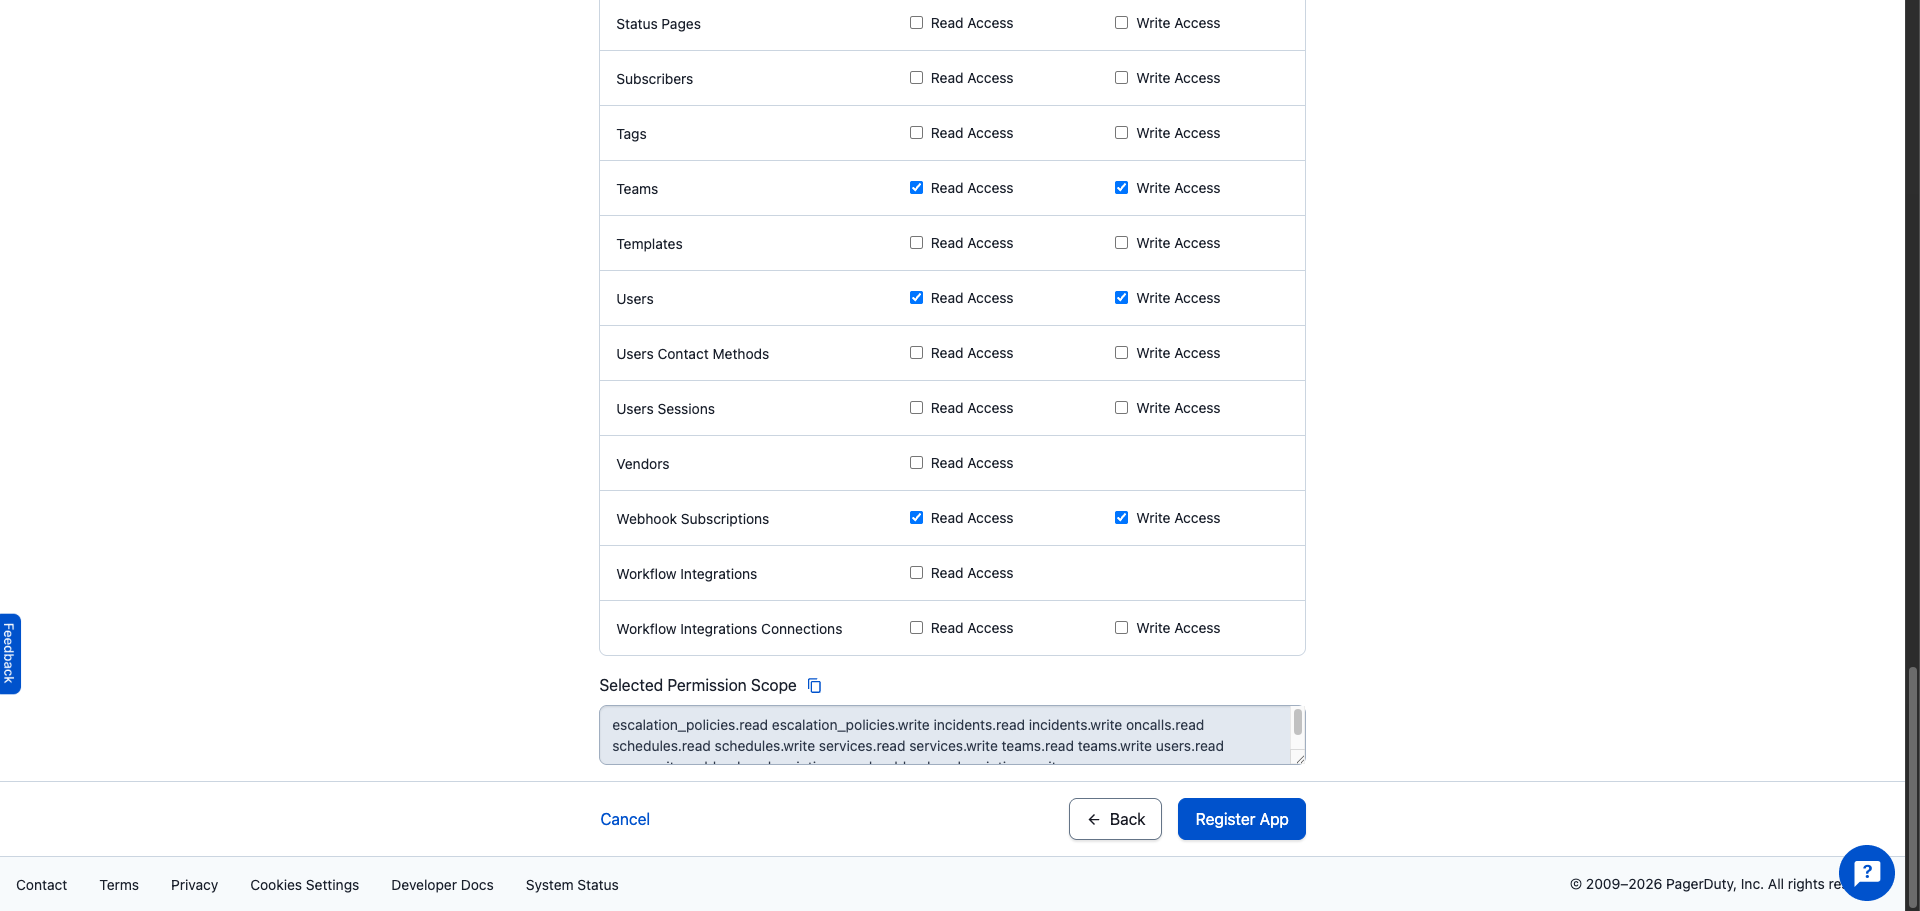
Under Permission Scope, select Read Access and Write Access for the following resources:
| Resource | Scopes |
|---|---|
| Incidents | incidents.read, incidents.write |
| Services | services.read, services.write |
| Schedules | schedules.read, schedules.write |
| Escalation Policies | escalation_policies.read, escalation_policies.write |
| Oncalls | oncalls.read |
| Users | users.read, users.write |
| Teams | teams.read, teams.write |
| Webhook Subscriptions | webhook_subscriptions.read, webhook_subscriptions.write |
Minimum required scopes
Minimum required scopes
For basic incident management, you need at least incidents.read, incidents.write, and services.read. Add more scopes only if your integration needs them.
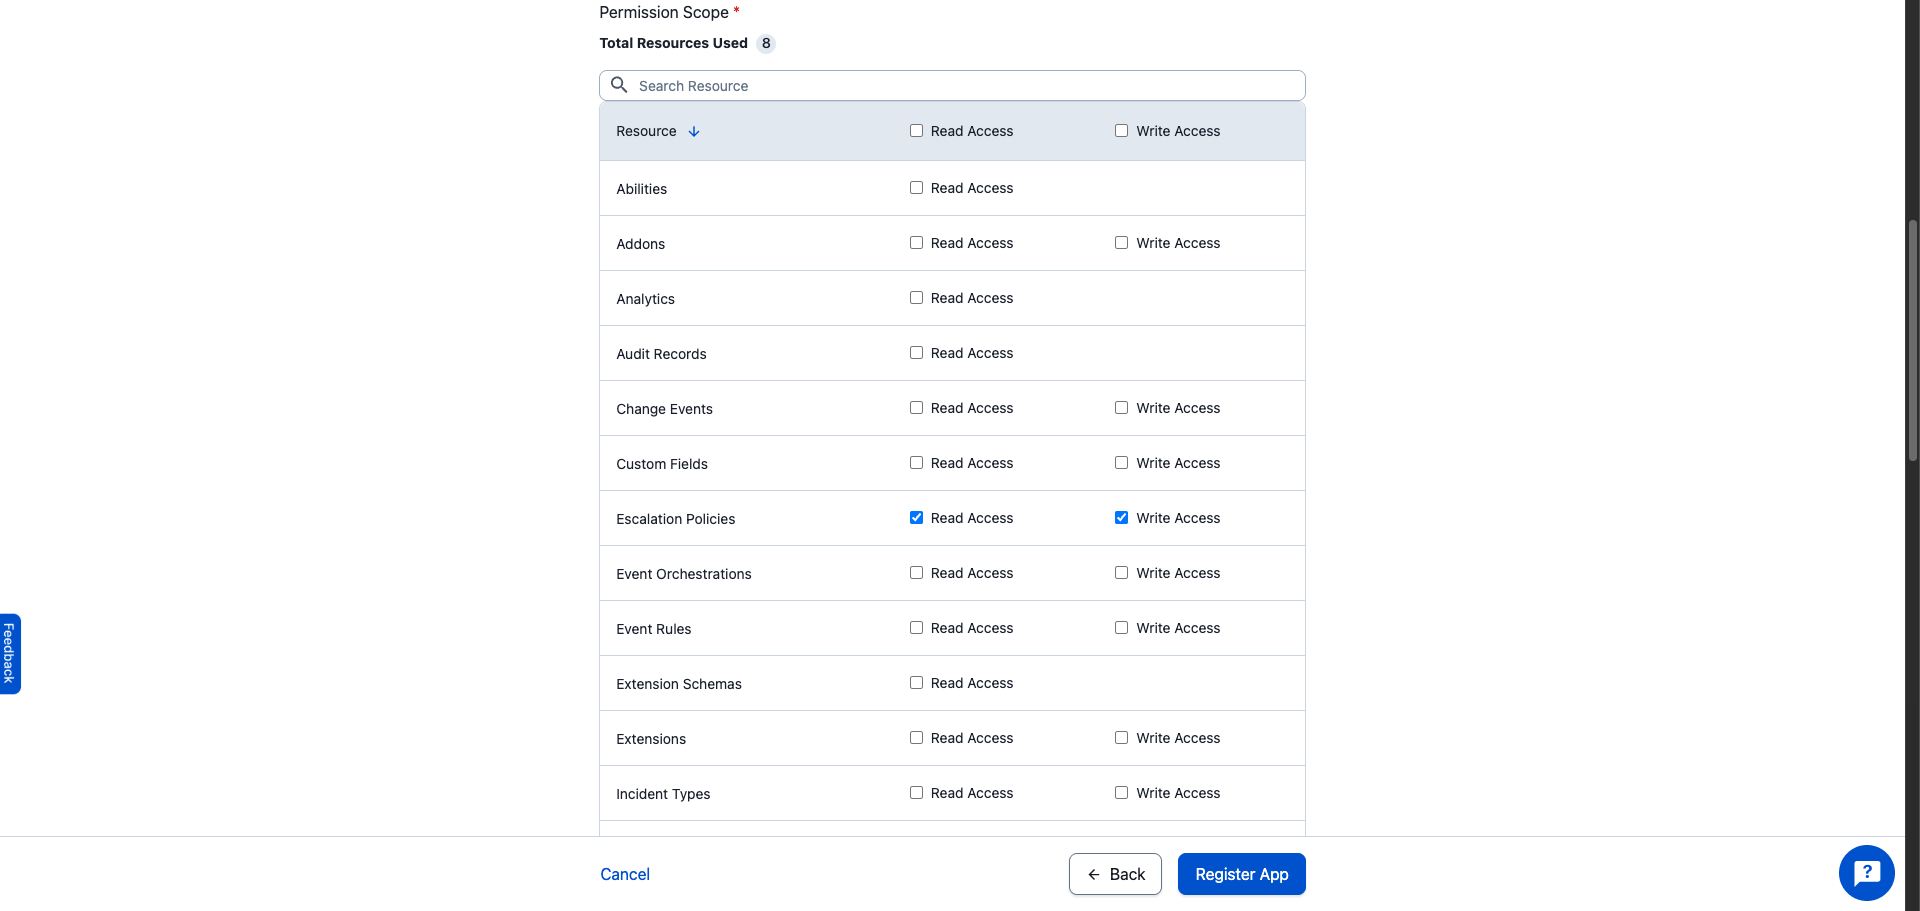
Scroll down to the Selected Permission Scope section to confirm that all required scopes are listed in the read-only field. The full list should match the resources selected above.
Click Register App. PagerDuty displays the OAuth 2.0 Client Information dialog with your Client ID and Client Secret. Copy both values and store them in a safe place.
One-time display
One-time display
PagerDuty shows the Client Secret only once. If you lose it, you must generate a new one from the app's settings.

Once you have obtained your Client ID and Client Secret from the steps above, enter them in the integration configuration page of the Frontegg portal:
- Open the Frontegg portal and navigate to your environment → Integrations → PagerDuty.
- Enter the Client ID and Client Secret in the corresponding fields.
- Select the required scopes.
- Click Save.
Keep your credentials secure
Keep your credentials secure
Never share or commit your Client Secret to version control.