Rollbar is a real-time error monitoring and observability platform that tracks errors, exceptions, and crashes across your applications. Integrating Rollbar with Frontegg lets your application list and manage items (errors), occurrences, and deploys, query data with RQL, and administer projects, teams, and users on behalf of your users.
Rollbar authenticates with access tokens (no OAuth flow). The integration sends a Project Access Token in the X-Rollbar-Access-Token header. You generate the token in your Rollbar account and paste it into the Frontegg portal.
Prerequisites
Prerequisites
- A Rollbar account (sign up for free)
- At least one Rollbar project
- Owner or admin access to the project (and to the account, if you want account-level tools)
Log in to Rollbar, open your project, then go to Settings → Project Access Tokens.
Rollbar provisions a set of default ingestion tokens with every project. Each row shows the token's scopes under its name — the defaults are post_client_item and post_server_item. A read / write token is not created by default, so you will create one in the next step.
Tokens are shown only once
Tokens are shown only once
Rollbar displays the full access token value only at creation. Afterward, the list shows the token's Public ID — which cannot be used for API calls. Reuse a token whose value you have already saved, or create a new one to obtain a fresh value.
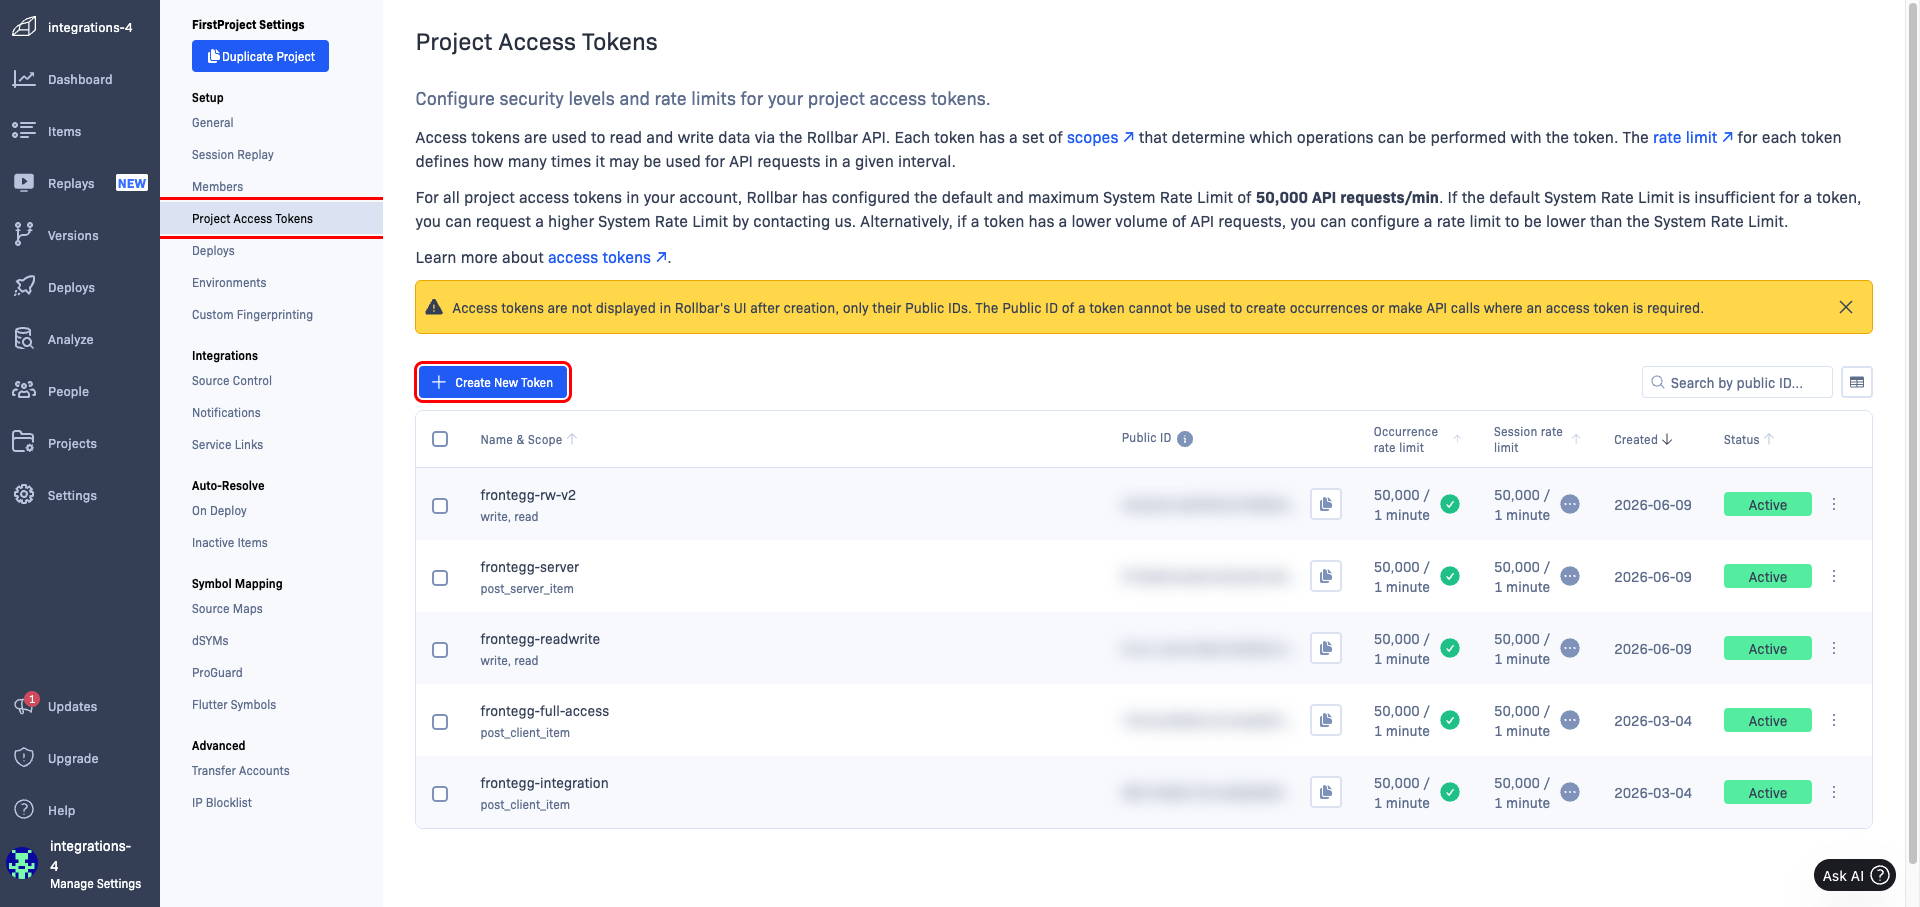
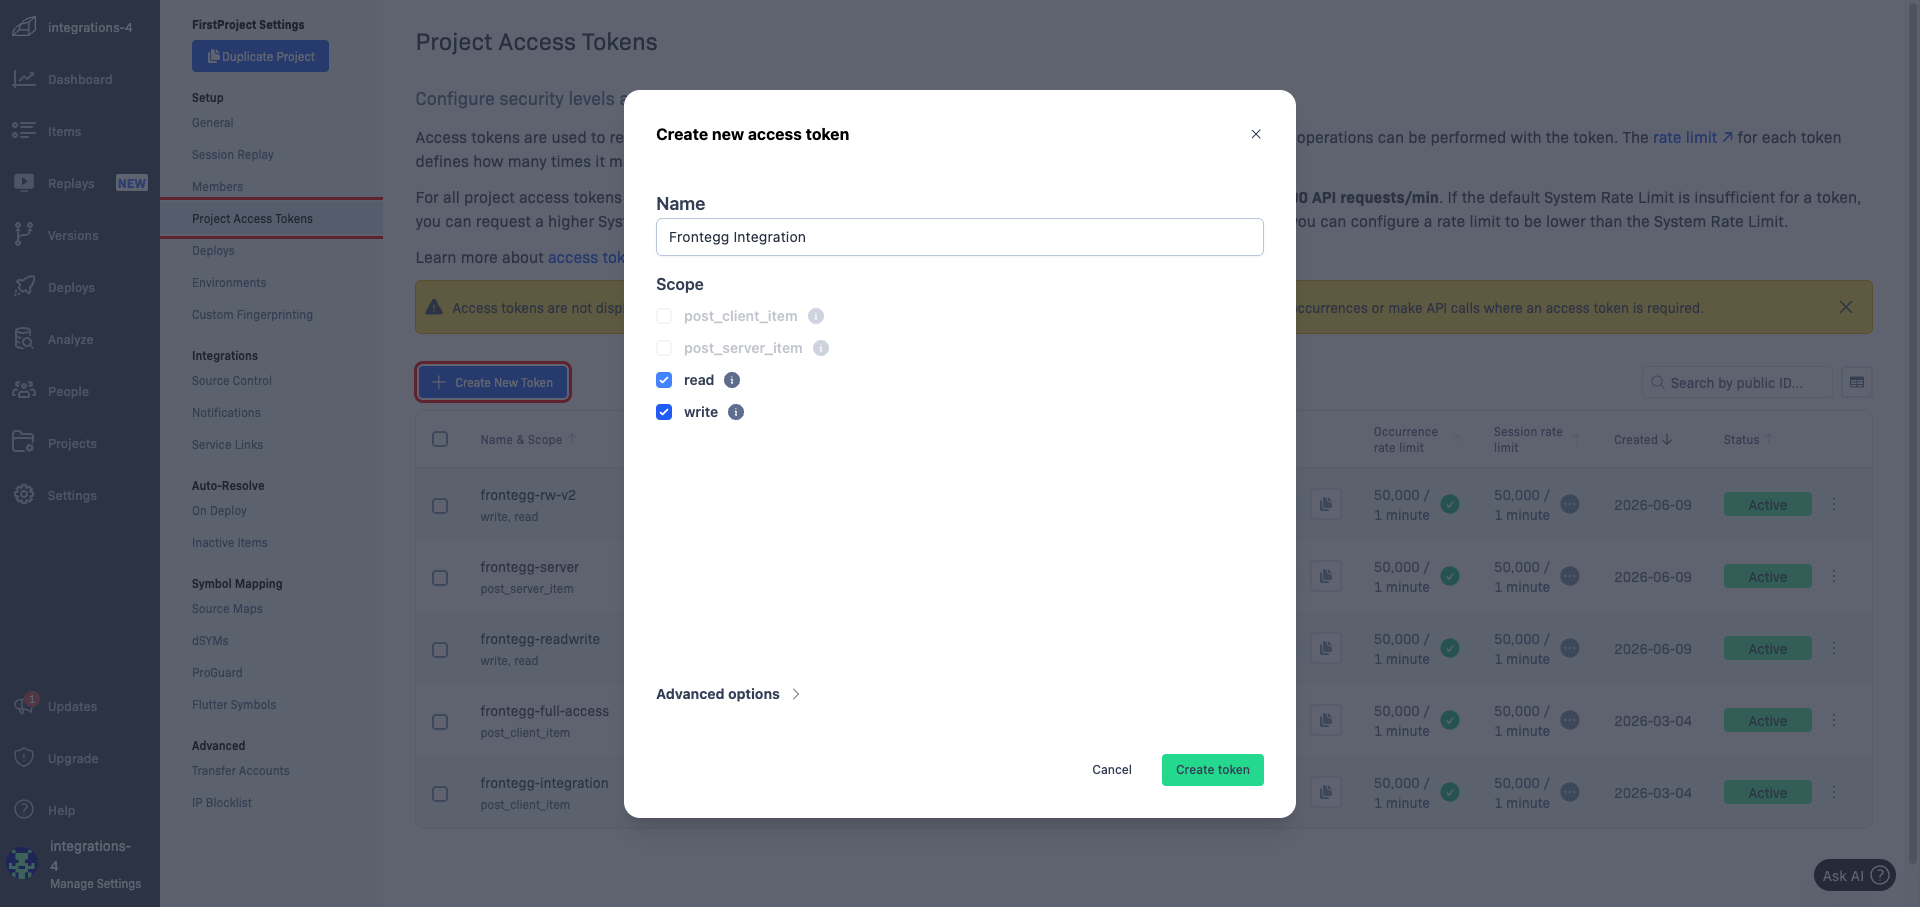
The integration needs a Project Access Token with the read and write scopes. Since Rollbar does not create one by default, click Create New Token, enter a name such as Frontegg Integration, select read and write, then click Create token and copy the value. If you already have a read/write token whose value you saved, you can reuse it instead.
Scopes are mutually exclusive
Scopes are mutually exclusive
In Rollbar, the read / write scopes cannot be combined with post_server_item or post_client_item in the same token. Selecting post_server_item disables read and write. Use a separate token for post_server_item (see the optional step below).
Reporting deployments (the Create Deploy tool) requires a token with the post_server_item scope. On the same Project Access Tokens page, reuse a default post_server_item token or create a new one with that scope selected, then copy its value. You only need this if you want the integration to report deploys.
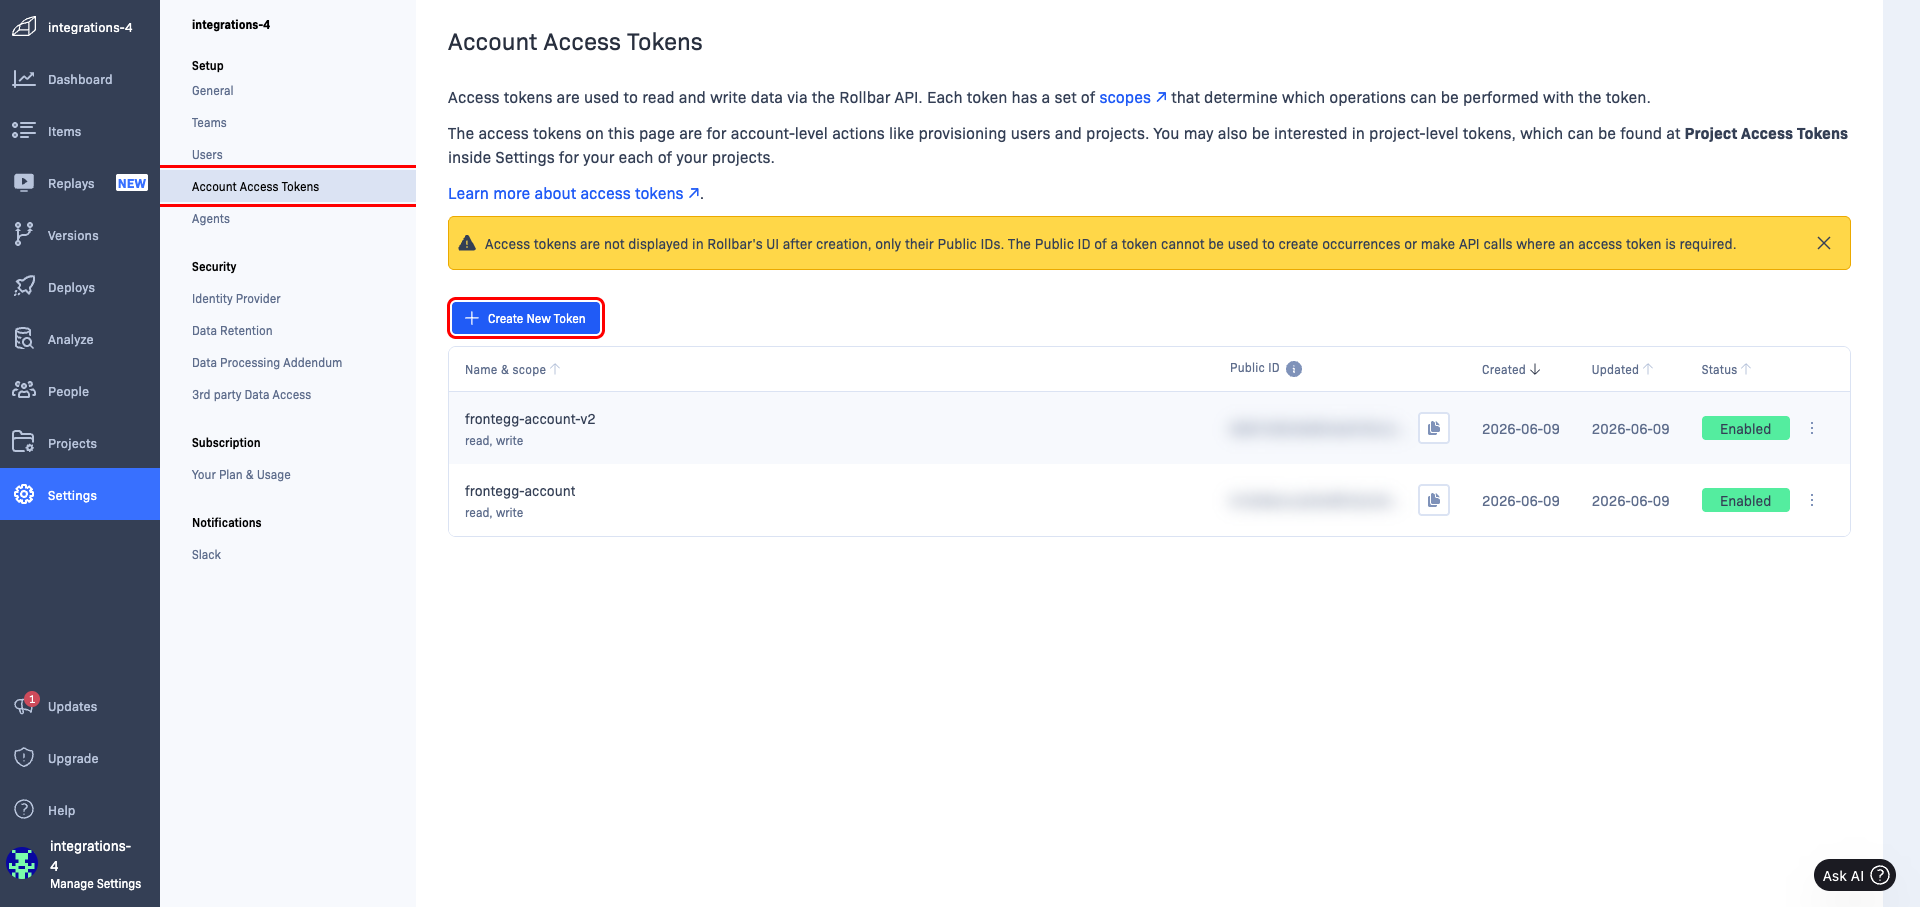
Account-level tools — managing projects, teams, users, and invites — require an Account Access Token. Go to Settings → Account Access Tokens, then reuse or create a token with the read and write scopes and copy its value. You only need this if you want the integration to perform account-level actions.
Once you have your token(s) from the steps above, enter them in the integration configuration page of the Frontegg portal:
- Open the Frontegg portal and navigate to [ENVIRONMENT] → Integrations → Rollbar.
- Paste your read/write token into the Project Access Token field (required).
- Optionally, paste an Account Access Token to enable account-level tools (projects, teams, users, invites).
- Optionally, paste a Server Access Token (with the
post_server_itemscope) to enable reporting deploys. - Click Save.
Keep your tokens secure
Keep your tokens secure
Treat access tokens like passwords. Never share them or commit them to version control. If a token is exposed, delete it in Rollbar and create a new one.
Rate limits require a paid plan
Rate limits require a paid plan
The Update Access Token tool configures per-token rate limits, which Rollbar gates to paid plans. On the free plan it returns HTTP 422 — Upgrade account to configure rate limits. All other tools work on the free plan.