Integrating Meta Ads with Frontegg lets your application read and manage advertising on Facebook and Instagram through the Meta Marketing API. Once connected, the integration can list ad accounts, read campaigns, ad sets, ads, and performance insights, and create, update, or pause campaigns, ad sets, and ads. You configure the integration by creating a Meta for Developers app with the Marketing API use case, then providing the App ID, App secret, and Frontegg redirect URL.
Prerequisites
Prerequisites
- A Meta for Developers account.
- A Meta Business Portfolio to associate with the app (you can also create one during app creation).
- Access to at least one Meta ad account that the connected user manages.
Sign in to the Meta for Developers apps page and click Create App. On the App details step, enter an App name (for example, Frontegg Ads Connector) and confirm the App contact email. Meta uses this email for policy notifications, so set it to an address you check regularly. Click Next.
App name restrictions
App name restrictions
Meta does not allow app names that contain reserved brand terms like FB, Face, Book, Insta, or Gram. Choose a neutral name (for example, Frontegg Ads Connector) instead.

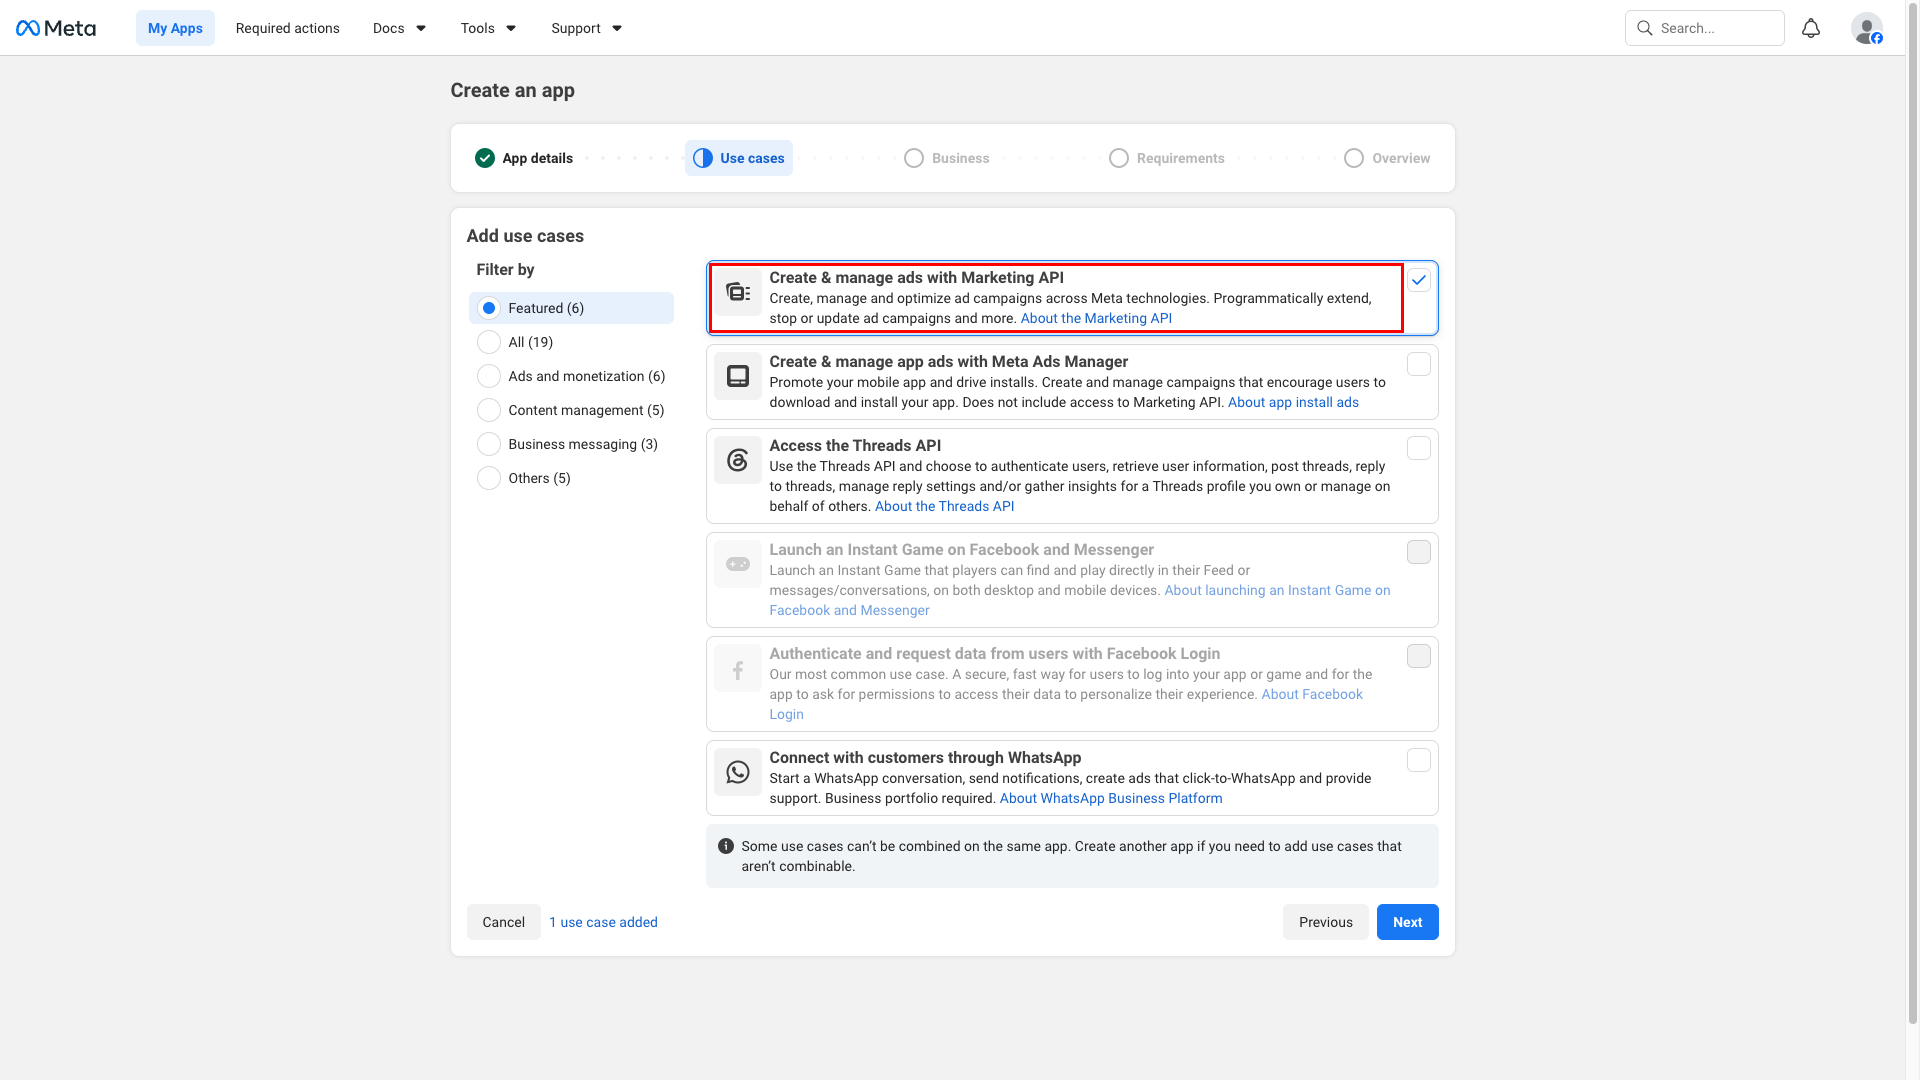
On the Use cases step, select Create & manage ads with Marketing API. This use case grants the ads_read and ads_management permissions and provisions the OAuth settings the integration needs. Click Next.
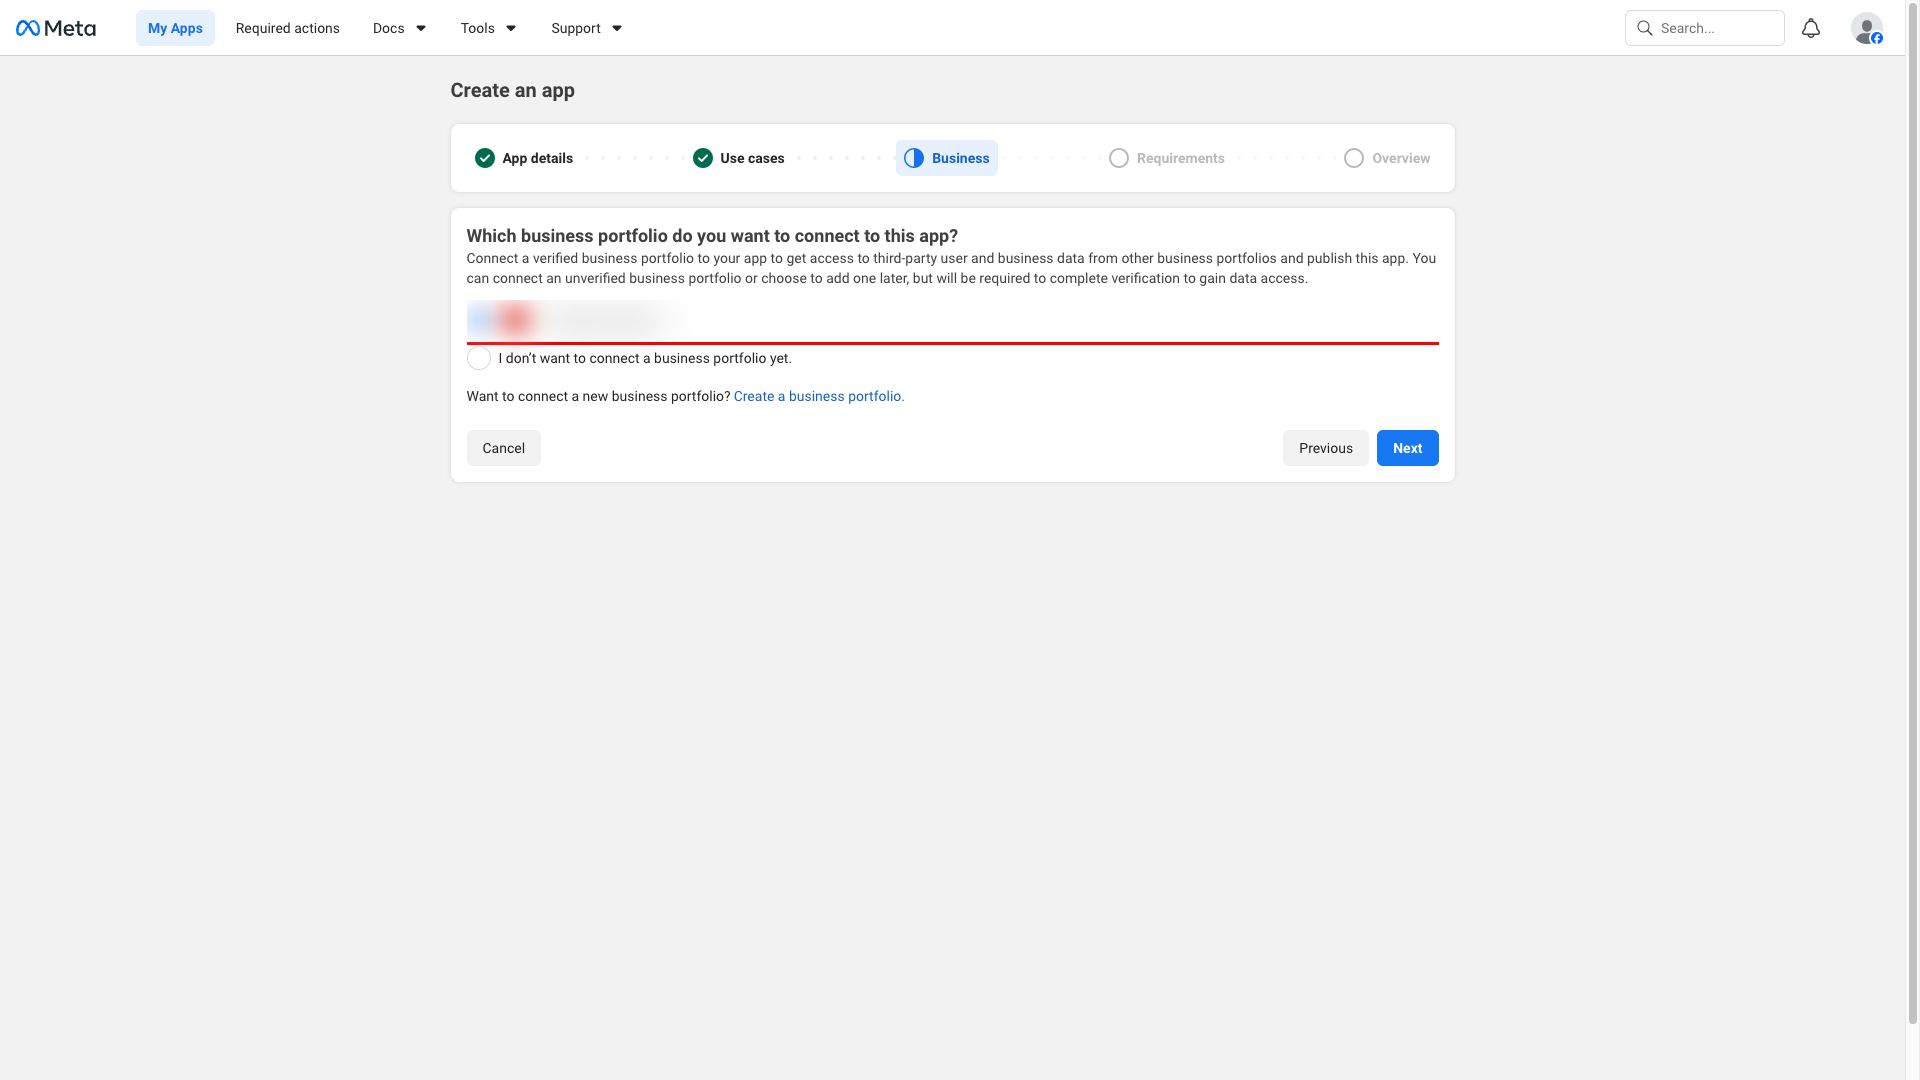
On the Business step, choose the Business Portfolio that will own this app, then click Next. You can connect an unverified portfolio now and complete business verification later when you move beyond the limited access tier.
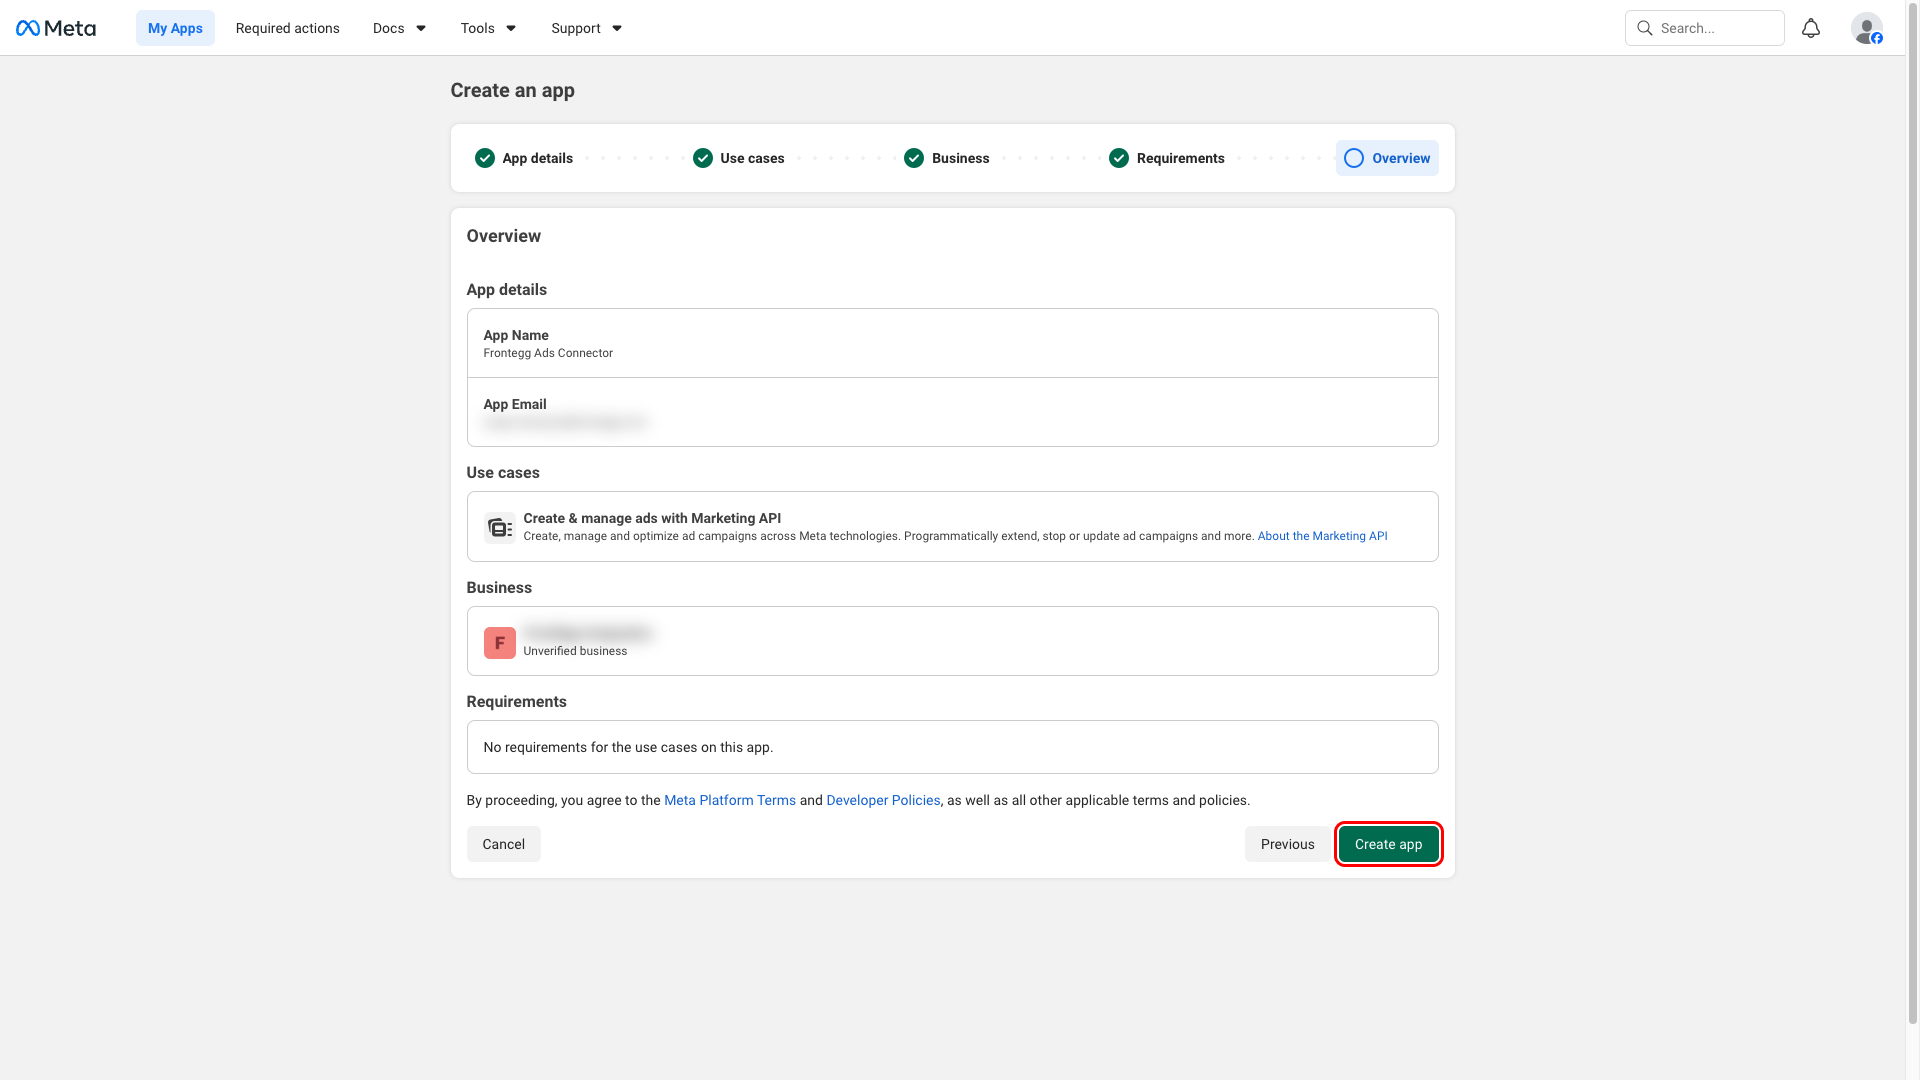
Click Next through the Requirements step, review the Overview, then click Create app. Meta may ask you to re-enter your Facebook password to confirm.
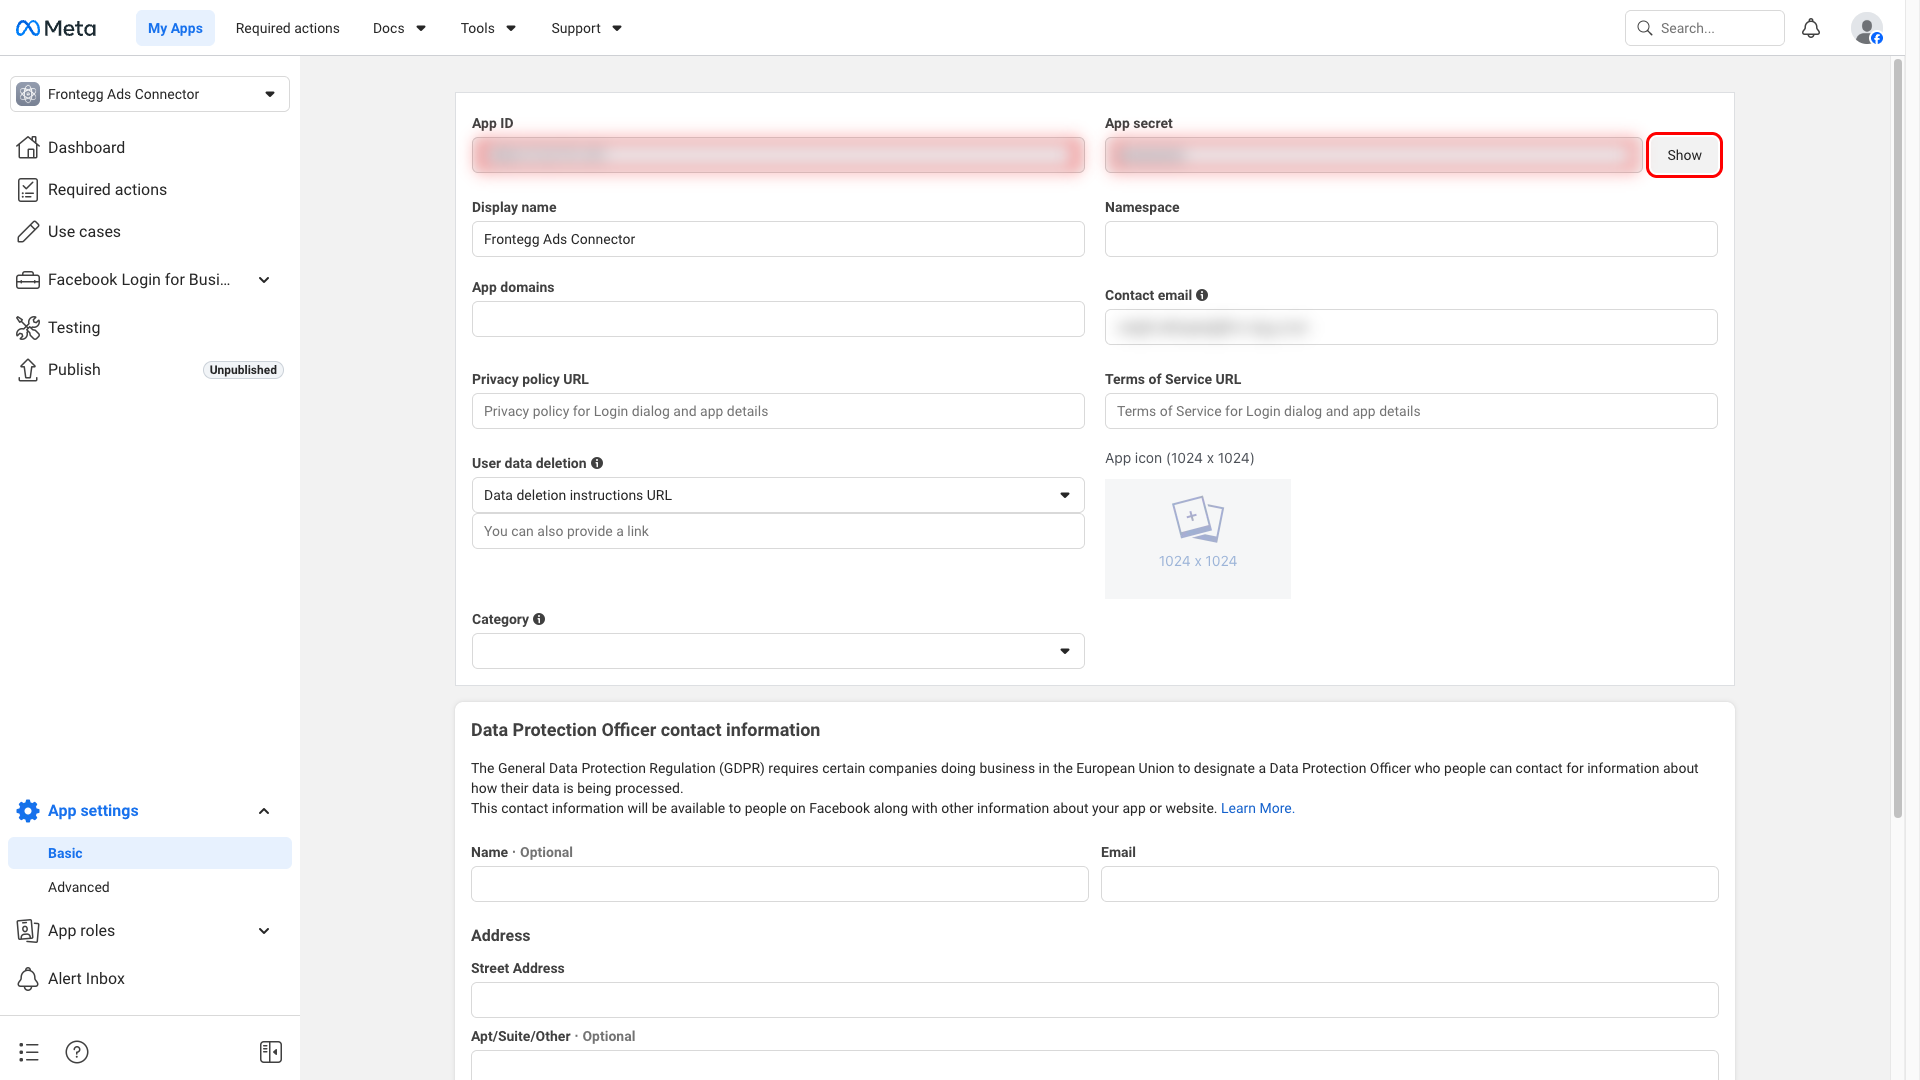
In the app dashboard, navigate to App settings → Basic. The top of the page shows the App ID and App secret. Copy the App ID — this is your Frontegg Client ID. Click Show next to App secret, re-enter your Facebook password when prompted, and copy the value — this is your Frontegg Client Secret.
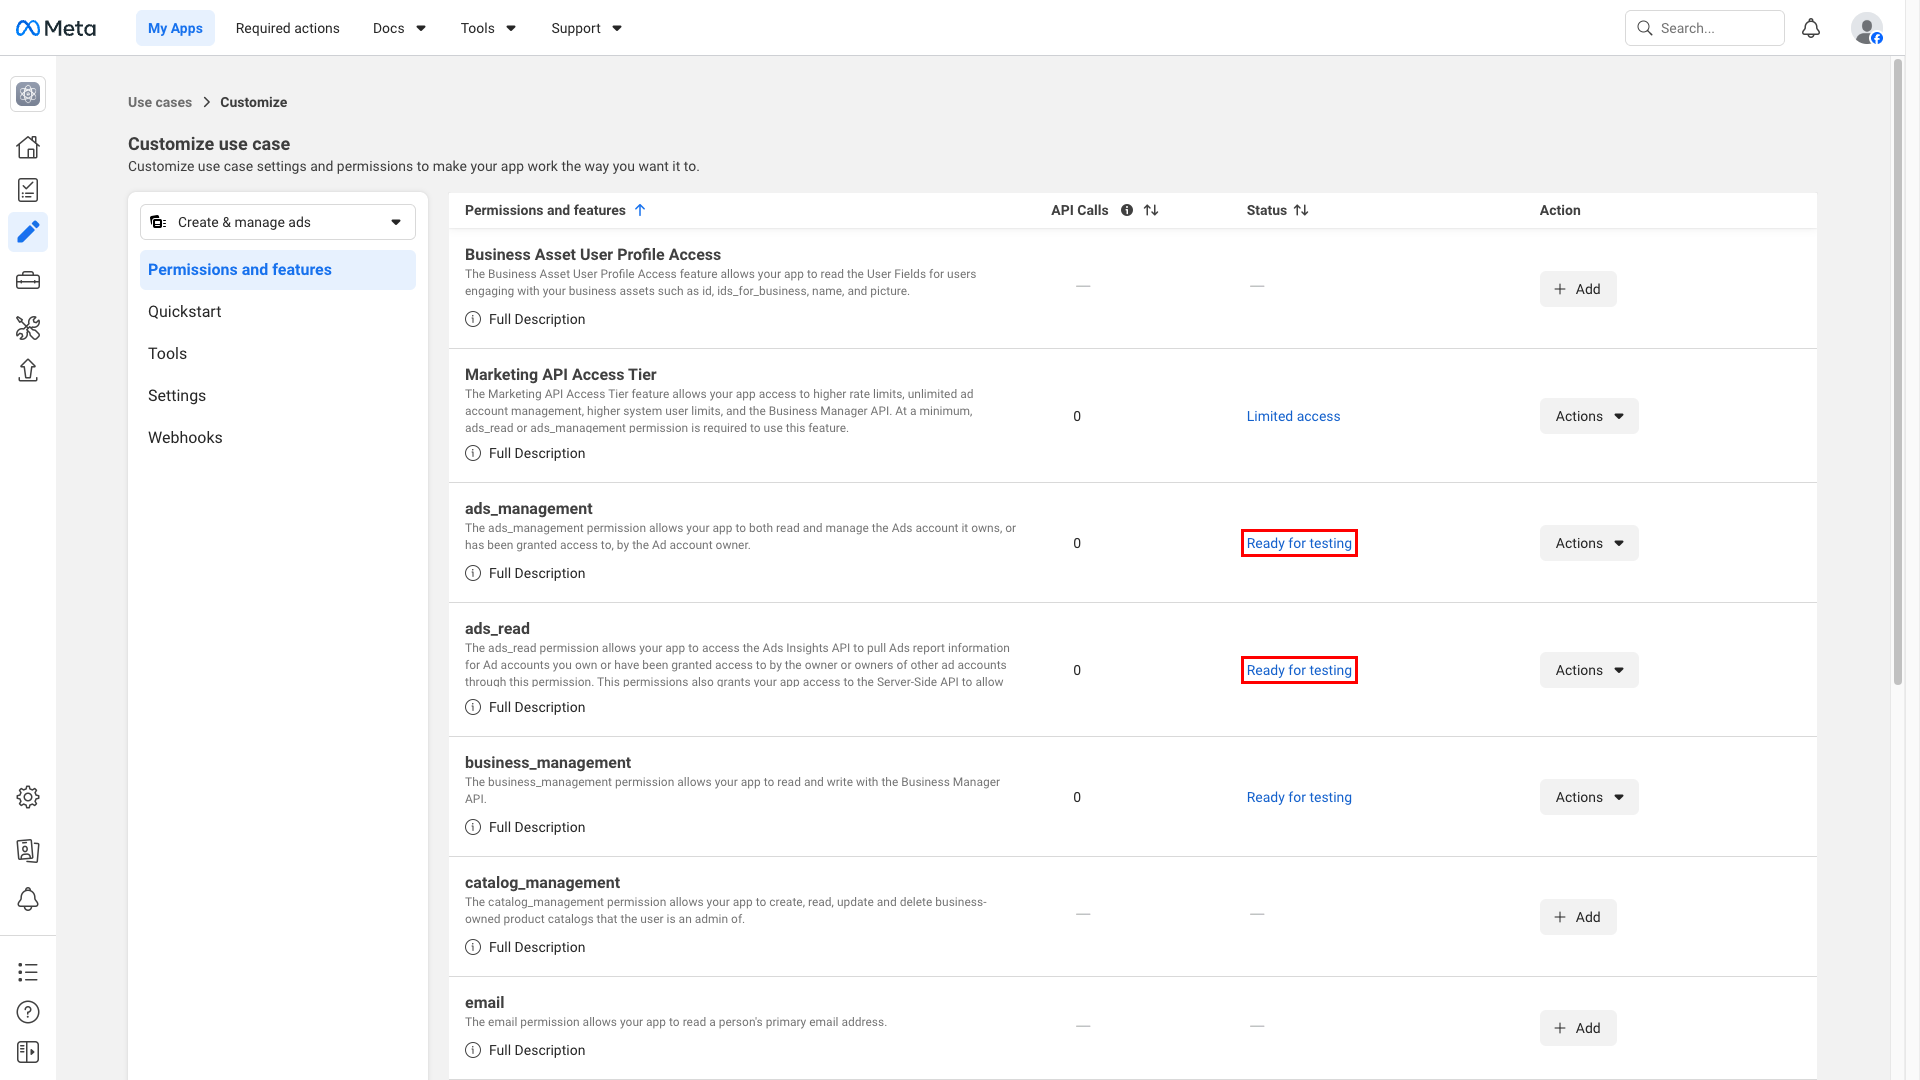
Navigate to Use cases → Customize on the Create & manage ads with Marketing API tile, then open the Permissions and features tab. The Marketing API use case includes the permissions the integration uses — confirm that both ads_read and ads_management are listed.
The integration uses the following scopes:
| Scope | Description |
|---|---|
ads_read | Read ad accounts, campaigns, ad sets, ads, ad creatives, and performance insights. |
ads_management | Create, update, pause, and delete campaigns, ad sets, and ads. |
Minimum required scopes
Minimum required scopes
For read-only reporting, you need ads_read. To create or modify campaigns, ad sets, and ads, add ads_management.
Standard access requires App Review
Standard access requires App Review
Permissions are initially Ready for testing — they work only for users assigned to the app under App roles → Roles or Test users. To grant access to any Meta user, publish your app and submit it for App Review, requesting Standard access and the higher Marketing API access tier.
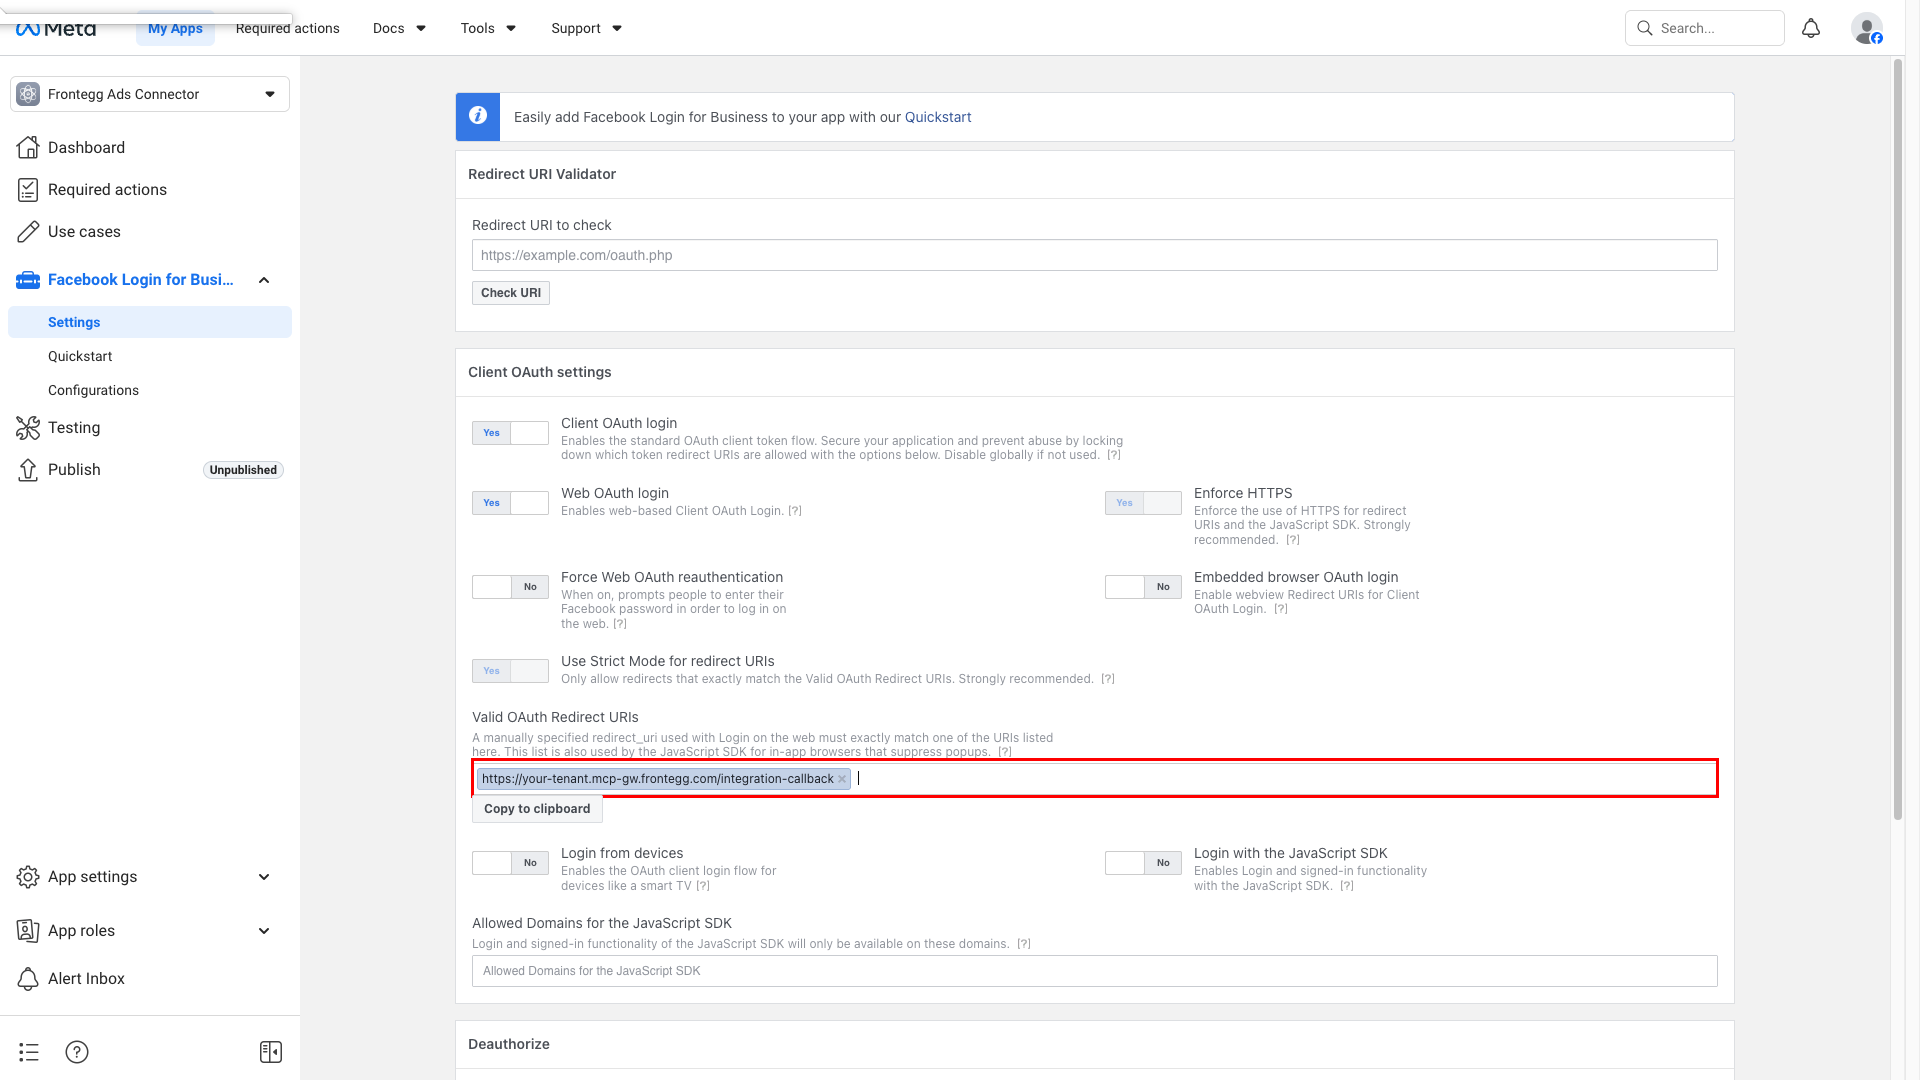
In the left menu, open Facebook Login for Business → Settings. Under Client OAuth settings, make sure Client OAuth login, Web OAuth login, and Use Strict Mode for redirect URIs are set to Yes. Scroll to Valid OAuth Redirect URIs and add your Frontegg redirect URL:
https://YOUR_MCP_GATEWAY_URL/integration-callback
Replace YOUR_MCP_GATEWAY_URL with the MCP Gateway URL from the Frontegg portal Settings → Basic configuration page. Press Enter to add the URI as a chip, then click Save changes.
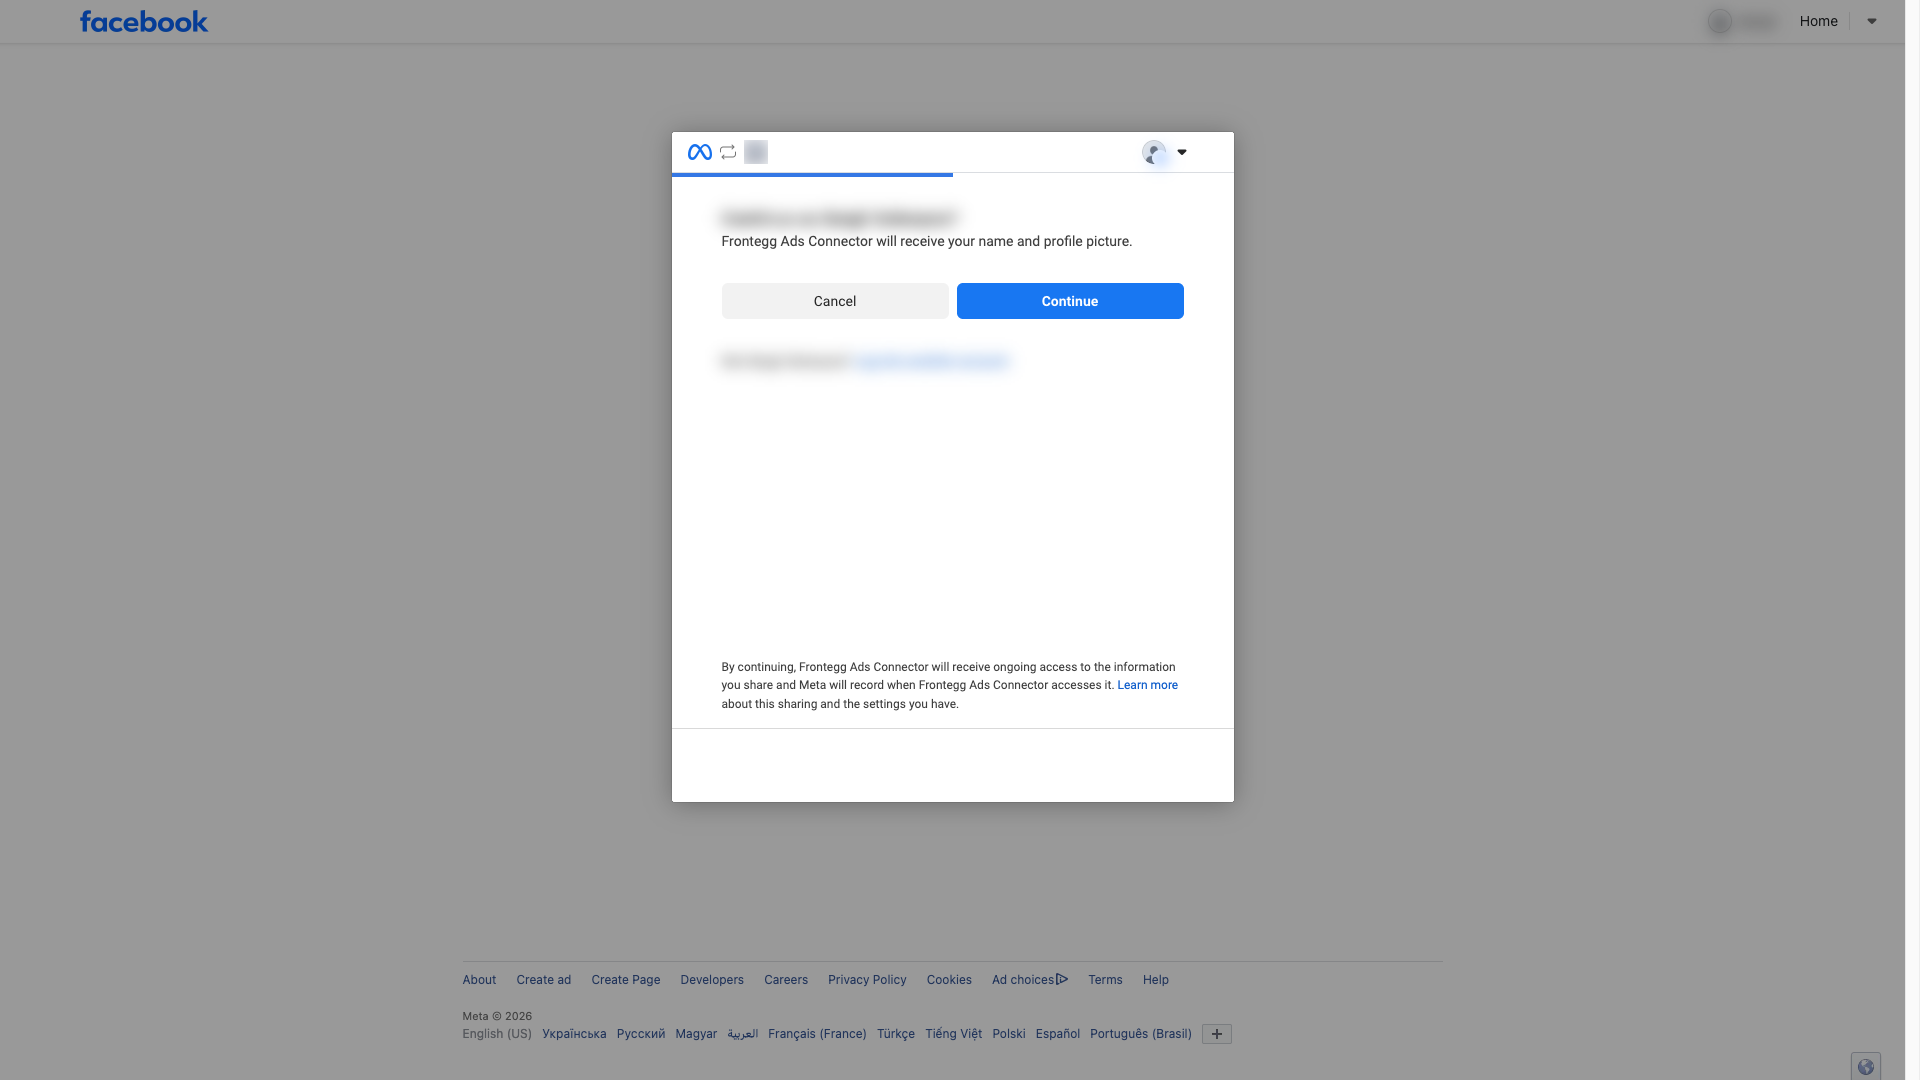
Open the Meta OAuth dialog in a new tab to confirm that the redirect URL, App ID, and scopes are wired correctly:
https://www.facebook.com/v24.0/dialog/oauth?client_id=YOUR_APP_ID&redirect_uri=https://YOUR_MCP_GATEWAY_URL/integration-callback&response_type=code&scope=ads_read,ads_managementIf everything is configured correctly, Meta shows a consent screen titled "Continue as ..." that names your app — this is the screen the connected user sees when authorizing the integration. If the redirect URL is missing or mistyped, Meta shows a "URL Blocked" error instead.
Once you have your App ID (Client ID) and App secret (Client Secret), enter them in the Frontegg portal:
- Open the Frontegg portal and navigate to [ENVIRONMENT] → Integrations → Meta Ads.
- Enter the Client ID and Client Secret in the corresponding fields.
- Select the required scopes.
- Click Save.
When a user authorizes the integration, Meta prompts them to log in and grant the requested permissions to your app.
Tokens expire after about 60 days
Tokens expire after about 60 days
Meta does not issue refresh tokens for this flow. Access tokens are long-lived (about 60 days), after which the connection must be re-authorized.
Keep your credentials secure
Keep your credentials secure
Never share or commit your App secret to version control.