PayPal is an online payments platform for accepting payments, billing, and payouts.
It can be connected to Agen.co two ways, matching the Official / In-house filter in the connector picker:
- Official — Agen.co connects through PayPal's own hosted MCP server. Each user authorizes with their own PayPal account, and agents reach only the resources covered by the permissions granted at authorization.
- In-house — Agen.co wraps the PayPal REST API directly through its own integration layer, using a REST API app you register once in the PayPal Developer Dashboard.
Pick Official if invoicing, orders and payments, disputes, and transaction search cover what your agents need. Fall back to In-house if your agents must also manage subscriptions, payouts, shipment tracking, or the product catalog — the Official server's granted permissions don't cover those.
Prerequisites
Prerequisites
- A PayPal account with access to the resources you want to connect. No app needs to be registered with PayPal — the MCP server registers Agen.co as a client automatically, so there is no Client ID or Client Secret to copy.
In the Agen.co portal, go to Connectors → My connectors and click Add connector.
In the Select connector drawer, search for
PayPaland select it. The Add PayPal panel opens with Official selected at the top.Fill in the field:
Field Required Description Instance Slug Yes Prefixes each imported tool as slug__tool, so several instances of the connector can coexist. Prefilled withpaypal. Use lowercase kebab-case. You can change it later from the connector's settings.Click Connect. PayPal opens in a new tab, and the panel shows Waiting for authorization — complete it in the opened tab…
Sign in to PayPal if prompted, then approve the requested access on PayPal's consent screen.
Back in Agen.co, the panel switches to Select the tools to import from PayPal. Every tool is toggled on; turn off any you don't want to import, then click Add.
The connector is created and its tools imported only when you click Add. If you close the panel before that, nothing is saved, even though the PayPal tab reported success.
Adding the connector doesn't authorize anyone's tool calls yet. The first time each user's agent calls a PayPal tool, the call returns an authorization link instead of a result. The user opens the link and signs in — authorization happens on live paypal.com, with no sandbox option — and approves access on a consent screen that names the app pp-mcp-server. After that, the user's tool calls run with their own PayPal account, within the permissions granted.
Once connected, PayPal appears under My connectors with tools covering:
| Area | What it covers |
|---|---|
| Invoices | Creating, listing, and sending invoices, one at a time or in bulk |
| Payment links | Creating shareable payment links, listing them, and checking their status |
| Disputes | Listing disputes |
| Reporting | Listing transactions for a date range of up to 31 days |
create_invoice, send_invoice, and create_payment_link open an interactive form for the user to fill in, rather than taking the details as tool arguments.
The Official server's granted permissions don't cover subscriptions, payouts, shipment tracking, or the product catalog. Use the In-house tab for those.
Enabling the PayPal connector isn't enough on its own. Tool calls remain denied until you create a policy that grants access to the specific tools you want to expose.
PayPal is an online payments platform for accepting payments, billing, and payouts. Integrating PayPal with Frontegg lets your application create and capture orders, attach shipment tracking, refund captures, manage invoices and chase unpaid ones, run subscriptions with their plans and products, send payouts, handle disputes, and search transactions on behalf of your users — all through Frontegg's integration layer (PayPal REST API). PayPal authenticates with OAuth 2.0 client credentials.
Prerequisites
Prerequisites
- A PayPal account (a Business account is required for live credentials)
- Access to the PayPal Developer Dashboard to create a REST API app
PayPal uses the OAuth 2.0 client credentials grant — an app-to-app flow with no browser step or redirect URL. You create a REST API app in the PayPal Developer Dashboard, which issues a Client ID and Secret, and the integration exchanges them for a short-lived access token on each request.
Sign in to the PayPal Developer Dashboard and open Apps & Credentials. Use the Sandbox / Live toggle to choose the environment — sandbox and live apps have separate credentials. Your account starts with a Default Application, or click Create App to add one.
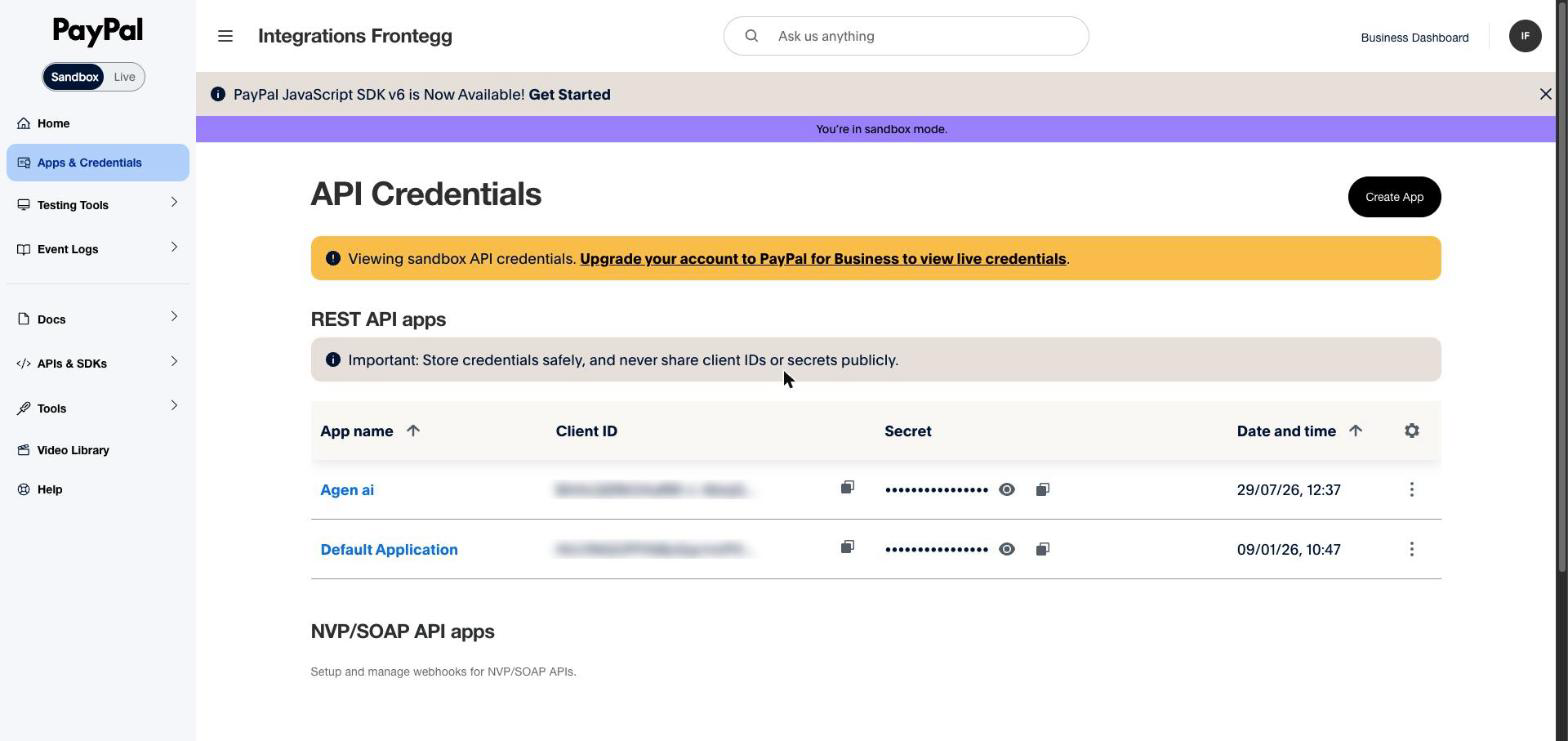
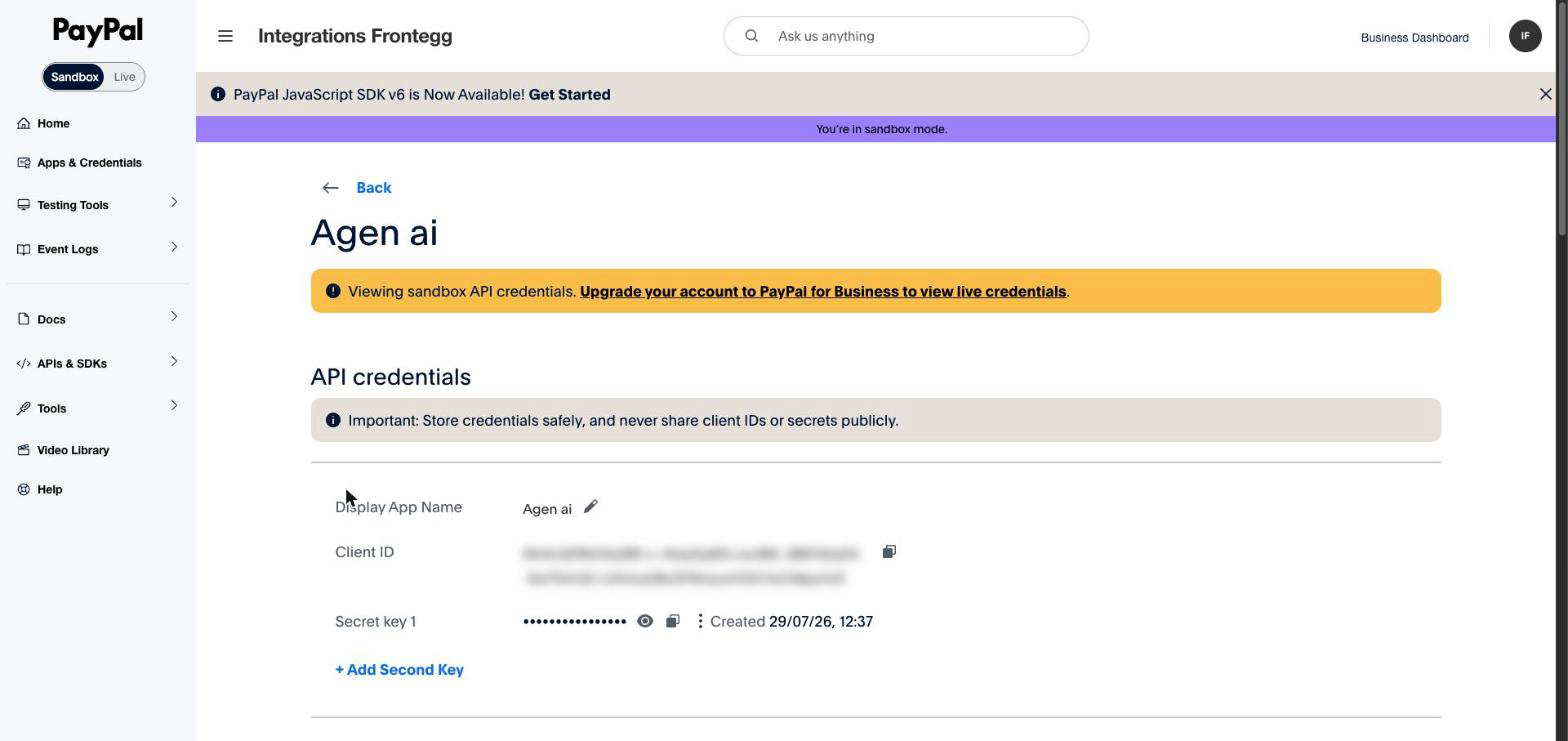
Open your app. Copy the Client ID and reveal and copy the Secret.
Keep your Secret safe
Keep your Secret safe
The Secret grants access to your account through the API. Treat it like a password and never expose it in client-side code or commit it to version control. You can add or delete secrets on the app page.
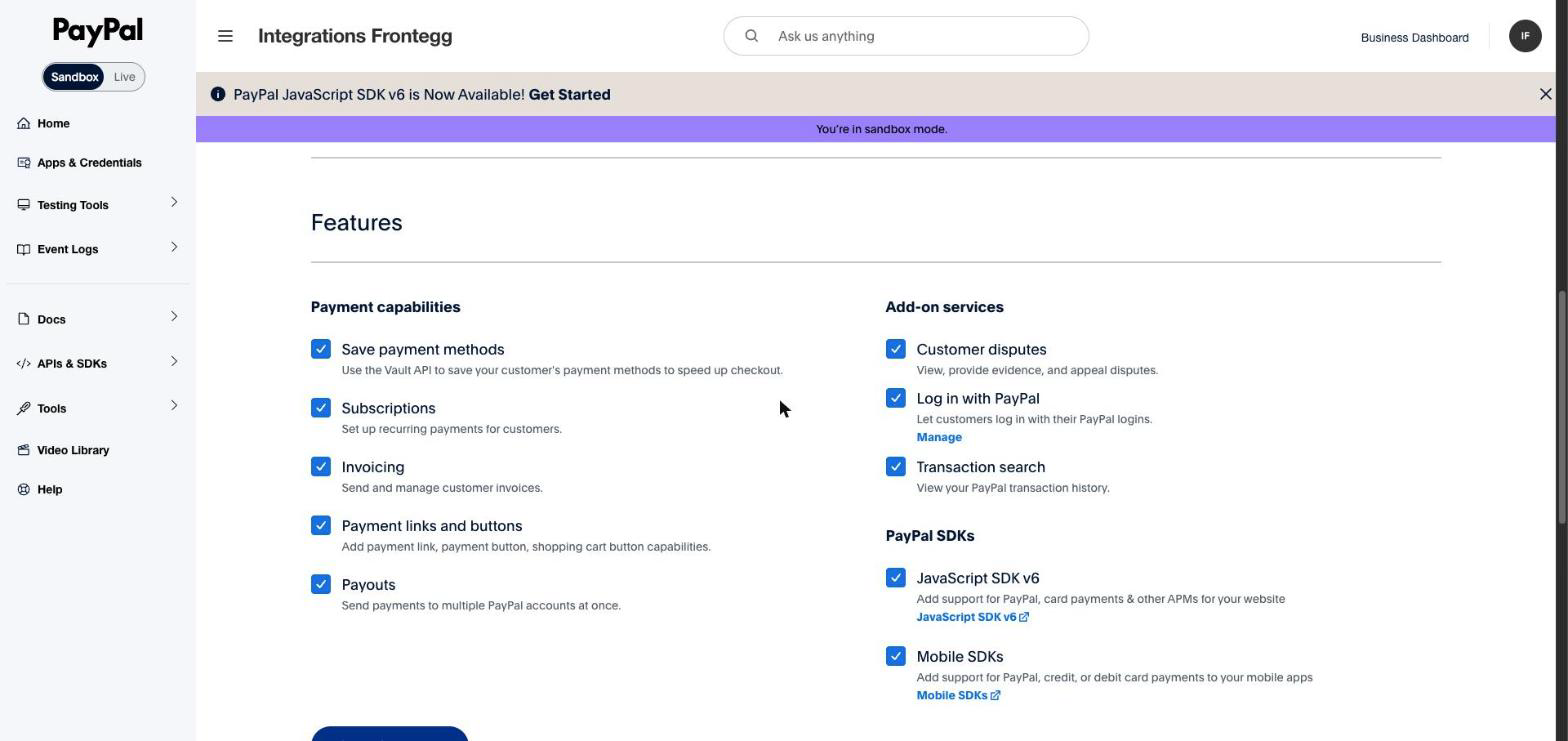
Scroll to Features on the app page and enable the capabilities the integration should use — for example Invoicing, Subscriptions, Payouts, Customer disputes, and Transaction search. PayPal grants only the matching scopes to tokens issued for the app, and drops the rest from the token without failing the request. A missing feature therefore does not stop the integration from connecting — it surfaces later, as a NOT_AUTHORIZED error on the affected operation. If a tool fails that way, check this section first.
Once you have your credentials, configure the integration in the Frontegg portal:
- Open the Frontegg portal and navigate to [ENVIRONMENT] → Integrations → PayPal.
- Enter the Client ID and Client Secret.
- Enable Use sandbox environment only if you entered sandbox credentials. Leave it off for live credentials.
- Click Save.
The integration requests the following scopes, granted through the app's Features. All scopes except openid share the prefix https://uri.paypal.com, abbreviated as ... below.
| Scope | Description |
|---|---|
.../services/payments/realtimepayment | Create and manage orders |
.../services/payments/payment | Attach and correct shipment tracking on orders |
.../services/payments/payment/authcapture | Authorize, capture, and reauthorize payments |
.../services/payments/refund | Refund captured payments |
.../services/invoicing | Create, send, and manage invoices |
.../services/subscriptions | Manage subscriptions, plans, and products |
.../payments/payouts | Send payouts |
.../services/disputes/read-seller | Read disputes |
.../services/disputes/update-seller | Respond to disputes |
.../services/reporting/search/read | Search transactions and read account balances |
openid | Read the connected account's profile |
Keep your credentials secure
Keep your credentials secure
Never share or commit your Secret to version control.