Integrating Microsoft Dynamics 365 Business Central with Frontegg allows your application to read and manage the signed-in user's Business Central data — companies, customers, items, sales and purchase orders, invoices, journals, financial accounts, dimensions, and tax groups — through Frontegg's integration layer using Microsoft OAuth 2.0 and the Business Central REST API v2.0.
Prerequisites
Prerequisites
- A Microsoft Entra (Azure AD) tenant with at least the Application Developer role
- A Microsoft Dynamics 365 Business Central environment (Production or Sandbox) provisioned in the same tenant
- The Directory (tenant) ID for that tenant
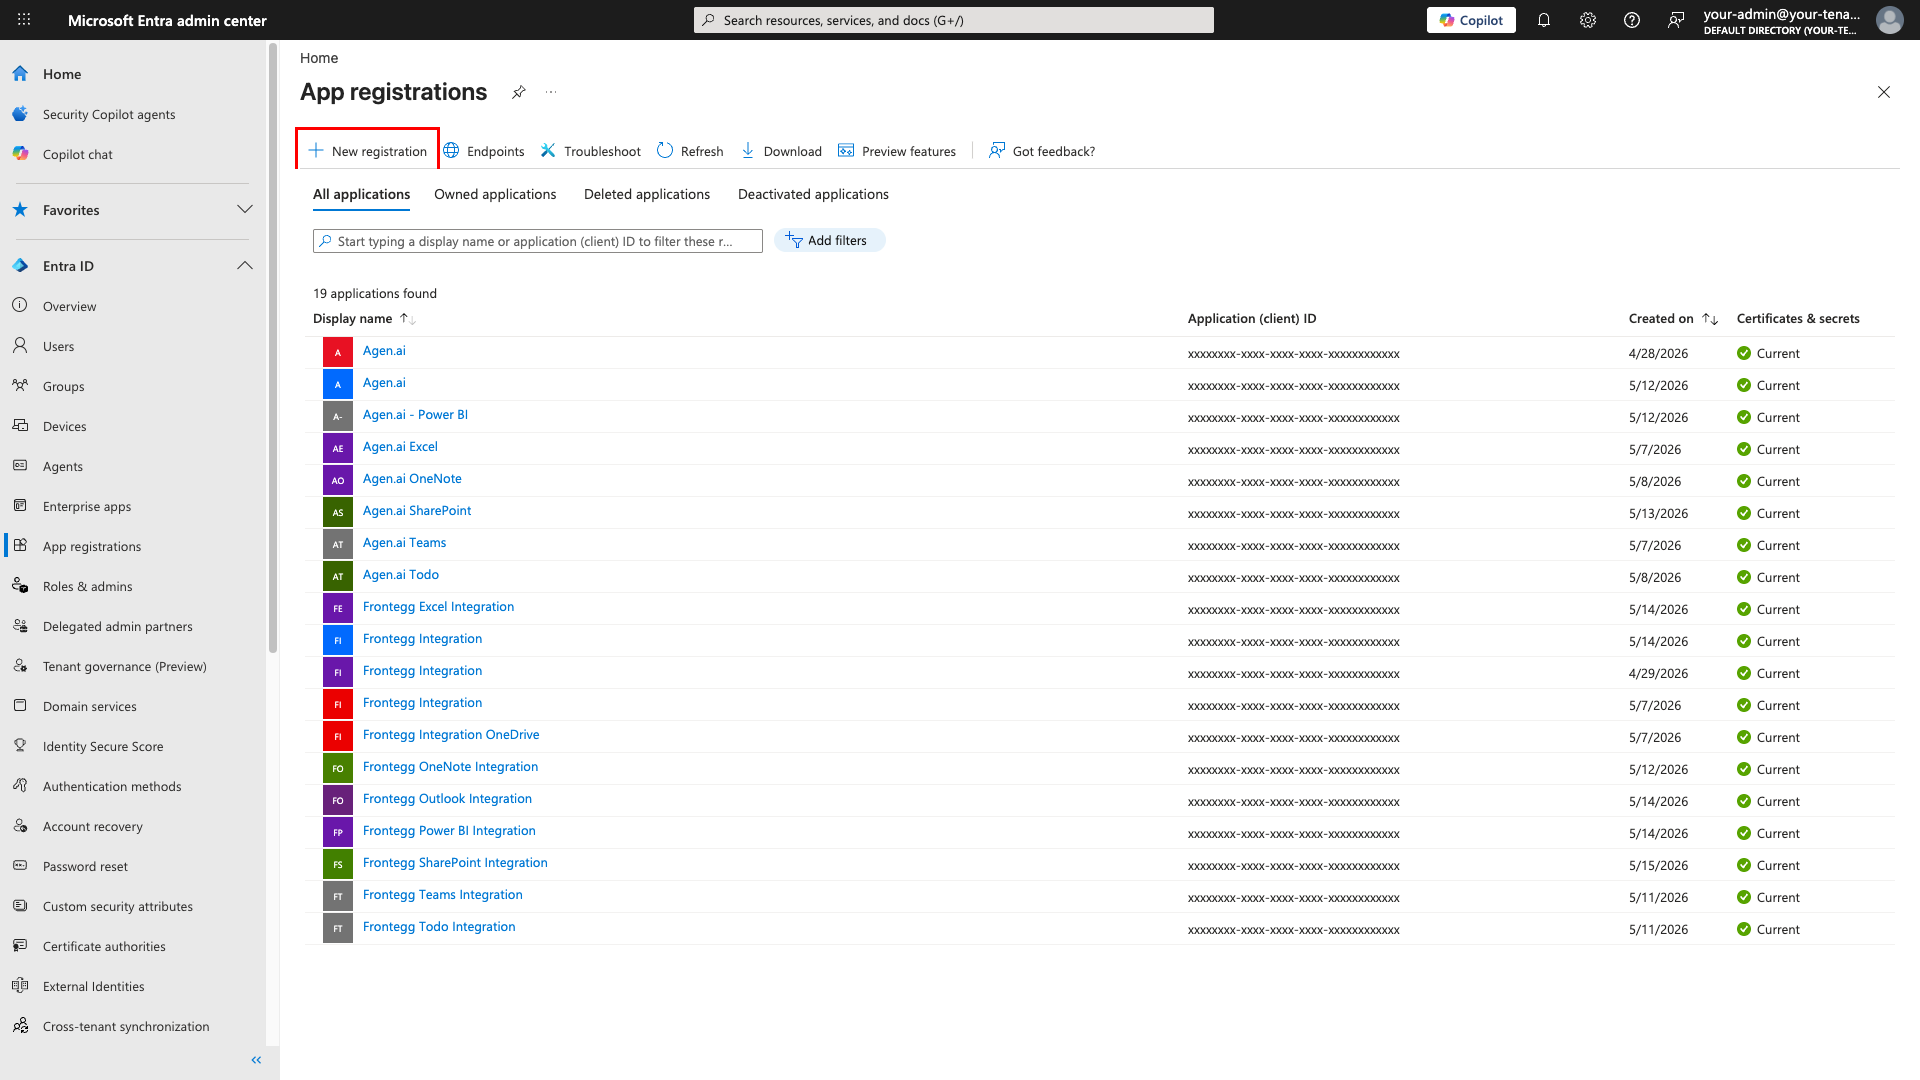
Sign in to the Microsoft Entra admin center and navigate to Entra ID → App registrations. Click New registration.
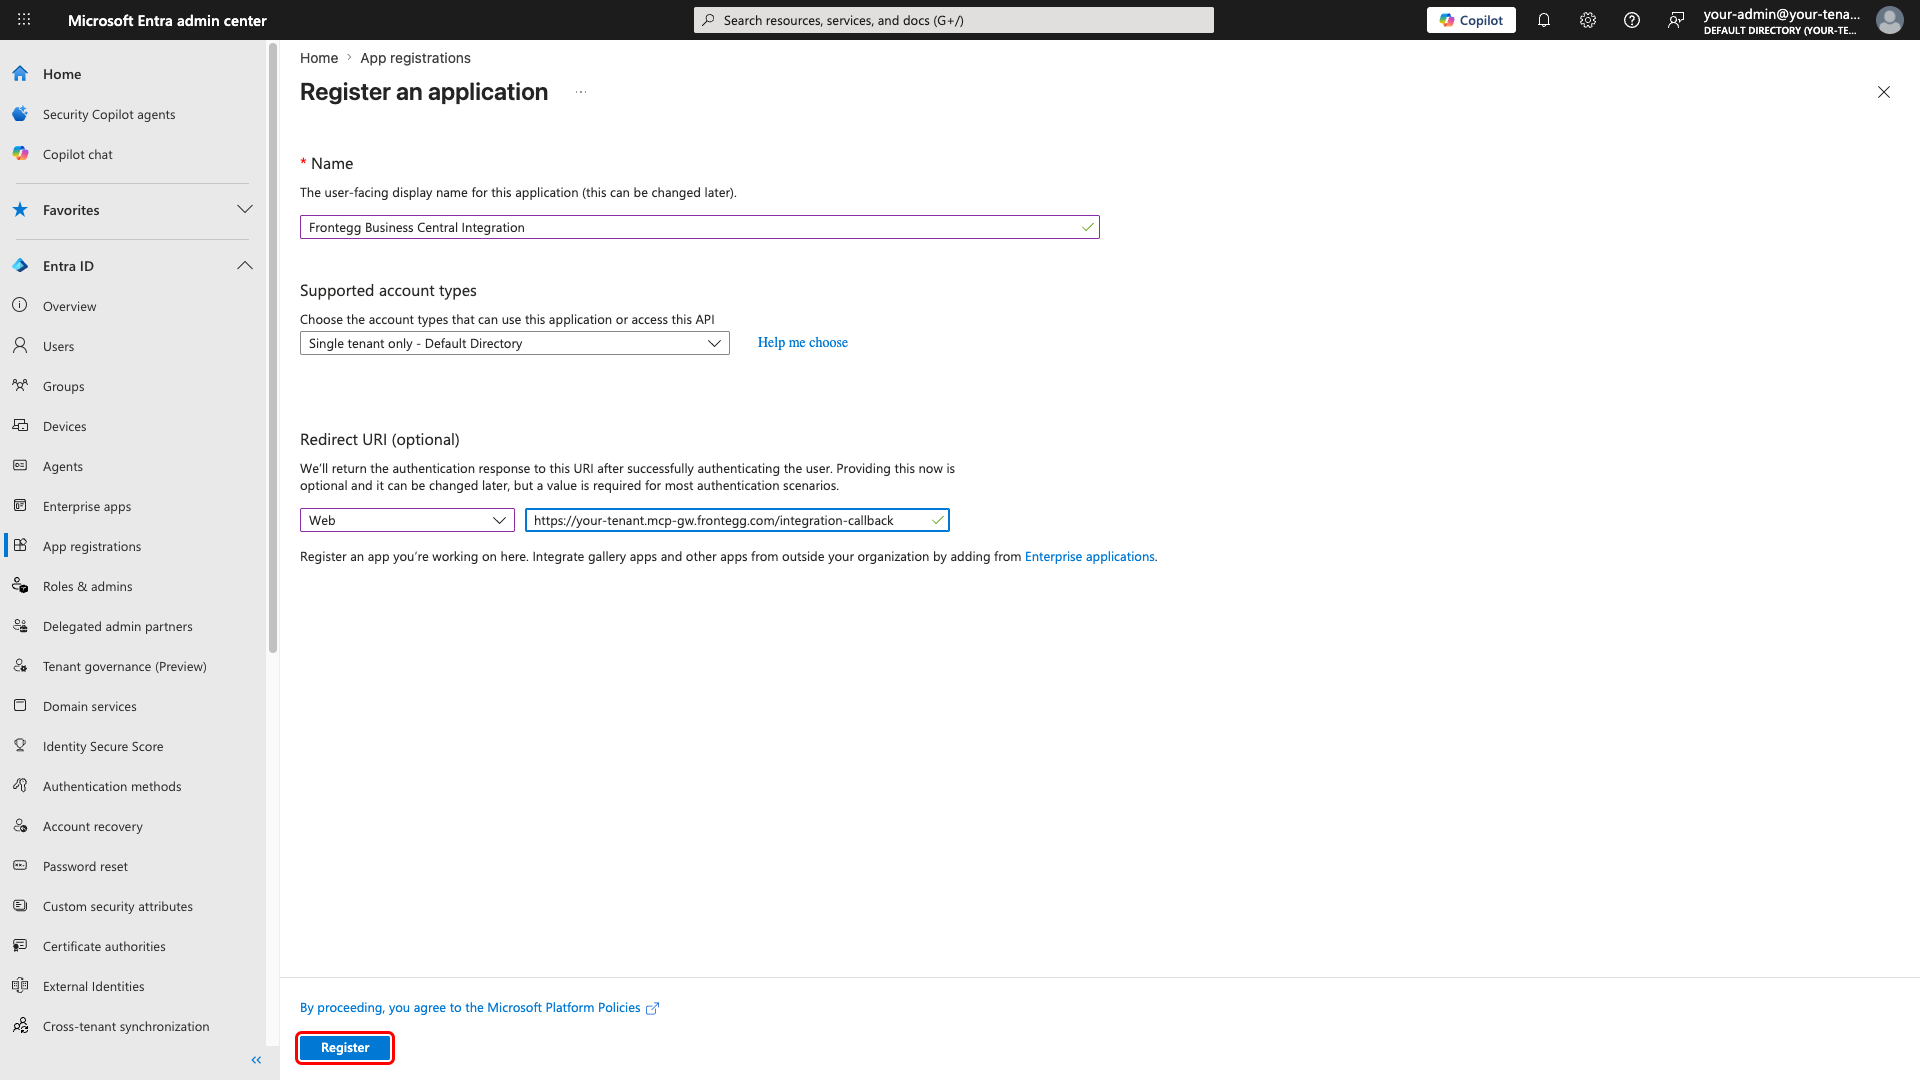
Fill in the registration form:
- Enter a name for your application (for example,
Frontegg Business Central Integration). - Under Supported account types, select Accounts in this organizational directory only (single tenant). Business Central REST endpoints embed your tenant ID directly, so single-tenant is the correct choice.
- Under Redirect URI, select Web as the platform and enter your Frontegg Redirect URL:
https://YOUR_MCP_GATEWAY_URL/integration-callback - Click Register.
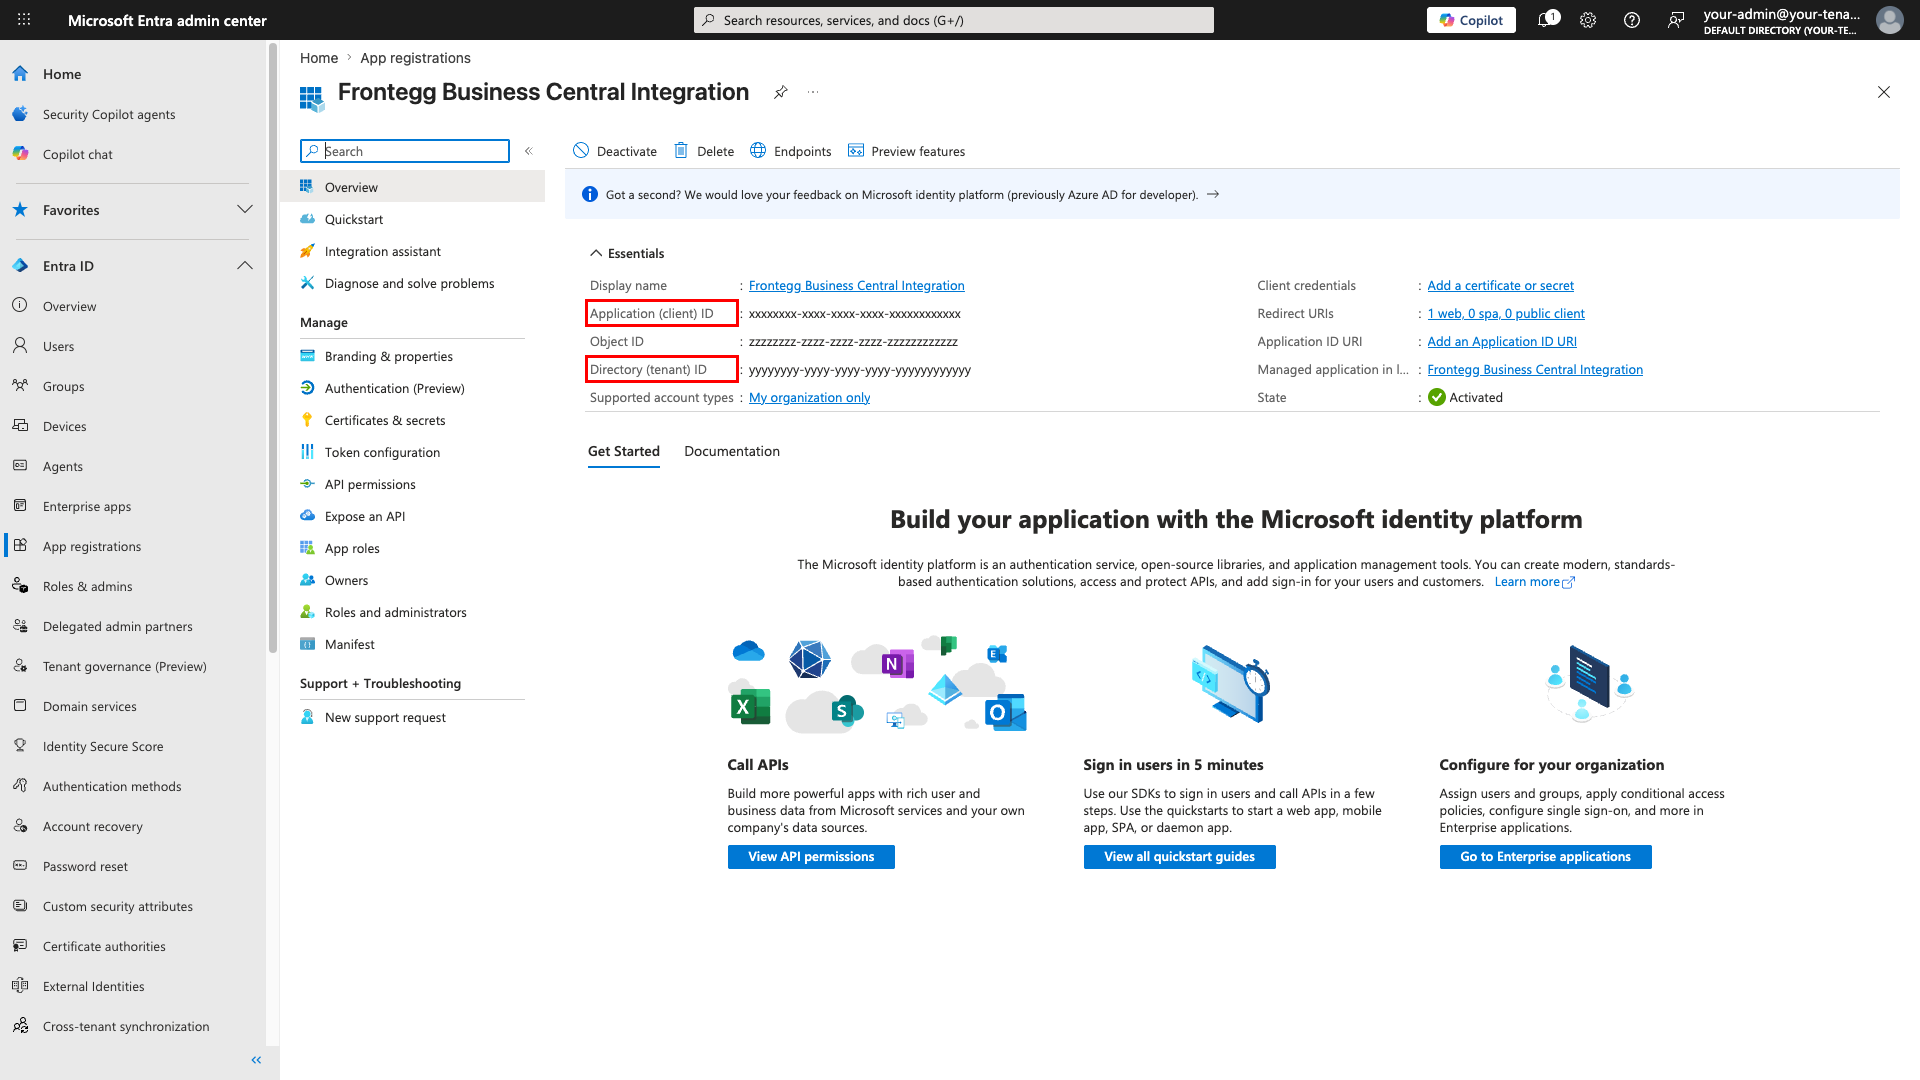
After registration, you are taken to the application Overview page. Copy both the Application (client) ID and the Directory (tenant) ID — you will need them when configuring the Frontegg portal.
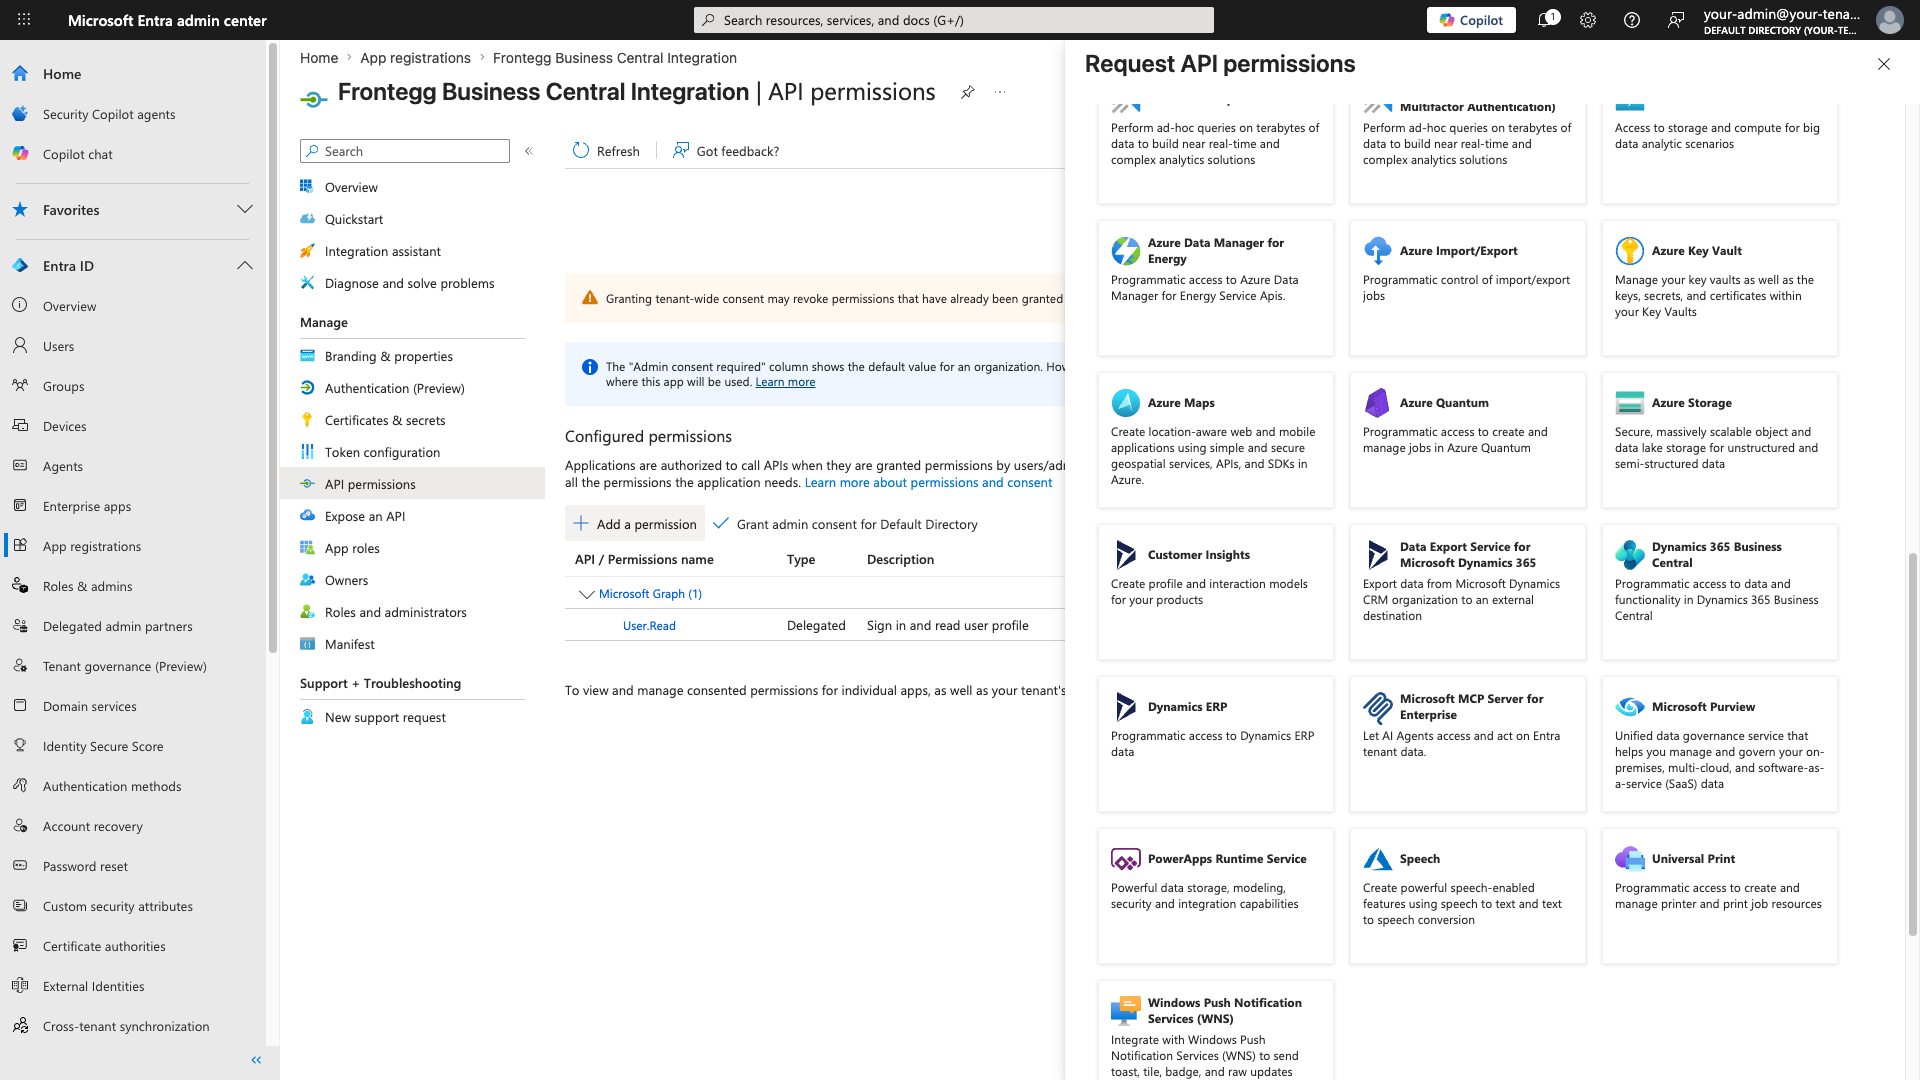
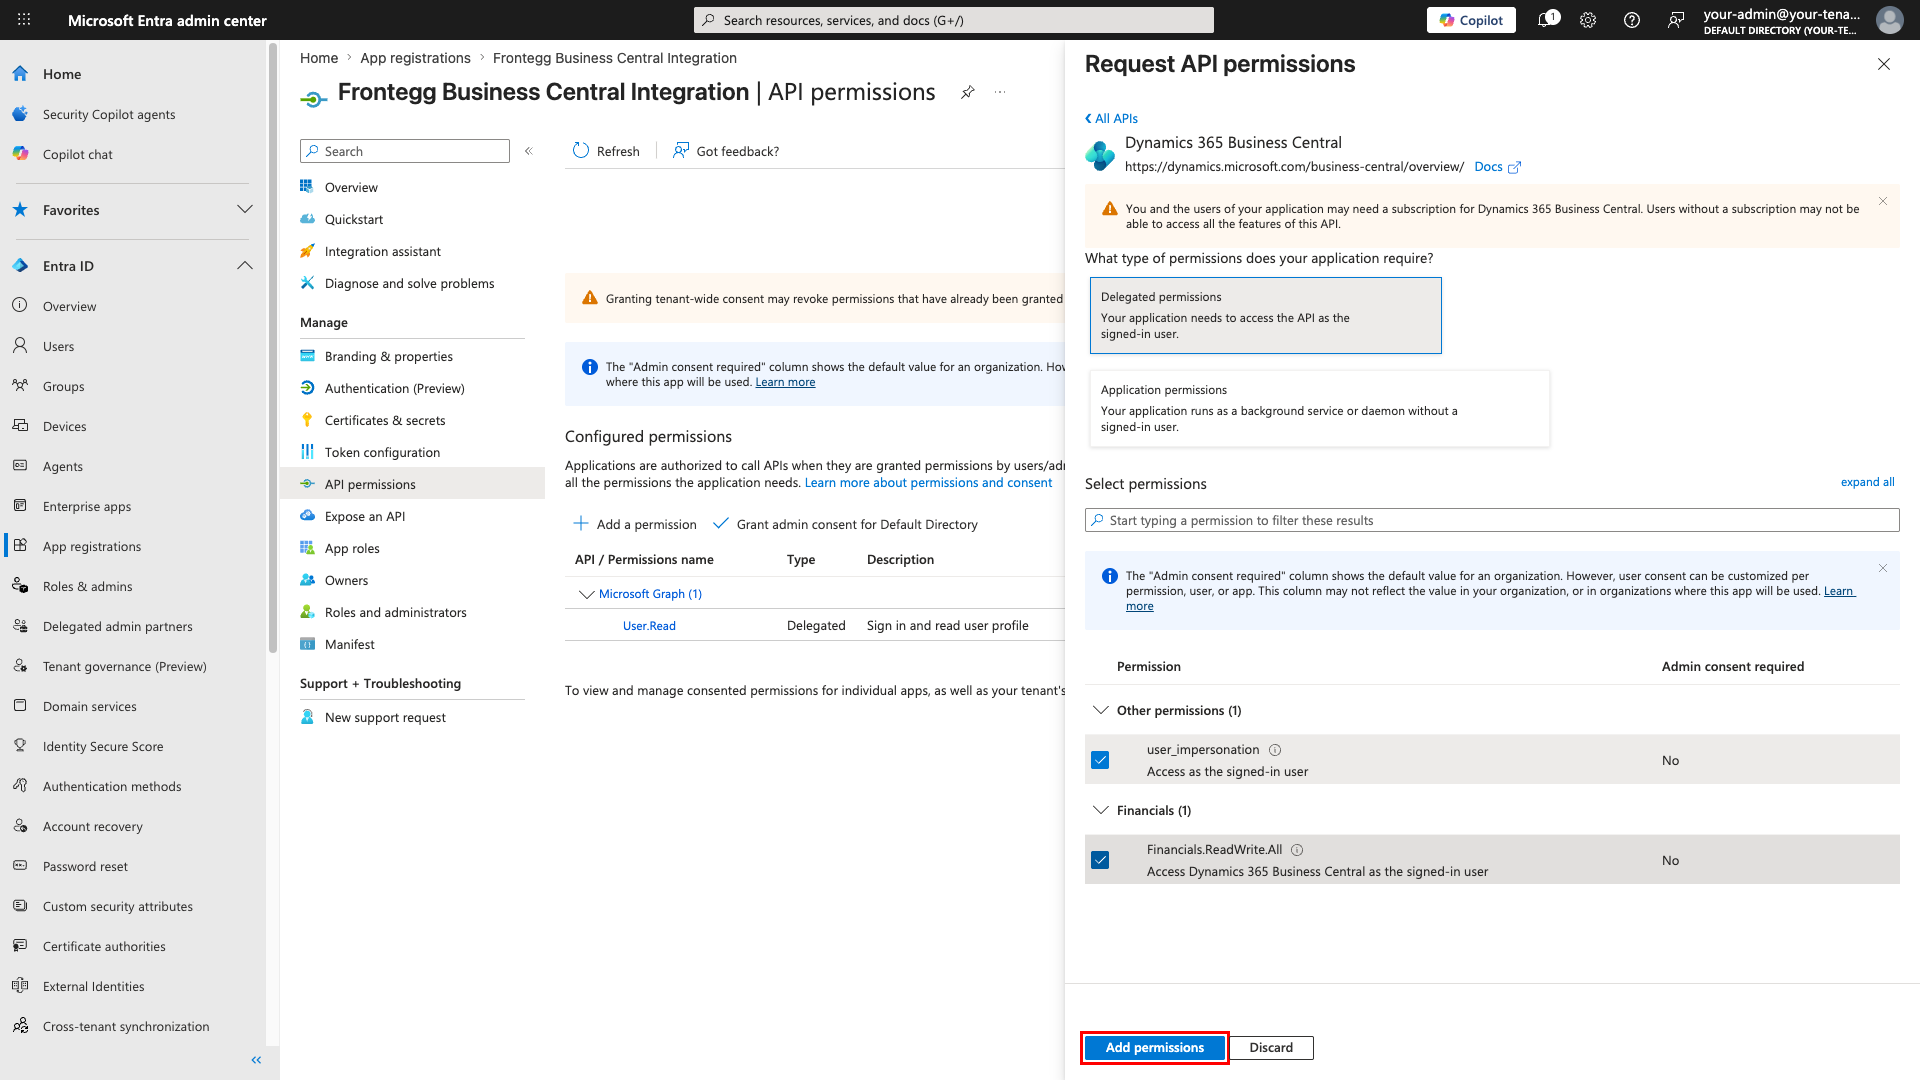
In the left sidebar, click API permissions, then click Add a permission. On the Microsoft APIs tab, scroll down under More Microsoft APIs and select Dynamics 365 Business Central.
Click Delegated permissions. Select both of the following scopes, then click Add permissions:
| Scope | Description |
|---|---|
user_impersonation | Access Business Central as the signed-in user |
Financials.ReadWrite.All | Read and write all Business Central financial data the user can access |
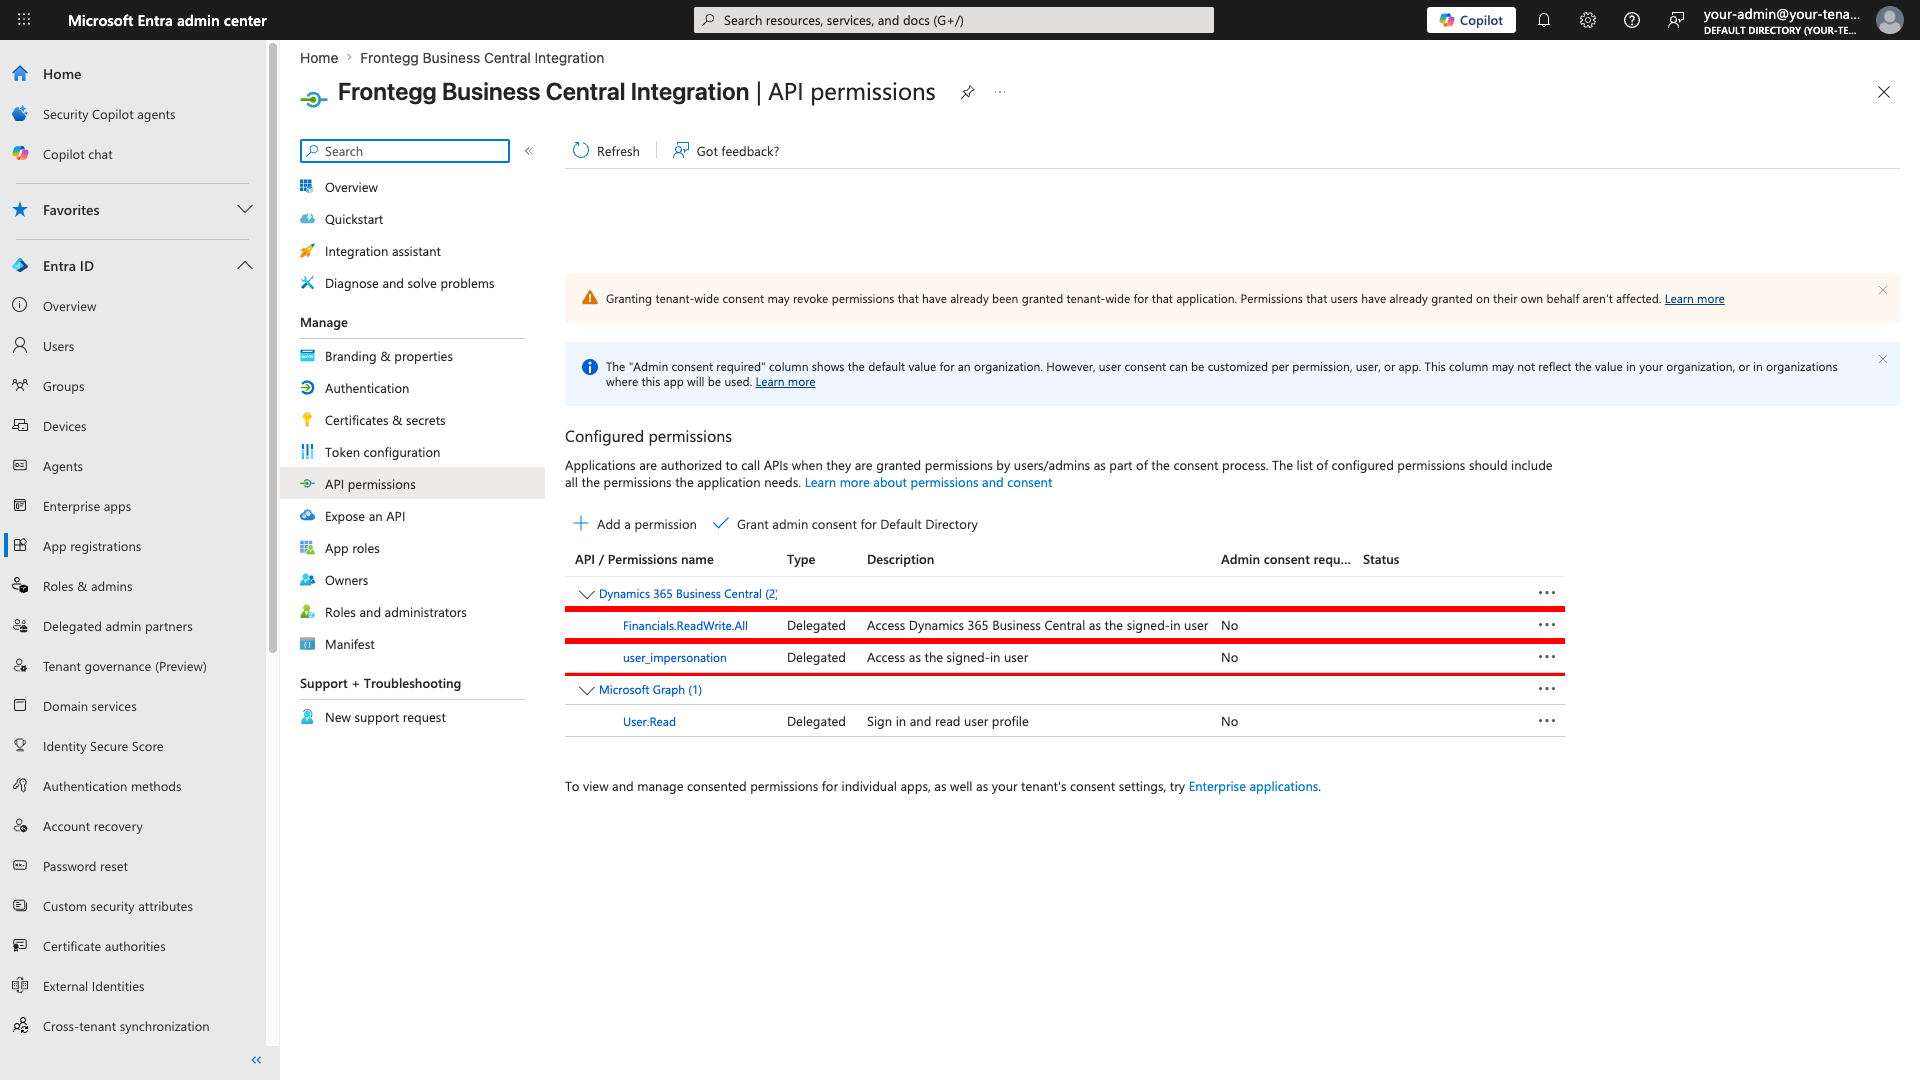
On the API permissions page, click Grant admin consent for {your directory} and confirm. Both Business Central scopes show as configured under Dynamics 365 Business Central.
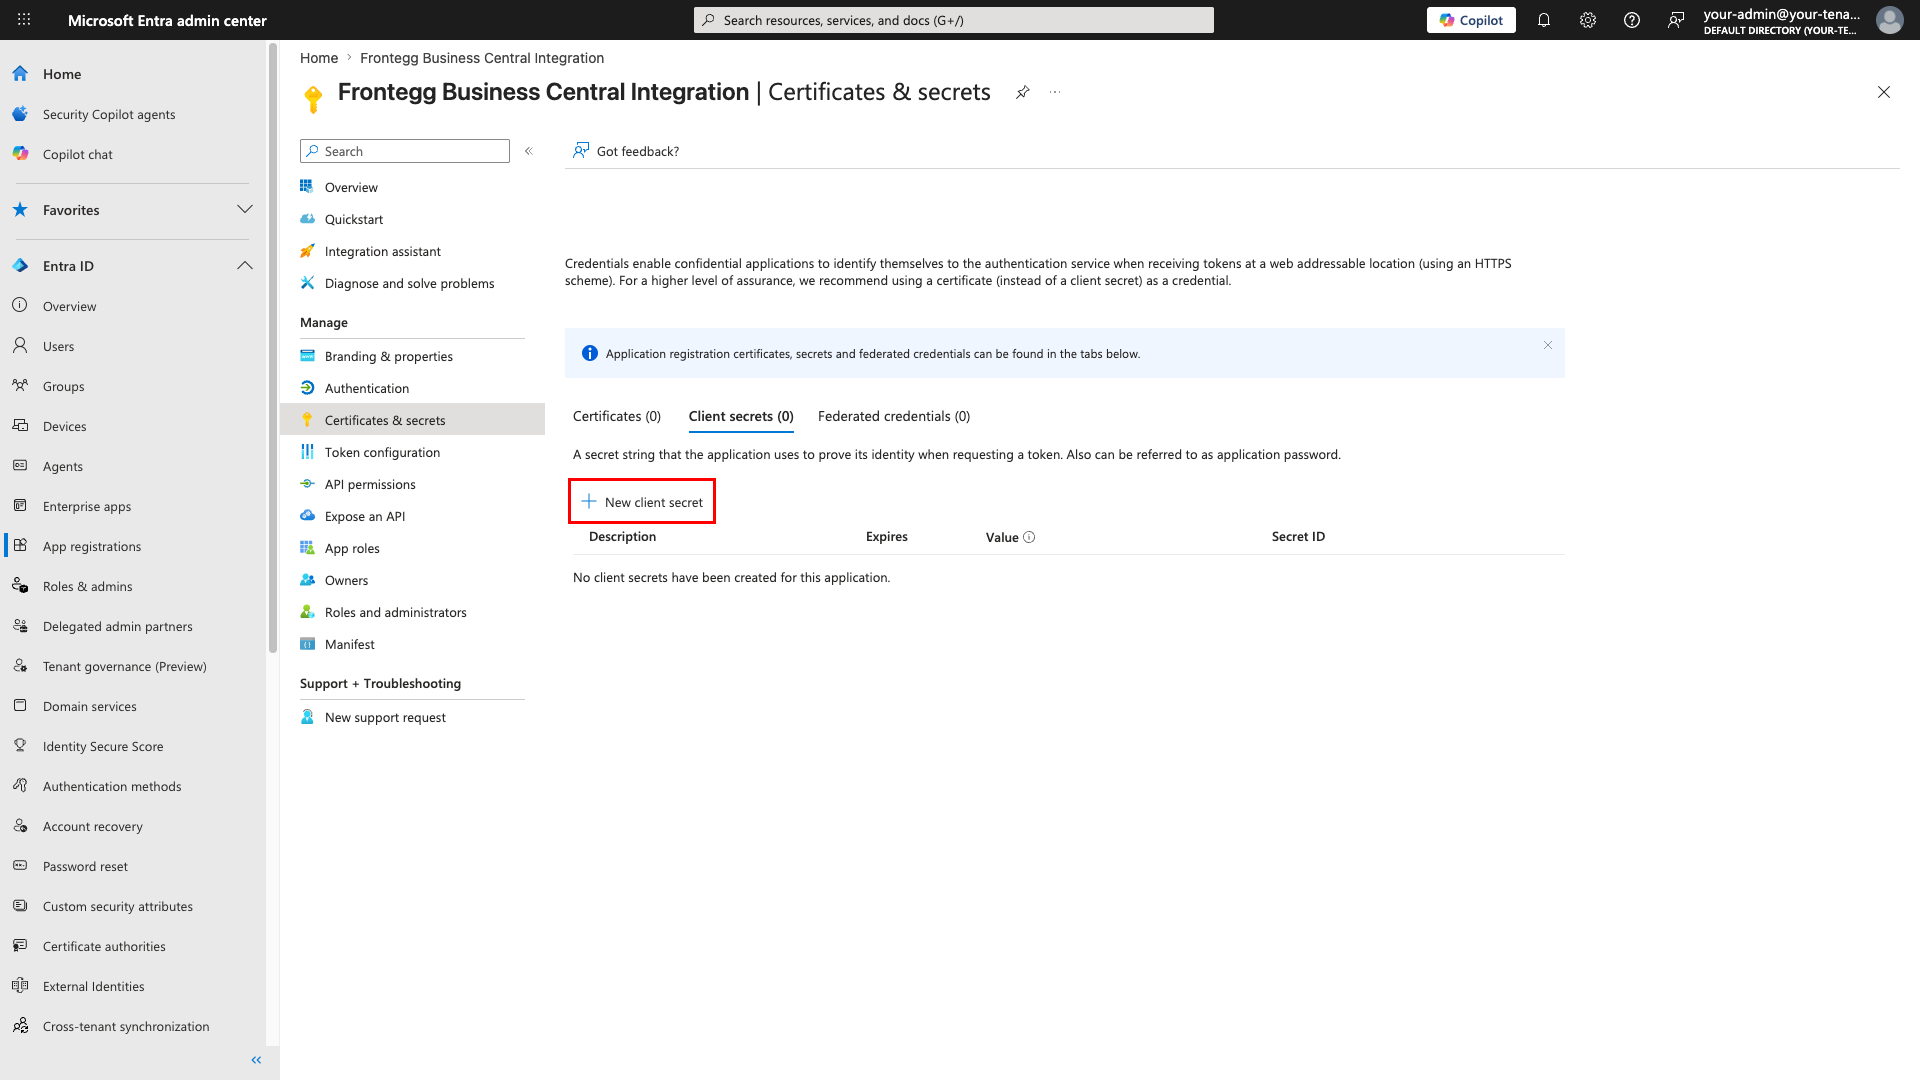
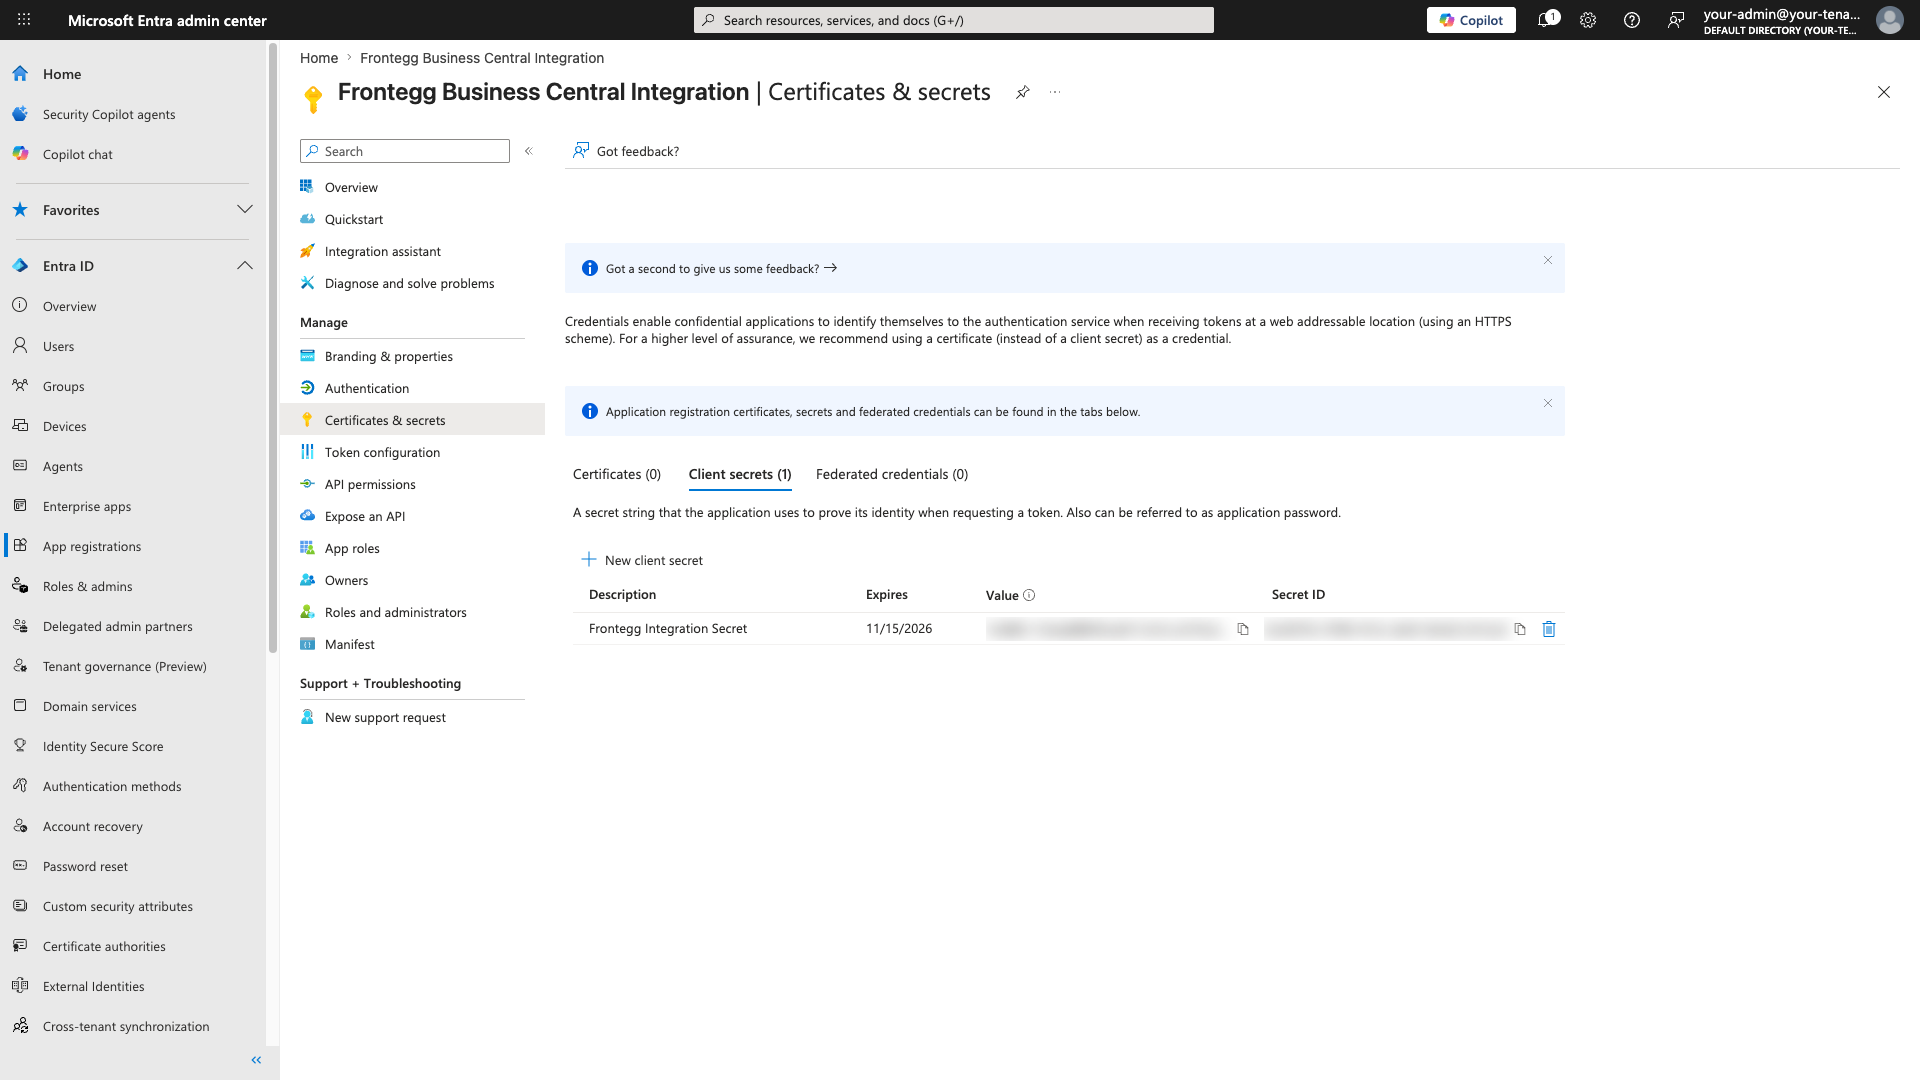
In the left sidebar, click Certificates & secrets, then on the Client secrets tab click New client secret.
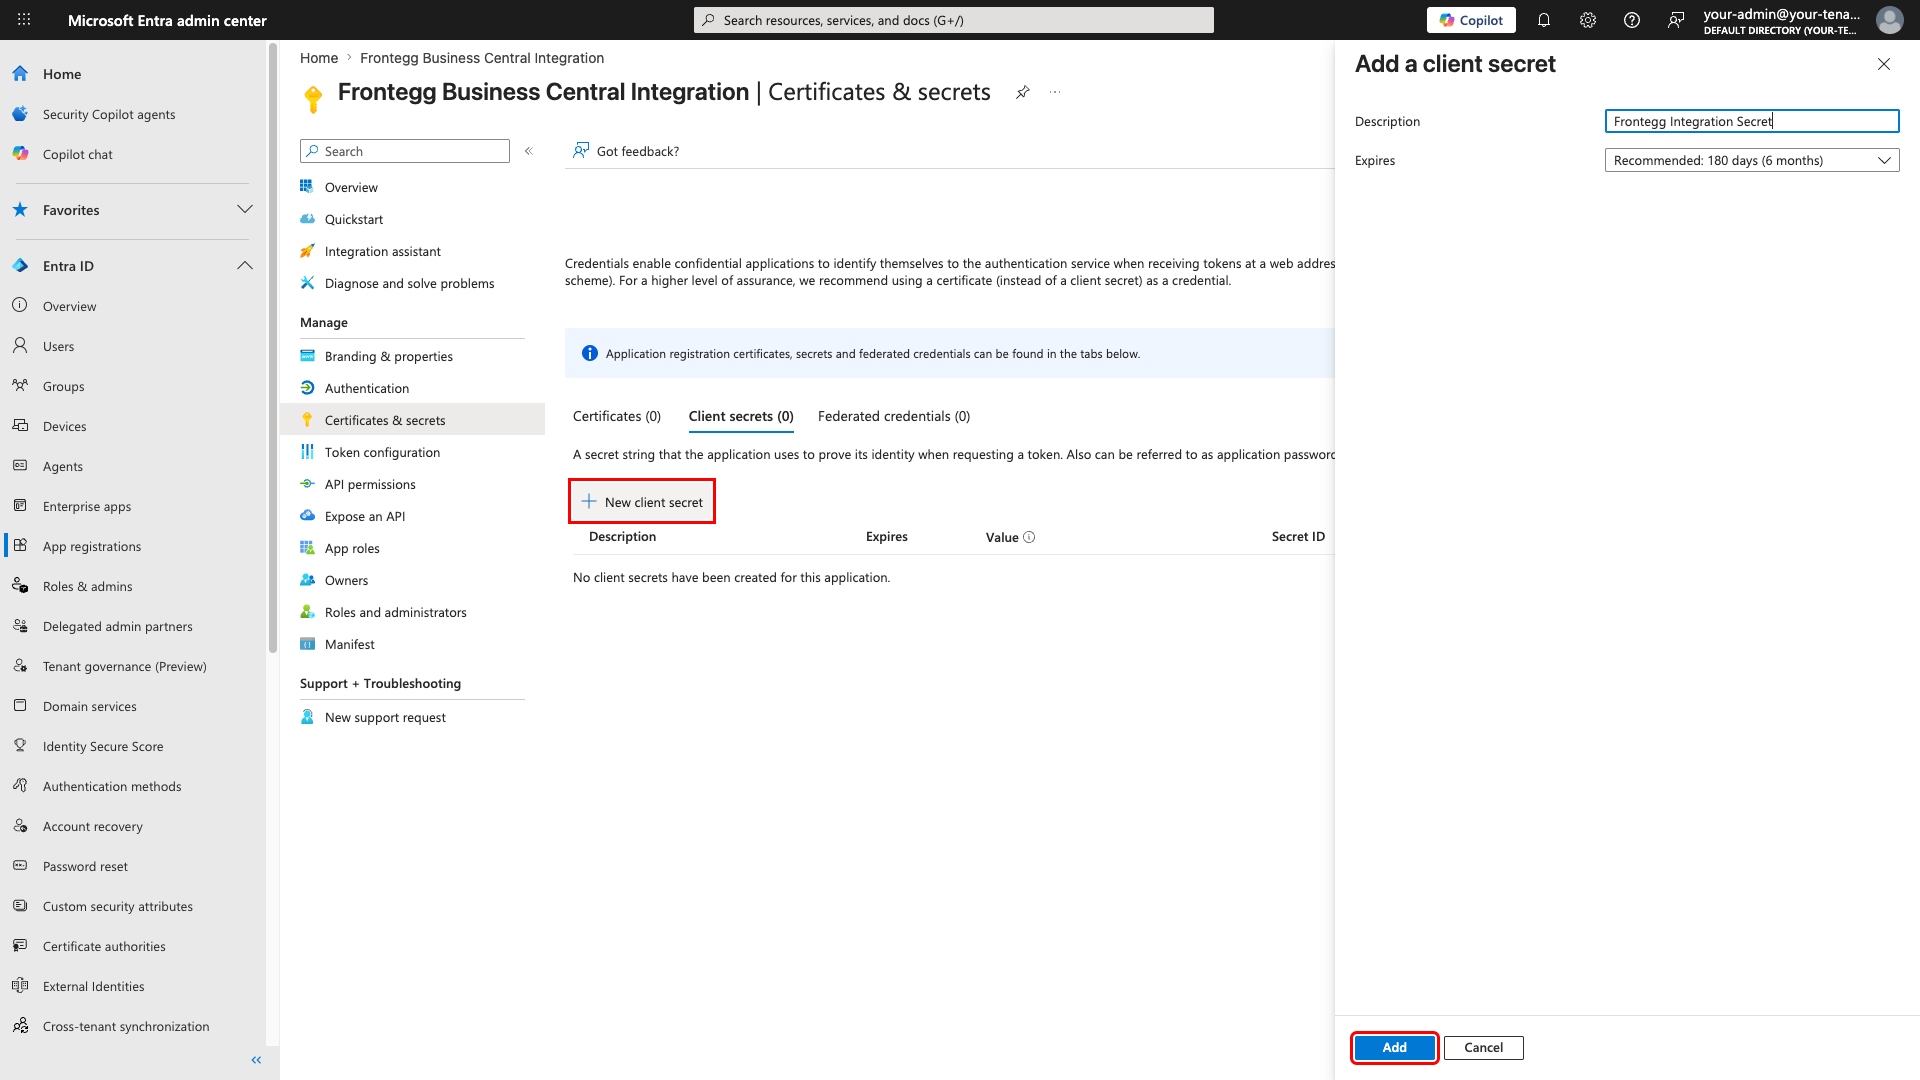
In the Add a client secret panel, enter a description (for example, Frontegg Integration Secret), choose an expiry period, and click Add.
The new secret appears in the list. Copy the Value immediately — it is only displayed once. After you navigate away, you cannot retrieve it again.
Save your Client Secret now
Save your Client Secret now
The Client Secret value is only displayed once. After you leave this page, you can only see the Secret ID — not the value. Store the value securely before continuing.
Business Central REST URLs embed two per-tenant identifiers in addition to the Directory (tenant) ID: the environment name and (optionally) a default company ID.
Open the Business Central admin center and go to the Environments page. Each row lists the environment Name (for example, Production or Sandbox) and its Type. Use the name exactly as shown — it is case-sensitive.
Sign in to Business Central and switch to the company you want as the default. The company ID is a GUID returned by the /companies endpoint of the Business Central REST API — you can call GET https://api.businesscentral.dynamics.com/v2.0/<tenant-id>/<environment>/api/v2.0/companies to list all companies and their IDs. Leave this field empty in Frontegg to require companyId on every tool call.
Once you have your Client ID, Client Secret, Directory (tenant) ID, and environment name, enter them in the Frontegg portal:
- Open the Frontegg portal and navigate to [ENVIRONMENT] → Integrations → Microsoft Dynamics 365 Business Central.
- Enter the Client ID and Client Secret from your Entra app registration.
- Enter the Directory (tenant) ID (for example,
xxxxxxxx-xxxx-xxxx-xxxx-xxxxxxxxxxxx). - Enter the Business Central environment name (for example,
Production). - (Optional) Enter the Default company ID GUID.
- The Base URL auto-populates as
https://api.businesscentral.dynamics.com/v2.0/<tenant-id>/<environment>/api/v2.0. - Click Save.
Keep your credentials secure
Keep your credentials secure
Never share or commit your Client Secret to version control.