CircleCI is a continuous integration and delivery platform that automates building, testing, and deploying software. This integration connects CircleCI to Frontegg using a Personal API Token, enabling your AI agent to manage projects, pipelines, workflows, jobs, contexts, environment variables, webhooks, schedules, and insights.
Prerequisites
Prerequisites
- A CircleCI account
- Access to your User Settings → Personal API Tokens
Token permissions
Token permissions
A Personal API Token acts on your behalf and has full read and write permissions for the organizations and projects you can access. Create the token under a user account with the access level you want the integration to have.
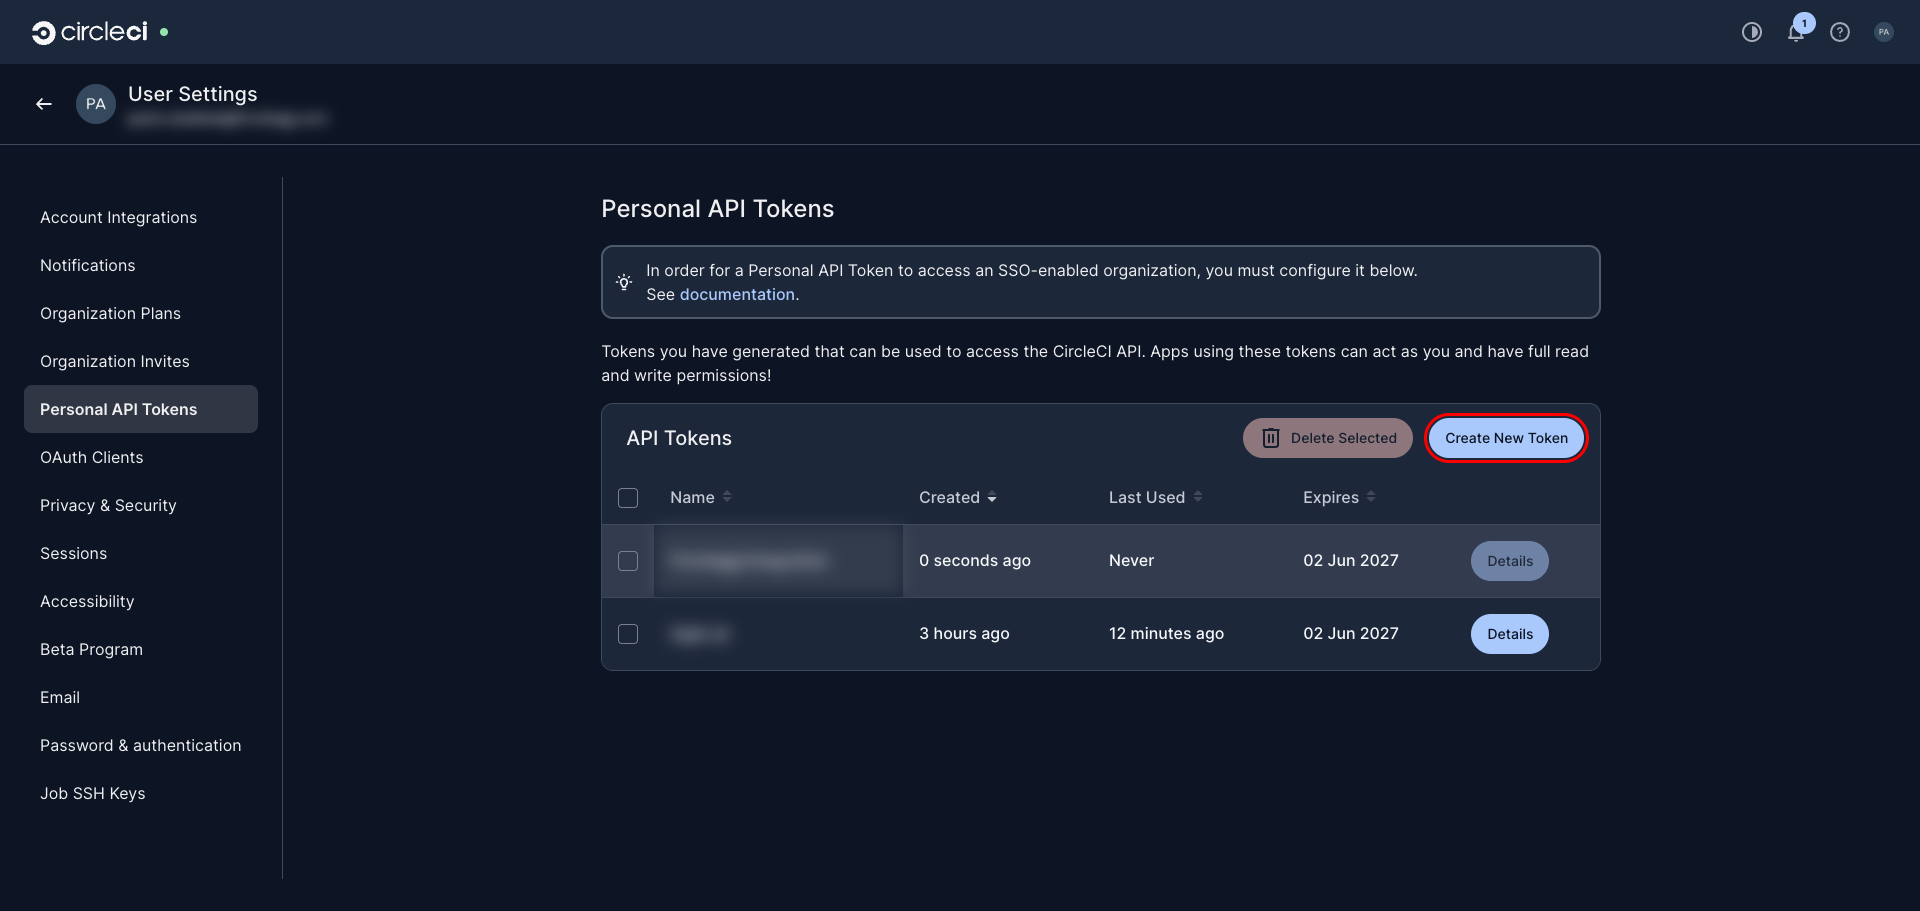
Sign in to CircleCI and navigate to User Settings → Personal API Tokens at https://app.circleci.com/settings/user/tokens. This page lists the tokens generated for your account.
Click Create New Token.
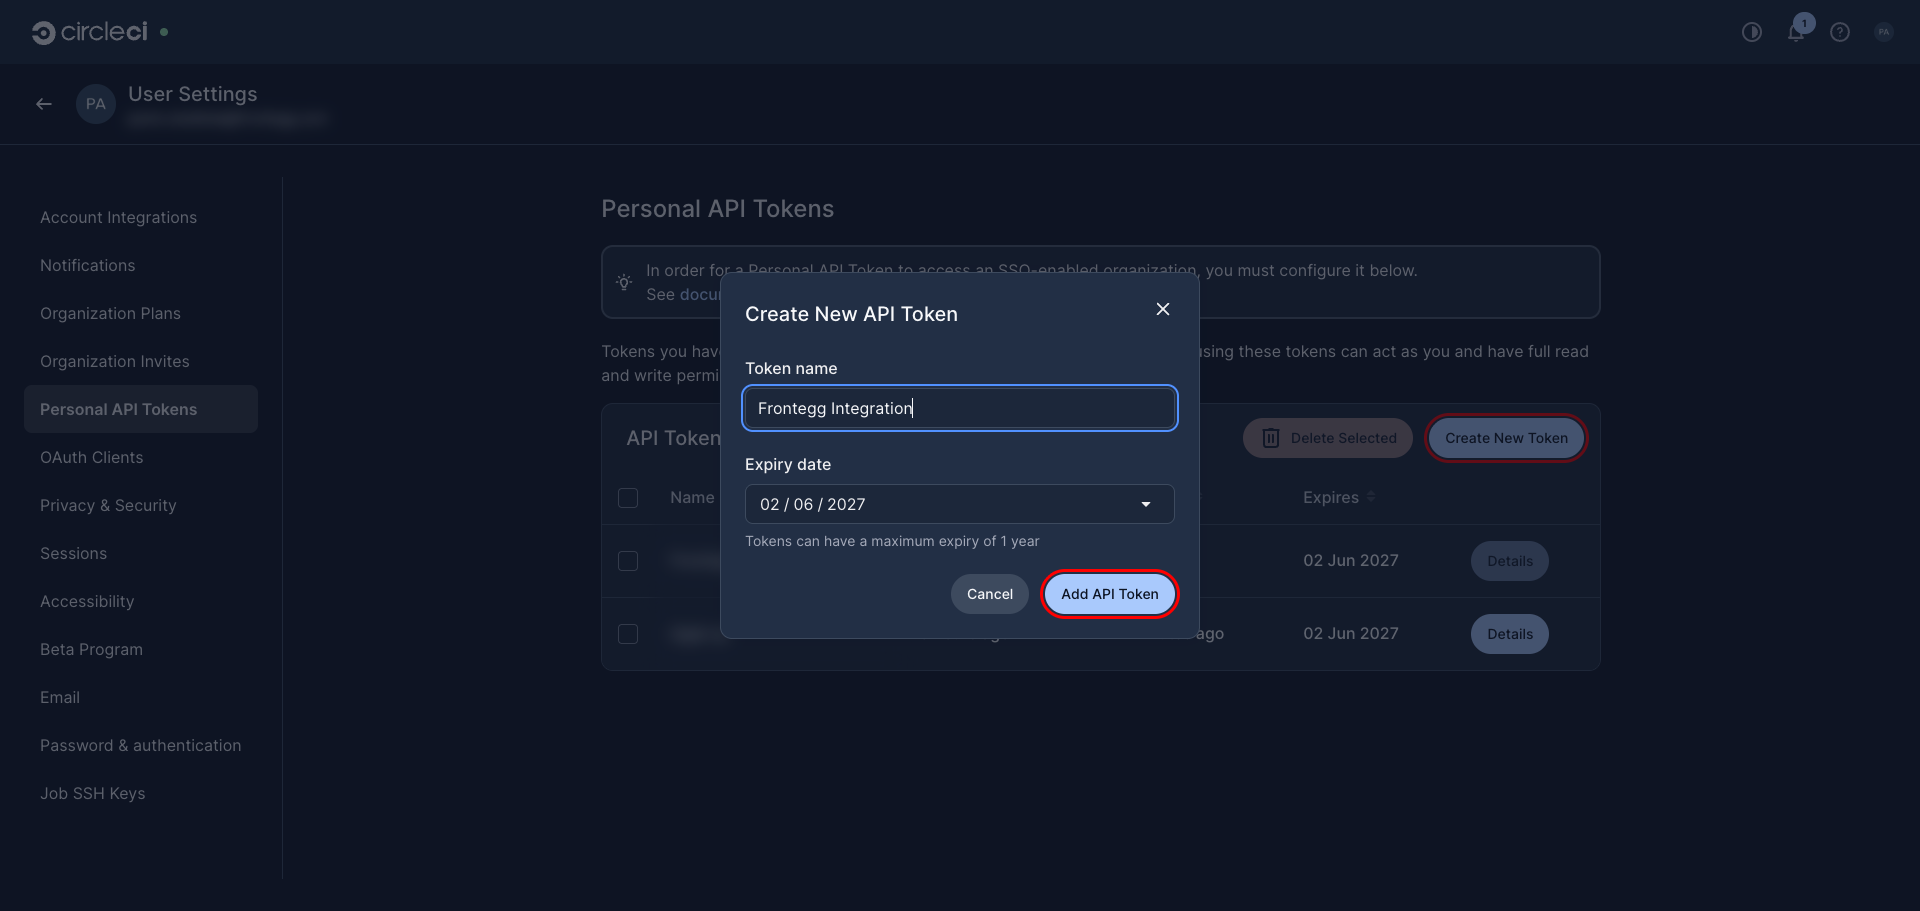
In the Create New API Token dialog, enter a descriptive Token name such as Frontegg Integration. Optionally adjust the Expiry date (tokens can have a maximum expiry of one year), then click Add API Token.
CircleCI displays the new token value once. Click Copy to copy it, and store it securely — you will not be able to view it again after closing the dialog.
Copy the token now
Copy the token now
CircleCI shows the full token only once, immediately after creation. Copy it before closing the dialog. If you lose it, delete the token and create a new one.

Once you have obtained your Personal API Token from the steps above, enter it in the integration configuration page of the Frontegg portal:
- Open the Frontegg portal and navigate to [ENVIRONMENT] → Integrations → CircleCI.
- Enter the token in the API Key field.
- Click Save.
Keep your credentials secure
Keep your credentials secure
Never share or commit your Personal API Token to version control.