LaunchDarkly is a feature management platform for releasing, controlling, and experimenting with features in production. Integrating LaunchDarkly with Frontegg lets your application read and manage feature flags, projects, environments, segments, contexts, and audit log entries through the LaunchDarkly REST API.
The integration authenticates with a LaunchDarkly access token sent in the Authorization header — there is no OAuth flow and no redirect URL. You generate the token in LaunchDarkly and paste it into the Frontegg portal.
Prerequisites
Prerequisites
- A LaunchDarkly account
- Permission to create access tokens (an account member with the Writer or Admin role)
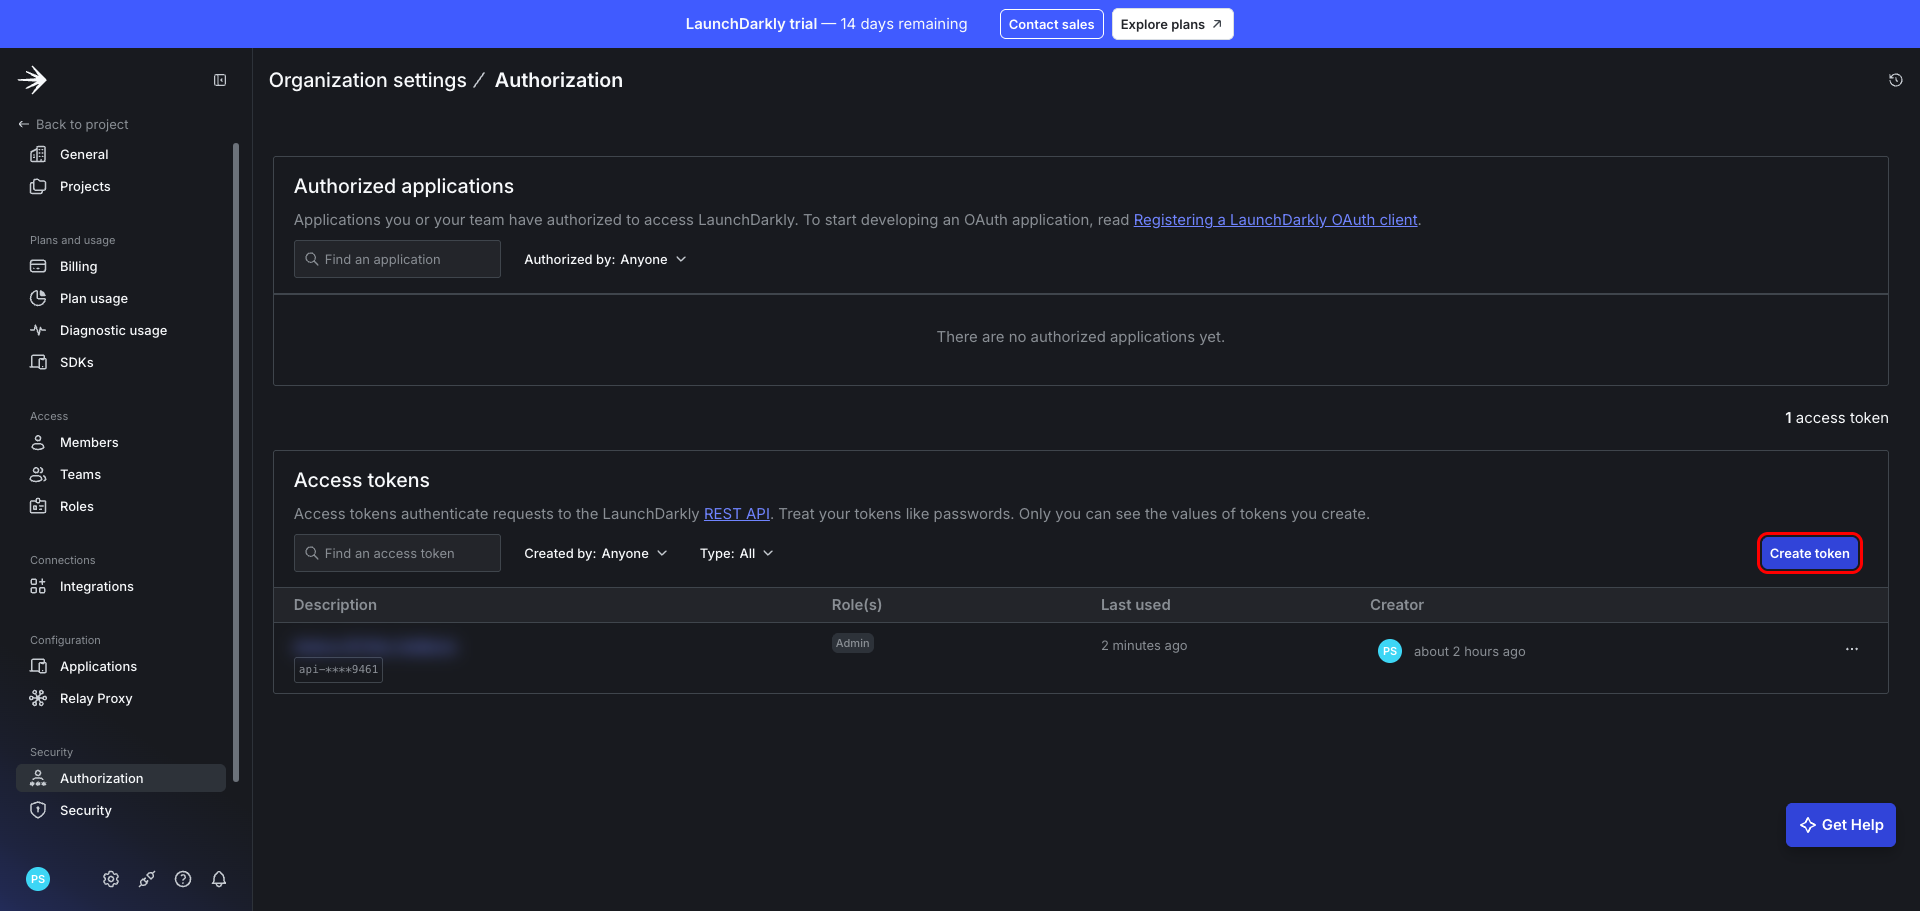
Sign in to LaunchDarkly and open Organization settings → Authorization. Scroll to the Access tokens section and click Create token.
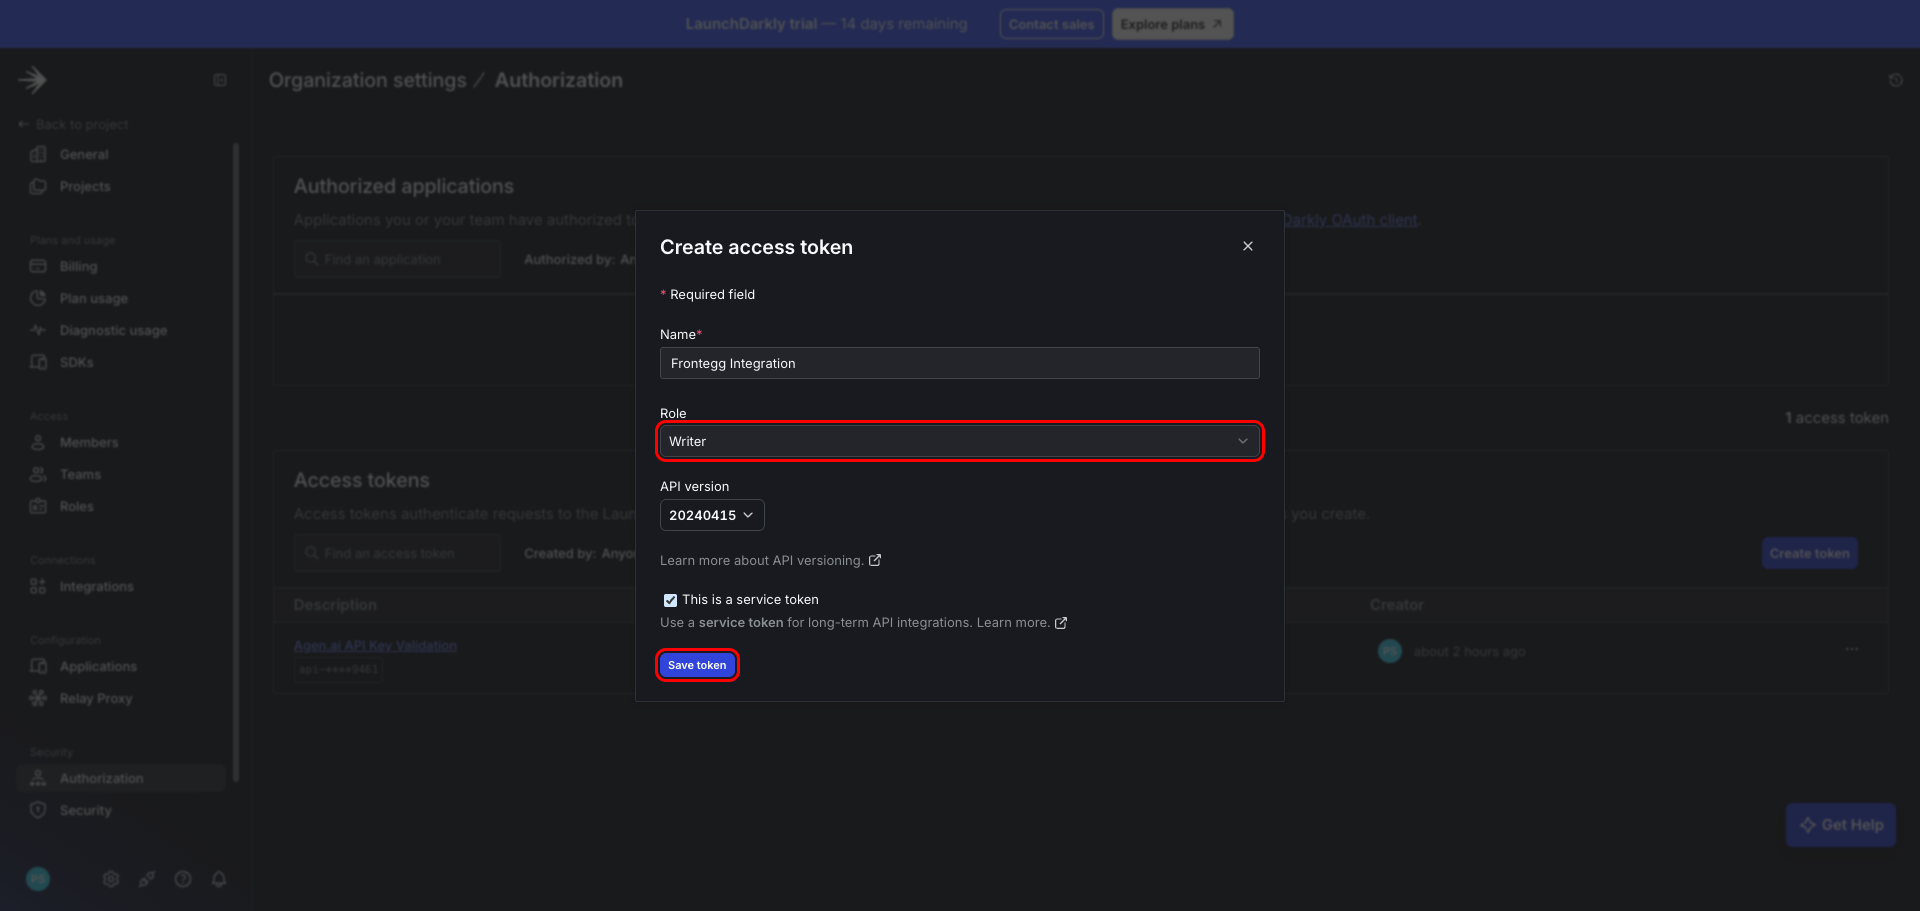
In the Create access token dialog, fill in the following:
- Name — A descriptive name, for example
Frontegg Integration. - Role — Select Writer to allow the integration to both read and create or update resources. Choose Reader if you only need read-only access.
- This is a service token — Enable this option so the token is not tied to an individual member's session, which is recommended for long-term integrations.
The role you choose determines what the integration can do:
| Role | Access |
|---|---|
Reader | Read-only access to flags, projects, environments, segments, contexts, and the audit log |
Writer | Read access plus creating, updating, and deleting feature flags |
Minimum required role
Minimum required role
For read-only operations, Reader is sufficient. To let the integration create, update, or delete feature flags, select Writer.
Click Save token.
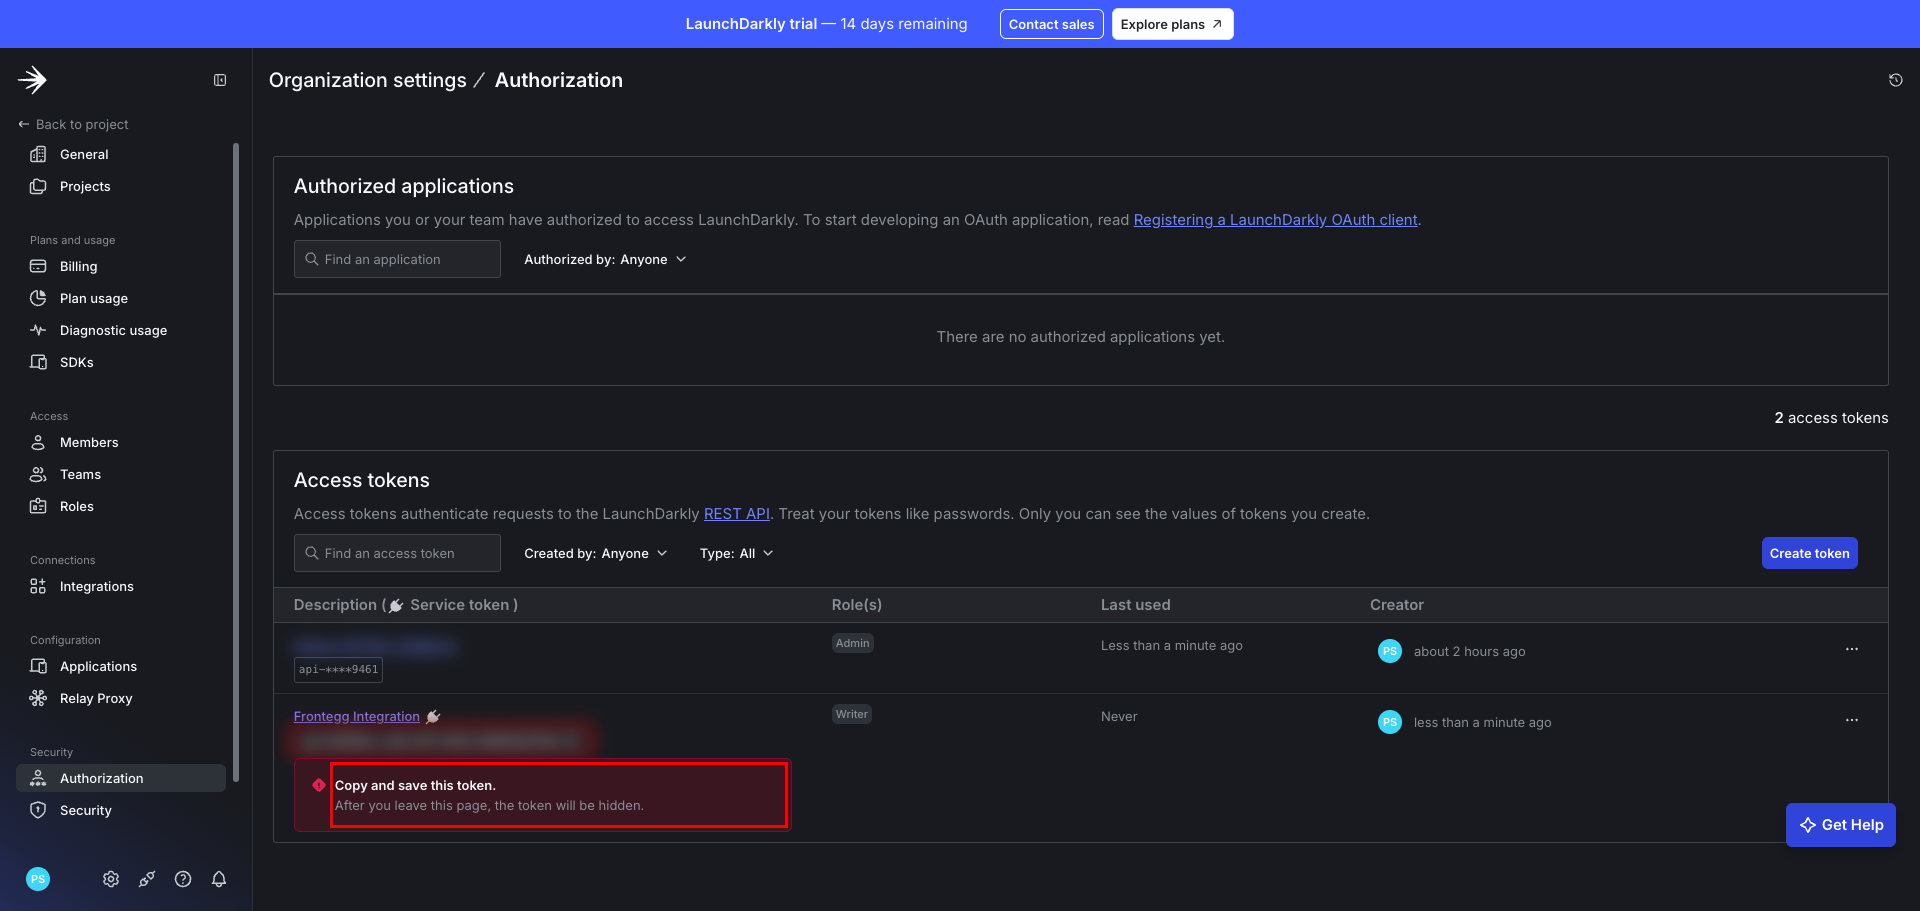
LaunchDarkly displays the token value once, immediately after creation. Copy it now and store it securely — you will paste it into the Frontegg portal.
One-time display
One-time display
The token value is shown only at creation time. After you leave the page, it is hidden and cannot be retrieved. If you lose it, reset or create a new token.
Once you have copied your access token, configure the integration in the Frontegg portal:
- Open the Frontegg portal and navigate to [ENVIRONMENT] → Integrations → LaunchDarkly.
- Enter the token in the API Key field.
- Click Save.
Keep your token secure
Keep your token secure
Treat your access token like a password. Never share or commit it to version control.