SCIM configuration
Enabling SCIM for self-service
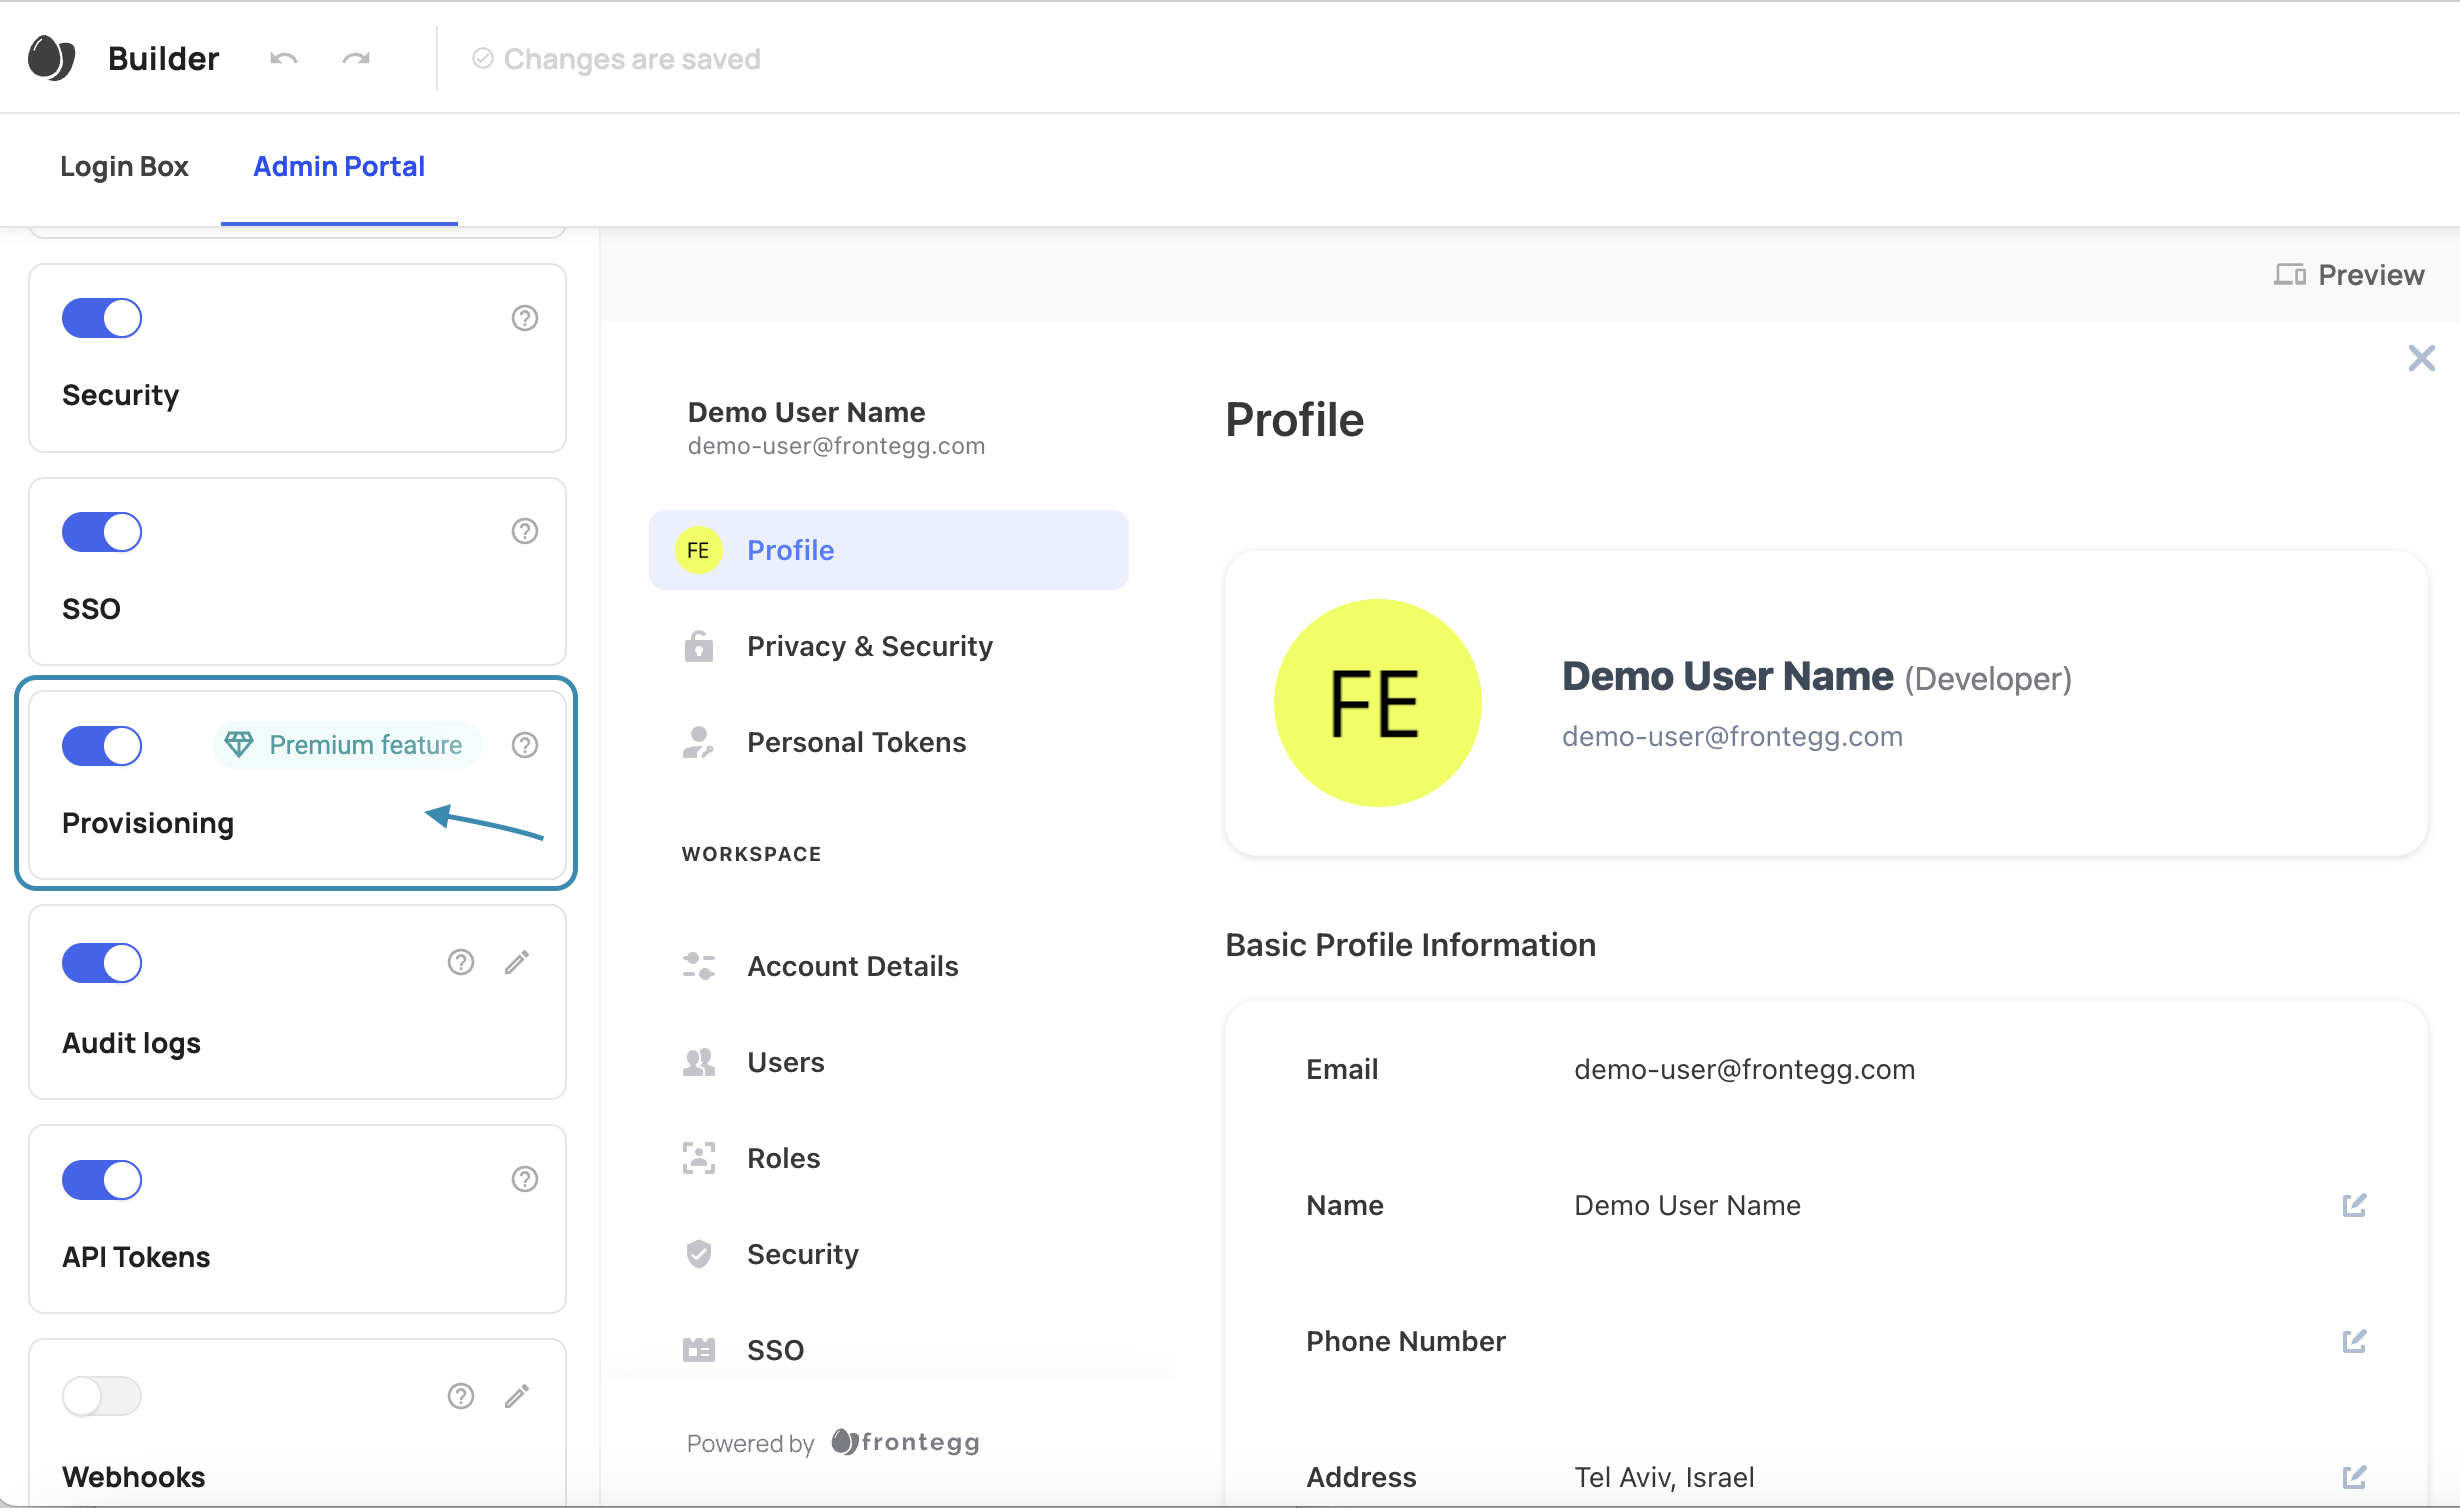
To allow your end users to configure SCIM connections from the self-service portal, go to the builder and enable the SCIM Provisioning toggle, like so:
Set authorization for SCIM
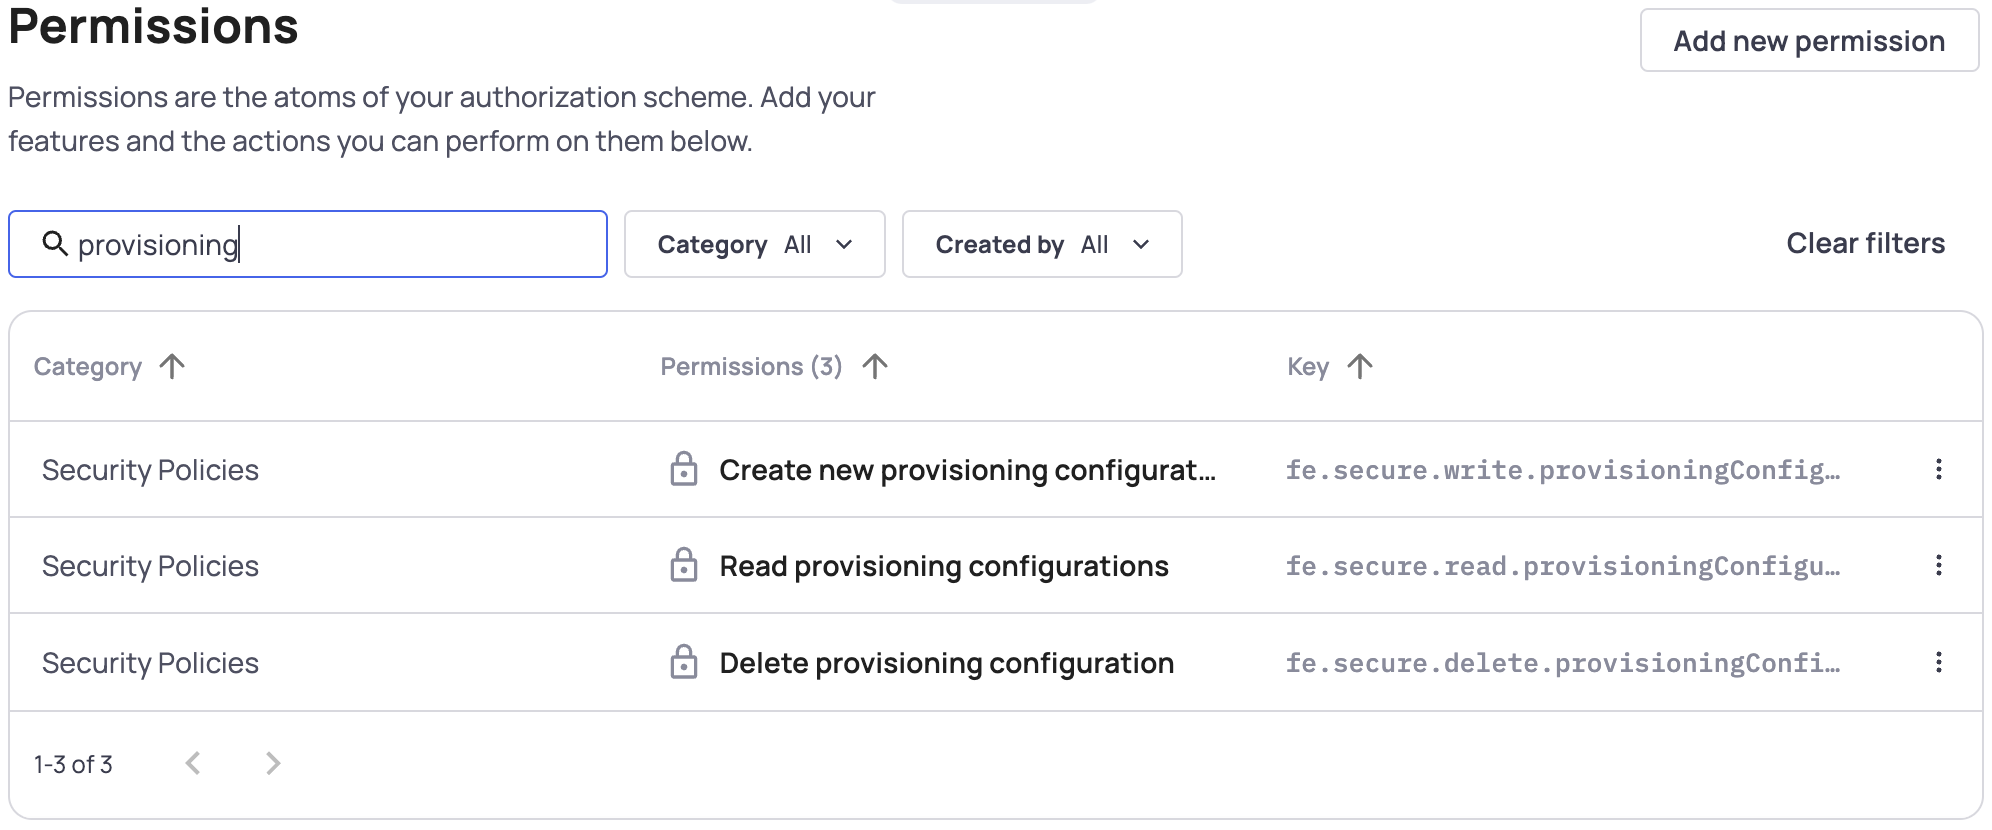
Once you have set up provisioning for your self-service, you need to decide which roles include permissions related to performing provisioning-related tasks in the portal to read, create, and delete provisioning configurations. The only users who need access to provisioning settings in the self-service portal are those responsible for configuring and maintaining identity provider settings.
You can assign the relevant provisioning permissions to your roles. The 3 relevant permissions are:
- Create new provisioning configurations - Allows users with this role to create provisioning configurations
- Read provisioning configurations - Allows users to see the provisioning tab and see existing configurations
- Delete provisioning configurations - Allows users to delete existing configurations.
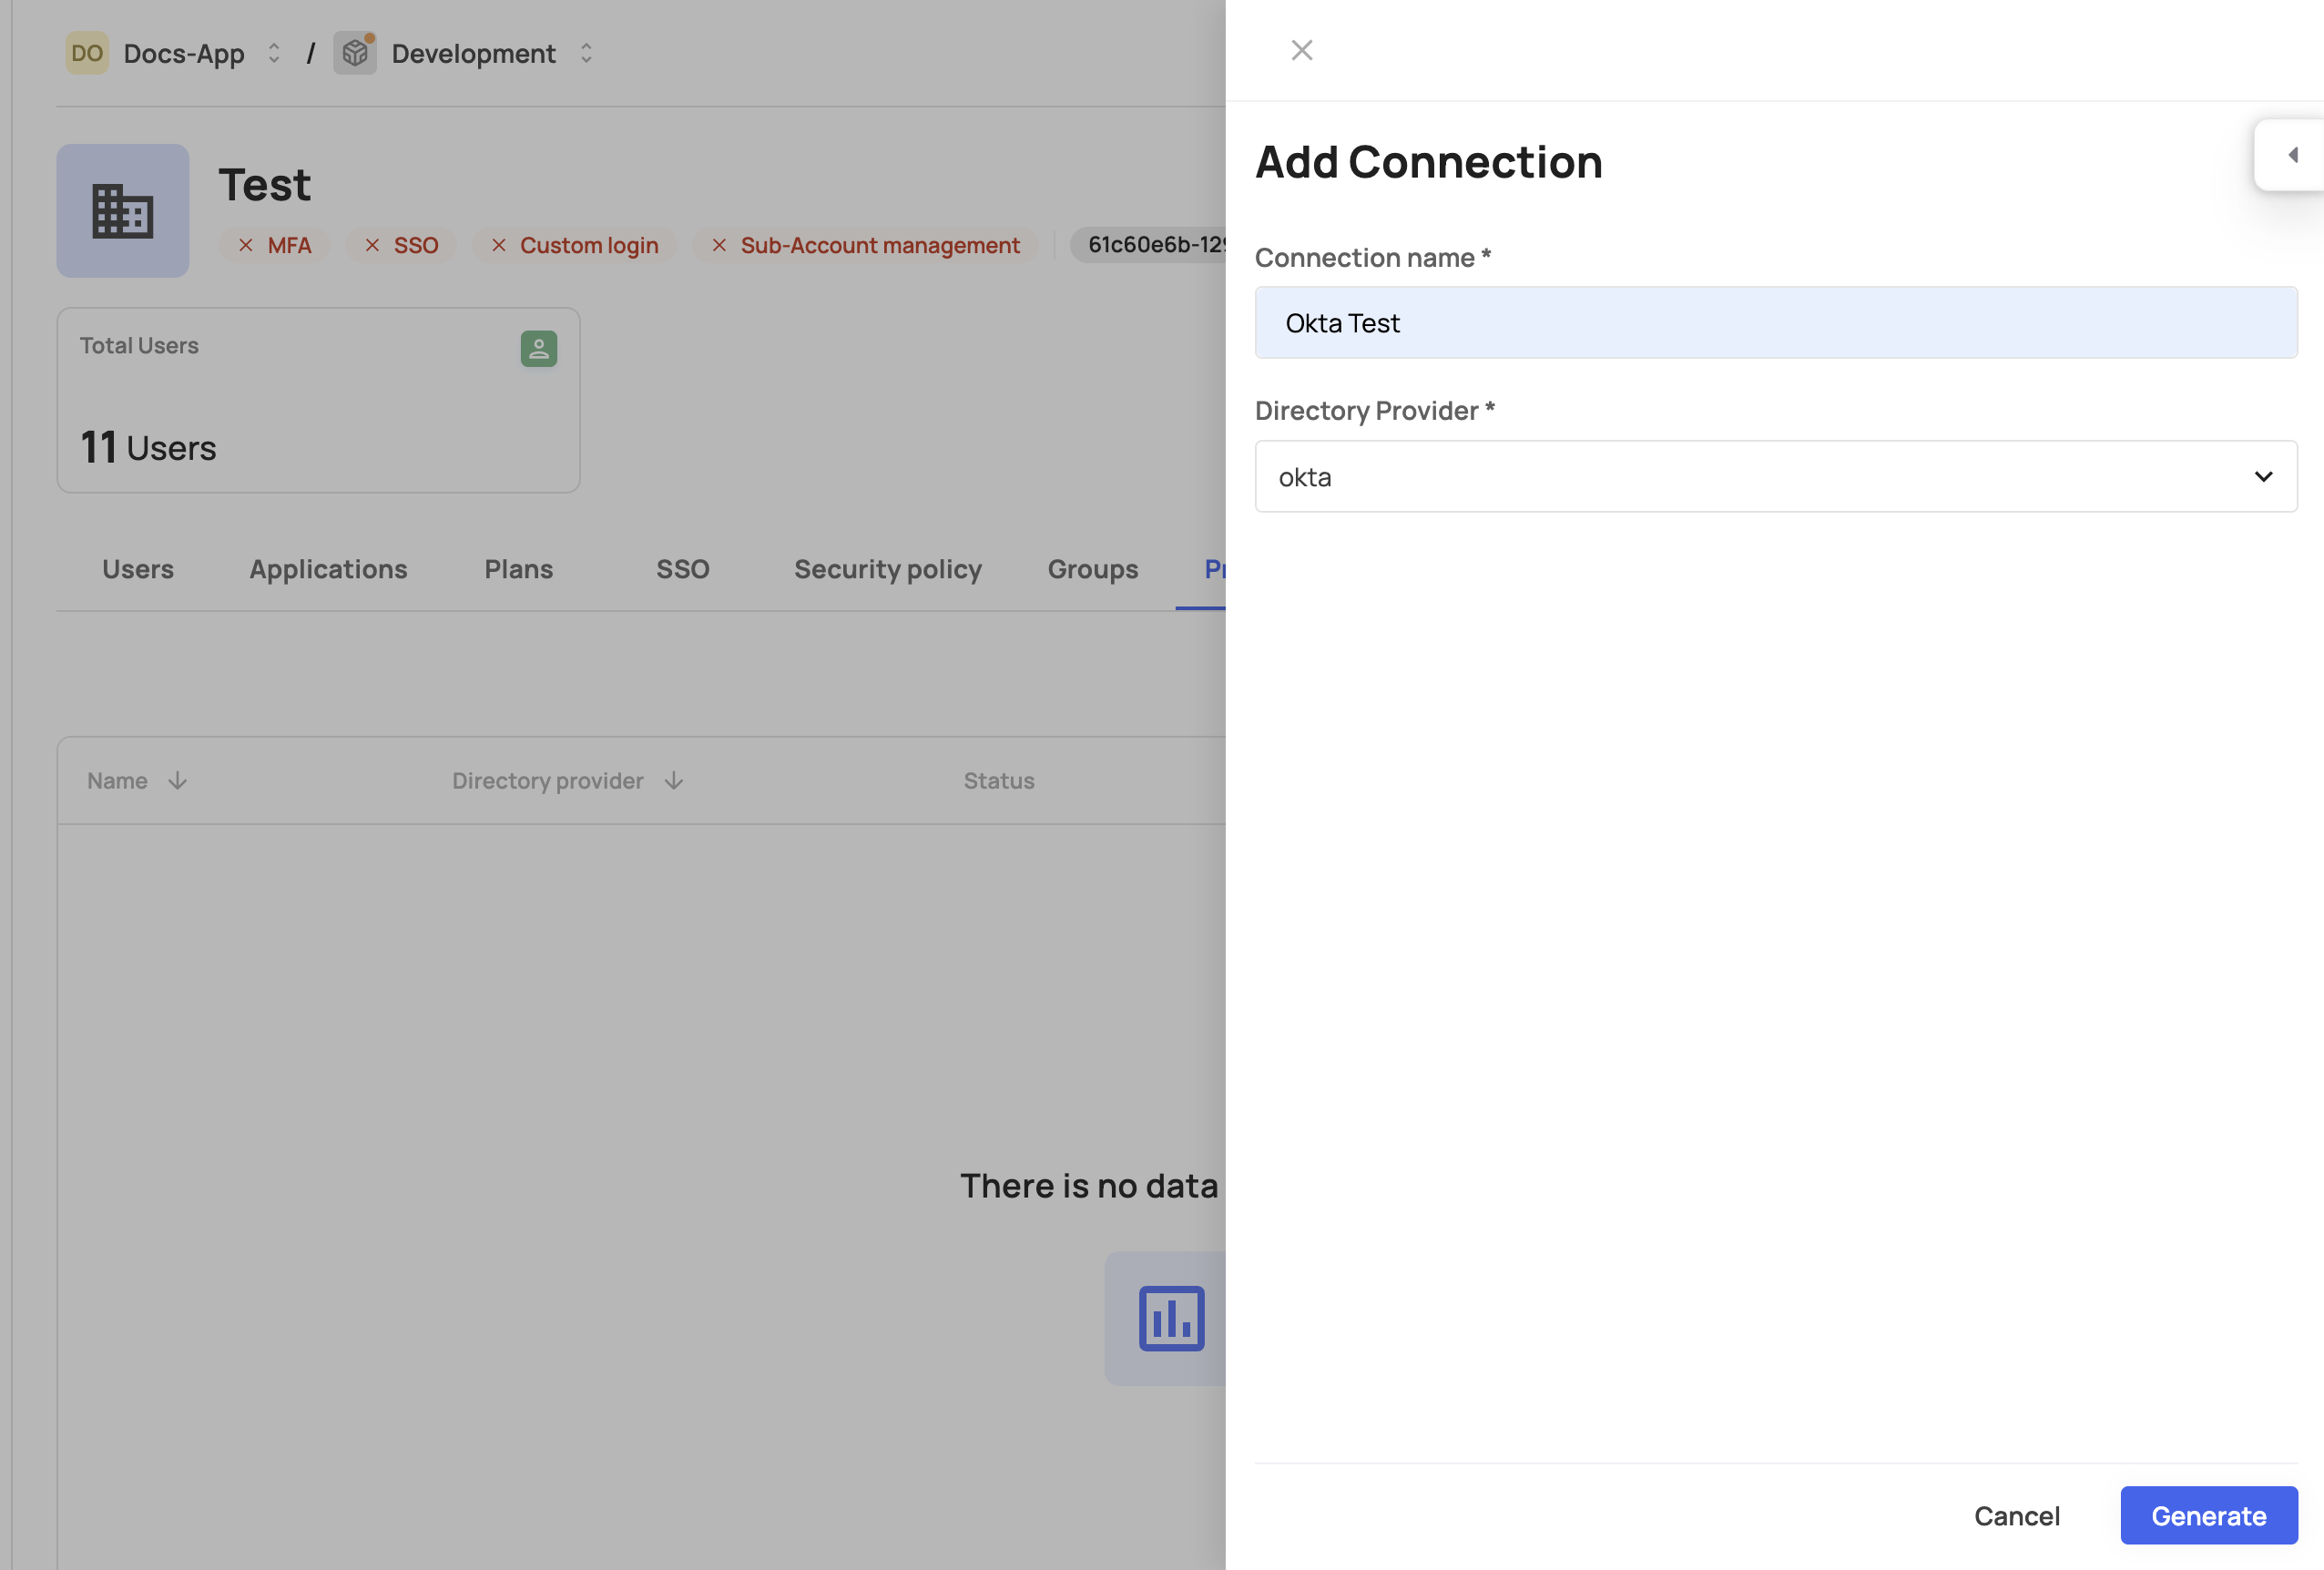
Create and manage SCIM connections from Frontegg dashboard
Under each account on the Frontegg management dashboard, there is a Provisioning section, where you can create and delete SCIM connections on behalf of your customers.

There are several pre-set directory providers on the list, but a connection can be created with any IdP that supports SCIM 2.0 standards.
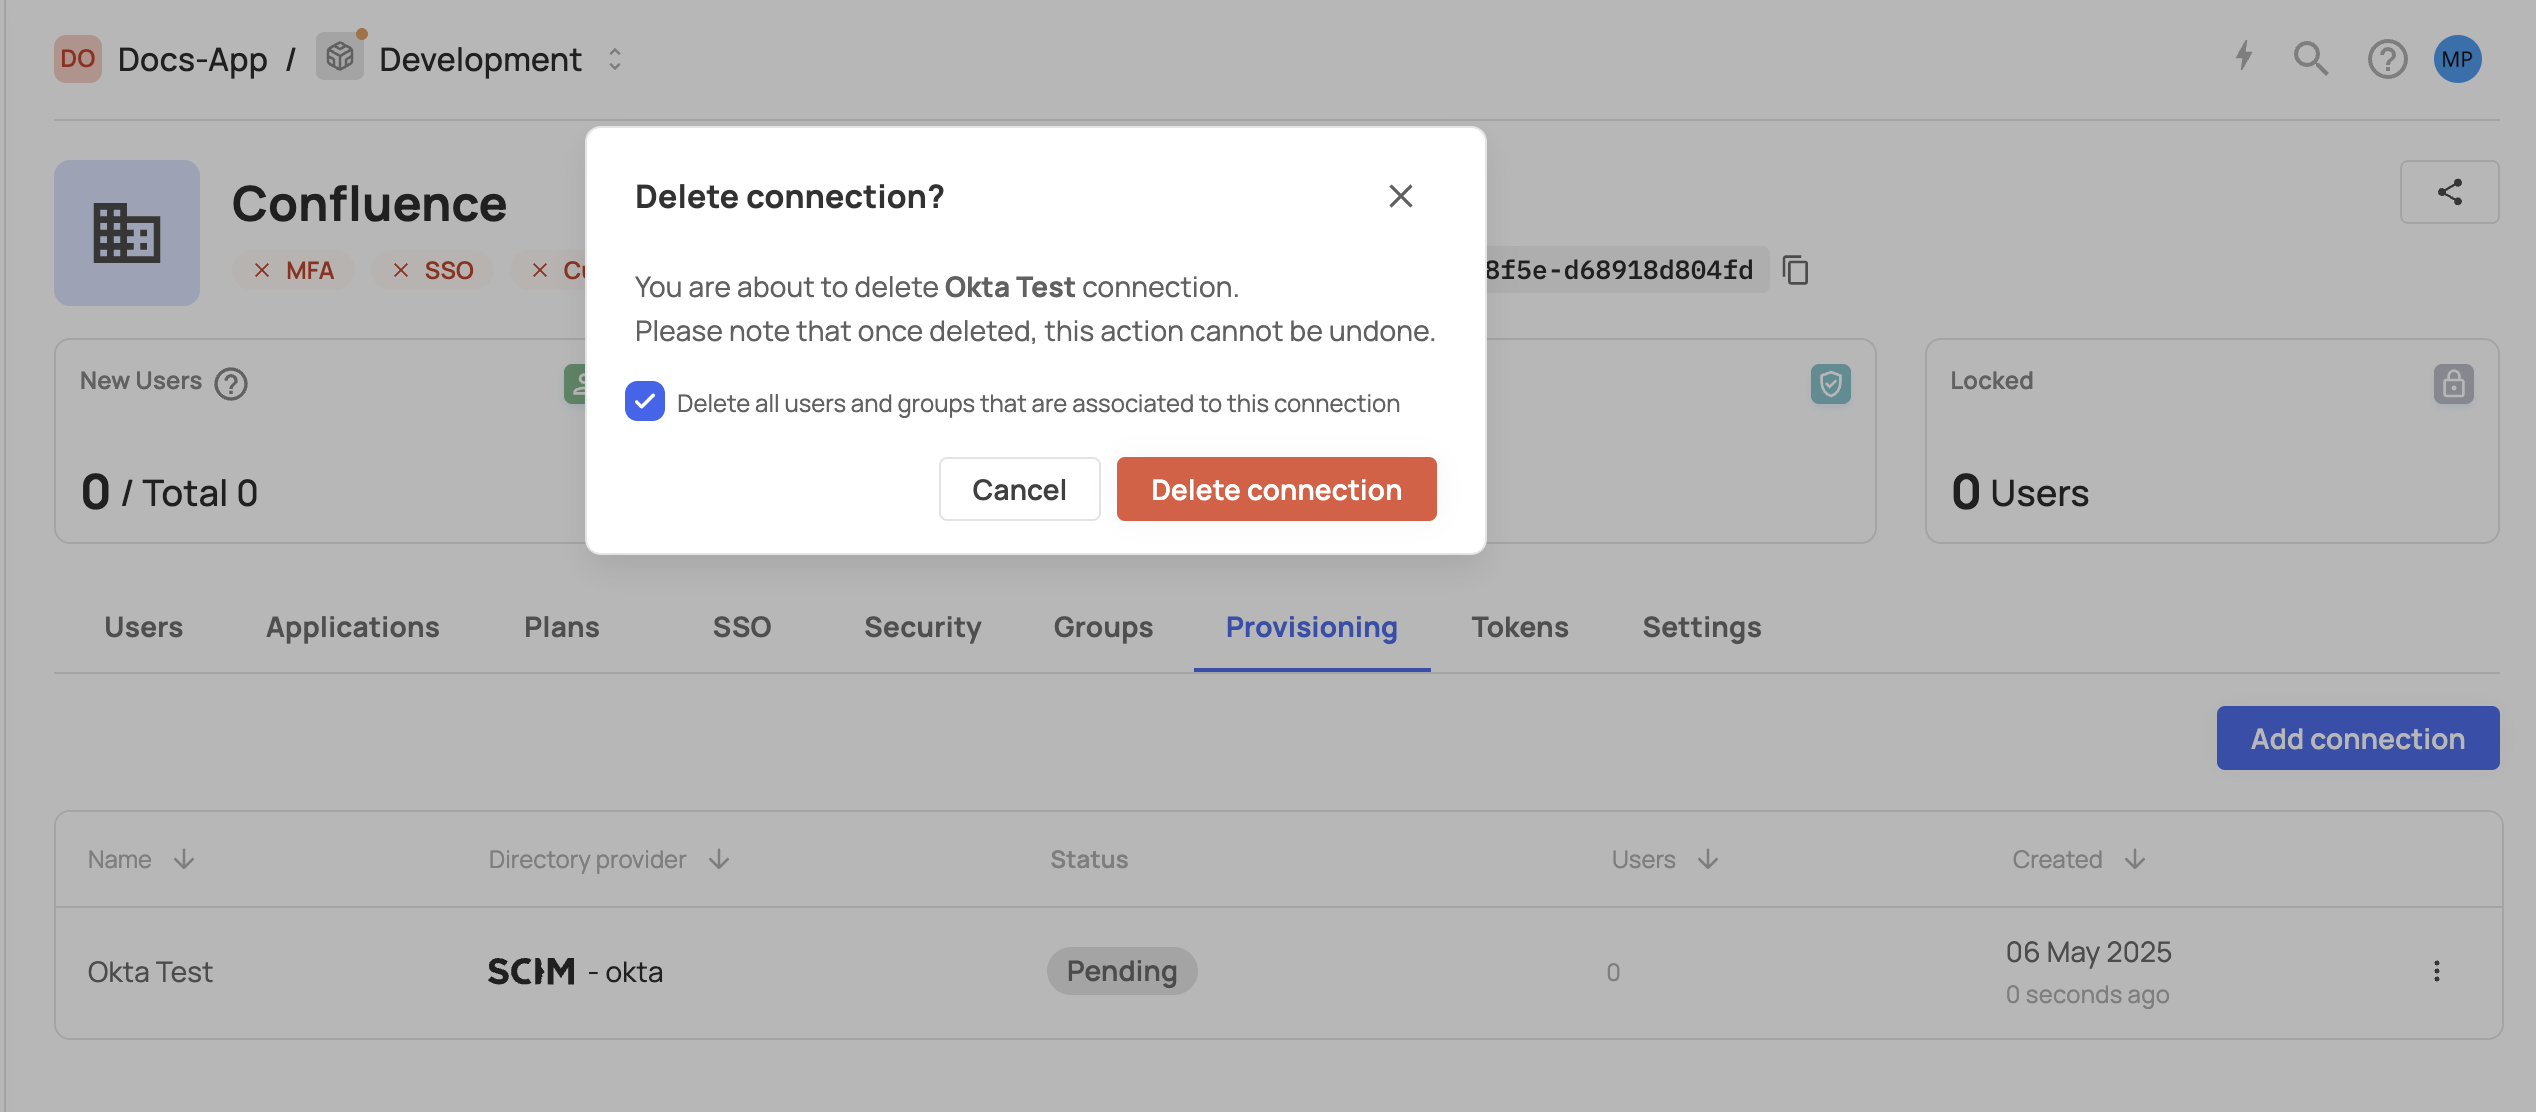
Deleting a connection
When deleting a SCIM connection from the management dashboard, the option to remove all associated users and groups is selected by default. If you choose to uncheck this option, you’ll need to manually remove all previously synced users and groups.
Create and manage SCIM connections via API
If you do not use Frontegg's self-service portal in your application, you can use Frontegg's APIs to set up a SCIM connection on behalf of your customers or implement your own UI.
- Create SCIM connection - This request will return an
idand atoken. Use theidto construct theprovisioning URLfor the IdP. It should look as below:
https://[your-custom-or-frontegg-domain]/directory/resources/scim/v2.0/[id-from-response]
Use the URL and the authorization token in your IdP settings for the connection.
Get all SCIM connections for an environment - This endpoint requires an environment token and will return all the connections from all accounts.
Delete SCIM connection - Note that currently, when a connection is being deleted, it does not automatically delete users and groups that were provisioned through this connection.
SCIM monitoring and troubleshooting
For details related to provisioned users and groups along with troubleshooting logs, we recommend checking the relevant logs in the monitoring section.