Integrating Microsoft SharePoint with Frontegg allows your application to read and manage SharePoint sites, document libraries, lists, and files through the Microsoft Graph API — all via Frontegg's integration layer using Microsoft Entra ID OAuth 2.0.
Prerequisites
Prerequisites
- A Microsoft account with access to the Azure portal
- A Microsoft Entra ID (Azure AD) tenant where you can register applications
- A SharePoint Online or Microsoft 365 subscription with at least one SharePoint site
Sign in to the Azure portal and open App registrations (you can search for it in the top search bar or open it directly from Microsoft Entra ID → App registrations). Click New registration at the top of the page.
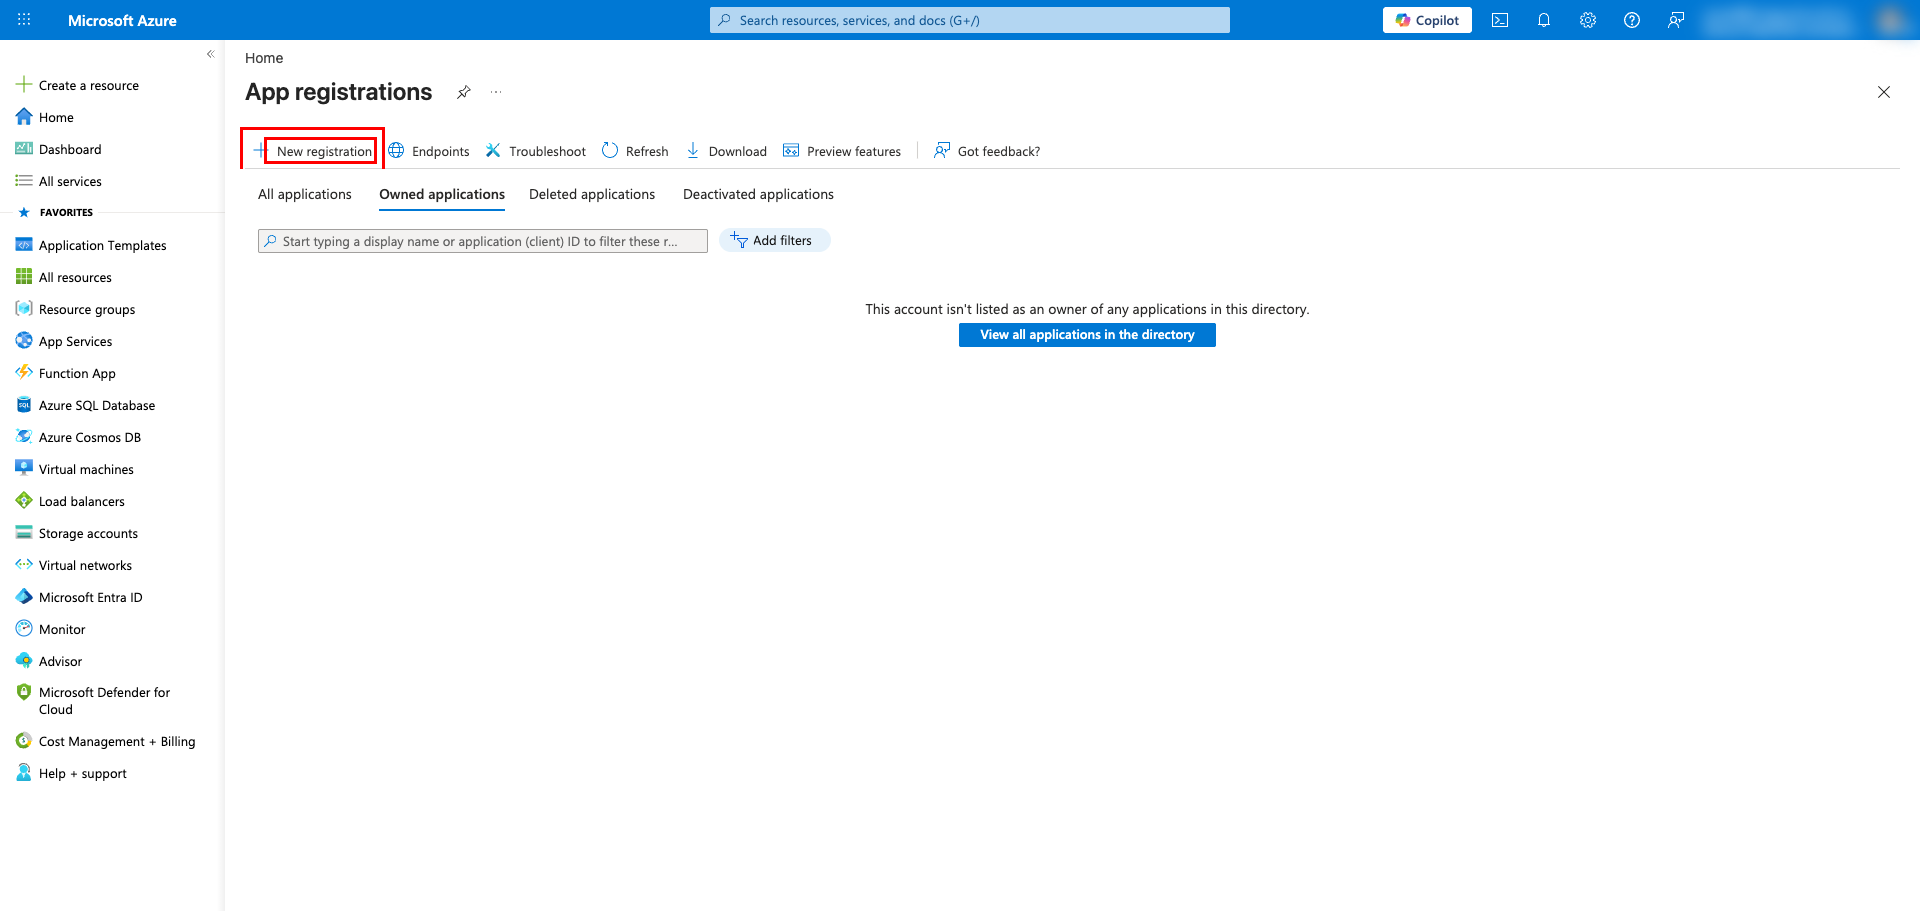
Fill in the registration form:
- Enter a name for your application (for example,
Frontegg SharePoint Integration). - Under Supported account types, select Accounts in any organizational directory (Any Microsoft Entra ID tenant — Multitenant) for multi-tenant apps, or Accounts in this organizational directory only for a single-tenant app.
- Under Redirect URI, choose Web as the platform and enter:
https://YOUR_MCP_GATEWAY_URL/integration-callback - Click Register.
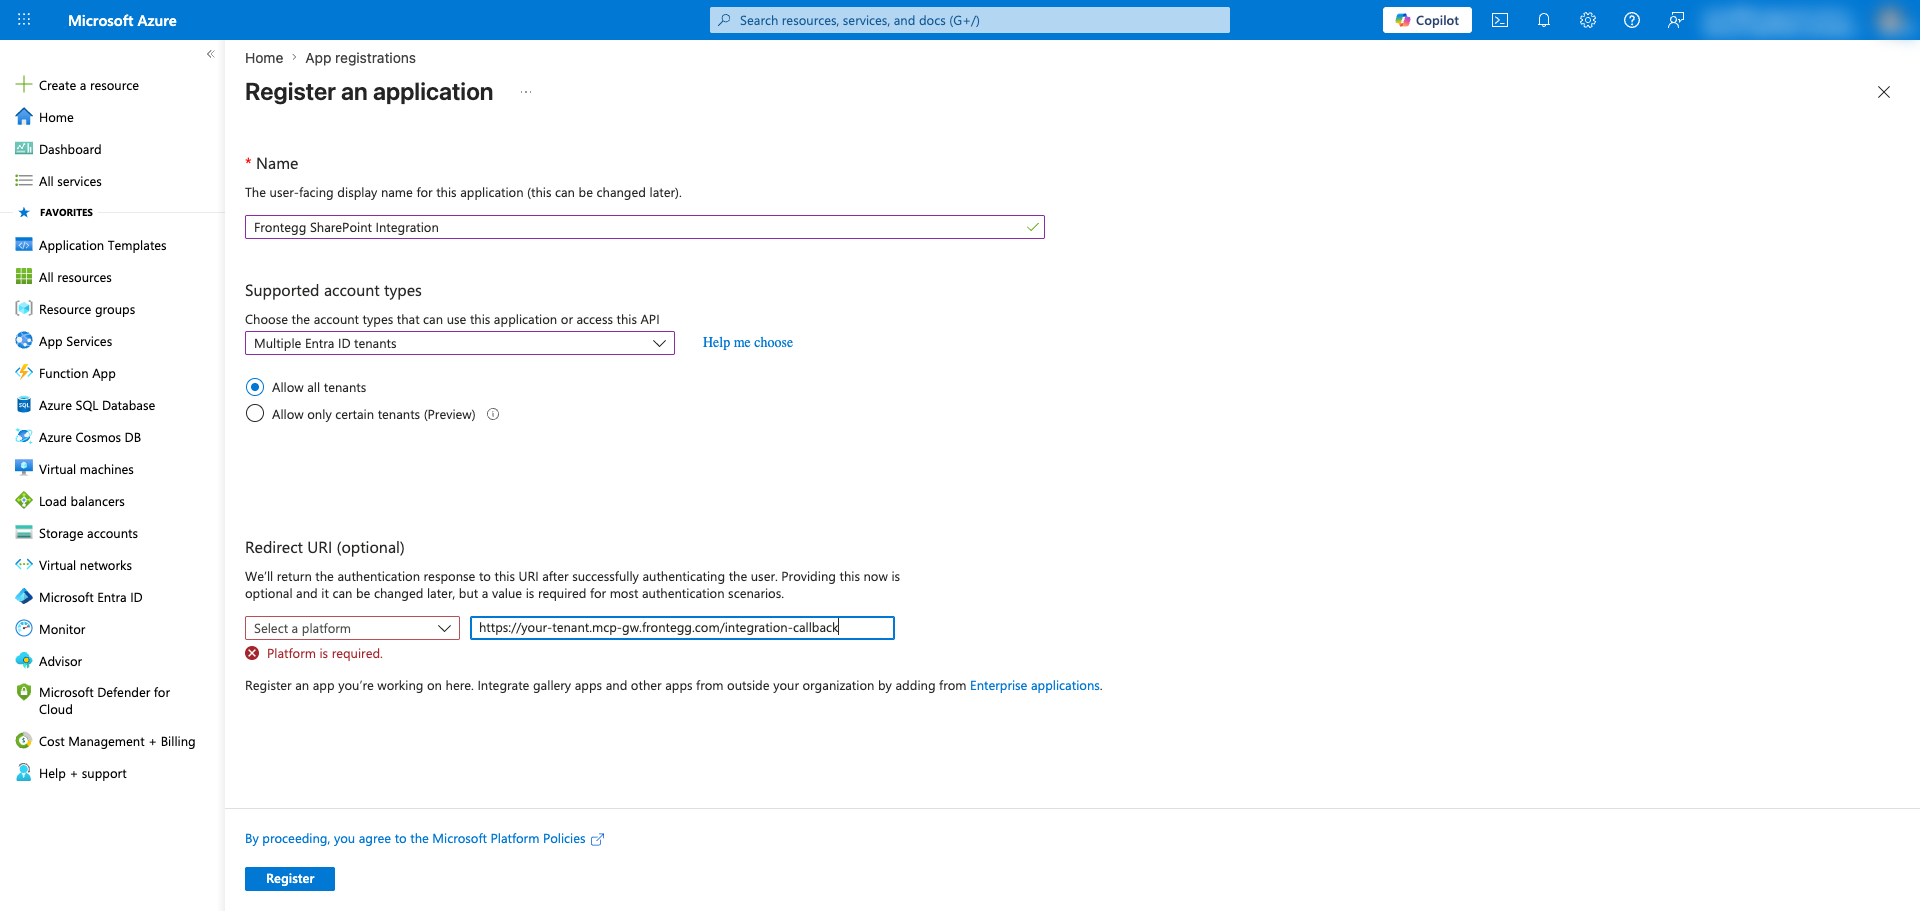
After registration, you are taken to the application Overview page. Copy both the Application (client) ID and the Directory (tenant) ID — you will need them when configuring the Frontegg portal.
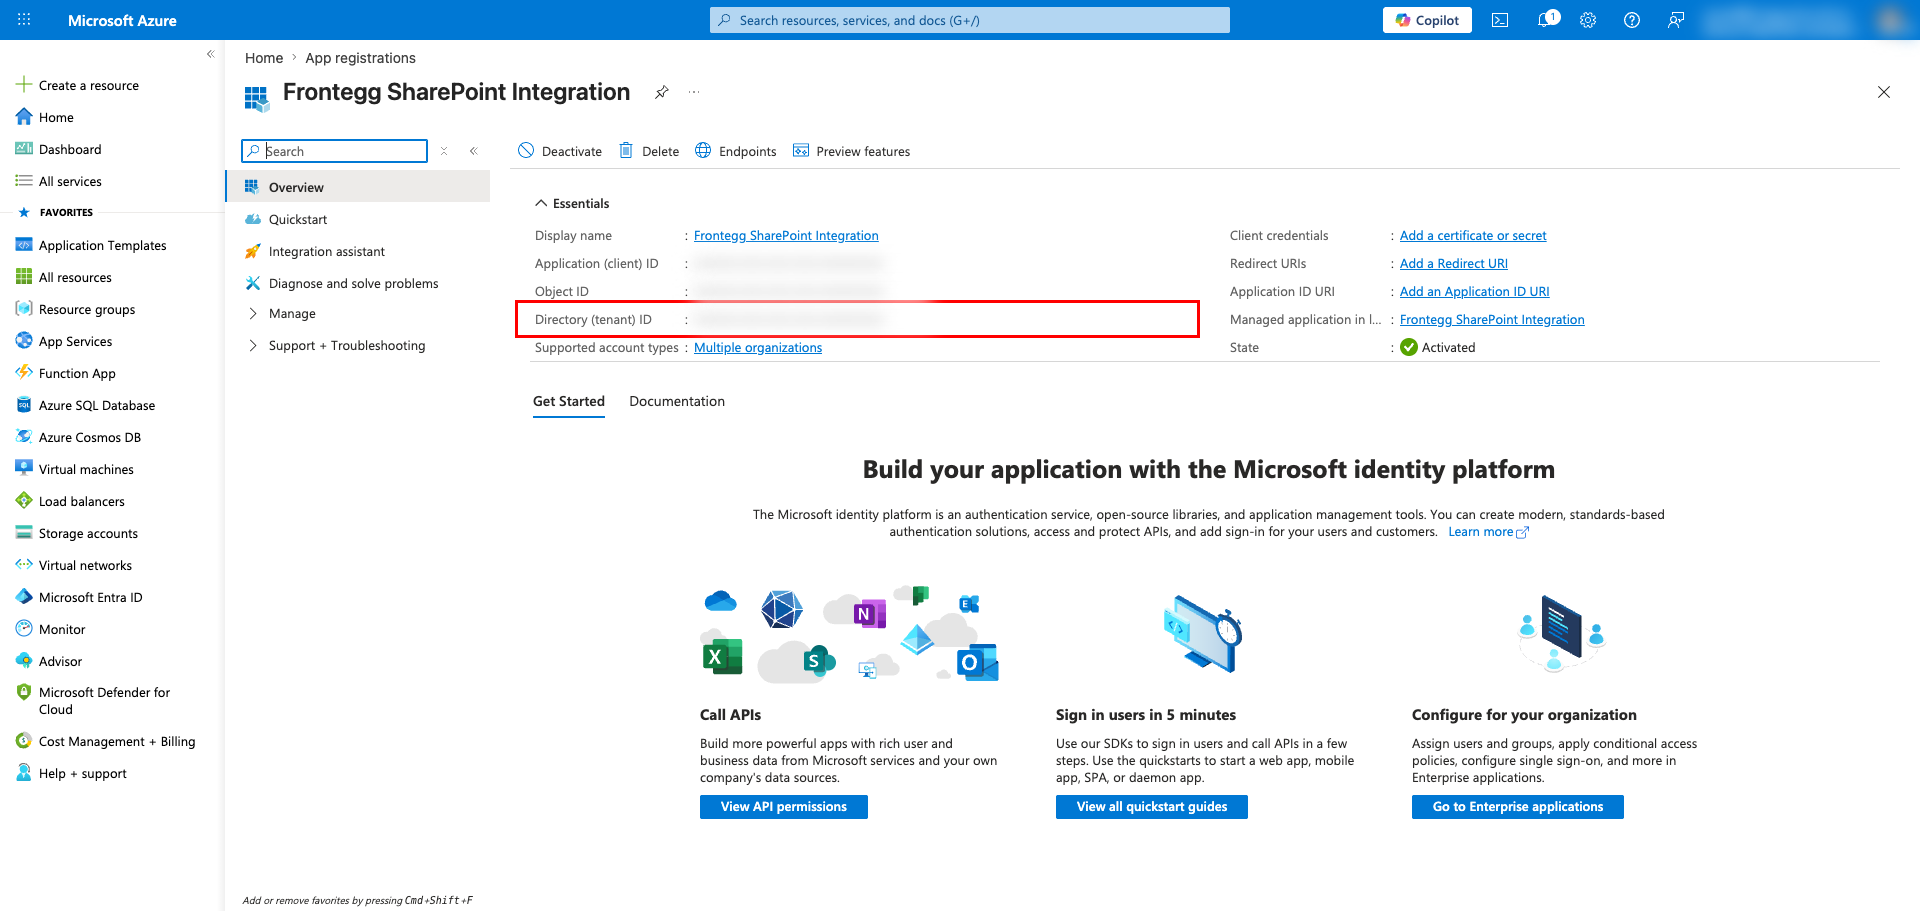
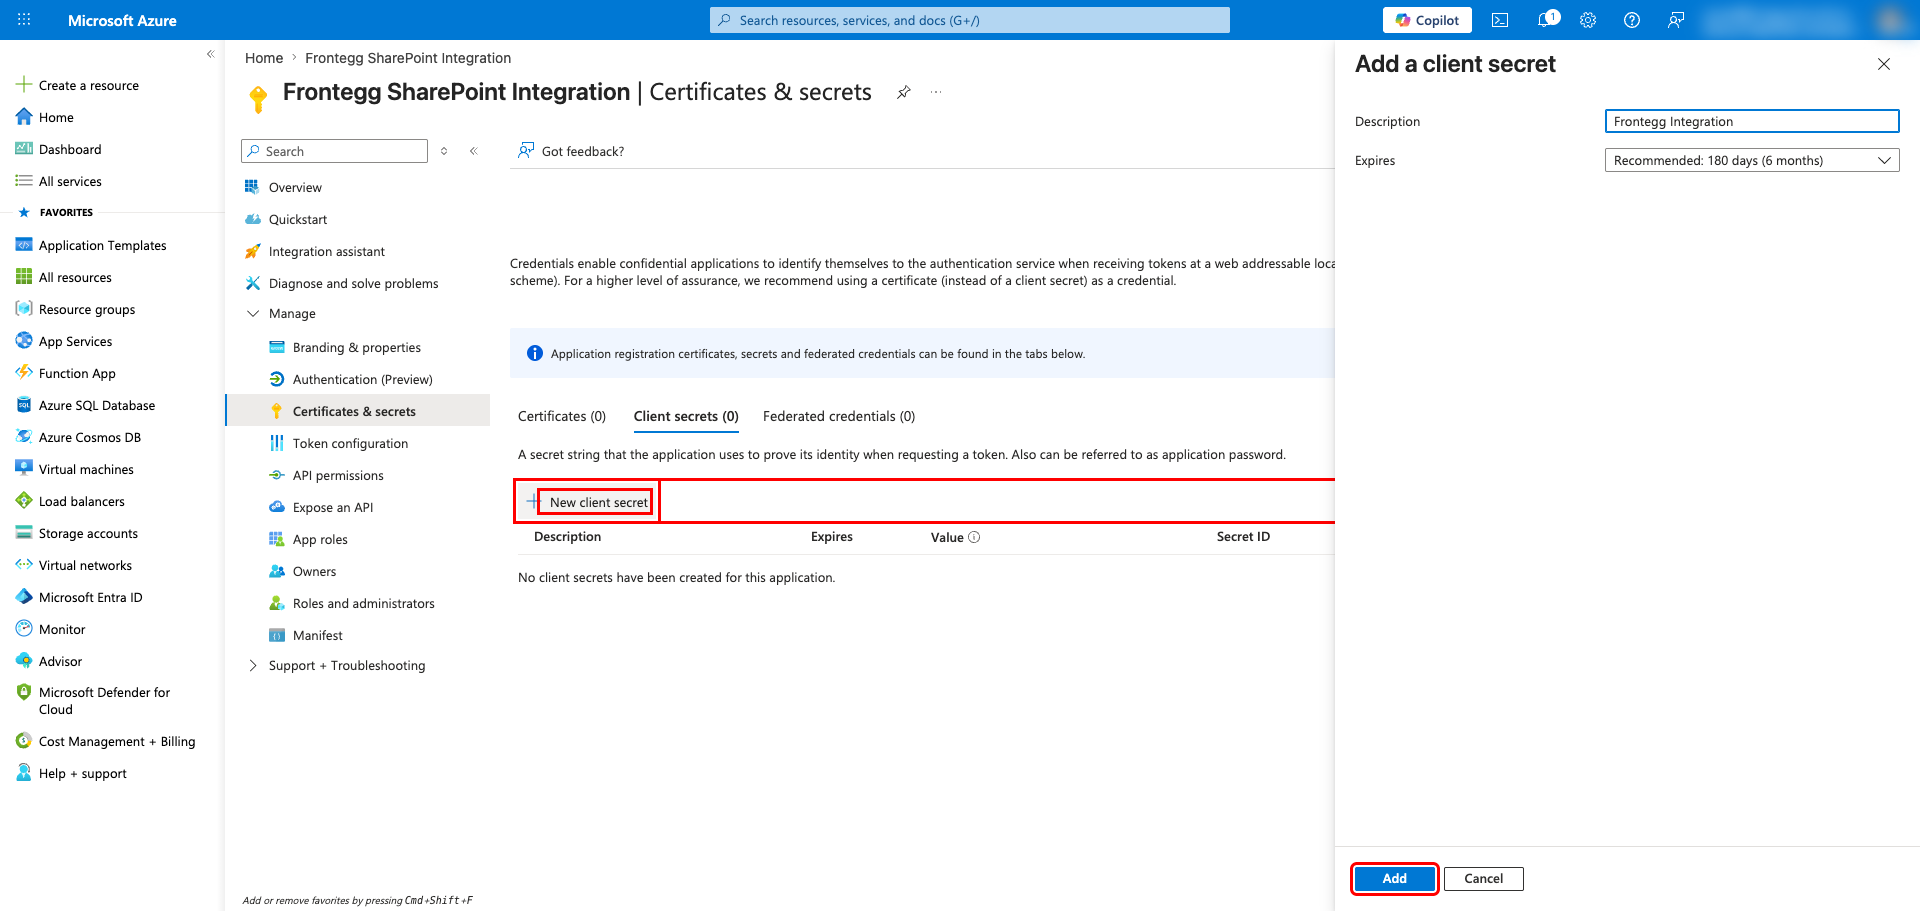
In the left sidebar, under Manage, click Certificates & secrets. On the Client secrets tab, click New client secret.
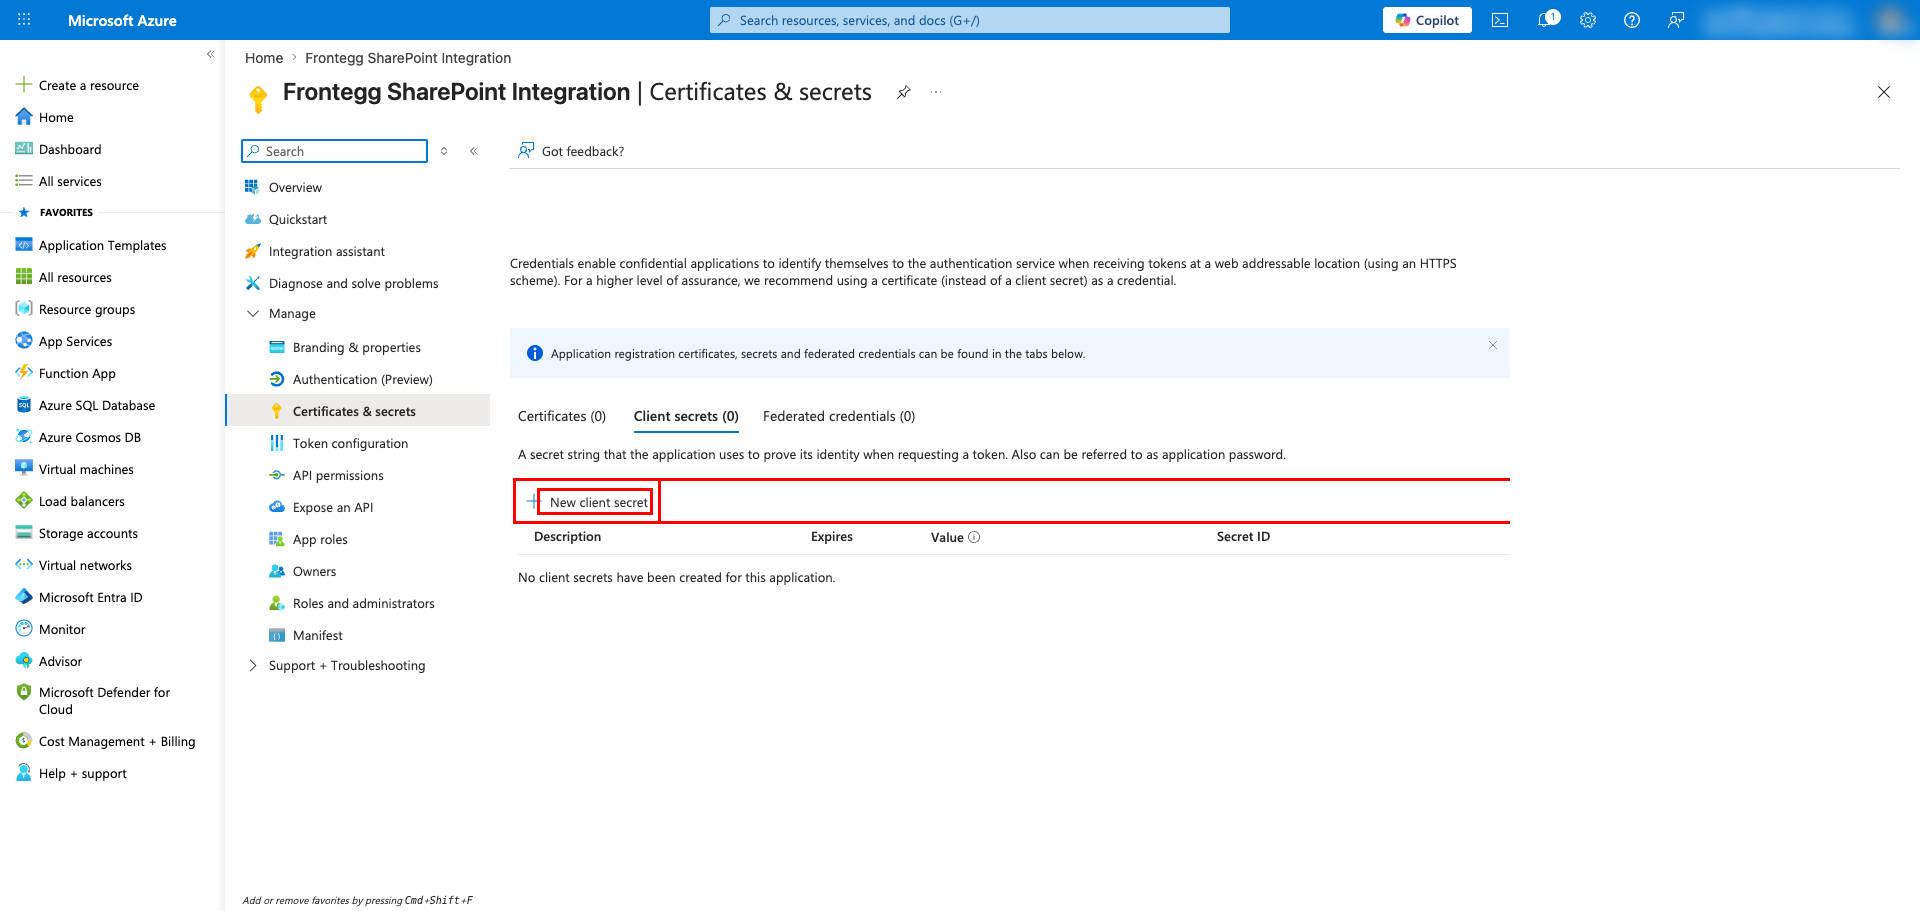
In the Add a client secret panel, enter a description (for example, Frontegg Integration) and choose an expiry period. Click Add.
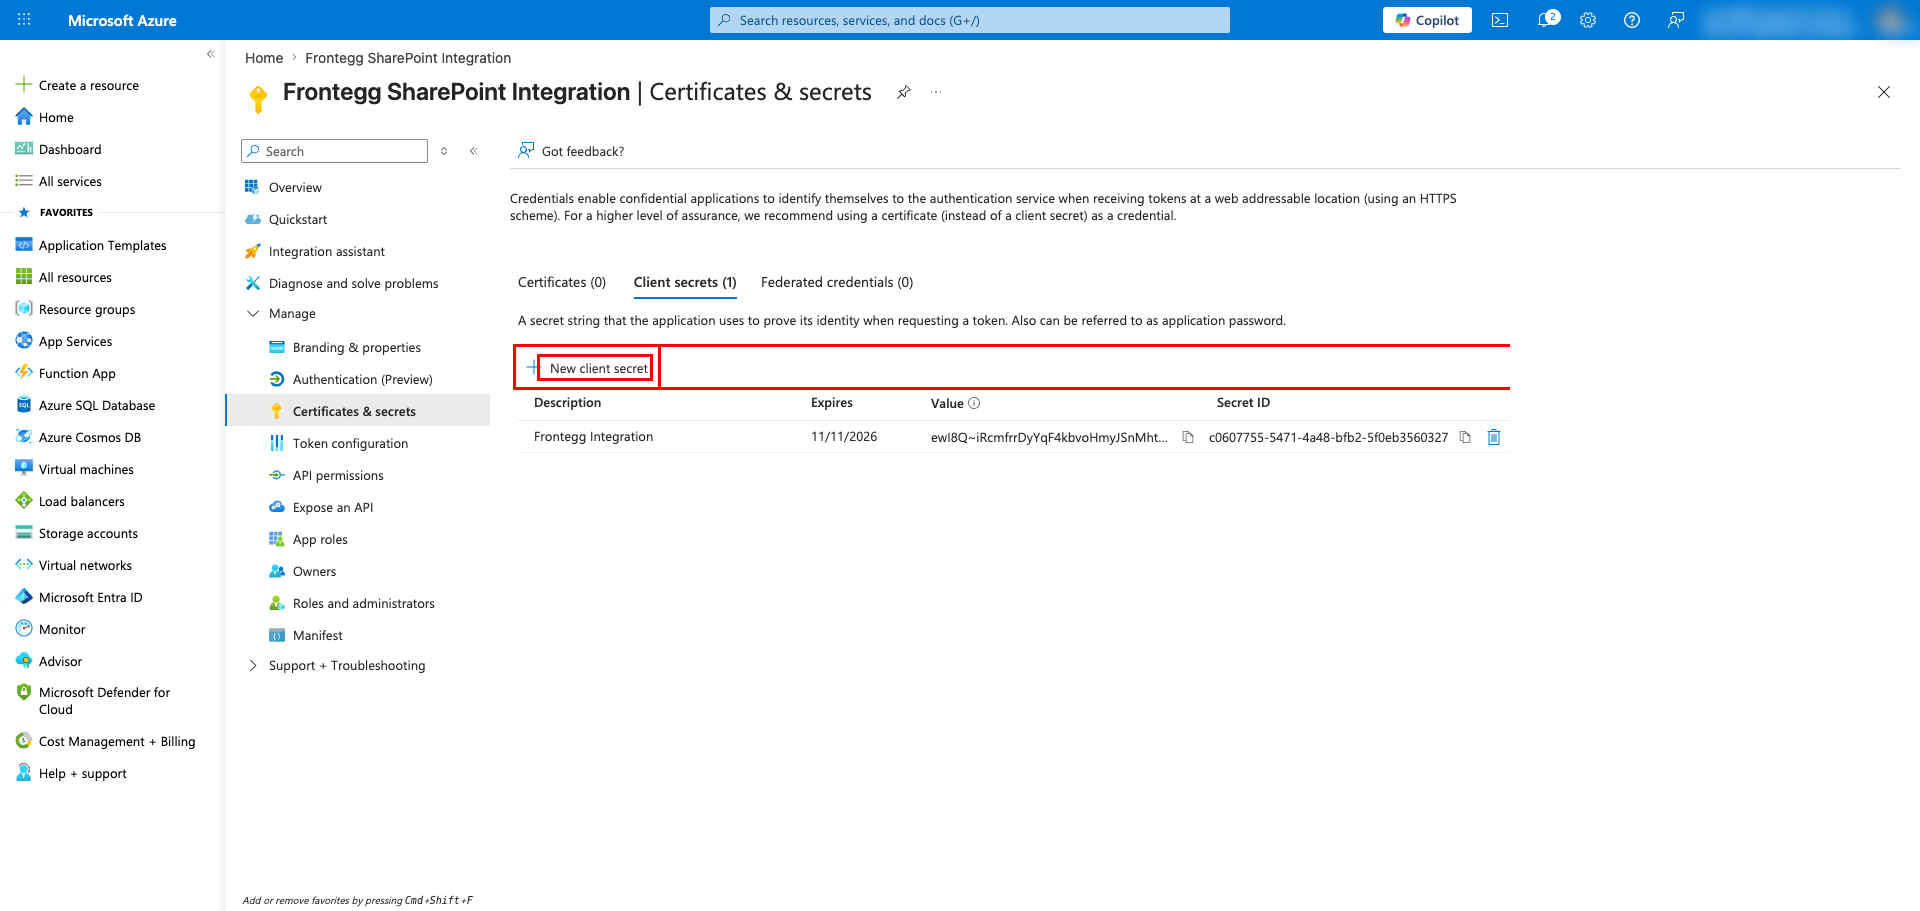
The new secret appears in the list. Copy the Value immediately — it is only shown once. After you navigate away, you cannot retrieve it again.
Save your Client Secret now
Save your Client Secret now
The Client Secret value is only displayed once. After you leave this page, you can only see the secret ID — not the value. Store the value securely before continuing.
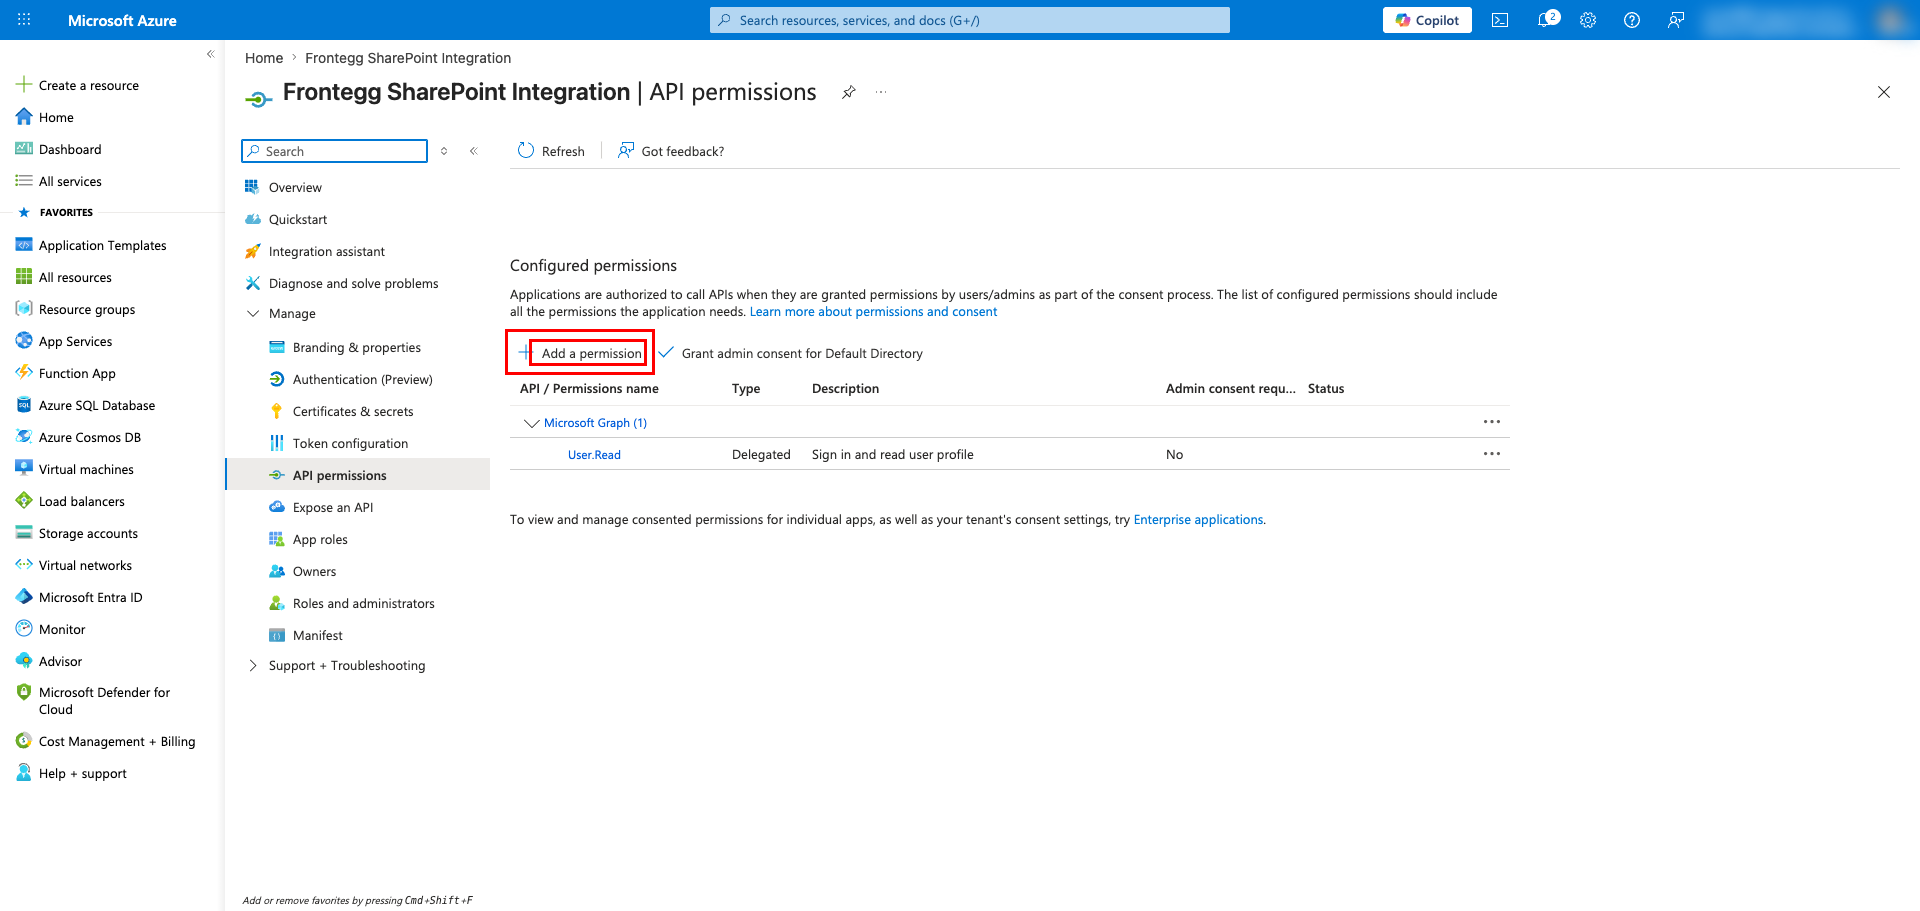
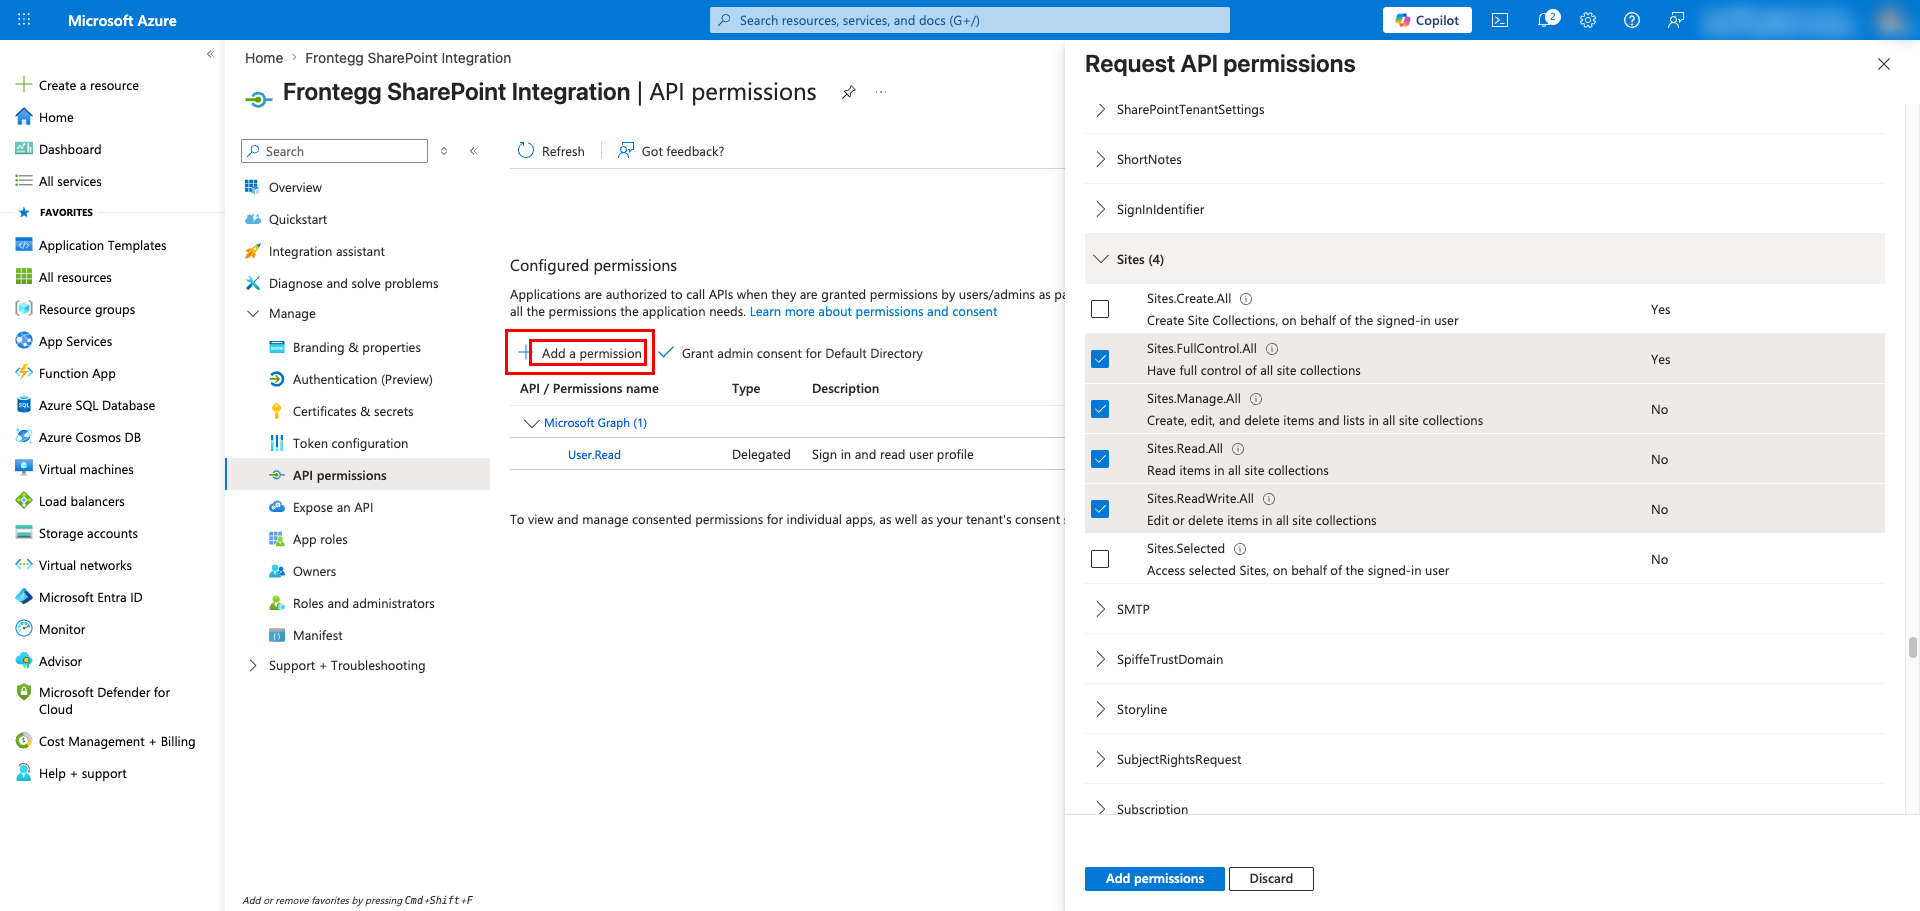
In the left sidebar, click API permissions, then click Add a permission.
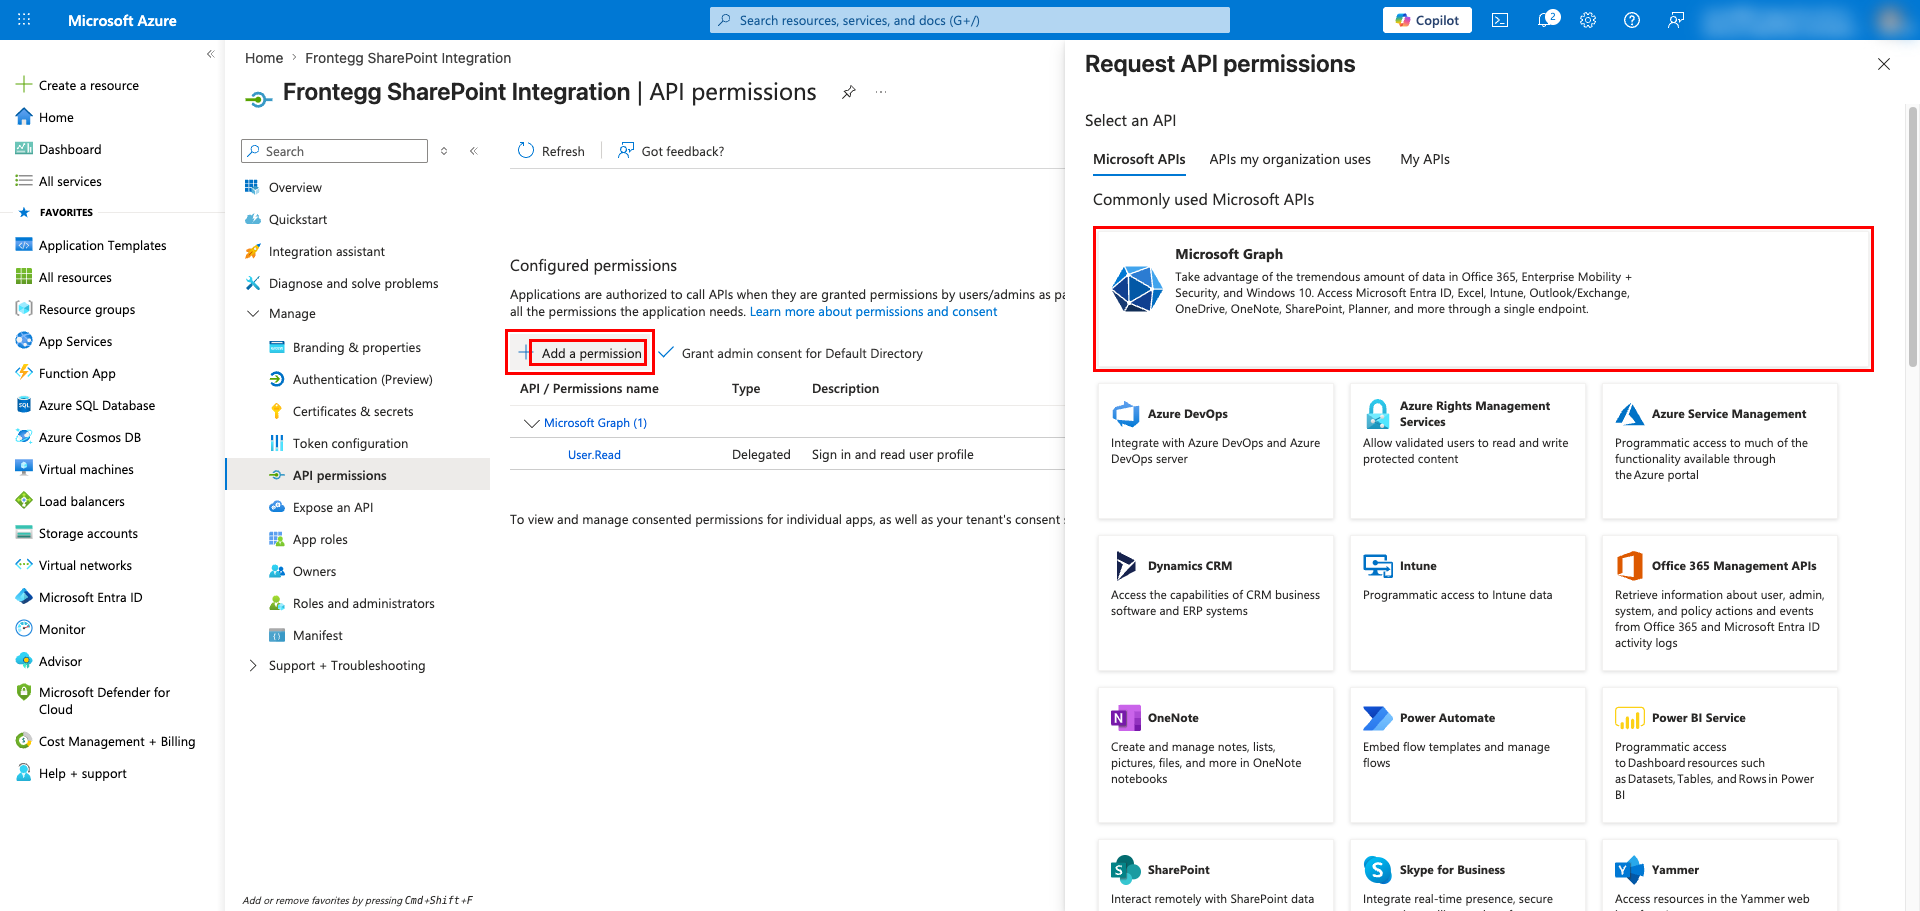
In the Request API permissions panel, click Microsoft Graph. Frontegg accesses SharePoint through Microsoft Graph — do not use the legacy SharePoint API entry.
Click Delegated permissions. Use the search box or expand the Sites and Files groups, then select the scopes your application requires. Select the following scopes:
| Scope | Description |
|---|---|
offline_access | Maintain access to data the user has granted (issues refresh tokens) |
Sites.Read.All | Read items in all site collections |
Sites.ReadWrite.All | Read and write items in all site collections |
Sites.Manage.All | Create, edit, and delete items and lists in all site collections |
Sites.FullControl.All | Full control of all site collections (admin consent required) |
Files.Read.All | Read all files the signed-in user can access |
Files.ReadWrite.All | Read, write, and delete all files the signed-in user can access |
Click Add permissions.
Minimum required scopes
Minimum required scopes
For basic read access to SharePoint sites and files, you only need Sites.Read.All, Files.Read.All, and offline_access. Add the ReadWrite and Manage scopes only if your application needs to create or modify content. Sites.FullControl.All is required only for managing site permissions and requires an Entra ID admin to grant tenant-wide consent.
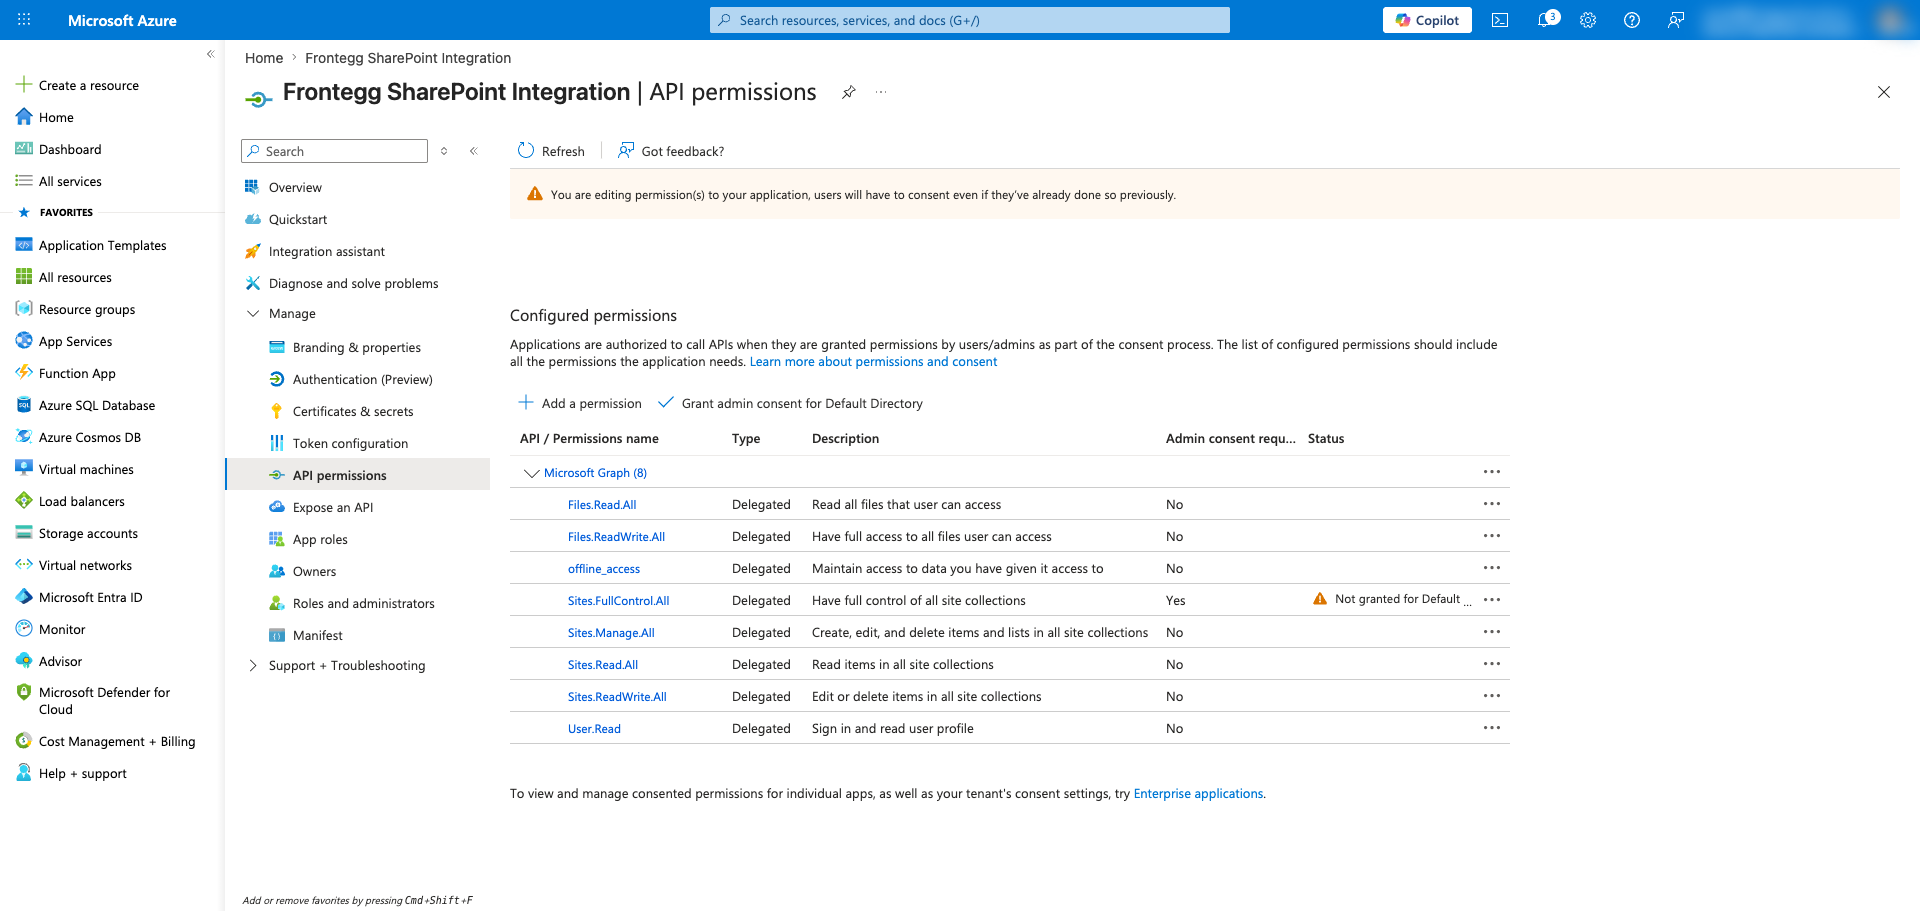
After adding permissions, the API permissions page lists all configured permissions under Microsoft Graph. The Sites.FullControl.All permission shows Admin consent required: Yes — an Entra ID admin must click Grant admin consent for {tenant} before users can complete the OAuth flow with that scope.
Once you have your Client ID, Client Secret, and Directory (tenant) ID, enter them in the Frontegg portal:
- Open the Frontegg portal and navigate to [ENVIRONMENT] → Integrations → SharePoint.
- Enter the Client ID and Client Secret in the corresponding fields.
- Optionally, enter the Directory (tenant) ID. Leave blank or set to
commonfor multi-tenant applications; use a tenant GUID or domain for single-tenant applications. - Select the required scopes.
- Click Save.
Keep your credentials secure
Keep your credentials secure
Never share or commit your Client Secret to version control.