Integrating Microsoft Teams with Frontegg allows your application to read and create teams and channels, send and read messages in channels and chats, manage team members, schedule online meetings, and read presence — all through Frontegg's integration layer using Microsoft OAuth 2.0 and the Microsoft Graph API.
Prerequisites
Prerequisites
- A Microsoft account with access to the Azure portal
- An Azure Active Directory (Microsoft Entra ID) tenant
Sign in to the Azure portal and search for App registrations in the top search bar. Click App registrations in the results.
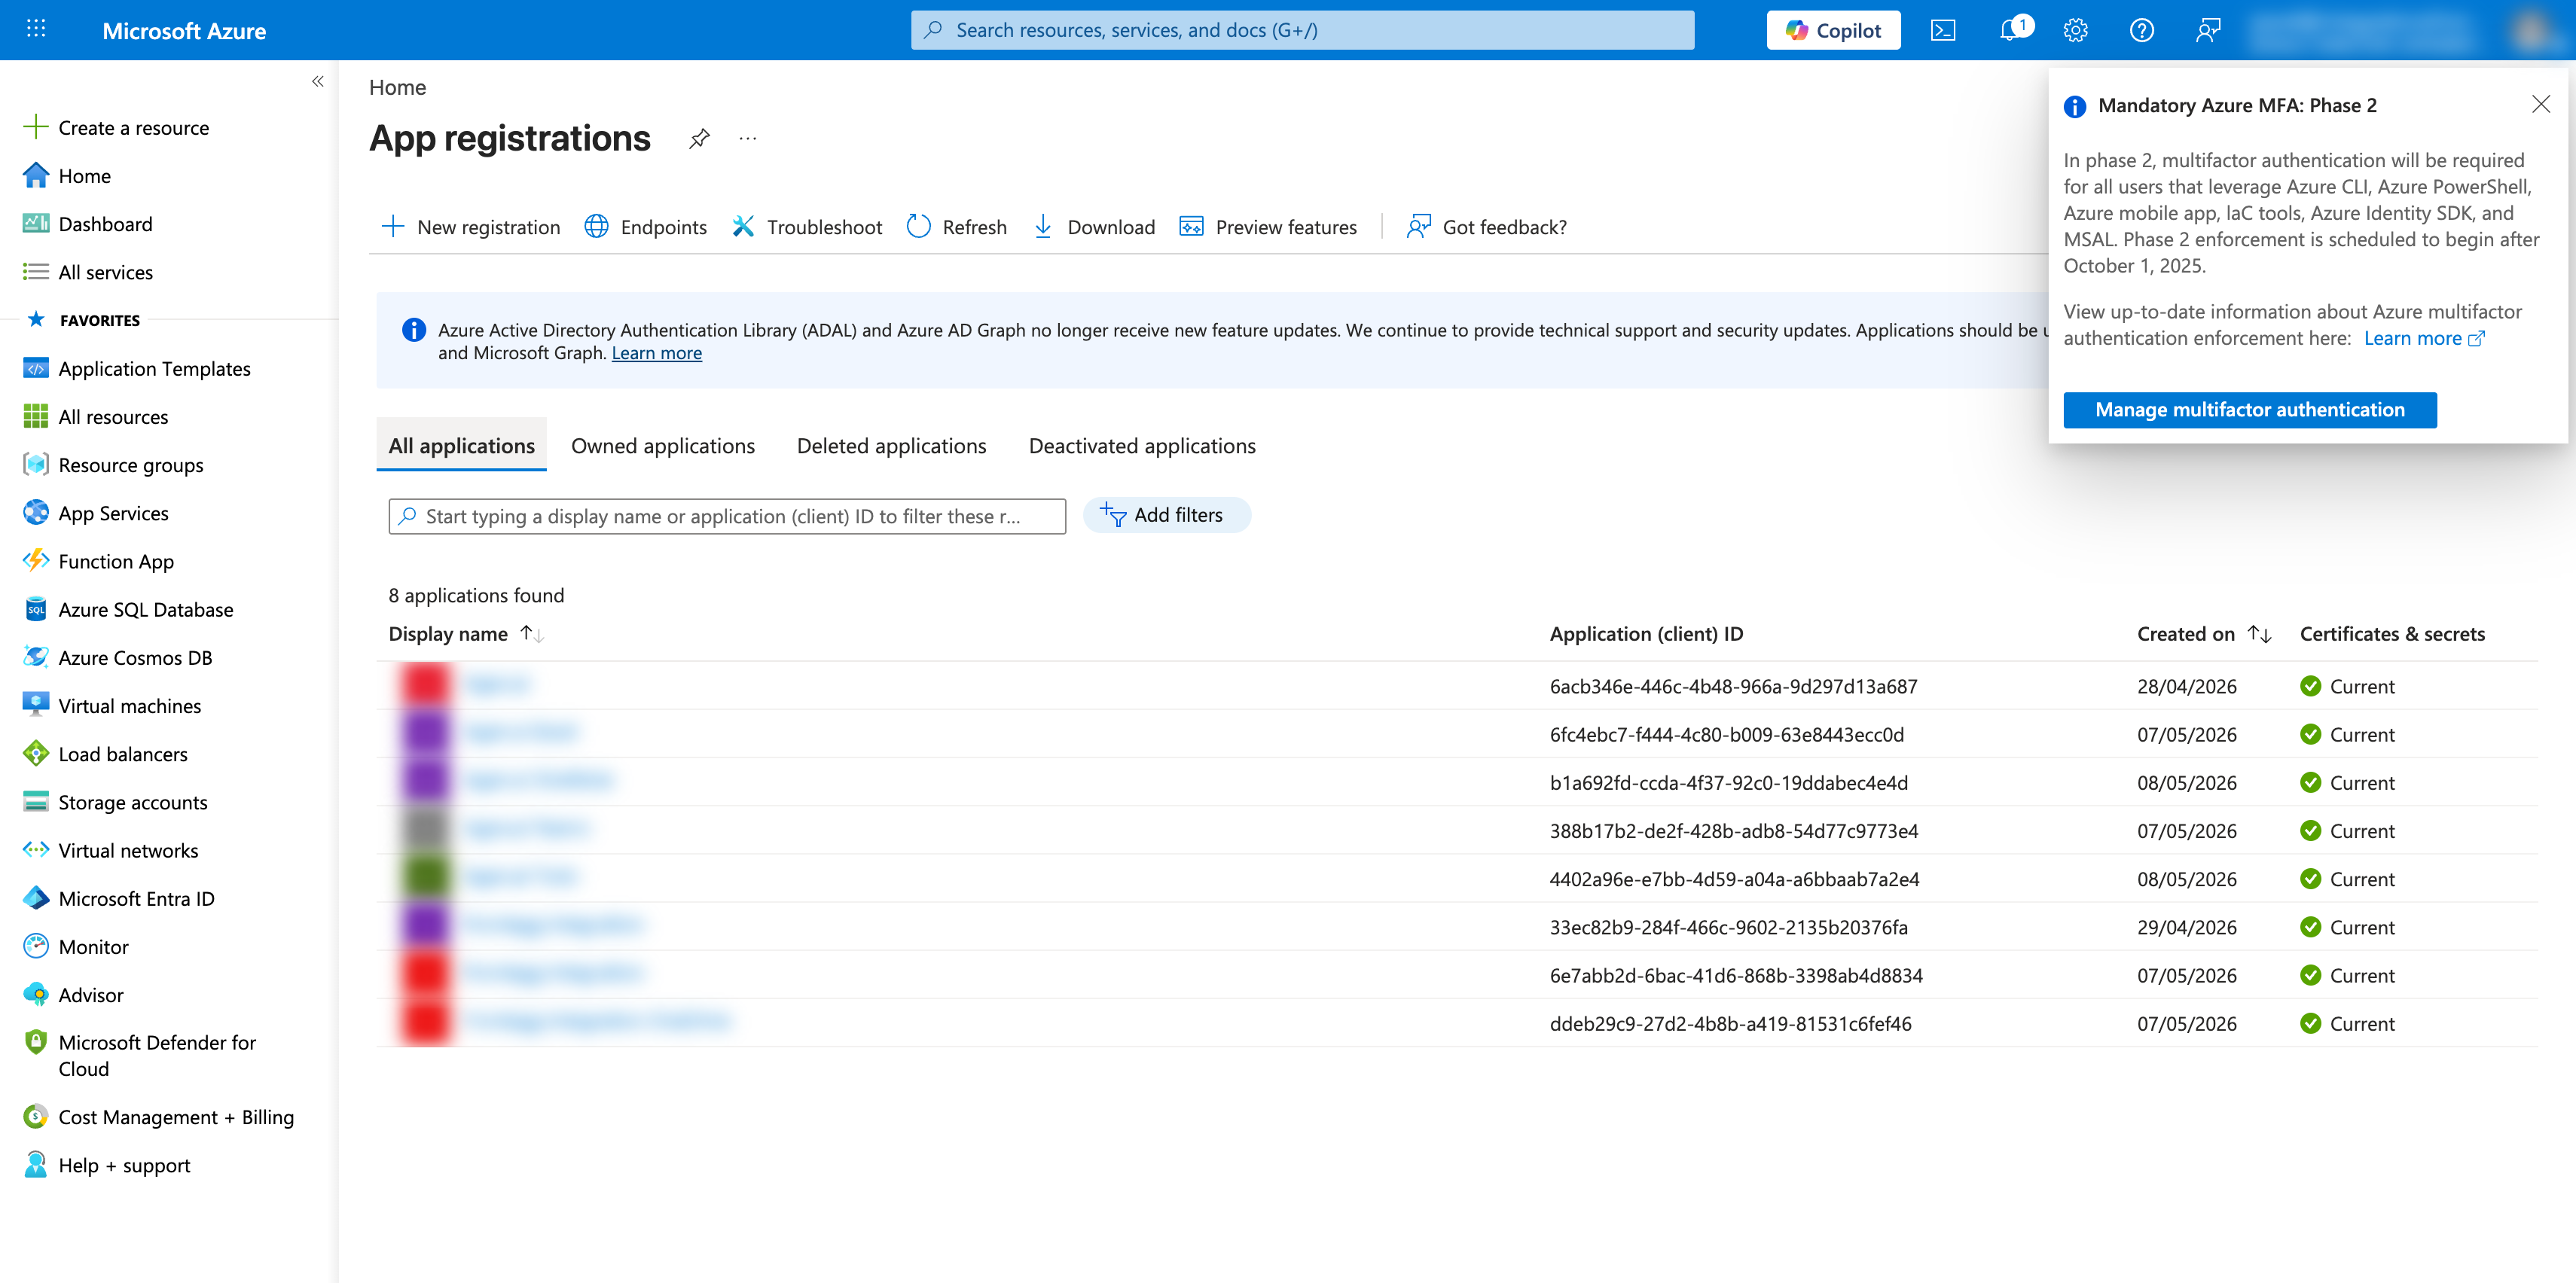
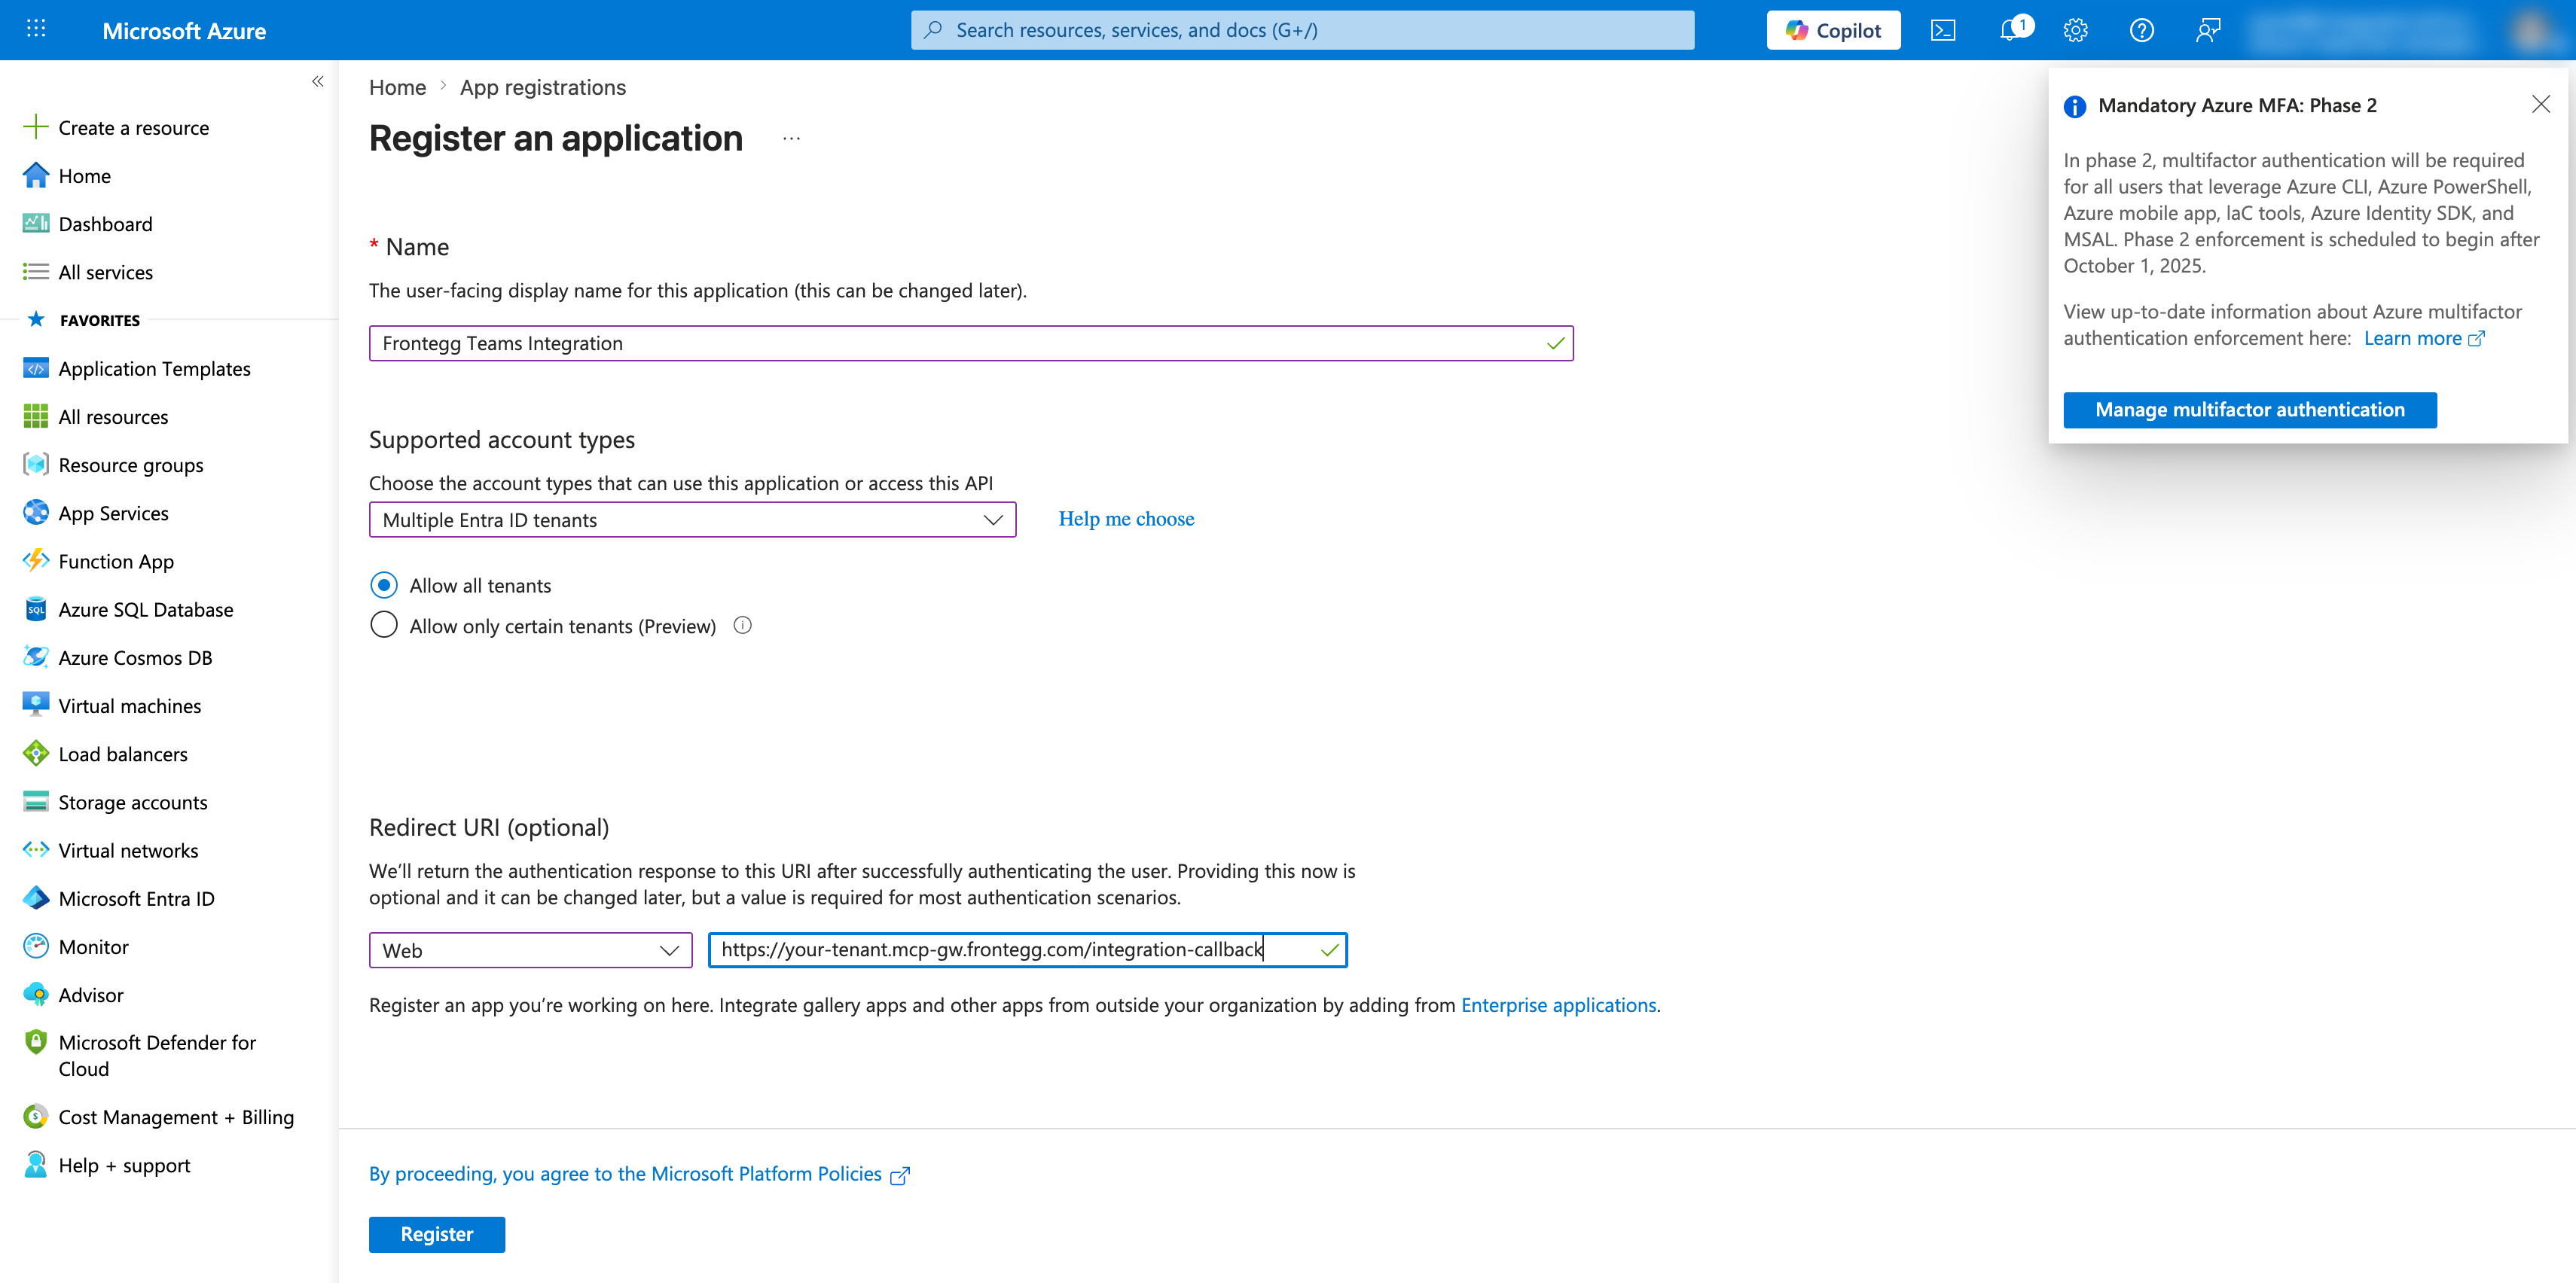
Click New registration at the top of the page. Fill in the registration form:
- Enter a name for your application (for example,
Frontegg Teams Integration). - Under Supported account types, select Accounts in any organizational directory (Any Microsoft Entra ID tenant — Multitenant) for multi-tenant apps, or the appropriate option for your use case.
- Under Redirect URI, select Web as the platform and enter:
https://YOUR_MCP_GATEWAY_URL/integration-callback - Click Register.
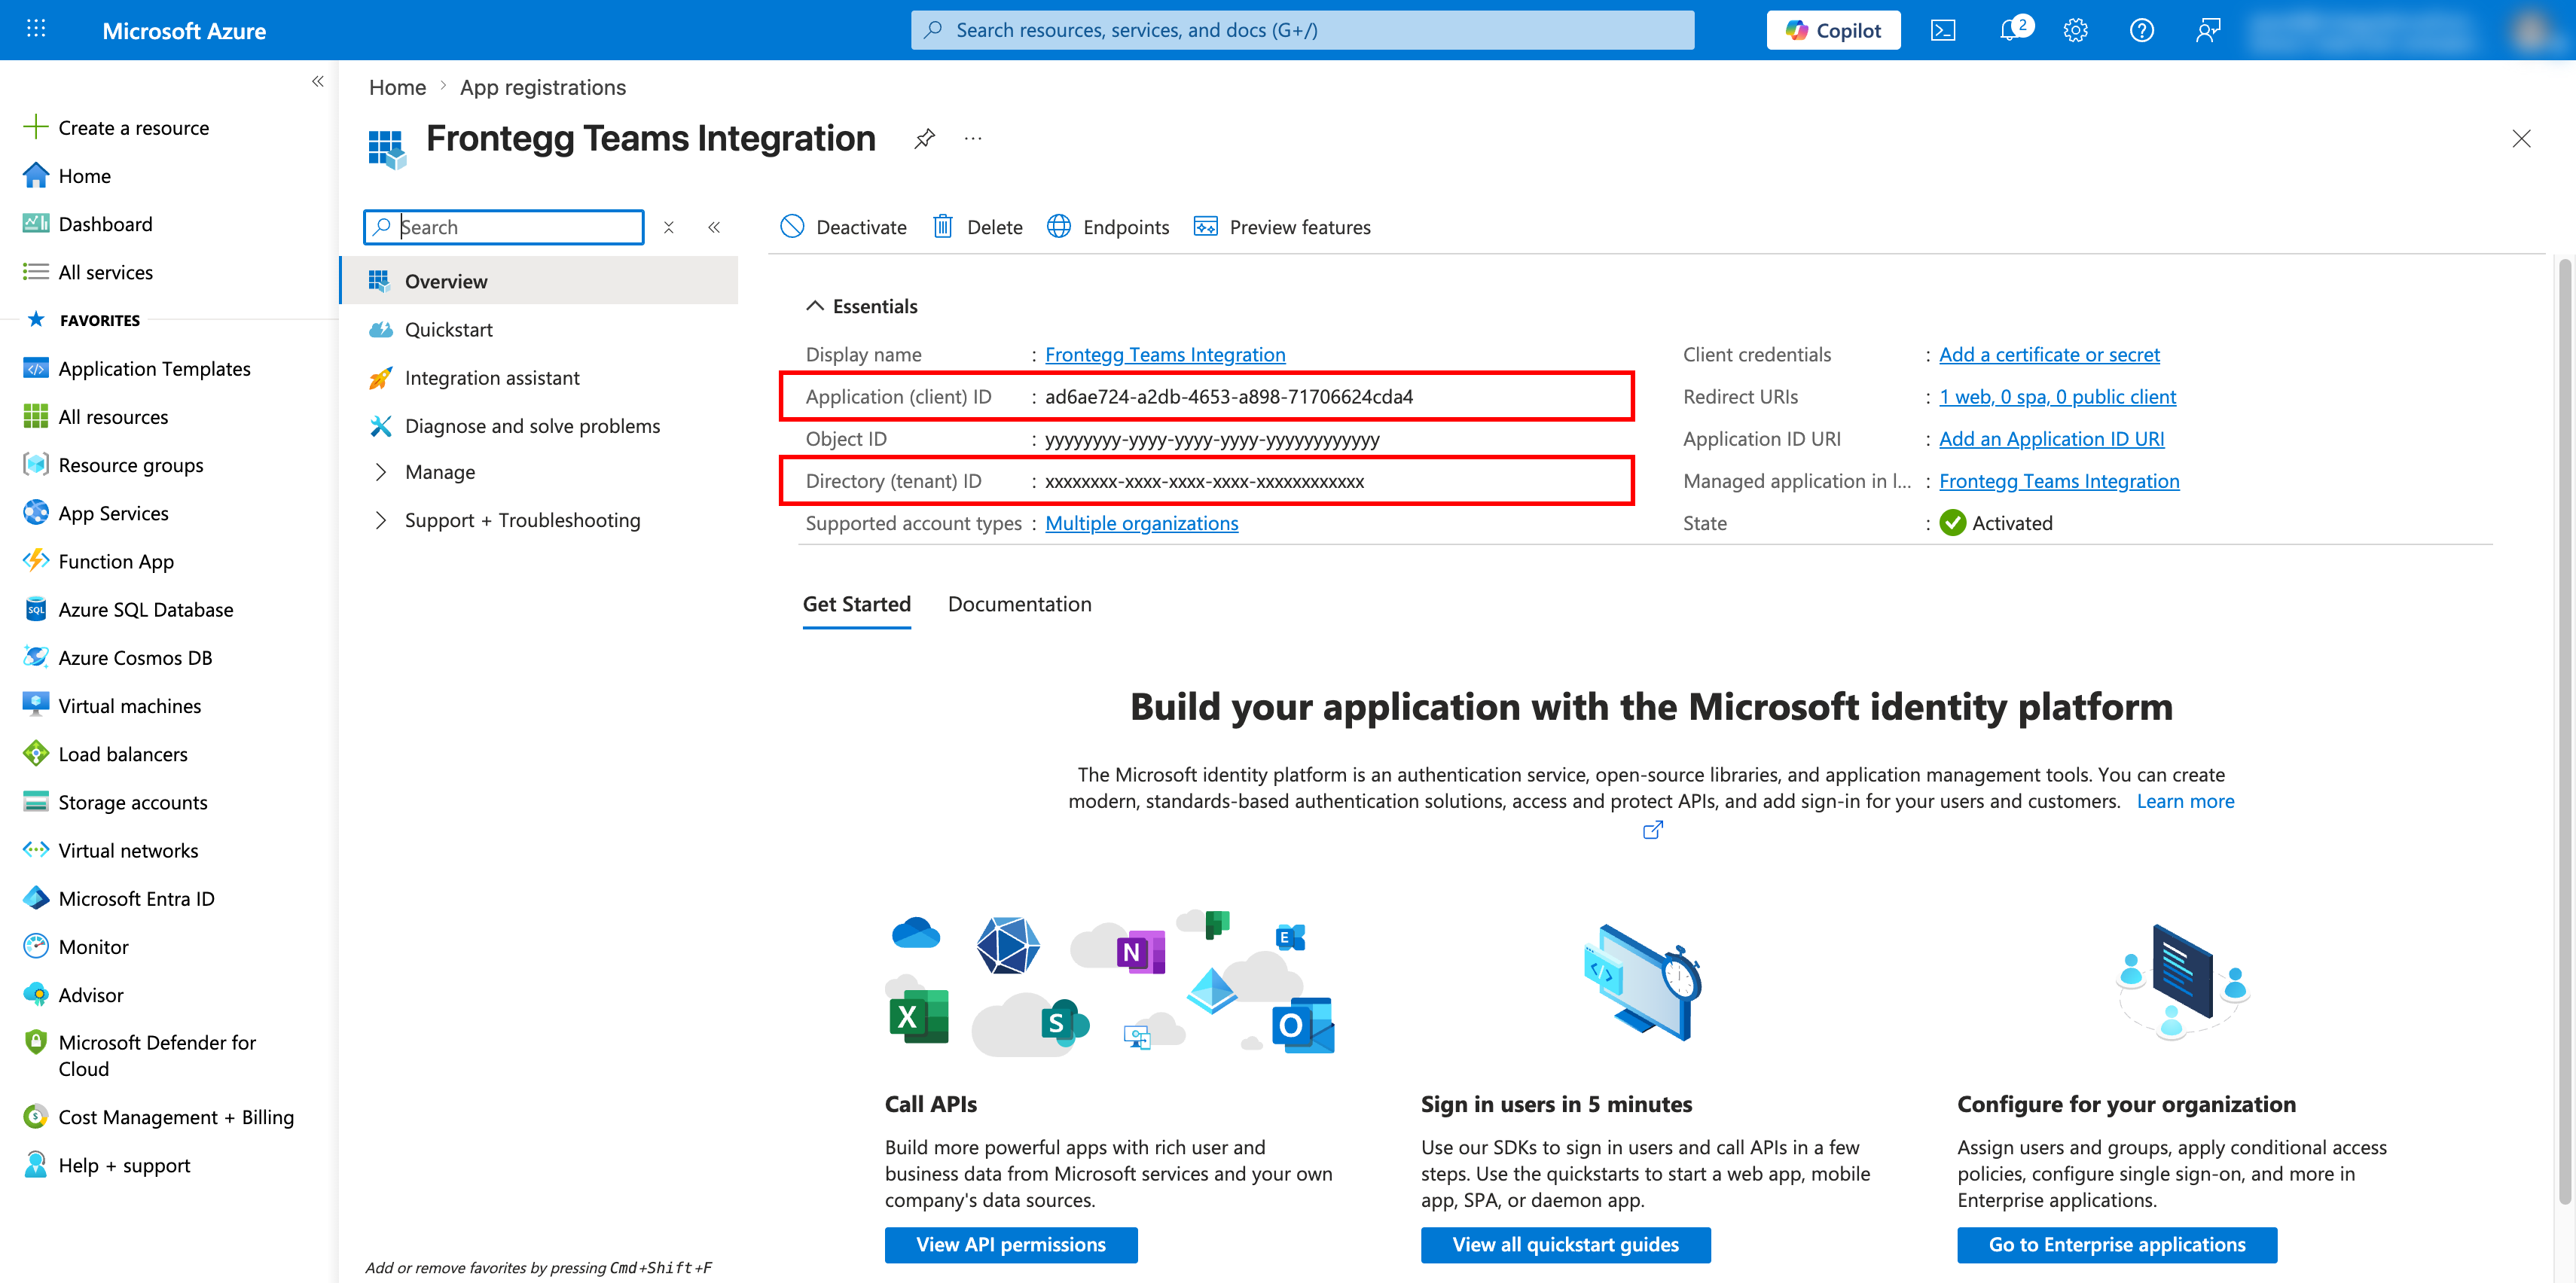
After registration, you are taken to the application overview page. Copy both the Application (client) ID and the Directory (tenant) ID — you will need them when configuring the Frontegg portal.
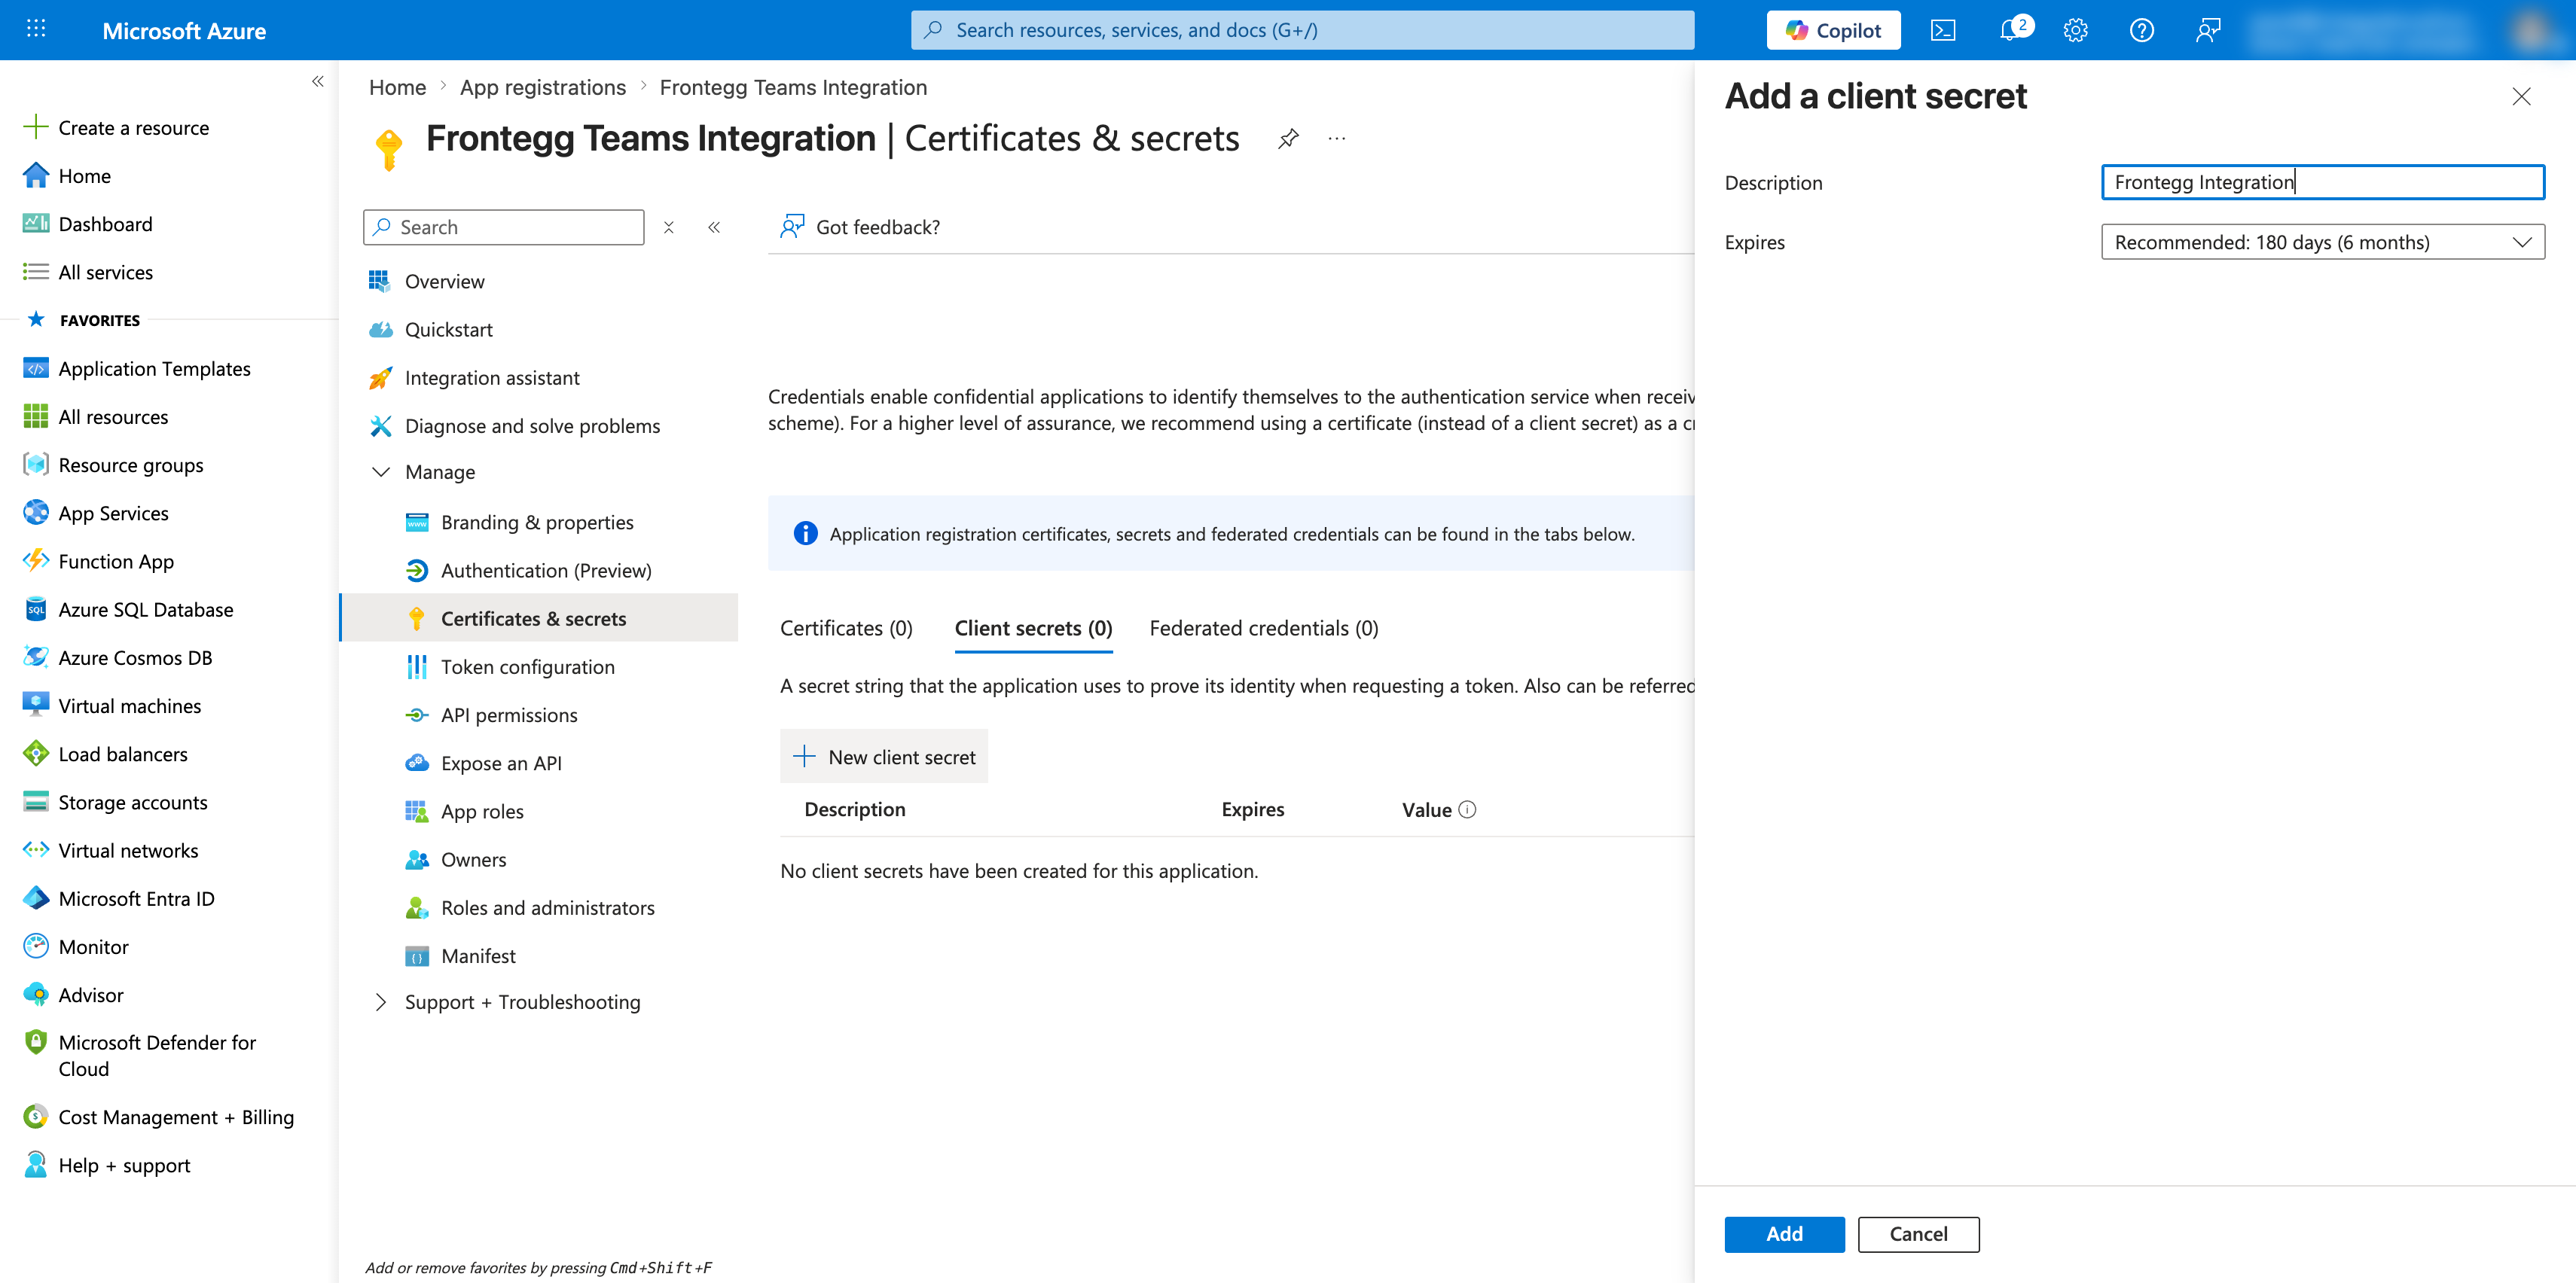
In the left sidebar, click Certificates & secrets, then click New client secret.
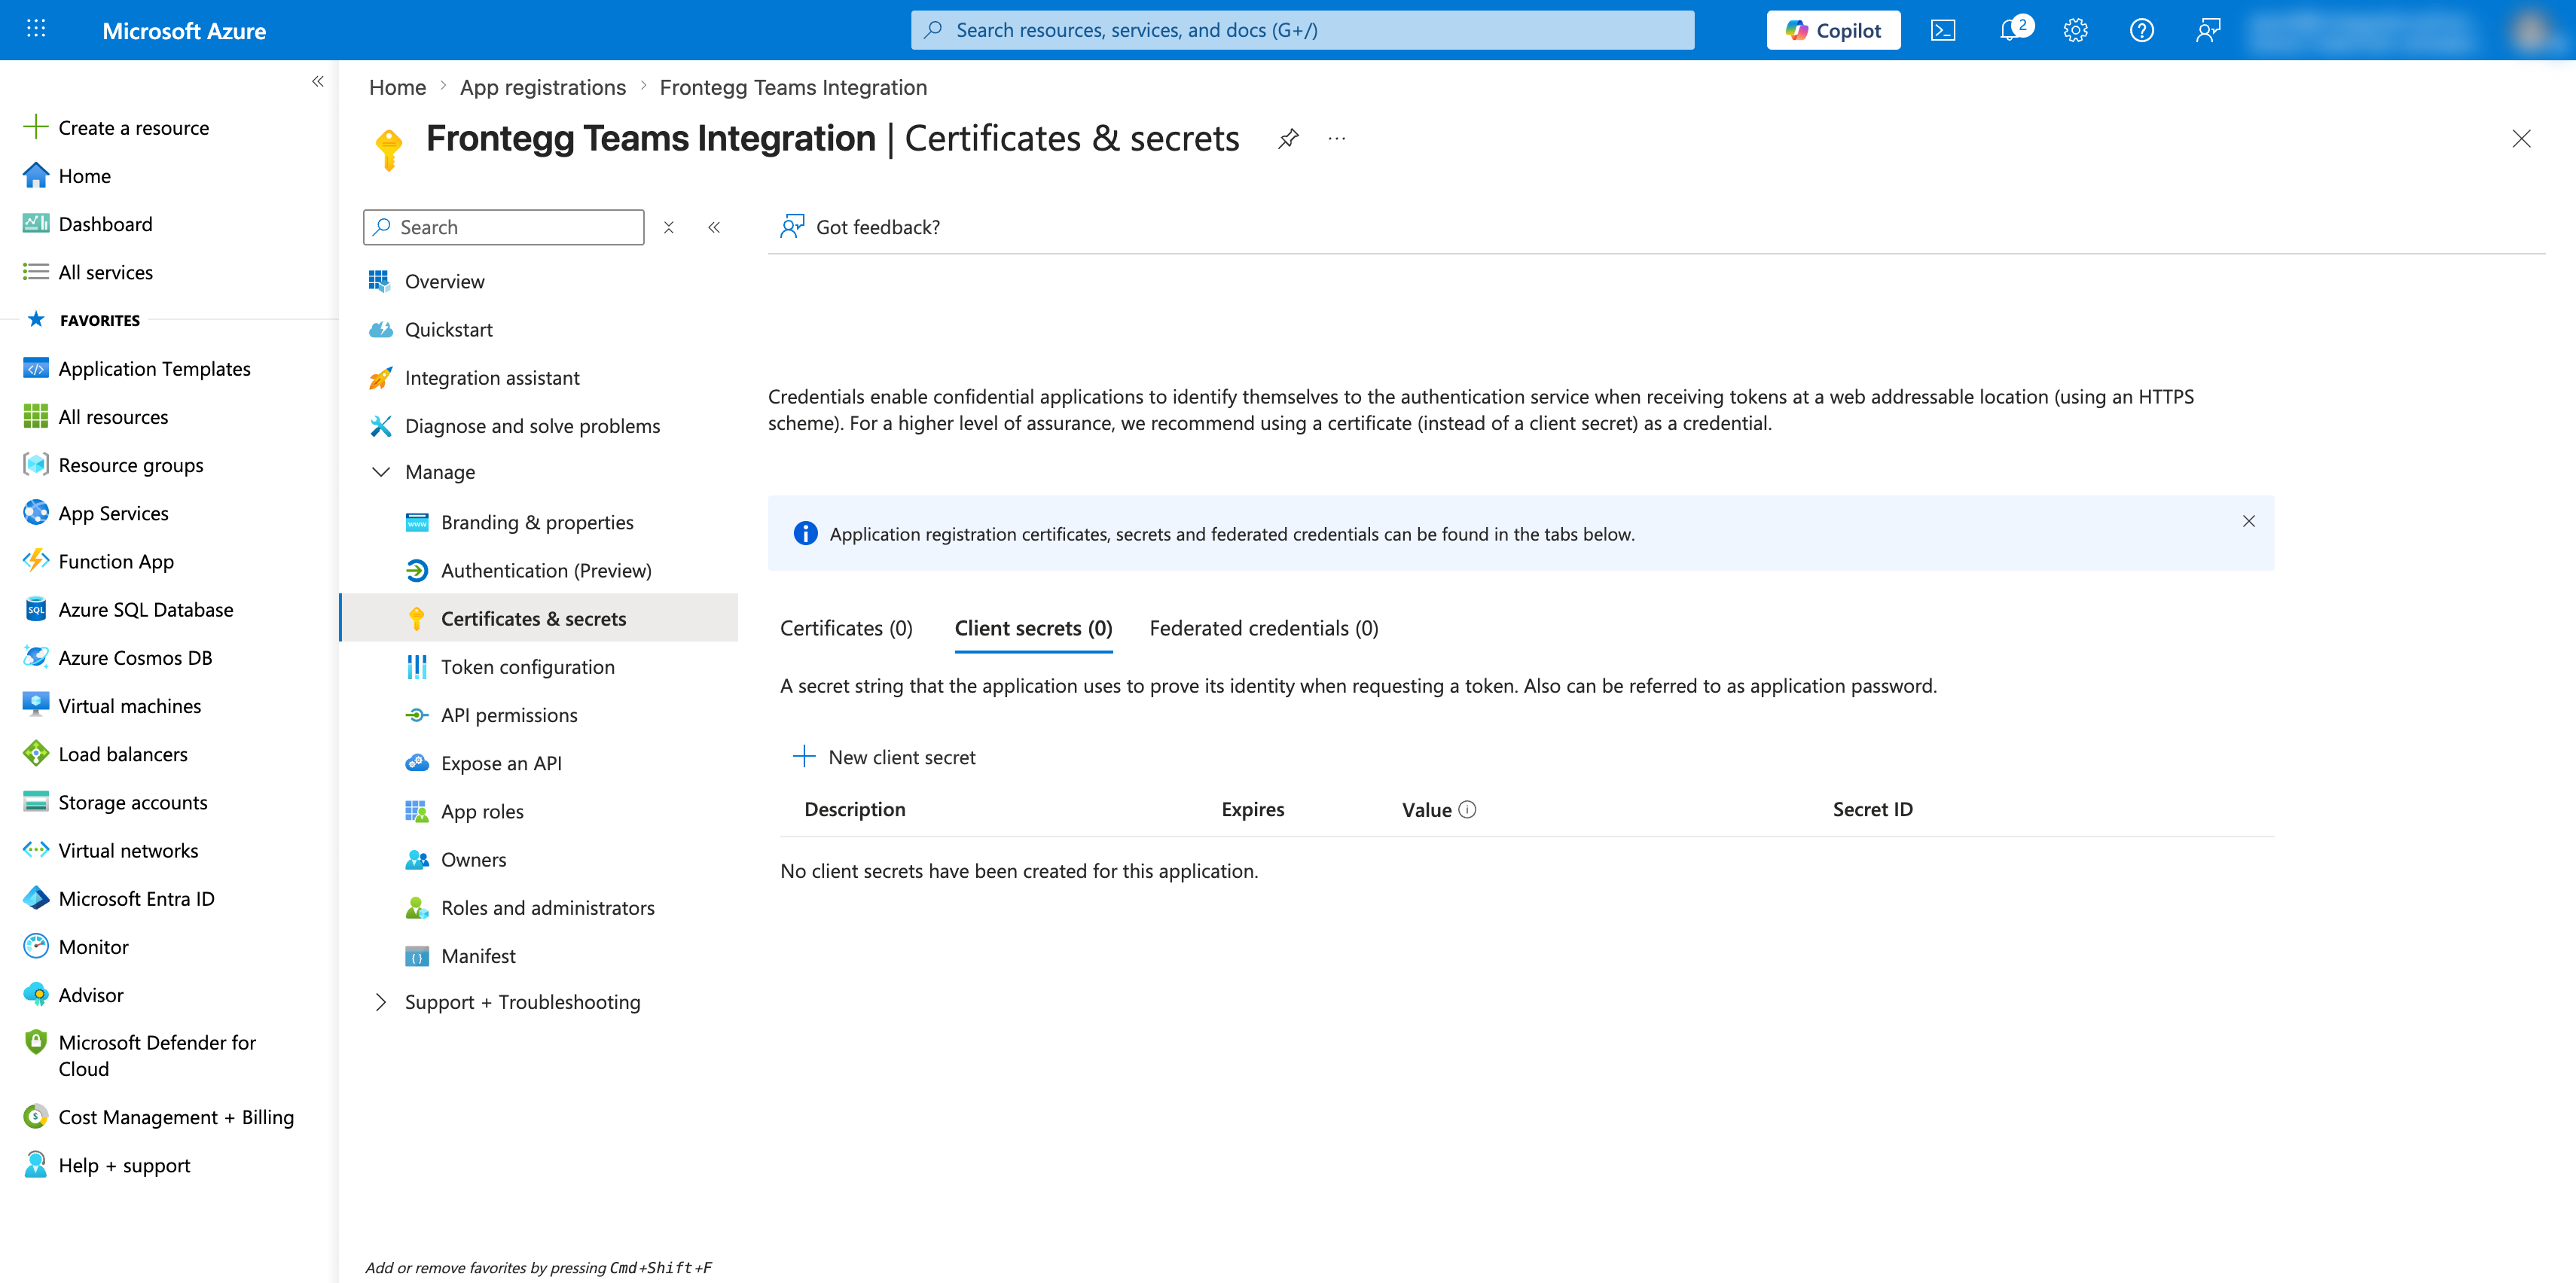
In the Add a client secret panel, enter a description (for example, Frontegg Integration) and choose an expiry period. Click Add.
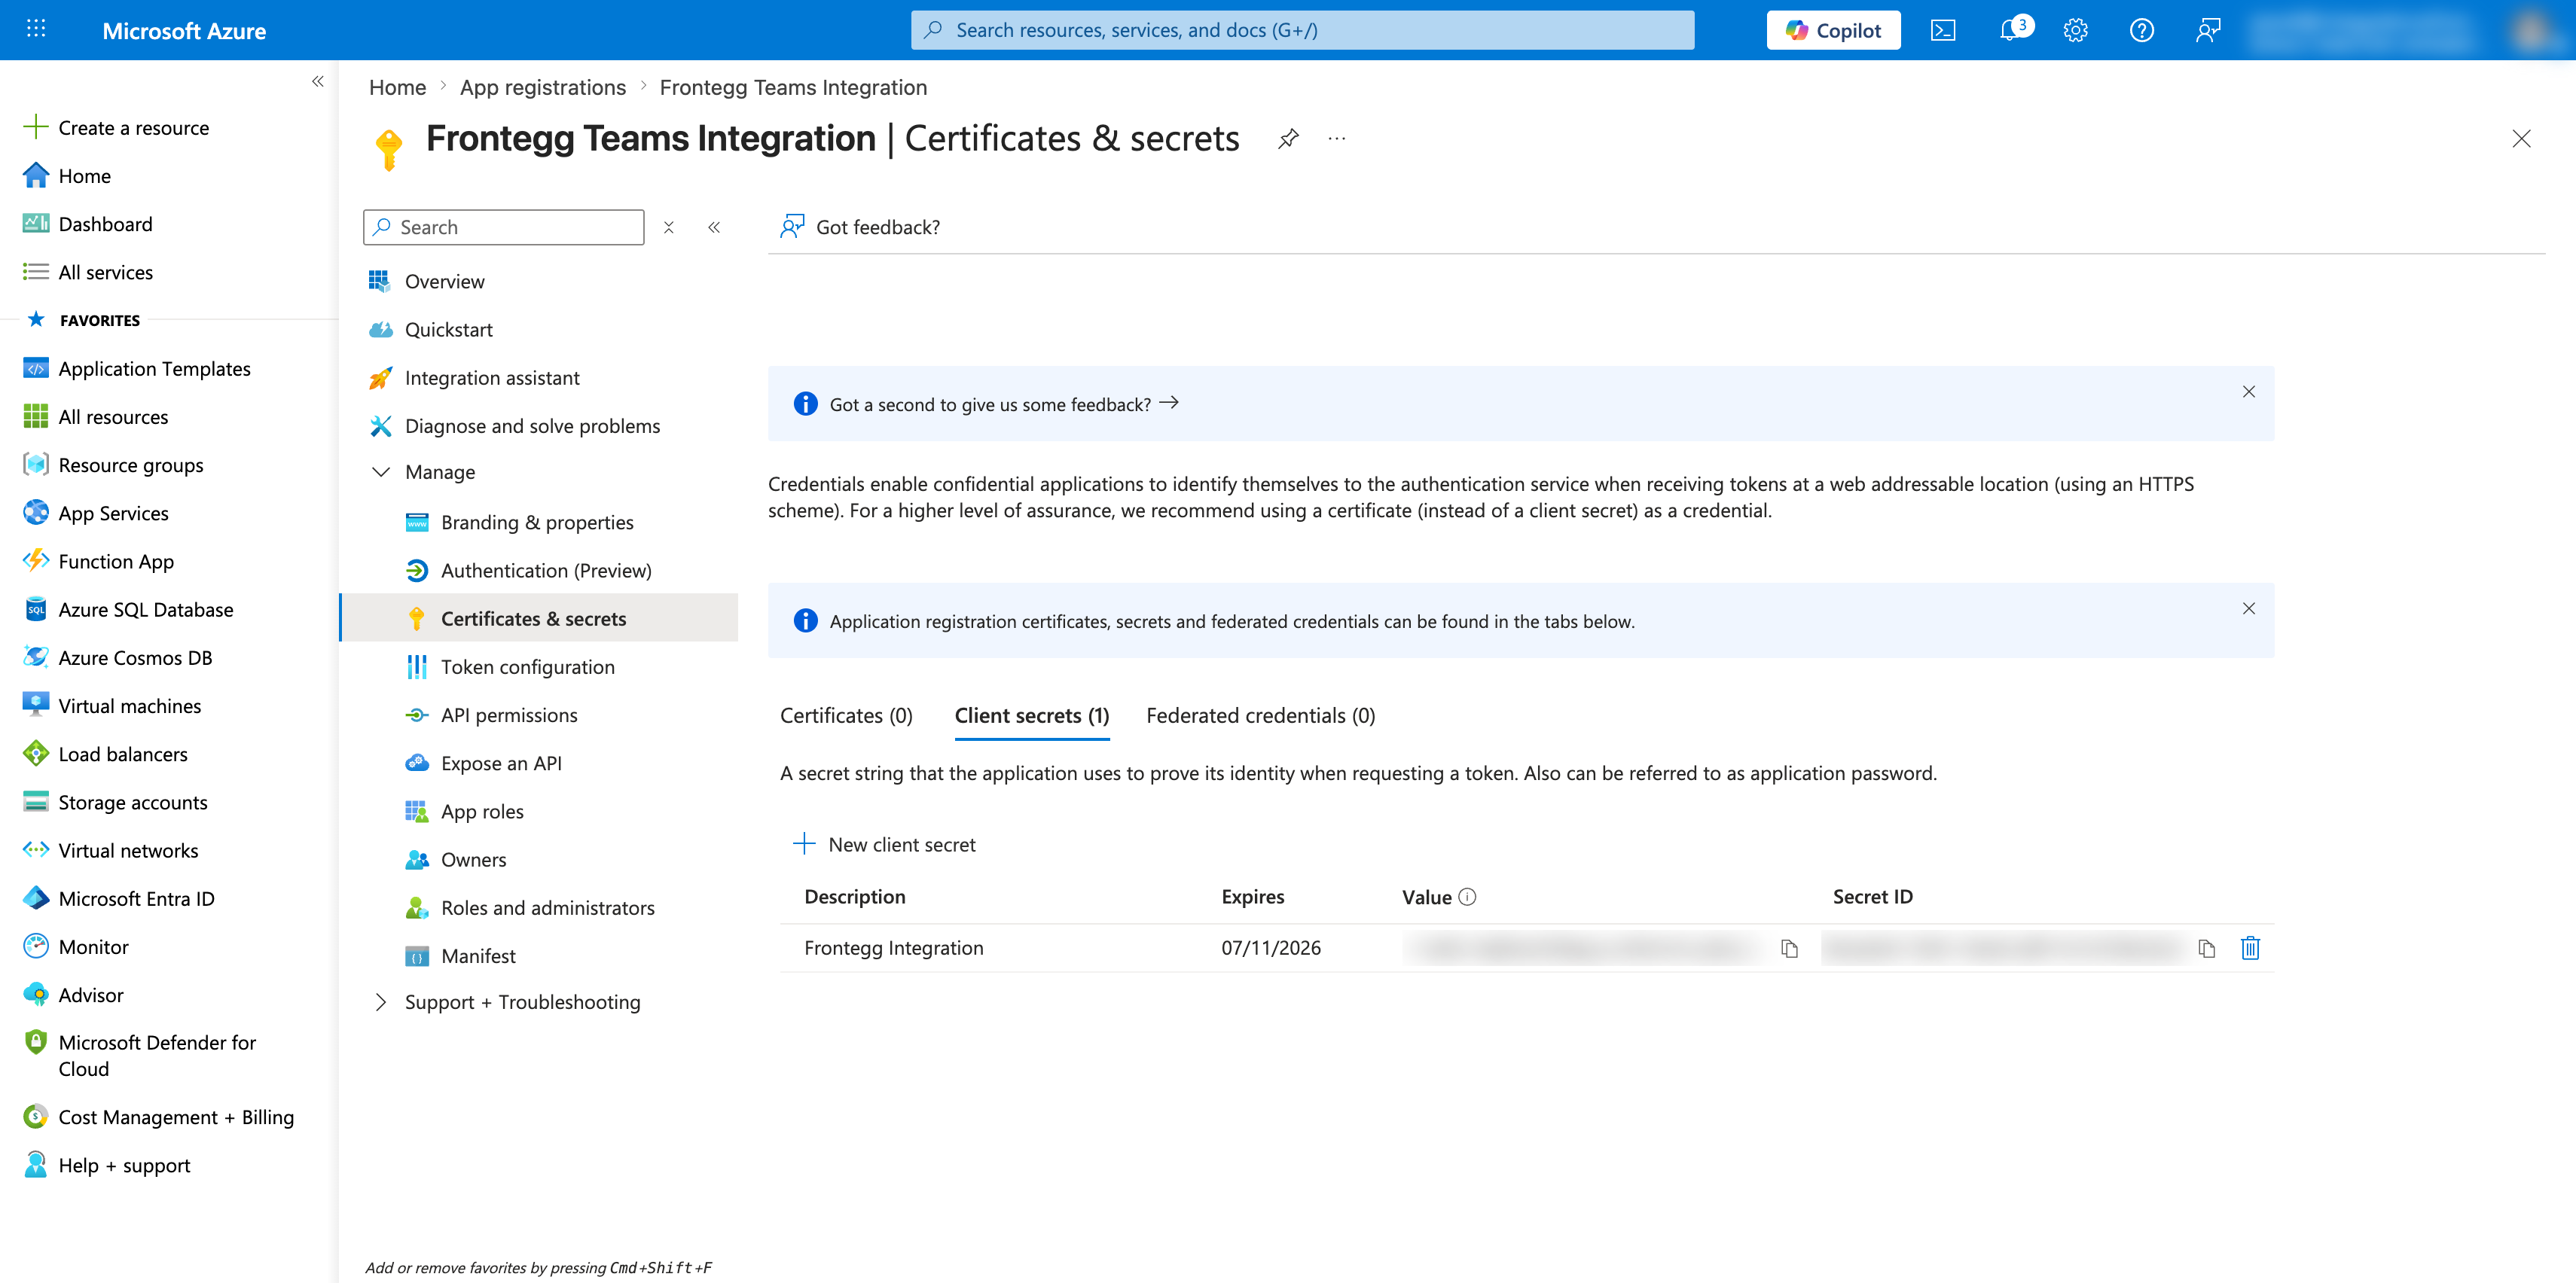
The new secret appears in the list. Copy the Value immediately — it is only shown once. After you navigate away, you cannot retrieve it again.
Save your Client Secret now
Save your Client Secret now
The Client Secret value is only displayed once. After you leave this page, you can only see the secret ID — not the value. Store the value securely before continuing.
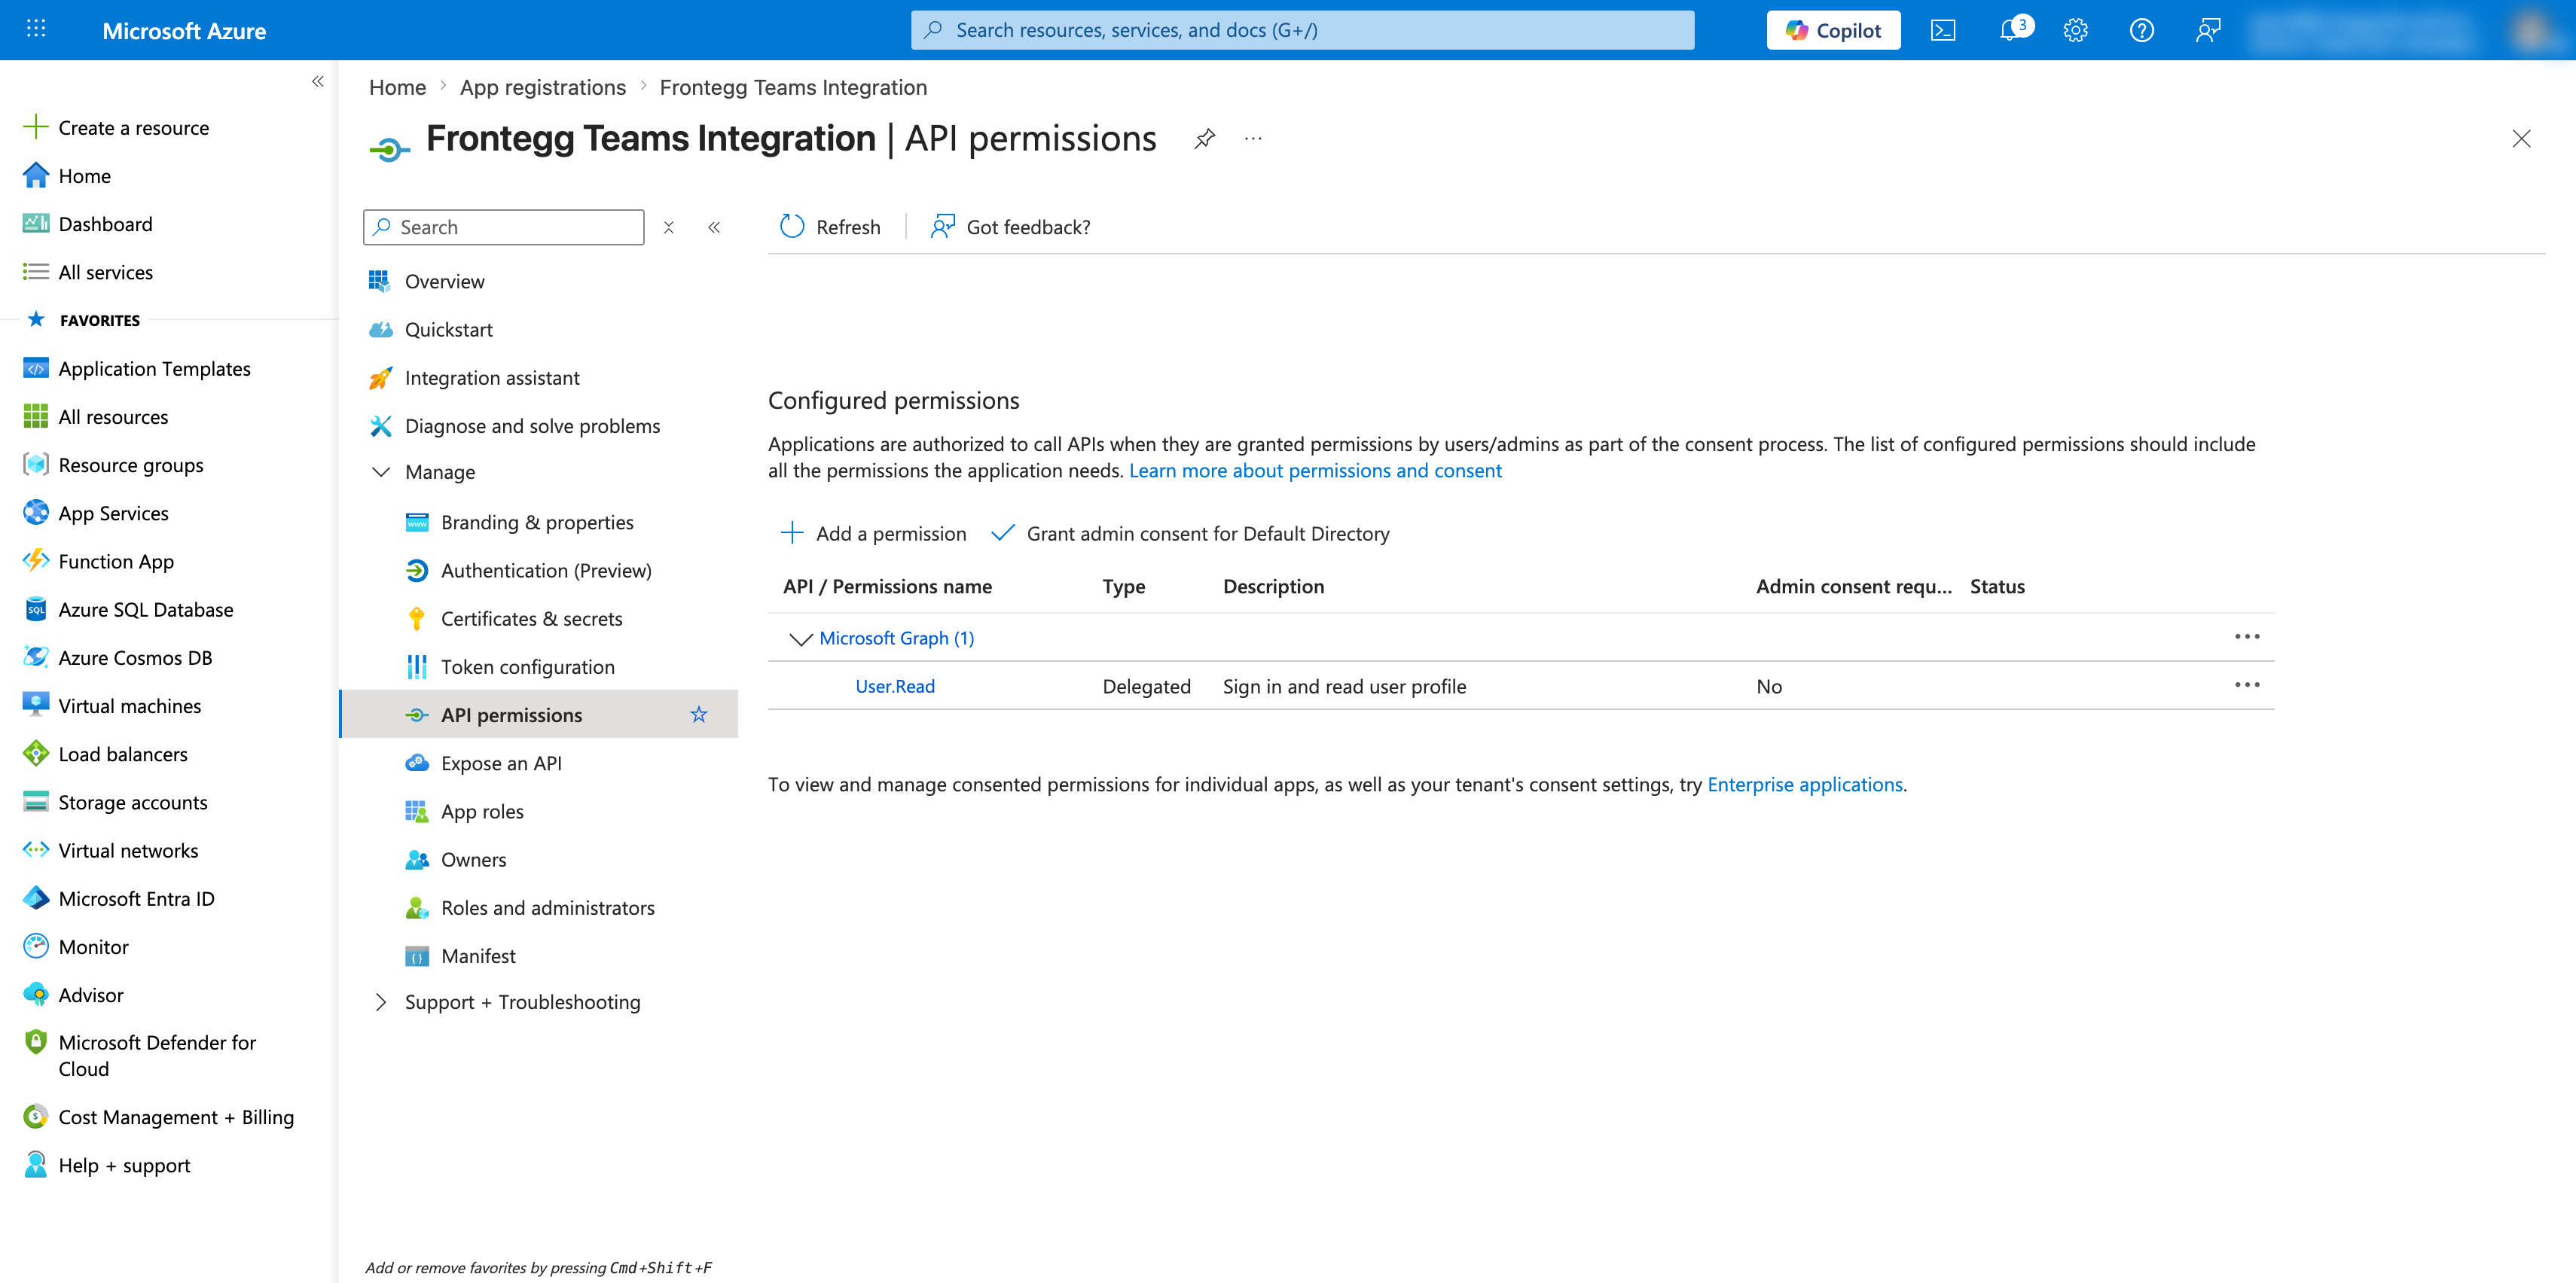
In the left sidebar, click API permissions, then click Add a permission.
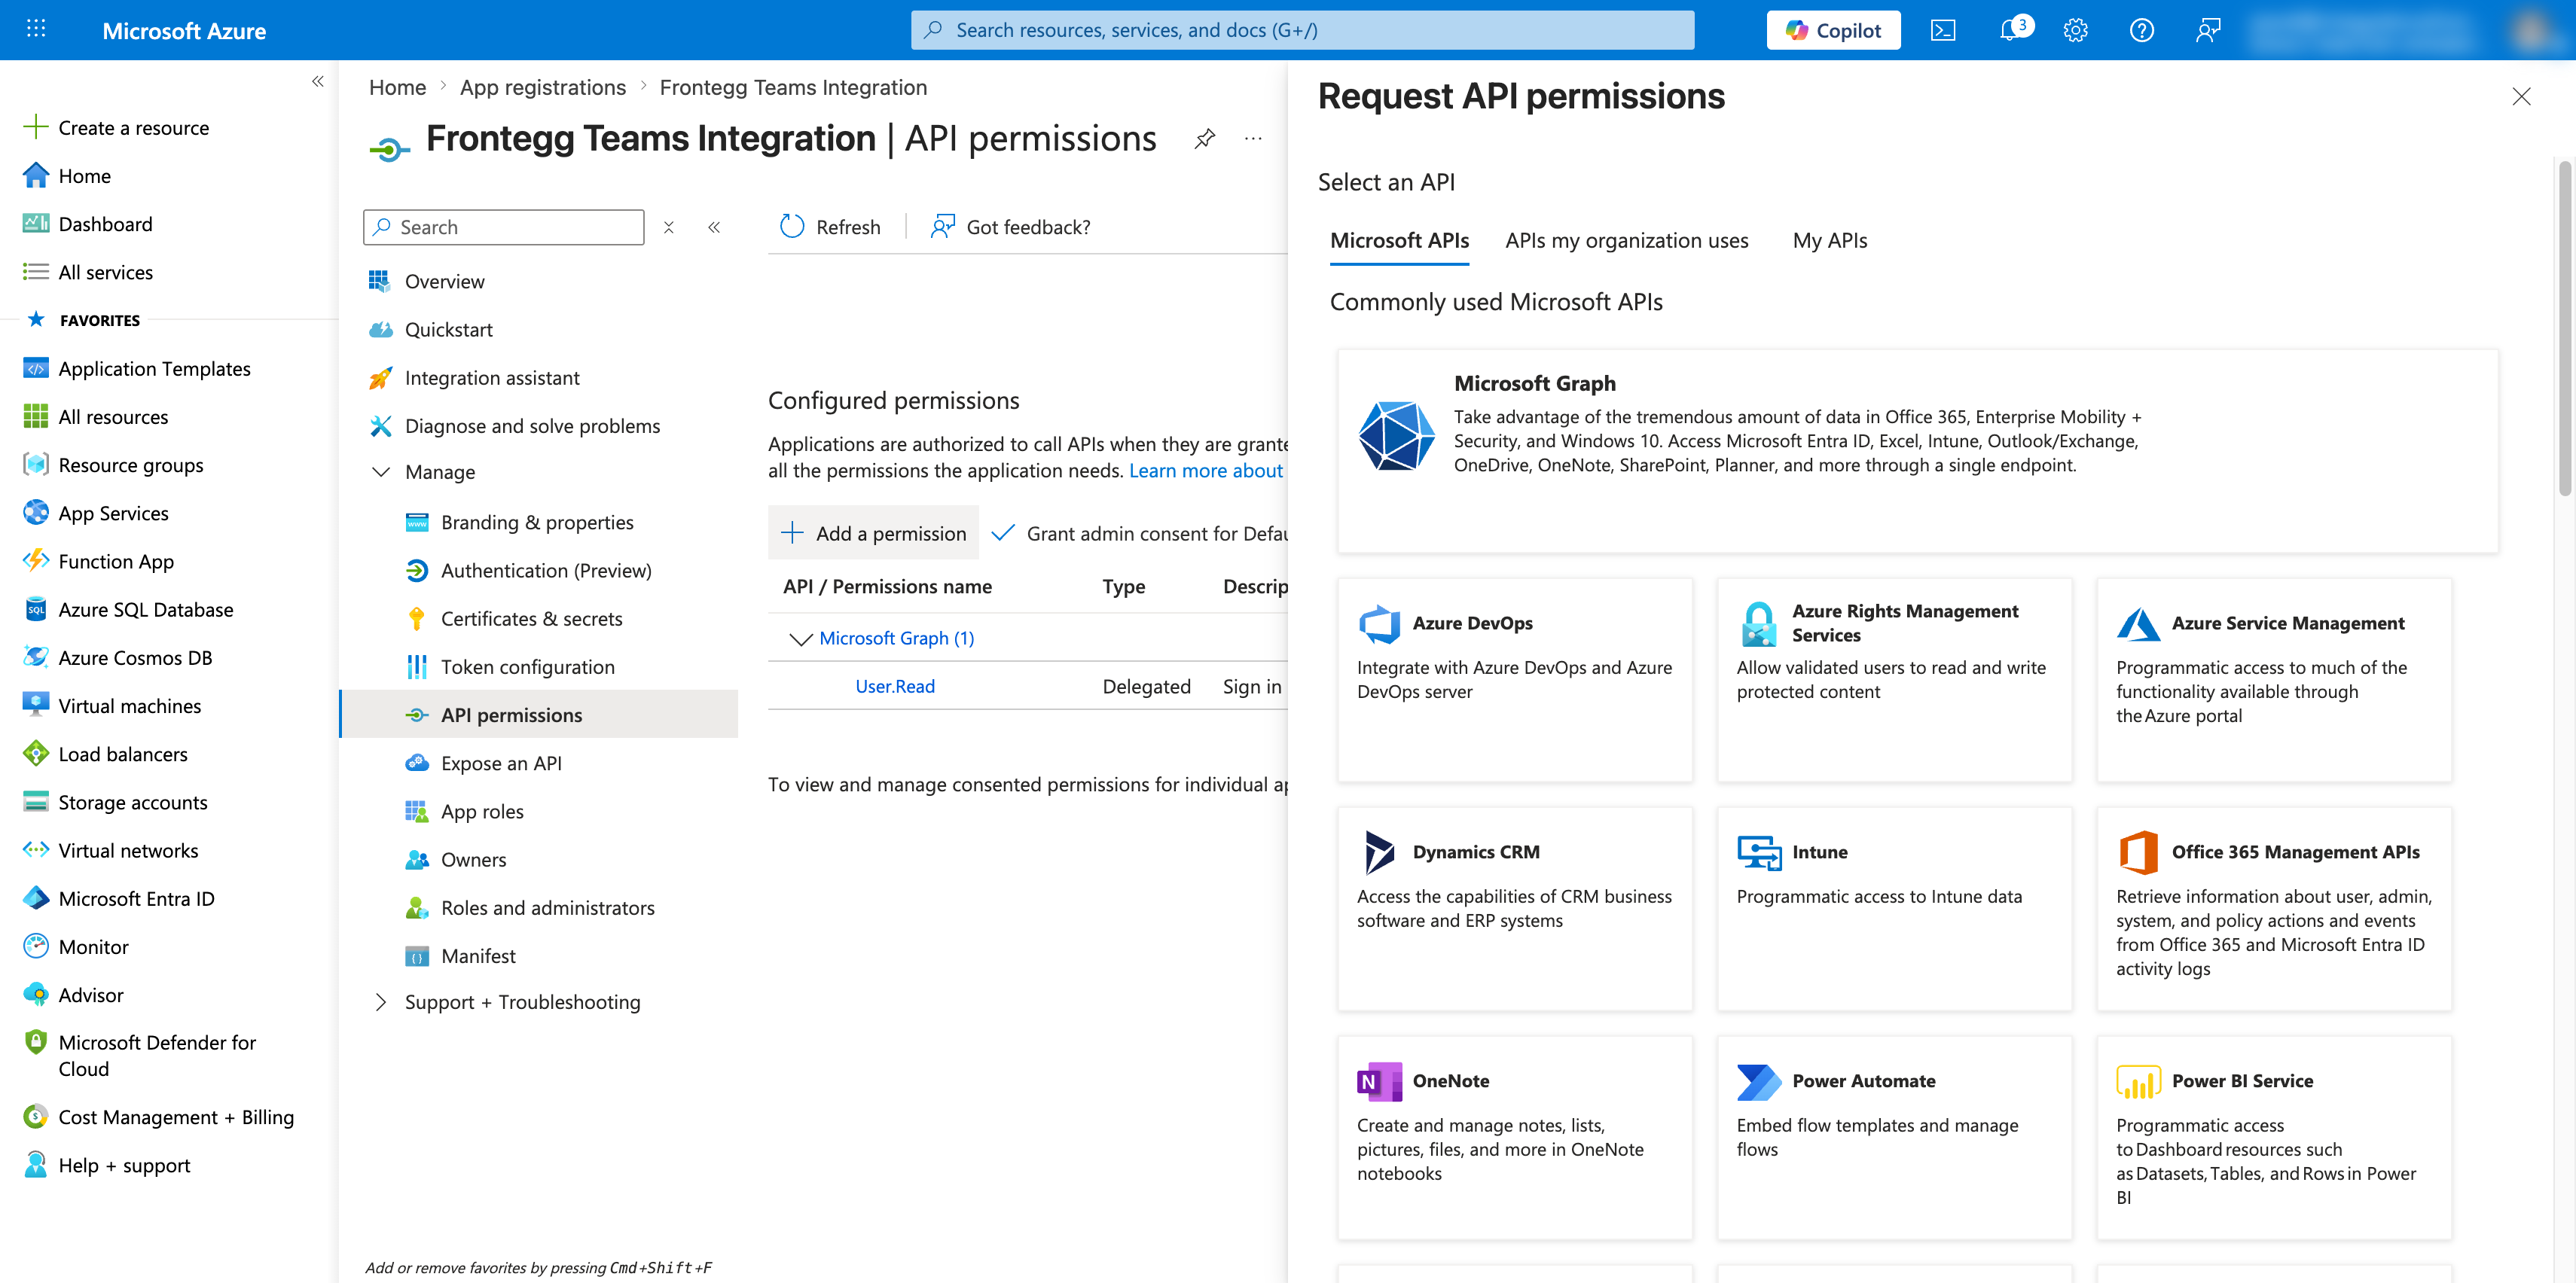
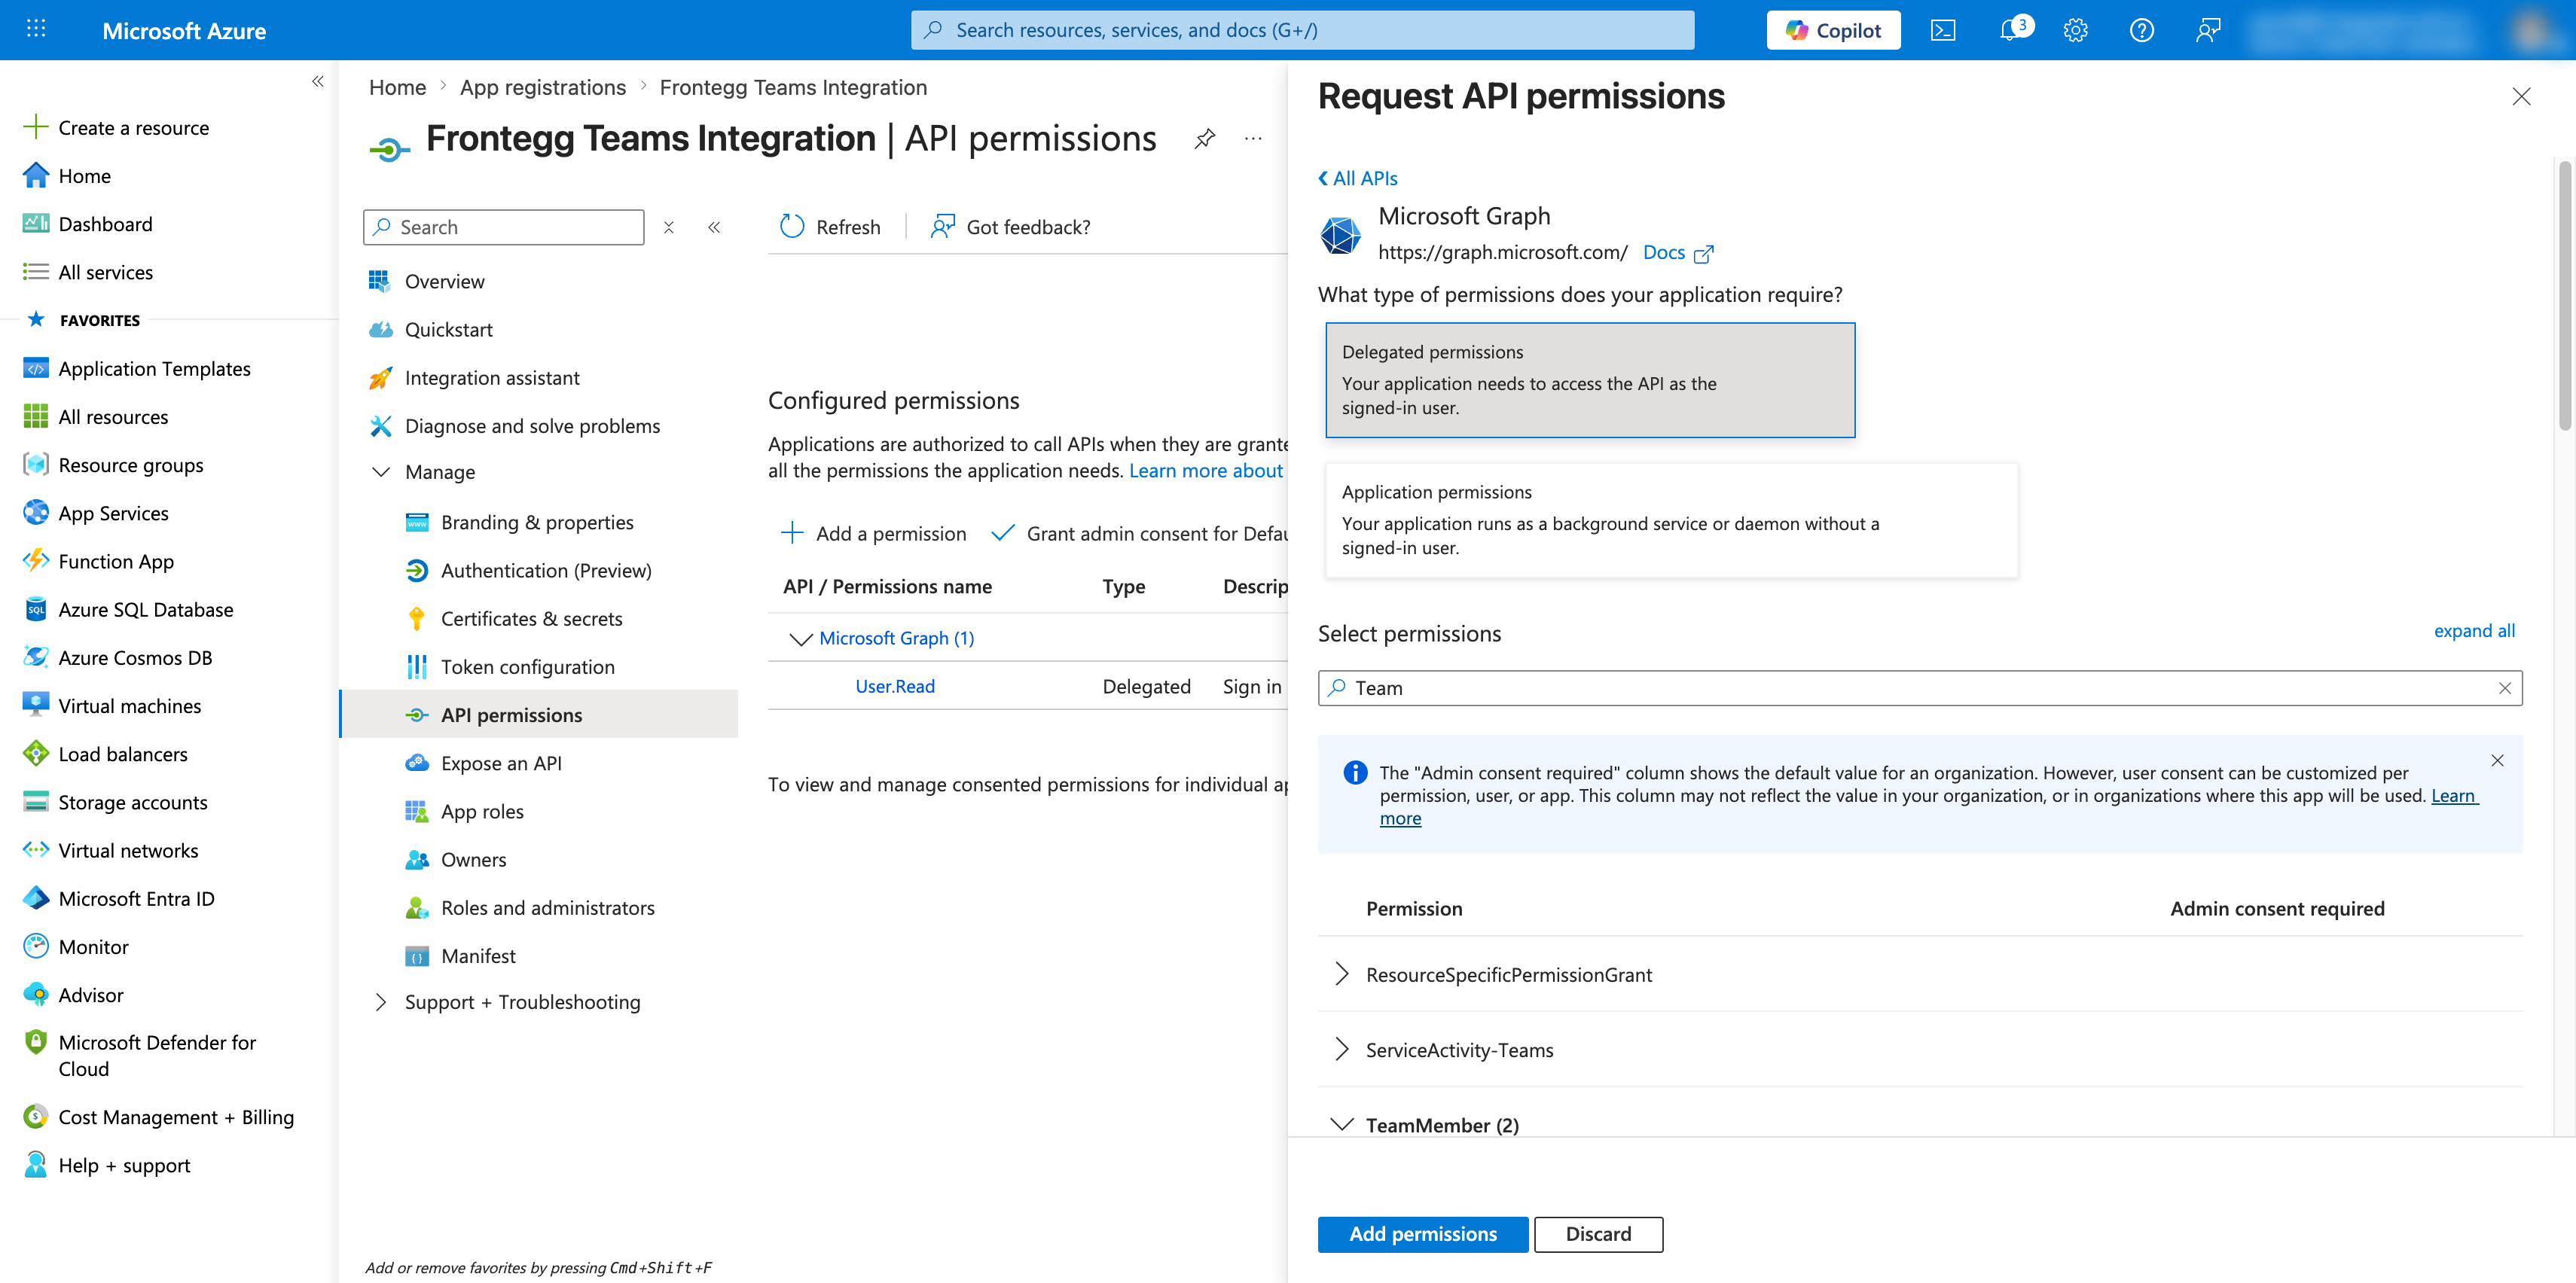
In the Request API permissions panel, click Microsoft Graph.
Click Delegated permissions. Use the search box to find each Teams-related group (for example, Team, Channel, Chat, OnlineMeetings), expand the group, select the required permissions, then click Add permissions.
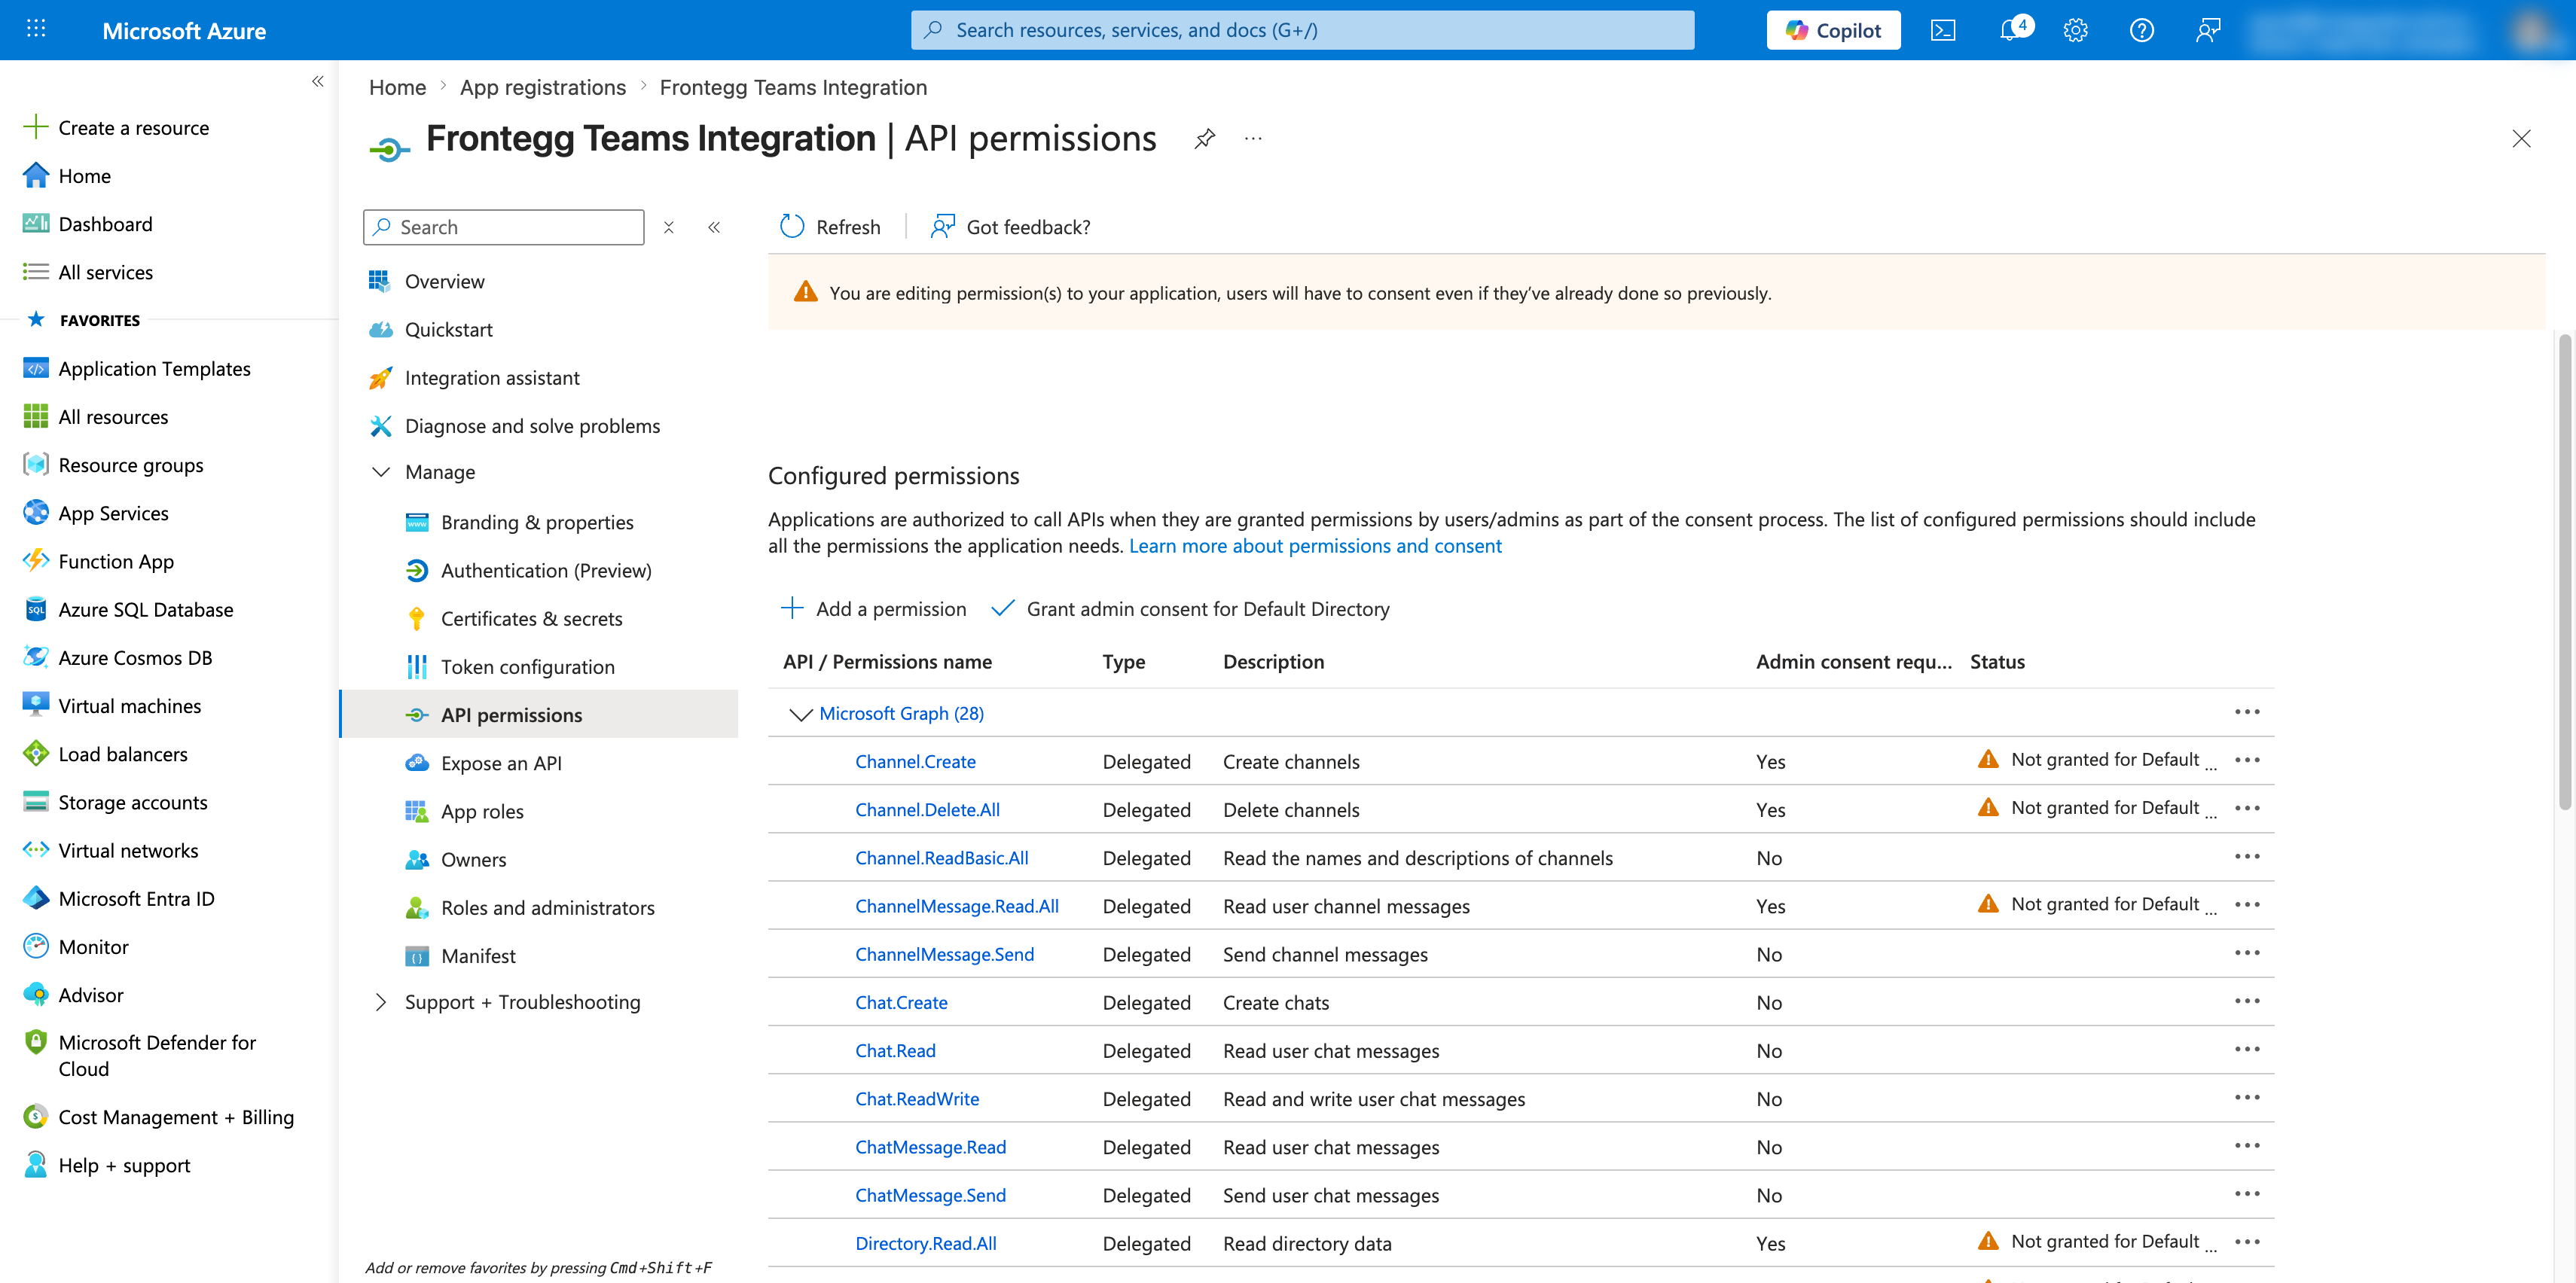
After adding permissions, the API permissions page shows all configured permissions under Microsoft Graph.
Once you have your Client ID, Client Secret, and optionally the Tenant ID, enter them in the Frontegg portal:
- Open the Frontegg portal and navigate to [ENVIRONMENT] → Integrations → Microsoft Teams.
- Enter the Client ID and Client Secret in the corresponding fields.
- Optionally, enter the Directory (tenant) ID. Leave blank or use
commonfor multi-tenant applications. - Select the required scopes:
| Scope | Description |
|---|---|
User.Read | Sign in and read the signed-in user's profile |
User.Read.All | Read all users' full profiles |
Team.ReadBasic.All | Read the names and descriptions of teams the user belongs to |
Team.Create | Create new teams on behalf of the signed-in user |
Channel.ReadBasic.All | Read the names and descriptions of channels |
Channel.Create | Create new channels in teams |
Channel.Delete.All | Delete channels in teams |
ChannelMessage.Read.All | Read messages in channels the user can access |
ChannelMessage.Send | Send messages to channels |
Chat.Read | Read the user's one-on-one and group chat messages |
Chat.ReadWrite | Read and write the user's chat messages |
Chat.Create | Create new chats on behalf of the signed-in user |
ChatMessage.Read | Read the user's chat messages |
ChatMessage.Send | Send chat messages as the signed-in user |
TeamMember.Read.All | Read the members of teams |
TeamMember.ReadWrite.All | Add and remove members from teams |
OnlineMeetings.Read | Read the user's online meetings |
OnlineMeetings.ReadWrite | Create, read, update, and delete the user's online meetings |
TeamsTab.Read.All | Read tabs in Microsoft Teams |
Group.Read.All | Read all groups the user can access |
Directory.Read.All | Read directory data |
Directory.ReadWrite.All | Read and write directory data |
Presence.Read | Read the signed-in user's presence information |
Presence.Read.All | Read presence information of all users in the organization |
openid | Sign the user in |
profile | View the user's basic profile |
email | View the user's email address |
offline_access | Maintain access to data the user has granted |
- Click Save.
Keep your credentials secure
Keep your credentials secure
Never share or commit your Client Secret to version control.