Accounts management
When managing multiple applications, you can assign specific applications to your accounts and control which users within those accounts can access each application. Let's explore how to make the most of this feature.
Creating new accounts and dashboard
Account management is performed via your Accounts tab in every environment. Here, you can create an account, edit its settings, manage users, and assign/remove applications. Go to Accounts under [ENVIRONMENT] → Management → Accounts sections to learn more about account management.
Single account management
Each of your accounts will have its own dashboard complete with data, KPIs, and configuration options. Upon creating an account, it will not have applications associated with it other than the default app or an auto-assigned app. You will need to go to the Applications tab and choose which applications will be assigned to that account. Note that you can assign applications even if they haven't been integrated yet (they will be marked as inactive in this case), but should you want your users to access it, you will have to integrate it via the app configuration tab. Go to [Creating Multiple Applications] to learn more.
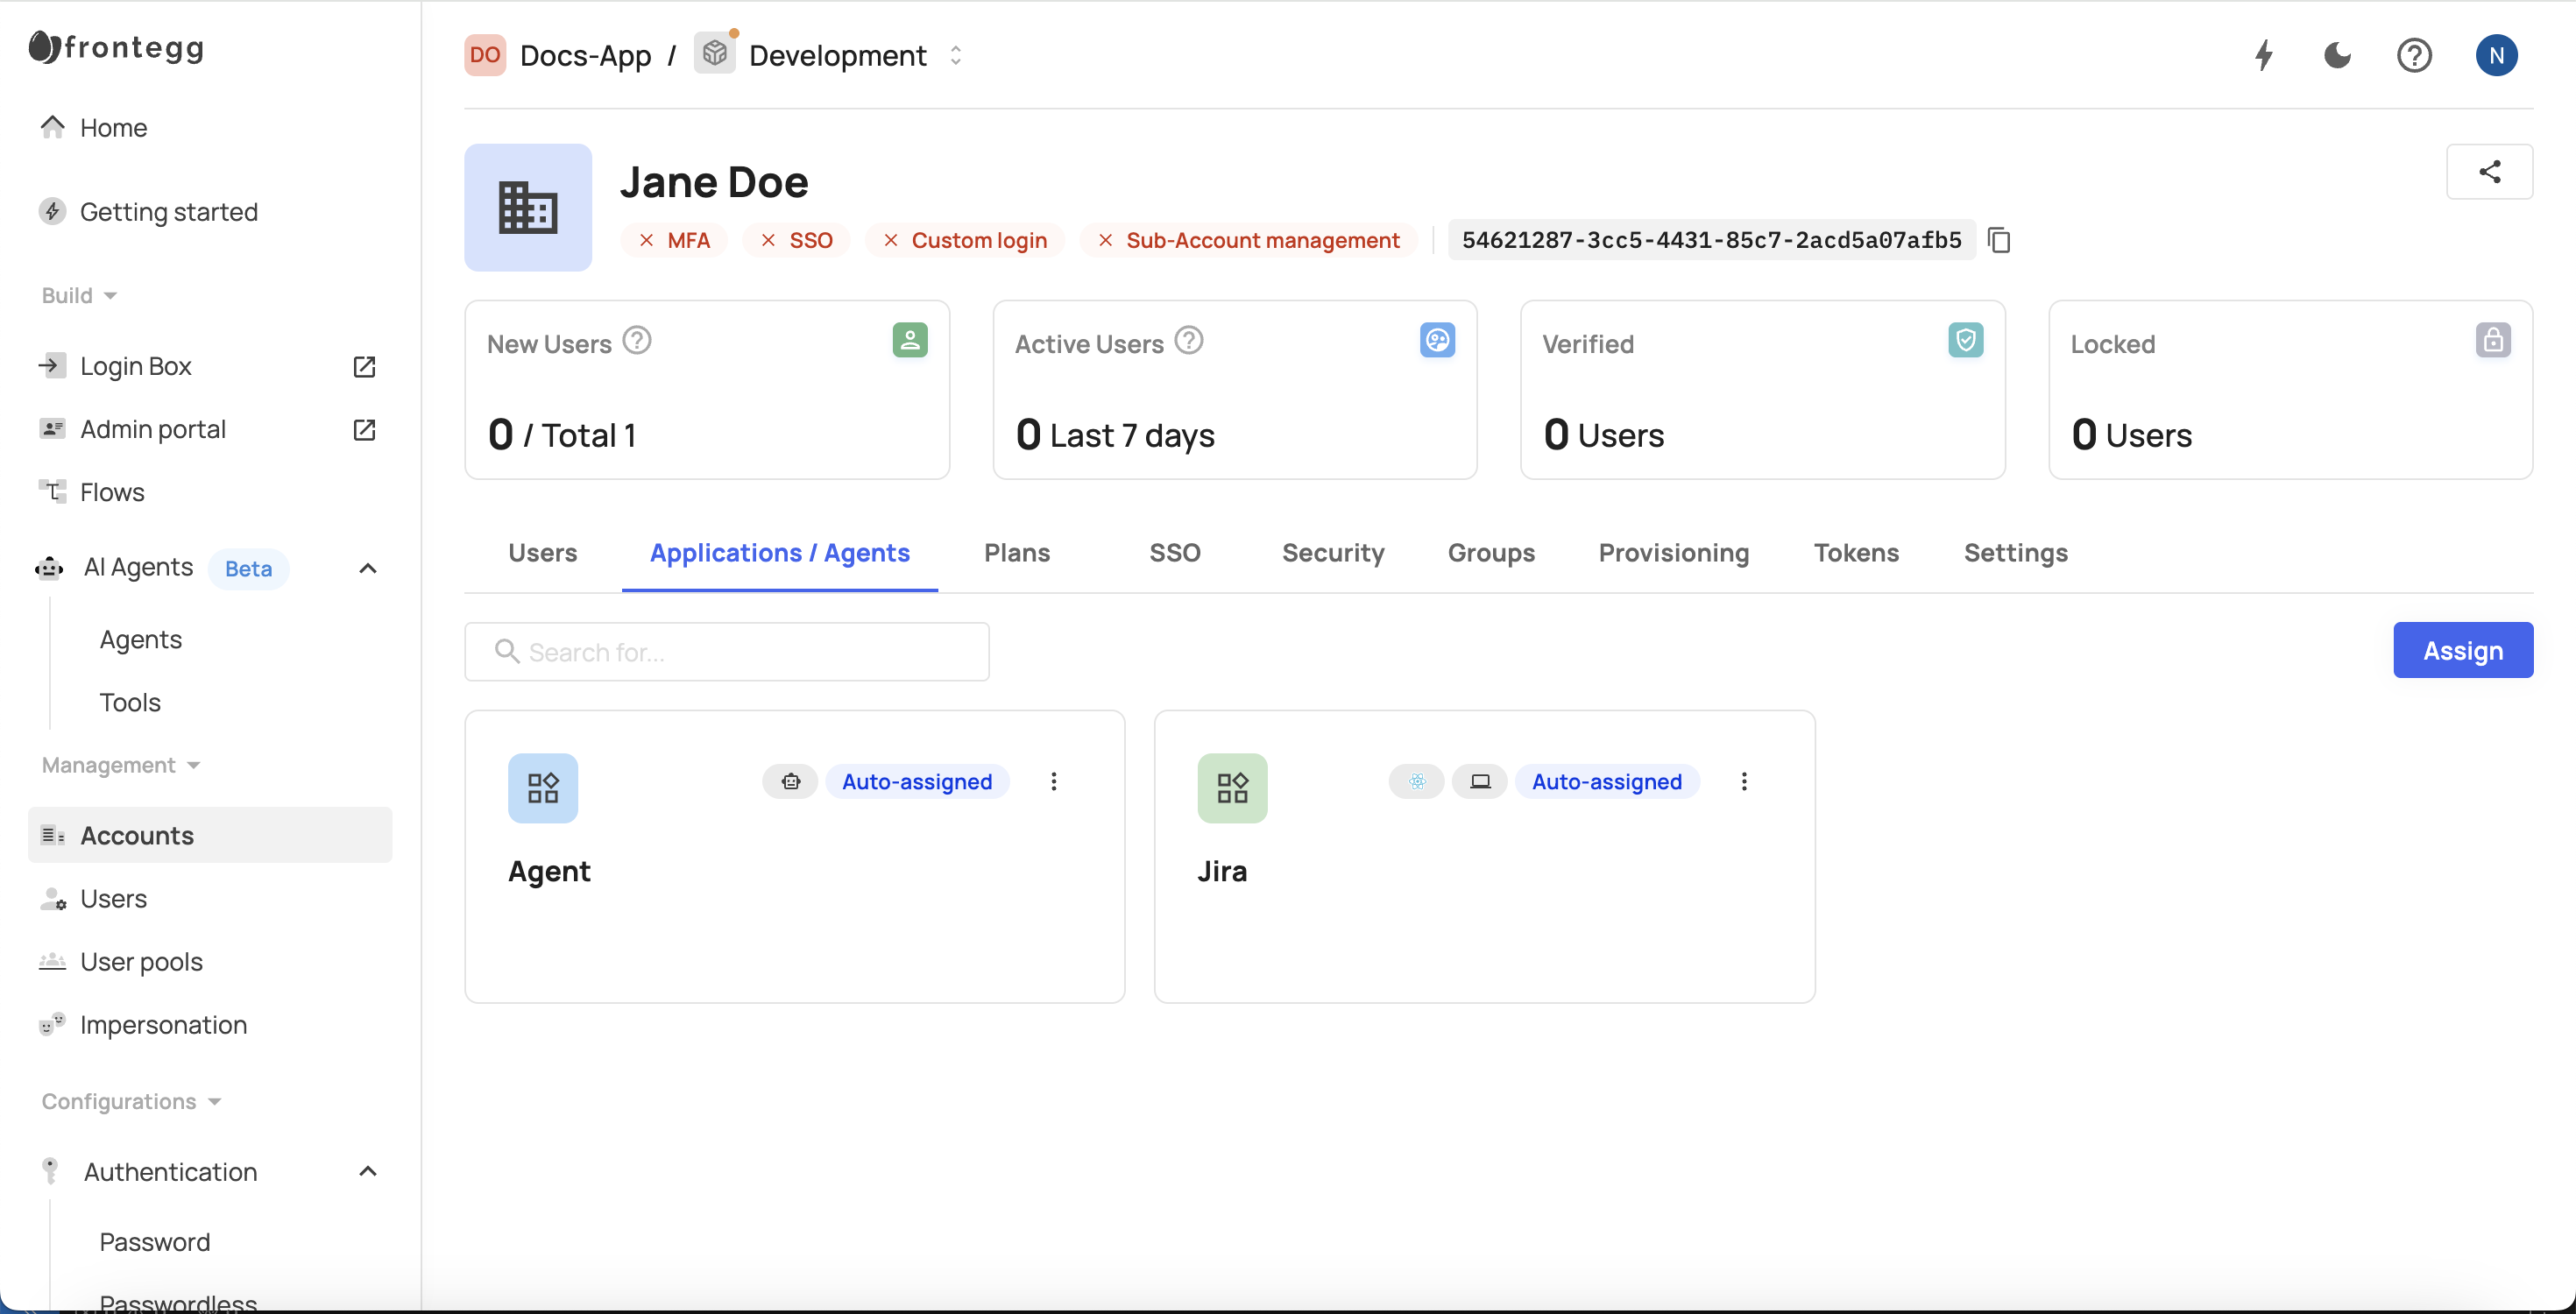
Applications tab
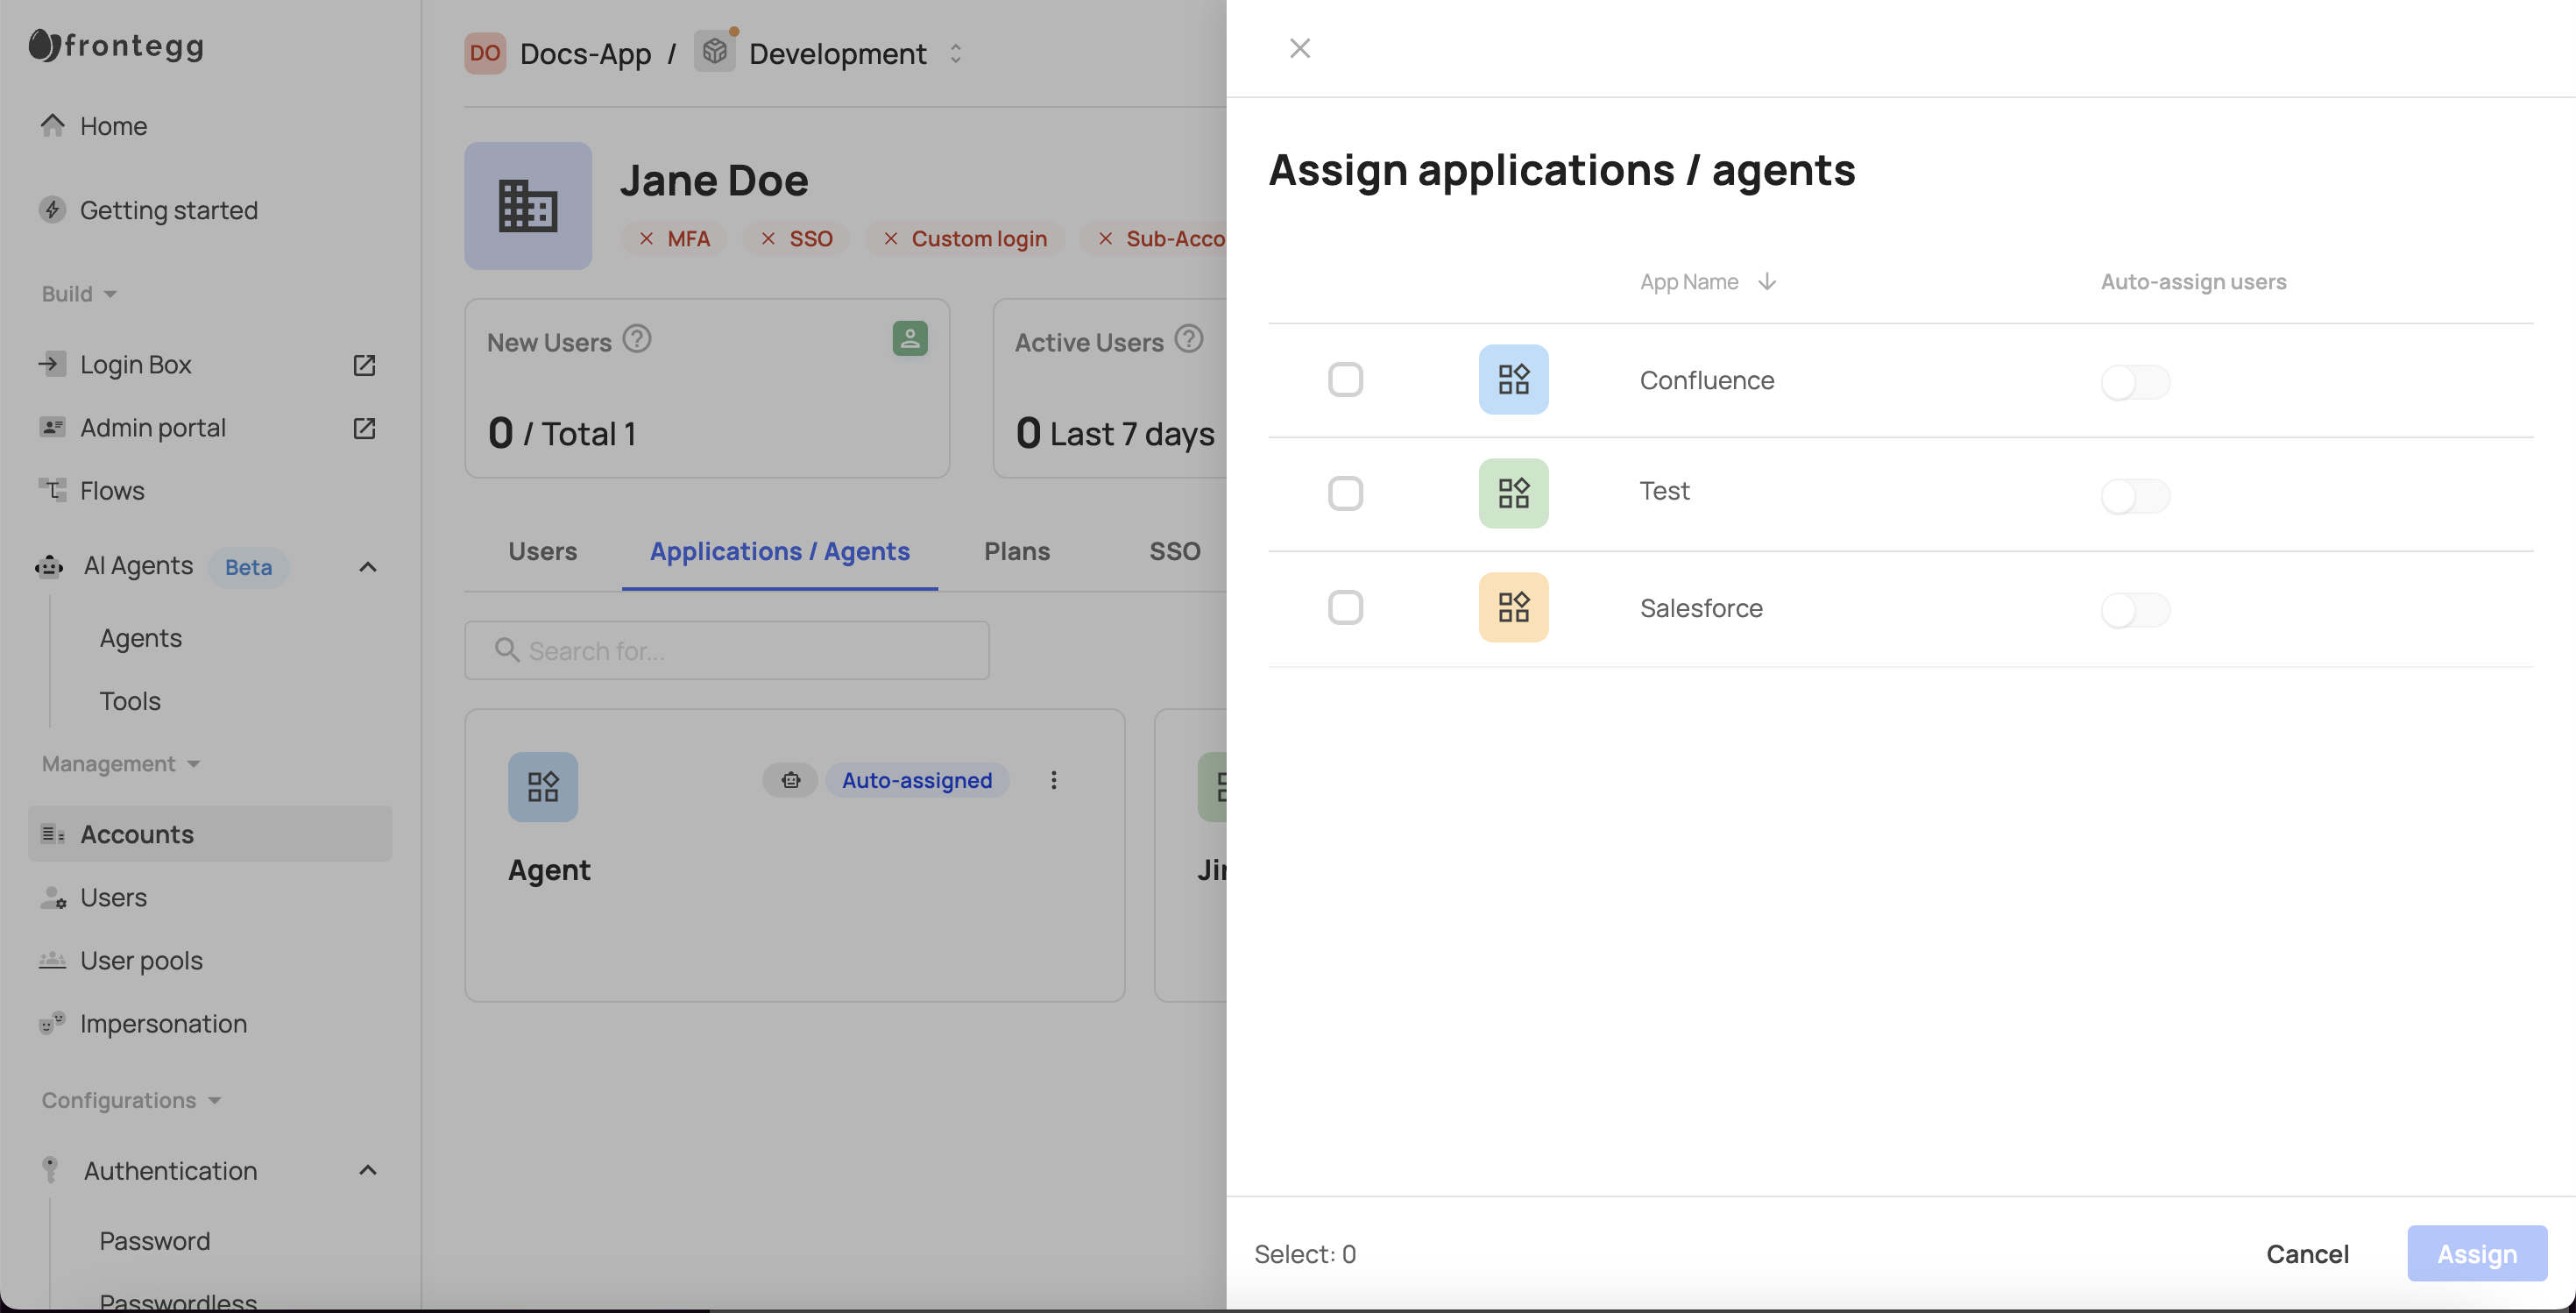
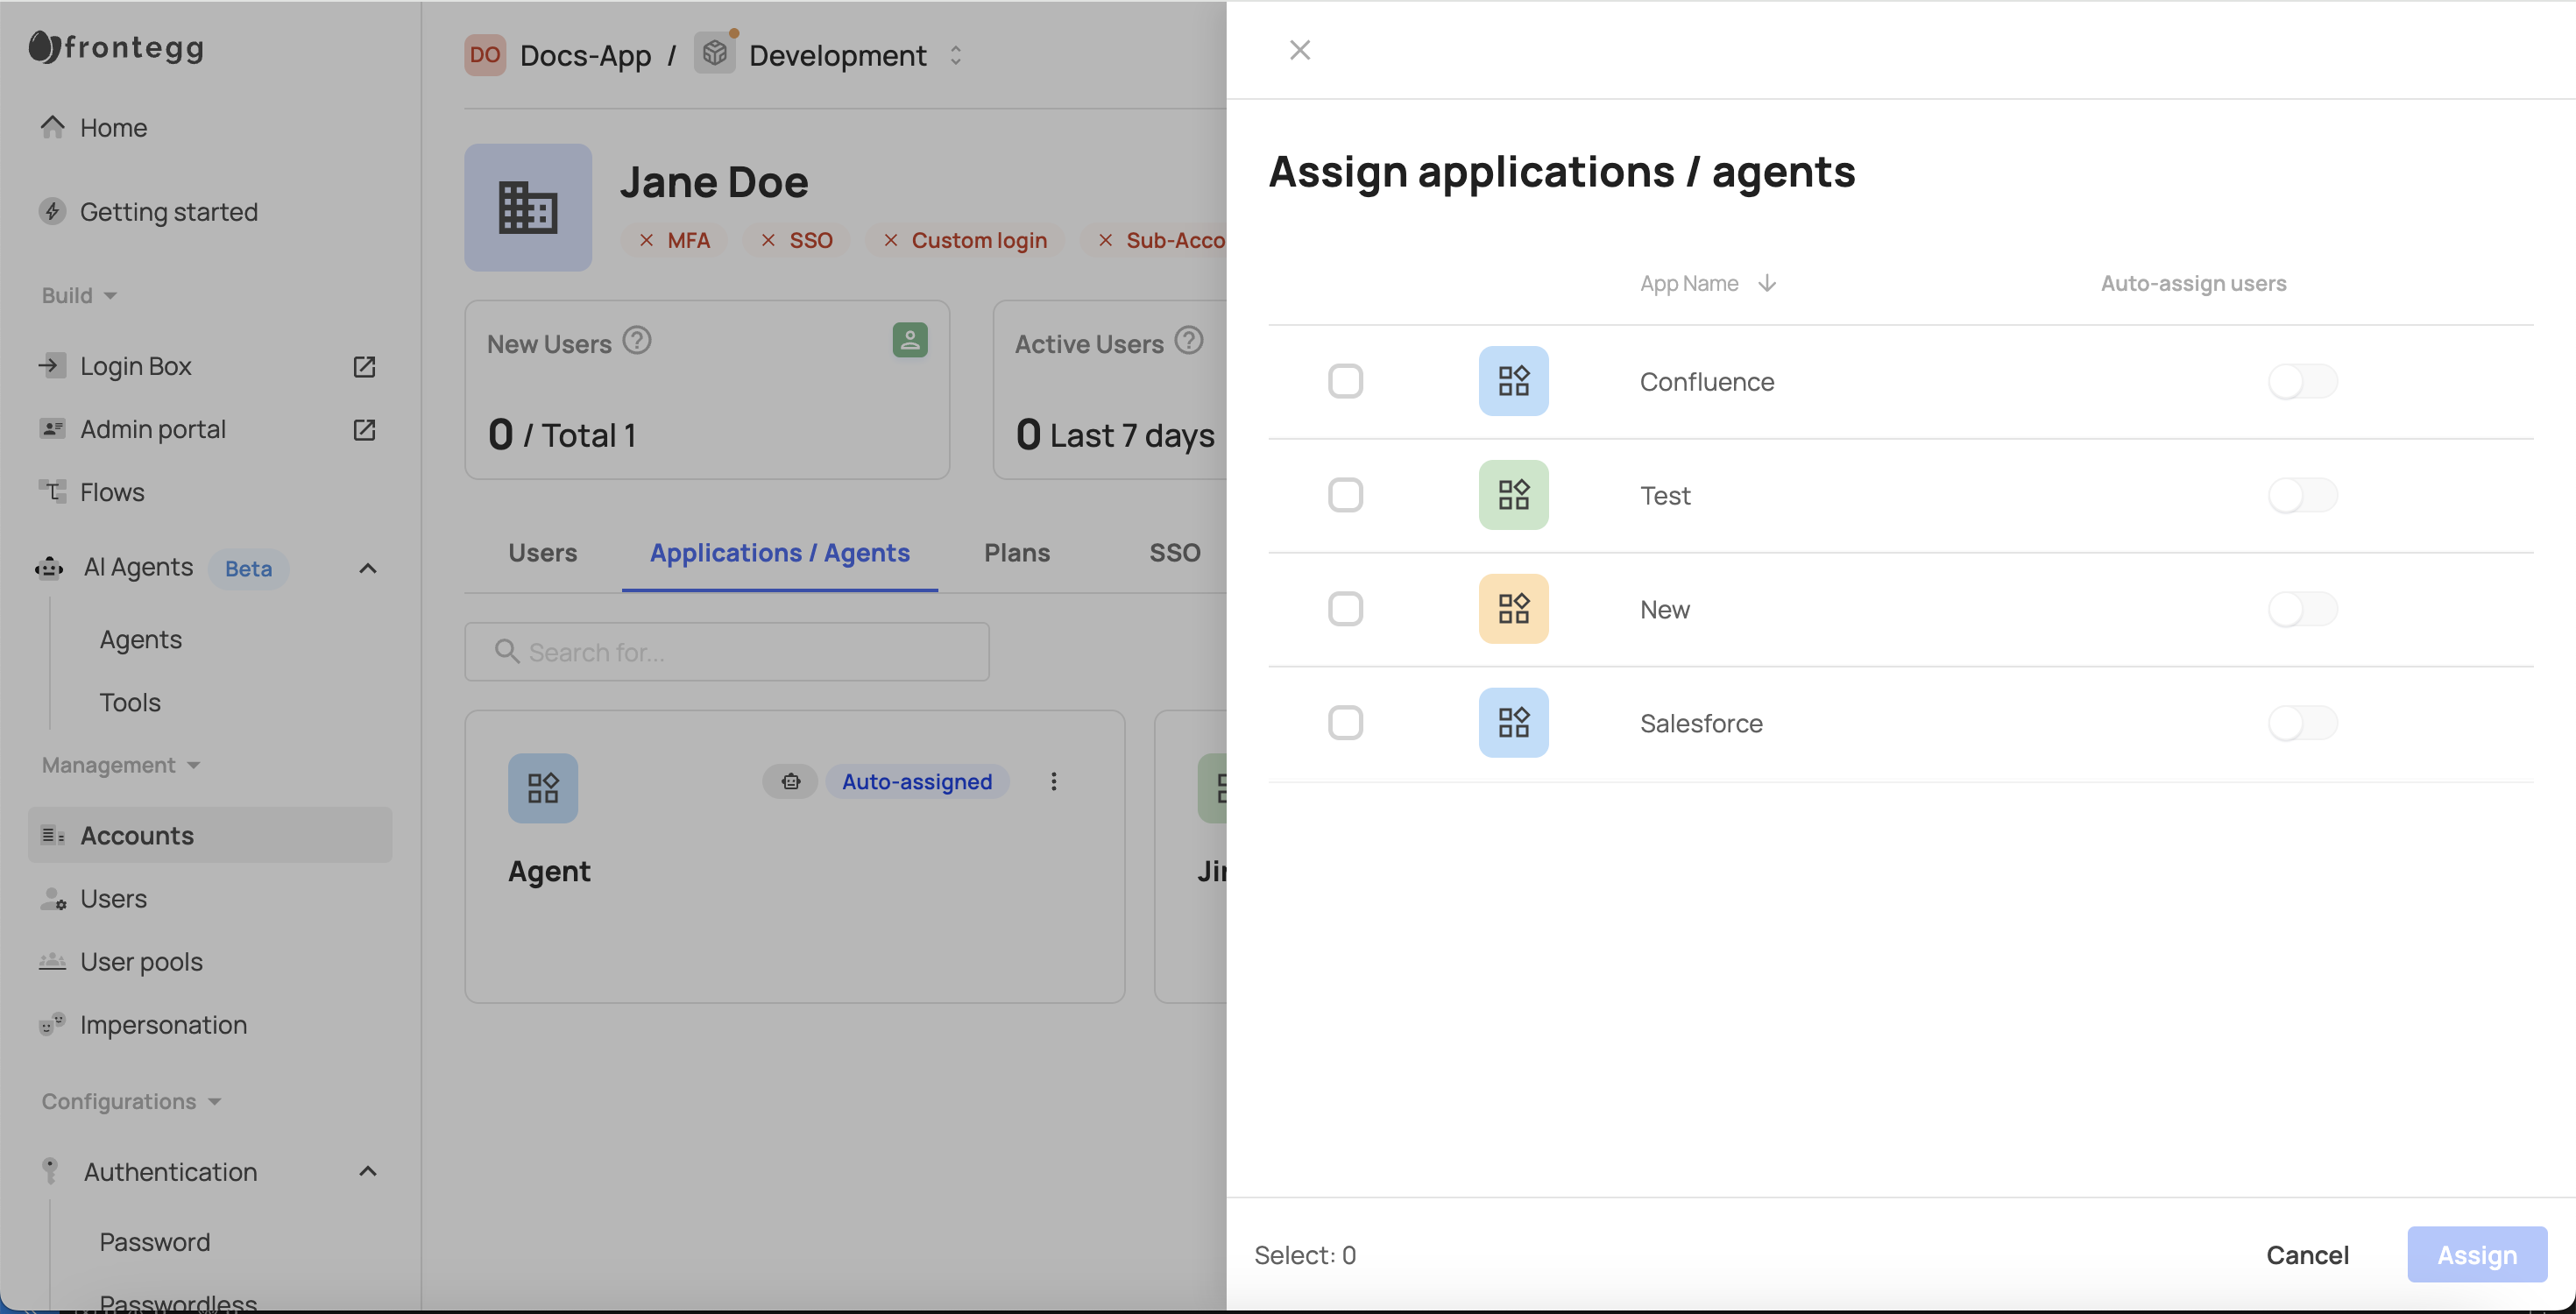
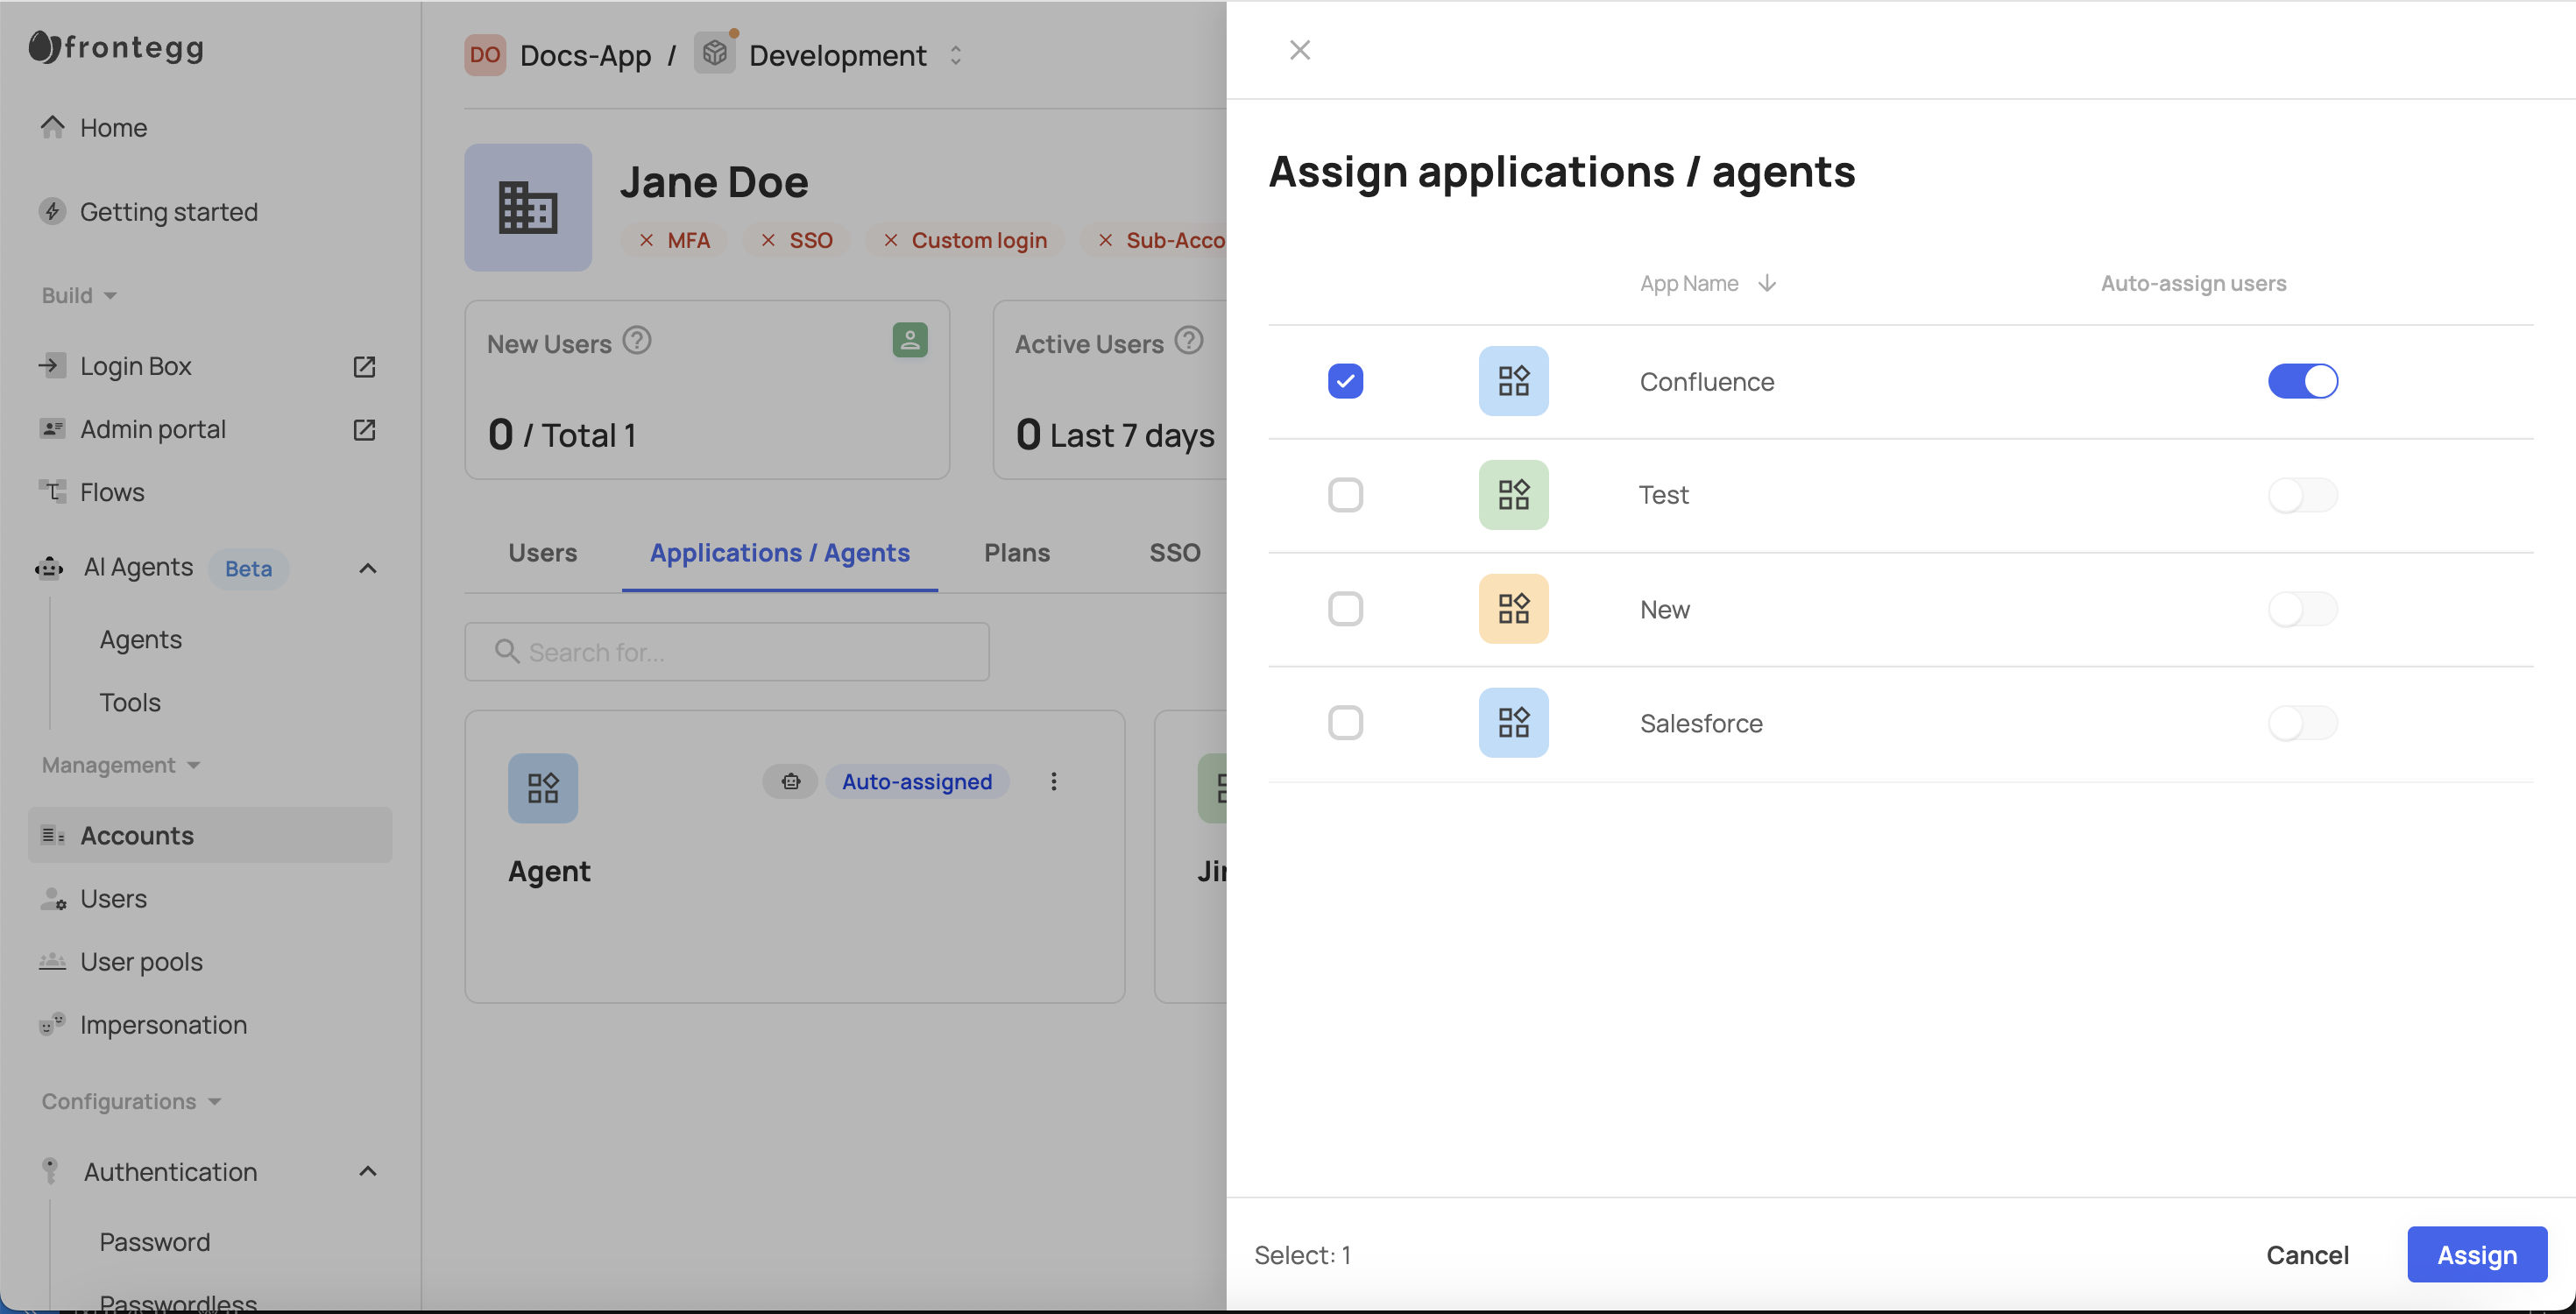
The Applications tab within your backoffice allows you to assign applications to that specific account. To assign new applications, click the Assign application button.
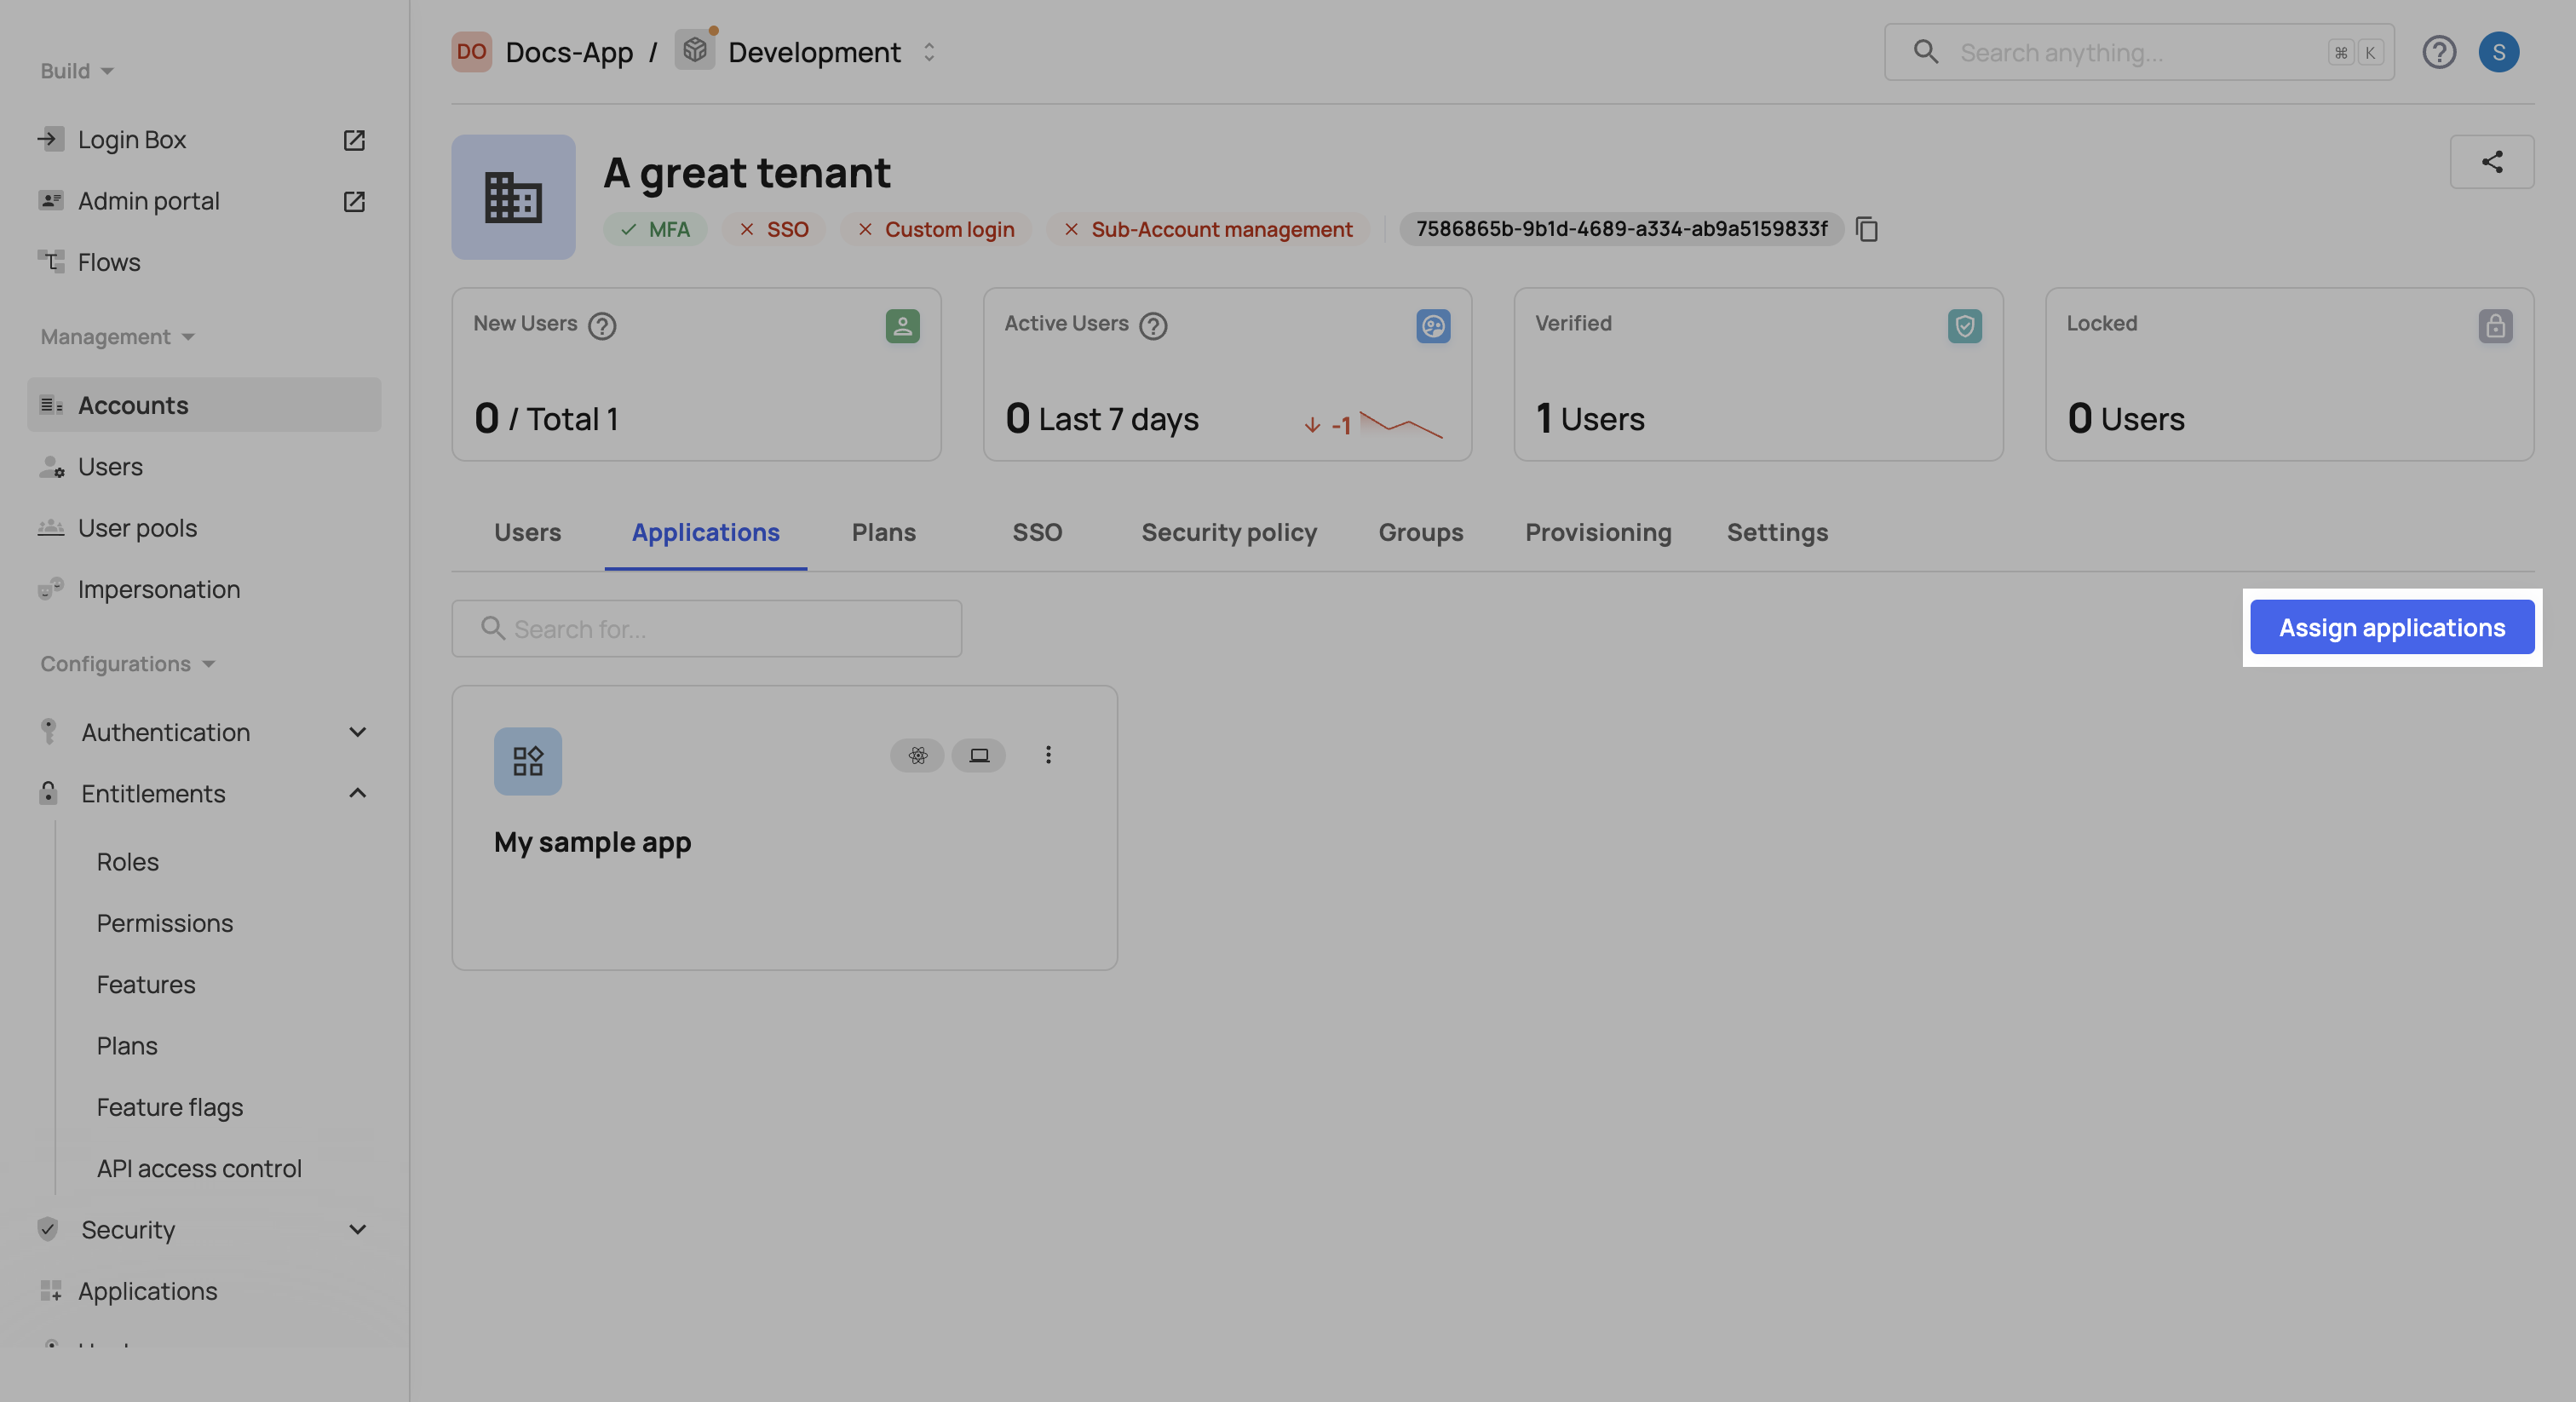
A drawer listing all of the available applications will be opened to the right. You can choose the applications you want to assign to that account and then click Assign.
You can add applications even if they are not yet set to Active (i.e., not integrated).
Default apps
While you can set a default app for users to be allocated with when managing multiple applications, this setting is optional, in case you have at least one application per environment. Note that to ensure users can login to an app, you will need to add an appId in your integration's contextOptions (see note).
Possible errors when you don't set a default app
Possible errors when you don't set a default app
If a user navigates directly to the login URL without you specifying the appId in the path, they won't be able to log in and will be redirected to an error page instead. To solve this issue, ensure you provide an appId within your contextOptions.
When there is no default nor auto-assigned application, you will need to assign users to an application manually, either via our APIs or via the backoffice.
Auto-assigned apps
An application can be auto-assigned globally to all accounts within an environment or within a specific account only. Such application will be marked as auto-assigned.
Auto-assign globally
To auto-assign a new application to all users within an environment:
- Navigate to [ENVIRONMENT] ➜ Applications.
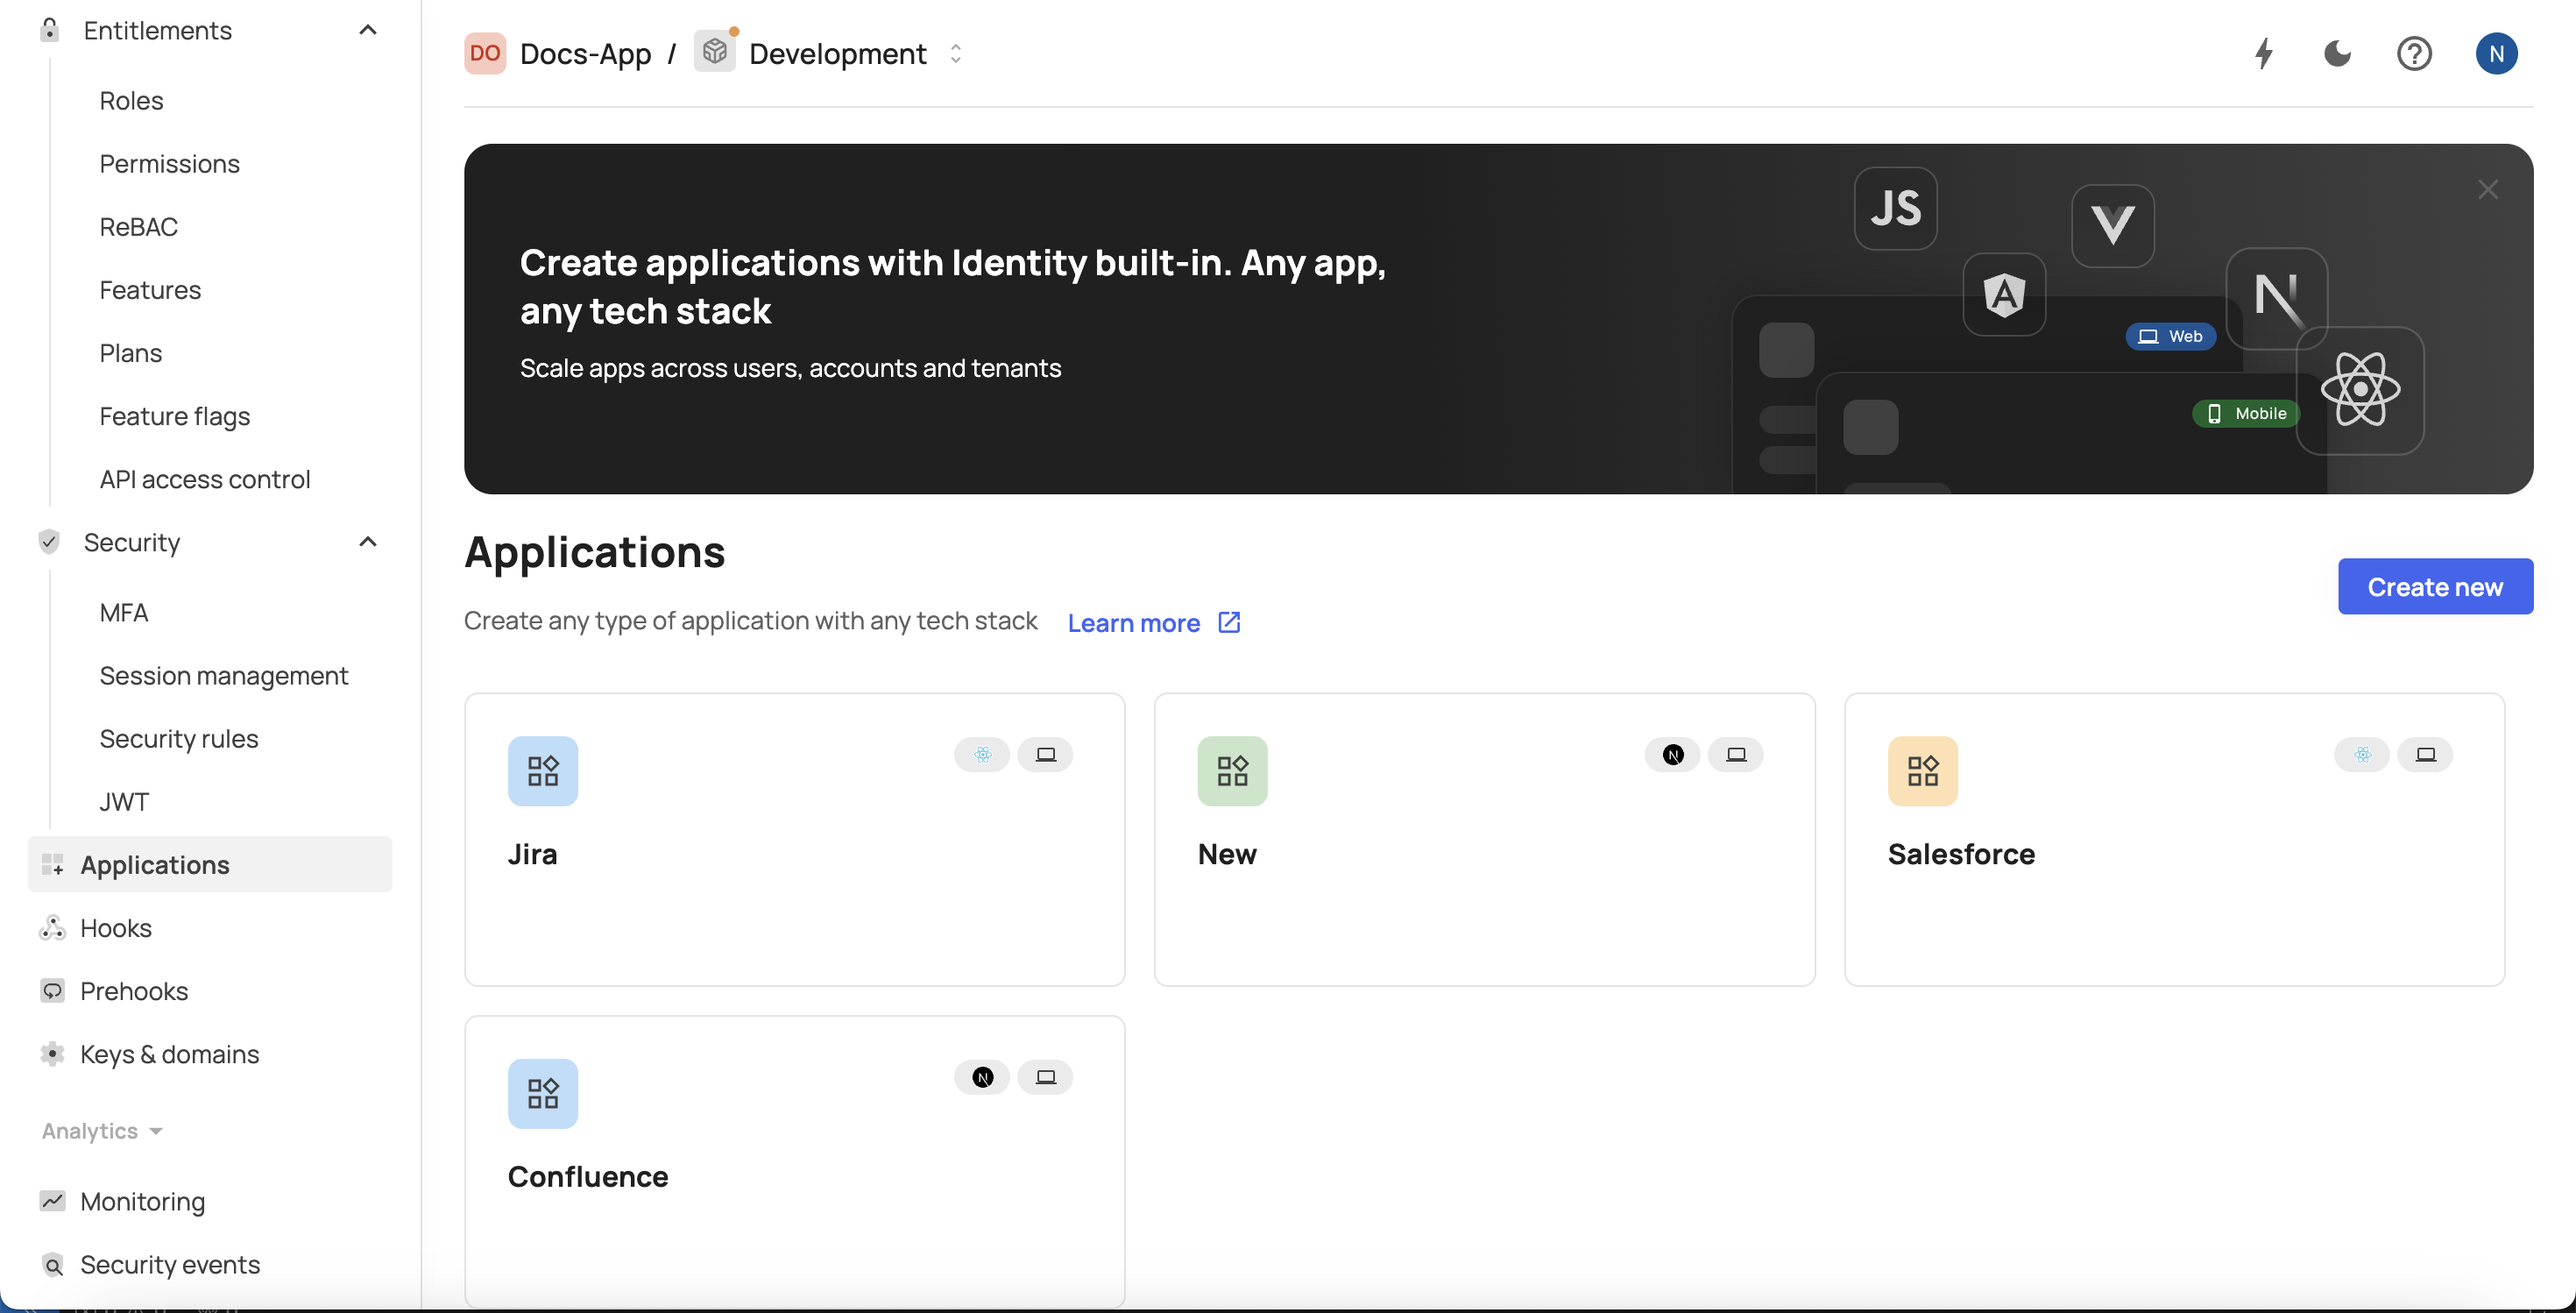
- Select the application and scroll down to the Auto-assigned app section.
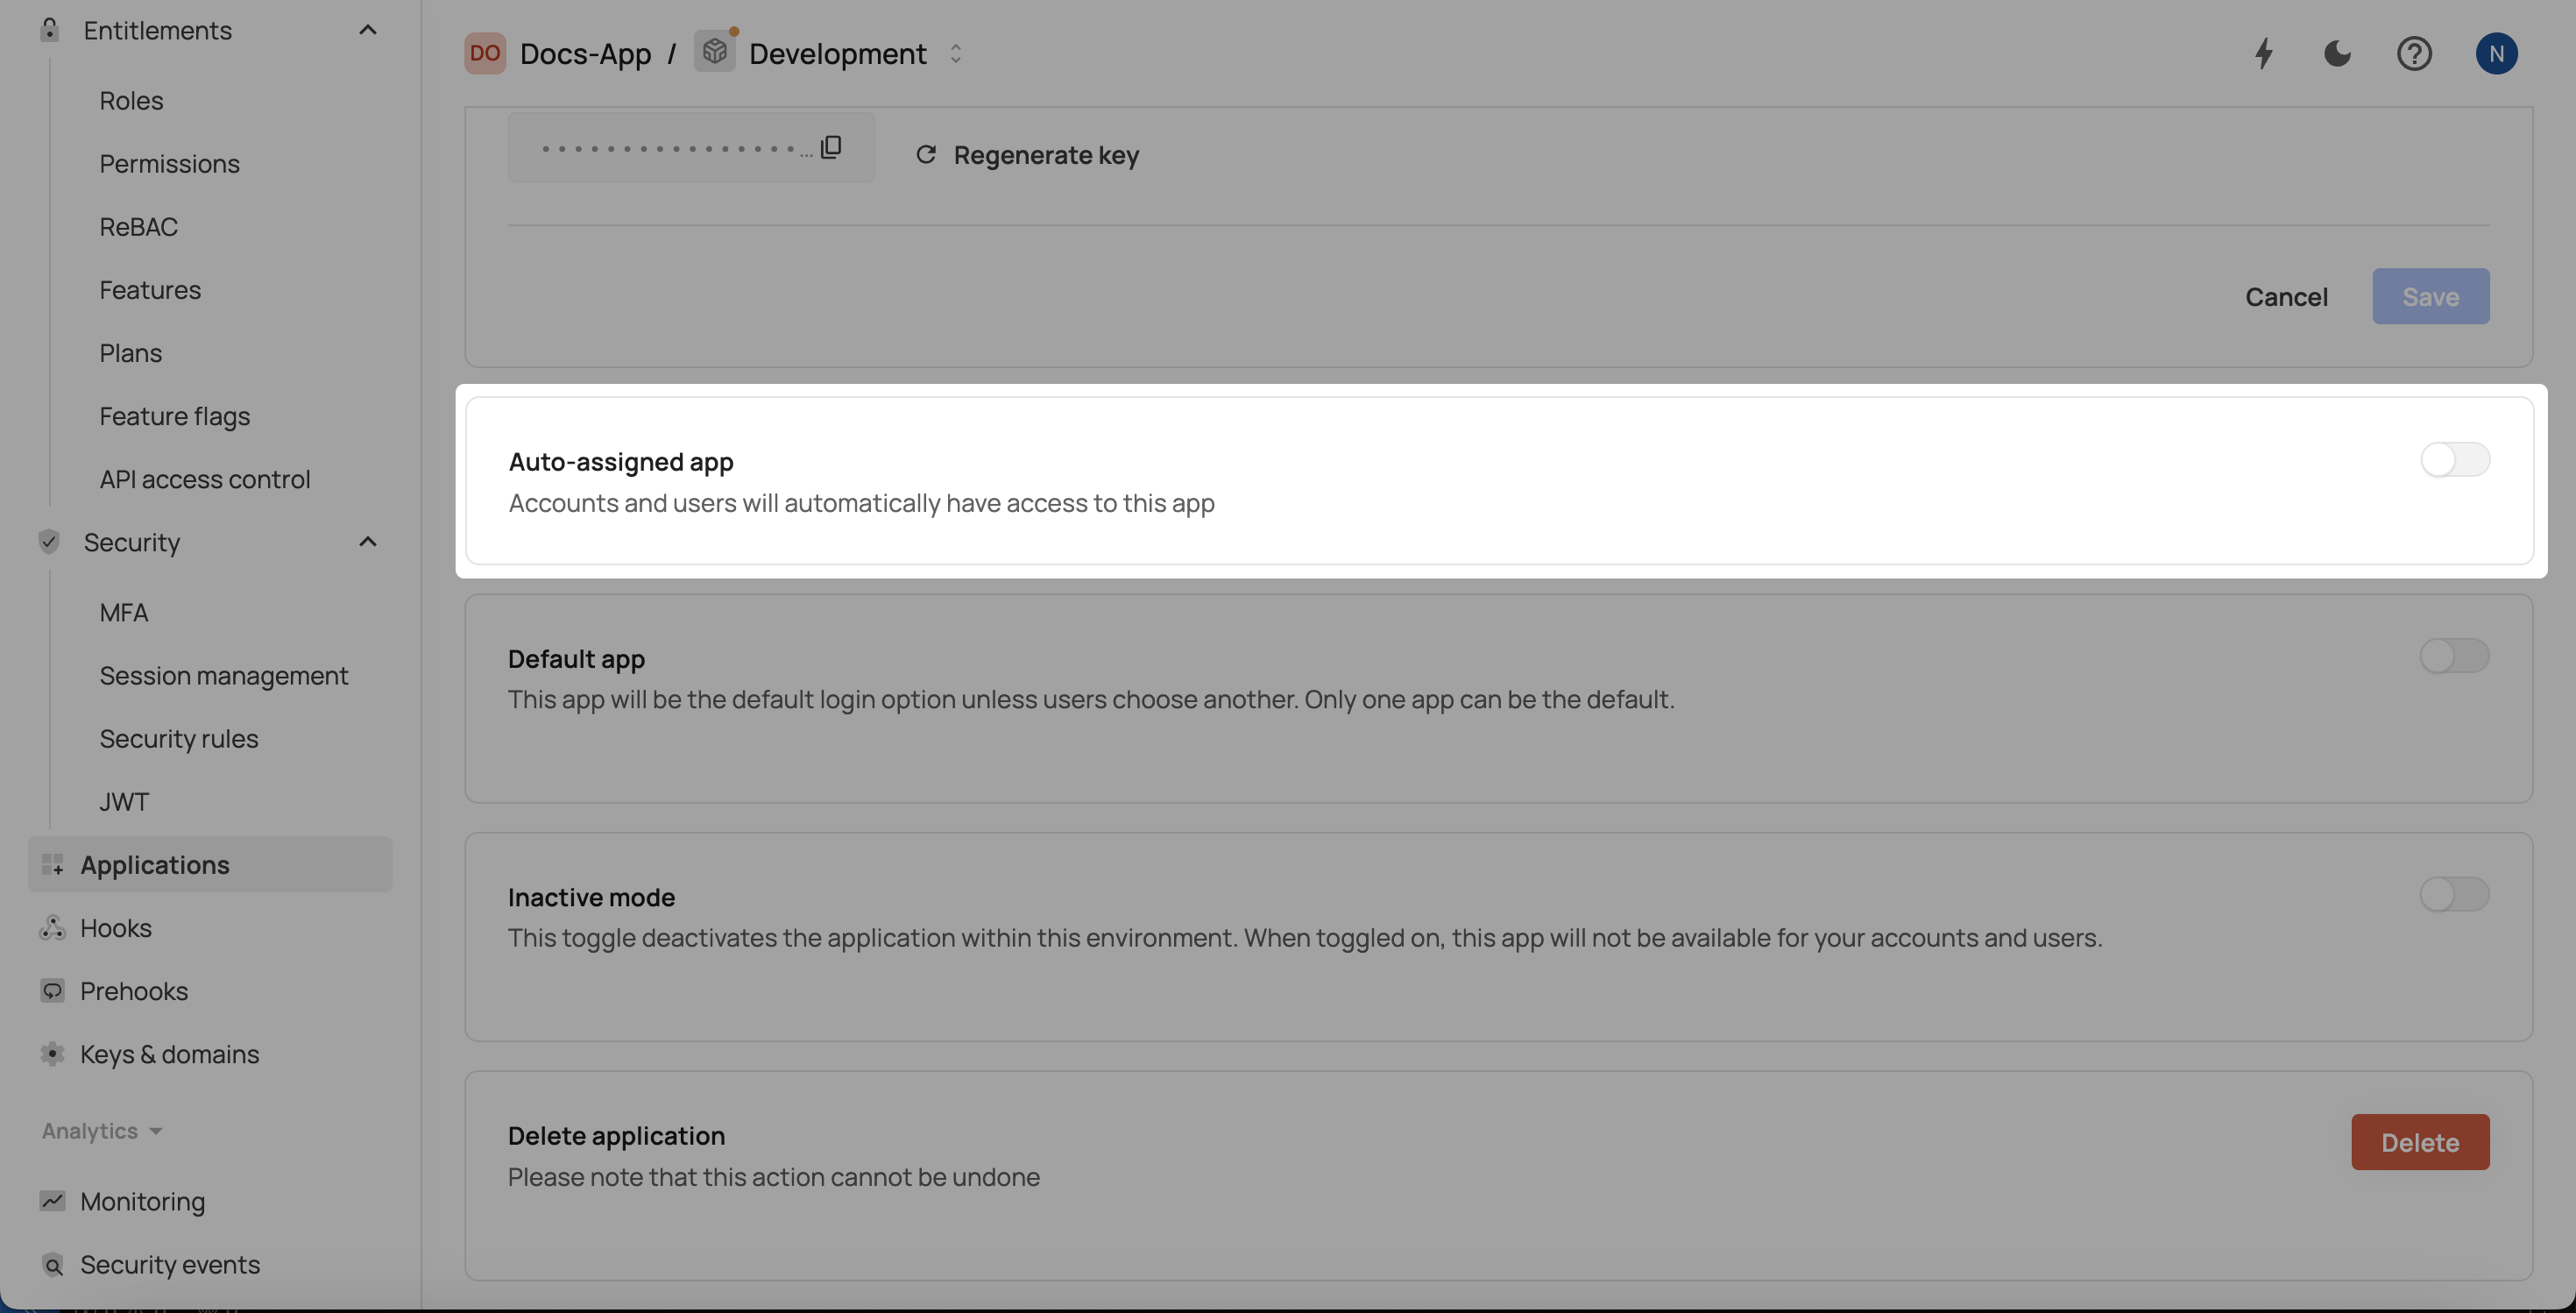
- Set the toggle to on.
Auto-assign on account level
To auto-assign a new application to all accounts and users within an account:
- Navigate to [ENVIRONMENT] → Applications → [ACCOUNT] → Applications / Agents.
- Click Auto-assign users.
- Select the application you want to assign all users in the environment to.
- The toggle on the Auto-assign users will be set to on.
- Click Assign.
Managing existing application assignments
For applications that are already assigned to an account, you can manage the auto-assignment setting in the Applications / Agents screen.
To enable auto-assignment for an application:
- Navigate to [ENVIRONMENT] ➜ Management → Accounts → [ACCOUNT] → Applications / Agents.
- Find the application in the list
- Click the three-dot menu (⋮) next to the application.
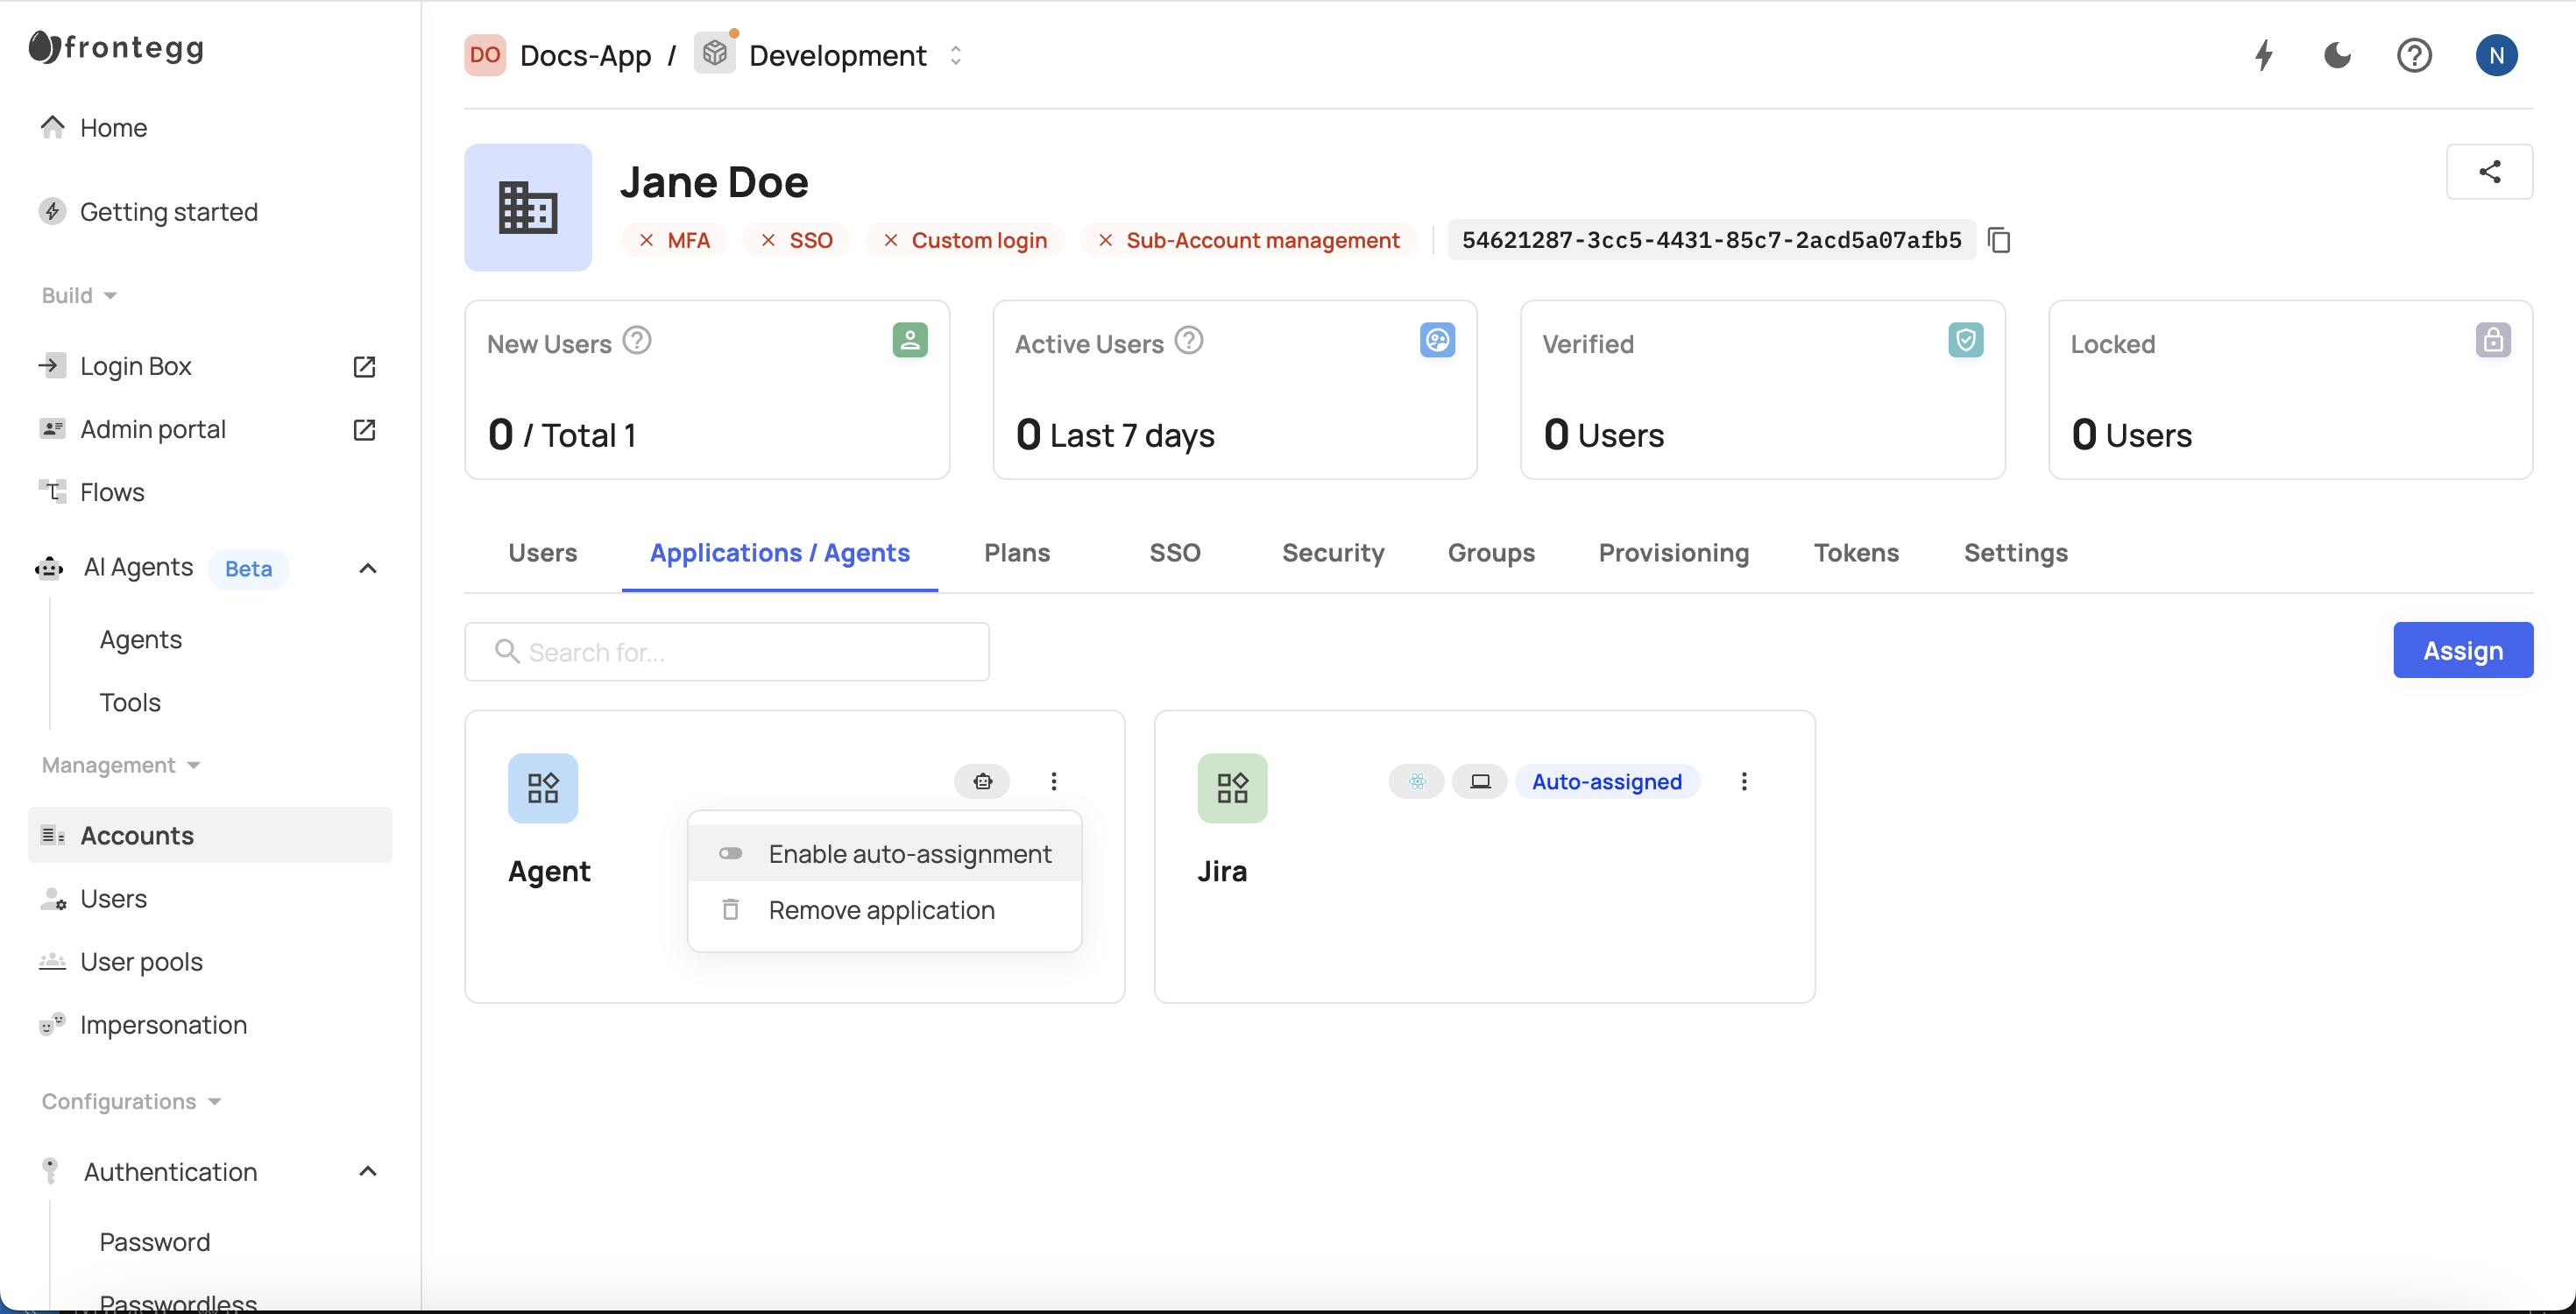
- Select Enable auto-assignment
- To disable auto-assignment, click the three-dot menu (⋮) next to the application again and select Disable auto-assignment.
Auto-assigned applications display
Applications that are auto-assigned (either at the environment level or account level) will be clearly labeled as "Auto-assigned" in the applications list. This label helps distinguish between:
- Environment auto-assigned: Applications auto-assigned at the environment level
- Account auto-assigned: Applications auto-assigned at the account level

Benefits of account-level auto-assignment
Account-level auto-assignment provides several benefits:
- Simplified user management: Automatically assign all users in an account to applications
- Consistent access control: Ensure all users have access to required applications
- Reduced manual work: Eliminate the need to manually assign each user to applications
- Granular control: Manage auto-assignment per account rather than globally
- Flexible deployment: Enable auto-assignment for specific accounts while maintaining manual control for others
Auto-assignment behavior
Auto-assignment behavior
When an application is auto-assigned to an account, all existing users in that account will be automatically assigned to the application. New users added to the account will also be automatically assigned to auto-assigned applications.
Manual assignments
Manual assignments
Users can still be manually assigned to additional applications that are not auto-assigned. Auto-assigned applications cannot be removed from individual users but can be supplemented with manual assignments.