Getting started with account hierarchies
An account hierarchy is a system representing relationships between entities in an organization, including parent-child structures or multiple nested layers. This structure helps manage complex setups, improving communication, efficiency, and accountability.
With hierarchies (sub-account management), you can create parent accounts with nested sub-accounts. Users can belong to any tenant or to a tenant and its subtenants.
While both hierarchies and multitenancy manage multiple entities, they serve distinct purposes. Multitenancy serves multiple tenants from a single software instance, with isolated data and configurations. Hierarchies, on the other hand, manage relationships and dependencies within a single tenant, providing granular control and resource allocation.
In Frontegg, a main parent account can create and manage sub-accounts within a hierarchy, offering more control over their account structure—ideal for complex setups or reselling scenarios. This is available from the All Accounts section in Frontegg's self-service portal.
Prerequisites
Prerequisites
Note that the following versions are required to use the feature:
@frontegg/react@5.0.44
@frontegg/angular@5.35.0
@frontegg/vue@2.0.40
@frontegg/nextjs@7.0.14
Sub-accounts management
Step 1: Enabling sub-account management on an account
Navigate to Management → Accounts → [ACCOUNT] → Settings and toggle the Sub-account management option.

Step 2: Assigning permissions
To access the All Accounts tab in the self-service portal, users must be assigned specific roles with corresponding [permissions]:
Read access to sub-accounts:
Users must have the role that grants the "Read sub-accounts" permission:fe.account-hierarchy.read.subAccount. This allows them to view sub-account information.Create or update sub-accounts:
Users should have a role with the "Create or update sub-account" permission:fe.account-hierarchy.write.subAccount. This allows them to add or modify sub-accounts.Delete sub-accounts:
Users must have a role with the "Delete sub-accounts" permission:fe.account-hierarchy.delete.subAccount. This enables them to remove sub-accounts.Grant access to sub-accounts:
Users must have the "Give access to sub-accounts" permission:fe.account-hierarchy.write.subAccountAccess. This allows them to assign access rights to users for specific sub-accounts.
Once the toggle for sub-account management is enabled and the relevant admin roles are assigned with the above permissions, an All Accounts section will appear in the end user's self-service menu.

Sub-accounts self-service
The self-service portal allows end users to manage tenant access, create sub-accounts, and more. Once sub-account management is enabled, users can access a dedicated Managed section within their All Accounts menu.
When viewing All Accounts, users can see their account hierarchy in two views: Table and Graph.
In the table view, the main account is listed at the top, followed by all sub-accounts, along with key details such as account names, user counts, and creation dates.

Switching to the graph view provides a better visual representation of how the account tree looks.

Creating sub-accounts
To create sub-accounts, users with the necessary permissions can go to the All Accounts section and click Create New Account. They just need to specify an account name and choose a parent account.
If an account has sub-account management enabled and the user holds the fe.account-hierarchy.write.sub-account-management permission, they can enable or disable sub-account management for child accounts. When enabled, the child account can access the All Accounts page.

Managing individual sub-accounts
To access specific sub-account details, click on the account name in either the table or graph view. You will see a summary, including the account name, hierarchy, user count, and total sub-accounts.

To delete a sub-account, navigate to the sub-accounts section in your master account, select the sub-account you want to remove, and proceed with deletion. Sub-accounts can only be deleted if they have no associated children.
Explicitly inviting users to accounts
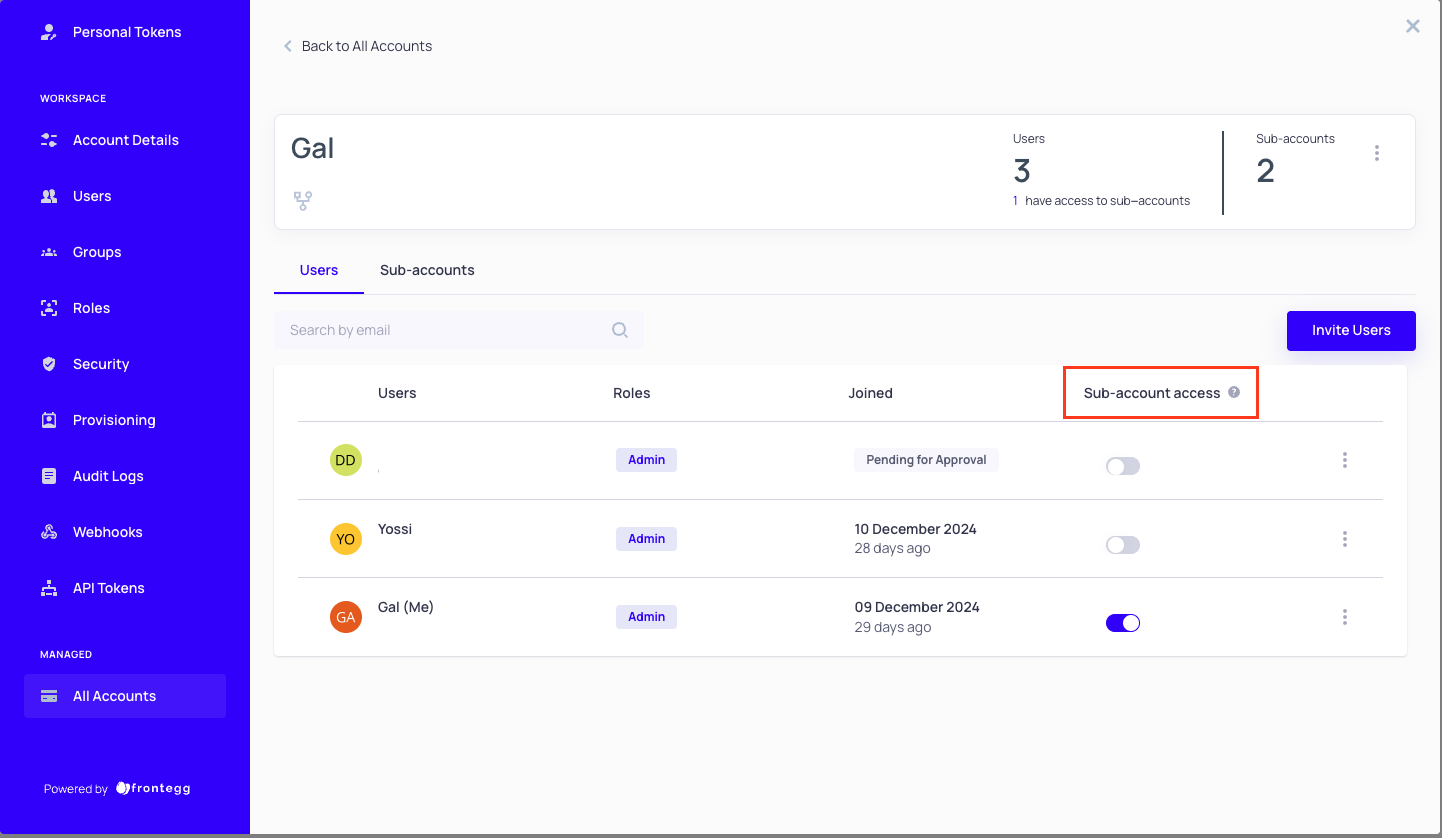
You can invite users directly to accounts by clicking the Invite Users button. They will receive an activation or an invitation email.

Granting access to sub-accounts and future sub-accounts
Grant user access to an entire hierarchy branch by assigning it at the parent account level. This grants the user full access to all current and future sub-accounts within that branch. The role assigned at the parent account automatically applies to all sub-accounts in the branch.
Users can be granted automatic access to sub-accounts and future sub-accounts through both the Admin portal and the Backoffice.
Admin portal:
- Upon user creation - Navigate to the "All Accounts" tab, select a specific account, click "Invite user," and toggle the access option before inviting.
- Update an existing user - Navigate to the "All Accounts" tab, select a specific account, and toggle on "Sub-account Access" in the user's list to enable access to all sub-accounts.
Backoffice:
- Upon user creation - Navigate to the accounts page in a specific environment, choose a specific account, and click the "Create user" button. Set the user information and toggle on "Sub-account access."
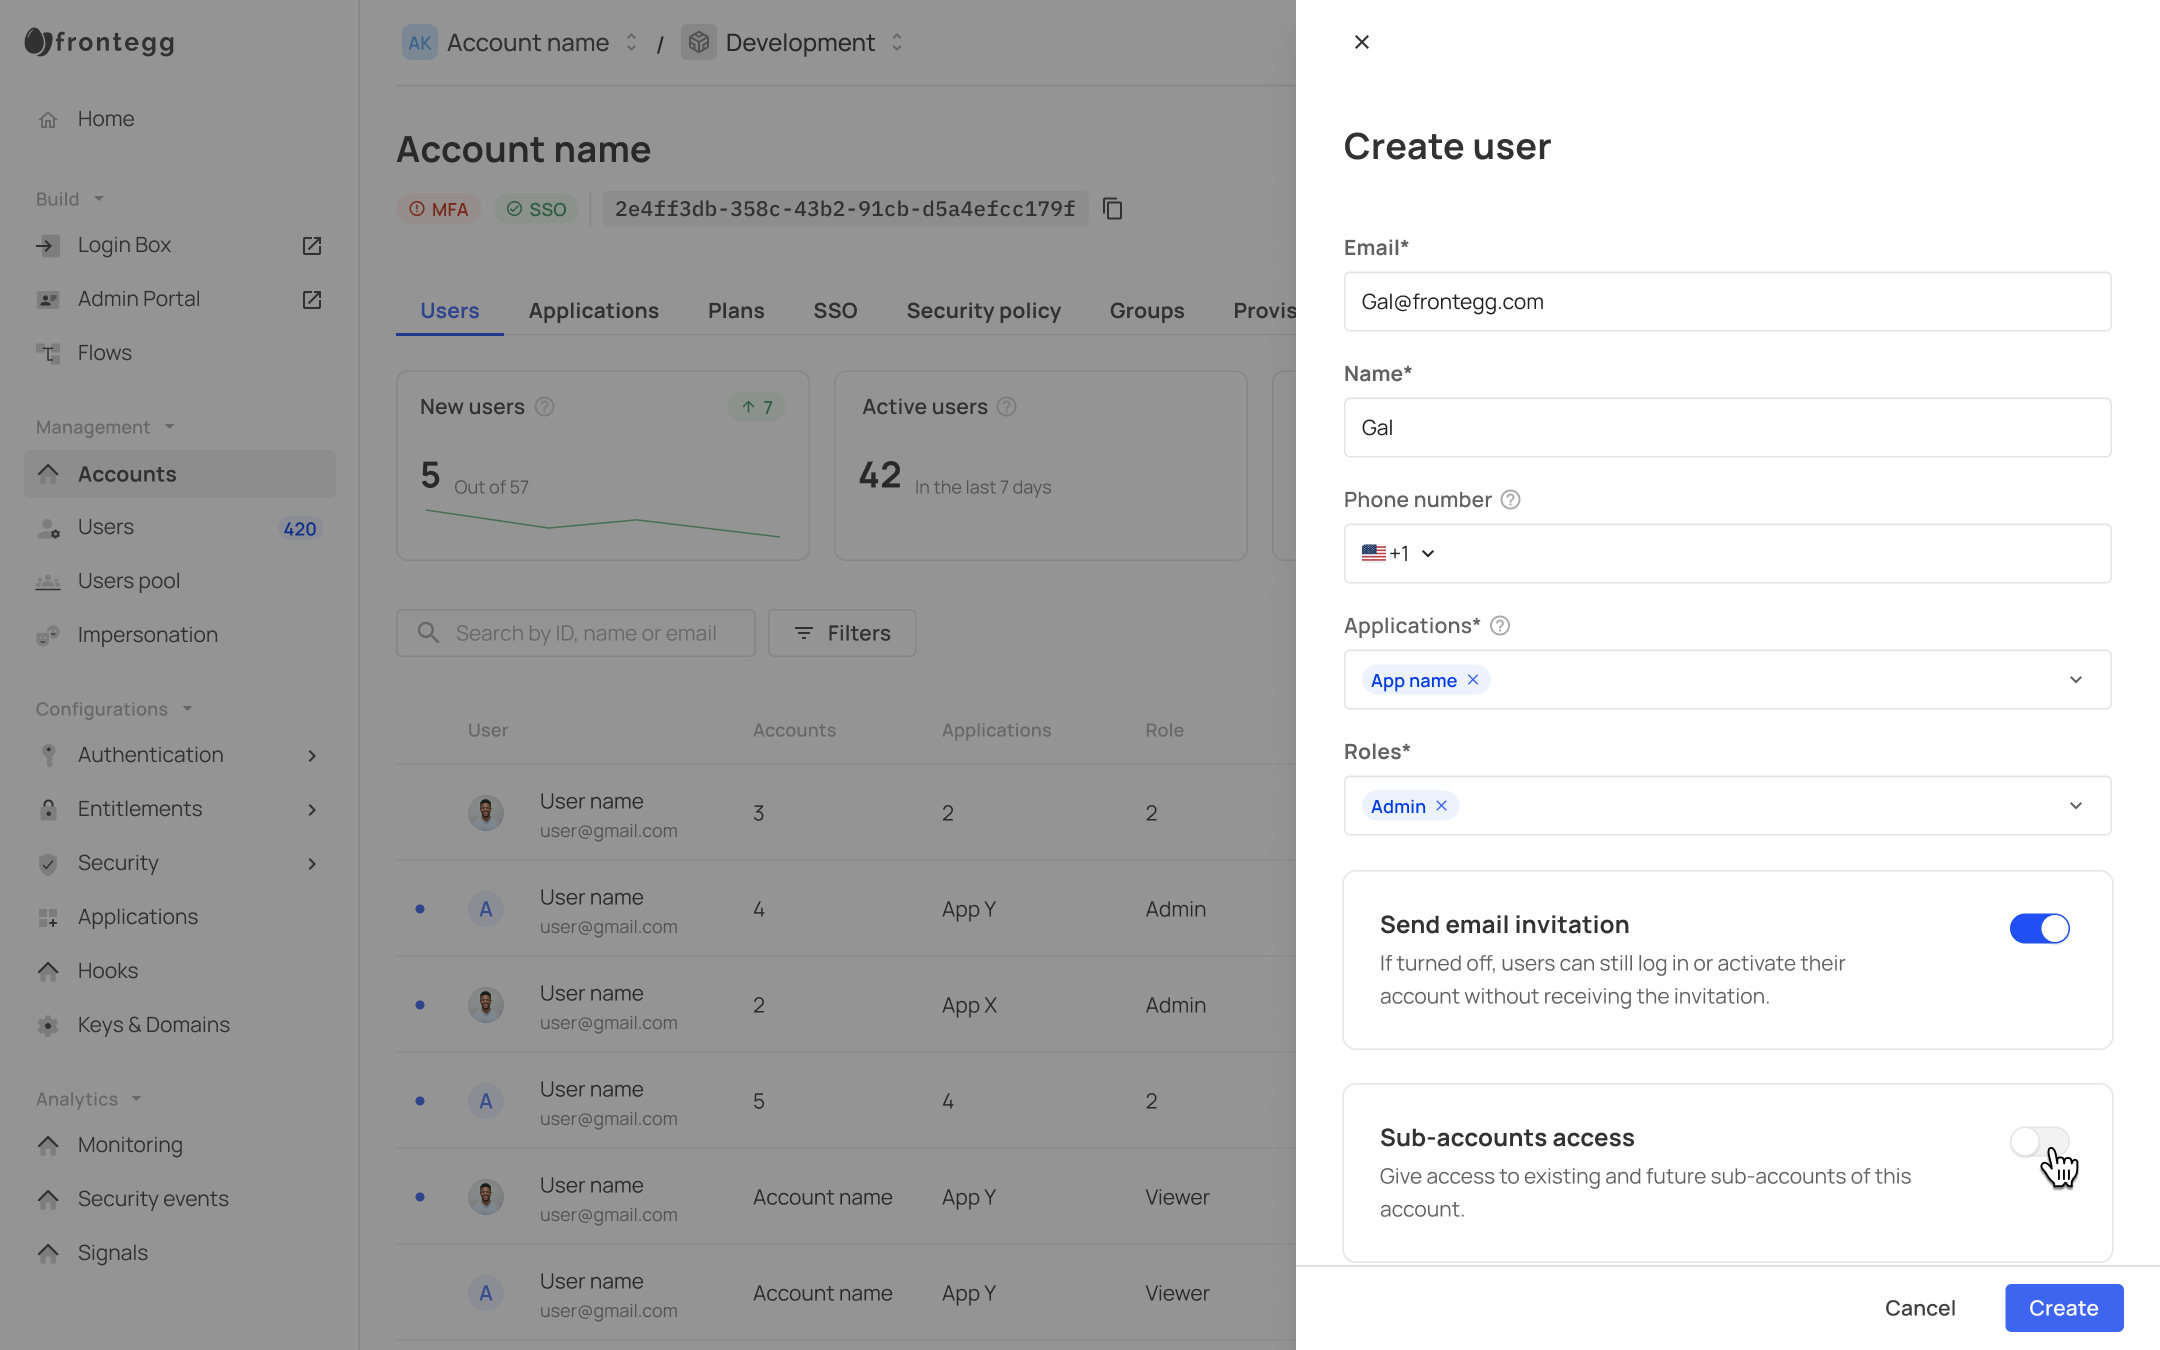
The sub-account access toggle will appear only if the current account is defined as a parent account.
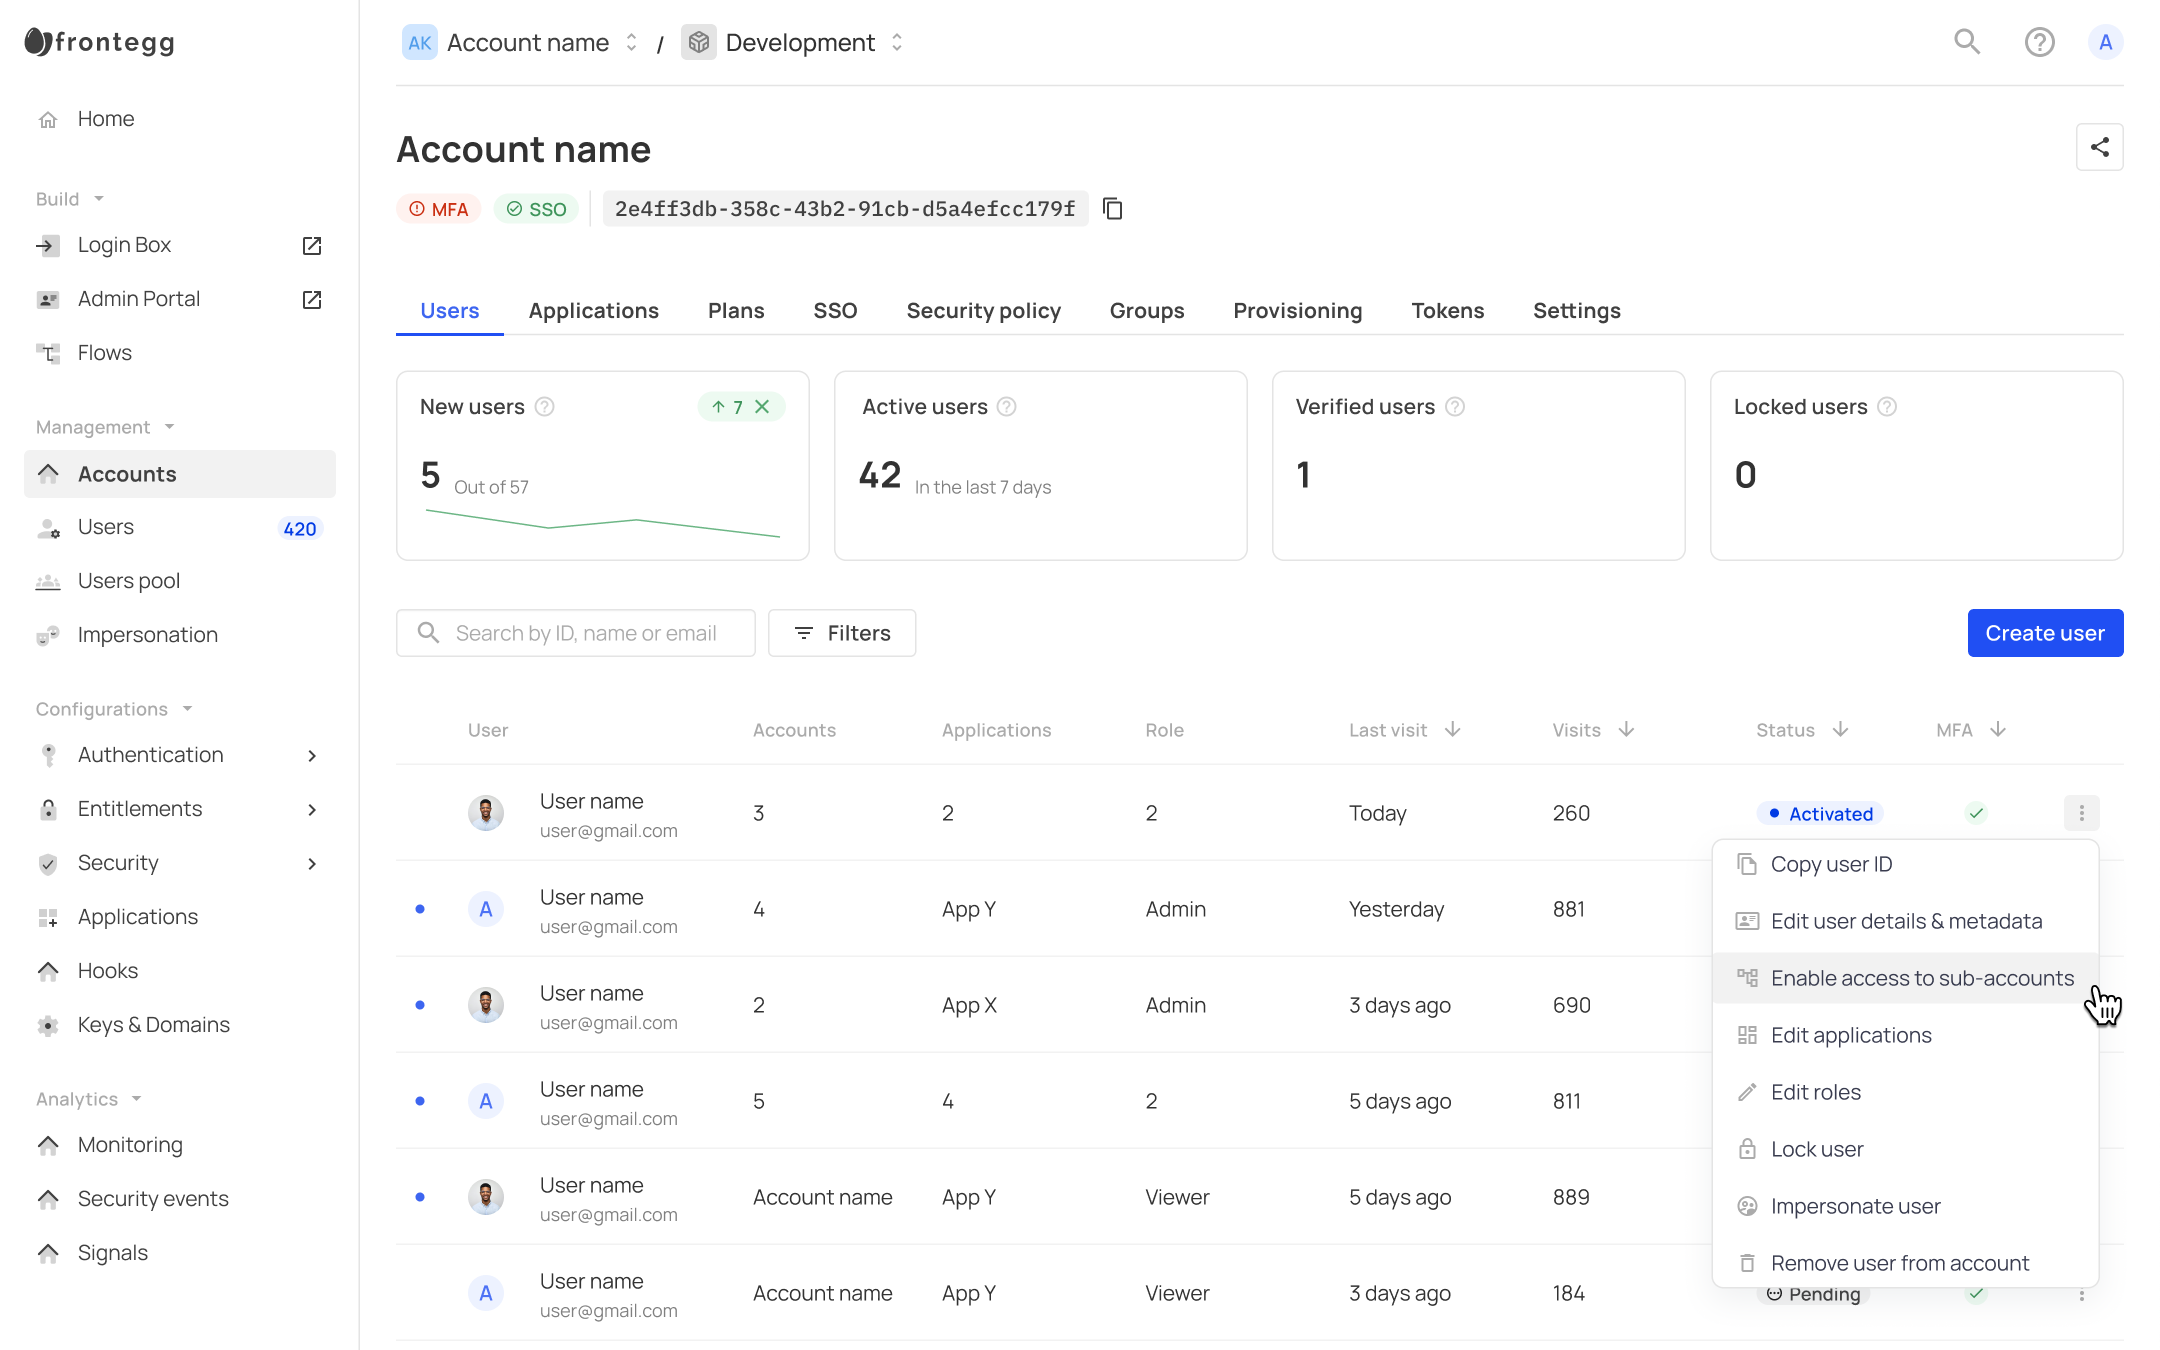
- Update an existing user - Navigate to the accounts page in a specific environment, select a specific account, and for a specific user via the three dots icon, choose "Enable access to sub-accounts." This action can be reversed.
Switch to sub-accounts
Switch to sub-accounts
- When users are granted access to sub-accounts, the accounts where they are allowed will not appear on the user's access token (JWT) or the user's state. To implement an account switcher in this case, you will need to calculate behind the scenes which accounts the user should have access to via APIs.
- Sub-account access will only be visible for users belonging to accounts with a hierarchy-based account structure.
Sub-account access settings
To allow users to set default sub-account access, ensure they have fe.account-hierarchy.write.subAccountAccess permission. Under the All Accounts tab in your application's self-service portal, users can select the default state for new users that will be invited to the application.

The Default off setting prevents users from accessing sub-accounts upon invitation. You can change this default on demand.
Default on gives users sub-account access by default. You can change this default on demand.
Always on affects all account users (current and future) and cannot be revoked. If you change it later to Default on or Default off, users who were invited previously will still have access. The settings will only affect future users.
Existing and future users
Existing and future users
When you invite users to accounts where Always on is enabled, both existing and future users of the account will get sub-account access. For Default on & Default off accounts, the settings will become effective for future users only.