Figma is a collaborative interface design tool for creating, sharing, and reviewing designs and prototypes. The Figma integration with Frontegg connects to the Figma REST API, letting your application read file content and metadata, read and create comments, and read project metadata on behalf of your users.
Prerequisites
Prerequisites
- A Figma account
- A newly created app starts in Draft state, which you and your team admins can use for testing right away. To let other users connect the app, you must submit it for review from the Publish tab.
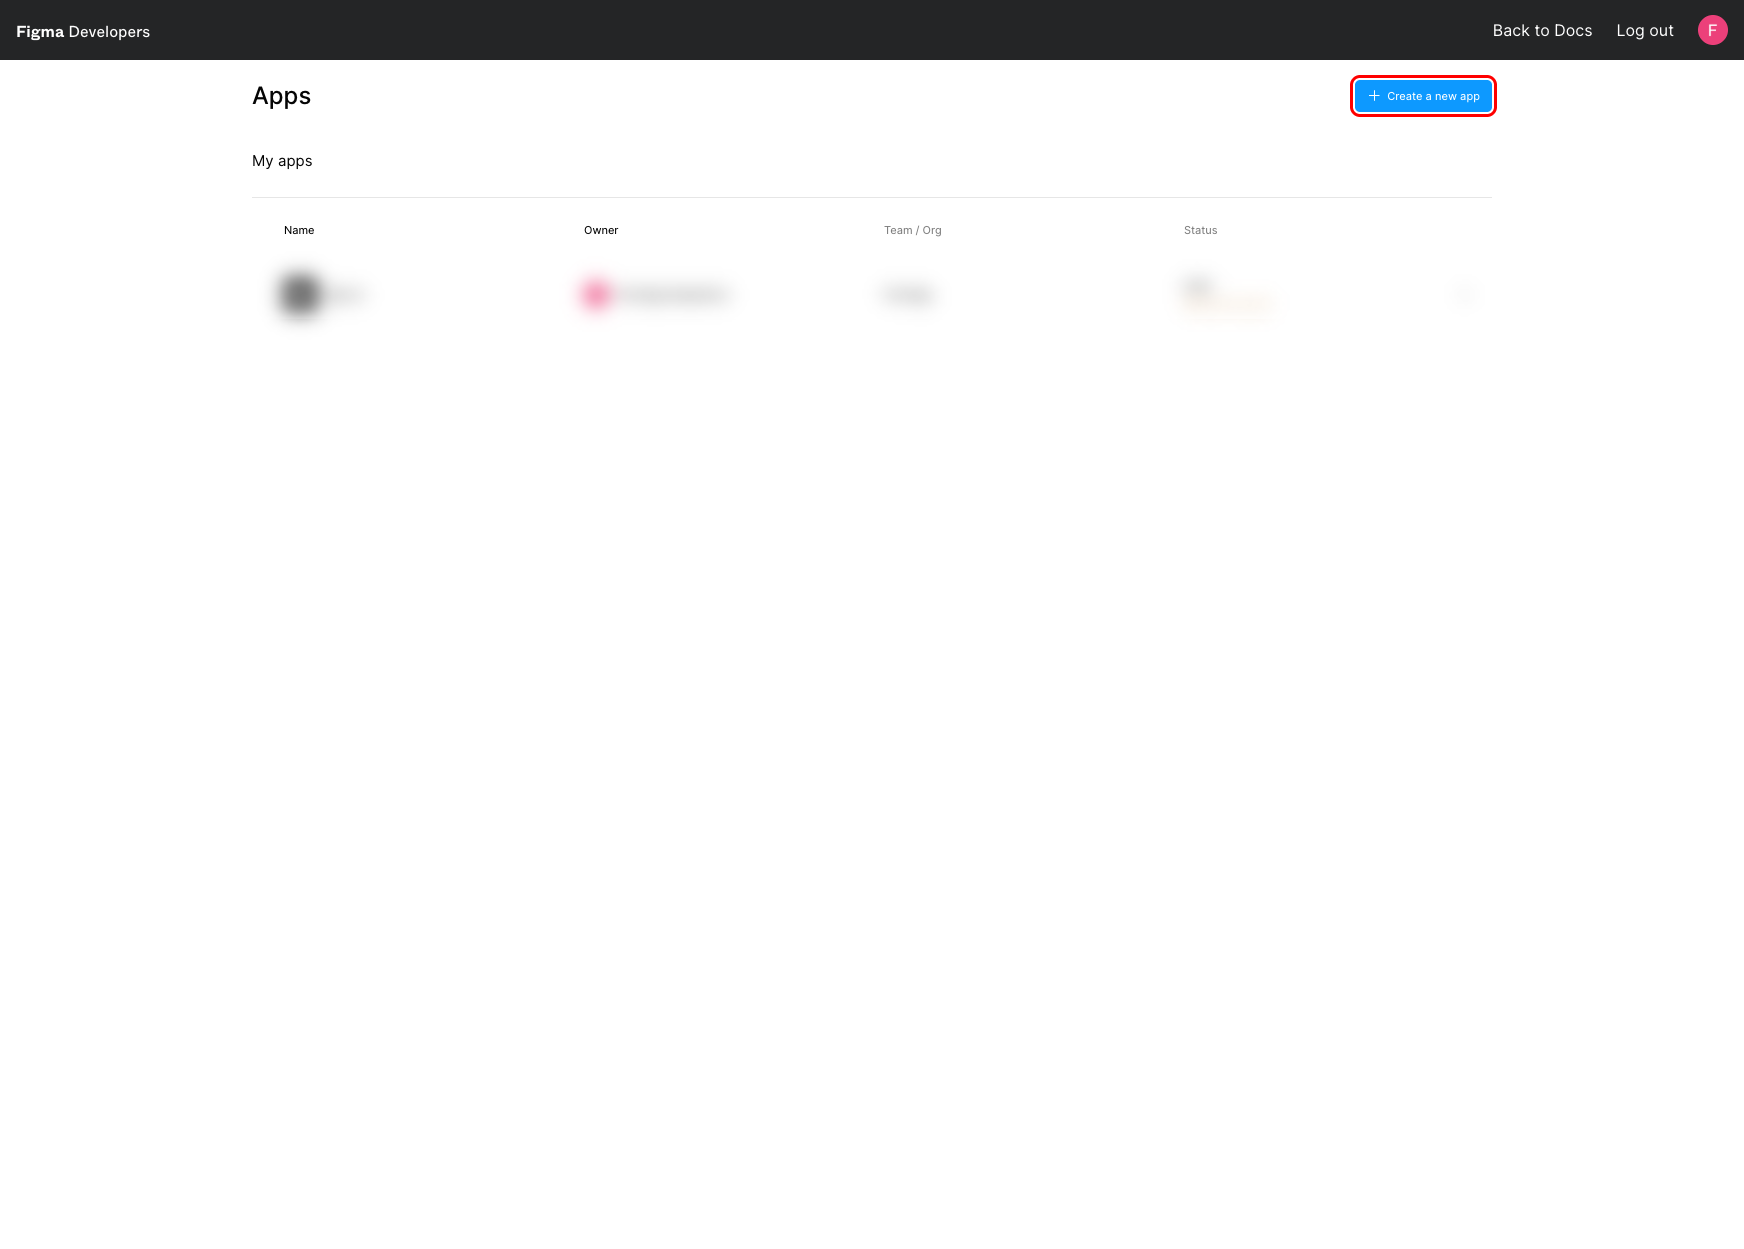
Sign in to Figma and go to the Figma apps page. Click Create a new app in the top-right corner.
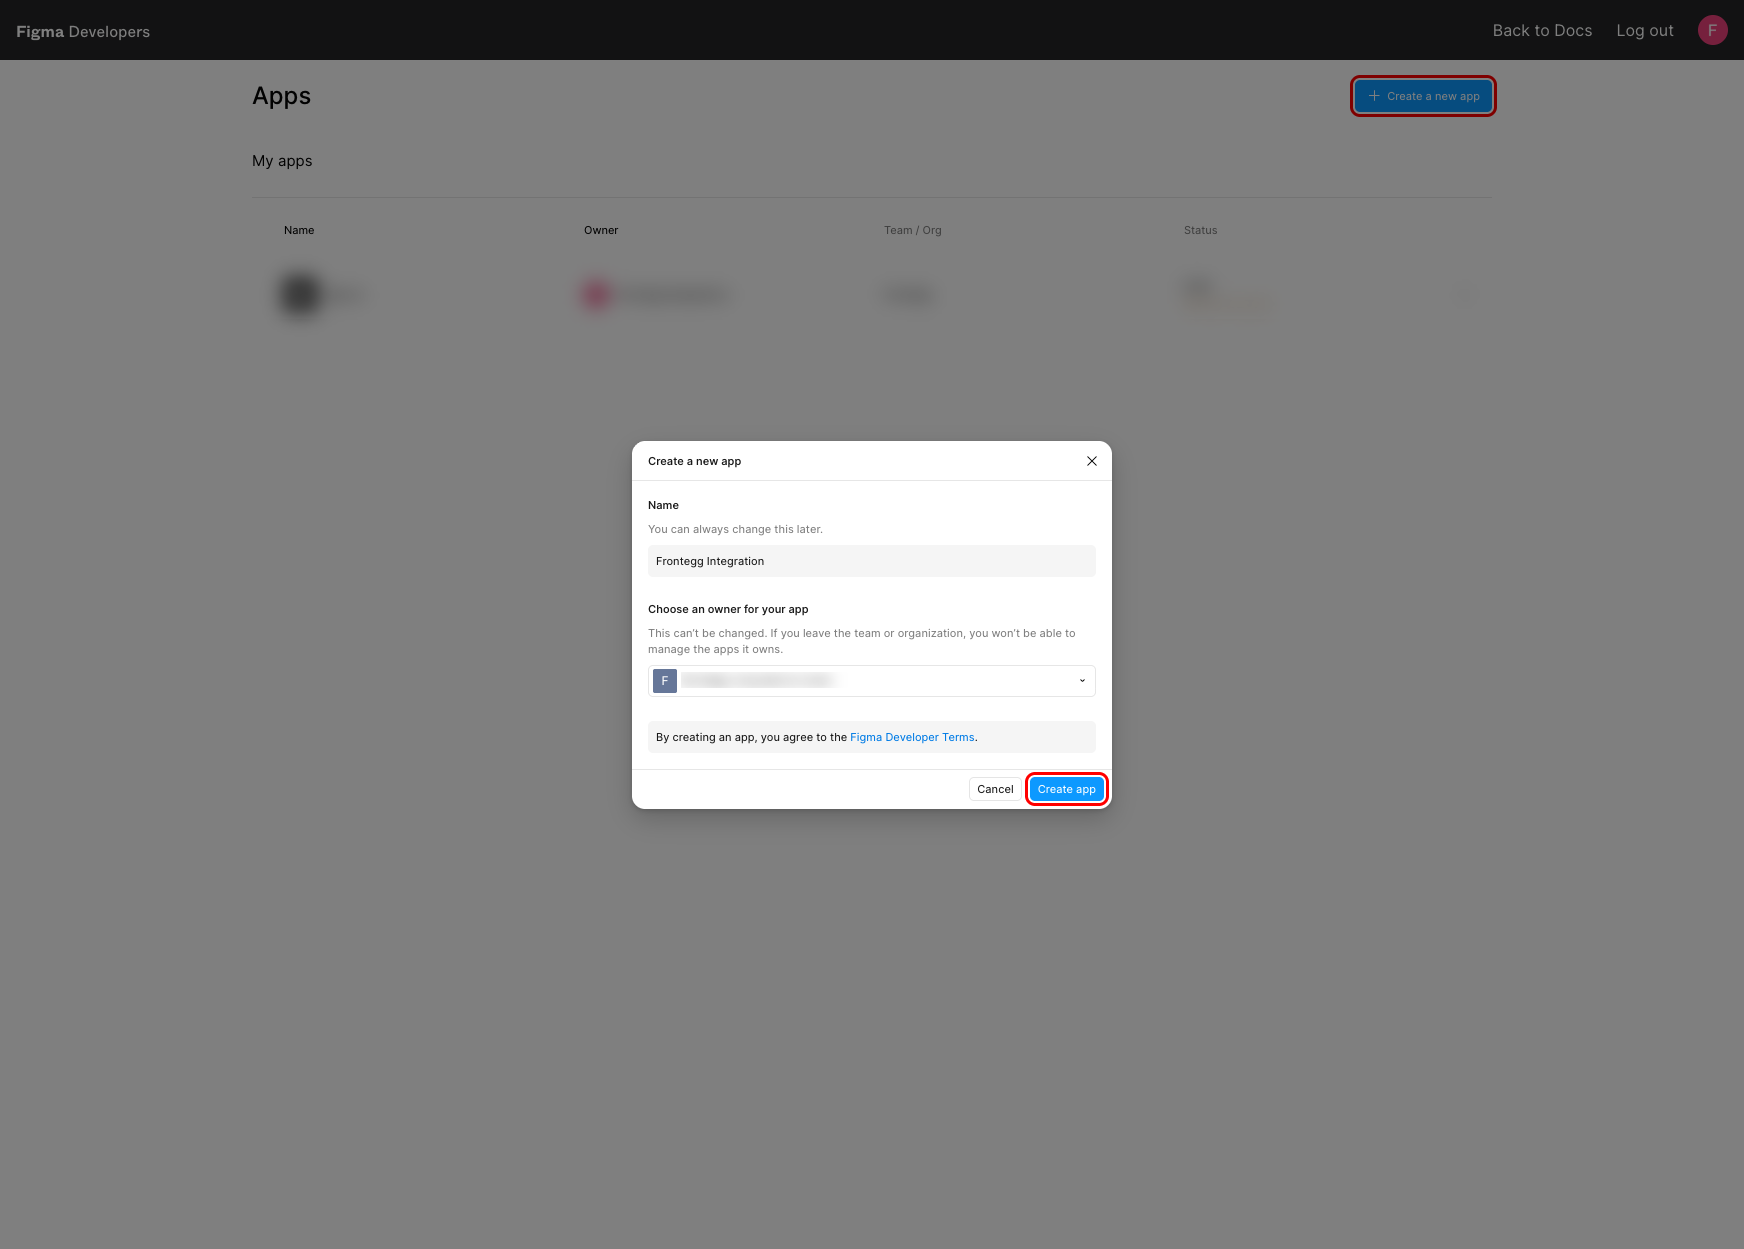
In the Create a new app dialog, enter a Name for your app, for example Frontegg Integration. Choose an owner (a team or organization) — this can't be changed later. Then click Create app.
Figma displays your Client ID and Client Secret. Copy both and store them somewhere safe — you will need them when configuring the integration in the Frontegg portal.
Keep your credentials secure
Keep your credentials secure
Figma shows the Client Secret only once. If you close this window without copying it, you will need to generate a new one. Never share your Client Secret or commit it to version control.
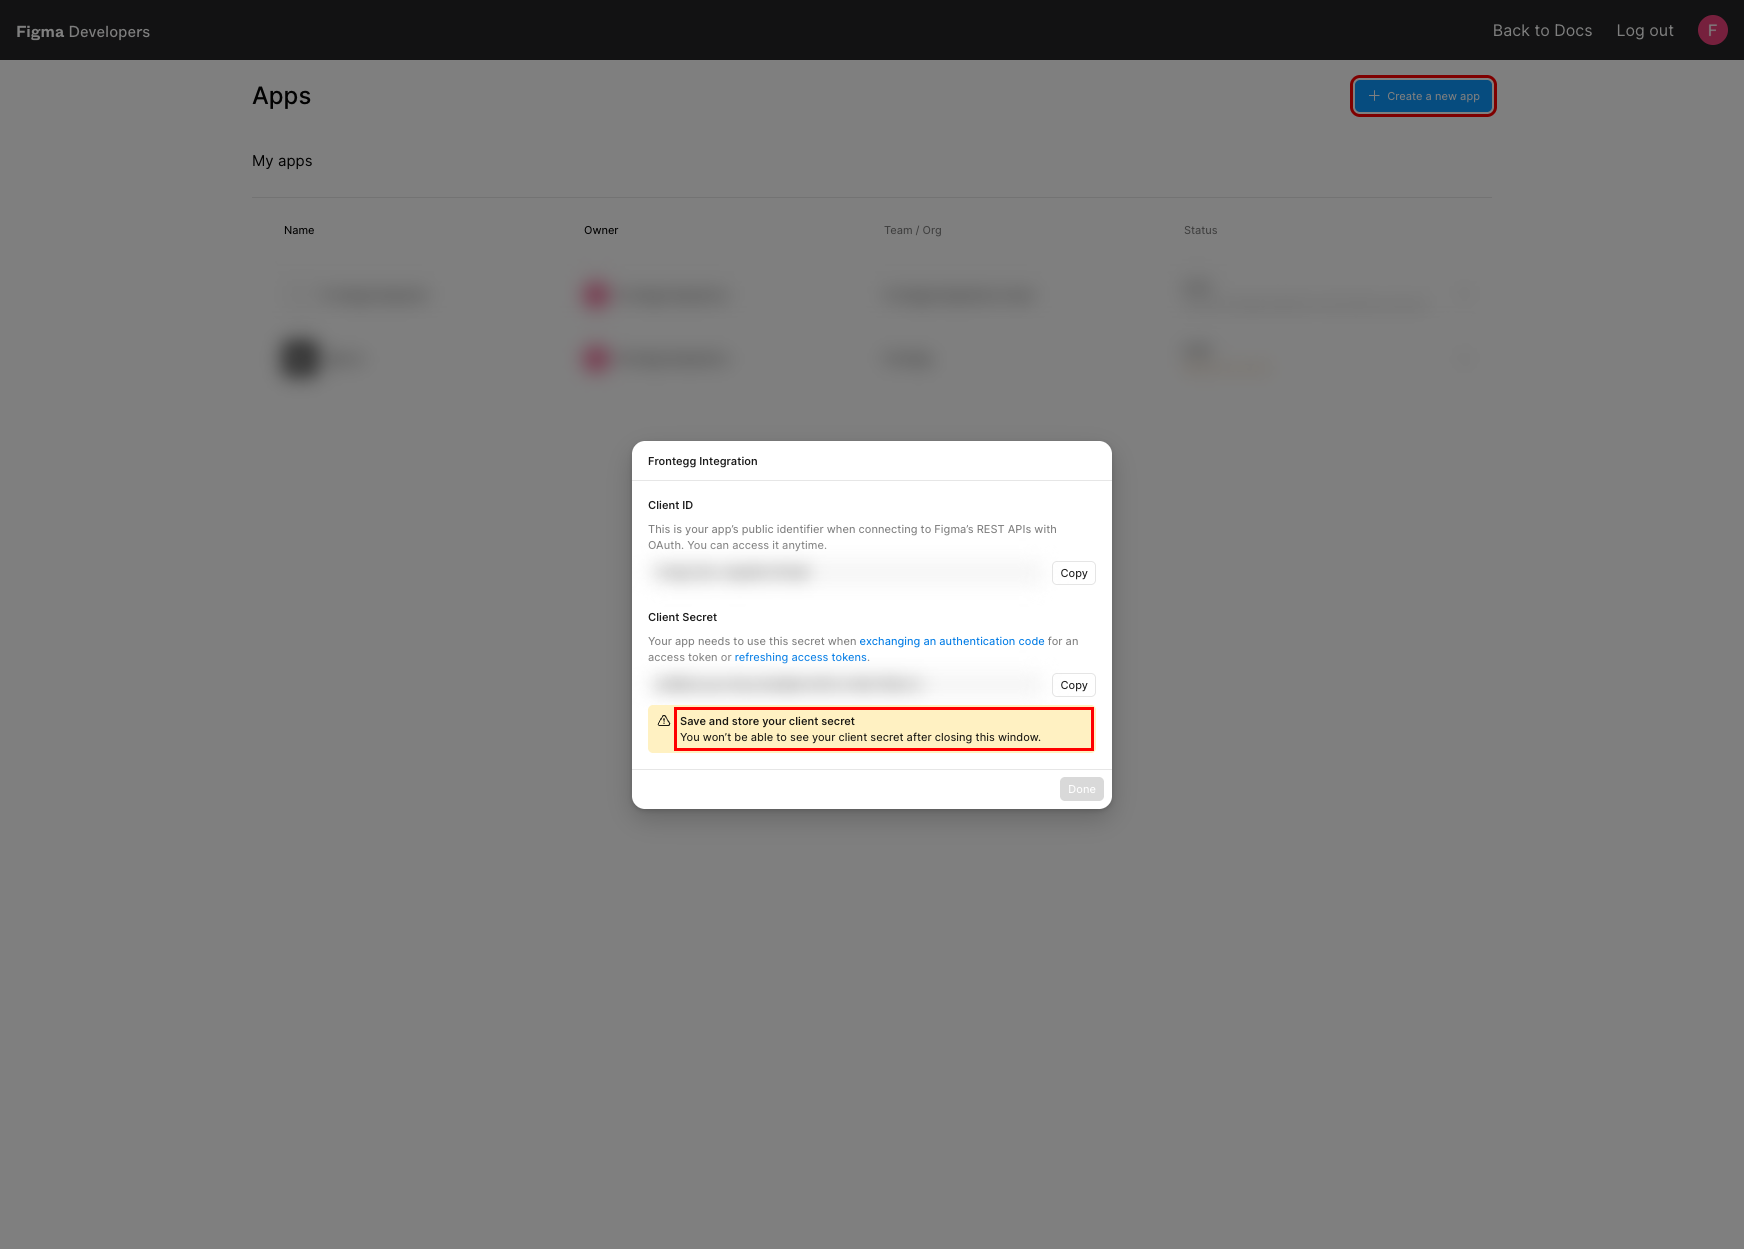
After copying the secret, click Done.
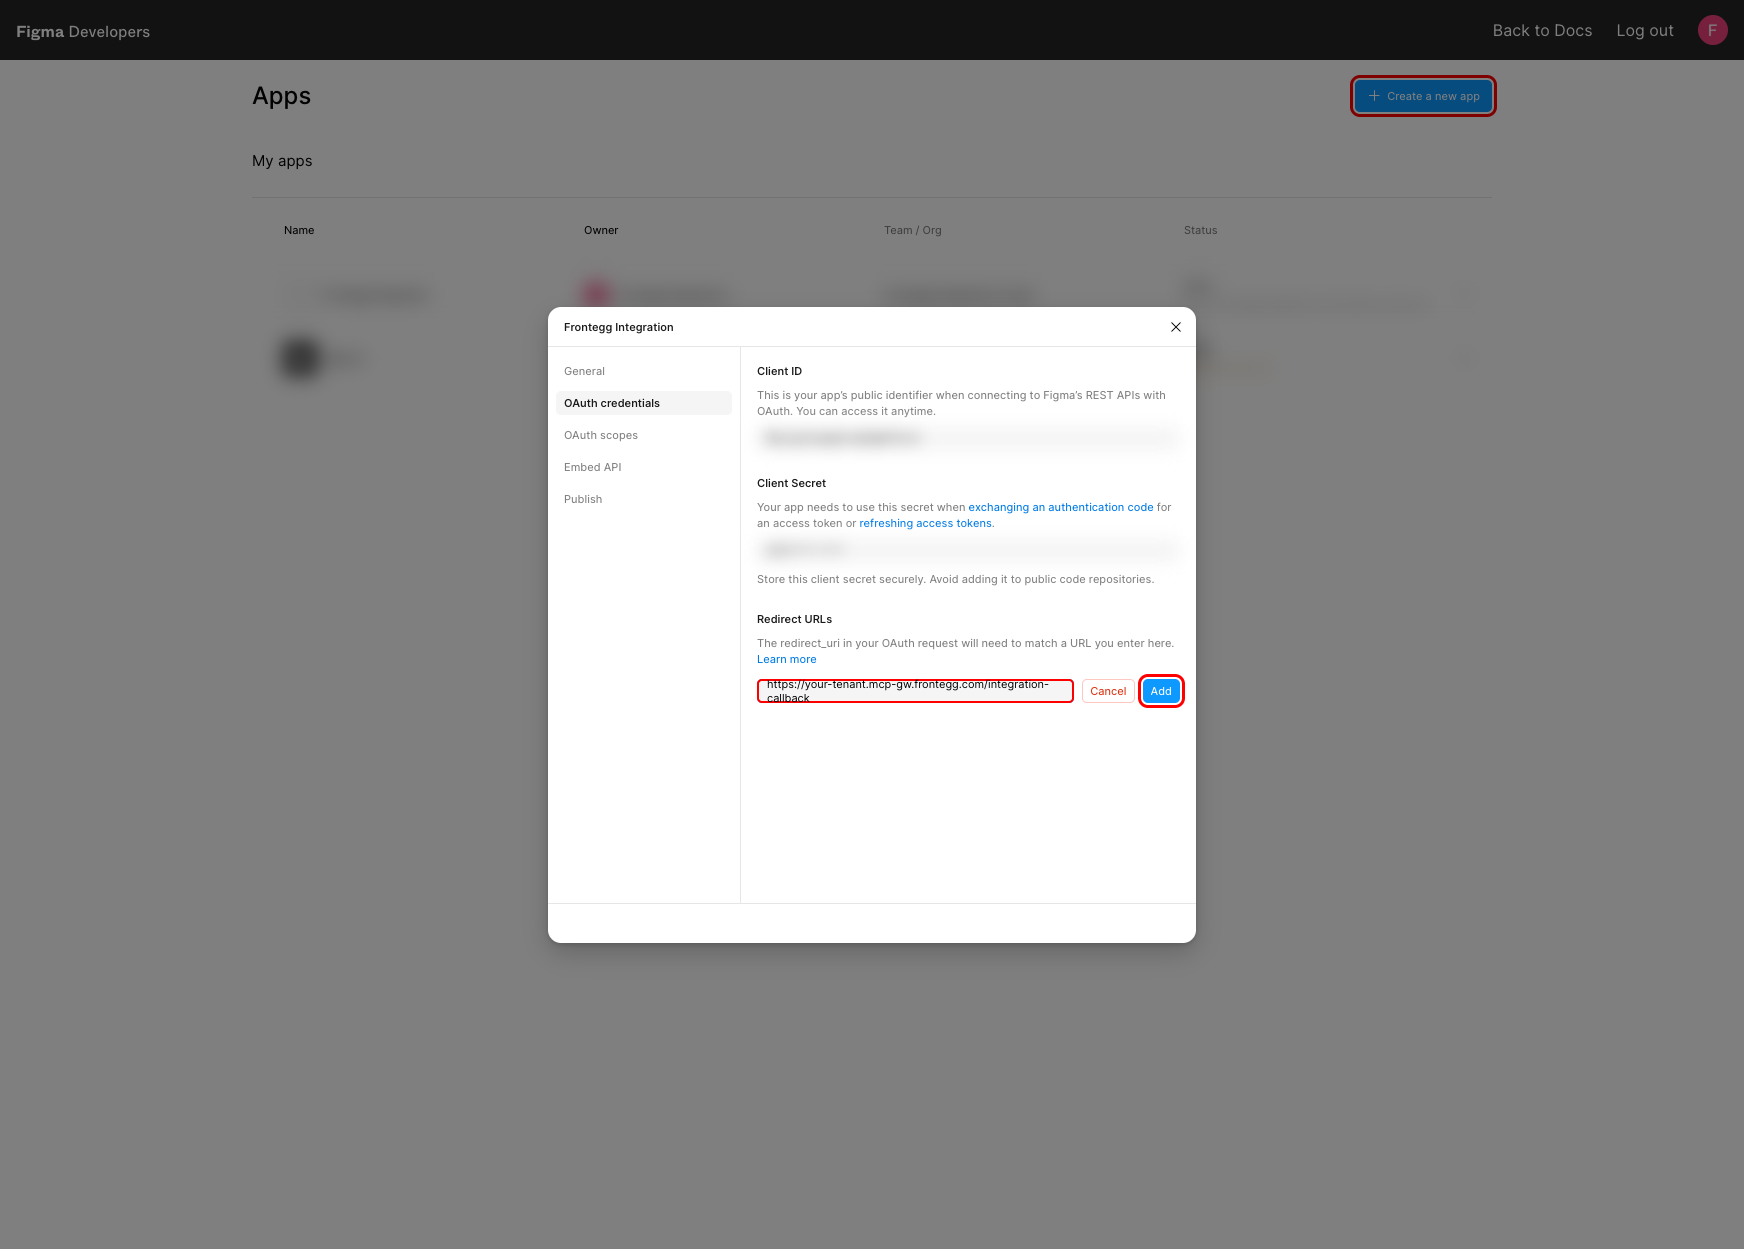
Open your app and select the OAuth credentials tab. Under Redirect URLs, click Add a redirect URL, enter your Frontegg Redirect URL, and click Add:
https://YOUR_MCP_GATEWAY_URL/integration-callback
The redirect URL must match exactly
The redirect URL must match exactly
The redirect_uri in the OAuth request must match a URL entered here exactly, including the protocol, any port, and trailing slashes. Otherwise Figma rejects the login with a redirect_uri mismatch error.
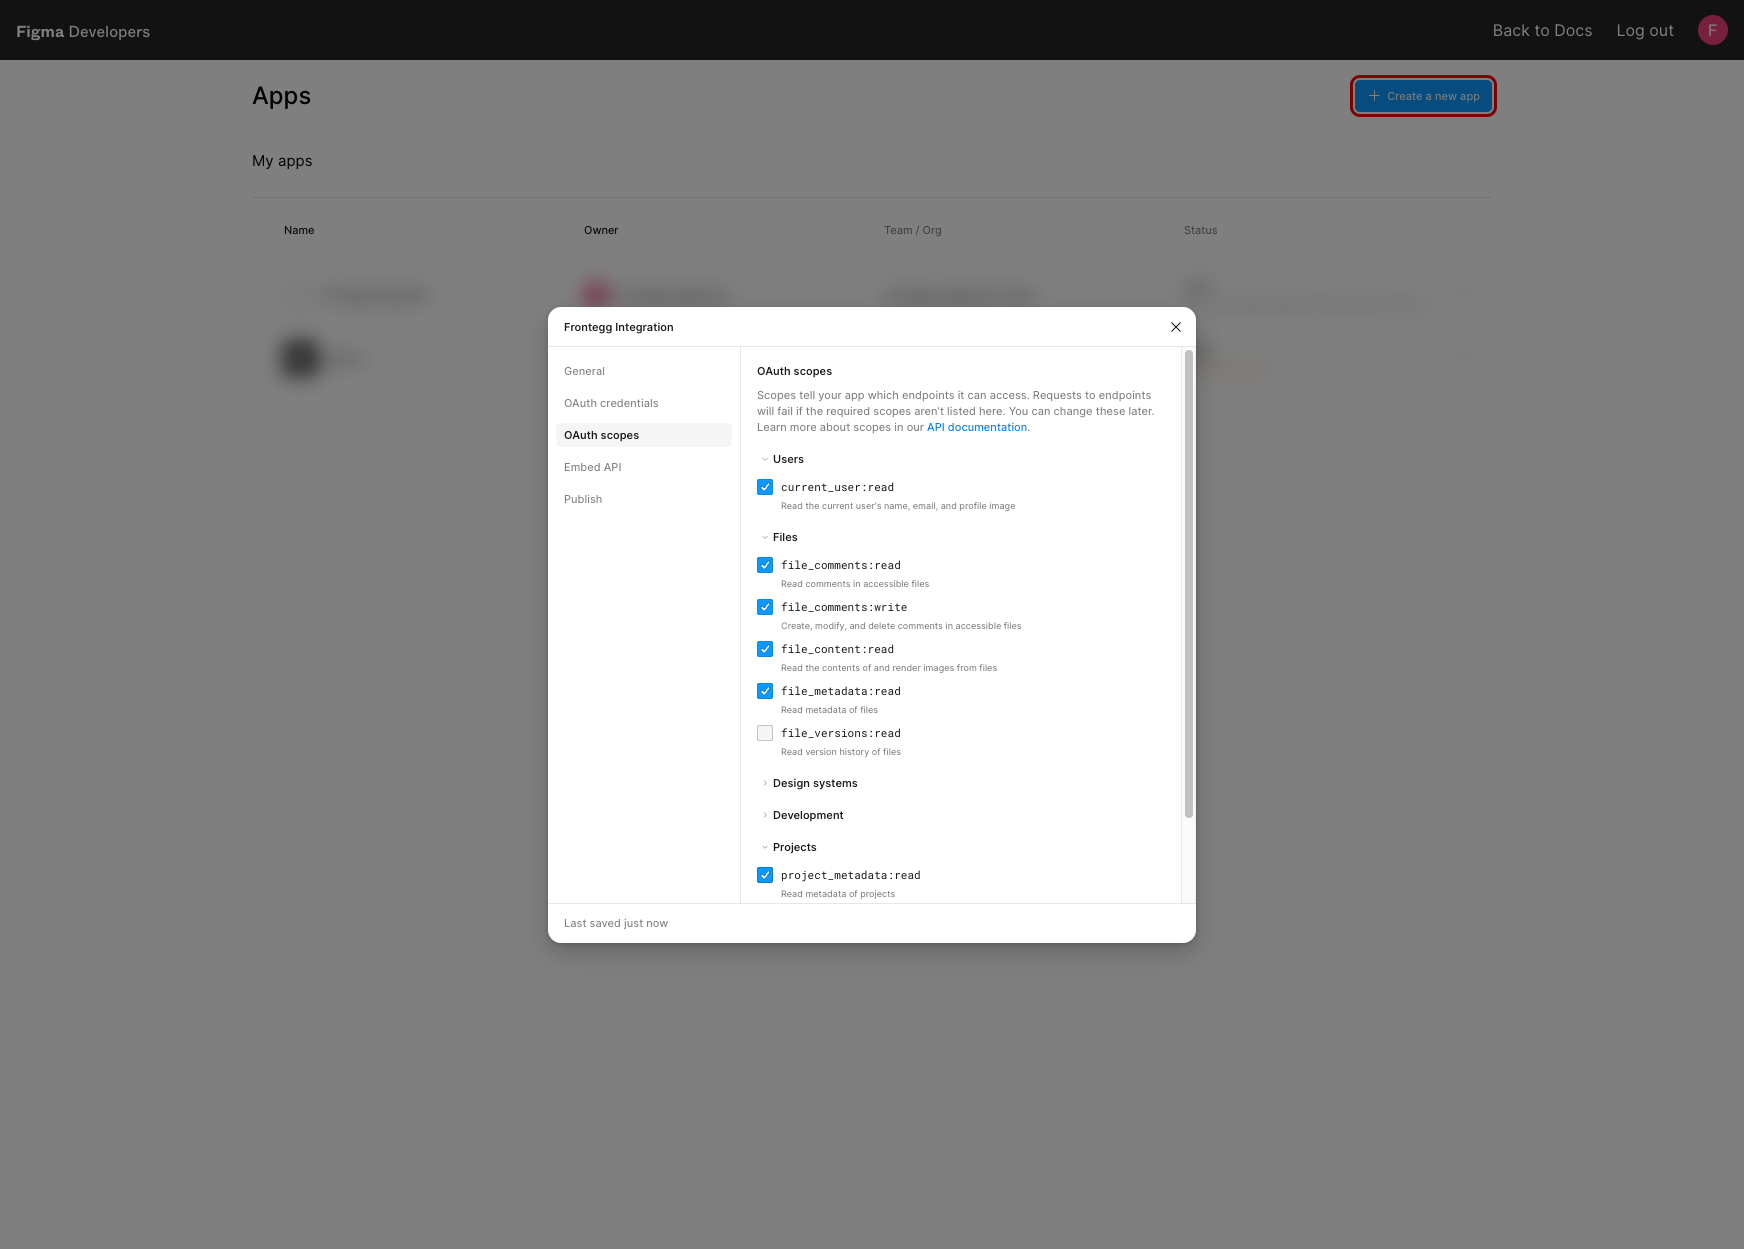
Select the OAuth scopes tab. Expand the Users, Files, and Projects categories and enable the scopes below by selecting their checkboxes:
| Scope | Description |
|---|---|
current_user:read | Read the current user's name, email, and profile image |
file_content:read | Read the contents of and render images from files |
file_metadata:read | Read metadata of files |
file_comments:read | Read comments in accessible files |
file_comments:write | Create, modify, and delete comments in accessible files |
project_metadata:read | Read metadata of projects |
Minimum required scopes
Minimum required scopes
For core file and comment functionality you need current_user:read, file_content:read, file_comments:read, and file_comments:write. To list a team's project structure, Figma also requires the projects:read scope, which is marked Private and must be approved by Figma.
Scopes are saved automatically when you select them.
Once you have your Client ID and Client Secret from the steps above, enter them in the integration configuration page of the Frontegg portal:
- Open the Frontegg portal and navigate to [ENVIRONMENT] → Integrations → Figma.
- Enter the Client ID and Client Secret in the corresponding fields.
- Select the required scopes.
- Click Save.