Environment-level domain restrictions
To enhance control over user activity in your app, Frontegg offers account domain restriction within your environment settings, allowing you to either allow or block user sign-ups when users belonging to specific domains try to access your app. This option becomes especially useful if you want to fine-tune user traffic by allowing or restricting users from accessing it.
Use cases
Suppose you aim to enhance user control in your application by implementing Frontegg's domain restriction feature. By enabling this functionality, you can regulate user sign-ups based on specific domain criteria.
As an administrator, you can input the domains from which users can sign up. For example, @xyzcorporation.com and @partnercompany.com. With domain restrictions enabled, users attempting to sign up with email addresses outside the specified domains are notified that their sign-up is restricted.
Feature highlights
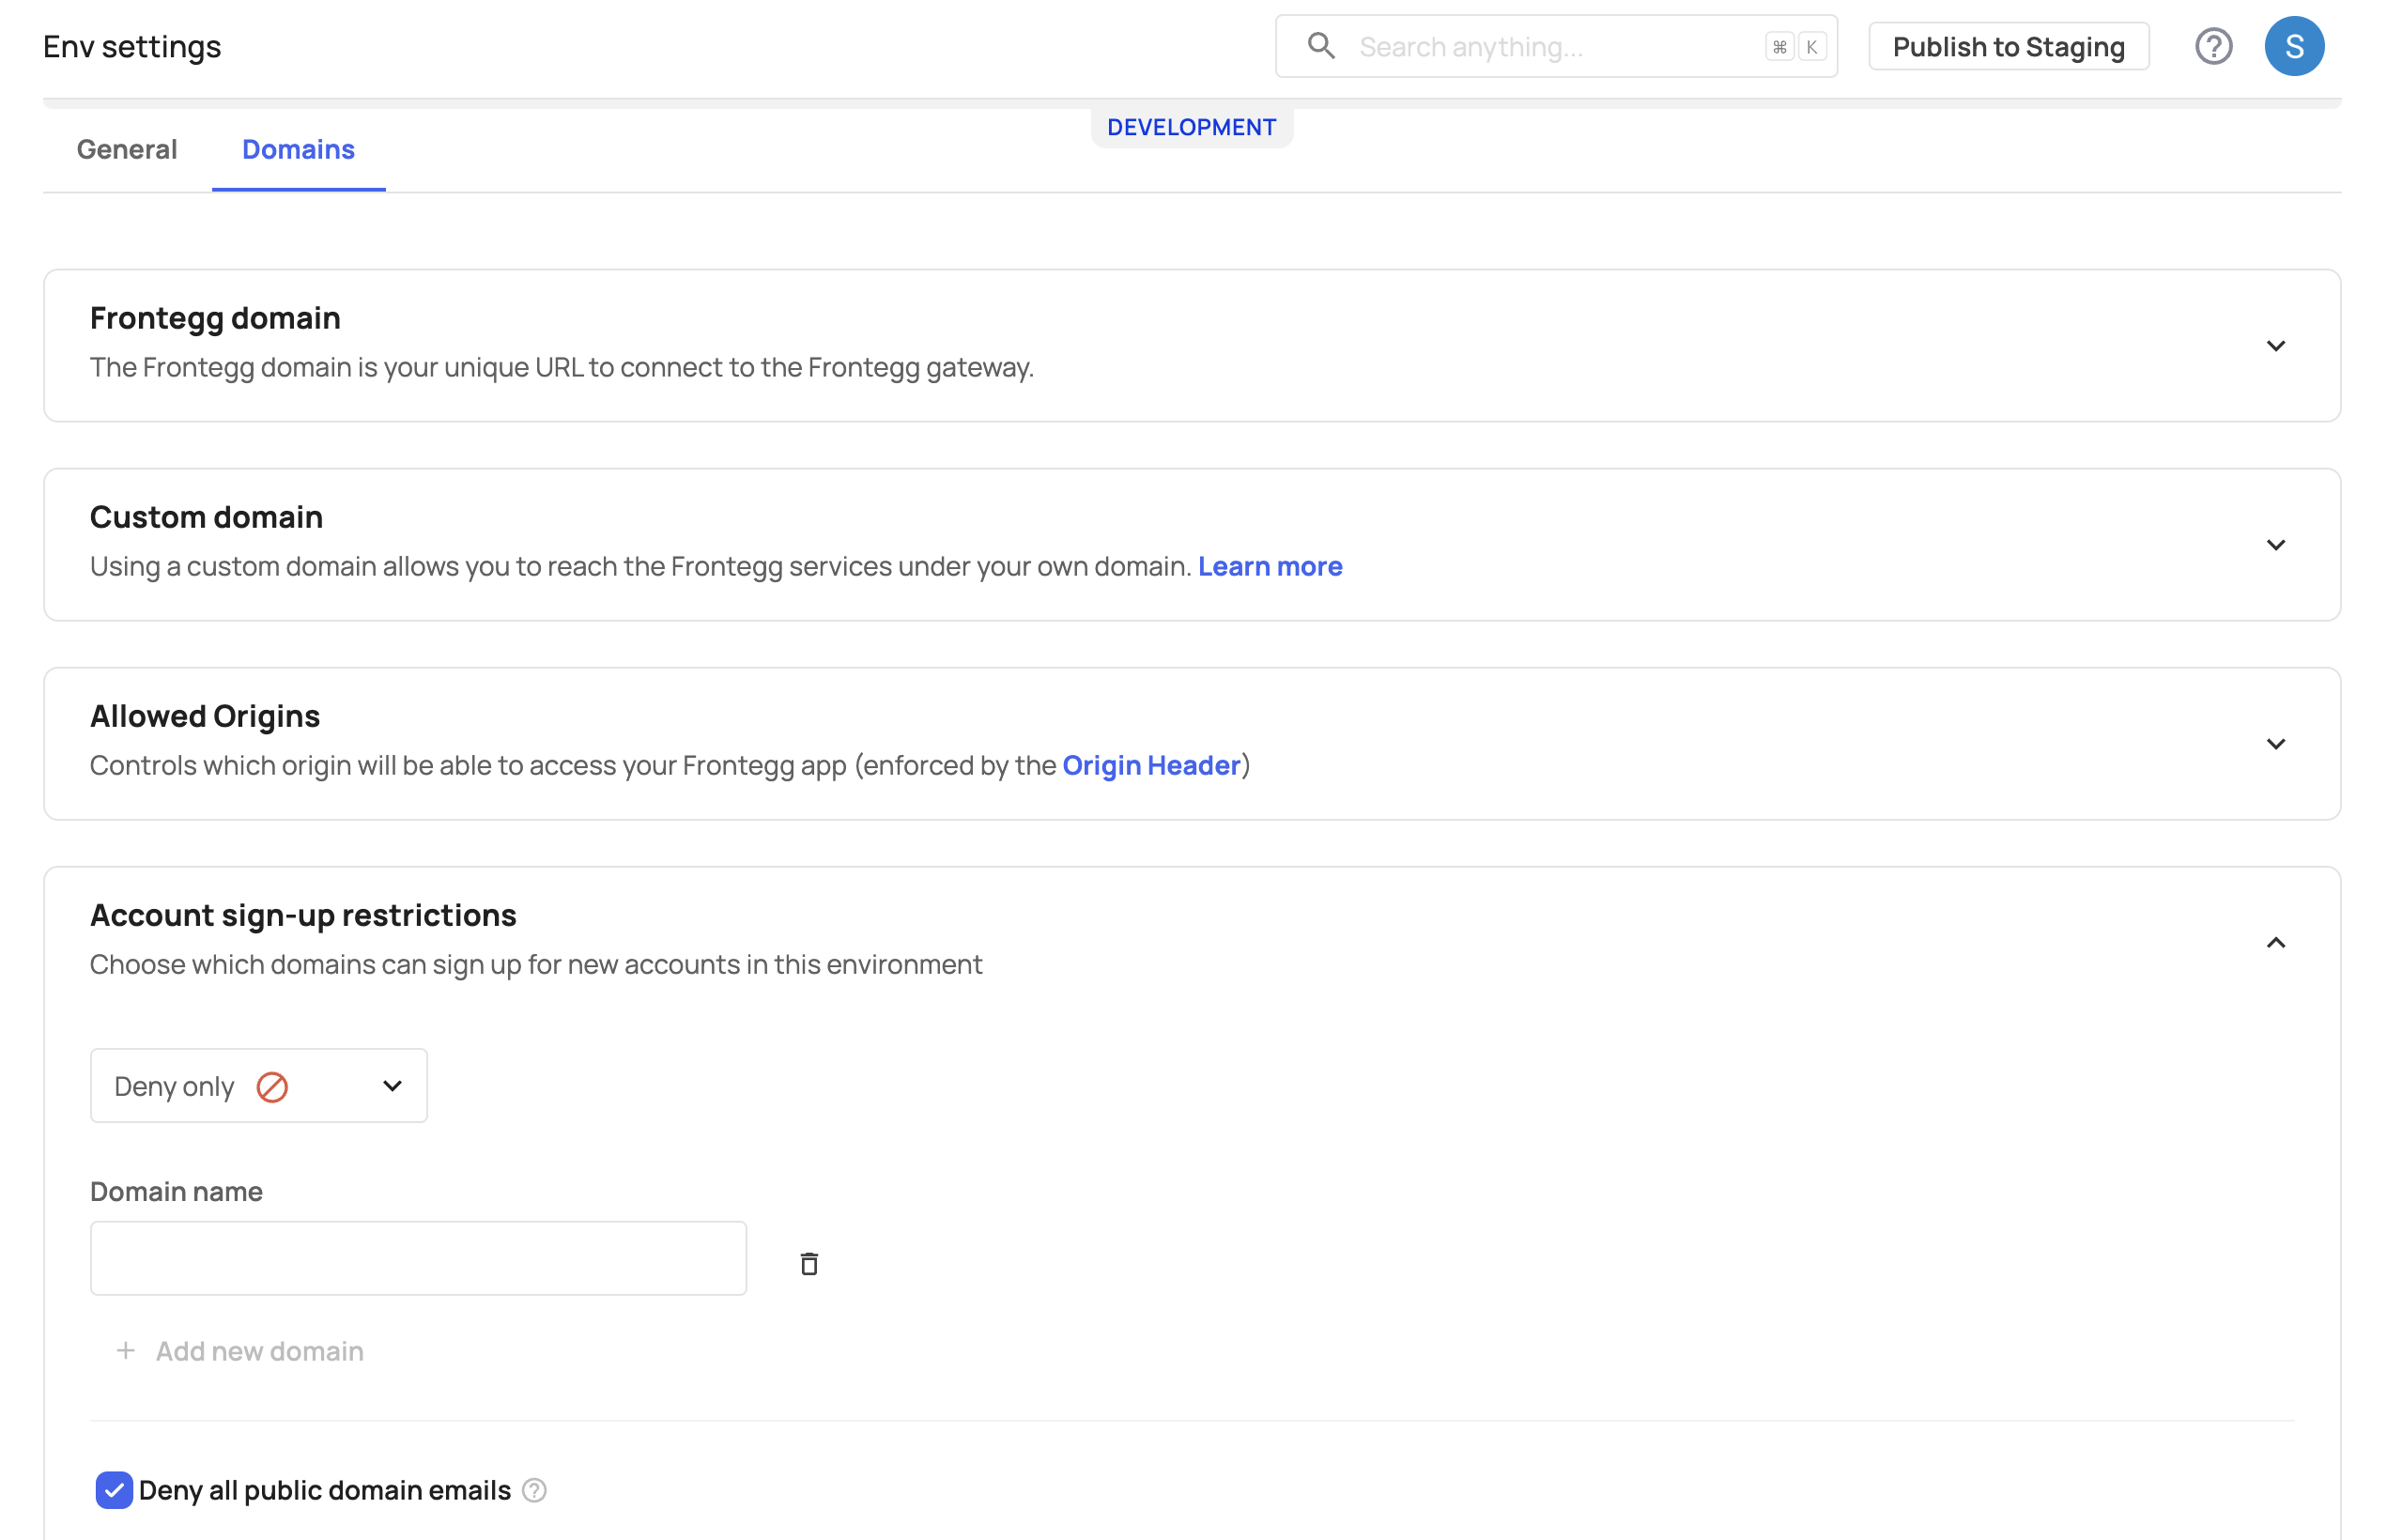
Domain restriction offers the following finely-grained options:
- Deny only - Users belonging to domains in this list are blocked from signing up.
- Allow only - Users belonging to domains in this list are the only ones allowed to sign up for an account in this environment (see note).
- Deny public domain - Users with emails from public domains (e.g., Gmail, Yahoo) are restricted from signing up to this environment.
Environment-specific settings
Environment-specific settings
Note that account sign-up settings are not applied across all of your environments when enabled in one of them. You need to apply these settings separately to initiate them in specific environments.
Environment sign-up restrictions setup
To set environment restrictions by domain, go to [ENVIRONMENT] → Configurations → Keys & domains → Domains → Account sign-up restrictions. Here, you can either Deny domains, Allow domains, or Deny all public domain emails.
Domain restriction via API
Check out our API Reference to perform domain restriction via API.
Account-level IP and domain restrictions
The Frontegg portal gives you a centralized interface to manage domain and IP restrictions for the accounts within your environment.
IP vs. domain restrictions
IP vs. domain restrictions
IP restrictions apply to sign-up and logging in, meaning users accessing from a blocked IP will be denied access. Domain restrictions apply to sign-up and invitation, meaning users with a blocked domain cannot register or be invited, but already activated users remain unaffected.
Restricting an IP
To restrict access for a specific IP address, follow these steps:
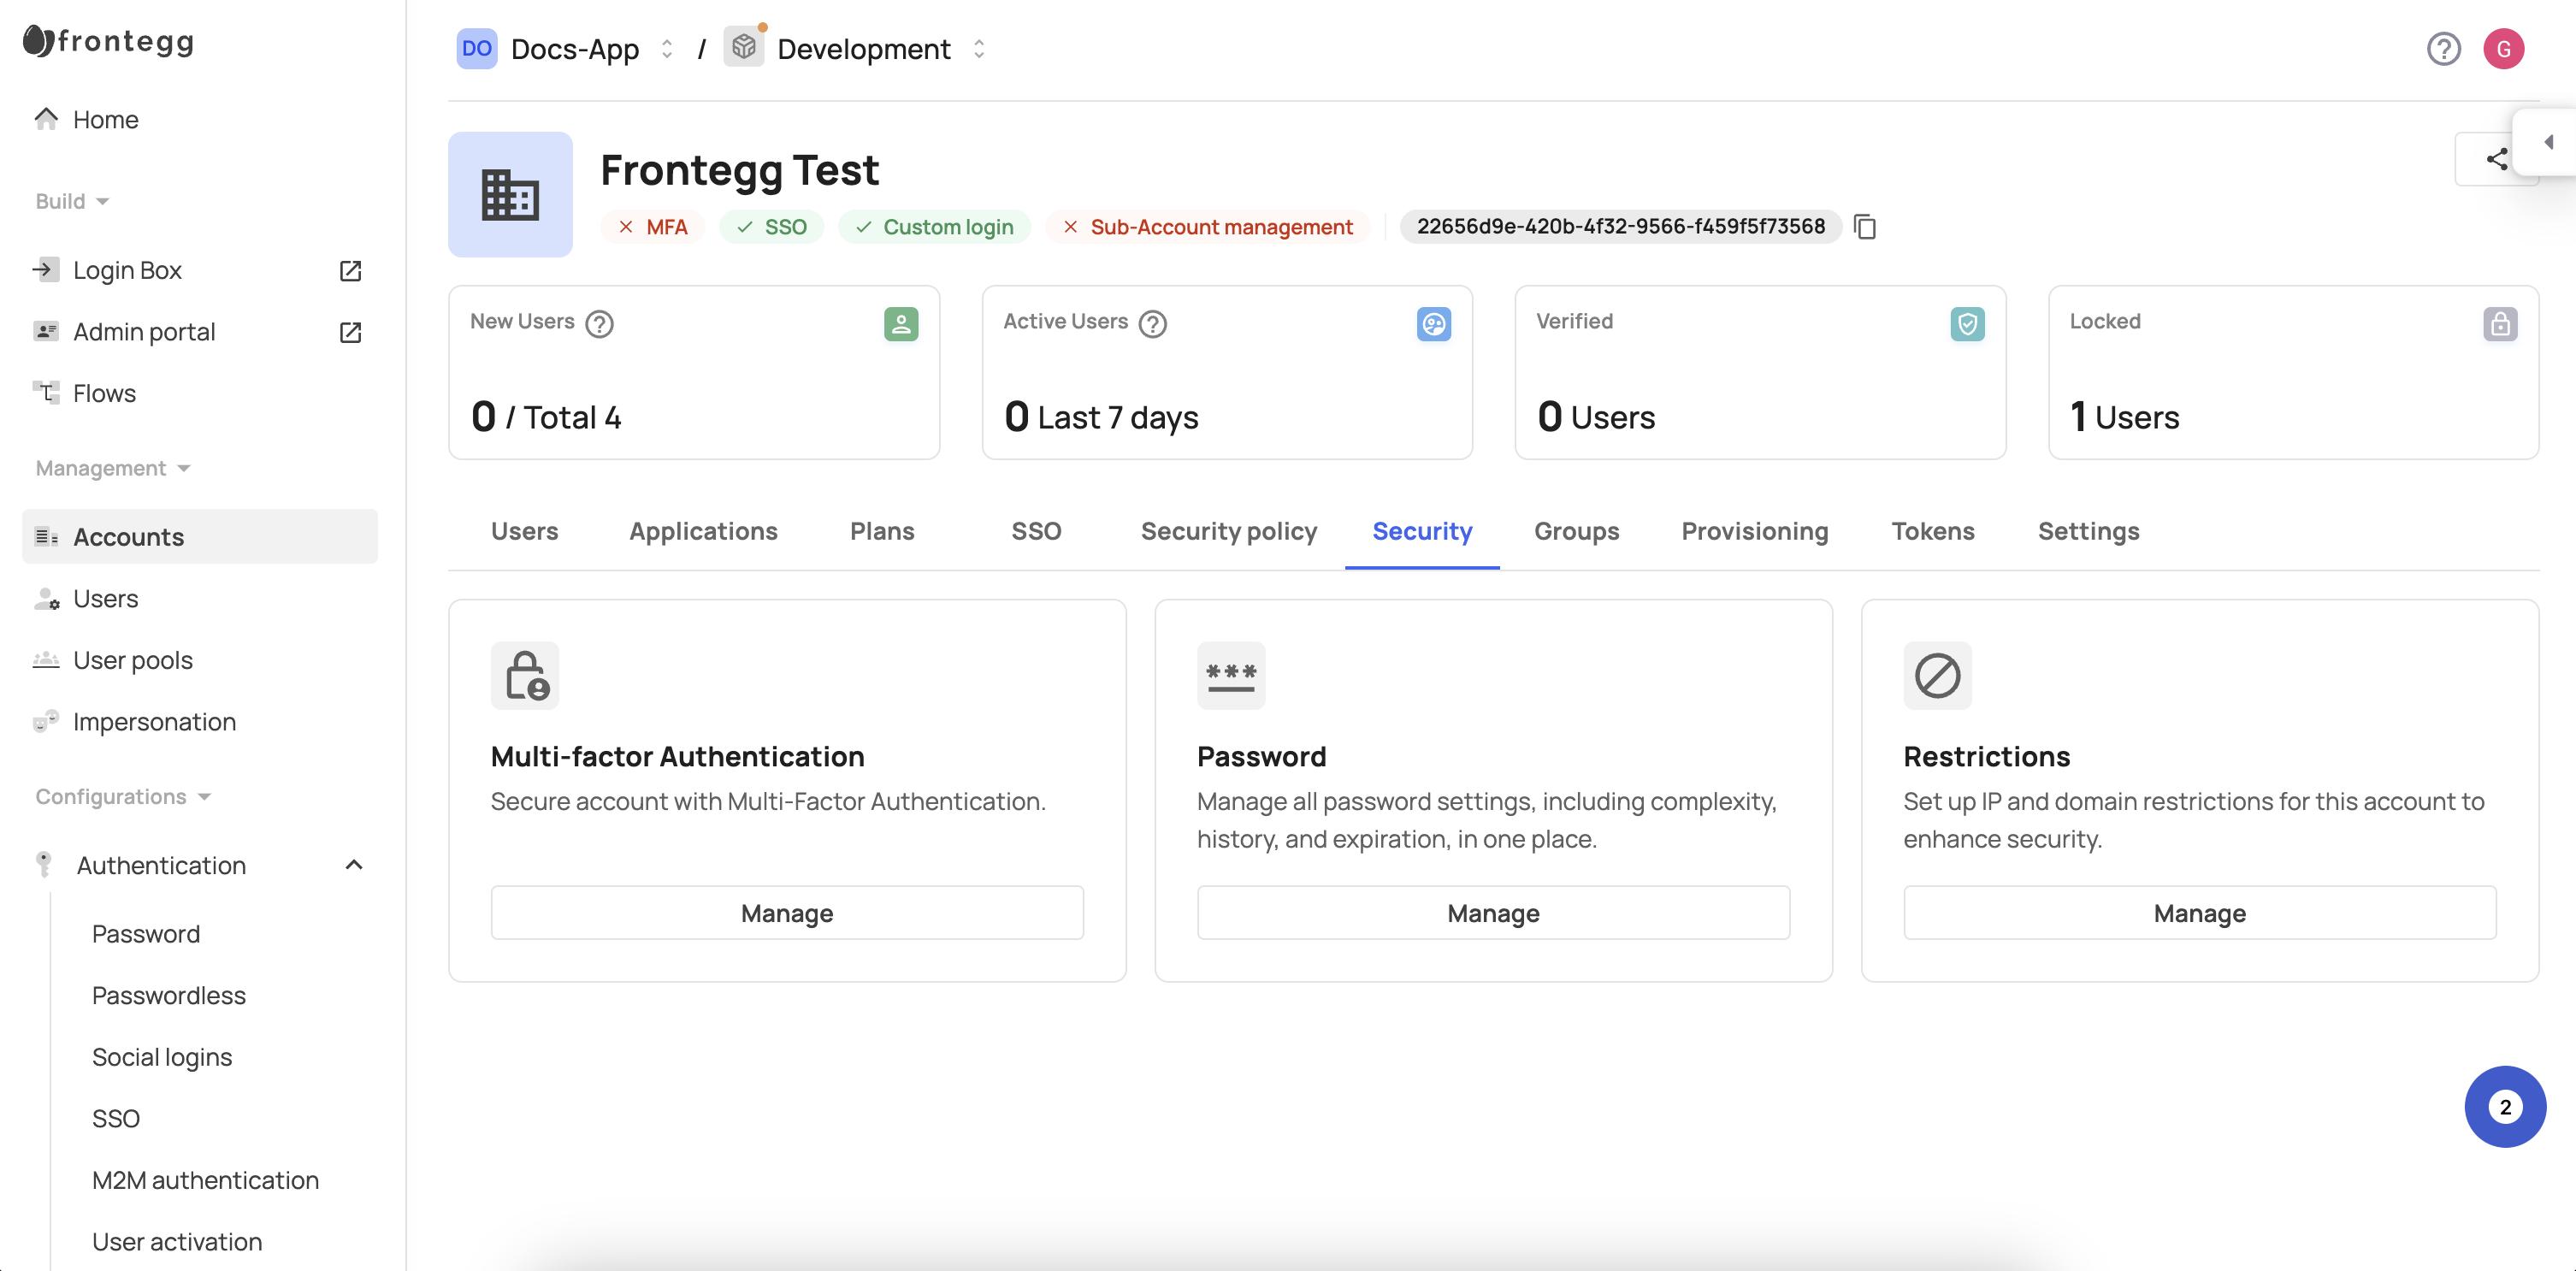
- Open the Frontegg portal.
- Navigate to a specific account → click the Security tab → choose "Restrictions".
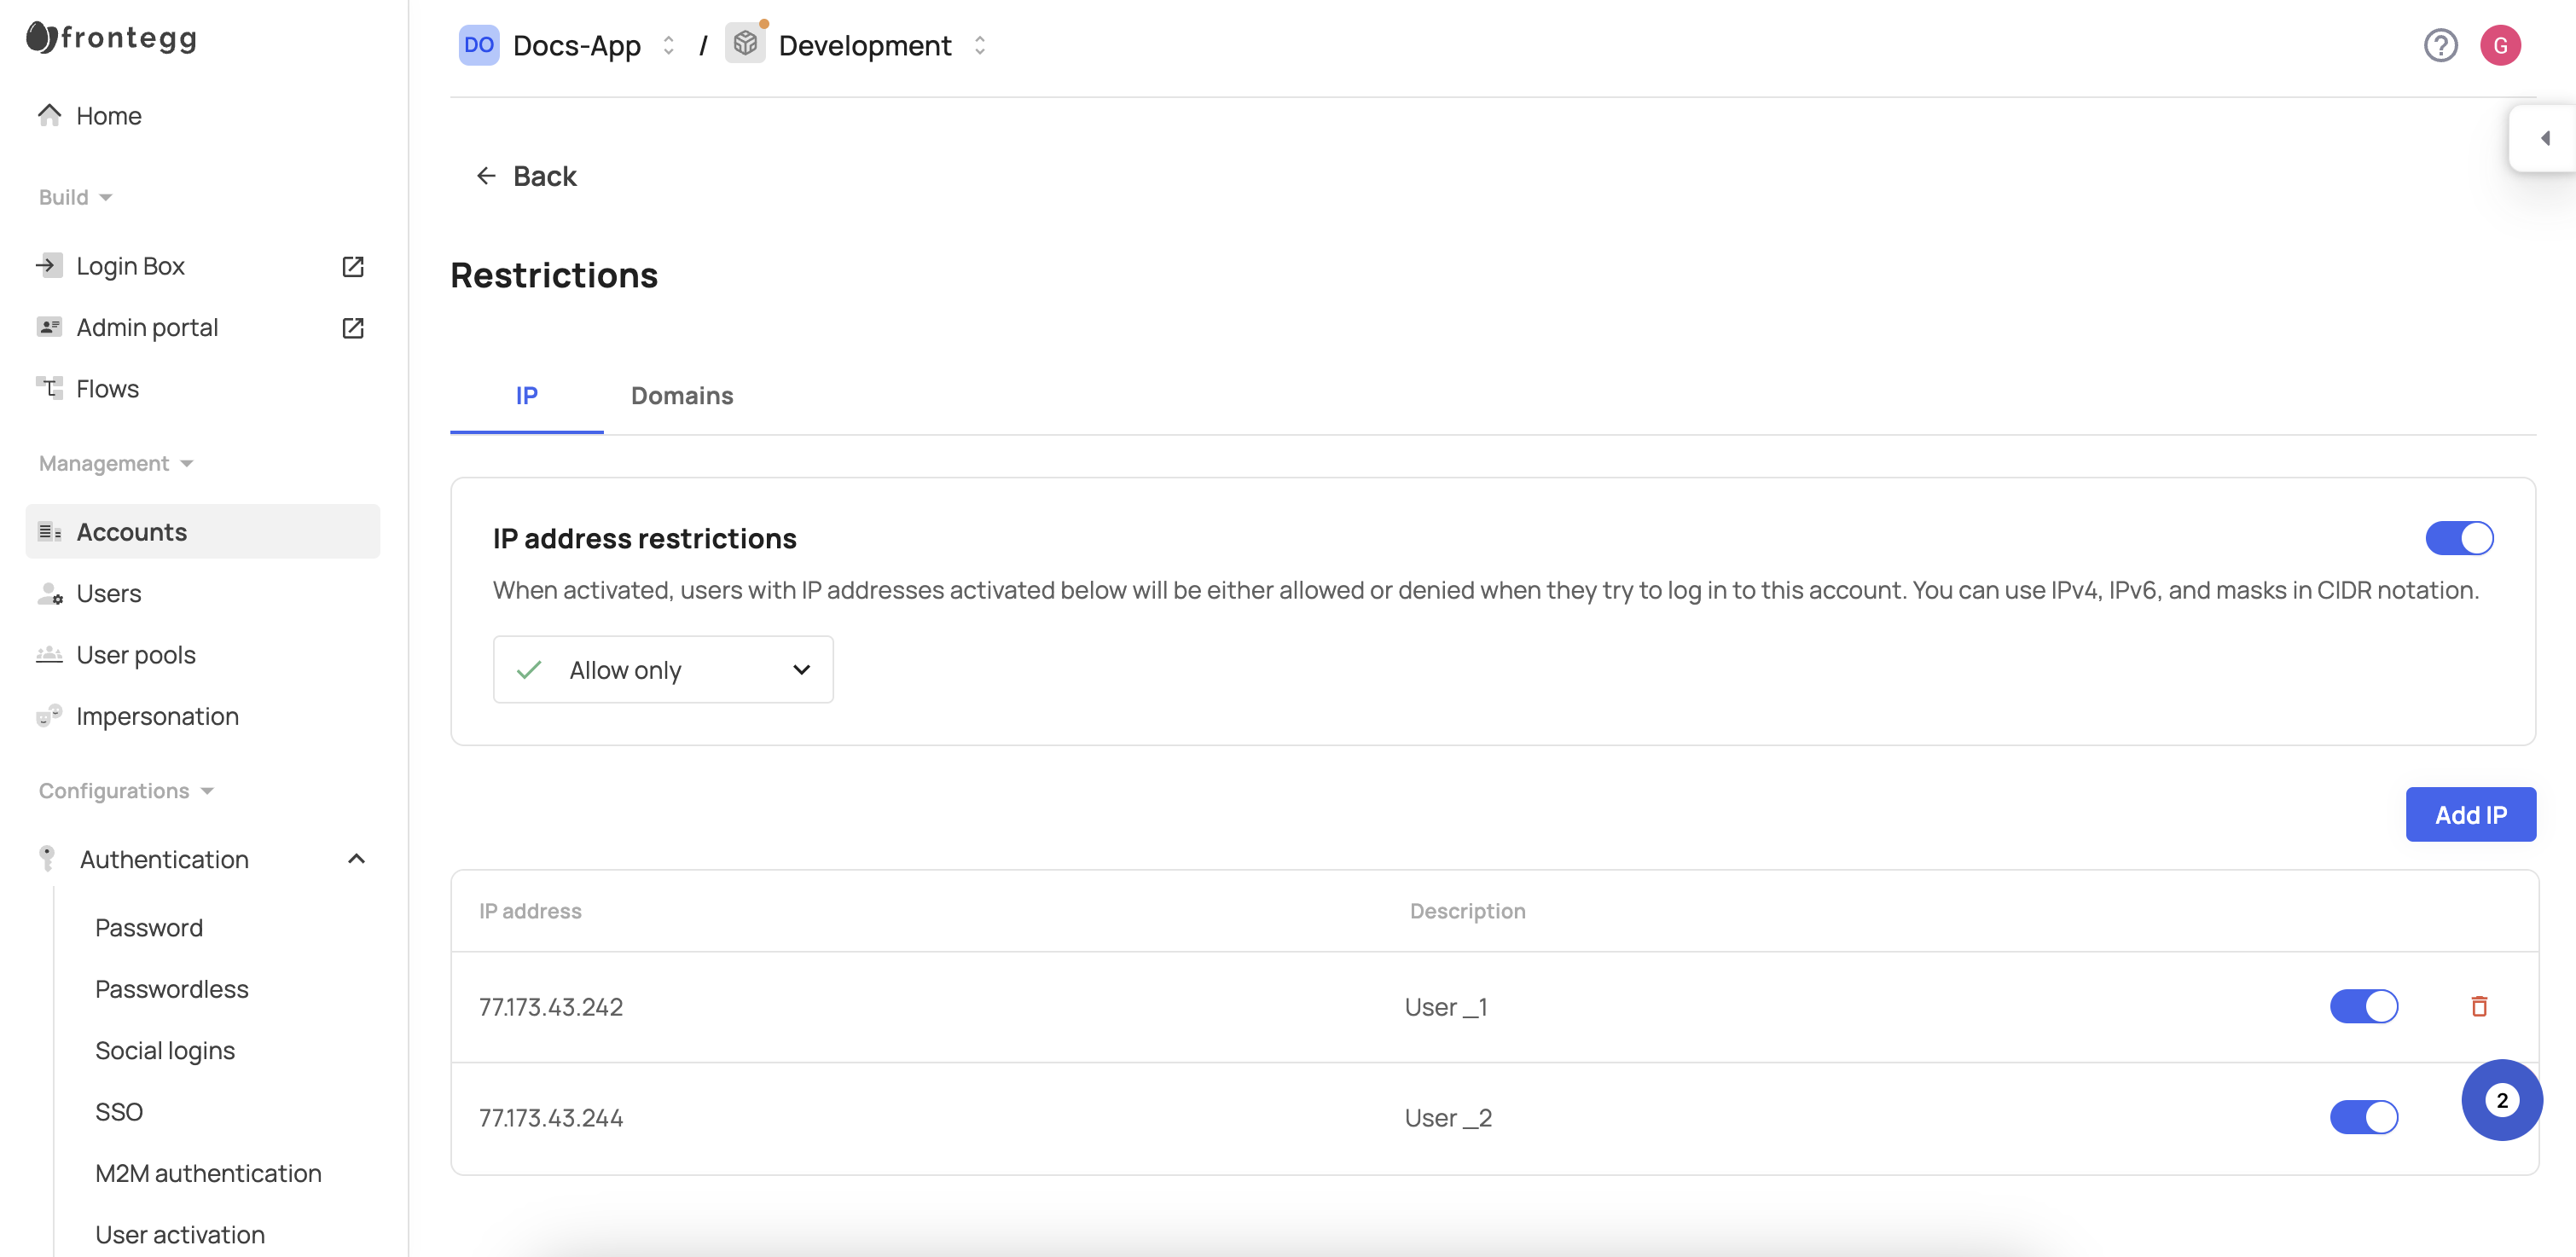
- Enable IP address restriction by toggling the switch.
- Confirm by clicking Enable.
- Select the restriction type from the dropdown menu: Allow only or Deny only.
- Click Add IP.
- Enter the IP address in the IP field. Supported formats: IPv4, IPv6, masks, and CIDR notation.
- (Optional) Add a description for the IP address.
- Click Add.
- To disable an IP restriction without removing the IP from the list, deactivate the toggle in the row of the IP you want to disable.
- To permanently remove an IP restriction, click the bin icon in the row of the IP you want to remove and click Delete IP.
- To switch the restriction type for all IP addresses between Deny only and Allow only, select the required restriction list type from the dropdown menu and click Change.
Restricting a domain
To restrict access for specific domains, follow these steps:
- Open the Frontegg portal.
- Navigate to a specific account → click the Security tab → choose "Restrictions".
- Select the Domain tab.
- Enable Domain restriction by toggling the switch.
- Confirm by clicking Turn on.
- Select the restriction type from the dropdown menu: Allow only or Deny only.
- Click Add domain.
- Enter the domain in the Domain field. The syntax is auto-validated.
- Click Add.
- To permanently remove a domain restriction, click the bin icon in the row of the domain you want to remove and click Delete domain.
- To switch the restriction type for all domains between Deny only and Allow only, select the required restriction list type from the dropdown menu and click Change.
- To block all public domain email addresses, toggle the Block all public domain emails switch on.