Create SAML application with Google
This guide outlines the steps to create and configure a SAML application in Google, including setup, user assignments, and metadata submission.
Step 1: Create SAML application
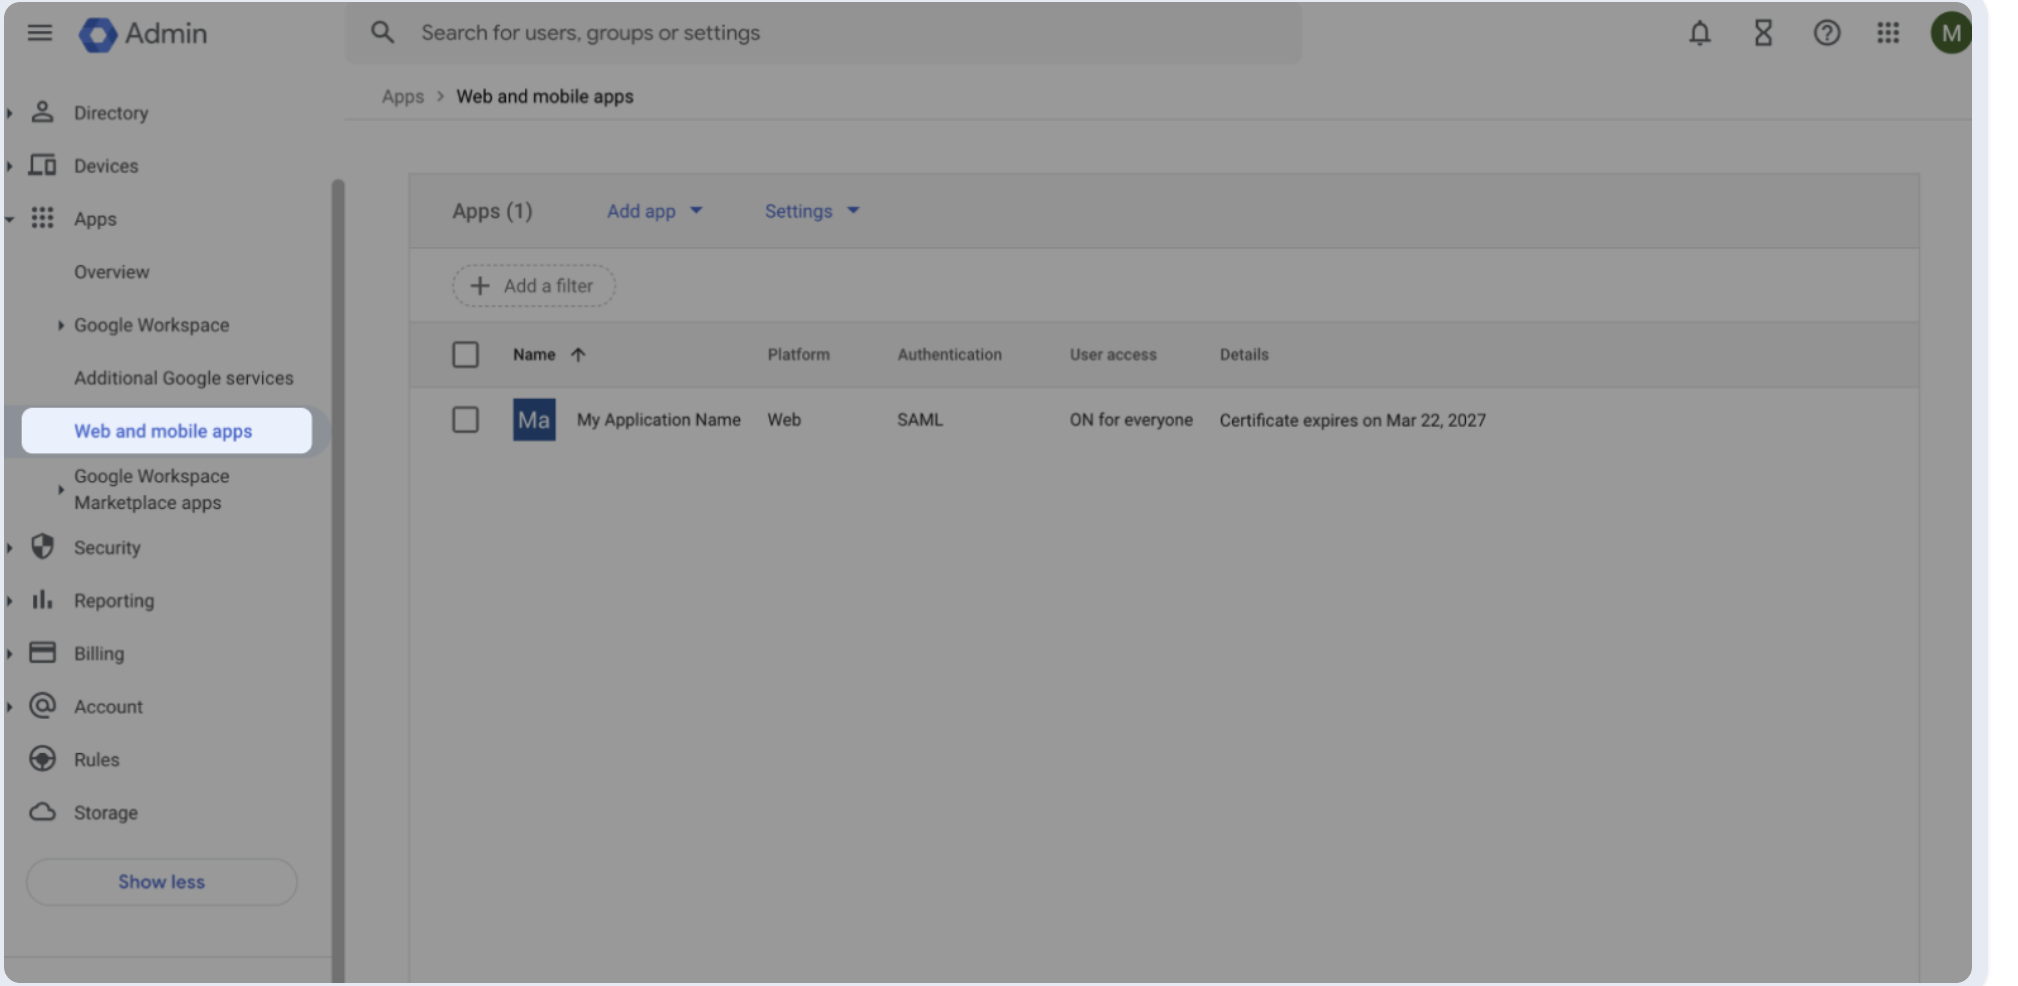
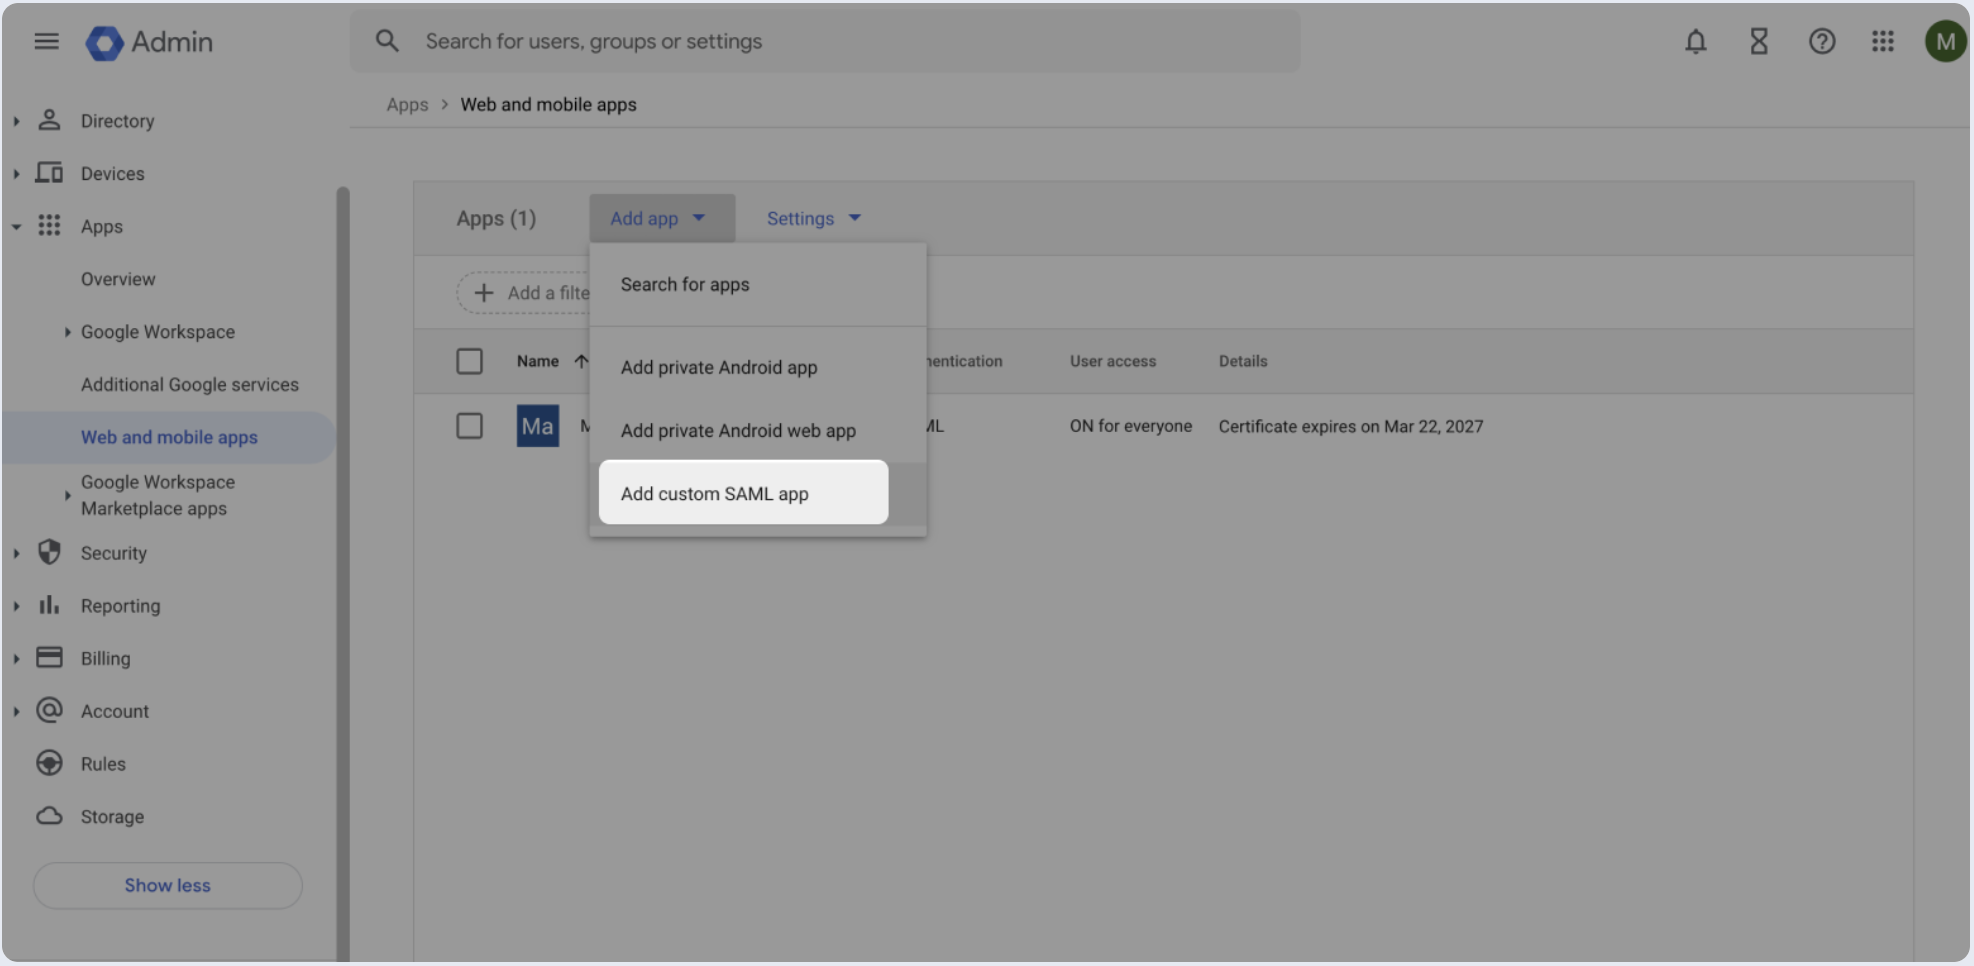
- Log in to your Google Workspace dashboard and click Web and mobile apps in the sidebar.
- Choose Add custom SAML app.
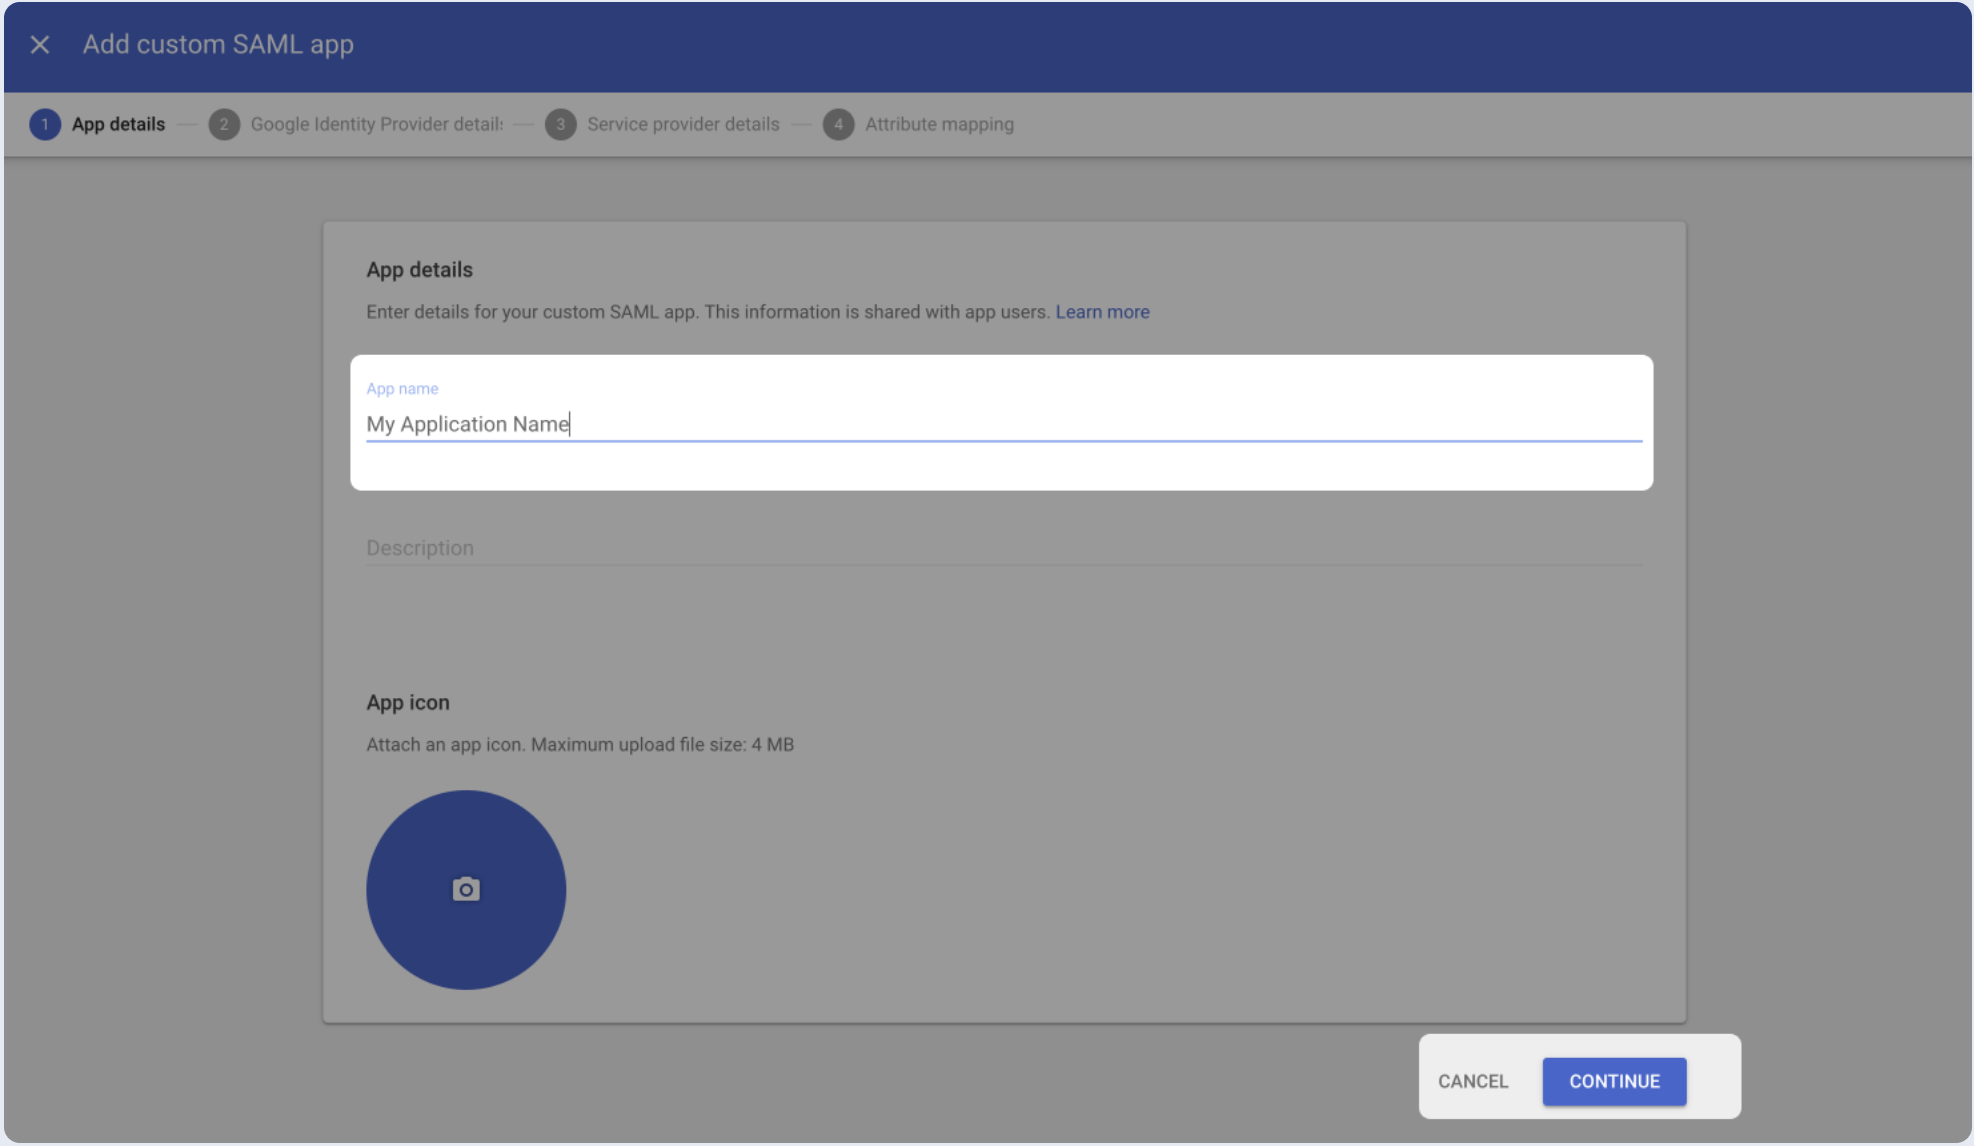
- Enter the name of your application, then click Continue.
- Skip to the next screen by clicking Continue.
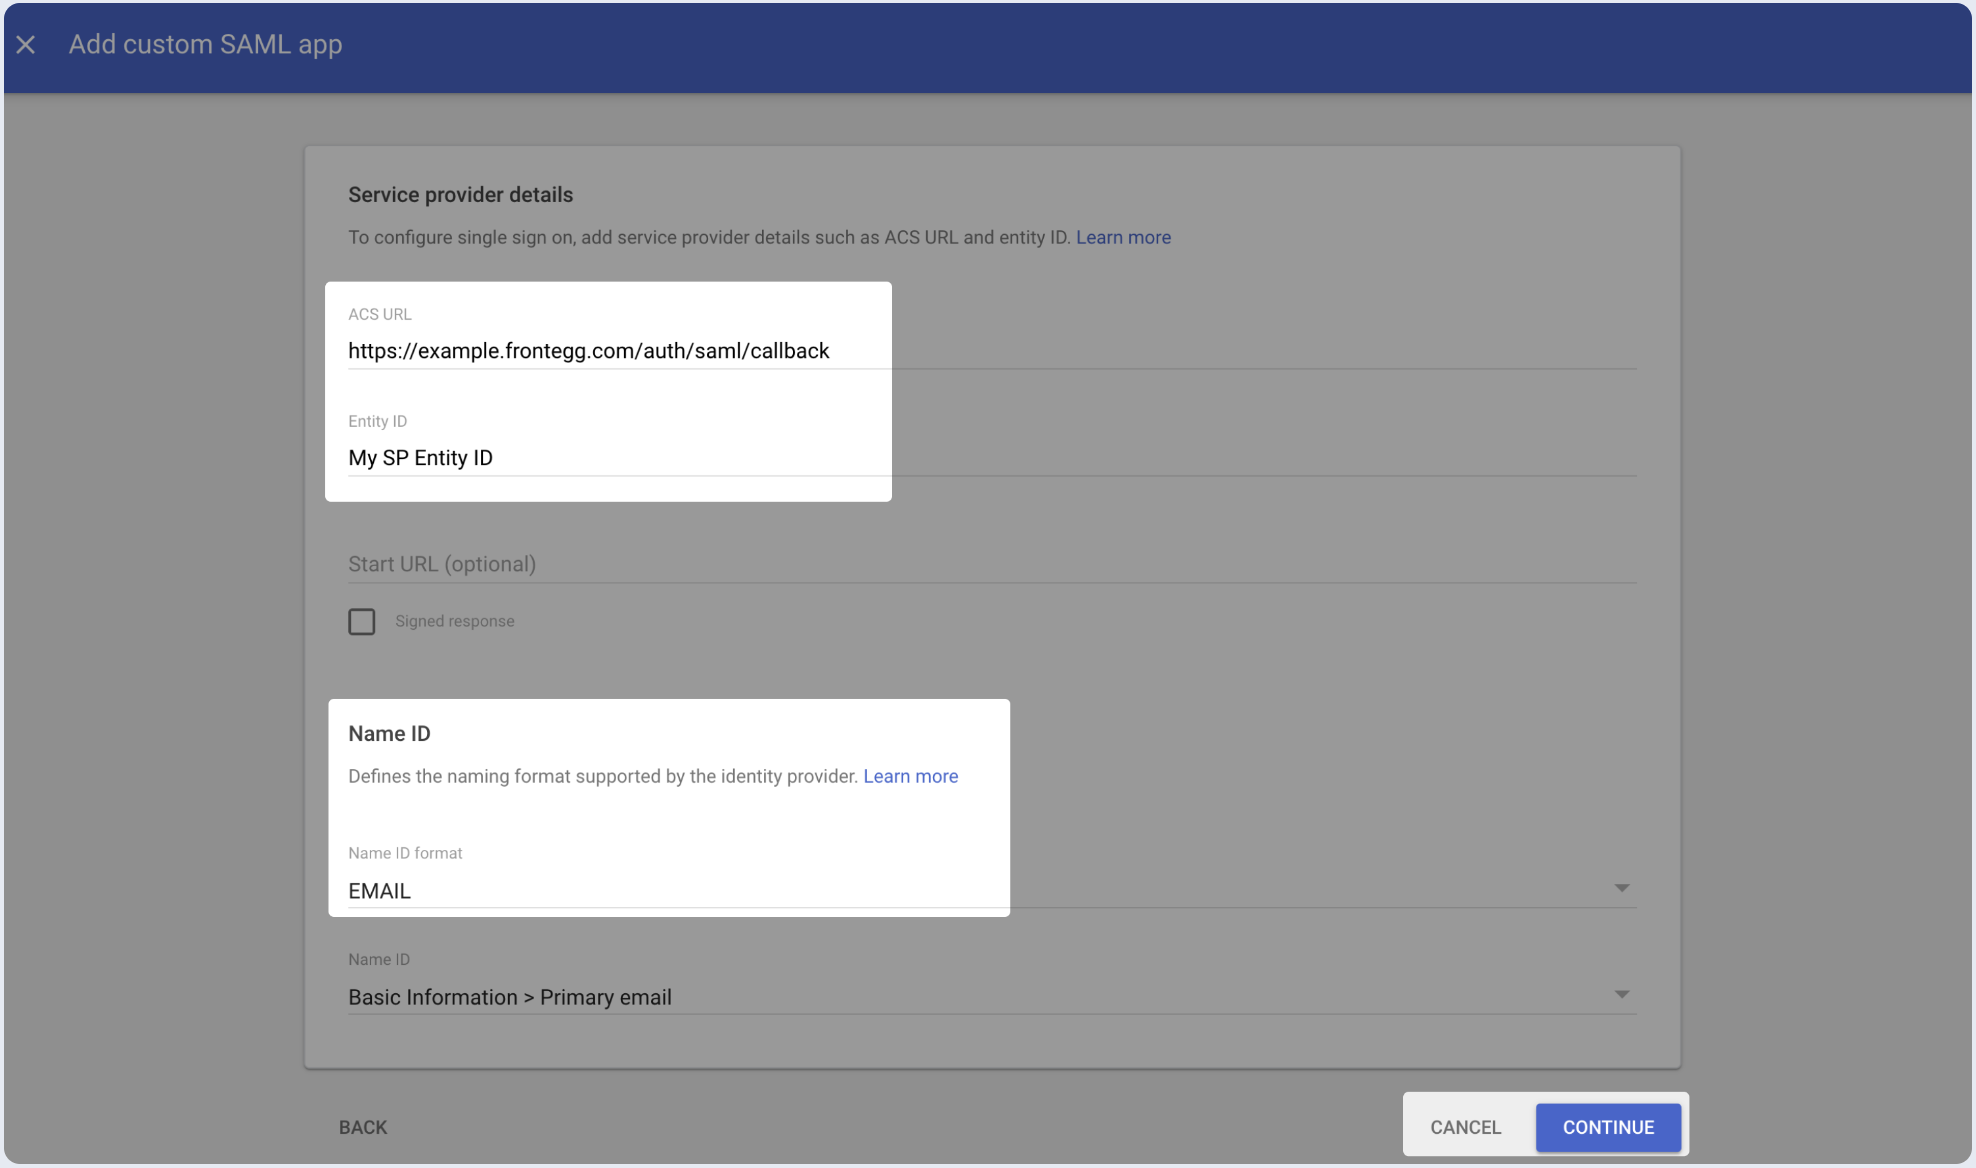
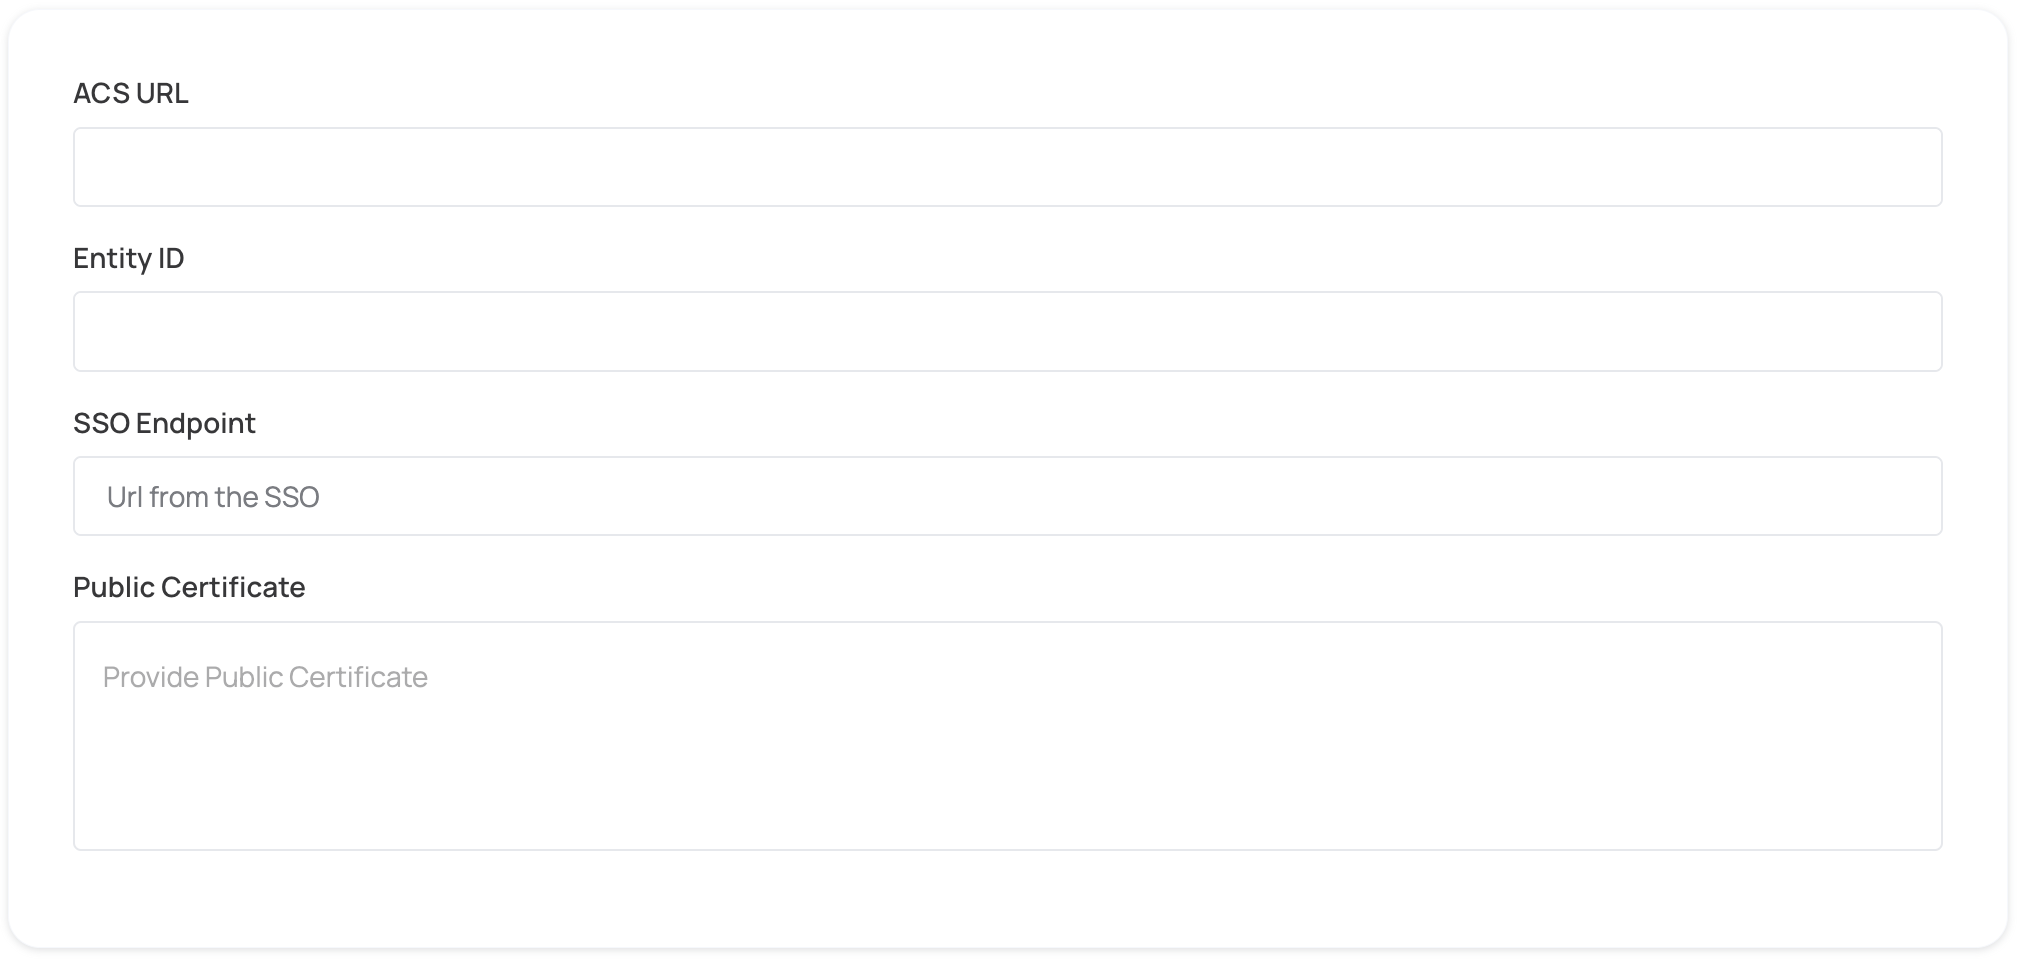
- Copy and paste the values into the relevant fields in the Service provider details section.
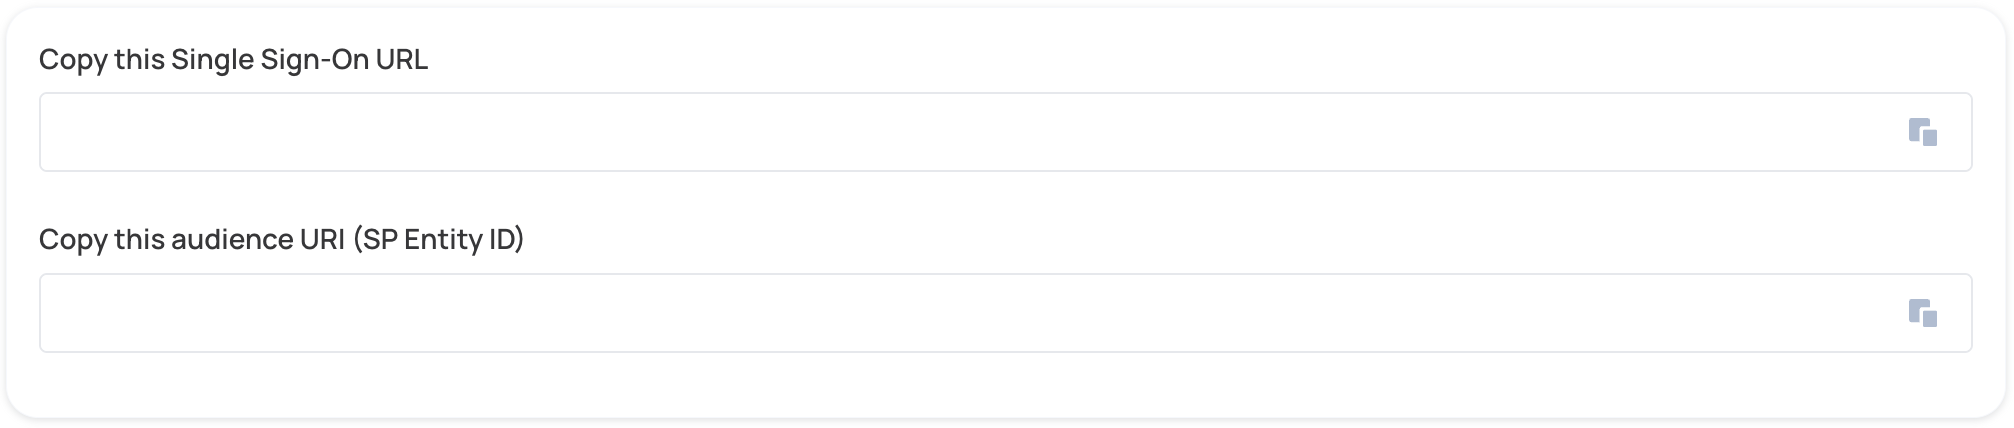
- Paste the ACS URL and Entity ID in the relevant fields.
Step 2: Fill attribute statements (optional)
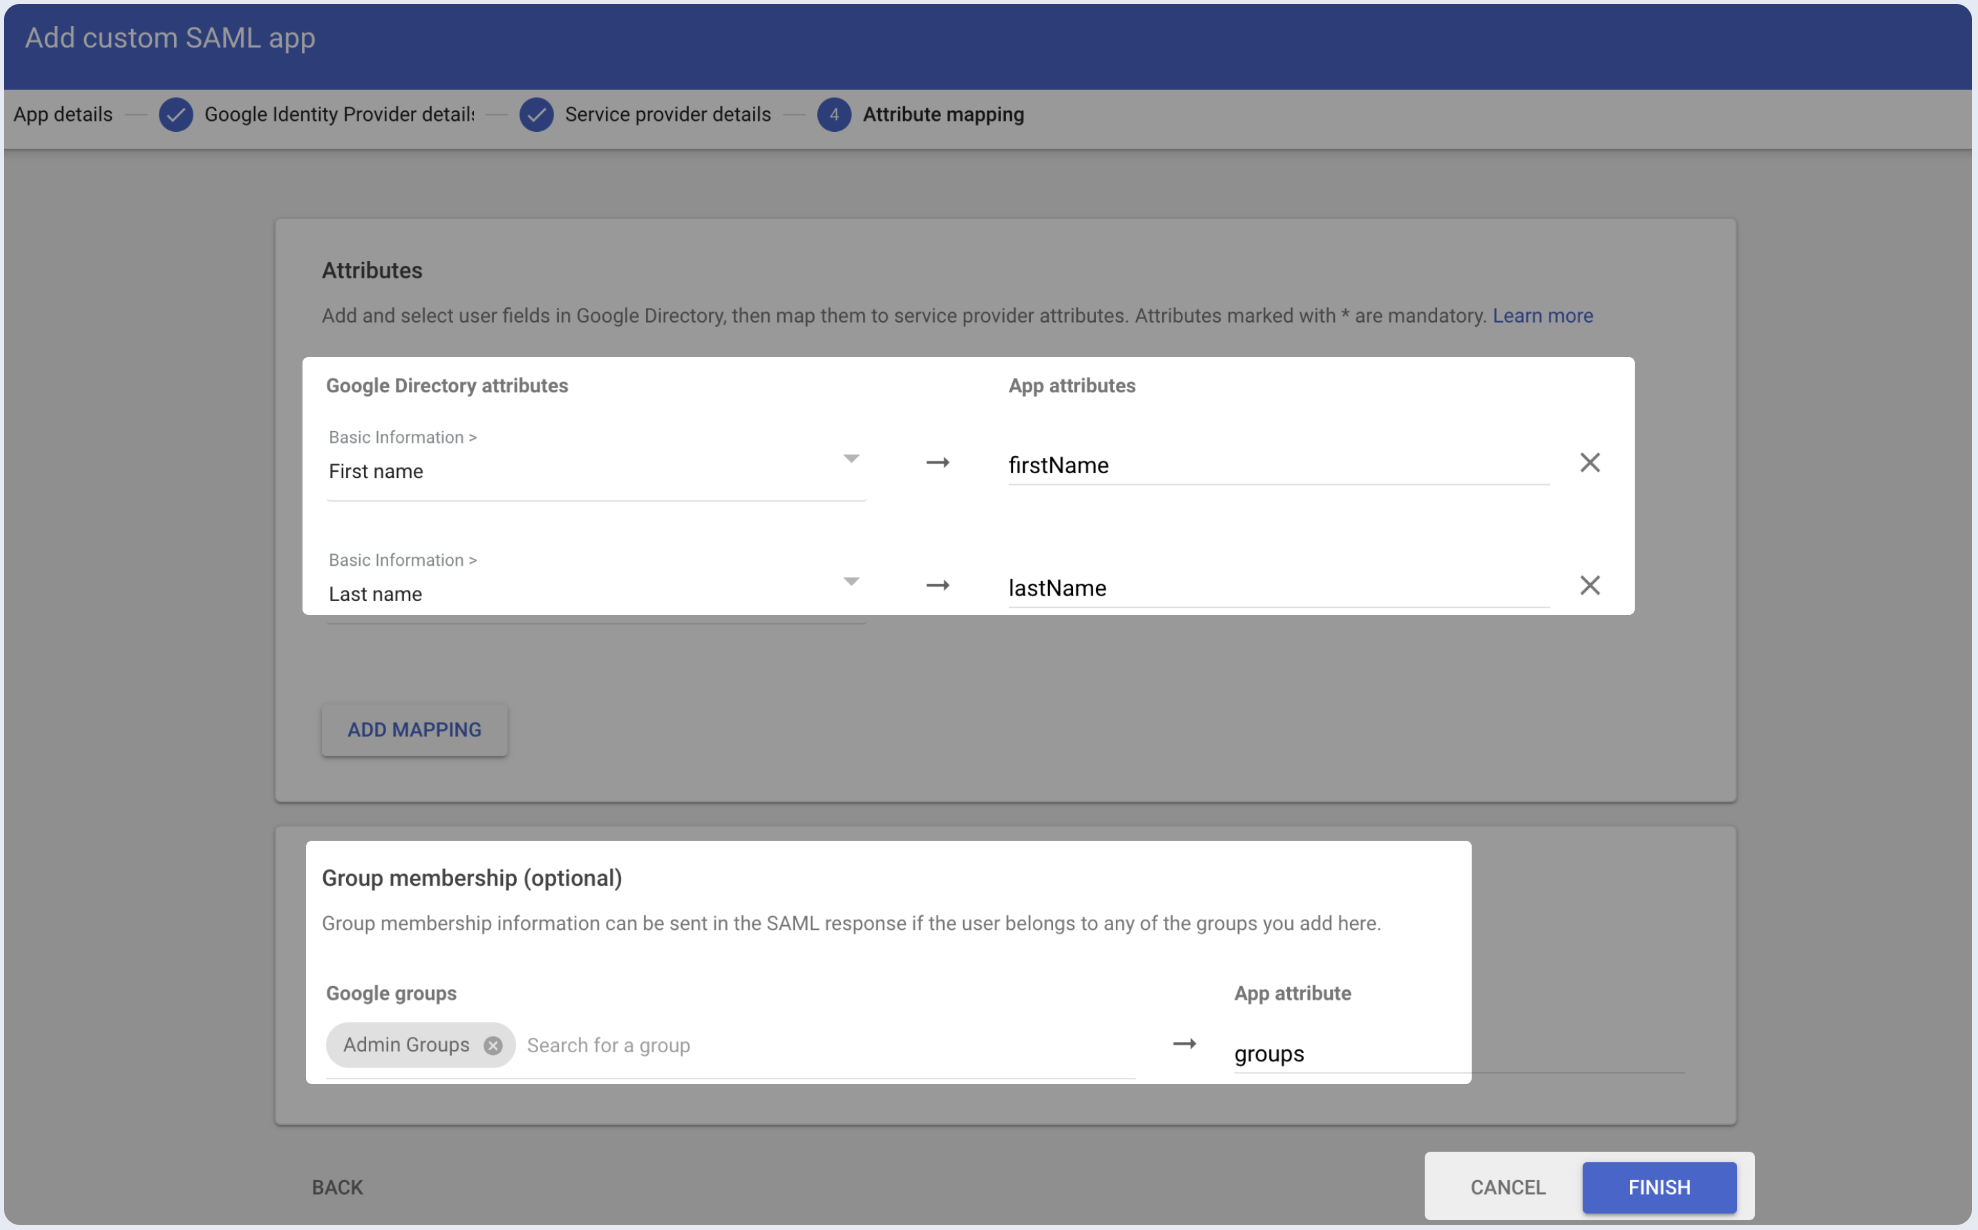
- Go to Attribute mapping (optional) in SAML Settings, fill in the following Attribute Statements:
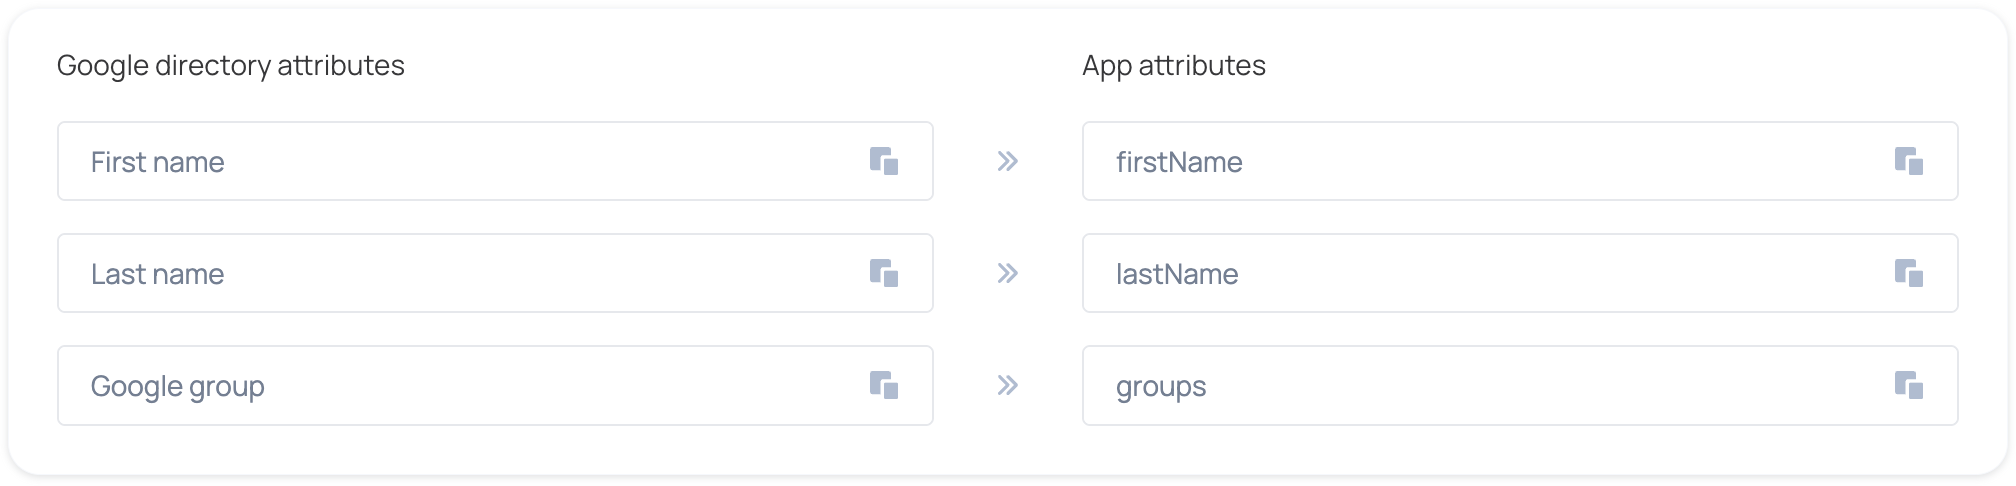
- Fill in the following Attribute Statements and click Finish:
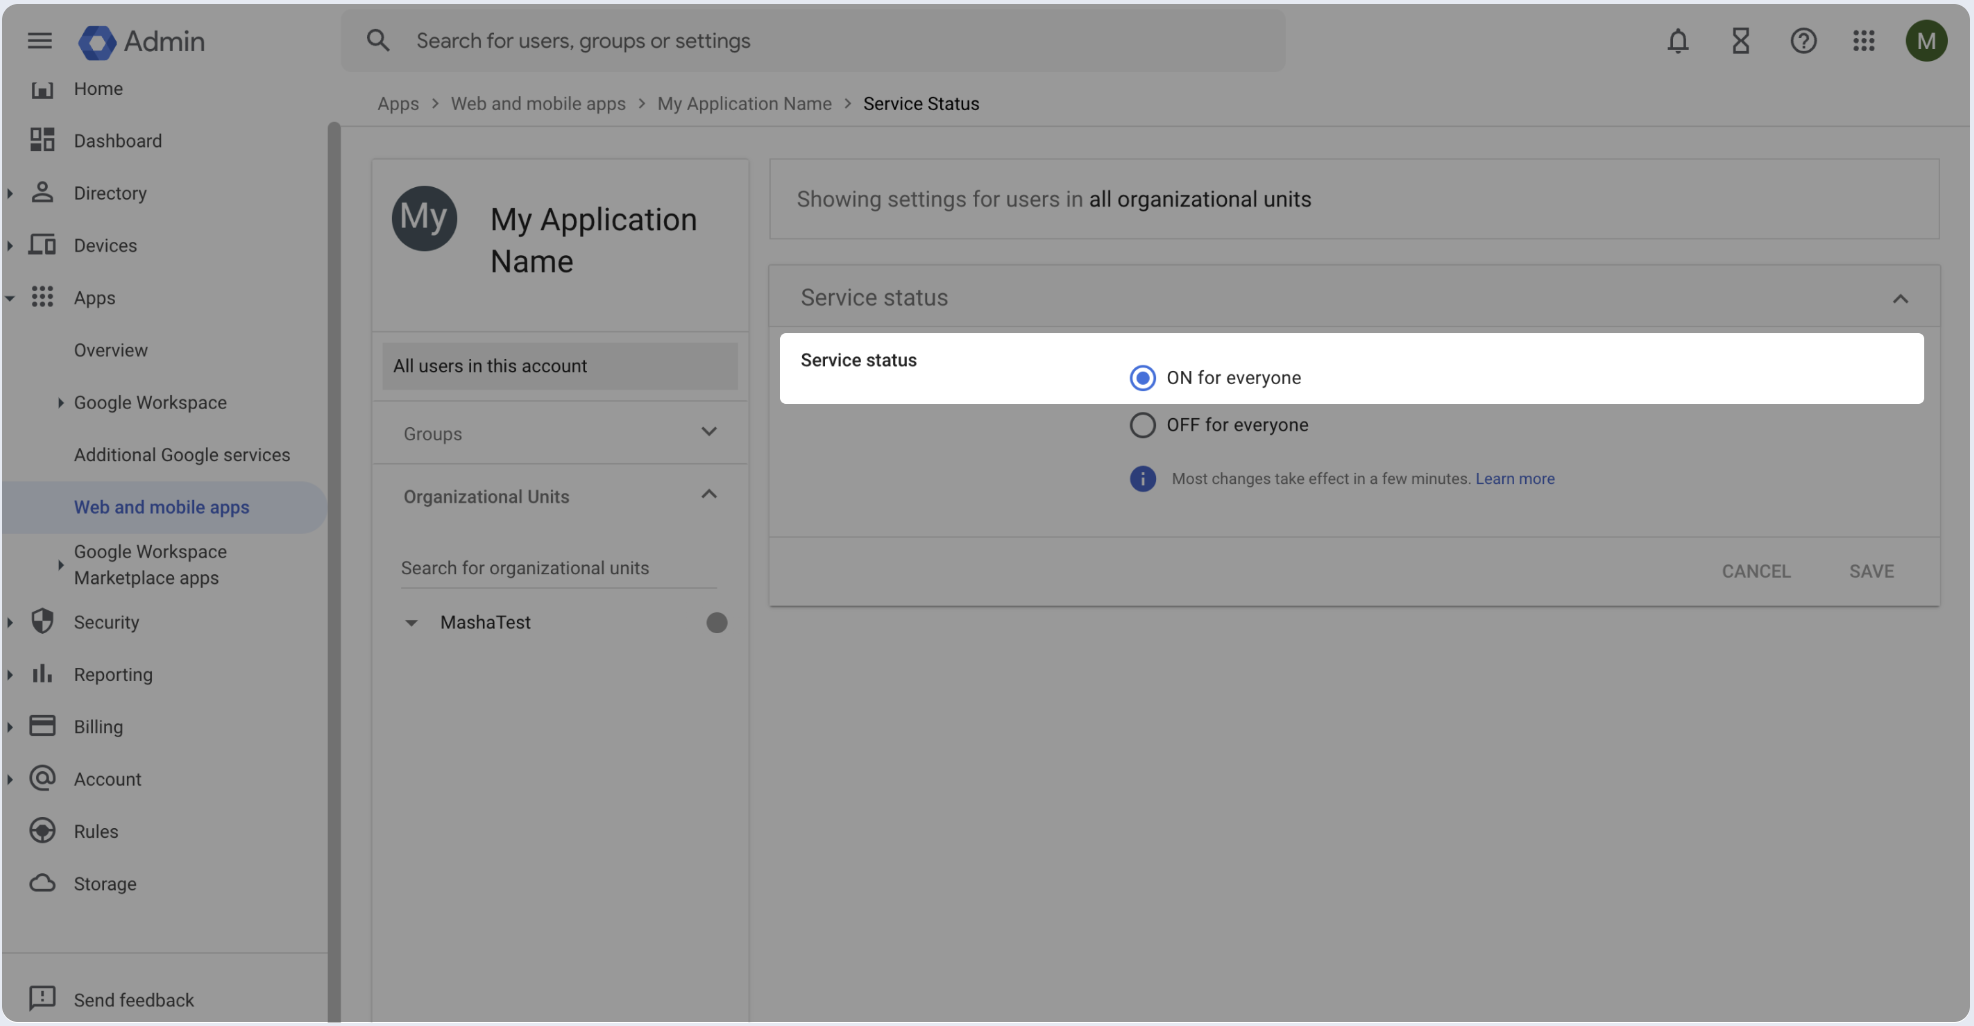
Step 3: Assign users
- Enable user access to the SAML application and click Save.
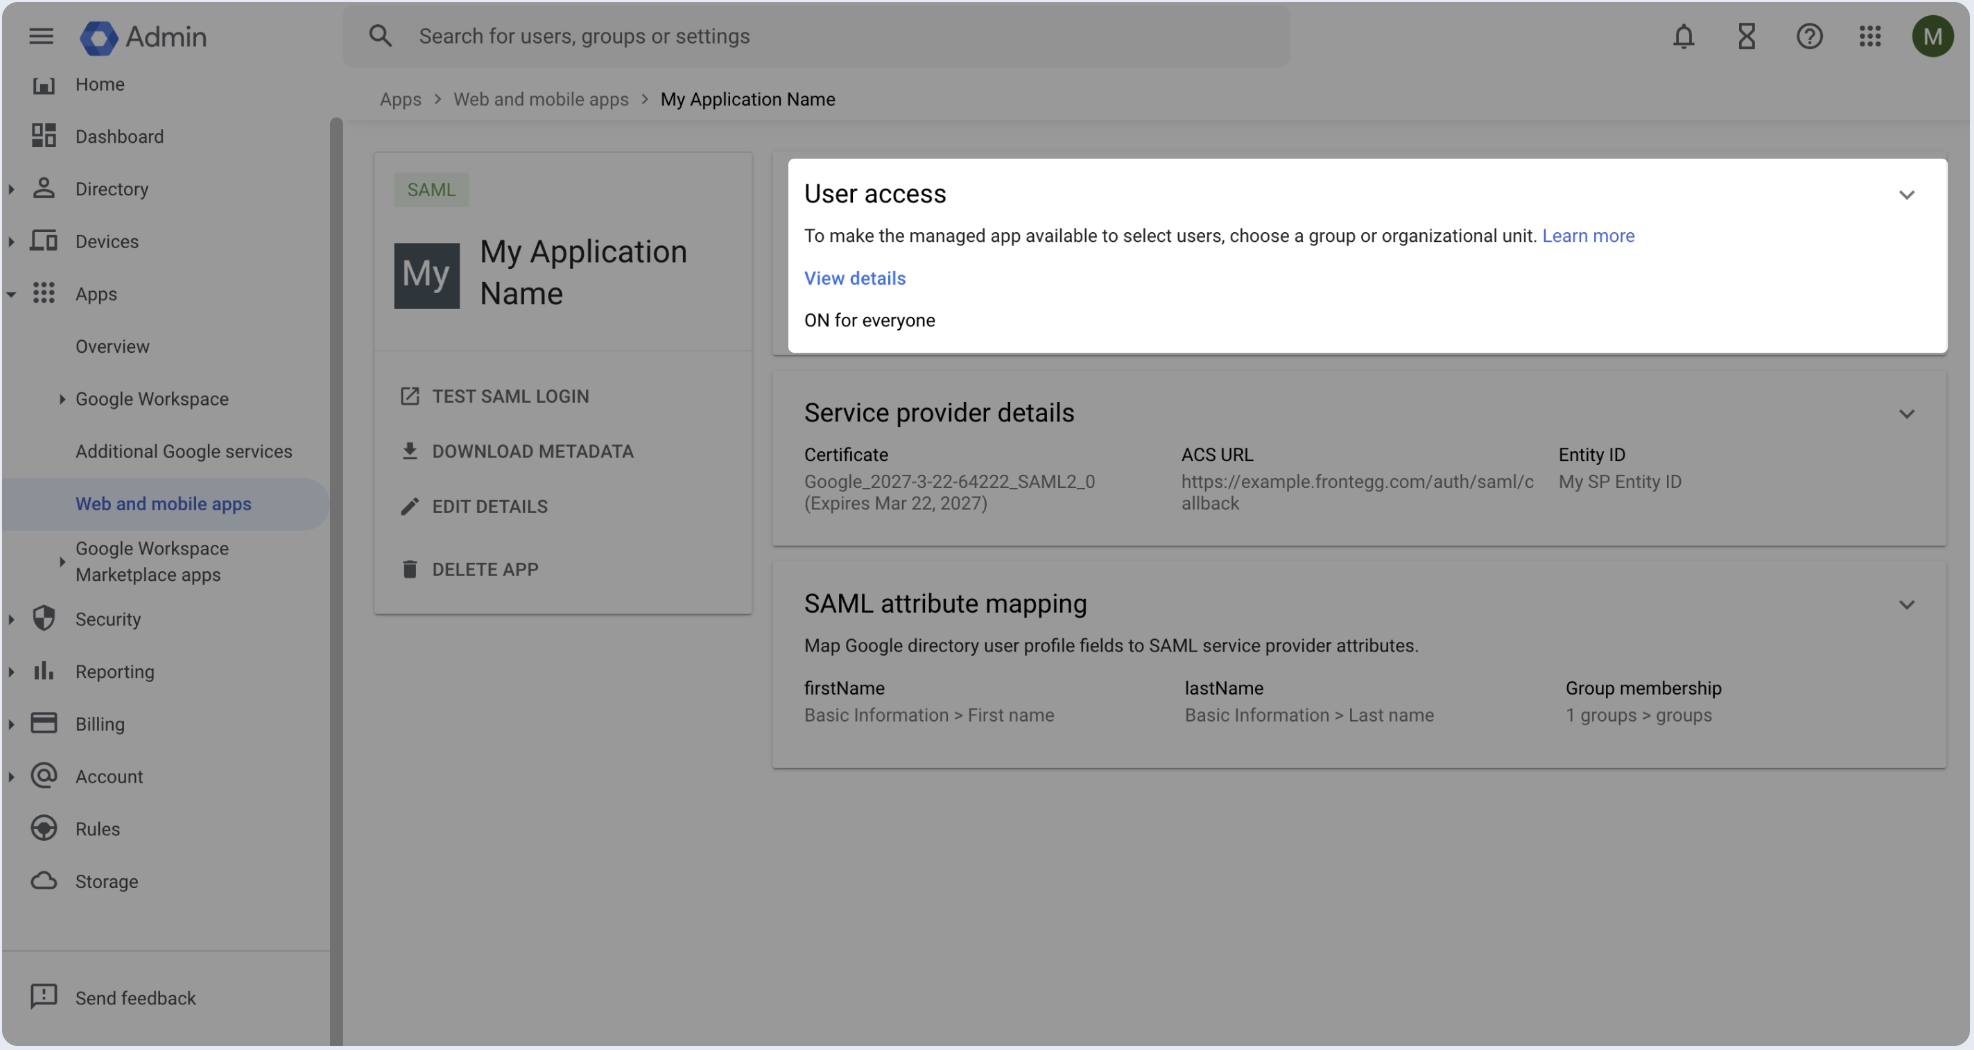
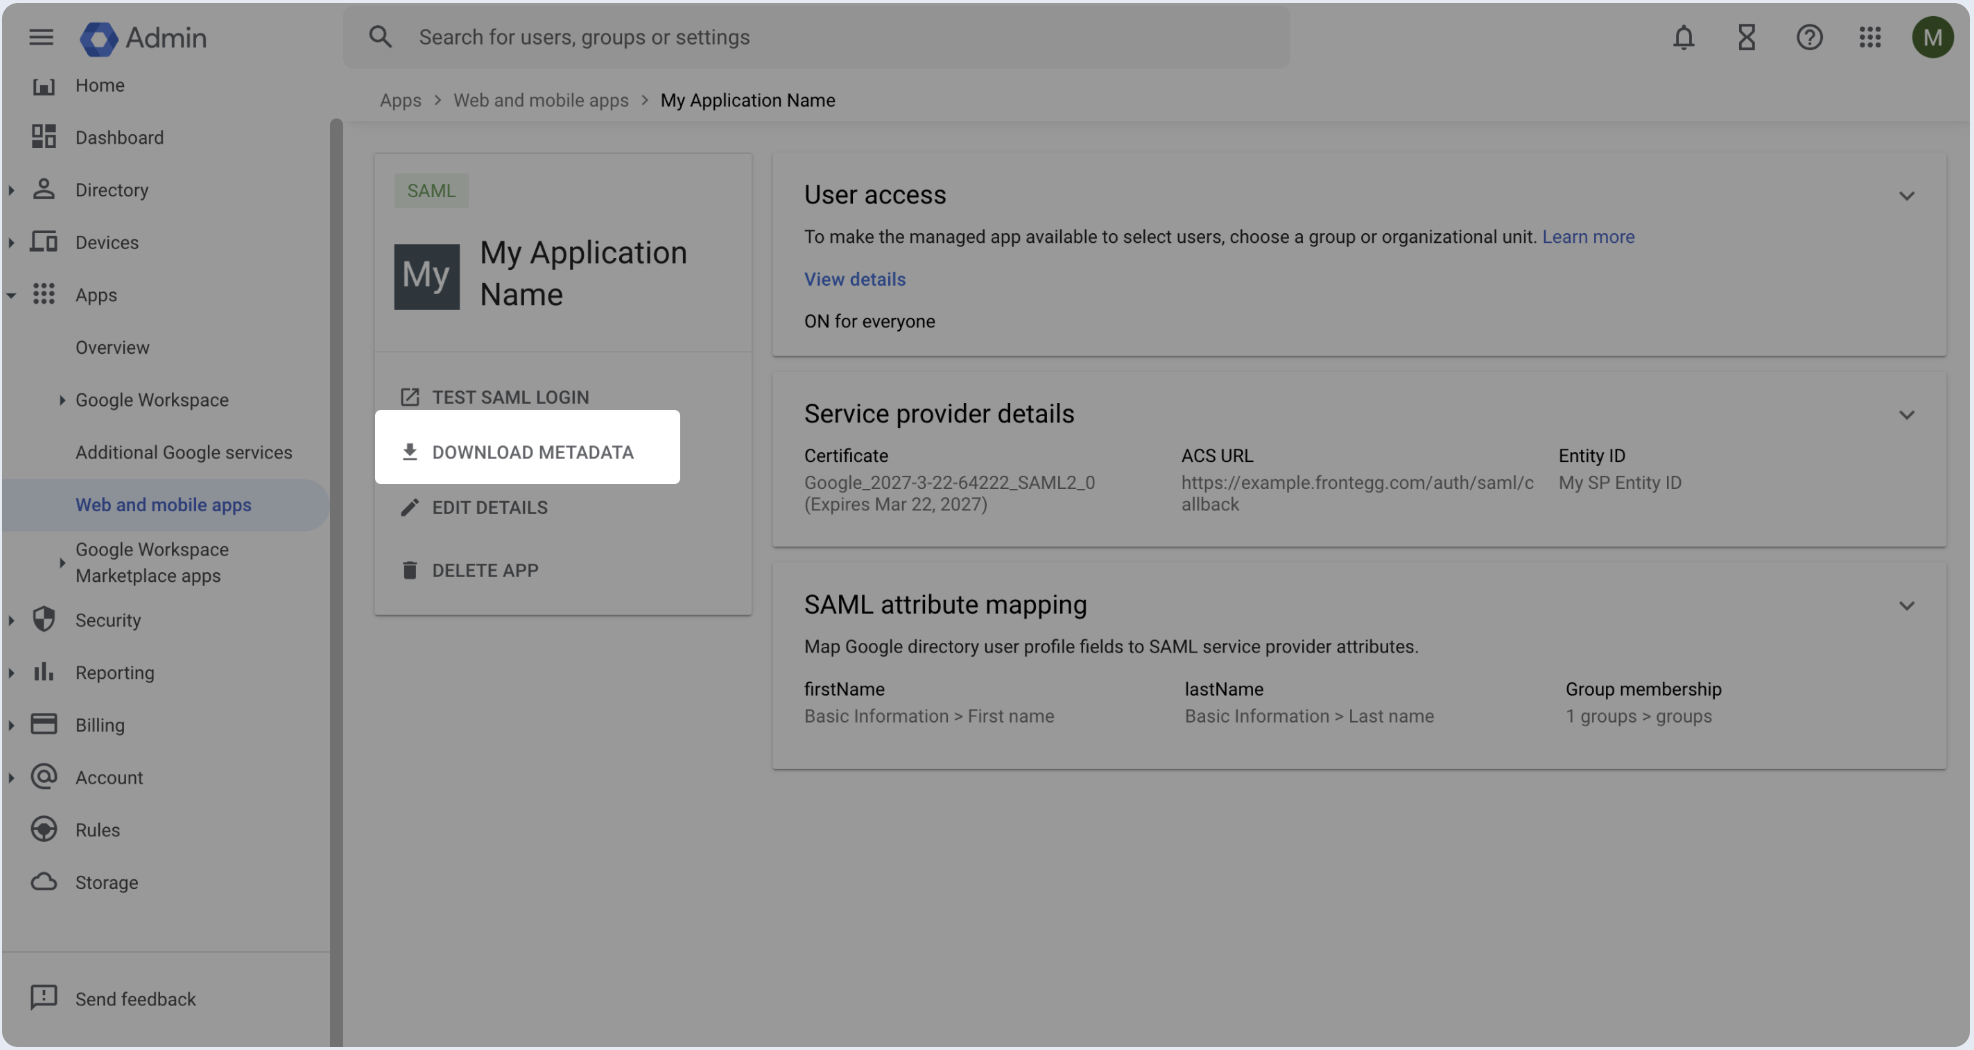
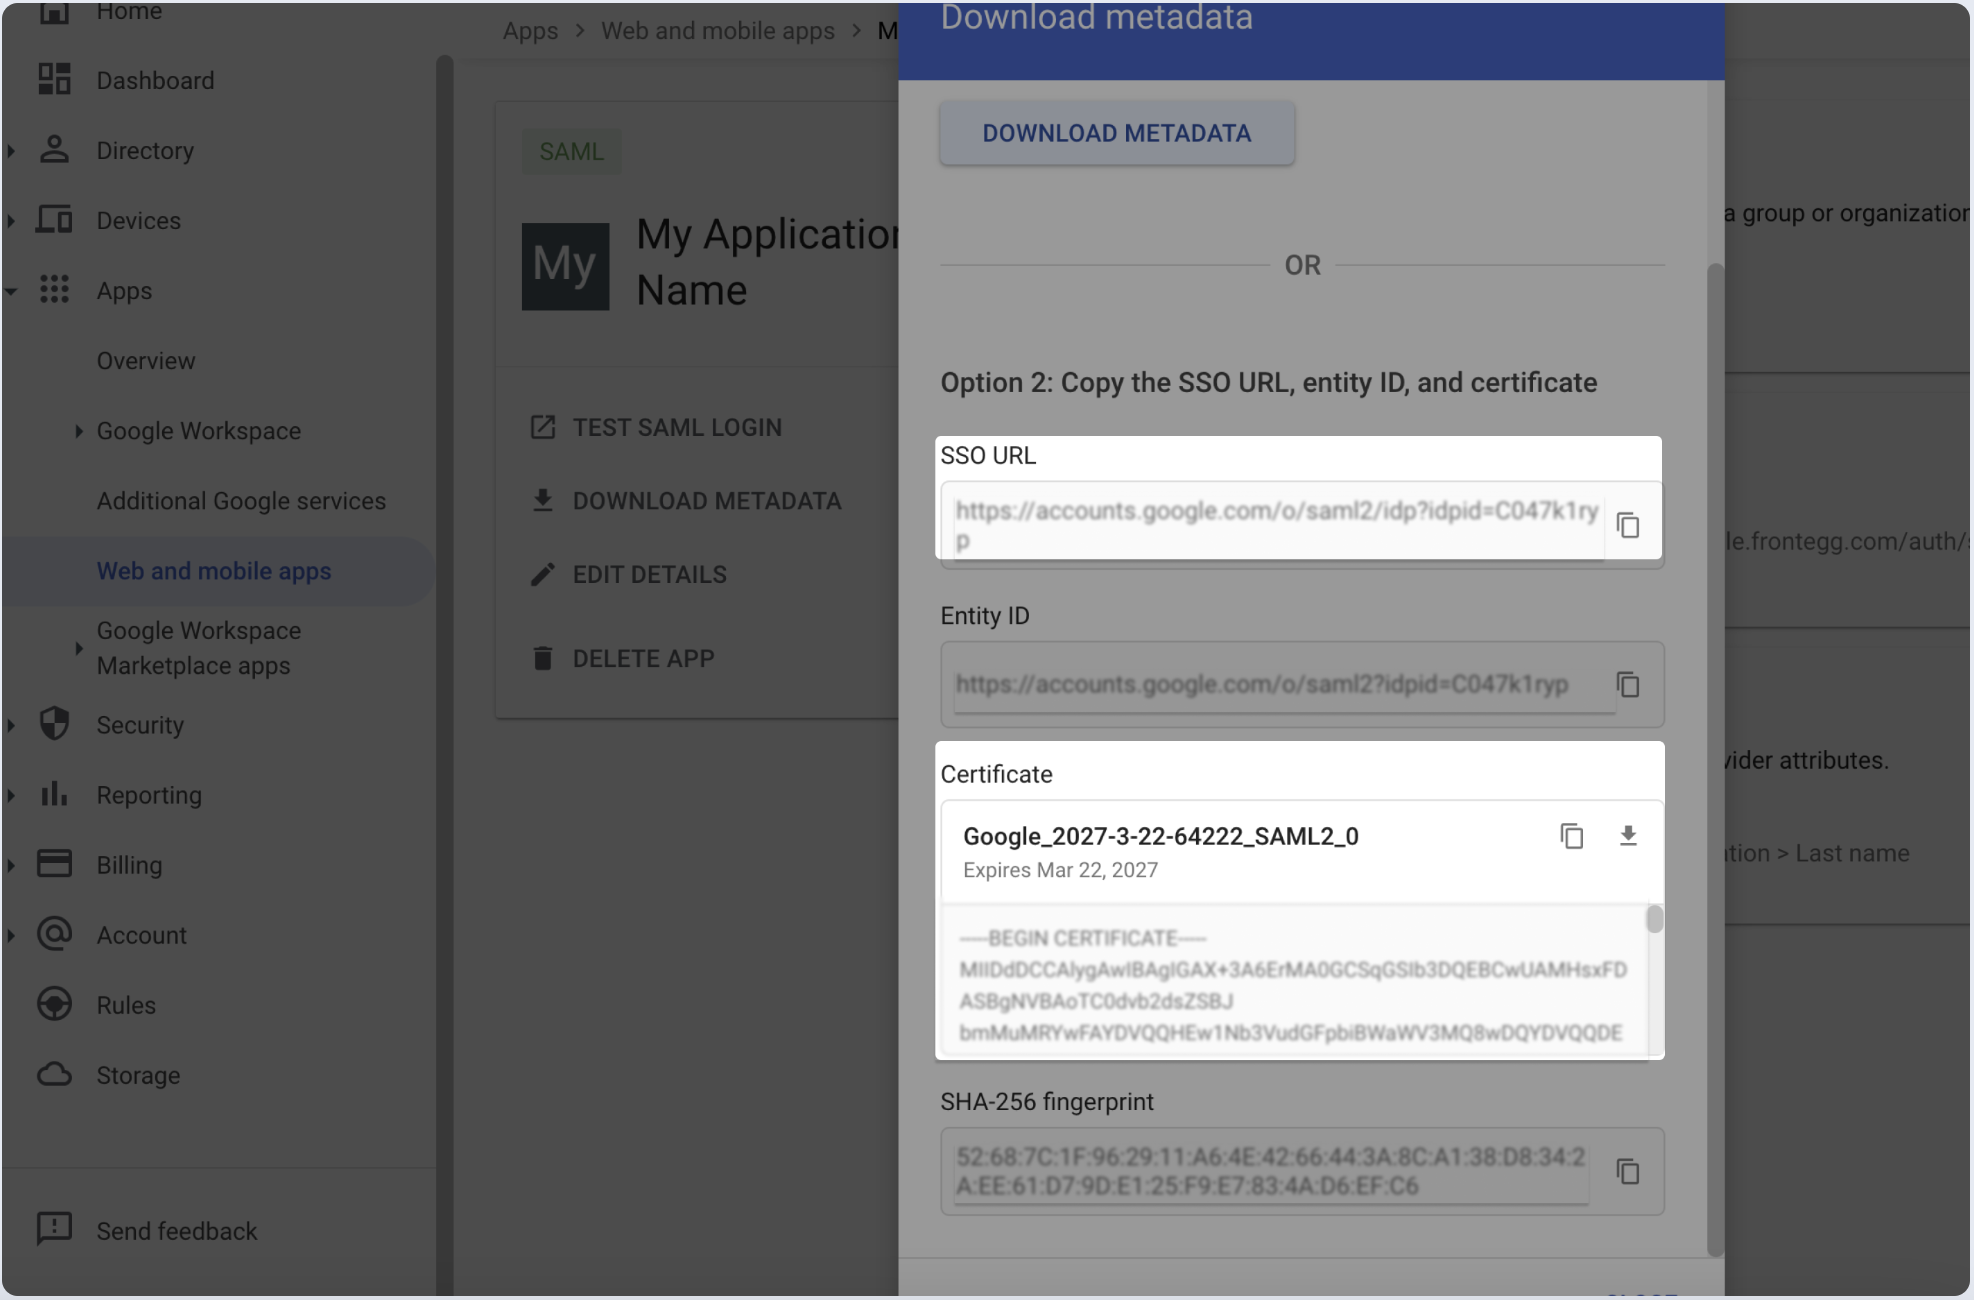
Step 4: Submit metadata
To complete the implementation of SAML SSO, you need to provide the application with your identity provider’s details.
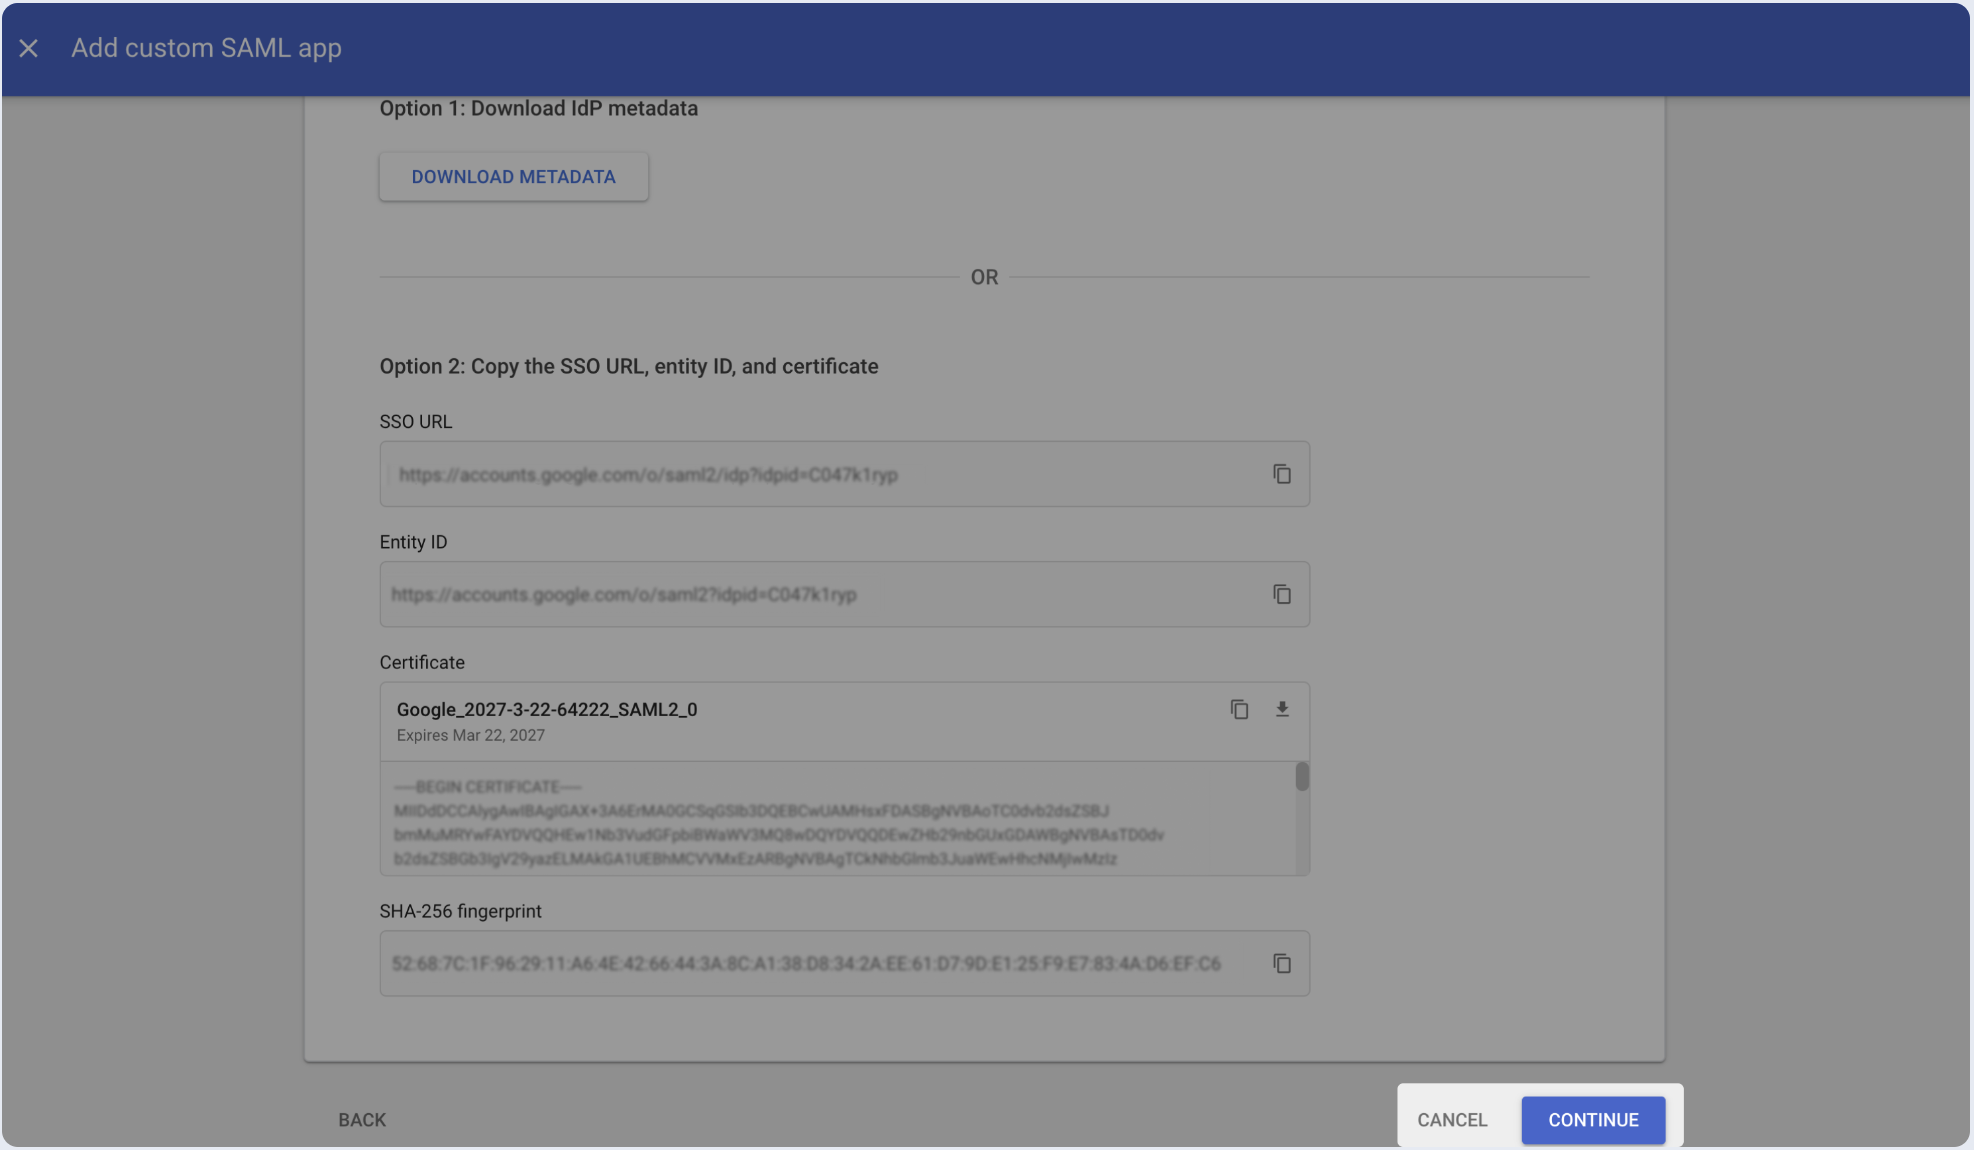
- Click on the Download metadata.
Automatic configuration
- Download the metadata file.
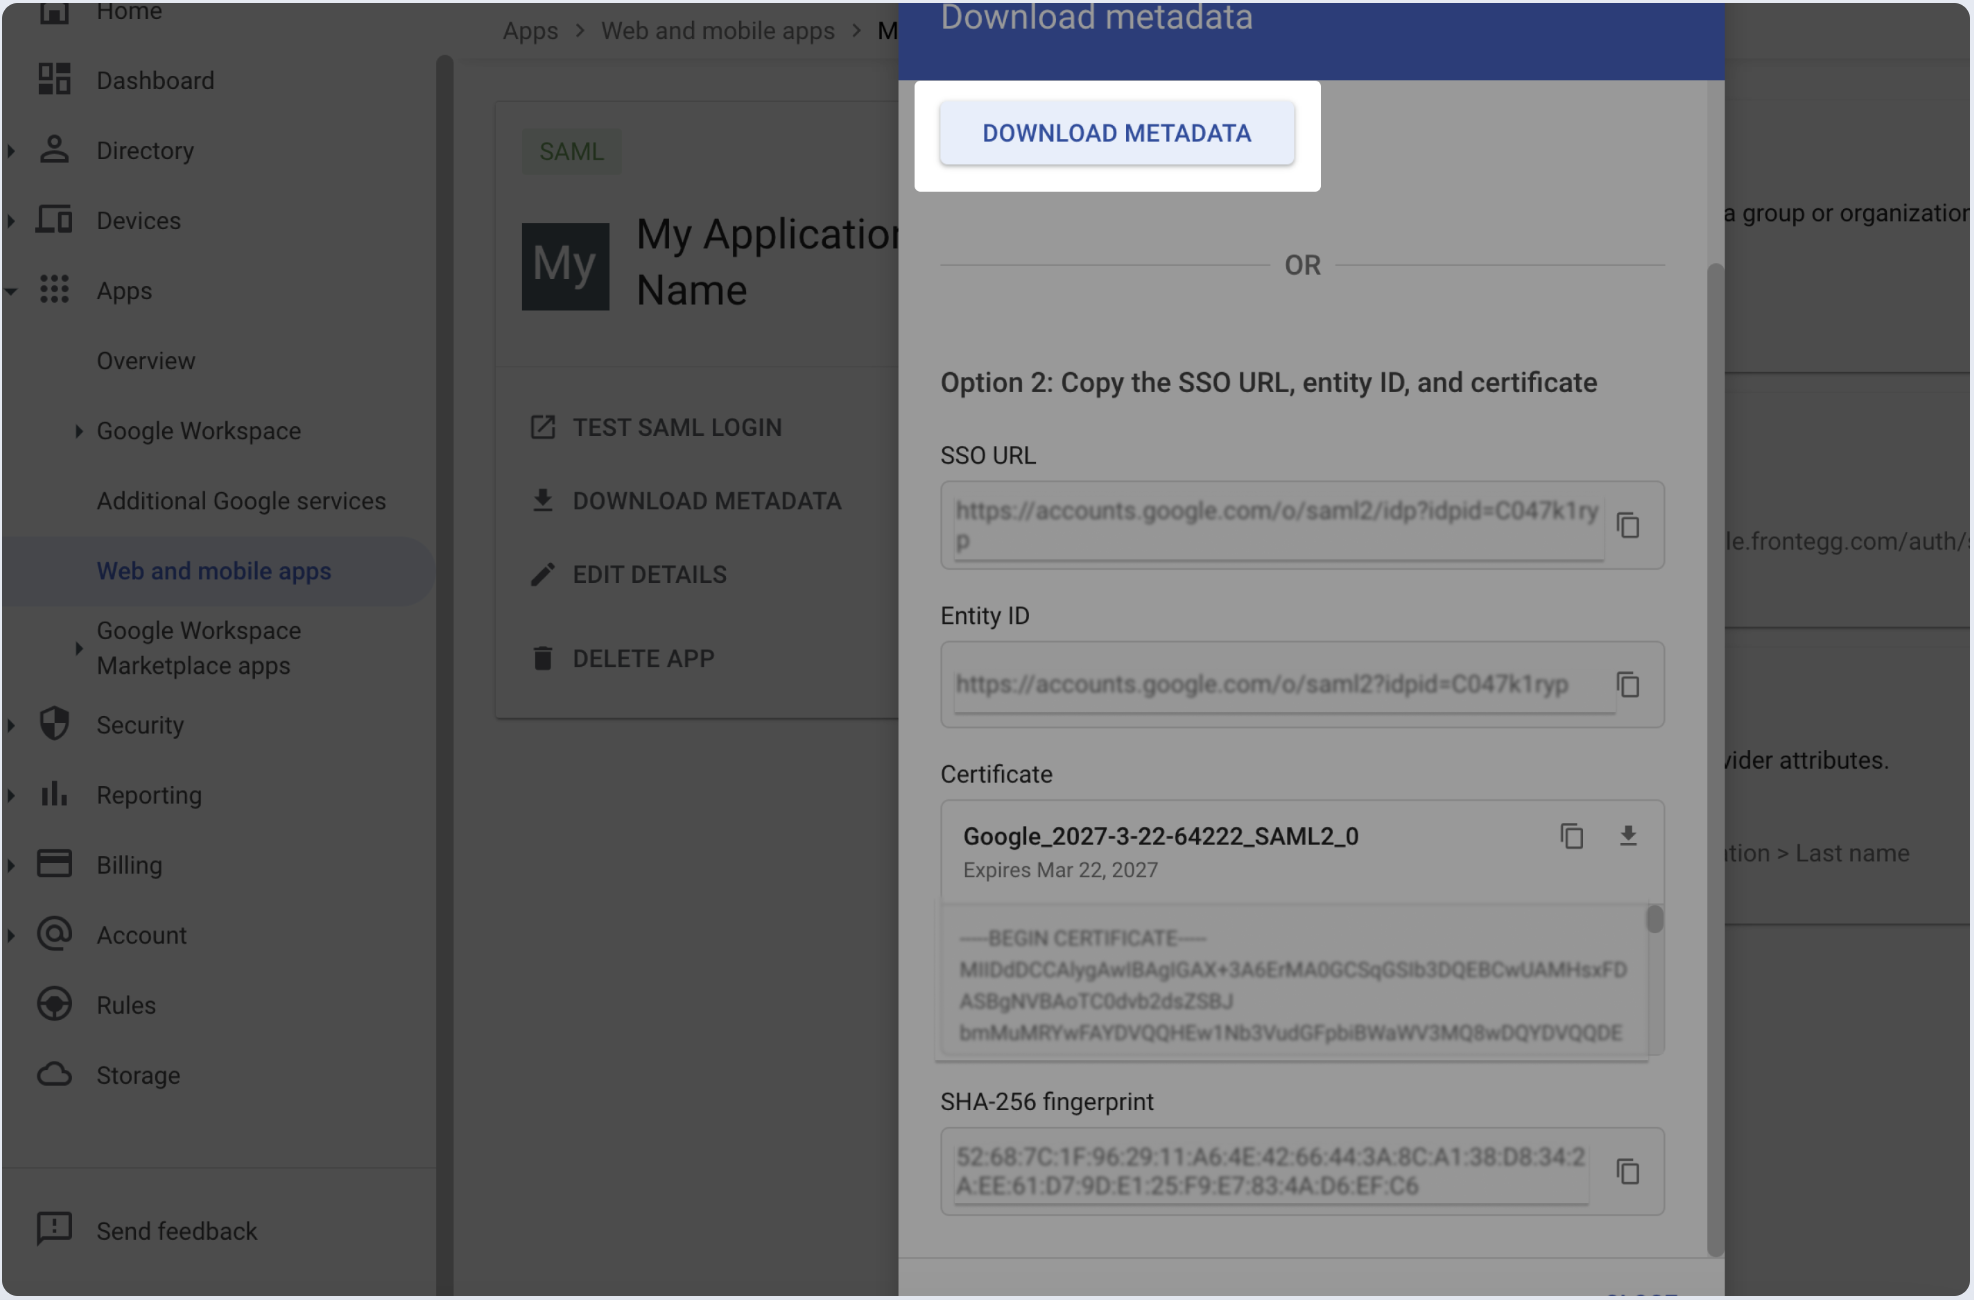
- Upload the file from the previous step.
Manual configuration
- Copy the value of the SSO URL and X.509 Certificate fields.
- Paste below the copied values from the previous step.
Step 5: Proceed with domain claiming and role assignment
- Click on Proceed with domain claiming and role assignment to confirm the completion the configuration of the IDP form.
- Follow the instructions in the Self-service SAML configuration guide to complete this step and manage authorization.