Approval flows in Agen for SaaS define the human-in-the-loop review process for sensitive tool calls. When a policy triggers a Request approval action, the tool call is paused and routed to the configured approval flow, where designated approvers review and approve or reject the request.

The Approval flows screen displays the following header:
Approval flows — Ensure that critical actions are reviewed and approved by the right people, supporting security and compliance.
A Learn more link is provided for additional documentation.
The screen includes:
- A search bar to filter flows.
- A Channel filter dropdown (default: "All") to filter by notification channel.
- A Create flow button.
Existing flows are displayed in a table with the following columns:
| Column | Description |
|---|---|
| Flow Name | The name of the approval flow (e.g., "Approve from admins"). |
| Description | An optional description of the flow. |
| Type | The flow scope: "Global" or specific. |
| Used channels | Badges showing the enabled notification channels (e.g., Email). |
| Last modified date | The date and time the flow was last updated, with a relative time indicator (e.g., "18 February 2026 — 17 days ago"). |
Each row has a three-dot menu for editing or deleting the flow.
Click Create flow to start the four-step creation wizard.
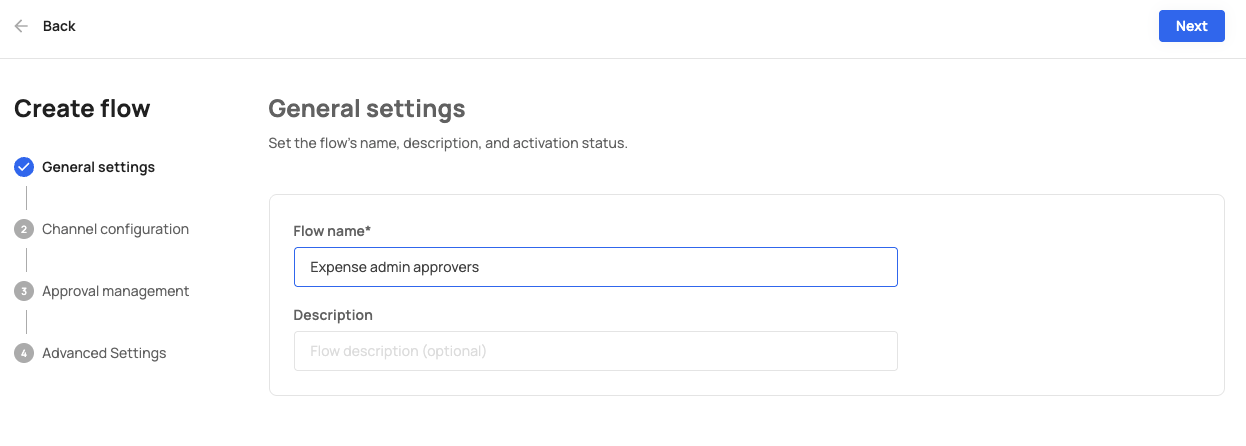
Set the flow's name, description, and activation status.
| Field | Description | Required |
|---|---|---|
| Flow name | A descriptive name for the approval flow. | Yes |
| Description | An optional description of the flow's purpose. | No |
Click Next to proceed to Step 2.
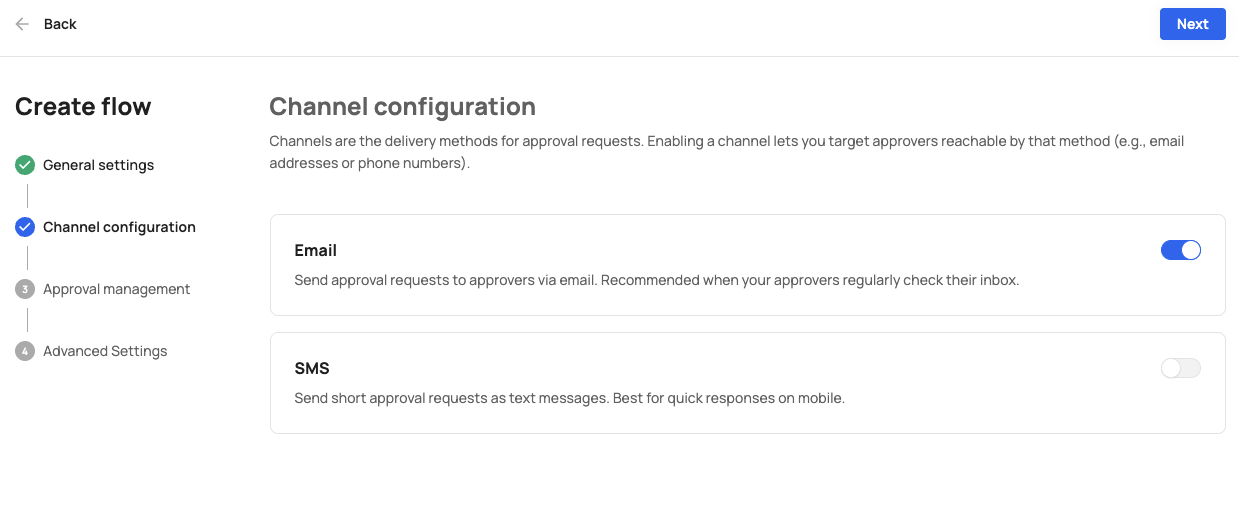
Channels are the delivery methods for approval requests. Enabling a channel lets you target approvers reachable by that method (e.g., email addresses or phone numbers).
Two channels are available, each with a toggle to enable or disable:
| Channel | Description |
|---|---|
| Send approval requests to approvers via email. Recommended when your approvers regularly check their inbox. | |
| SMS | Send short approval requests as text messages. Best for quick responses on mobile. |
Enable at least one channel to ensure approvers receive notifications. Click Next to proceed to Step 3.
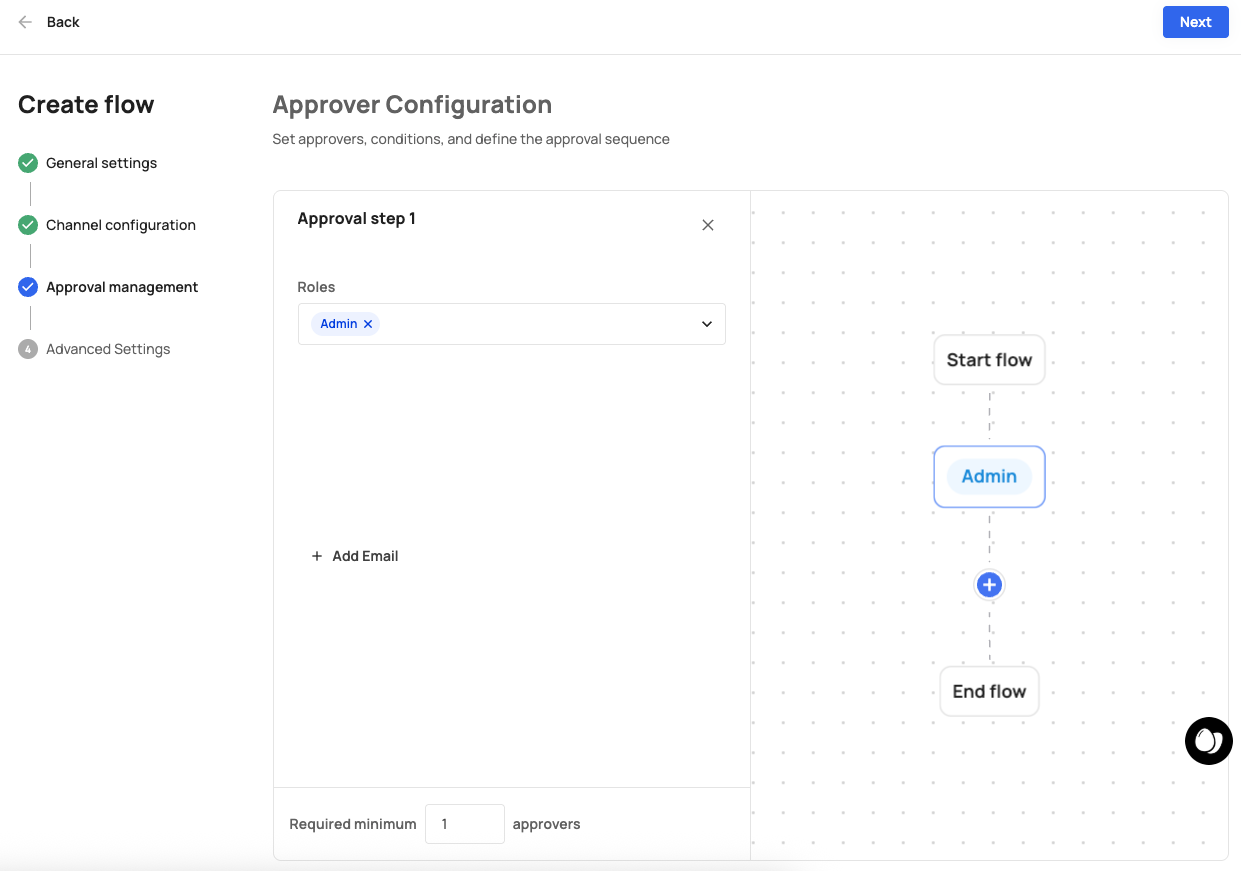
Set approvers, conditions, and define the approval sequence
This step provides a visual flow builder with two panels:
Visual flow diagram (right panel):
The flow is displayed as a vertical sequence:
Start flow
    ↓
[Approval Step 1] (e.g., "Admin" — role-based, highlighted in red)
    ↓
[Approval Step 2] (e.g., "security@frontegg.com" — email-based, highlighted in blue)
    ↓
  (+) Add step
    ↓
End flow
Click any step in the diagram to edit it in the left panel. Click the (+) button to add a new approval step.
Step configuration (left panel):
When a step is selected, the left panel shows:
| Field | Description |
|---|---|
| Roles | A dropdown to select approver roles. Users with these roles in their JWT can approve requests at this step. |
| Emails | A list of specific email addresses that can approve requests at this step. Click + Add Email to add more. Each email has a delete button. |
| Required minimum approvers | A numeric field setting the minimum number of approvers needed to advance past this step. Default: 1. |
Approval steps are sequential — Step 1 must be completed before Step 2 begins.
Click Next to proceed to Step 4.
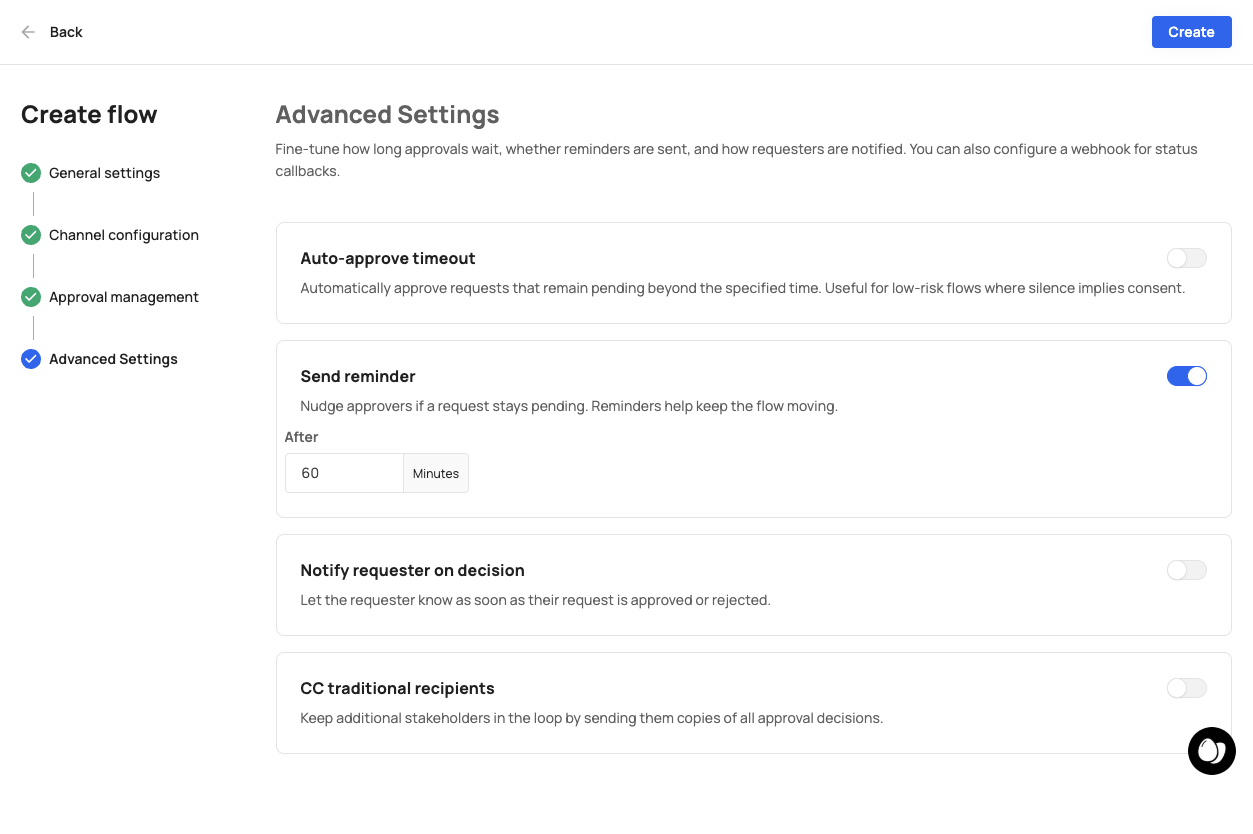
Fine-tune how long approvals wait, whether reminders are sent, and how requesters are notified. You can also configure a webhook for status callbacks.
Four optional settings are available, all disabled by default:
| Setting | Description |
|---|---|
| Auto-approve timeout | Automatically approve requests that remain pending beyond the specified time. Useful for low-risk flows where silence implies consent. |
| Send reminder | Nudge approvers if a request stays pending. Reminders help keep the flow moving. |
| Notify requester on decision | Let the requester know as soon as their request is approved or rejected. |
| CC traditional recipients | Keep additional stakeholders in the loop by sending them copies of all approval decisions. |
Each setting has a toggle to enable it. When enabled, additional configuration options appear (e.g., timeout duration, reminder interval, recipient email addresses).
Click Create to finalize the approval flow, or Back to return to a previous step.
- A policy with a Request approval action matches an incoming tool call.
- The tool call is paused — the AI agent receives a "pending approval" status.
- Agen for SaaS sends notifications to the approvers defined in the flow (via email, SMS, or both).
- Approvers review the request details and approve or reject it.
- If the required minimum number of approvers approve at each step, the flow advances to the next step.
- Once all steps are complete, the original tool call resumes automatically.
- If any step is rejected, the tool call is denied.
- The entire approval process is logged in the monitoring system.
Scenario: Critical operations require approval from both an admin and the security team.
- Click Create flow.
- General settings: Name the flow "Admin + Security review".
- Channel configuration: Enable Email.
- Approval management:
- Step 1: Set Roles to "Admin". Required minimum: 1.
- Click (+) to add Step 2.
- Step 2: Add email
security@yourcompany.com. Required minimum: 1.
- Advanced settings: Enable "Notify requester on decision".
- Click Create.
Result: When a policy triggers this flow, an admin must approve first, then the security team must approve. The requester is notified of the final decision.
Approval flows are connected to policies through the Request approval action:
- Create an approval flow (as described above).
- Create or edit a policy.
- Set the Policy action to Request approval.
- Select the approval flow from the dropdown (e.g., "Approve from admins").
- Save the policy.