The Authentication tab configures how your Agen for SaaS MCP Gateway verifies the identity of incoming requests. Every tool call and tool listing request that passes through the gateway must be authenticated.
The Authentication screen contains the following fields:
| Field | Description |
|---|---|
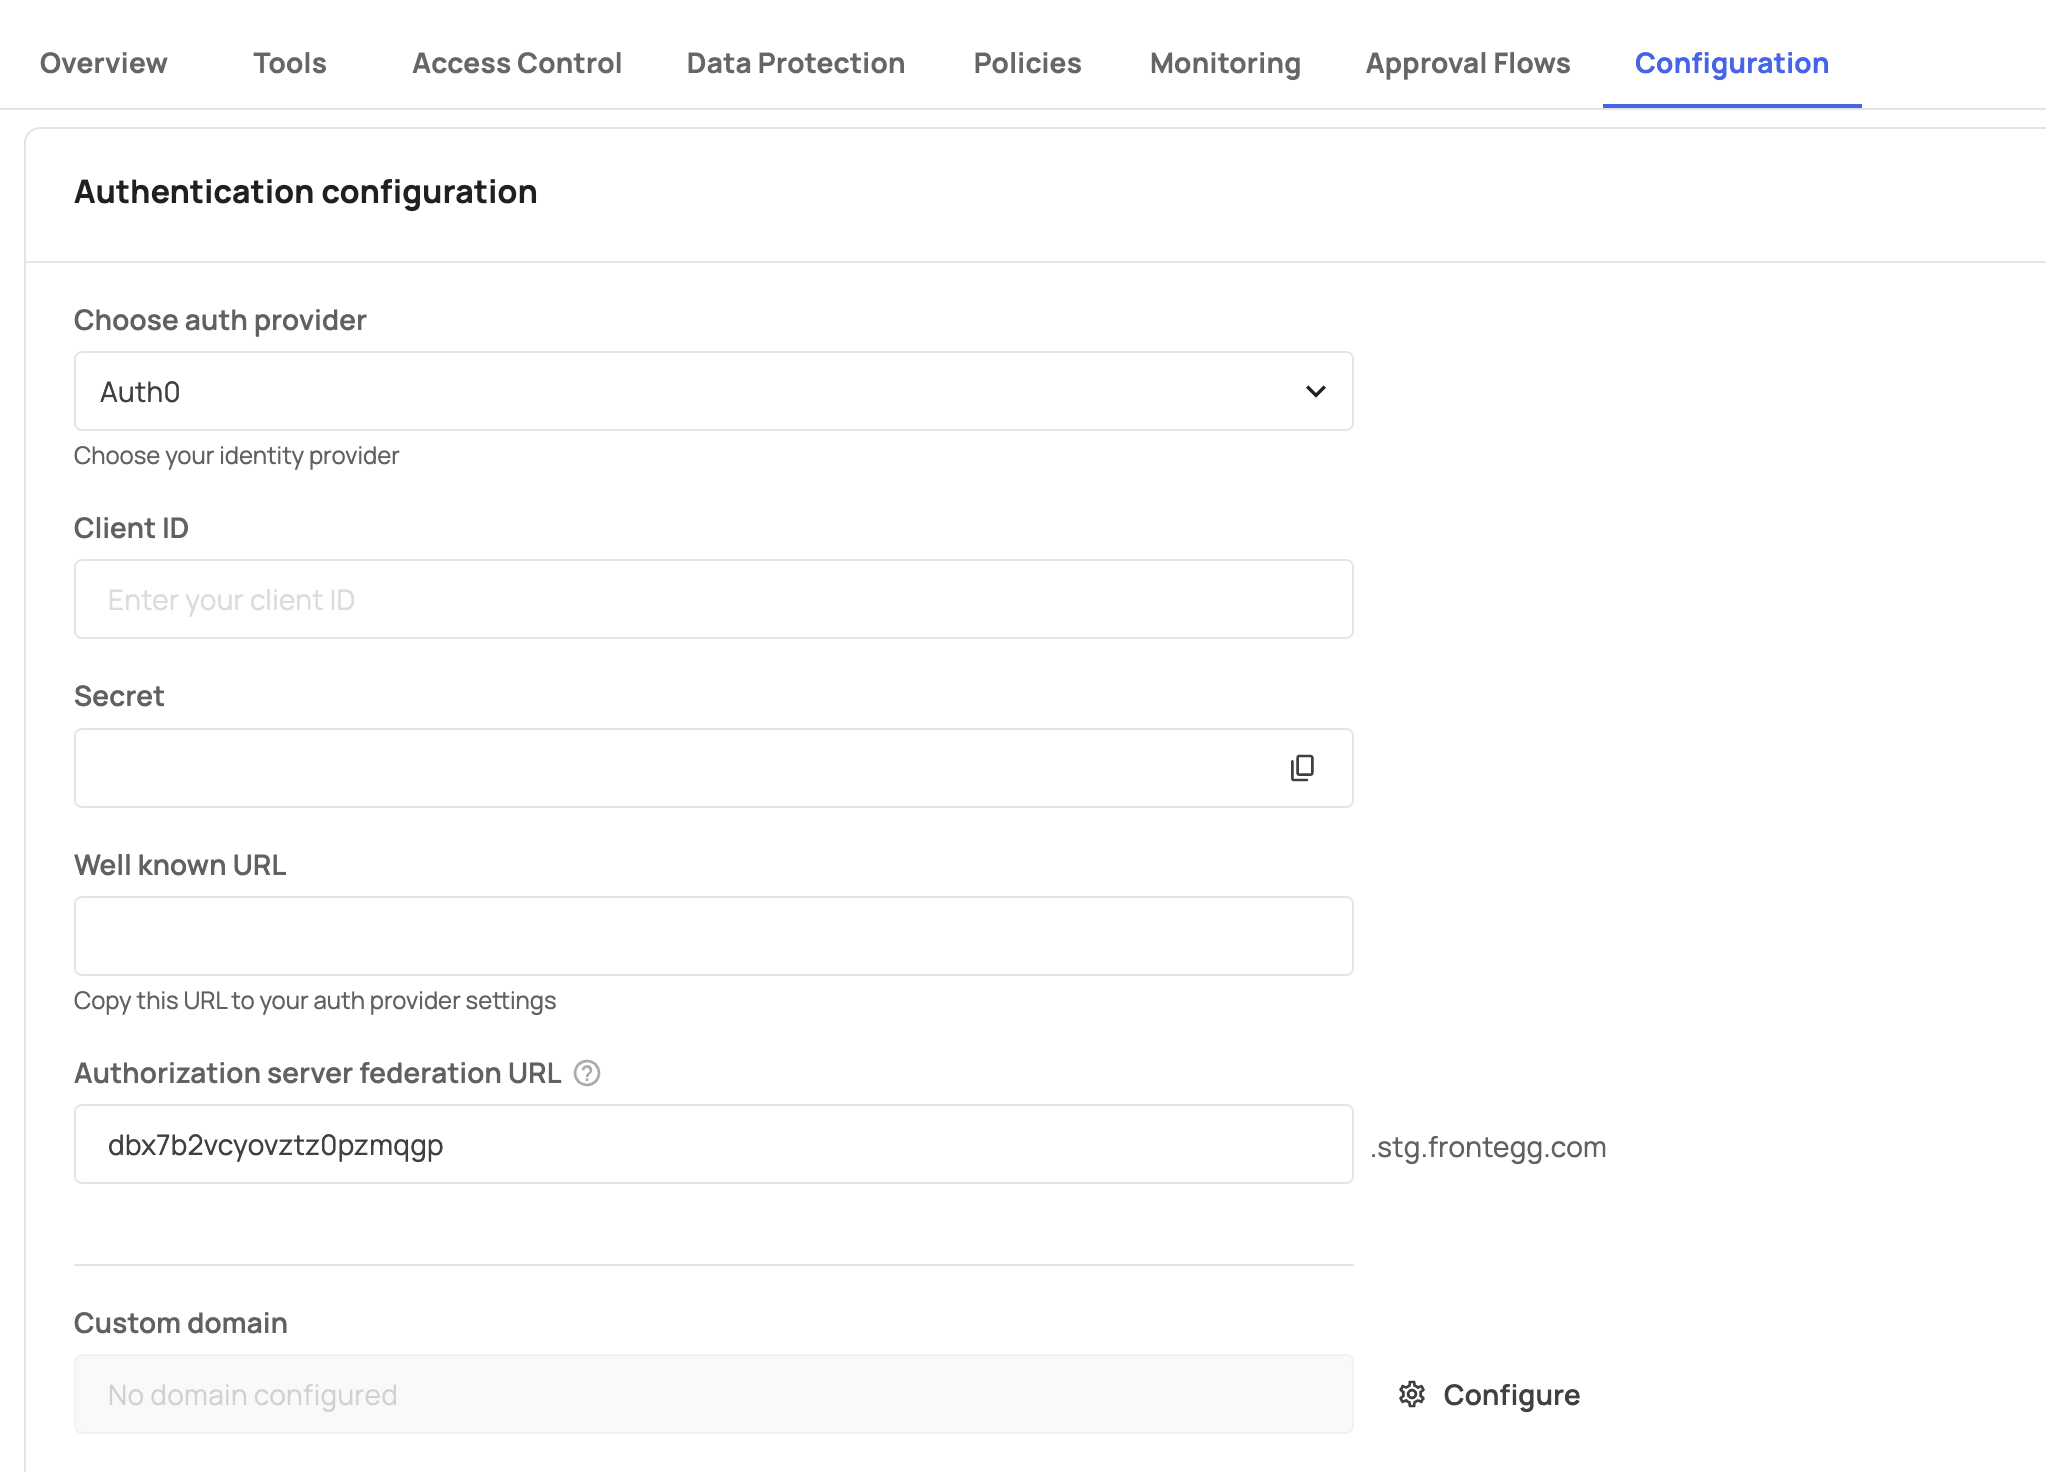
| Choose auth provider | A dropdown to select your identity provider. Options: Frontegg or Open ID. |
| Authorization server federation URL | The auto-generated URL for your authorization server (e.g., your-id.frontegg.com). Includes a copy button. This URL is used by AI platforms and agents to authenticate with your MCP Gateway. |
| Custom domain | An optional custom domain for your authentication endpoint. Displays "No domain configured" when not set. Click Configure to set up a custom domain. |
Click Save to apply changes, or Cancel to discard.
When Frontegg is selected as the auth provider, Agen for SaaS uses Frontegg's built-in identity platform for authentication. An authorization server federation URL is automatically provisioned for your environment.
This is the recommended option if your SaaS product already uses Frontegg for authentication, as it provides seamless integration with your existing identity infrastructure.
When Open ID is selected, you can connect any OIDC-compliant identity provider to your MCP Gateway. Supported providers include:
- Auth0
- Amazon Cognito
- Firebase
- Keycloak
- Azure AD
- Any OIDC-compliant provider
Each provider integration requires obtaining OAuth 2.0 credentials (Client ID and Client Secret) from your identity provider and configuring the Frontegg redirect URL.
Frontegg redirect URL format:
https://[YOUR-FRONTEGG-DOMAIN]/oauth/callbackMost organizations already have OAuth applications configured in their identity providers. You typically do not need to create a new application — you can use your existing one and add the Frontegg redirect URL to its configuration.
To configure a custom domain for your authentication endpoint:
- Click the Configure button below the Custom domain field.
- A two-step wizard opens:
- Step 1: Add domain — Enter your desired domain and click Next.
- Step 2: DNS records — Add the displayed DNS records to your domain's DNS configuration.
Once DNS propagation is complete, Agen for SaaS verifies the domain automatically.
For step-by-step instructions on configuring specific identity providers, see: