This guide helps you get started with Agen for SaaS — the fastest way to make your SaaS product AI-native.
In a few minutes, you will set up your MCP server, import your API tools from sources, configure authentication, and have a fully operational gateway ready for AI agents to connect.
The onboarding flow guides you through five steps:
| Step | Purpose |
|---|---|
| 1. Set up your MCP server | Create your environment and register your application. |
| 2. Add a source | Upload your API definition (OpenAPI, GraphQL, or connect a remote MCP server). |
| 3. Set up authentication | Choose your auth provider (Frontegg or OpenID Connect). |
| 4. Configure API base URL | Define where tool requests are forwarded. |
| 5. Test and verify | Confirm that everything works. |
When you sign up, Agen for SaaS walks you through creating your first MCP server.
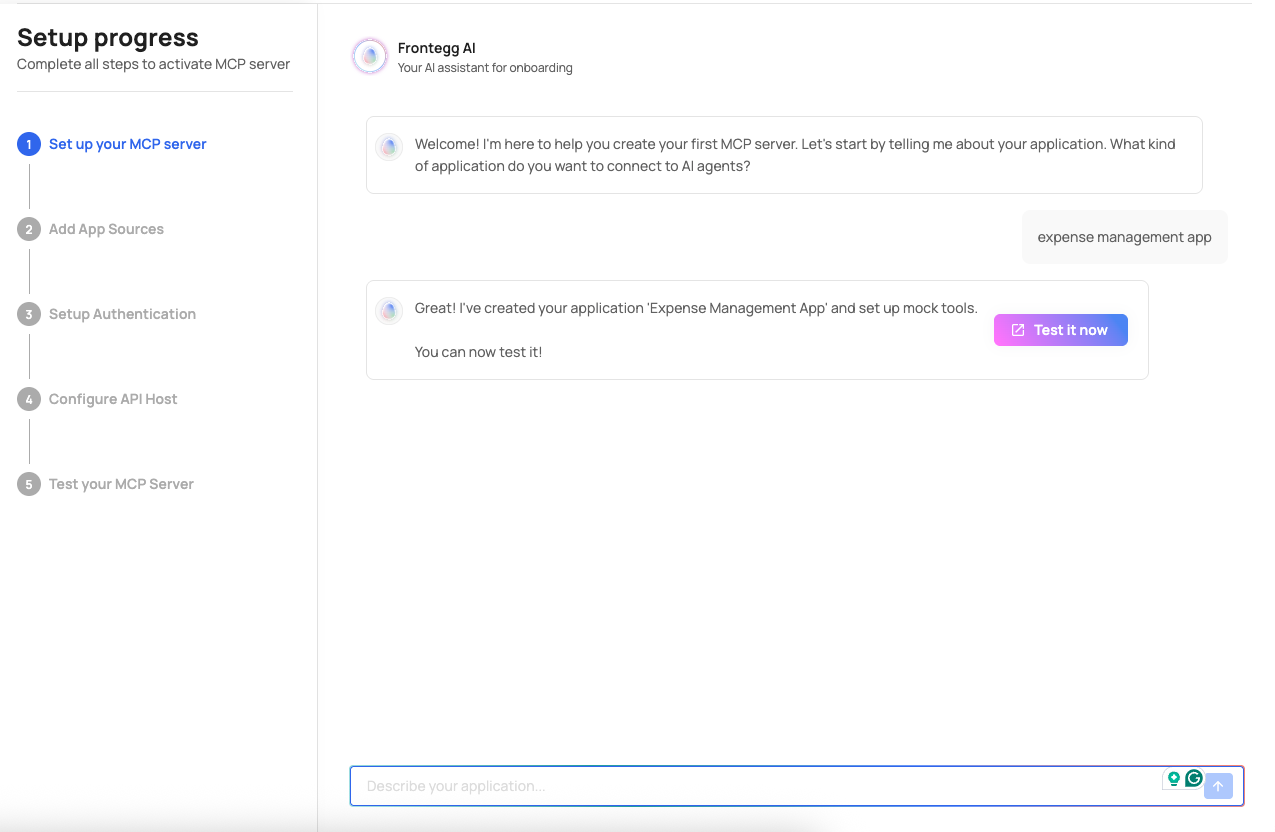
Describe your product or the type of application you want to connect to AI agents (e.g., "expense management app" or "CRM platform"). Agen for SaaS creates your environment automatically, including:
- A unique MCP Gateway URL (e.g.,
your-id.mcp-gw.frontegg.com). - An authorization server federation URL (e.g.,
your-id.frontegg.com). - A pre-configured pipeline with all governance layers.
Upload your product's API definition so Agen for SaaS can generate tools from it.
Three source types are supported:
| Source type | Input | What happens |
|---|---|---|
| REST | OpenAPI (Swagger) JSON or YAML specification | Endpoints are extracted as individual tools with method, path, and description. |
| GraphQL | GraphQL SDL schema | Queries and mutations are extracted as tools. |
| MCP server | Remote MCP server URL | Tools are discovered dynamically through the MCP protocol. |
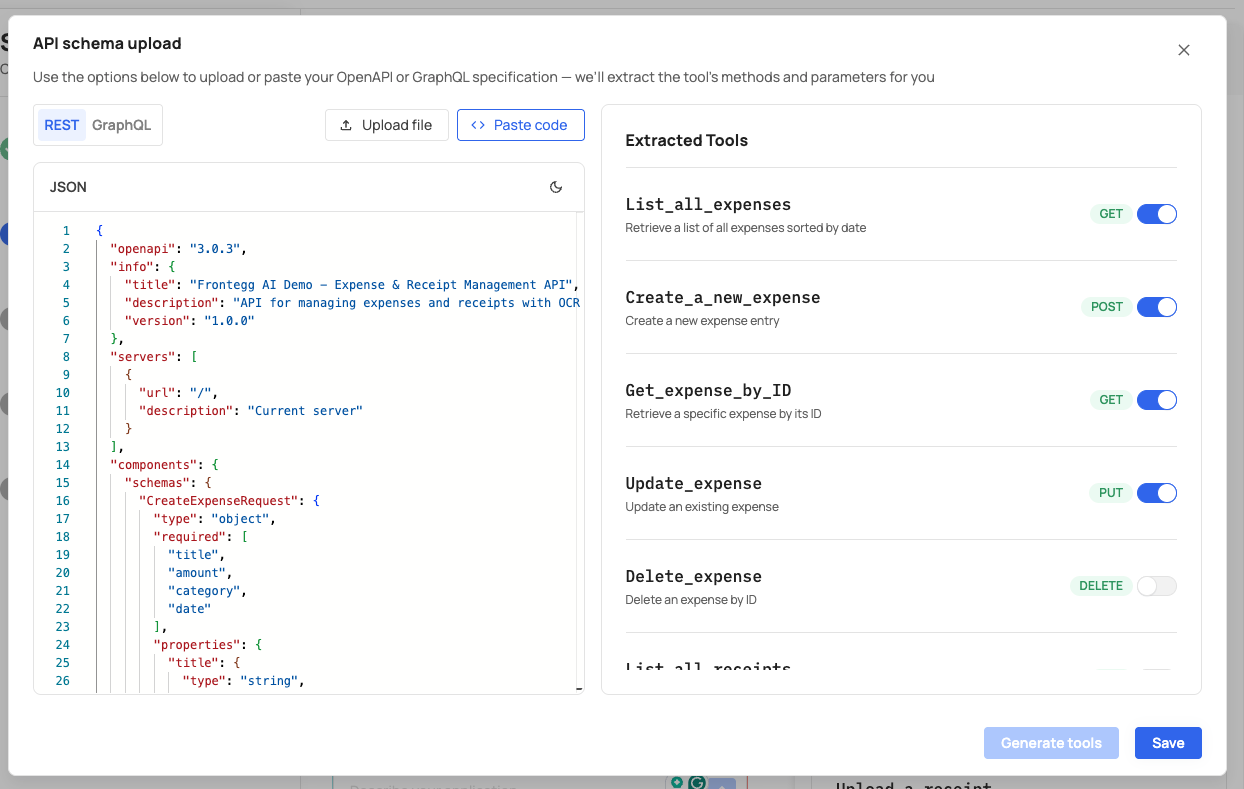
To add a source:
- Click Add source and select the source type.
- Enter a Source name and API base URL.
- Upload or paste your API specification (for REST and GraphQL).
- Click Generate tools to extract tools from the specification.
- Click Save.
After this step, your tools appear in the Tools section of the control plane, ready to be enabled, edited, or secured with access control and policies.
Choose how your MCP Gateway authenticates incoming requests.
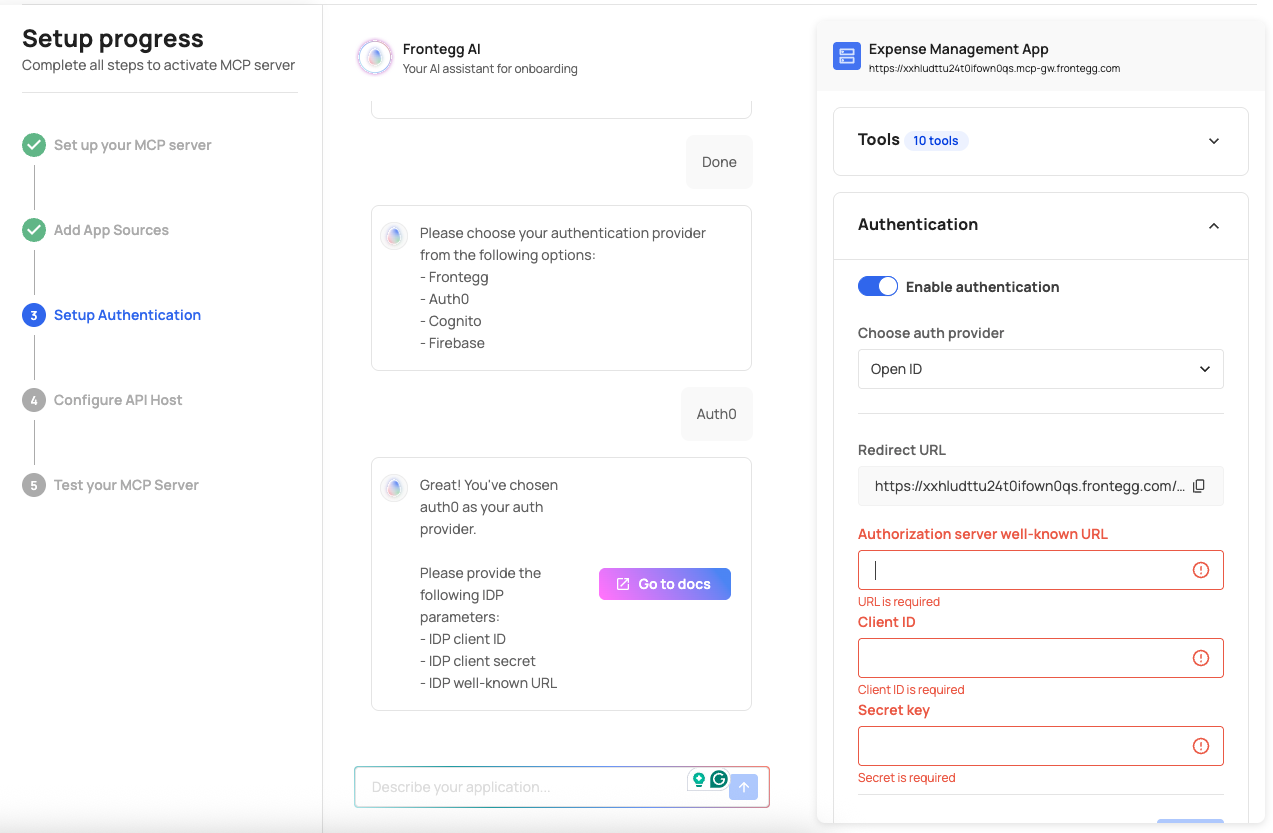
Navigate to the Authentication tab and select your auth provider:
| Provider | Description |
|---|---|
| Frontegg | Use Frontegg's built-in identity platform. An authorization server federation URL is auto-generated. |
| Open ID | Connect any OIDC-compliant provider (Auth0, Cognito, Firebase, Keycloak, Azure AD). |
If using Frontegg, authentication is ready immediately. If using Open ID, you need to configure your provider's OAuth credentials (Client ID and Client Secret) and add the Frontegg redirect URL.
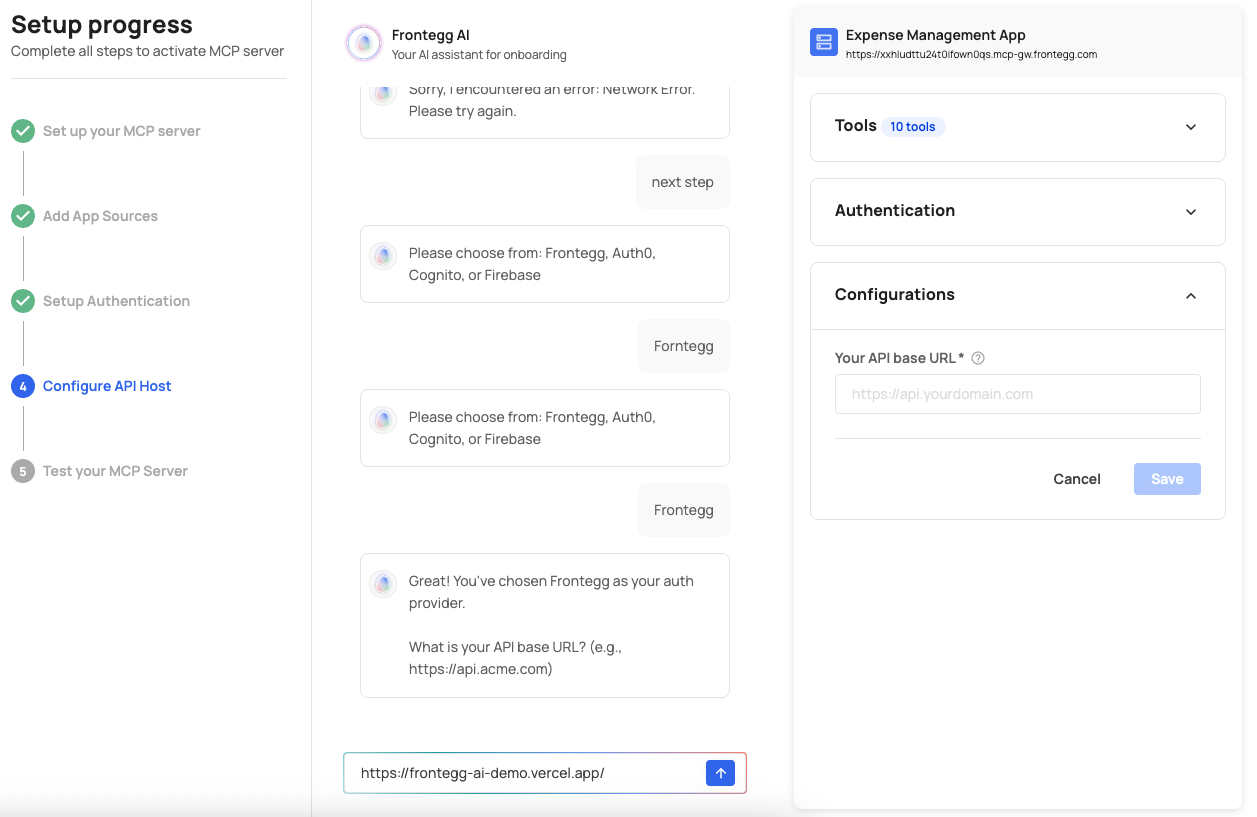
Provide the base URL where your API is hosted (e.g., https://api.yourcompany.com).
This tells Agen for SaaS where to forward tool requests from connected AI agents. You can configure this in the source settings or in the Configuration tab.
You can also:
- Set up a custom domain for your MCP Gateway.
- Configure allowed origins to control which web origins can access your application.
- Adjust API timeouts for MCP server sources.
Click the Test MCP Server button (available in the top-right corner of every screen) to verify your gateway is operational.
You can also:
- Use the built-in chat portal to interact with your MCP server and test tool responses.
- Verify that tools respond correctly with expected data.
- Confirm that authentication and access control are working as intended.
After completing the setup flow, continue with:
- Configure guardrails — Set up access control rules, policies, data protection, and approval flows to secure your tools.
- Connect to AI platforms — Integrate your MCP server with ChatGPT, Claude, or Gemini. See Connect to AI platforms.
- Monitor activity — Use the monitoring system to track tool calls, policy decisions, and approval events.