Organization space modules
In the self-service portal's workspace section, users with the required permissions can:
- Manage account details like account name
- Manage users, invite more to their account, create invite links, and assign roles
- Create and manage user groups for better organization
- Configure SSO for a more seamless login experience
- Configure provisioning to automatically sync users and groups with an IDP
- Monitor audit logs for full visibility and control over their account’s activity
- Create and manage account API tokens
- Create and manage webhooks for extended functionality
Prerequisites
Prerequisites
All the modules described in this guide must be enabled in the Frontegg builder, and relevant user permissions must be assigned.
Account details
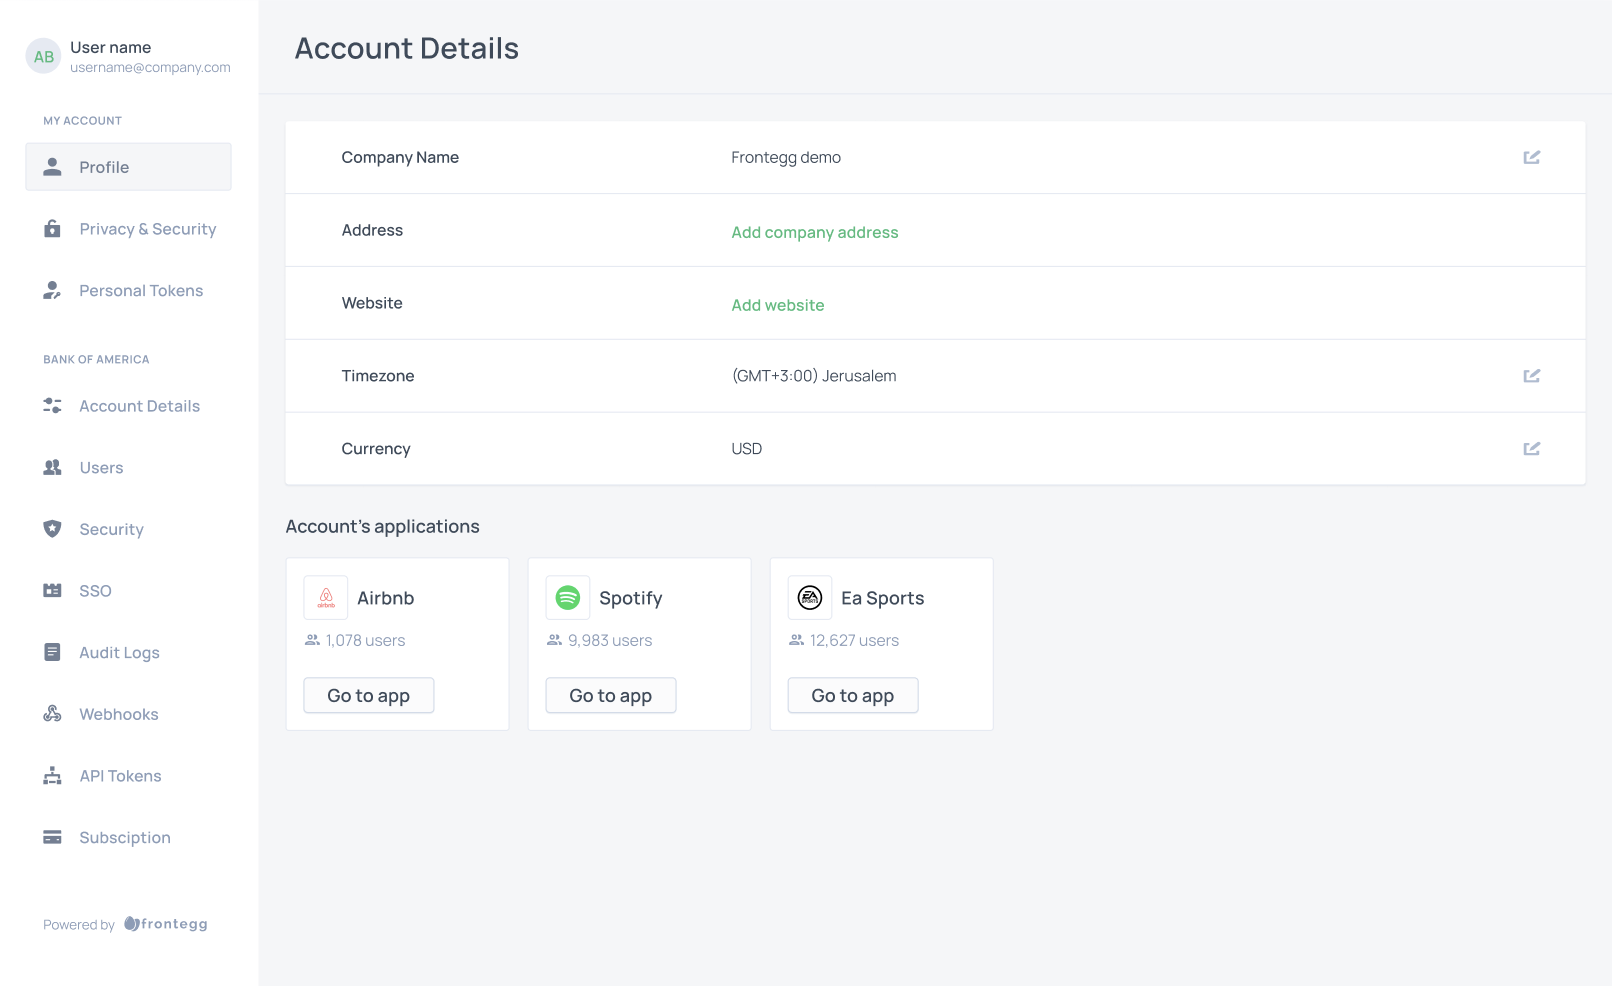
The Account Details tab in the self-service portal allows users to manage their account's details. Users can input and modify a variety of information, including Company Name, Address, Website, Timezone, Currency.
Account details in hosted mode
Account details in hosted mode
Additional details, such as the number of applications the account is assigned to, will be listed under the Account's applications in the hosted self-service portal.
User management
Enable your end-users to invite and manage users in the self-service portal, allowing team collaboration and controlled access for contractors.
User invitations
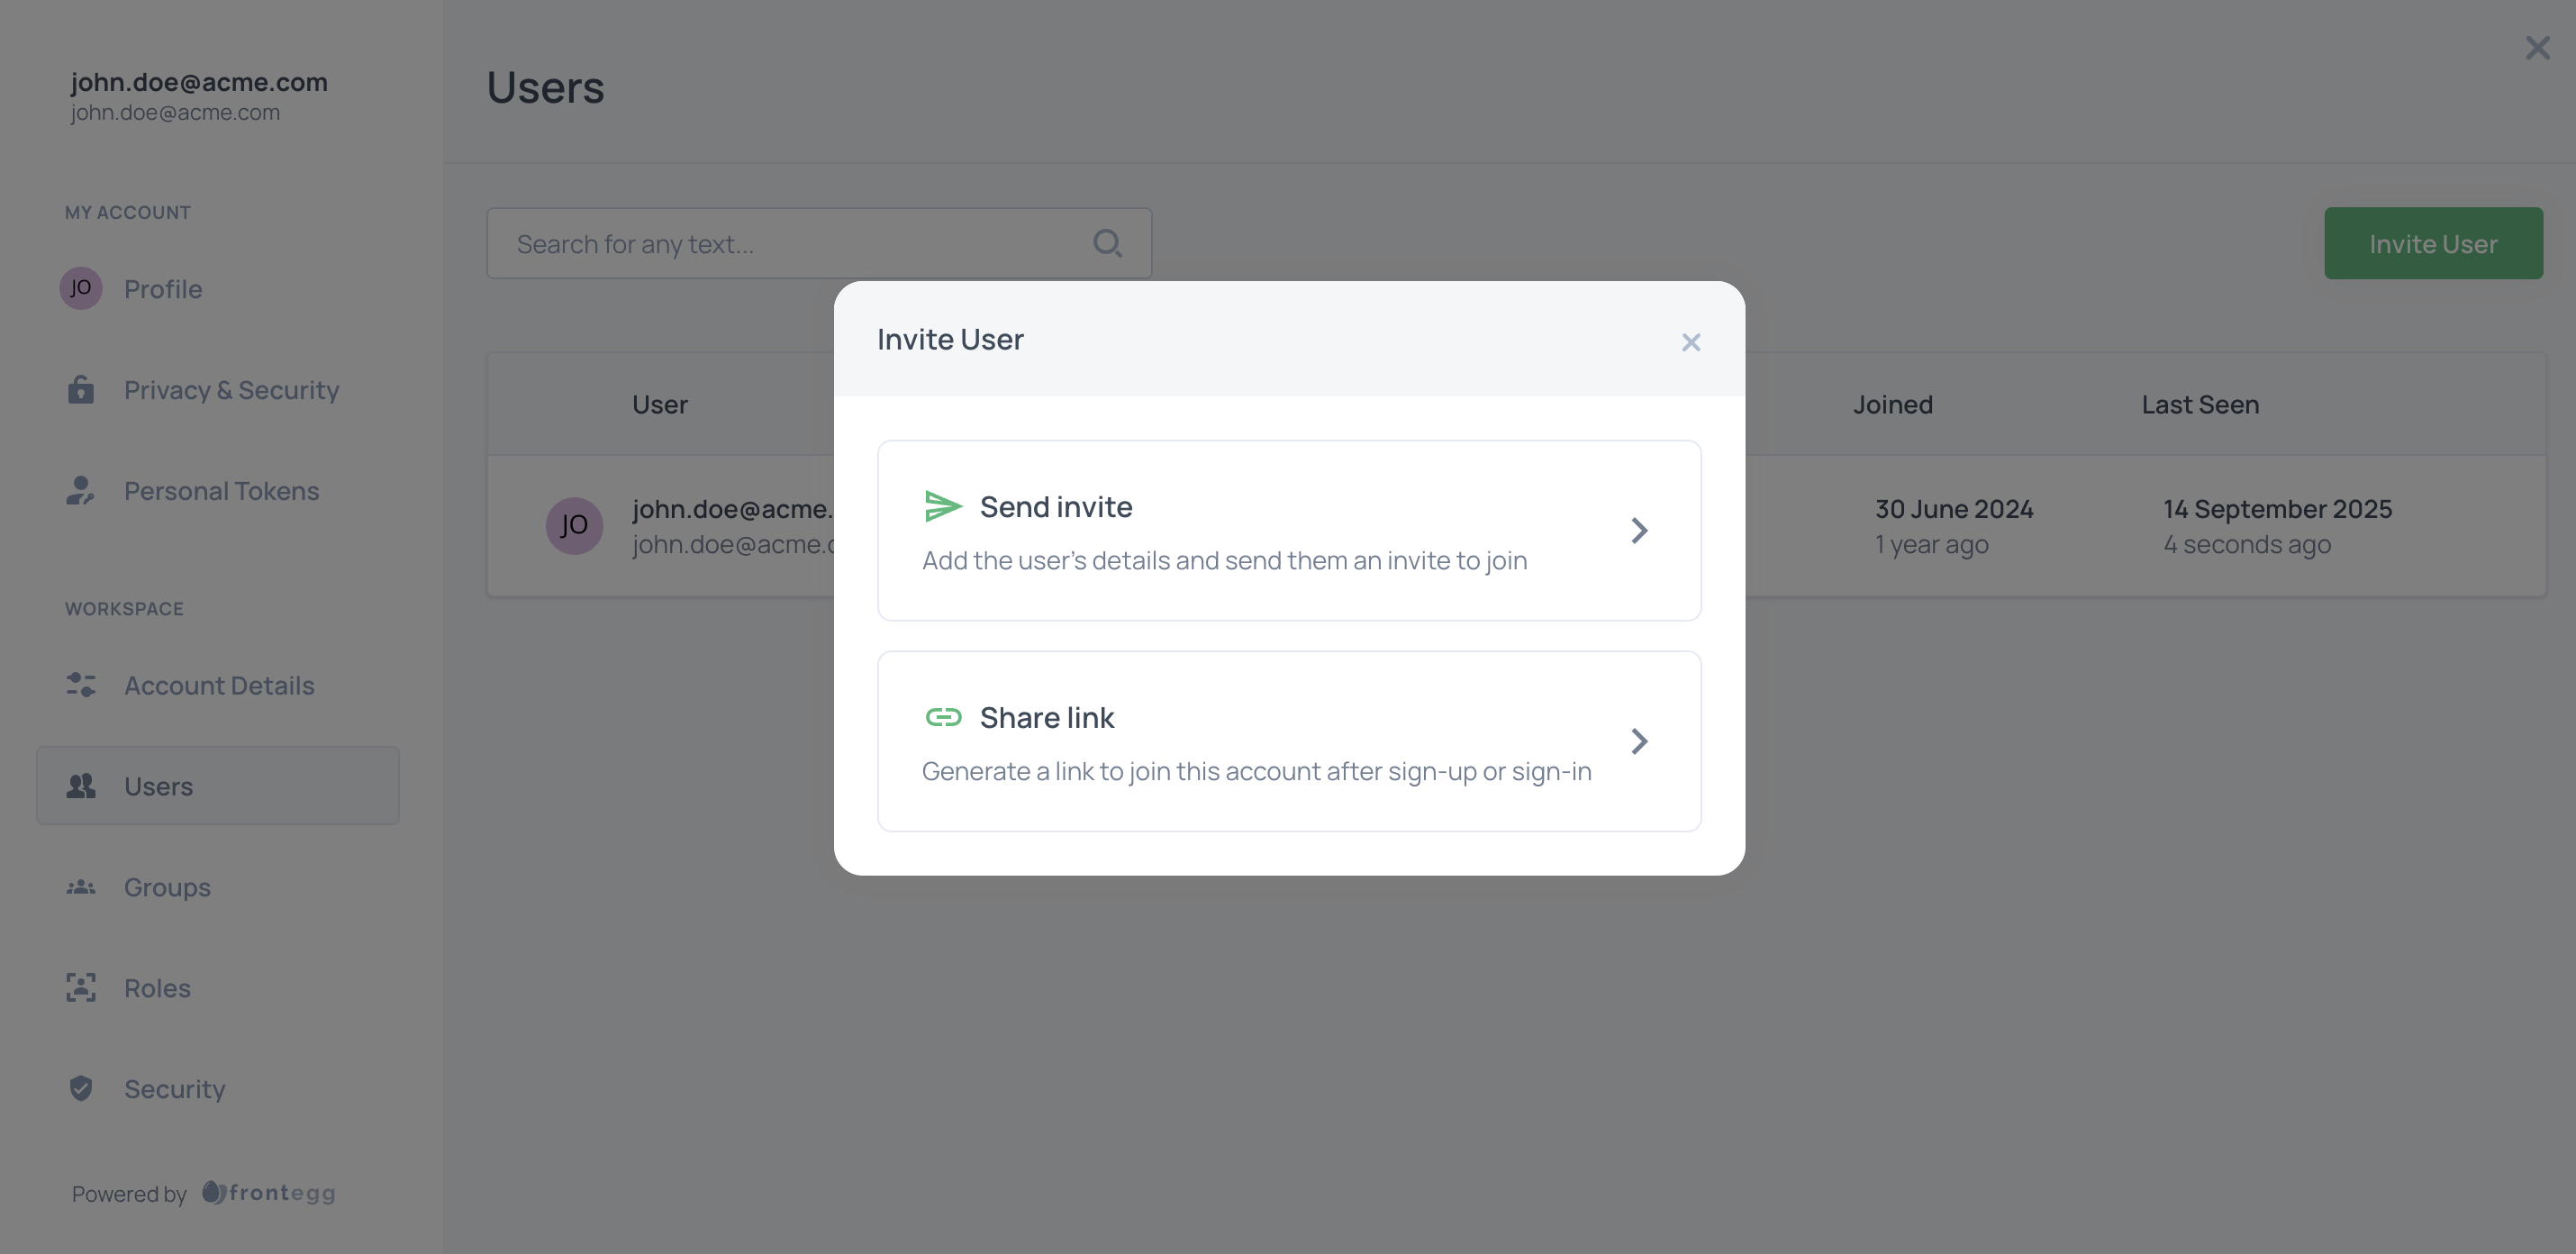
End users can invite other users to their account via email or via a link. To invite users by email, they will need to fill in the invitee's name, email, and role — and the invitee will receive an email with instructions.
Alternatively, end users can share an invitation link, which will automatically sign up or add the new member to the dedicated account. The new user will get the same roles as the user who generated the invitation link for them.
When inviting users by email, or when users try joining an account through an invite link, the invited user may be blocked if their email domain is not allowed according to domain restrictions. Domain restrictions can be configured in the security tab of the self-service portal.
Prerequisites
Prerequisites
The above invitation design is available from the below versions: @frontegg/react@7.12.5
@frontegg/angular@7.17.4
@frontegg/js@7.87.0
@frontegg/vue@4.10.4
Guest users with time-limited access
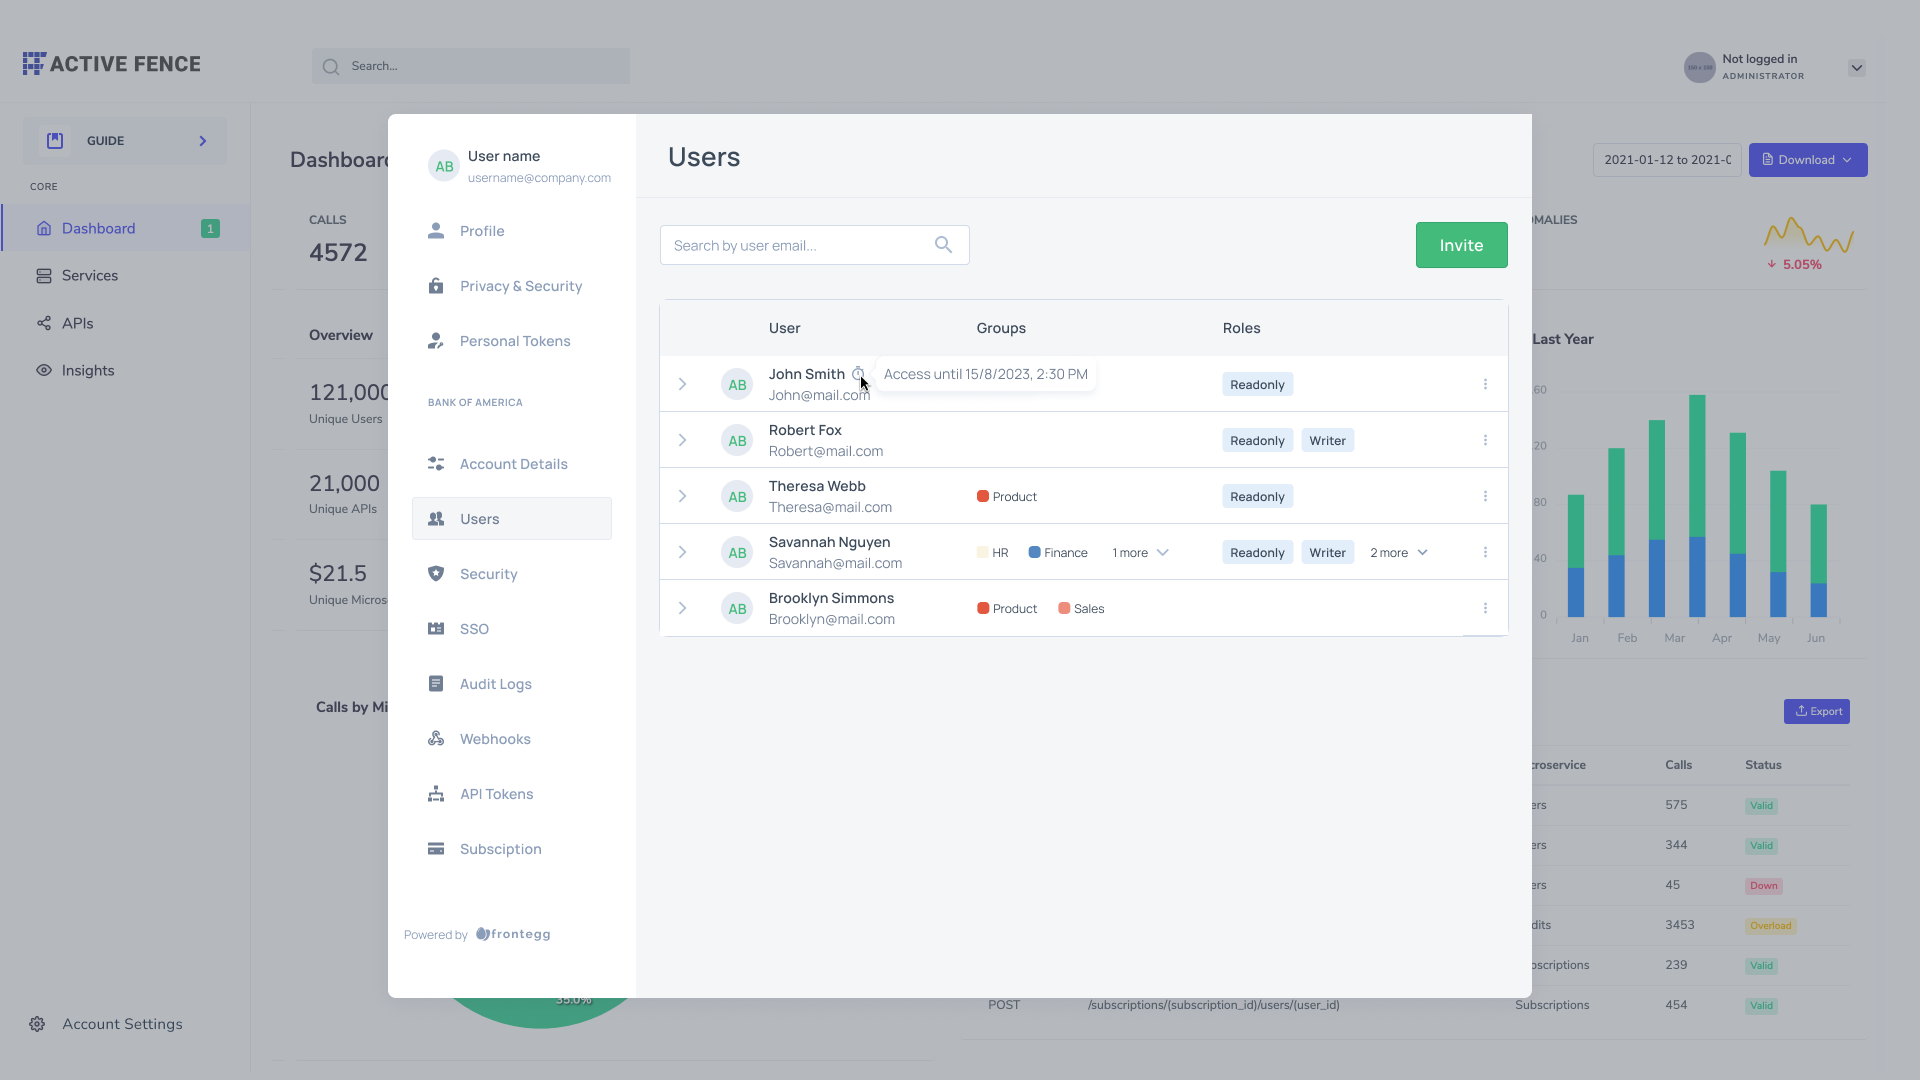
Guest users can perform actions for a limited time. In the self-service portal's Users tab, invite new users as Guests or set an Access Period for existing users. Guest profiles display their access expiration date.
Temporary vs. permanent access
Temporary vs. permanent access
You can decide whether your users will have temporary or permanent access. Access can be changed according to your preference.
Prerequisites
Prerequisites
@frontegg/react@6.0.18
@frontegg/angular@6.14.0
@frontegg/js@6.166.0
Setting access period for new users
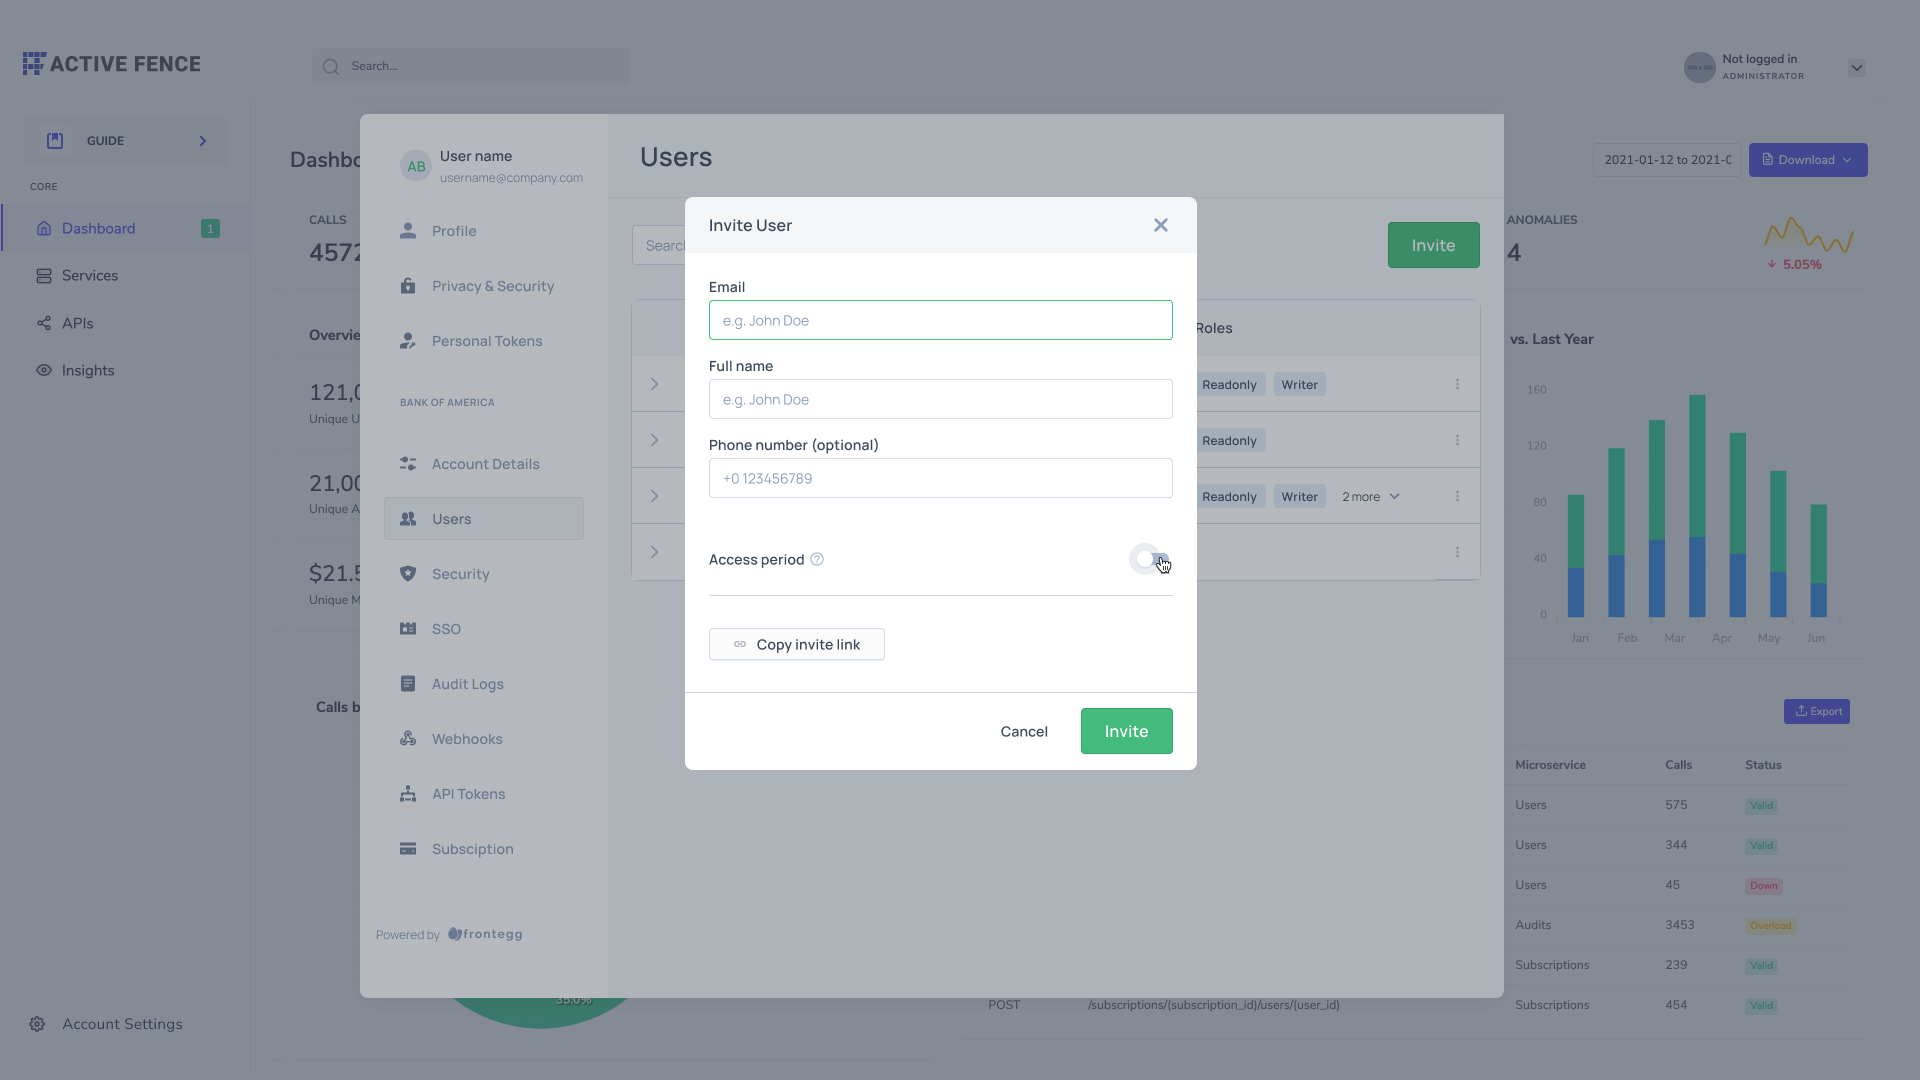
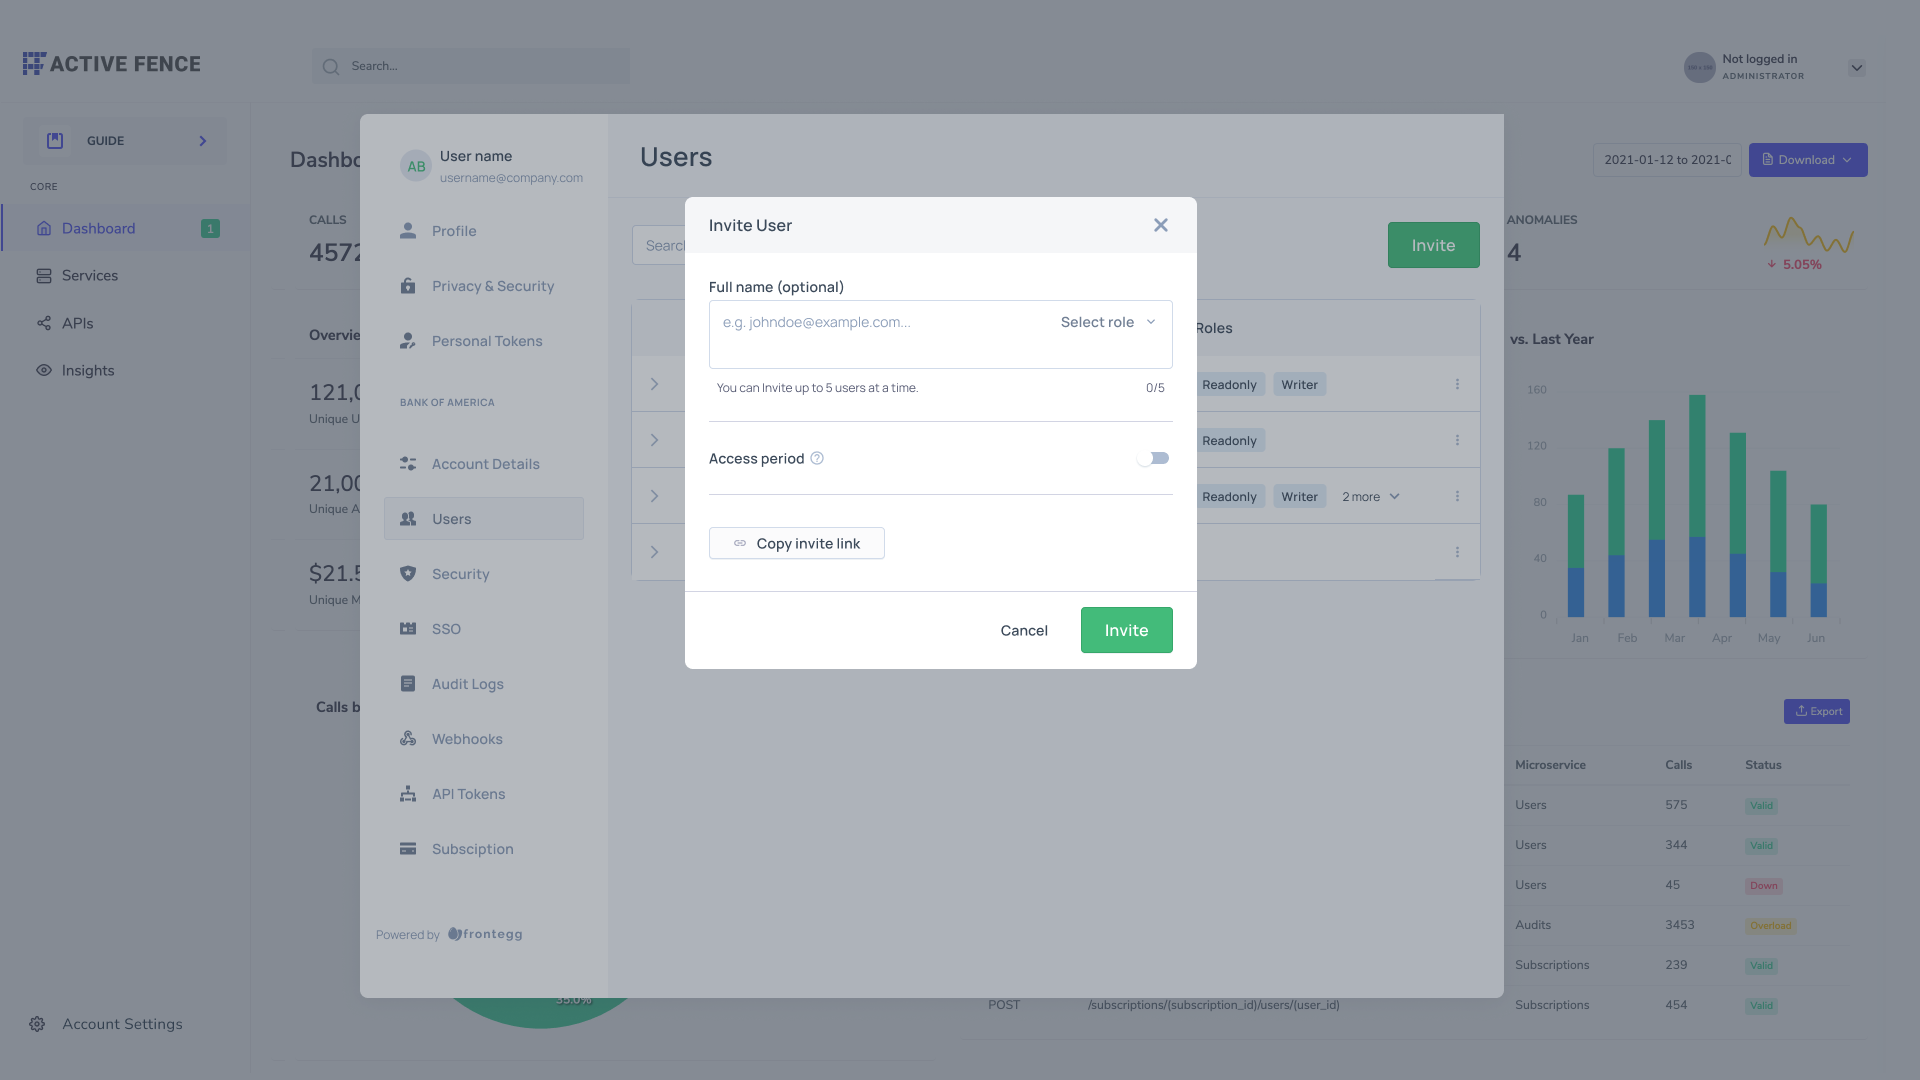
If you wish to invite new users and set them as Guests, you will need to enable the access period toggle and choose the time frame you want them to have access for:
Setting access period for new users via API
You can also set users' temporary access programmatically via the expirationInSeconds parameter.
Switching user status between guest and permanent
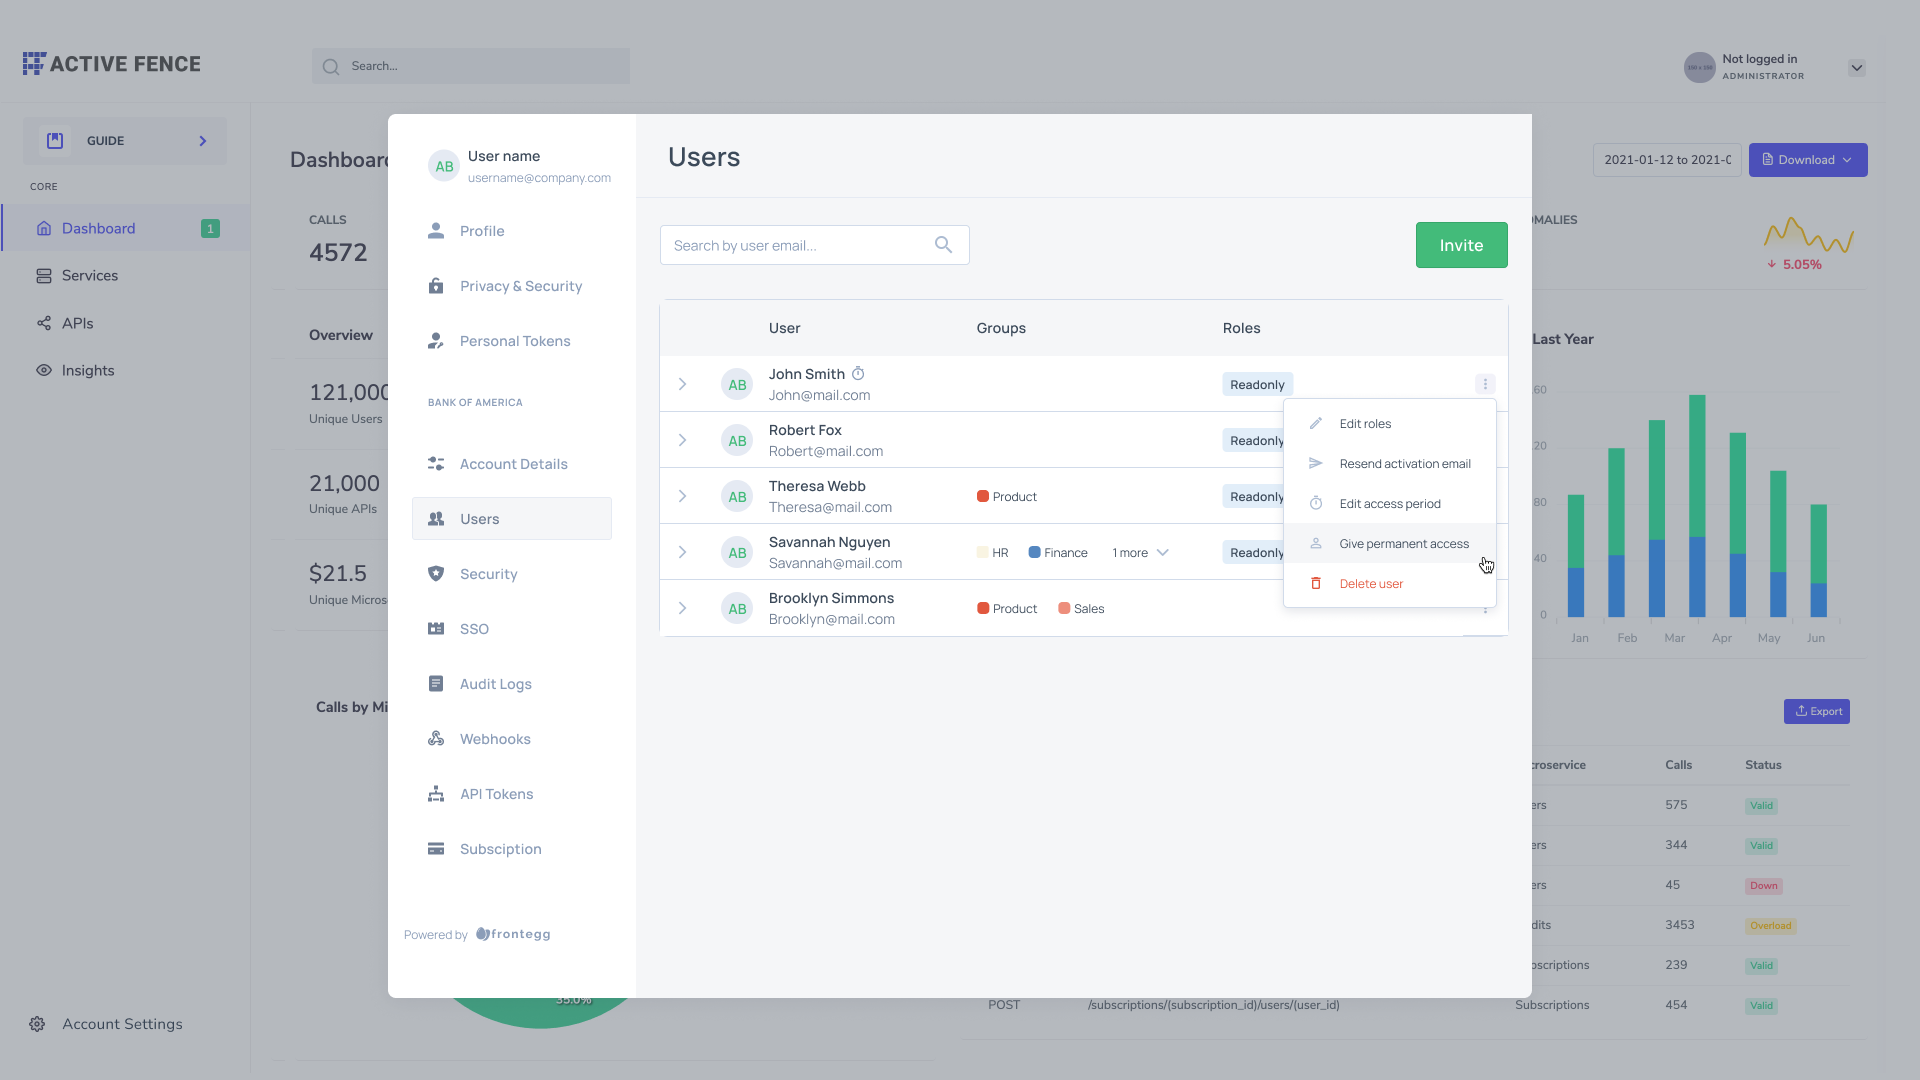
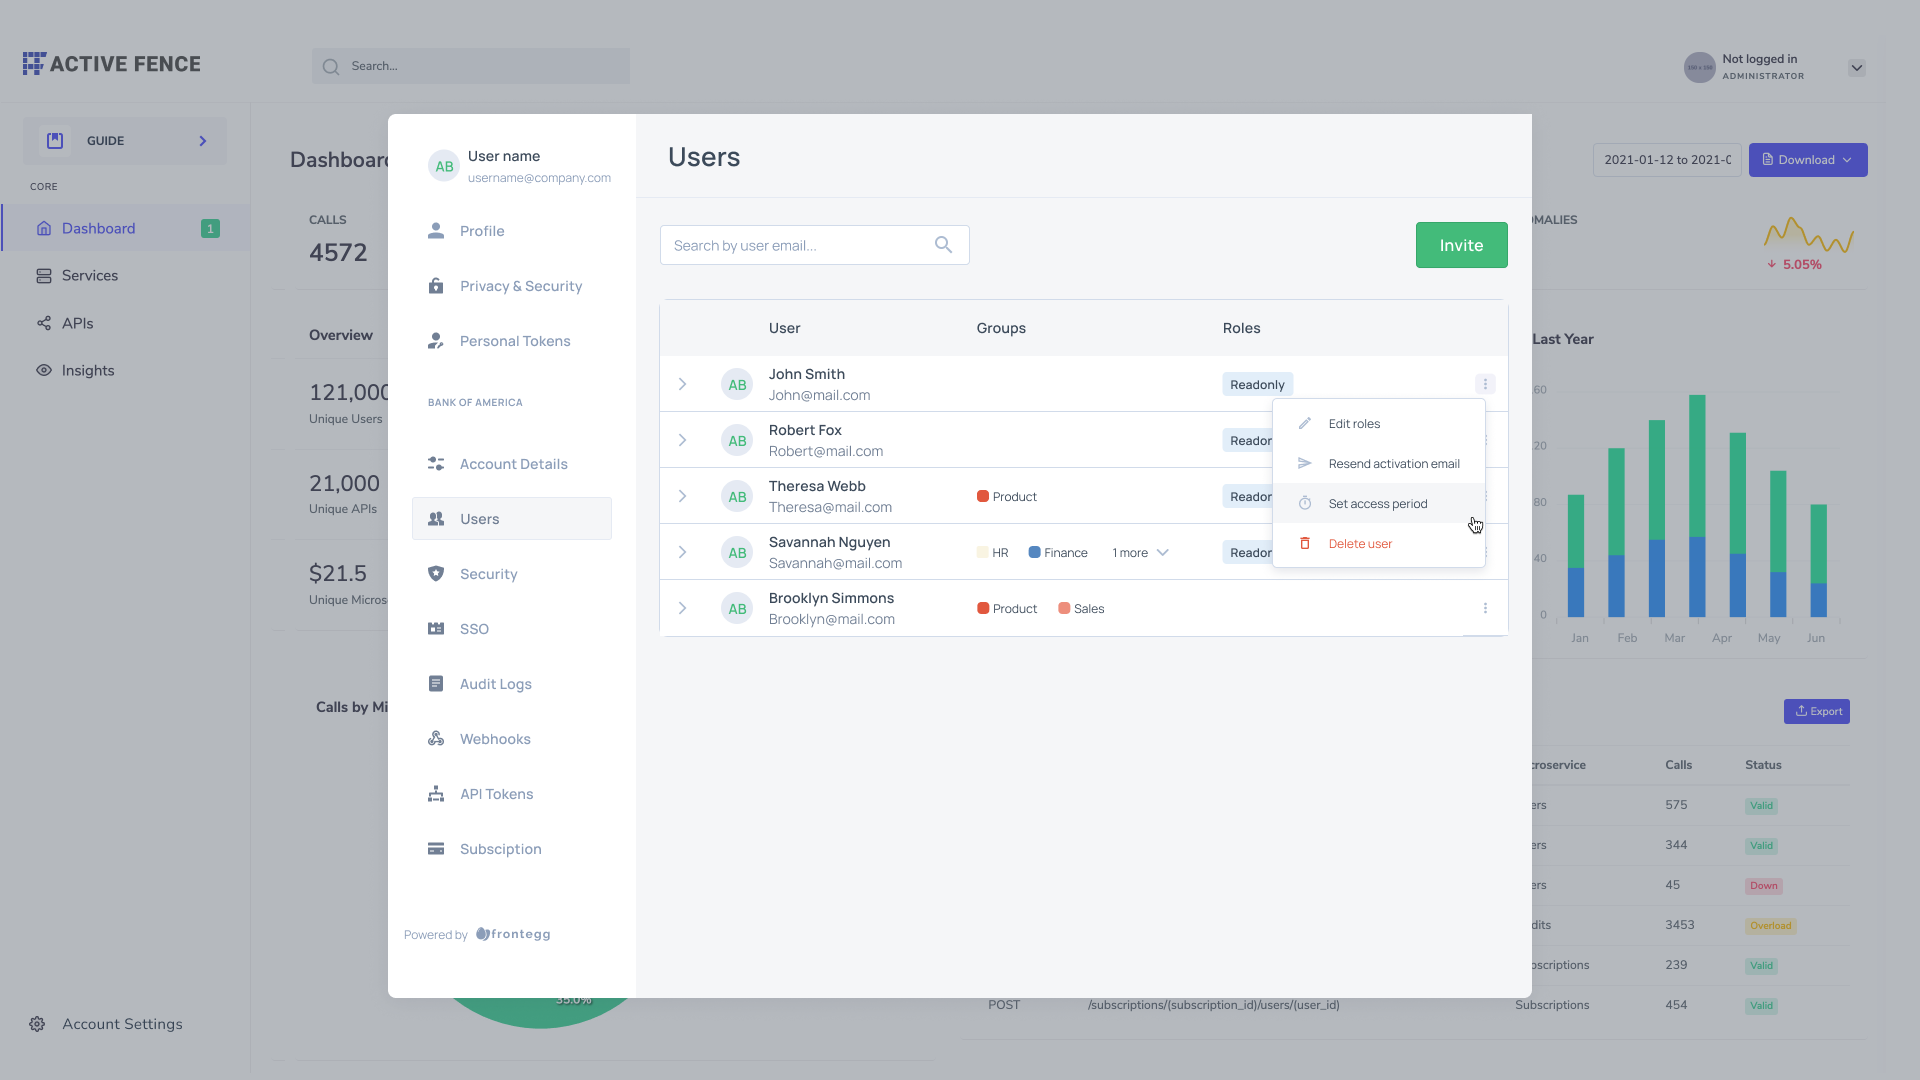
To switch a guest user status from guest to permanent, use the menu next to the user's name and choose the "Get permanent access" option. To remove permanent user status, set an access period for an existing user, and they will automatically receive temporary status.
Inviting multiple guest users (bulk invitation)
You can streamline user invitations by inviting up to 5 users at a time. Note that the access period you set will apply to all users you invite in bulk.
Disable or enable users
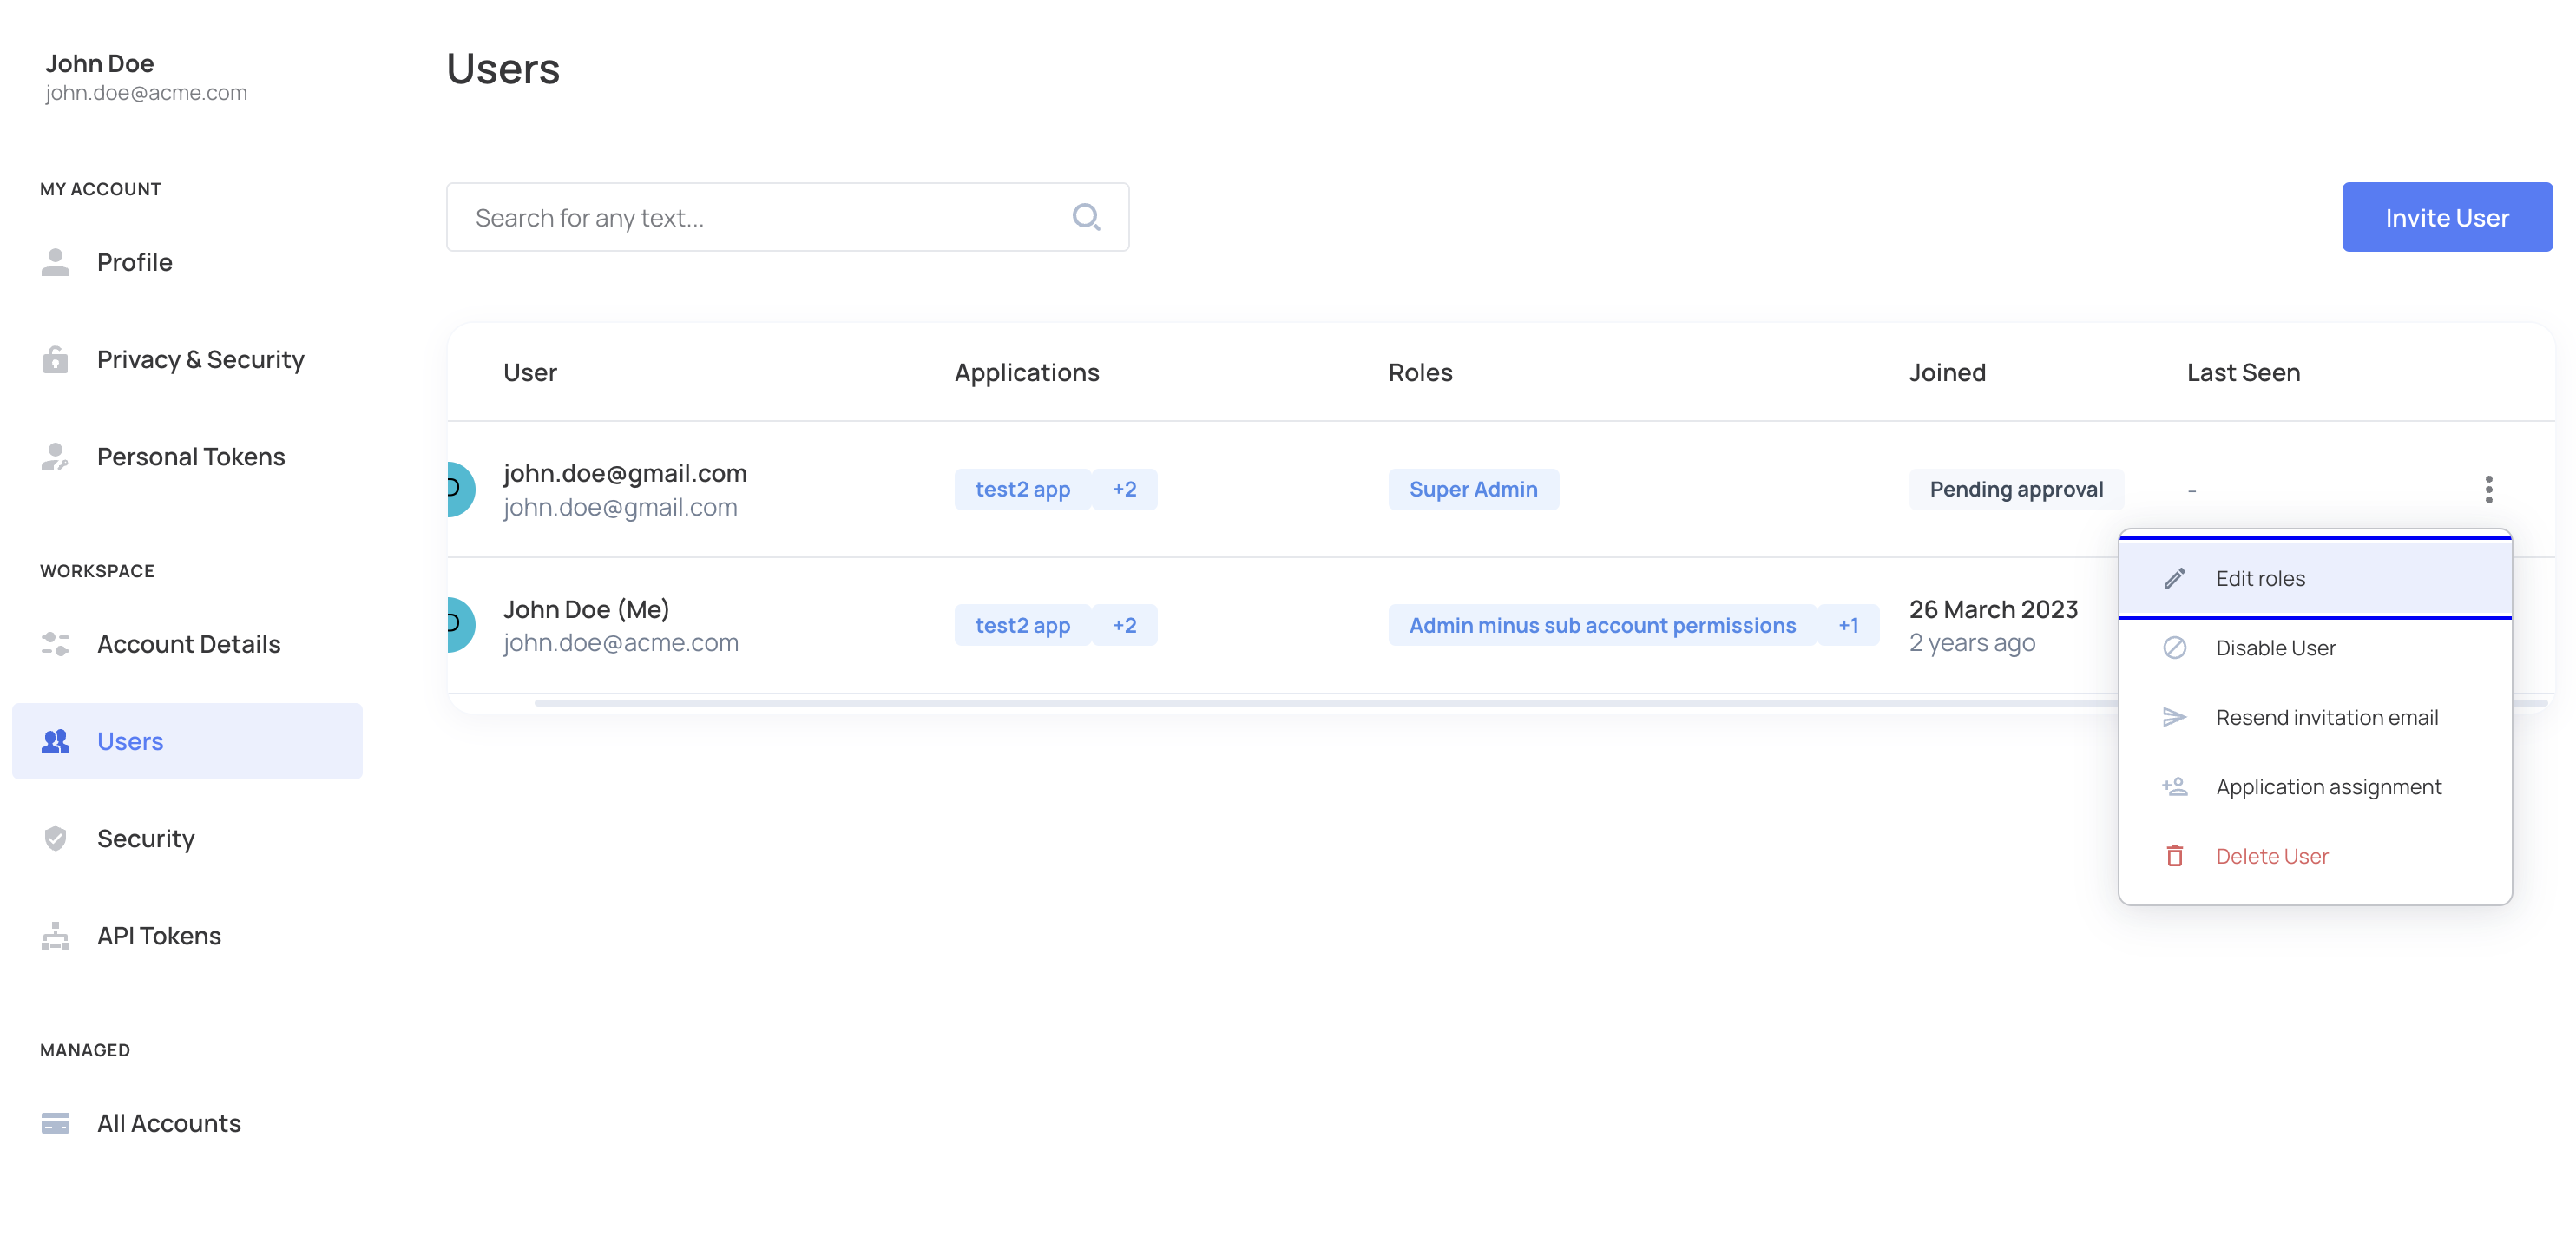
You can allow your end users to disable/enable other users in their account. This action requires fe.secure.write.enableDisable permission. Subsequently, users will be able to go to the self-service portal and enable/disable users in an account (via the Workspace → Users tab).
Users with invited and pending approval statuses
Users with invited and pending approval statuses
Note that when users with invited or pending approval statuses are disabled from logging in, the "Resend activation email" option will not appear as a viable option in the 'more information' (three dots) next to their name.
Disable or enable users via API
To disable or enable users programmatically, you can use the linked endpoints with either an environment token or a user token that contains the required permissions for this action.
User permissions
You can assign designated user management permissions to a specific role. Permissions will mirror the actions users can perform in the Users tab. Refer to the table below for the permissions and their respective keys.
| Category | Permission | Key | Location in Portal | Comments |
|---|---|---|---|---|
| User Management | Revoking user sessions (logging users out) | fe.secure.delete.sessions | Users | |
| User Management | Deleting invite links | fe.secure.delete.users | Users | |
| User Management | Deleting roles from users | fe.secure.delete.usersRoles | Users | |
| User Management | Resending activation email to a non-verified user | fe.secure.write.resendActivationEmail | Users | |
| User Management | Allowing users to enable/disable users from the app | fe.secure.write.enableDisable | Users | |
| User Management | Creating and editing invite links | fe.secure.write.tenantInvites | Users | |
| User Management | Adding users to accounts | fe.secure.write.users | Users | |
| User Management | Assigning roles to users | fe.secure.write.usersRoles | Users | |
| Account settings | Read user application* | fe.account-settings.read.app | Users | *Relevant to accounts with Multi-apps |
| Applications | Assign users to application* | fe.secure.write.appsUsers | Users | *Relevant to accounts with Multi-apps |
| Applications | Remove user from application* | fe.secure.delete.appsUsers | Users | *Relevant to accounts with Multi-apps |
Security settings
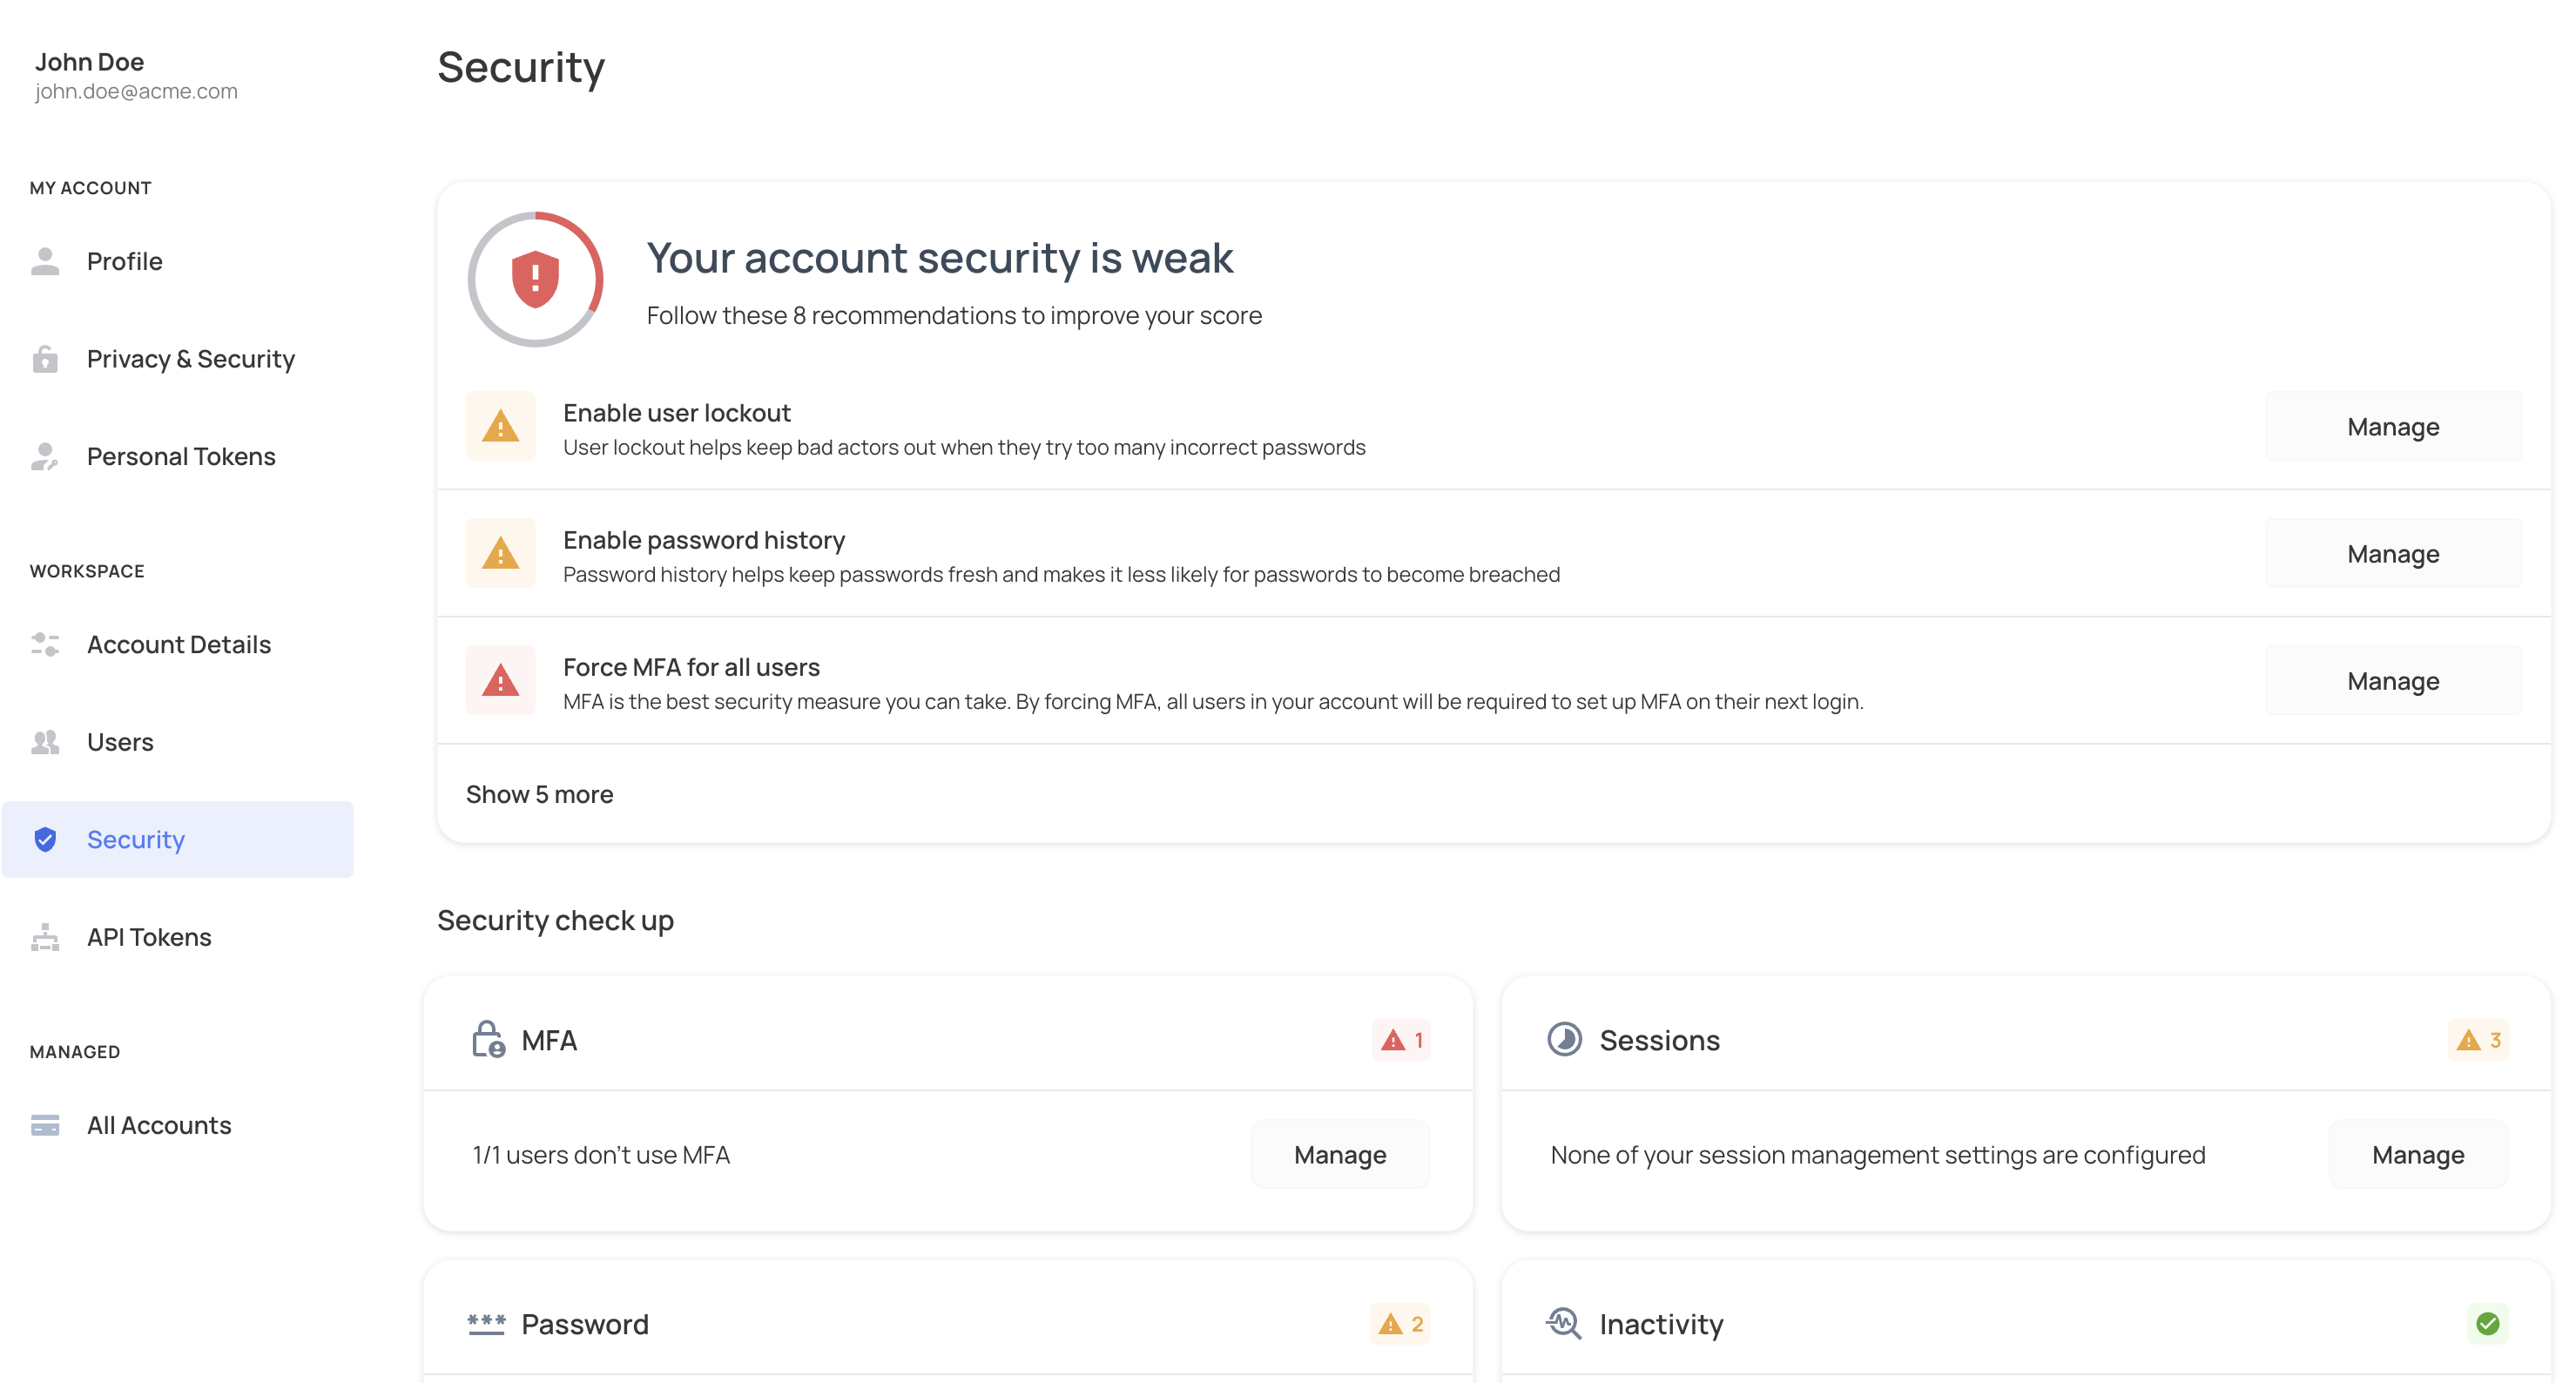
Security is critical for any app, and Frontegg gives you full control. In the self-service portal, customers can self-serve security features like MFA, session management, and login/signup restrictions. This guide covers all available self-serve security features.
MFA
End users can choose a stricter MFA policy than what is configured on the environment. For example, if the environment MFA policy is Don't Force, your customers can choose Force or Force except Enterprise SSO for their specific account users.
User lockout
For apps that use a password, customers can define how many incorrect password attempts a user can make before getting locked out. For this feature, customer settings override environment settings.
Password history
For apps that use a password, customers can define how many unique passwords a user can set before using one that was already used. For this feature, customer settings override environment settings.
Session management
End users can customize session management settings on their account, overriding the default settings configured for the environment.
- Idle session timeout - defines how long a user can be idle (no activity on the tab) before their session is terminated.
- Force re-login - defines the period of time after which a user will be logged out, whether sessions are active or inactive.
- Concurrent sessions - defines how many sessions users can have open at the same time. If users reach their limit, new sessions replace older sessions automatically.
IP restrictions
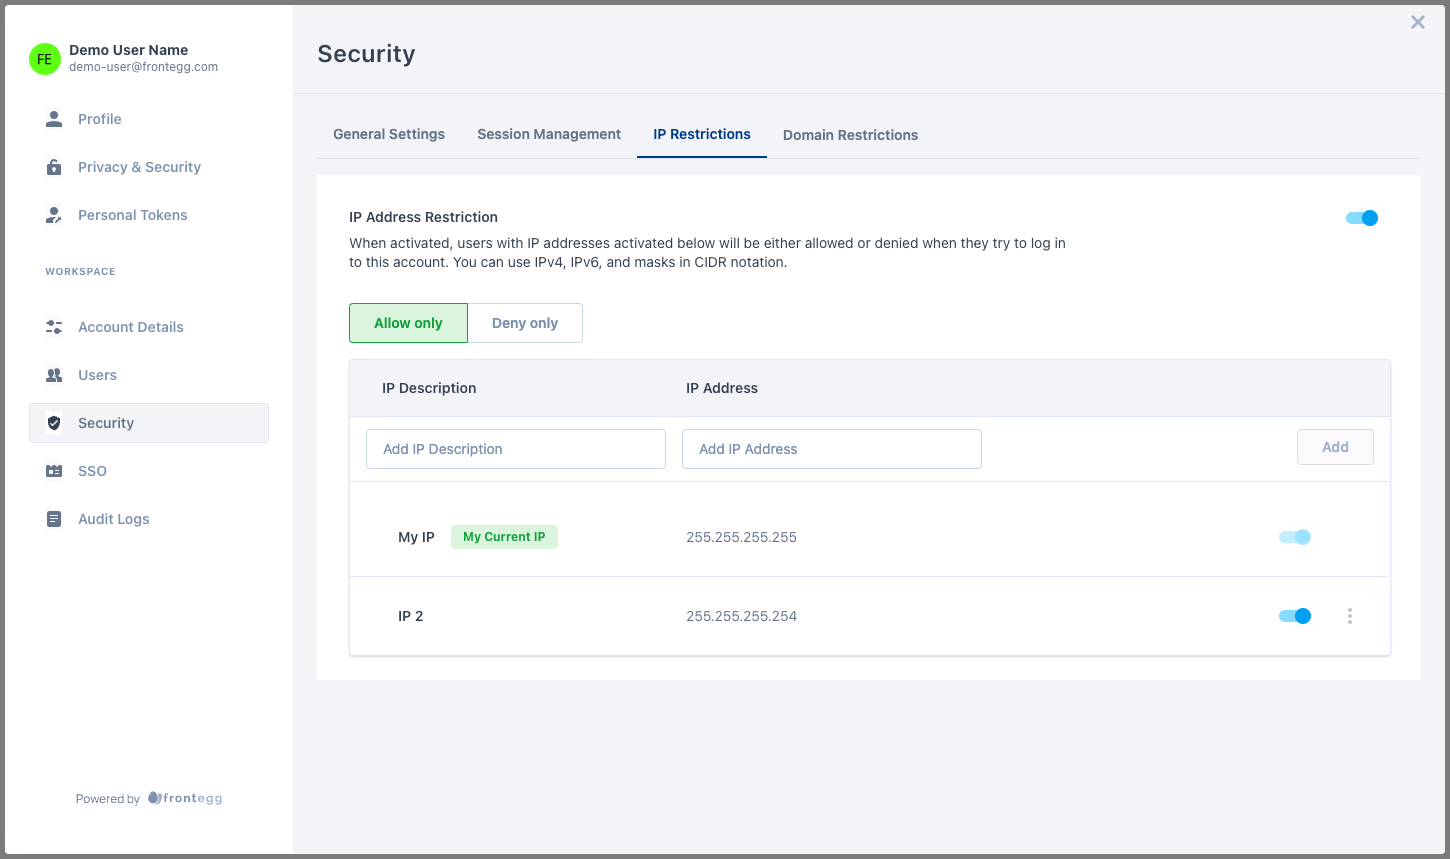
IP Restrictions give your customers the ability to restrict login or signup to certain IP addresses. The rules can contain IPv4 (e.g., 255.255.255.255), IPv6 (e.g., 2345:0425:2CA1:0000:0000:0567:5673:23b5), and masks in CIDR notation (e.g., 192.0.2.0/24 or 2002:abcd:ffff:c0a8:101/64).
Frontegg offers allowlists as well as denylists.
Allowlist: Only allow the following IPs and deny all others. Allowlists must contain the IP address of the user (otherwise, the user configuring it could get locked out of their account).
Denylist: Only block the following IPs and allow all others. Denylists can't contain the IP address of the user (otherwise, the user configuring it could get locked out of their account).
In order for IP restriction rules to be enforced, the toggle in the top-right corner of the feature must be enabled.
Domain restrictions
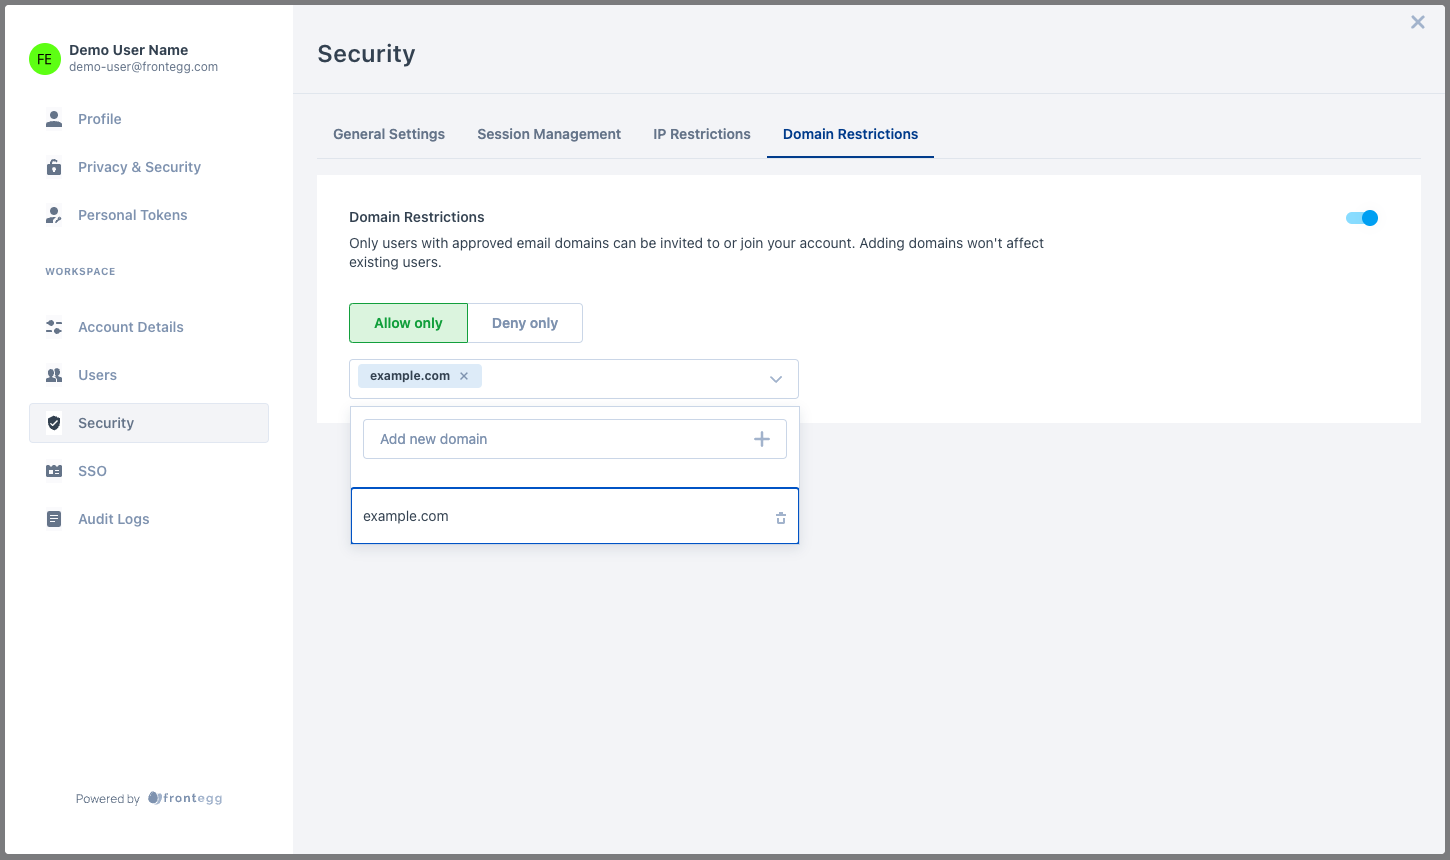
By configuring email domain restrictions, end users can restrict signup to their account for specific email domains.
Allowlist: Only allow the following domains and deny all others.
Denylist: Only block the following domains and allow all others.
Both methods apply in 2 places:
- On user invitation by email - if a user tries to invite a user with a domain that isn't allowed, they won't be able to invite them.
- On user signup after clicking an invite link - if a user tries to join your account with a domain that isn't allowed, they won't be able to join.
Note: Configuring domain restrictions doesn't affect existing users.
Single sign-on
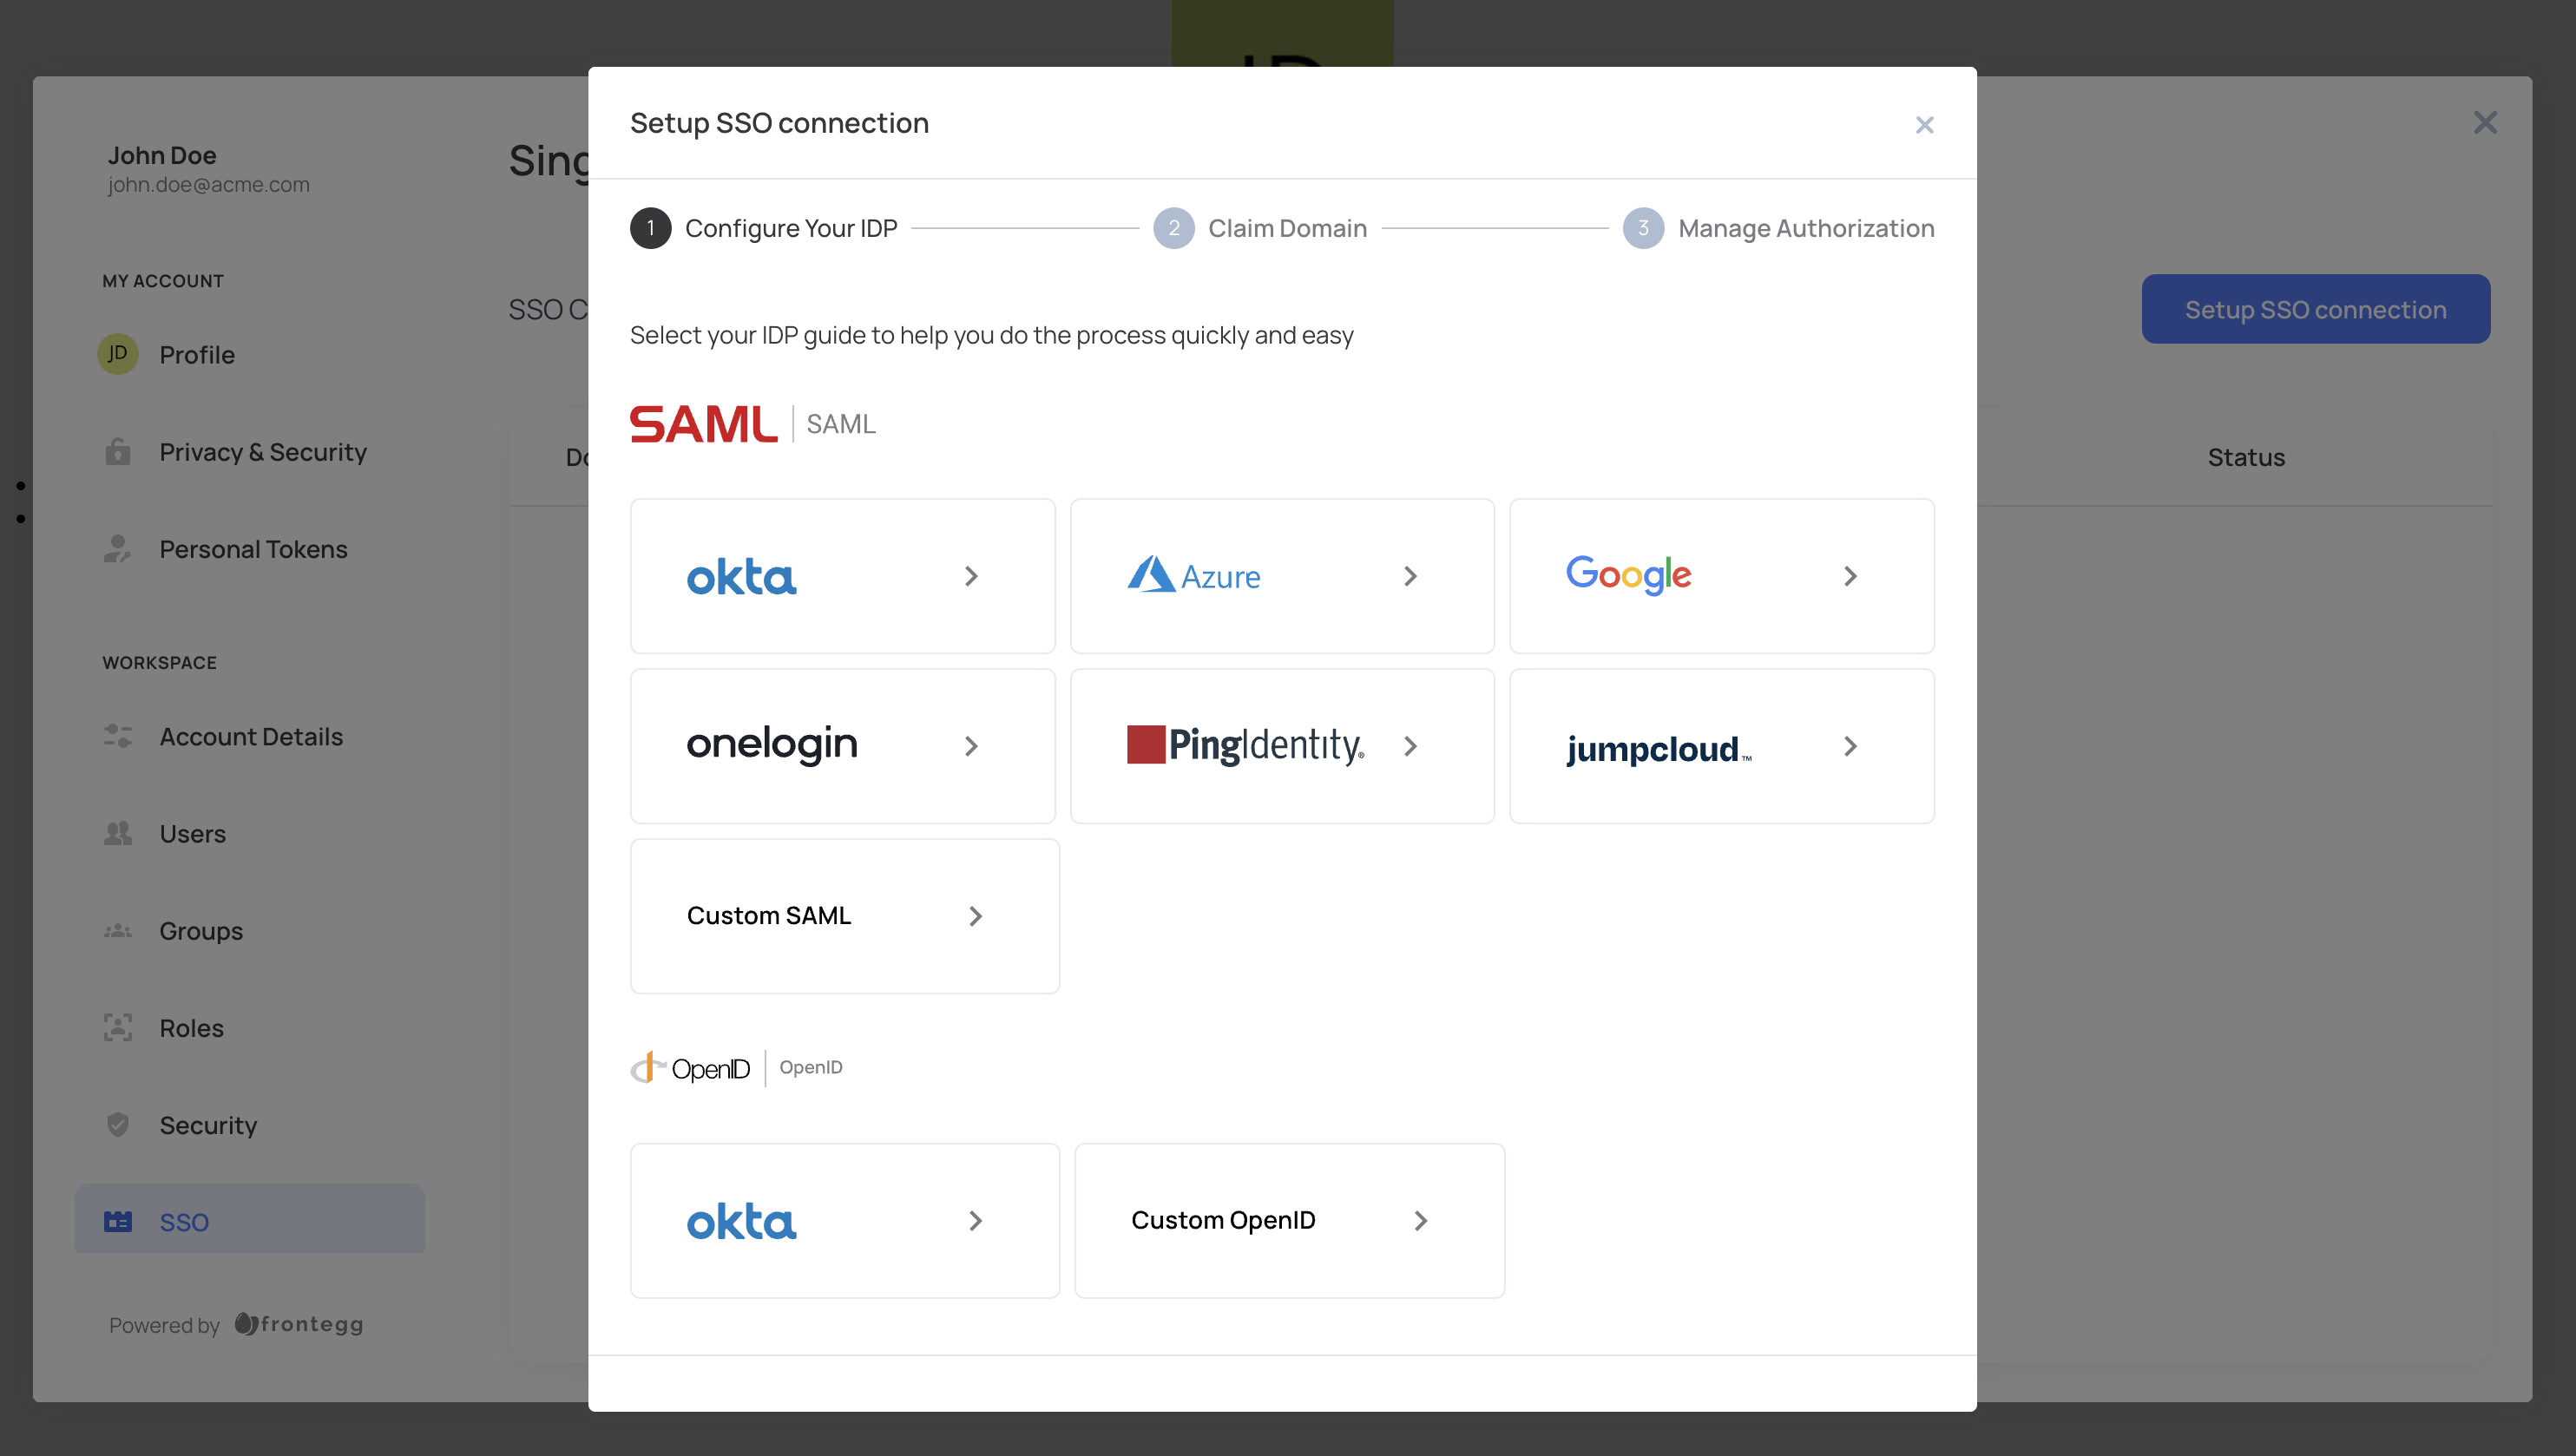
End users can easily set up login via single sign-on to their account from the SSO page. Frontegg provides multiple embedded walkthrough guides with detailed steps for each external identity provider. More details can be found in the dedicated SSO section.
User groups settings
Managing users and access can be complex, especially in large organizations or platforms with multiple roles. User groups simplify this by allowing customers to segment users, streamline access control, and manage permissions efficiently. This guide covers creating and managing user groups for effective use.
Prerequisites
Prerequisites
@frontegg/react@5.0.27
@frontegg/angular@5.20.0
@frontegg/vue@2.0.24
@frontegg/nextjs@7.0.1
Only users who are already members of the account can be added to a specific group.
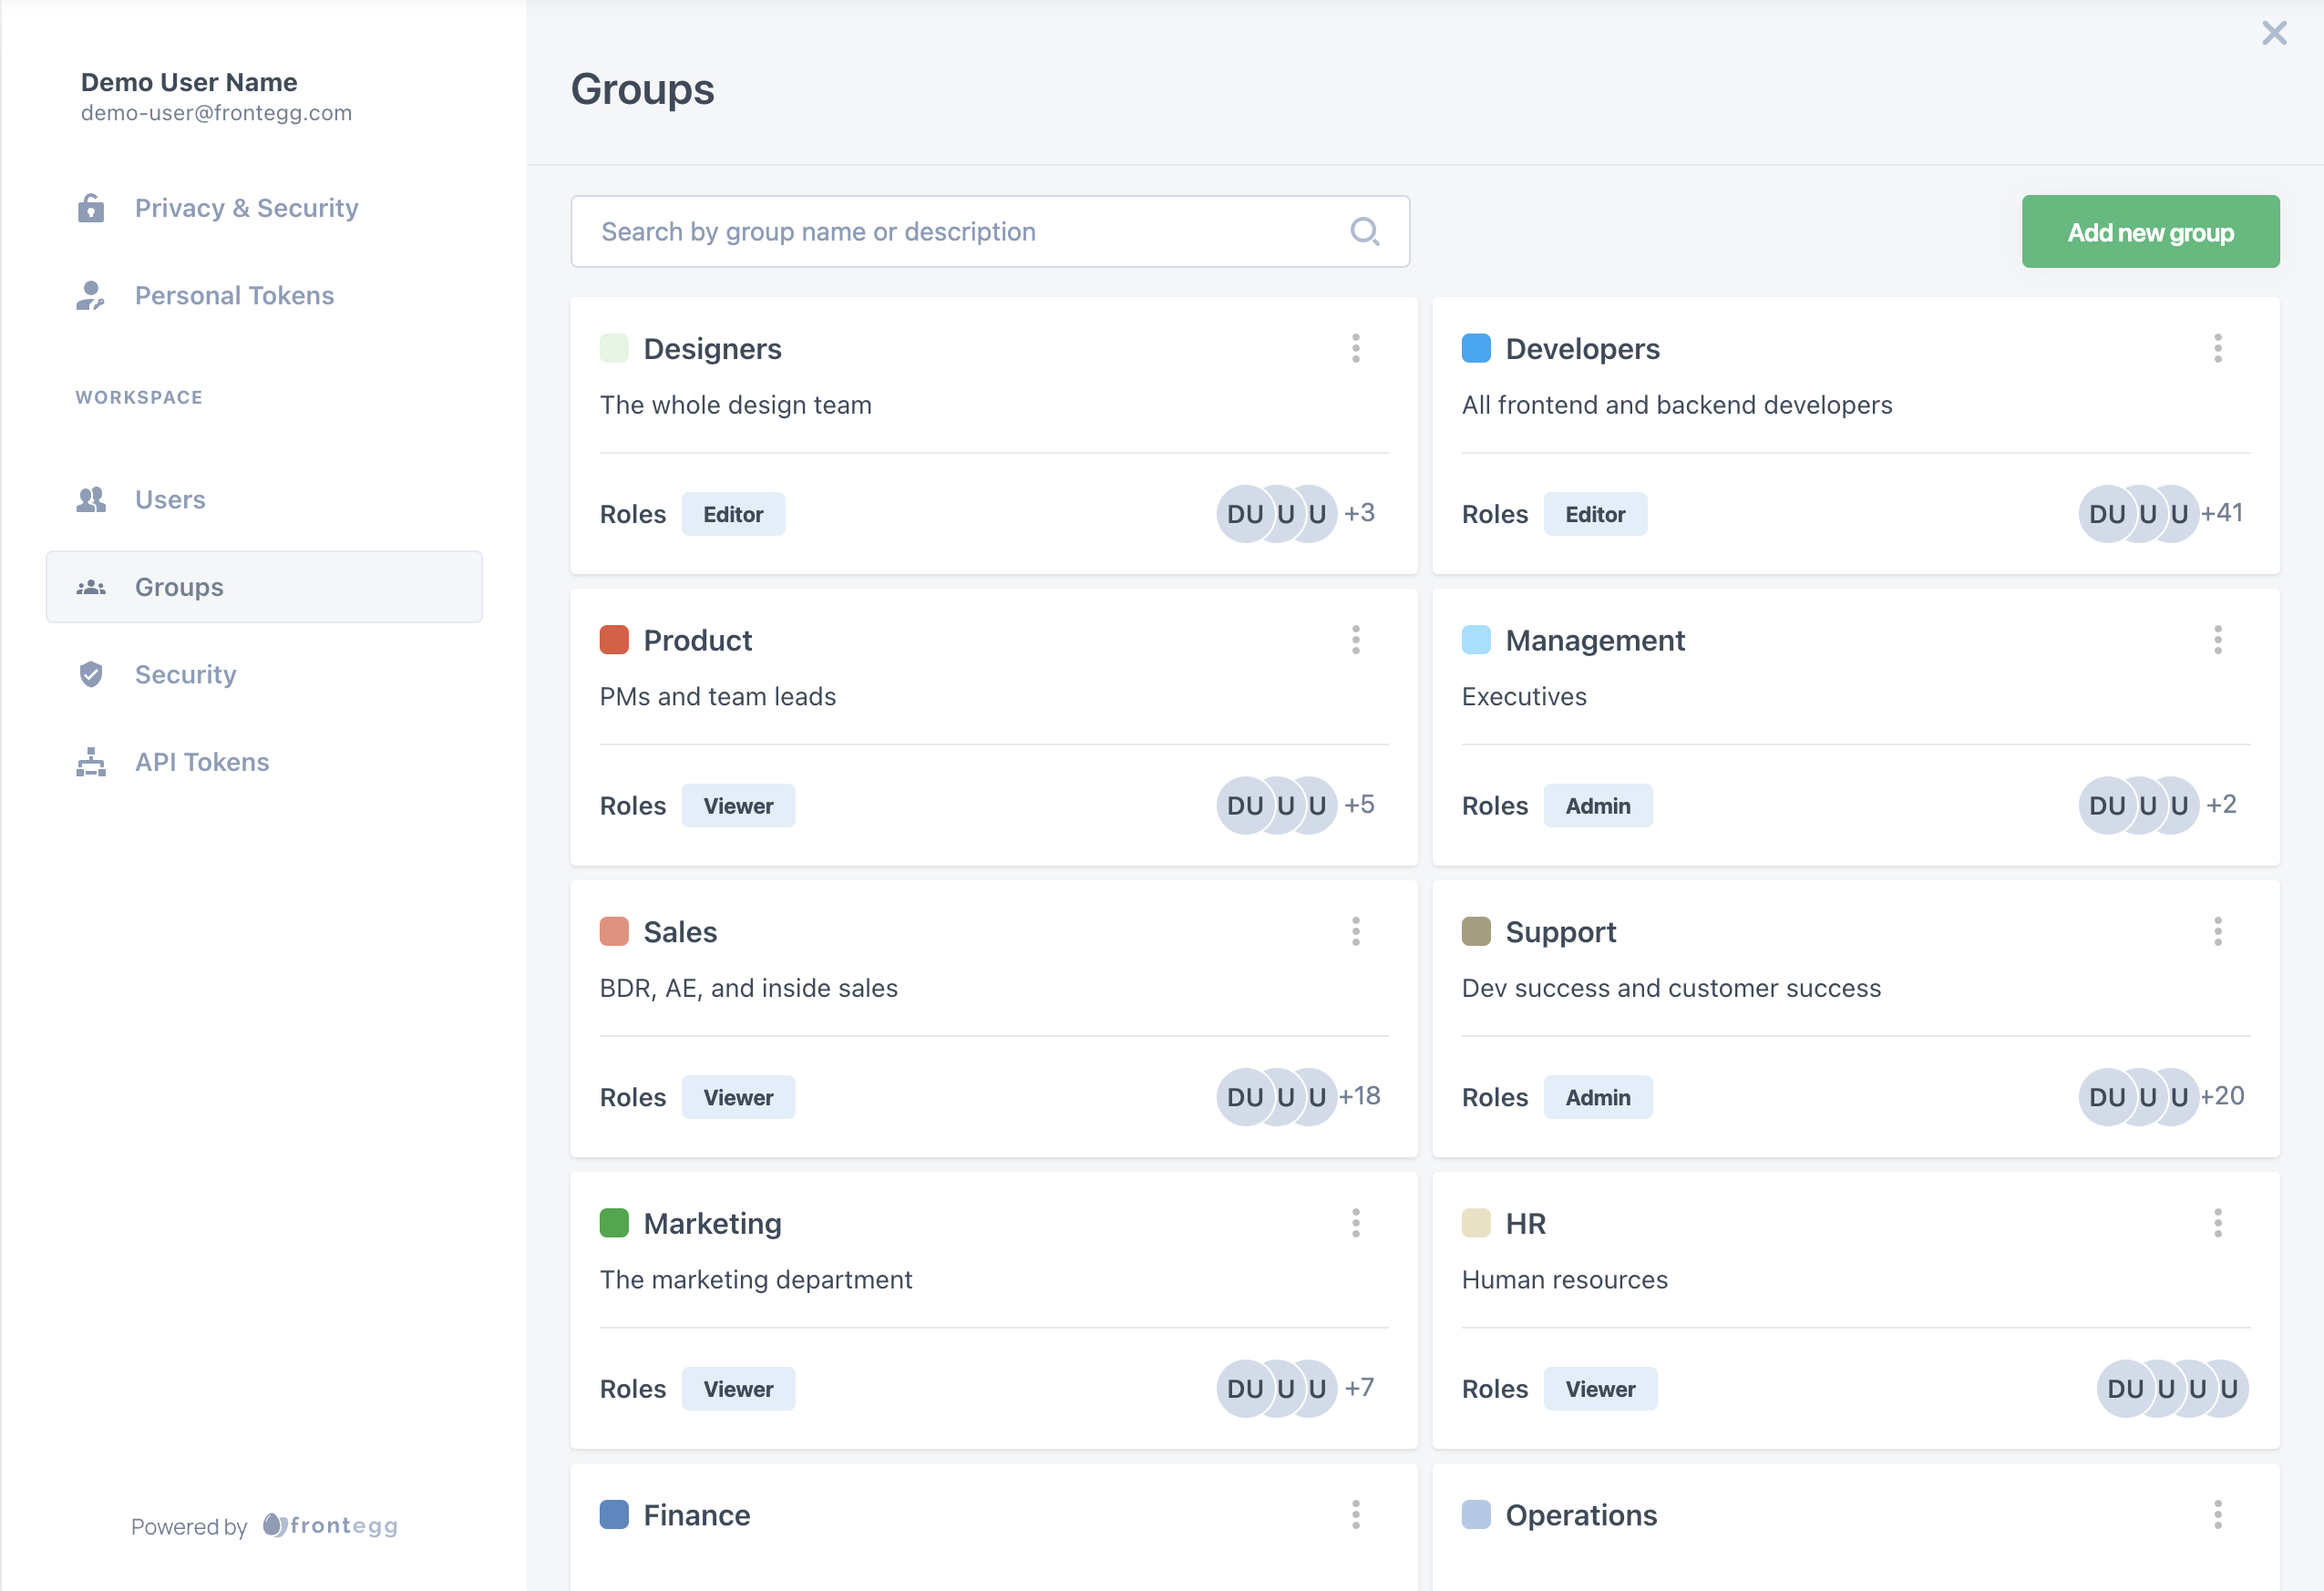
Users can have two kinds of roles: User roles and group roles. Default user roles are roles users have regardless of their group membership. In addition to the user's role, they will also get a group role based on their group membership.
For example, if a user has a default role called "Admin" and they're also in a group that grants an "Admin" role, and you remove the default role, the user will still have the role because they are still a member of the group.
Group roles
Group roles
User's group roles are calculated upon login and will appear in the user's JWT (access token), but will not be visible from the management section in the Frontegg portal.
Group management permissions
In order to manage user groups on the account, users will need the following permissions granted via their role:
| Category | Permission | Key | Location in Portal |
|---|---|---|---|
| Groups management | Read groups | fe.secure.read.groups | Groups |
| Groups management | Create or update groups | fe.secure.write.groups | Groups |
| Groups management | Delete groups | fe.secure.delete.groups | Groups |
| Groups management | Add users to groups | fe.secure.write.groupsUsers | Groups |
| Groups management | Remove users from groups | fe.secure.delete.groupsUsers | Groups |
| Groups management | Add roles to groups | fe.secure.write.groupsRoles | Groups |
| Groups management | Remove roles from groups | fe.secure.delete.groupsRoles | Groups |
| Groups management | Assign roles to users | fe.secure.write.usersRoles | Groups |
Self-service roles
If the roles page is enabled, end users will be able to create new custom roles via their self-service portal, where they will fill in the role's name and description and then assign the permissions that should be associated with that role.
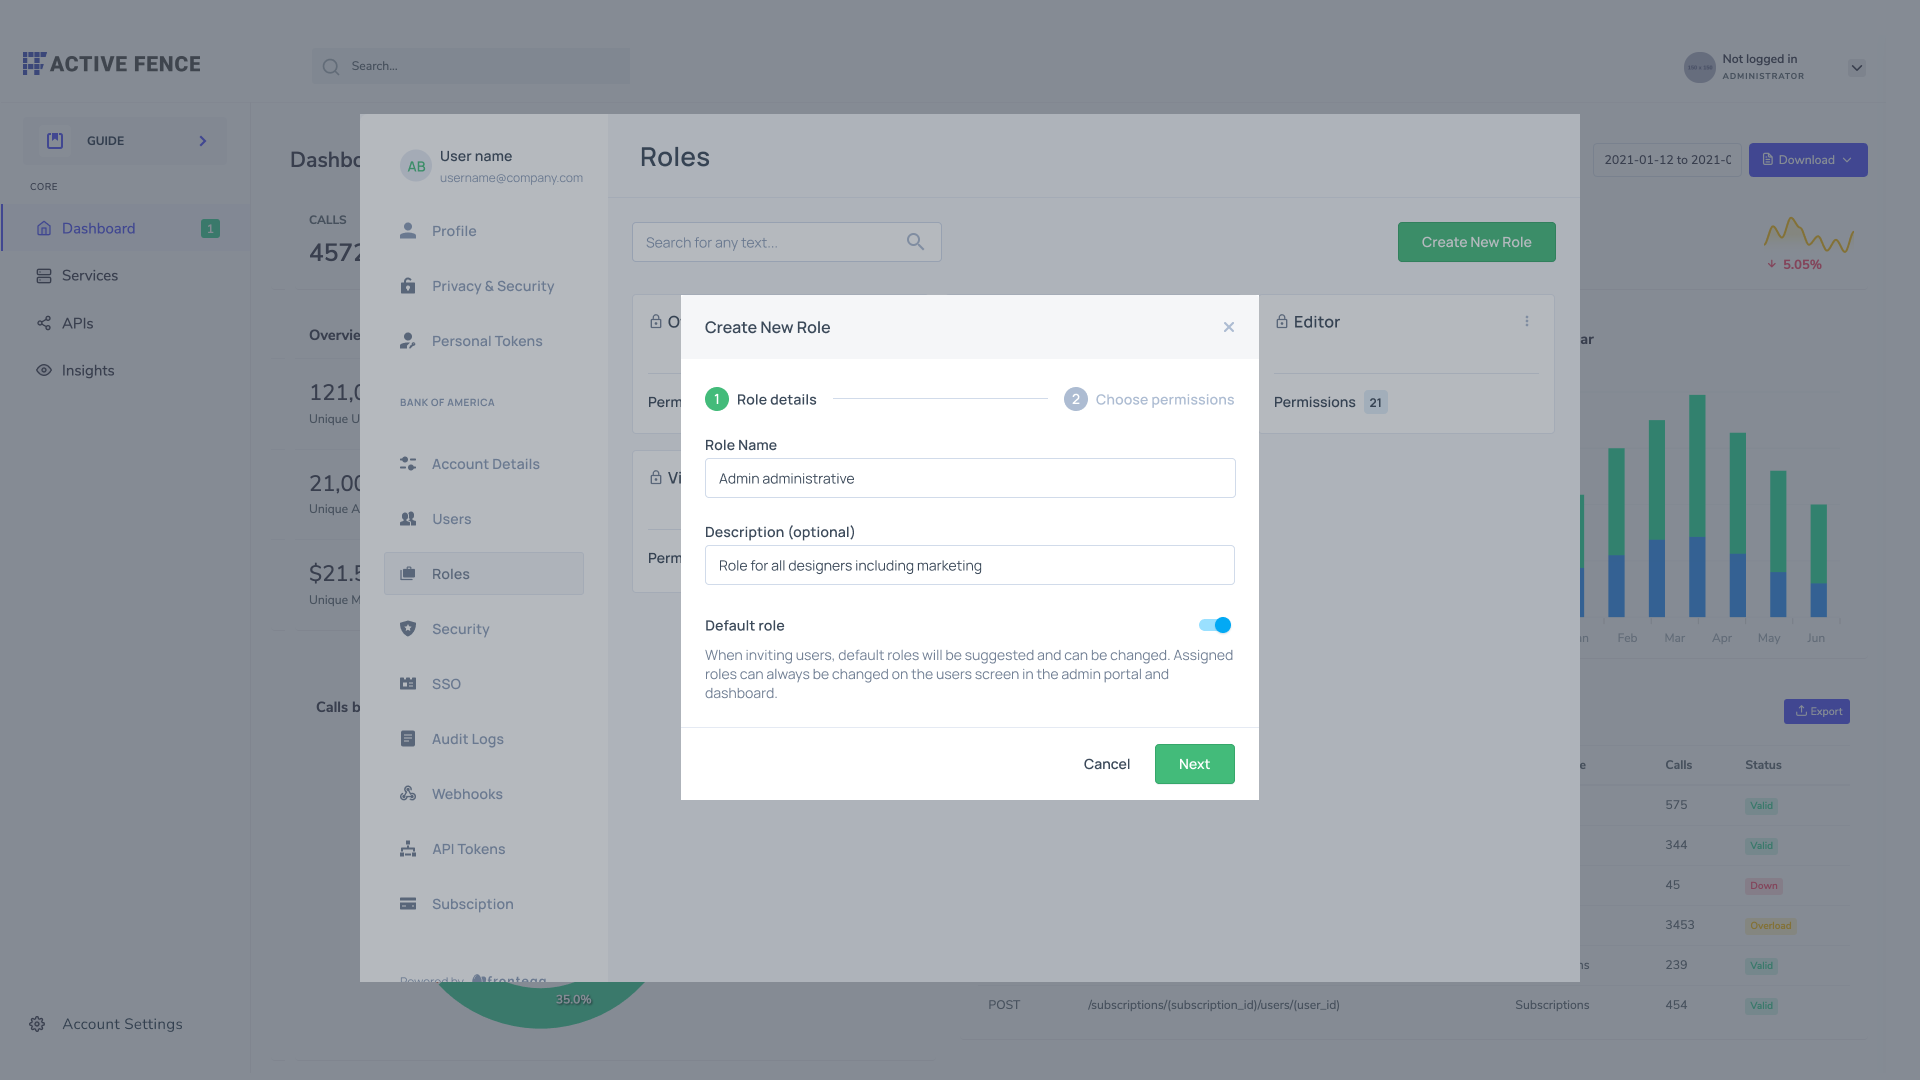
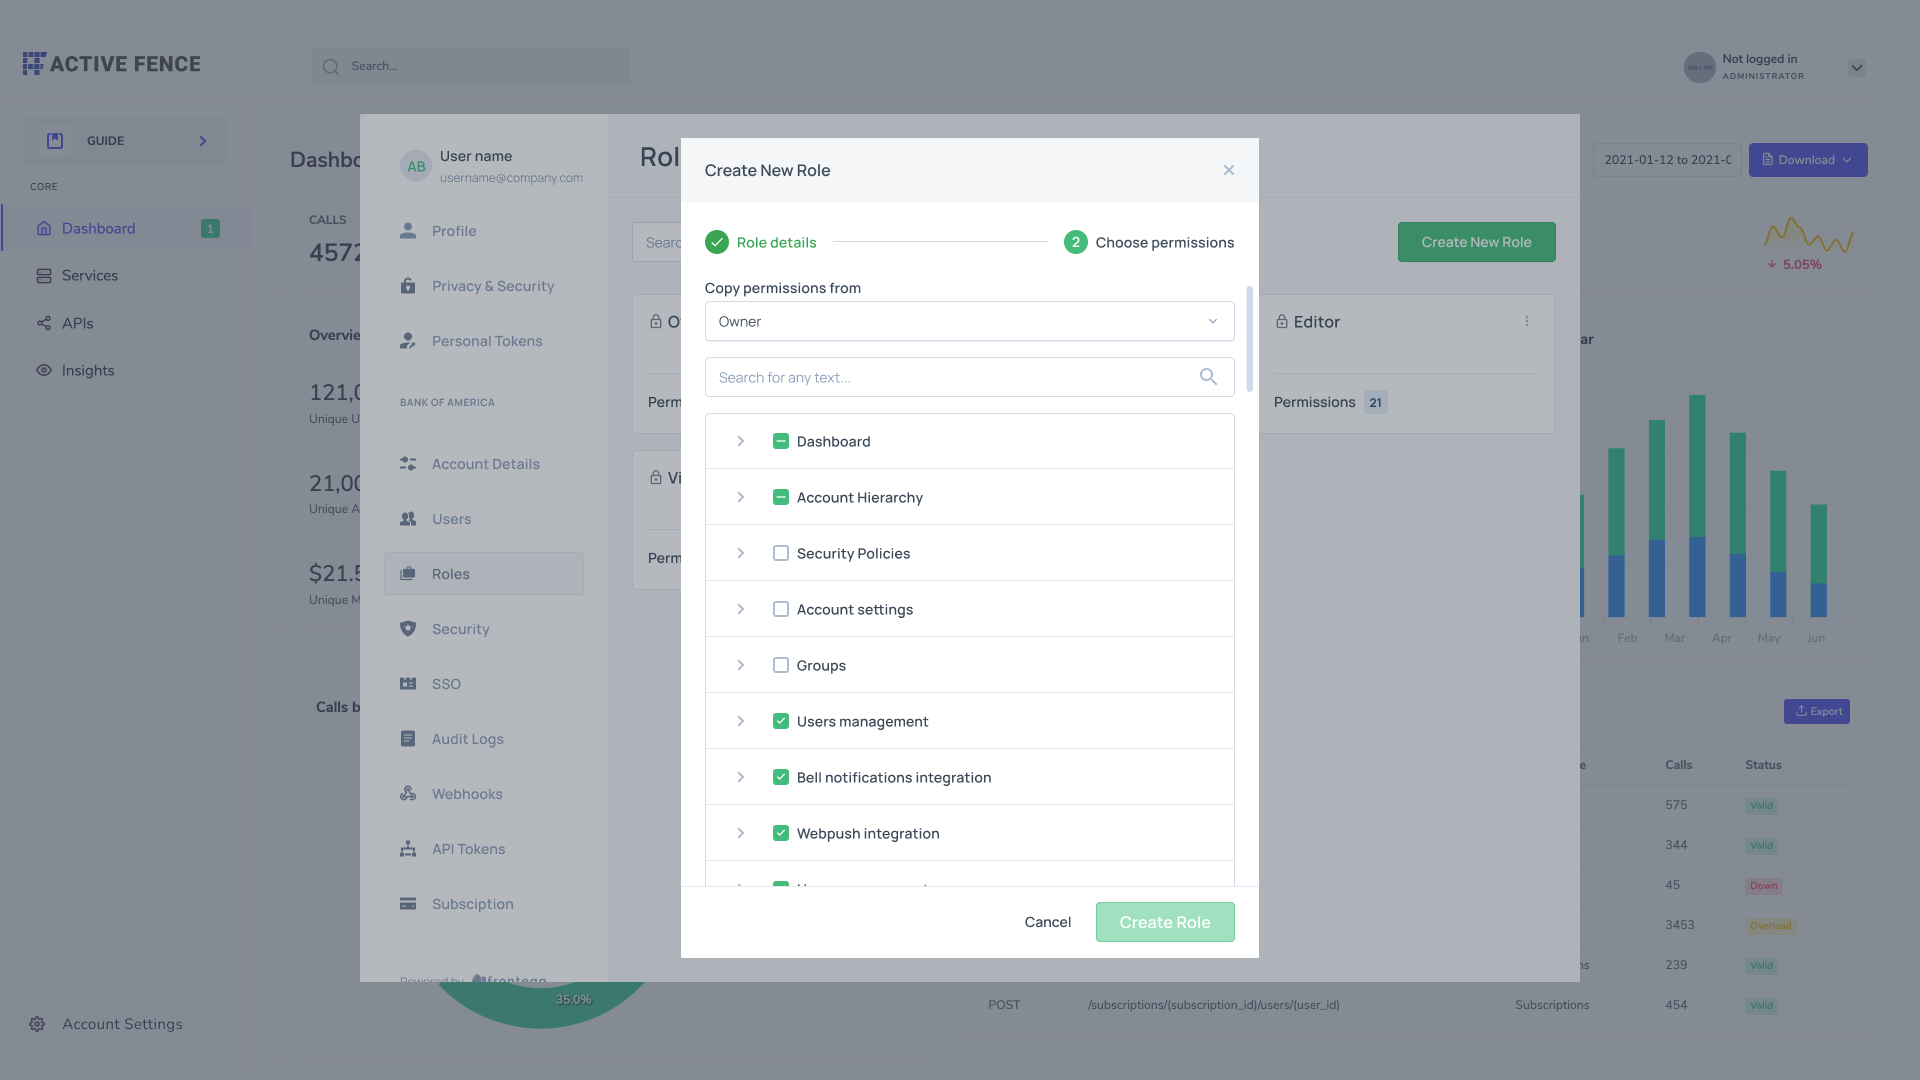
End users can choose which role (via the "Copy permissions from" drop-down menu, see image below) their new custom role will include. The new role will have the same level (created in the roles' settings section) as the role it was created from.
Self-served roles required permissions
The ability to create, edit, or delete custom roles is defined by specific permissions. The following table lists the possible permissions that include actions relating to Custom Roles.
| Category | Permission | Key | Location in Portal |
|---|---|---|---|
| Security Policies | Read Roles (access Roles section) | fe.secure.read.roles | Roles |
| Security Policies | Write Roles | fe.secure.write.roles | Roles |
| Security Policies | Delete Roles | fe.secure.delete.roles | Roles |
Self-served roles via API
To create and get account-level roles programmatically, you can use these APIs.
API (account) tokens
Frontegg API tokens are tenant-specific, role-based tokens that allow programmatic access to various functionalities.
Full details regarding the range of possibilities can be found in the dedicated machine to machine guide.
SCIM provisioning
End users can easily set up provisioning for their organization's identity provider and your application, powered by Frontegg. Full details can be found in the dedicated SCIM provisioning guide.
Audit logs
Frontegg's audit log solution offers insights into Frontegg events related to end users' management, authentication, and settings but also allows you to log and display your application's audit logs to your end users.
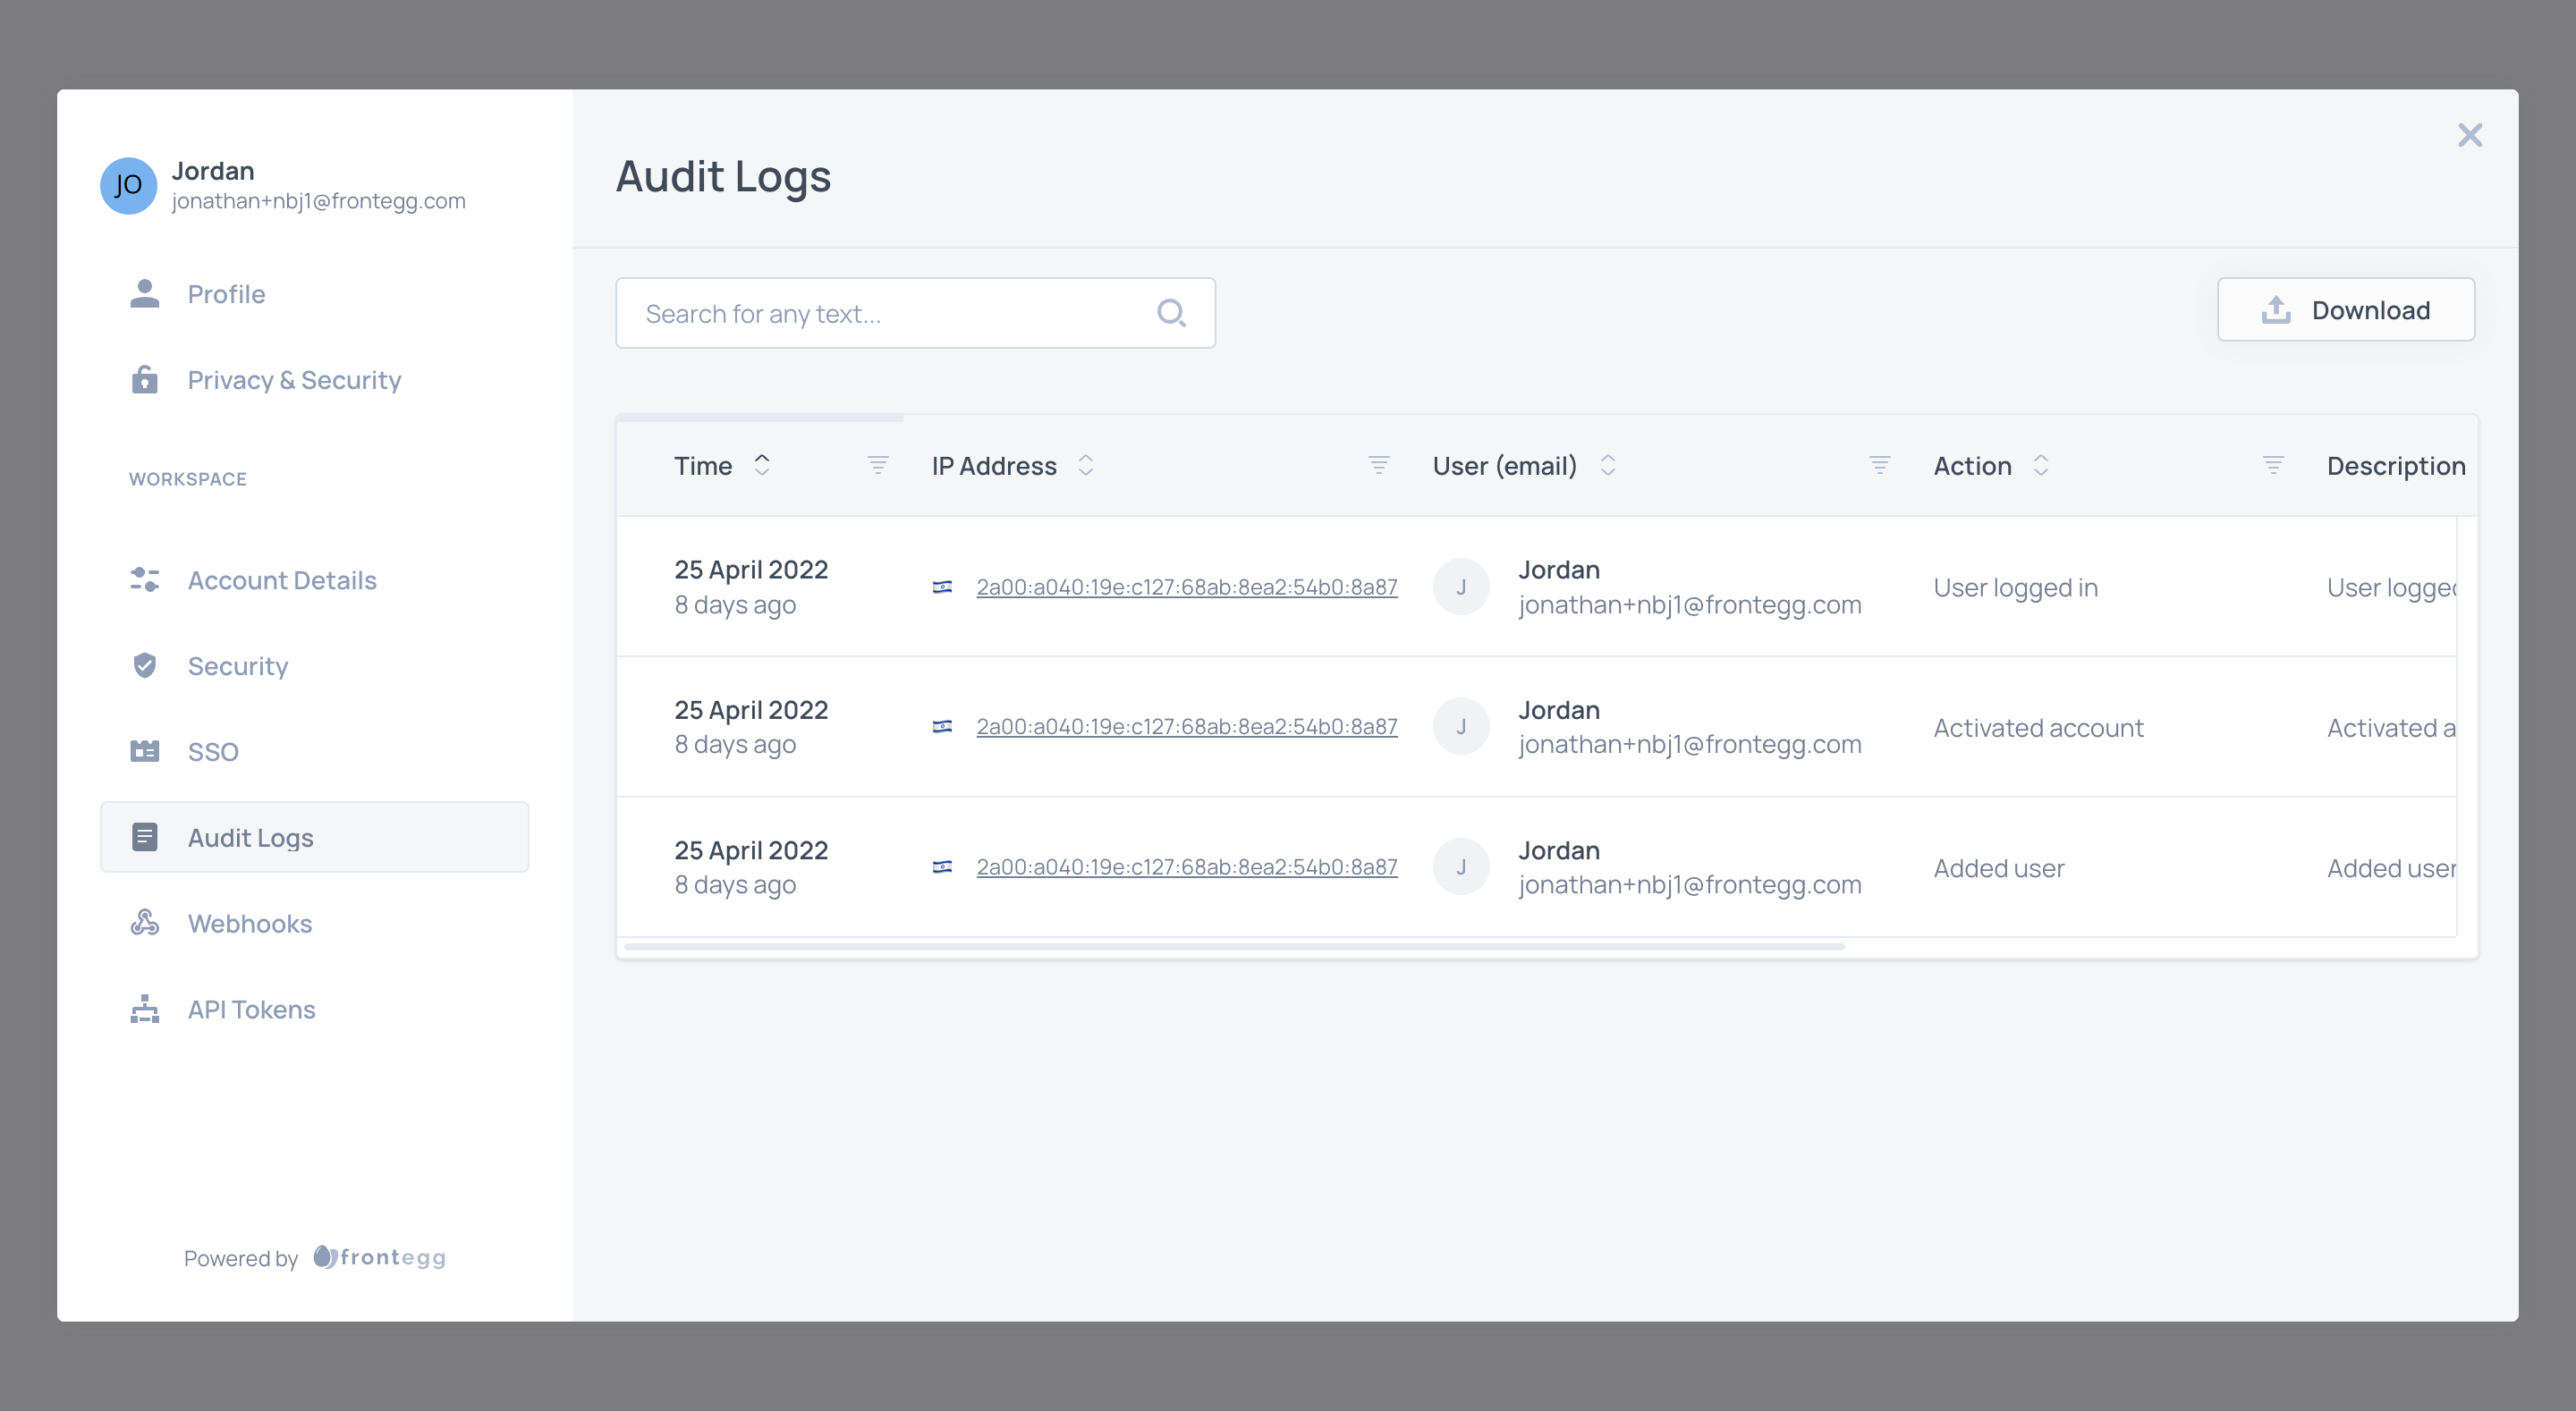
The columns displayed in the audit logs section of the self-service portal can be defined in the Frontegg builder.
Add custom audit logs
The audit logs page displays by default events related to Frontegg; however, you can send your own application audit logs to Frontegg, and they will be displayed alongside Frontegg's audits.
- Node.js SDK - see full instructions here.
- Python Flask - see full instructions here.
- Python FastAPI - see full instructions here.
- API - see full instructions here.
Export audit logs
Audit logs can be downloaded by end users via the download button.

Webhooks
Frontegg offers a custom webhook infrastructure that allows you to define application-specific events your end users can subscribe to. Through the self-service portal, users can configure their subscriptions, and when you trigger an event, Frontegg sends a notification to the endpoint specified by the user.
The list of events in the self-service portal will display events that were configured initially in the Frontegg builder.
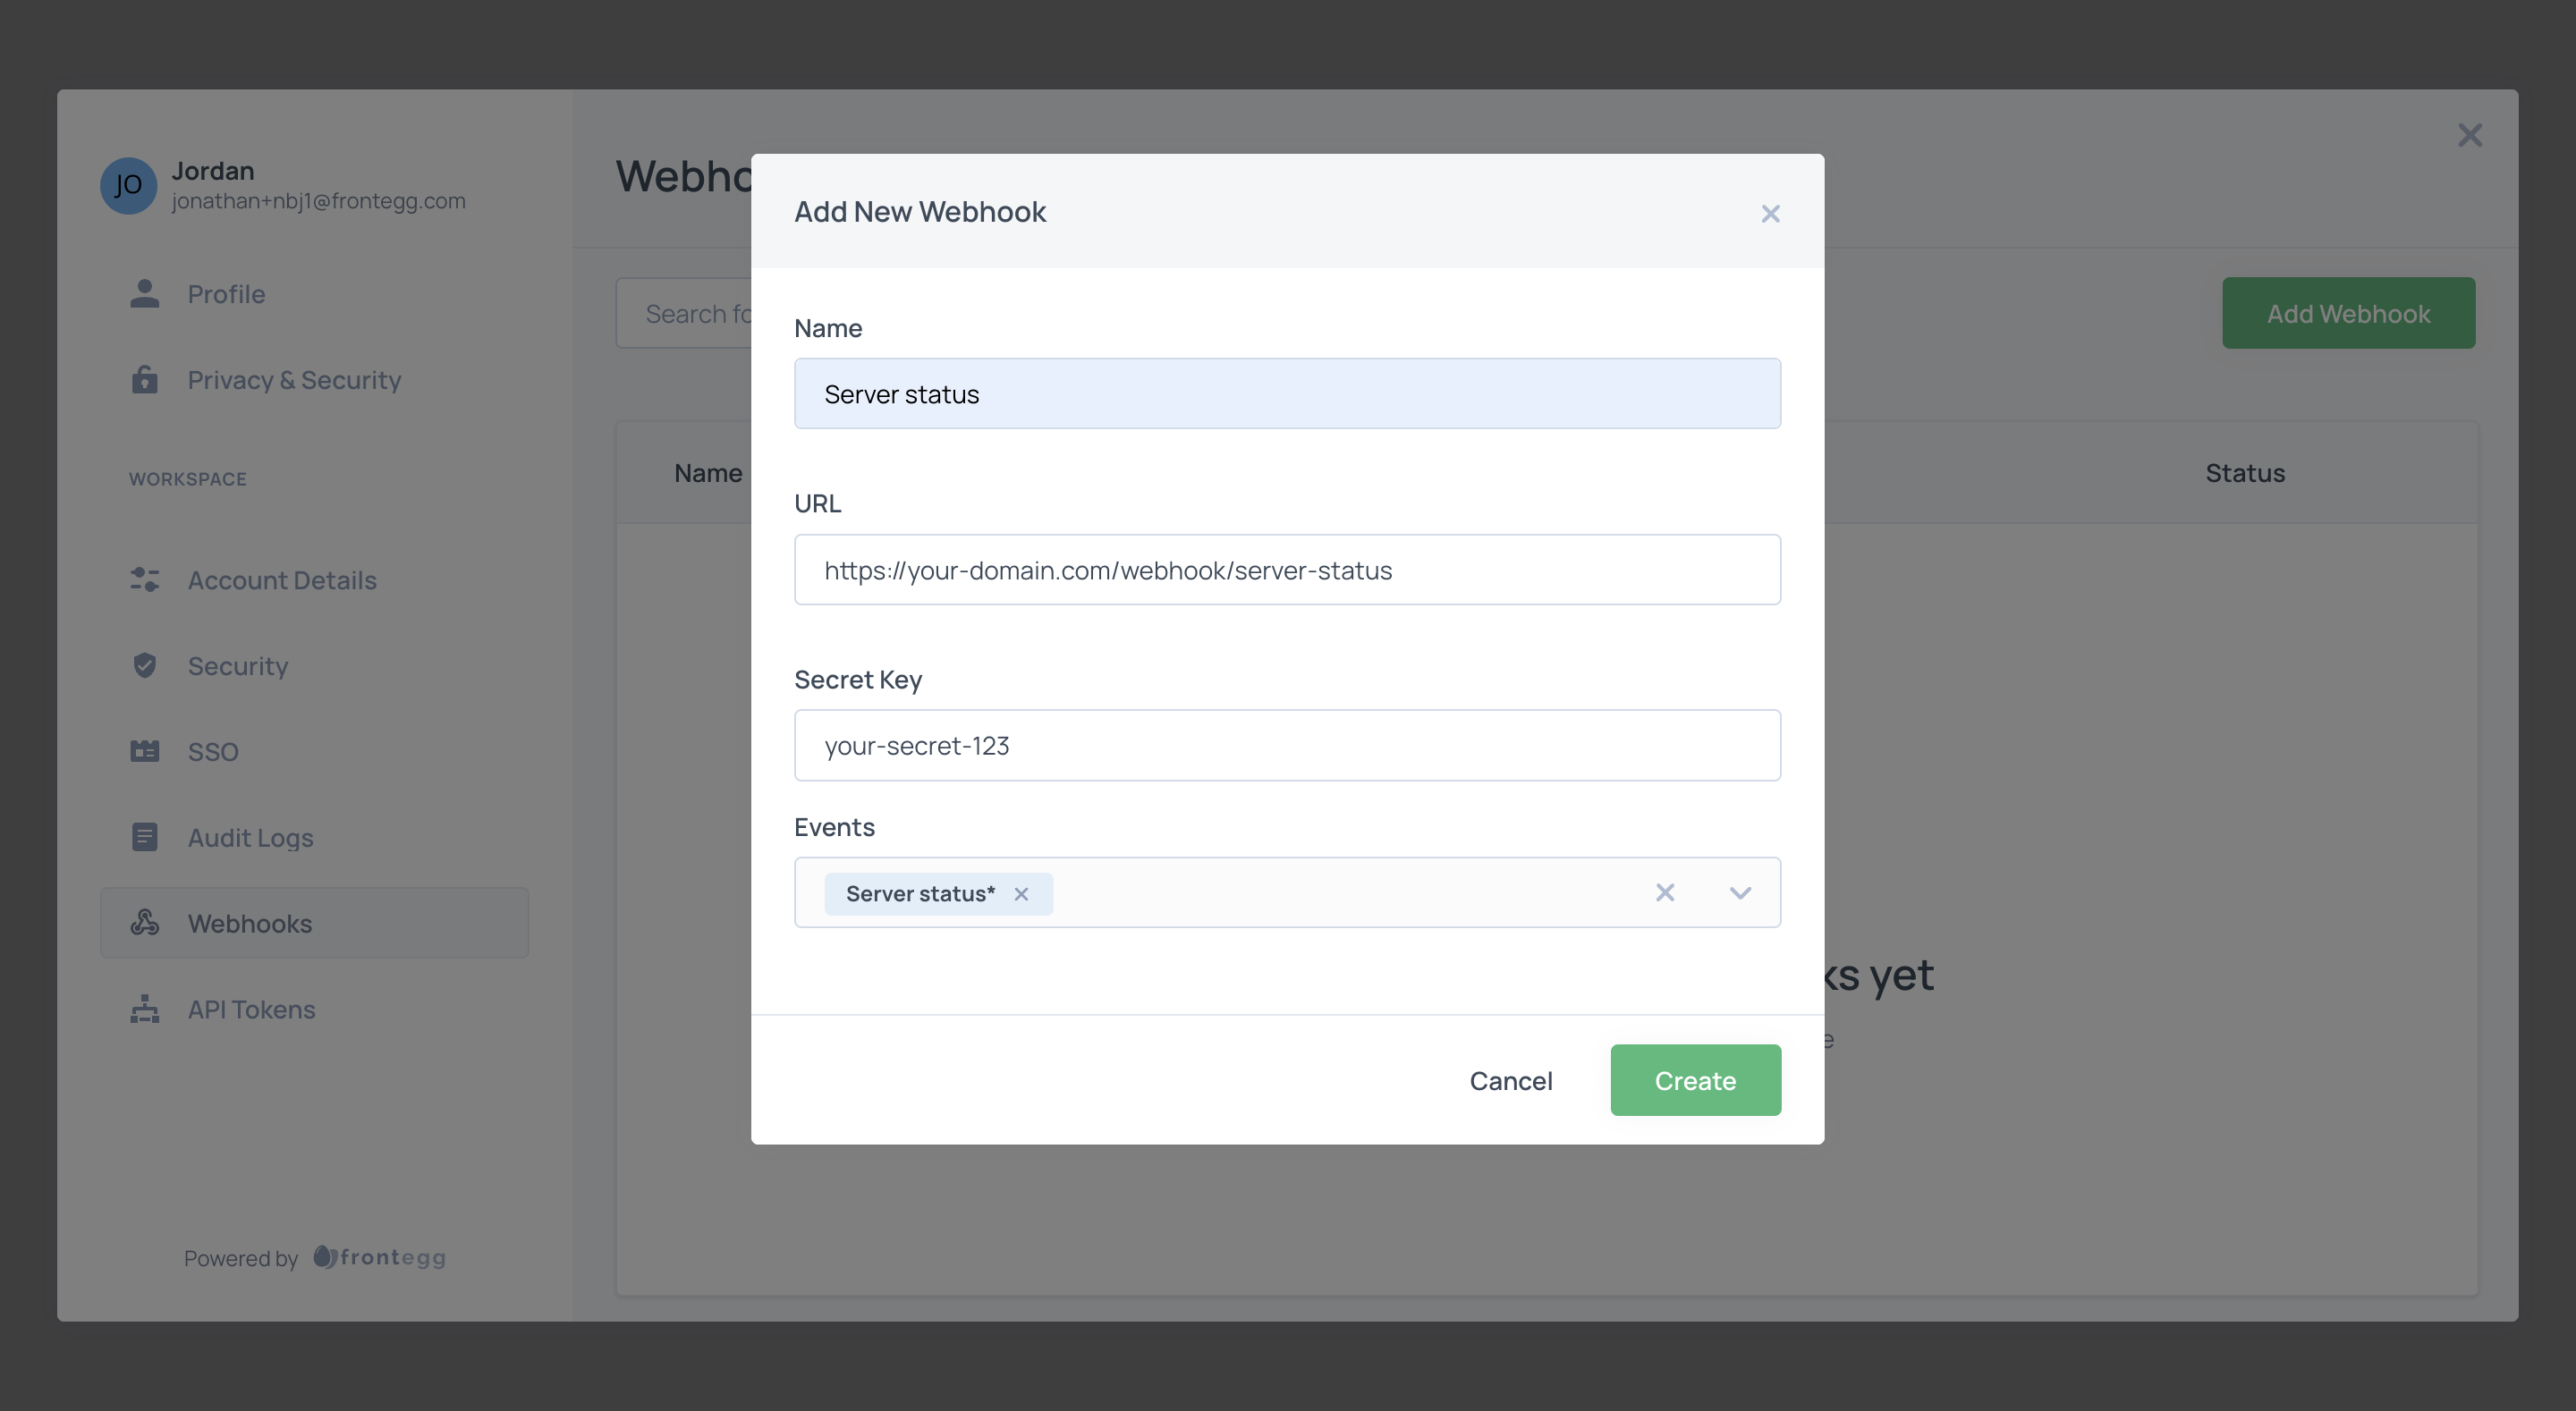
If you're using Frontegg's Node.js SDK, events can be triggered through the events client, or simply via API:
import { EventsClient } from '@frontegg/client'

// Init the events SDK with the clientId and api key
const eventsClient = new EventsClient();
await eventsClient.init('YOUR-CLIENT-ID', 'YOUR-API-KEY');

eventsClient.trigger({
 // A unique event key for the event
  eventKey: 'event-key',

  /* Title and description are required properties
     and will be sent in the request payload */
  properties: {
    title: 'Welcome To Our App',
    description: 'This is our new app',
  },

  /* Add additional properties to the request payload
     or use webhook:true to send only default properties */
  channels: {
    webhook: {
      someKey: 'some value',
    },
  },

  // Trigger the event for a specific tenantId.
  tenantId: 'my-tenant-id',
});
When end users subscribe to self-served webhooks, they’ll need to provide the following details:
- URL - The endpoint where Frontegg sends webhook notifications. Subscribers should set it to consume the notification.
- Secret Key - A confidential value for securing transactions; subscribers must not share it.
- Events - Choose an event from the dropdown, based on those created earlier.