Before you begin
Before you begin
- To get the most out of Flows, review the overview section to understand their impact on user journeys.
- Prehooks and webhooks can be created either in the backoffice (Prehook/Integrations tabs) or directly within flows. If created in a flow, they’ll also appear in the backoffice.
- Extend flow capabilities by creating sub-flows, reusable across multiple flows.
To customize your first flow, go to the Frontegg portal and select the desired environment from the dropdown at the top of the screen. Then navigate to Flows. The dashboard will display available user flows with ready-made templates. Choose a template to begin customization. You can either modify the flow manually or use the AI prompt (e.g., "Create a login flow that enrolls users in MFA only during their initial login") to auto-generate the required steps.
Building a flow involves three main steps:
- Choose a flow
- Customize it with hooks and sub-flows
- Test and publish
First, from the dropdown, select the desired environment. Then navigate to Build → Flows.
Frontegg offers pre-built flows for common actions, such as:
- User sign-up
- User updates
- User deletion
- User invite
- User login (password, OIDC/SAML, social)

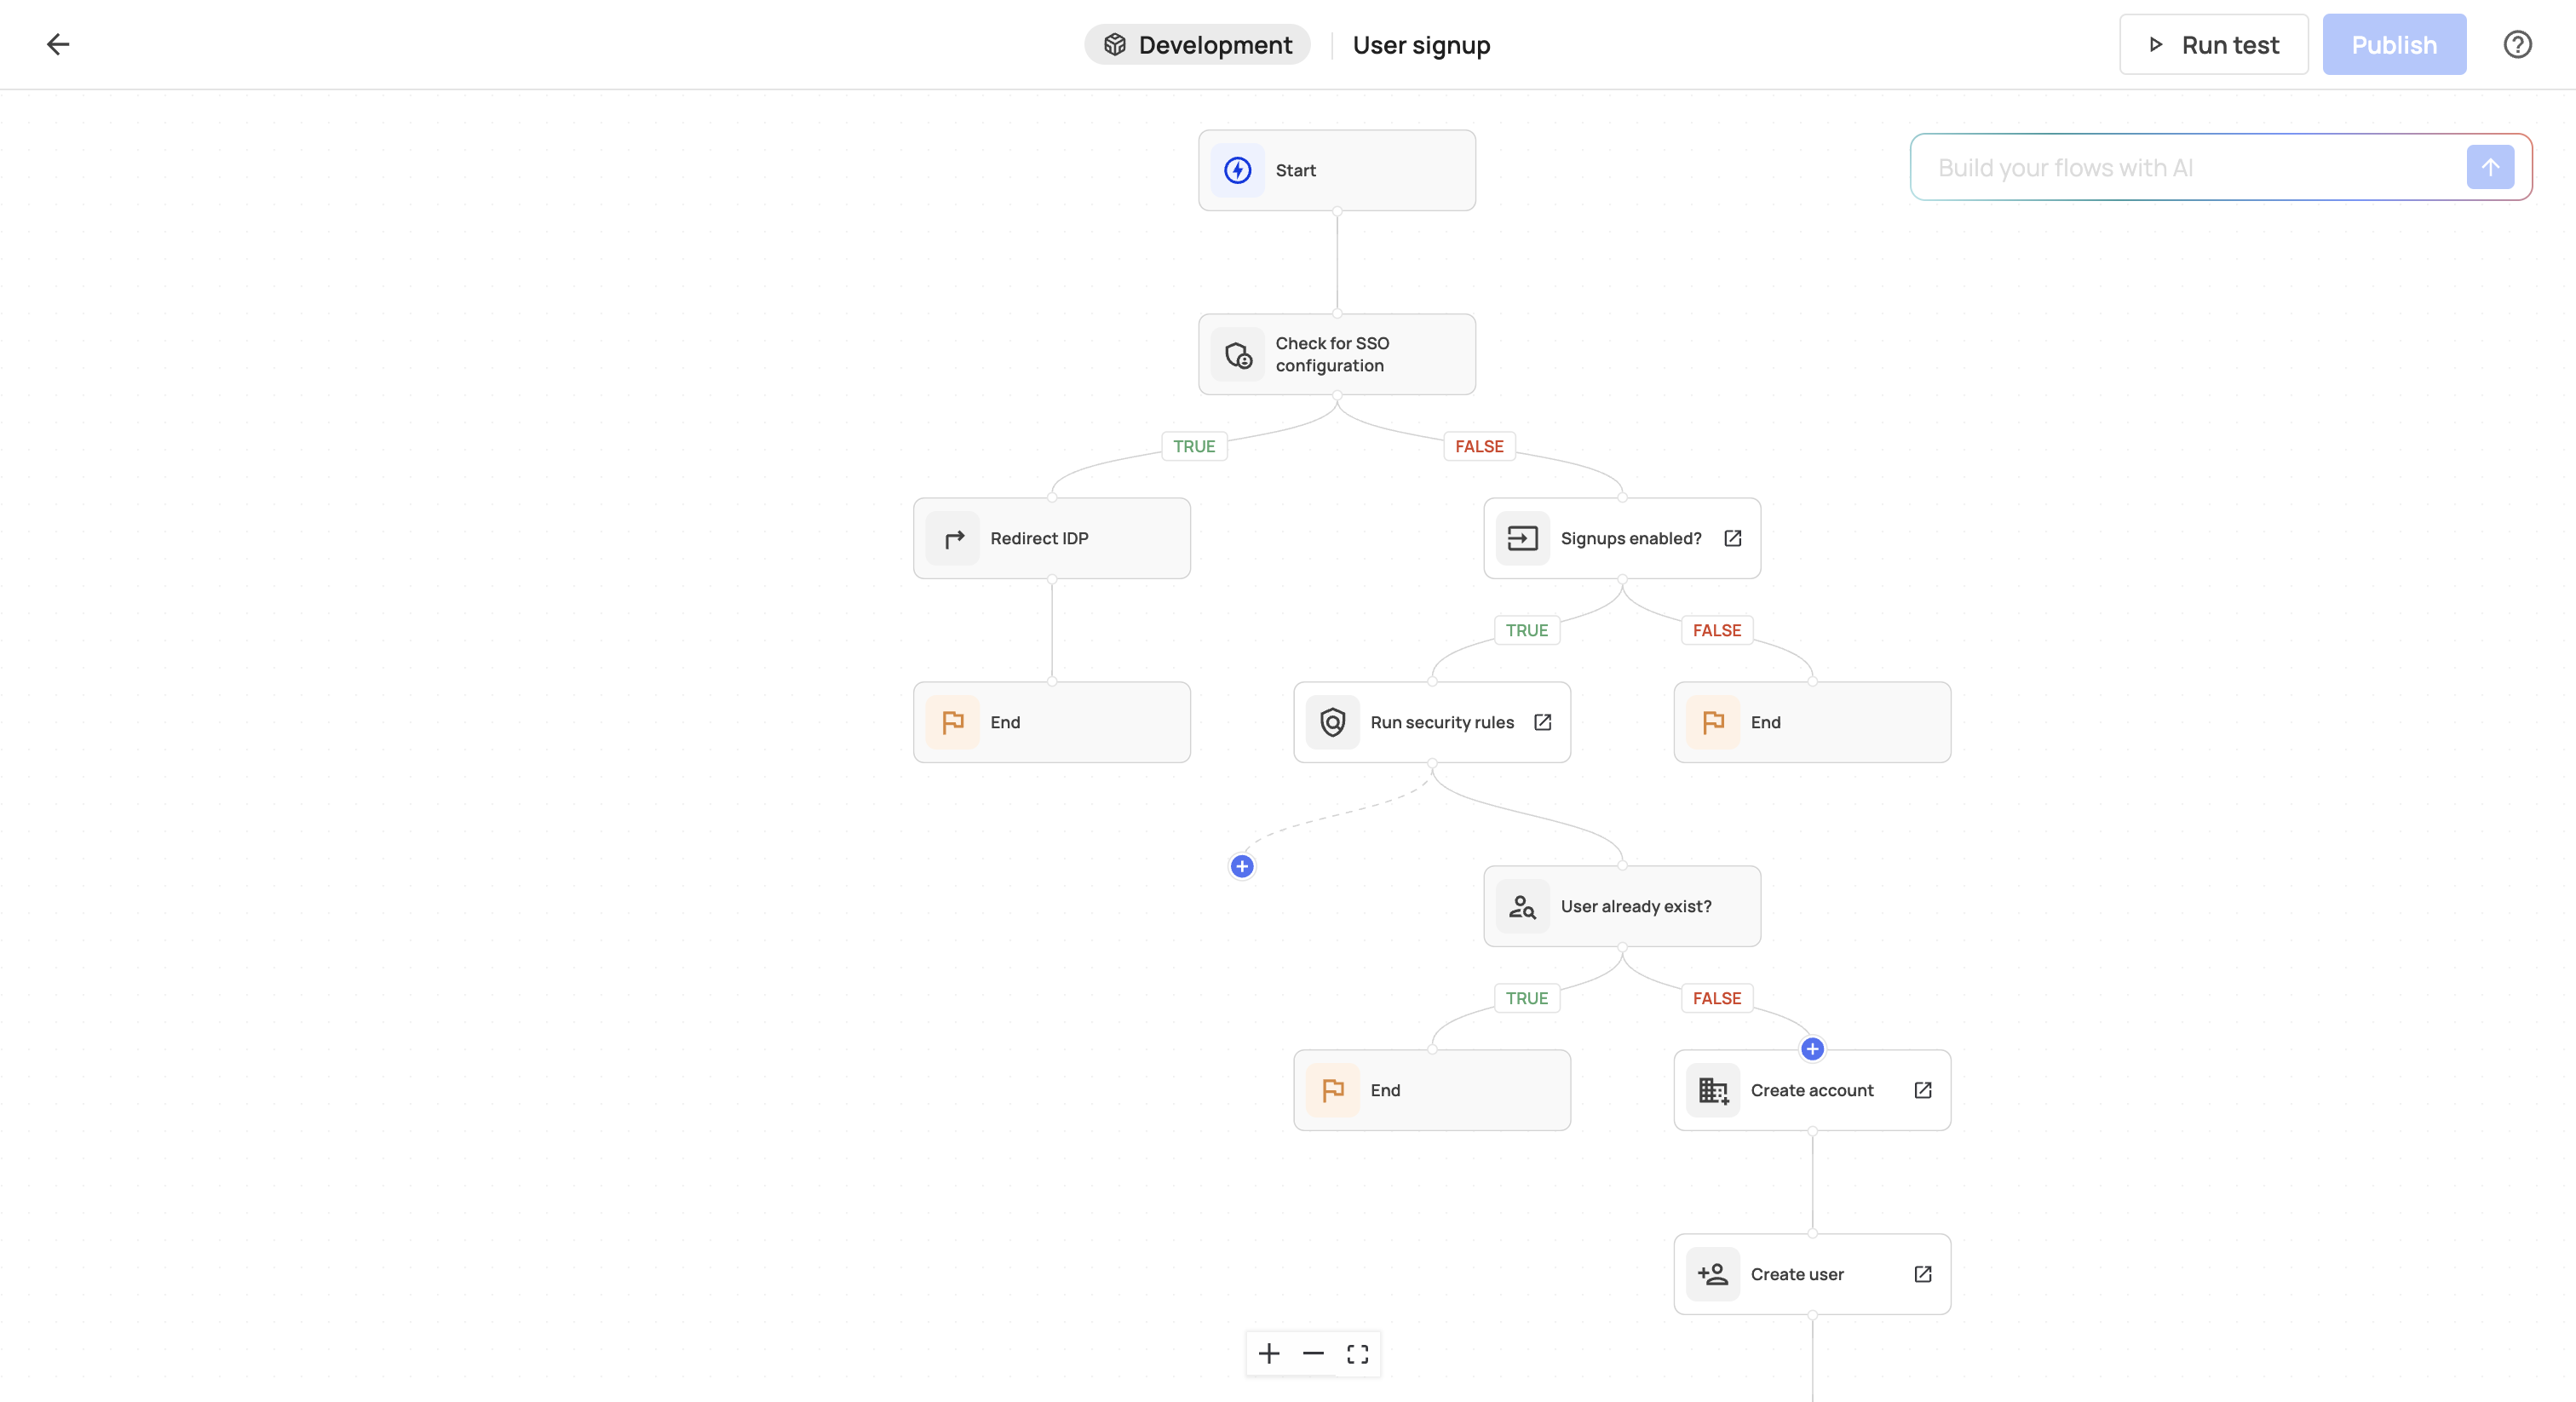
Once a flow is selected, you’ll see branches with + icons at strategic points.
- Dotted lines indicate where you can add a webhook.
- Solid lines indicate that you can add a prehook or a sub-flow.
- Add steps manually, or
- Use the AI prompt to describe your requirements.
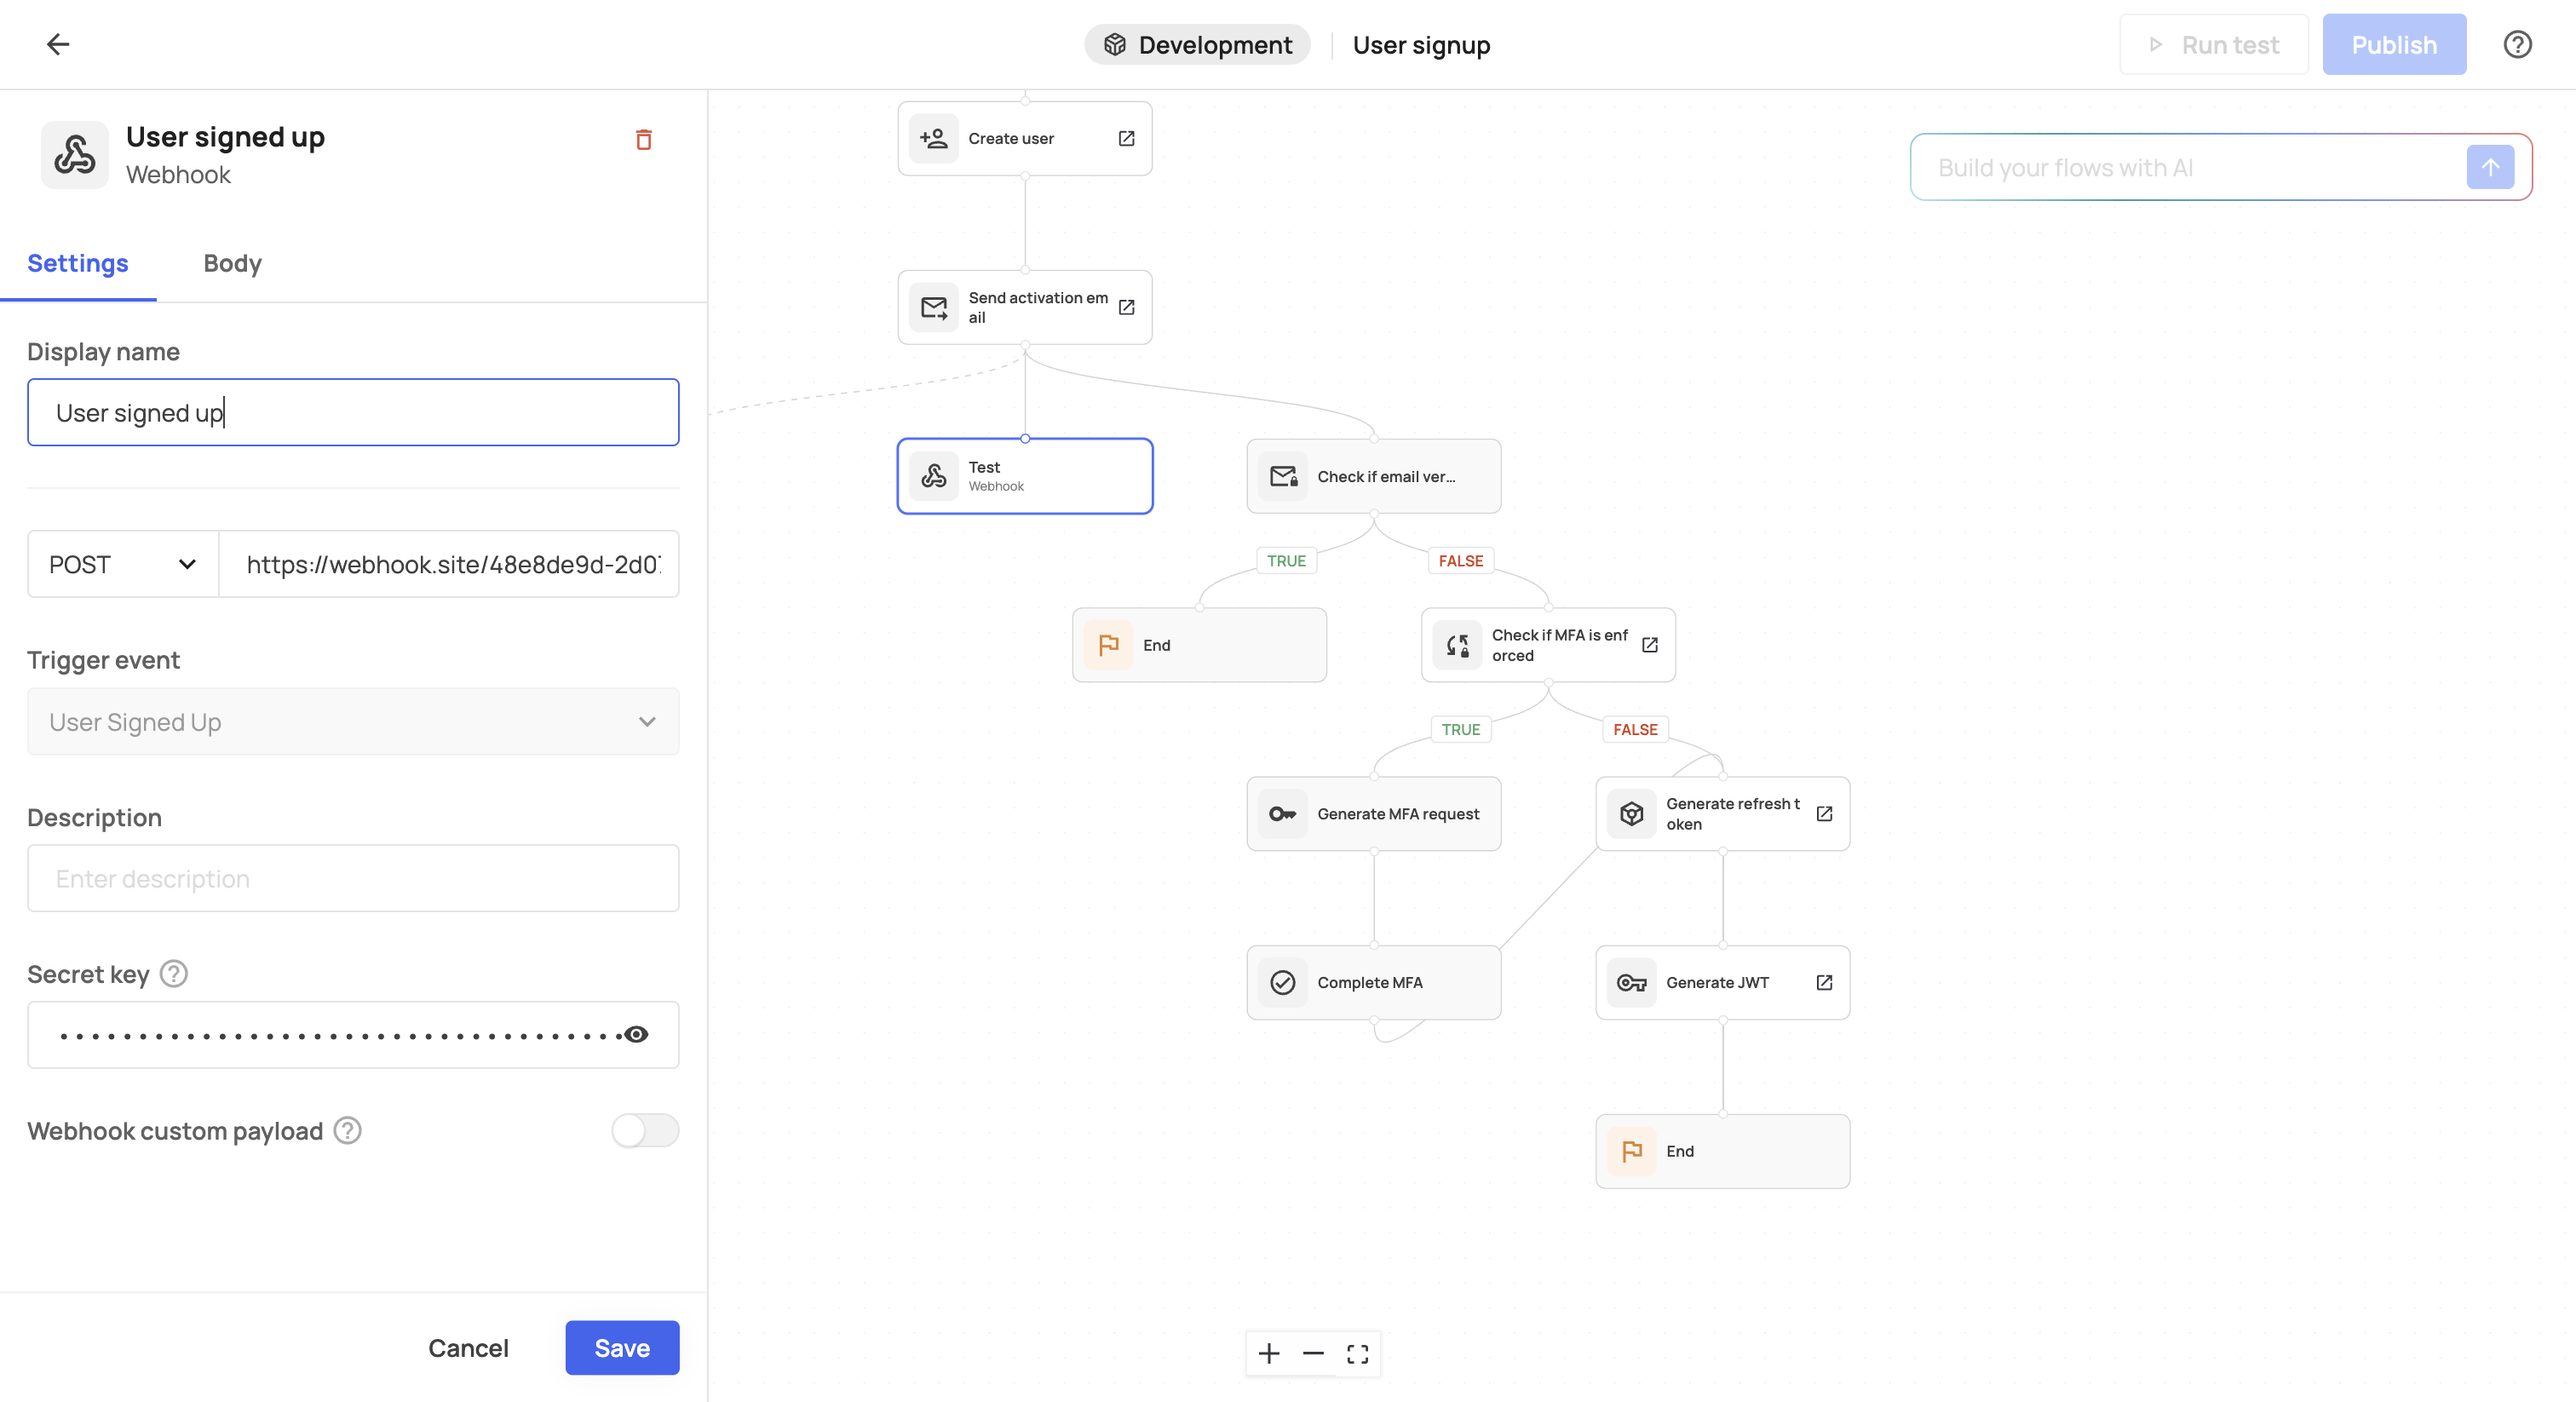
When you click a +, a side panel will open with available options.
Re-using hooks
Re-using hooks
Hooks created in one flow (e.g., a JWT token prehook) will remain identical if reused in other flows. Ensure compatibility across all flows using shared hooks.
Provide the necessary information for your webhook, prehook, or sub-flow. When done, click Save.
Sub-flows extend flow functionality, allowing for reusable, independent mini-flows.
- Sub-flows execute based on specific conditions within the parent flow.
- You can add logic (true/false), web requests (synchronous/asynchronous), or custom code.
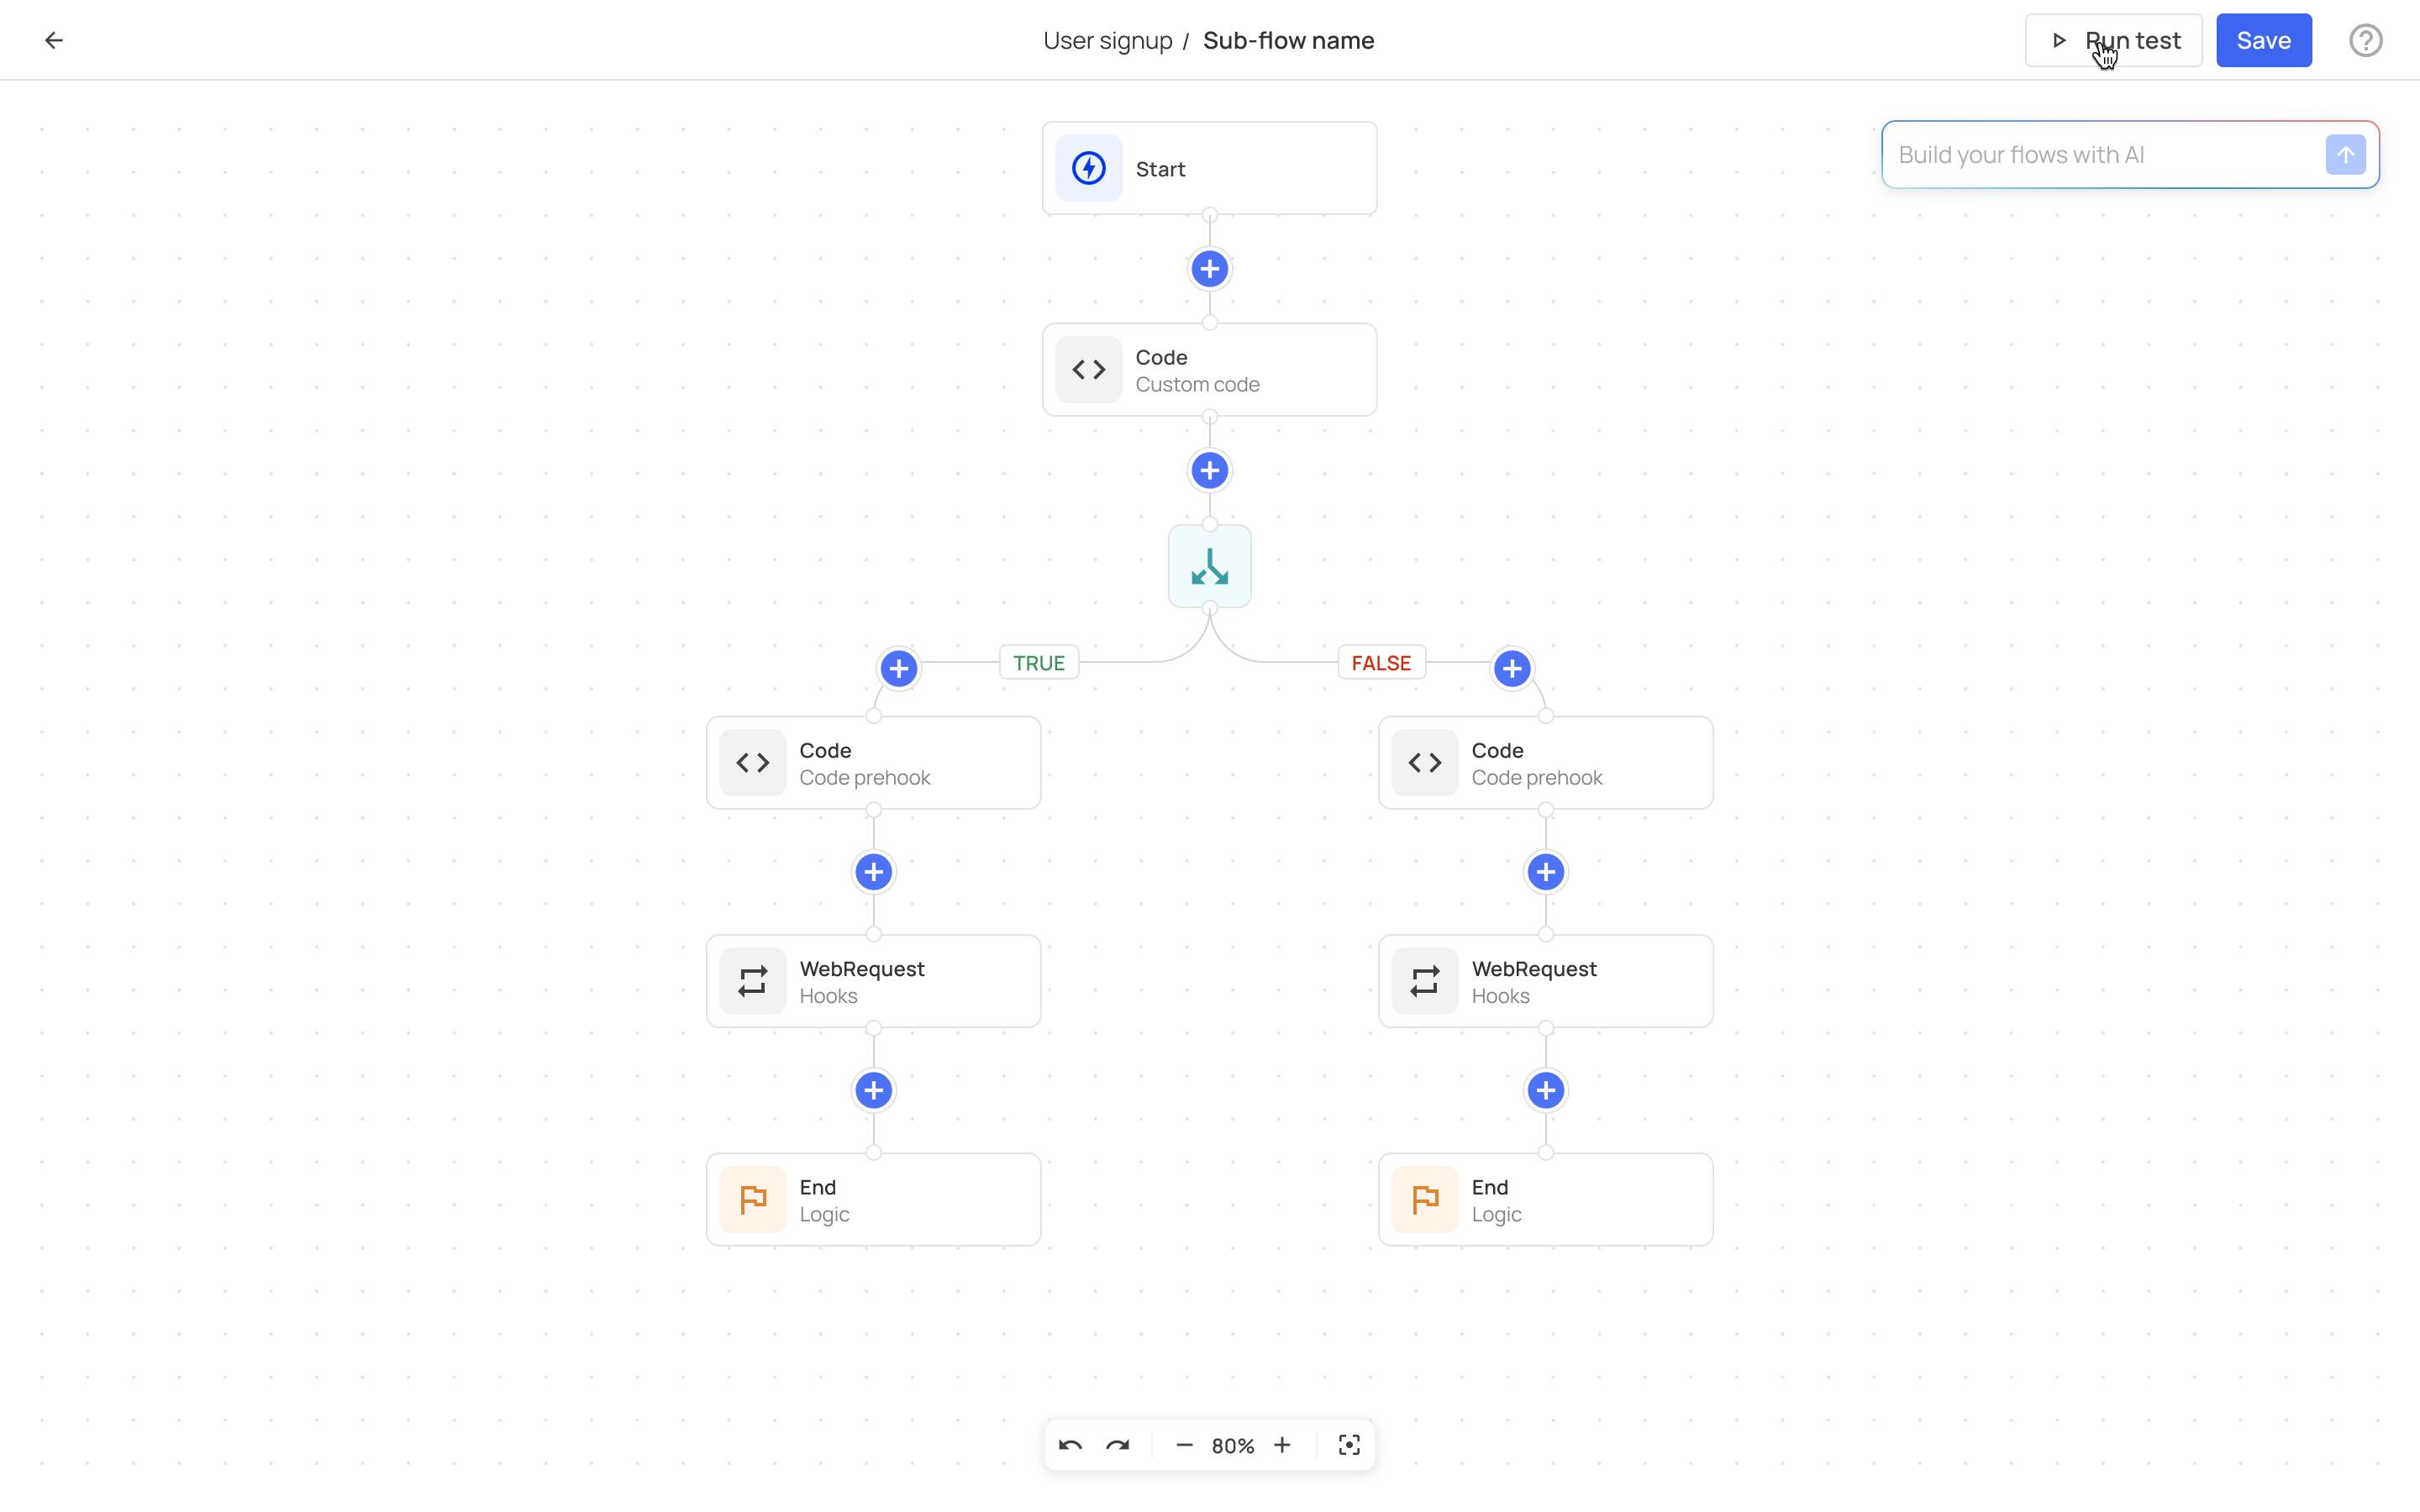
- Click
+, then choose Create new sub-flow or select an existing one from the Sub-flows tab. - Customize the sub-flow and save it for reuse.
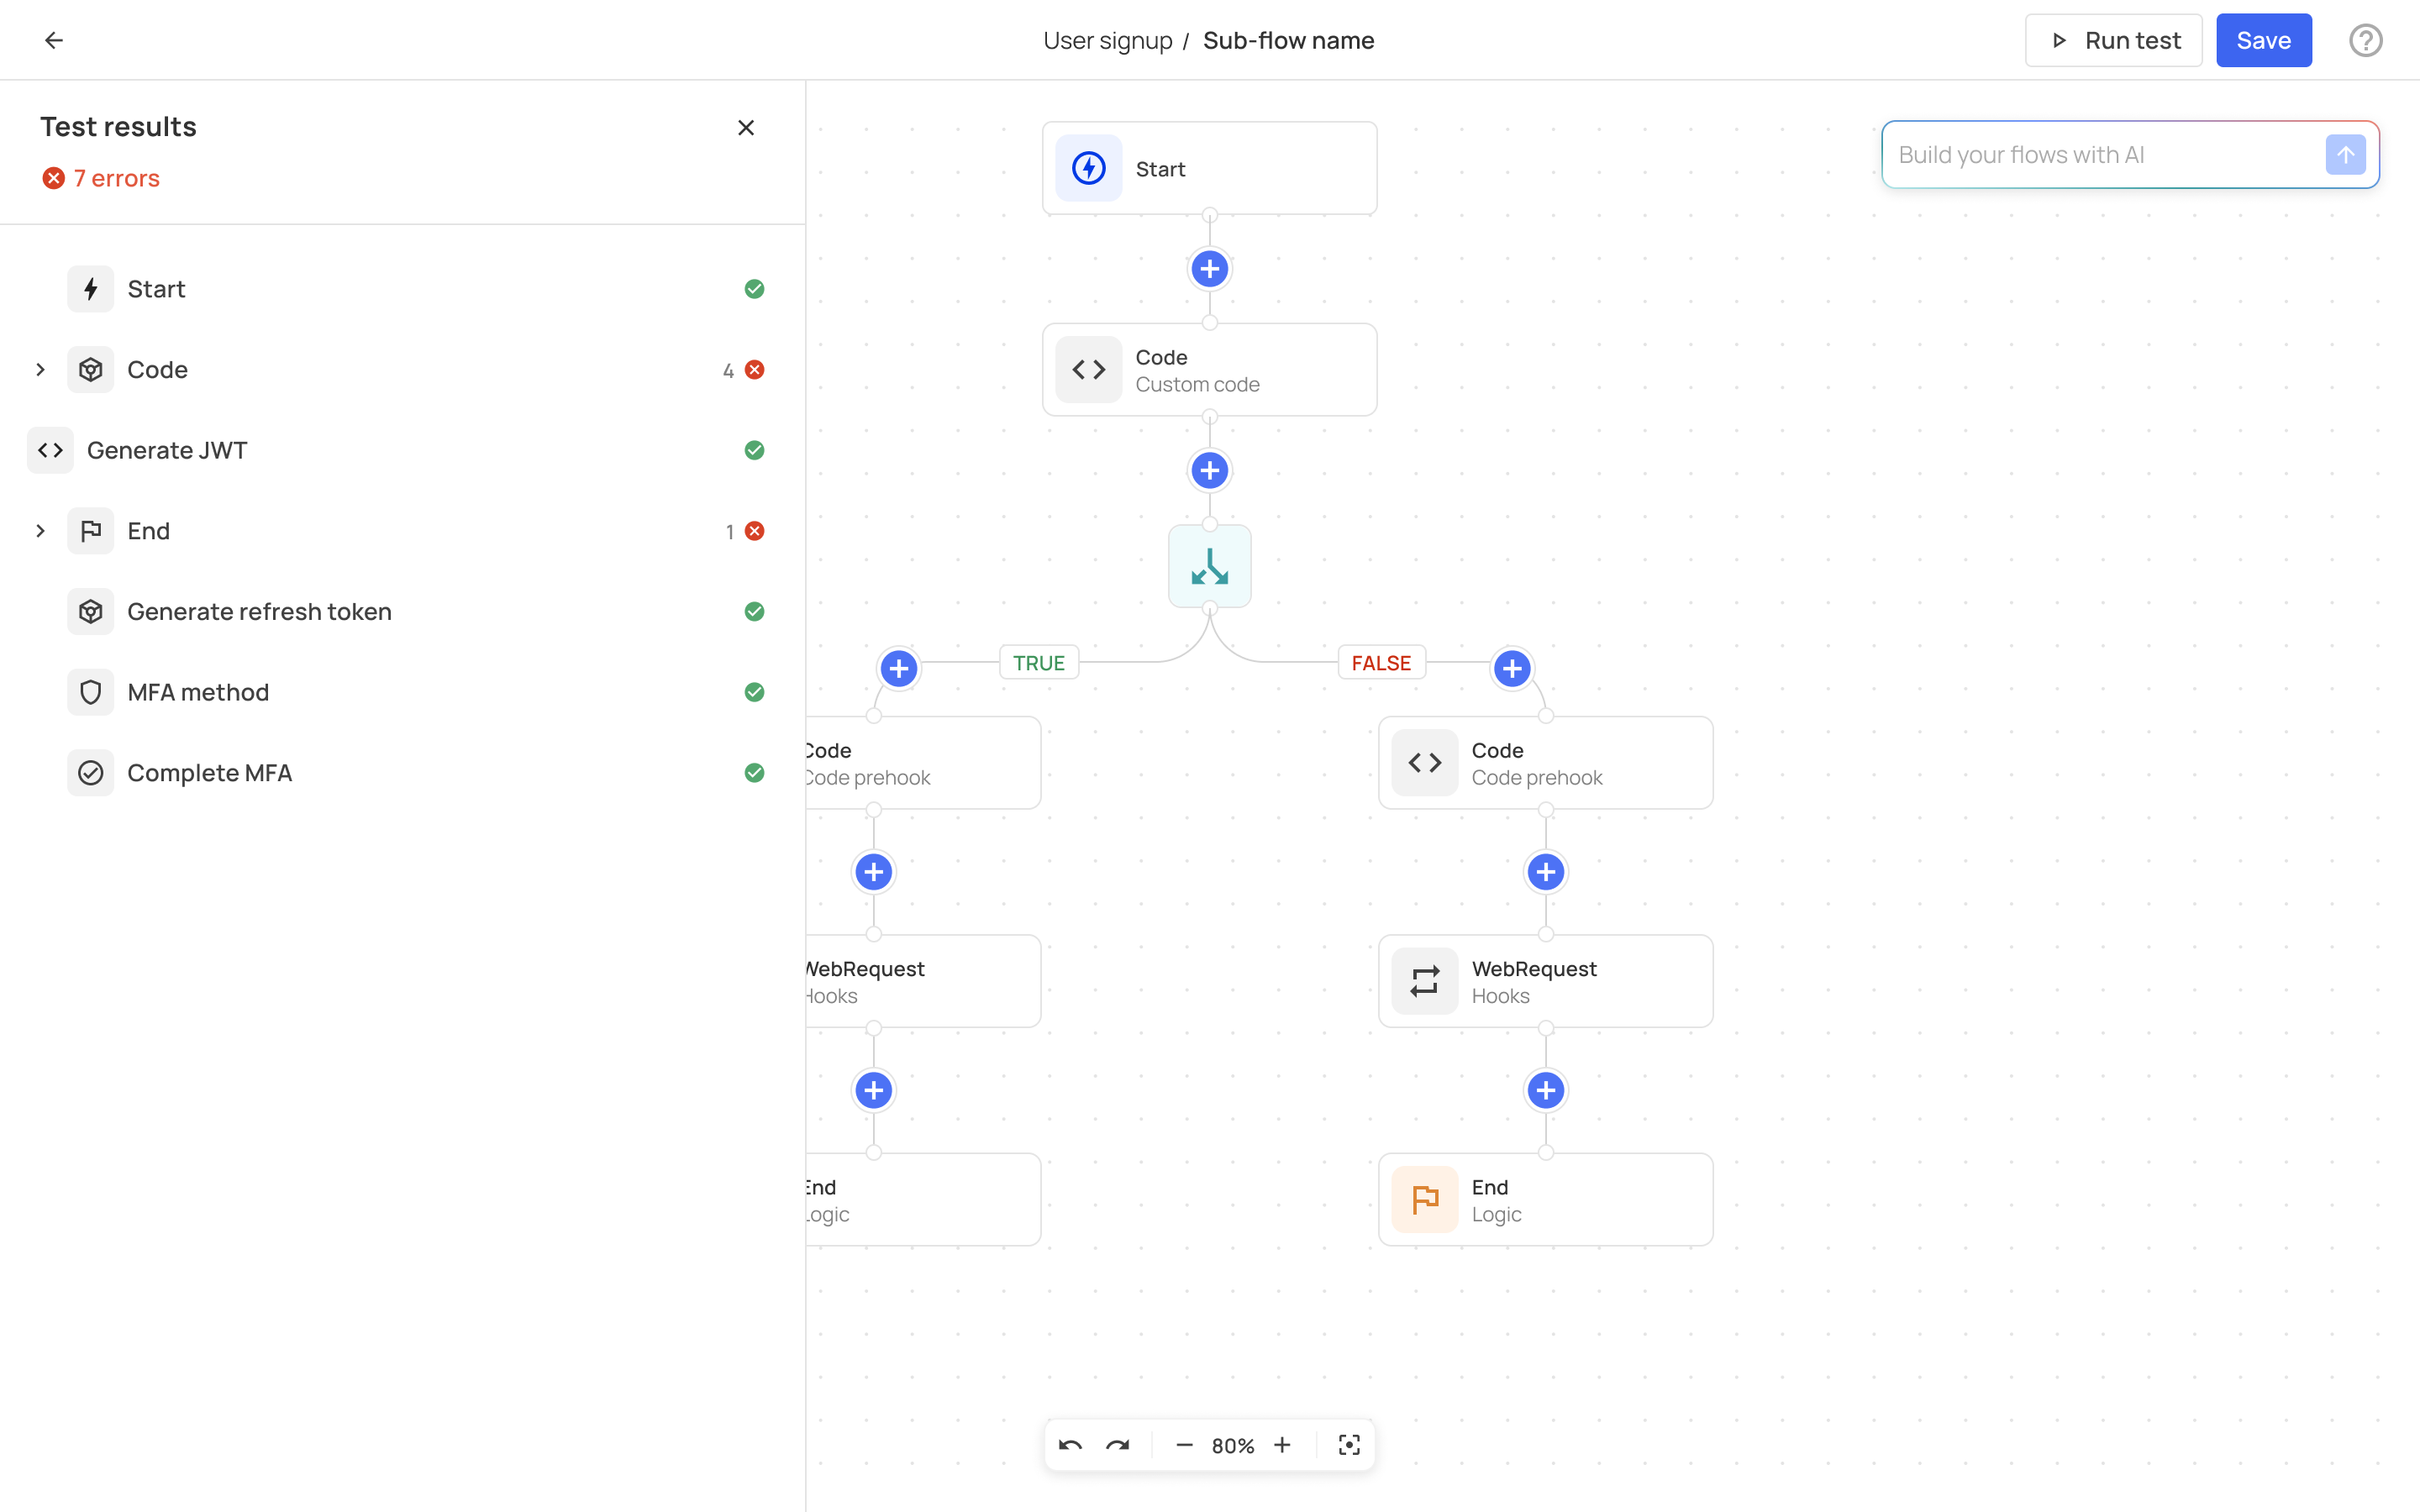
After designing your sub-flow:
- Use Run test to validate its logic.
- Review test results and refine as needed.

After customizing your flow, use Run test to ensure logic accuracy.
- Review results displayed on the left panel.
- Once satisfied, click Publish to activate the flow.
Sub-flows testing
Sub-flows testing
Sub-flows are tested separately. See previous section to learn more.
Hooks created within flows are synced with the Prehooks/Integrations tabs. Changes in one location will reflect in the other:
- Disabling a hook in the backoffice will tag the flow with "unpublished changes".
- Hooks in published flows will automatically appear as Enabled in Integrations.
All user activity within flows is logged for review in your audit logs.