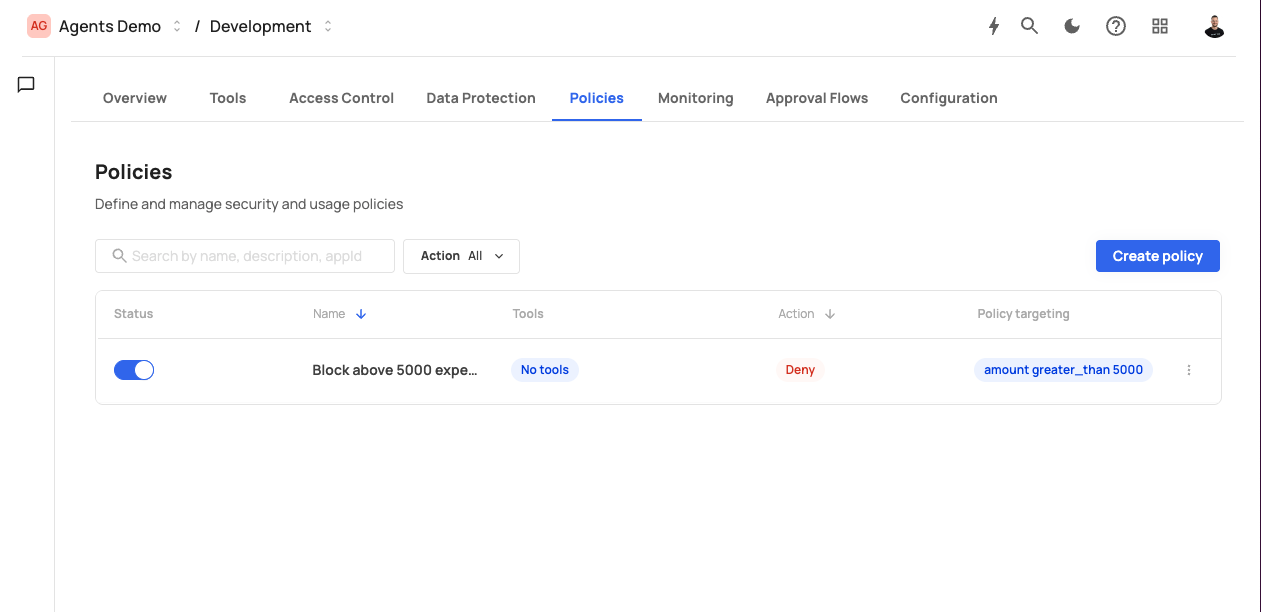
You can create and manage your security and usage policies in the Policies section of the AgentLink dashboard.
Each policy specifies:
- A set of conditions (attributes and values),
- An action (Deny, Step up, or Request approval),
- And optionally, a related approval flow.
- Click Create policy on the top-right of the Policies page.
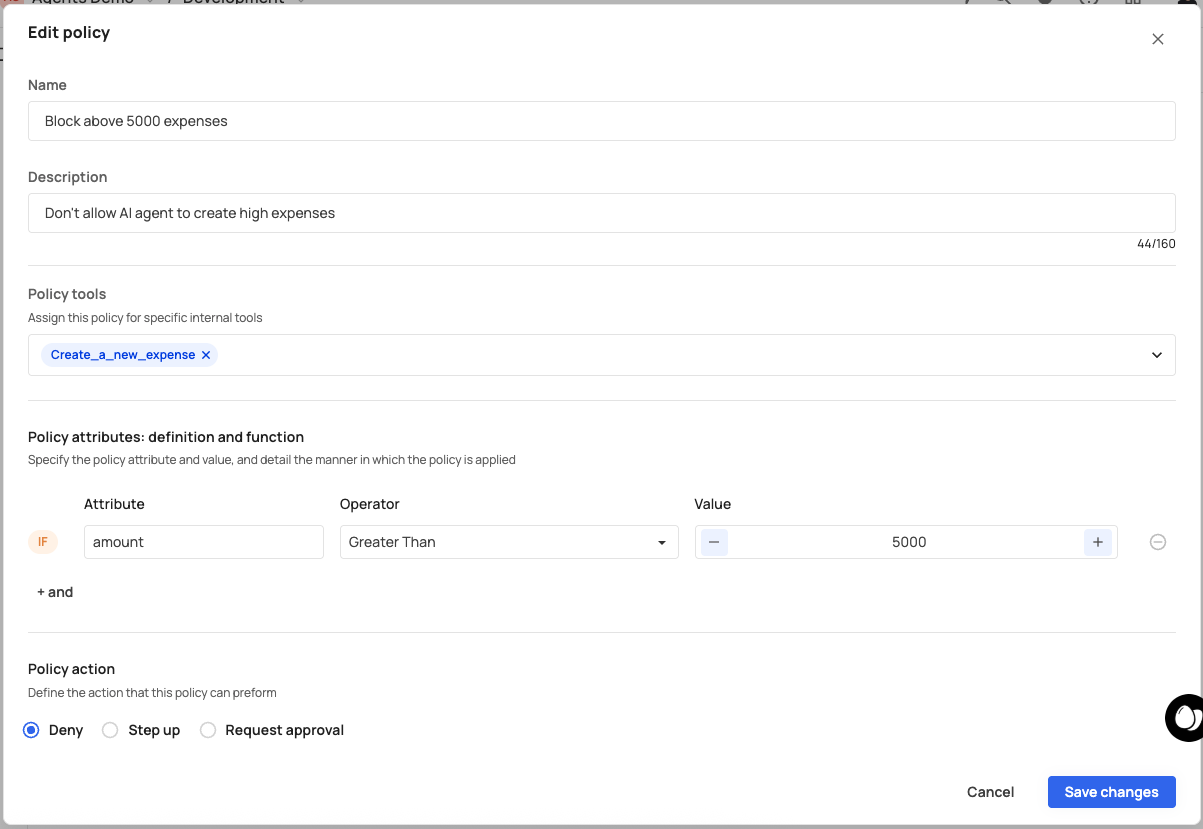
Fill out the policy creation form:
Field Description Name A clear descriptive name (e.g., Block large expense reports). Description Optional explanation of what this rule enforces. Policy attributes Define the conditional logic using attributes such as user.role,request.context, or payload values.Action Choose the behavior when the condition is met: Deny, Step up, or Request approval. Approval flow If you selected Request approval, choose which approval flow to use. Click Create to save your policy.
The policy will appear in the list and can be toggled on or off via the Status switch.
To edit an existing policy, click its row in the list.
An edit drawer will appear, allowing you to:
- Update the name and description.
- Modify conditions or actions.
- Change the assigned approval flow.
Changes are saved immediately once you click Save.
| Column | Description |
|---|---|
| Status | Enable or disable the policy. |
| Name | Policy name and description. |
| Action | The enforced action (Deny, Step up, or Request approval). |
| Applications | Number of MCP apps the policy applies to. |
You can filter or search by policy name, description, or application ID.
Policy name: Block expenses above $5000
Condition: request.payload.amount > 5000
Action: Deny
This prevents AI agents from executing the tool when the expense amount exceeds $5000.