This guide helps you get started with AgentLink — the fastest way to make your SaaS product AI-native.
In just a few minutes, you'll complete a five-step onboarding flow that sets up your MCP server, imports your API tools, configures authentication, and connects your application to AI platforms and agents.
The onboarding experience is fully interactive and chat-based.
You’ll be guided through five simple steps:
| Step | Purpose |
|---|---|
| 1. Set up your MCP Server | Create your environment and register your application. |
| 2. Add App Source | Upload your API definition (OpenAPI or GraphQL). |
| 3. Set up Authentication | Choose how your APIs authenticate requests. |
| 4. Configure API Base URL | Define where your API traffic should be forwarded. |
| 5. Test and Verify | Confirm that everything works as expected. |
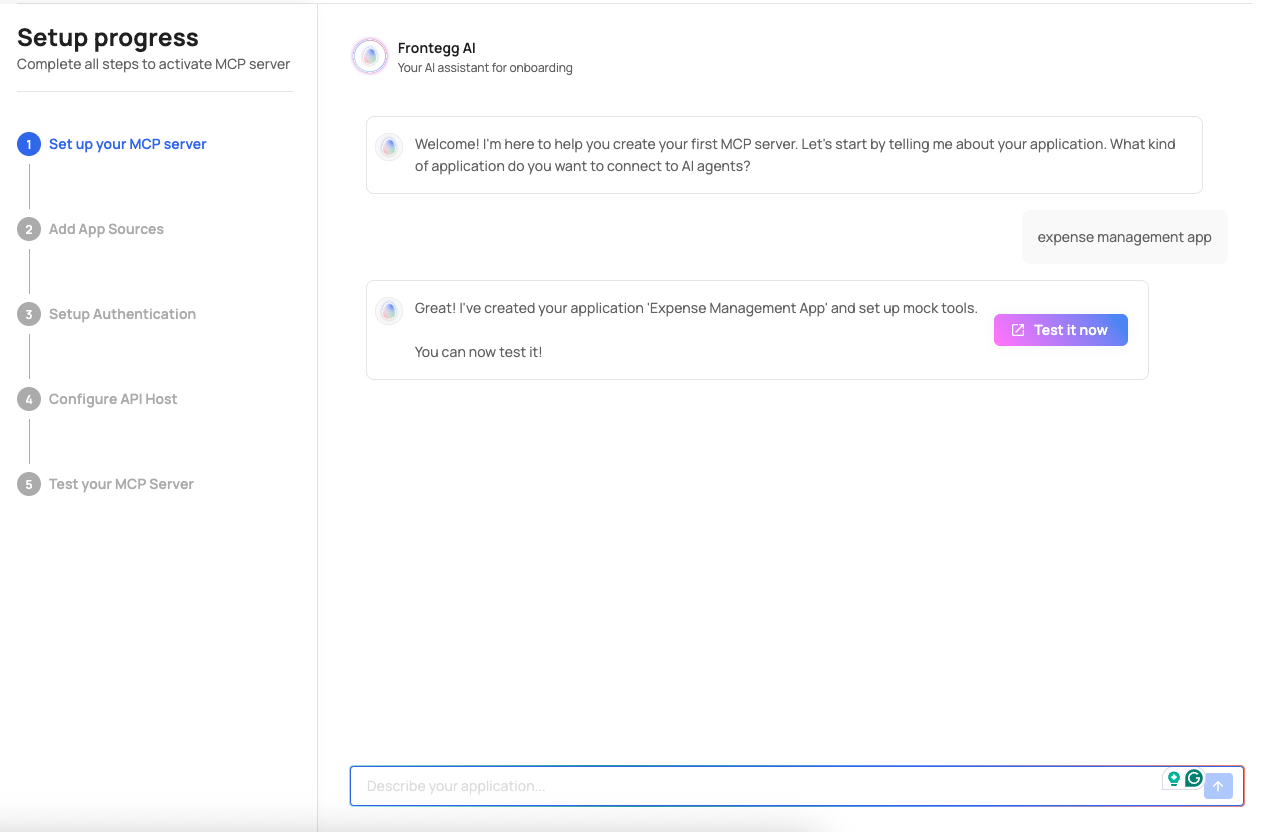
When you sign up, AgentLink walks you through creating your first MCP server.
You’ll be asked to describe in high-level your product or the type of application you want to connect to AI agents (e.g. "todo app" or "expense management app"). Once this step is complete, AgentLink creates your environment automatically so you can continue with setup.
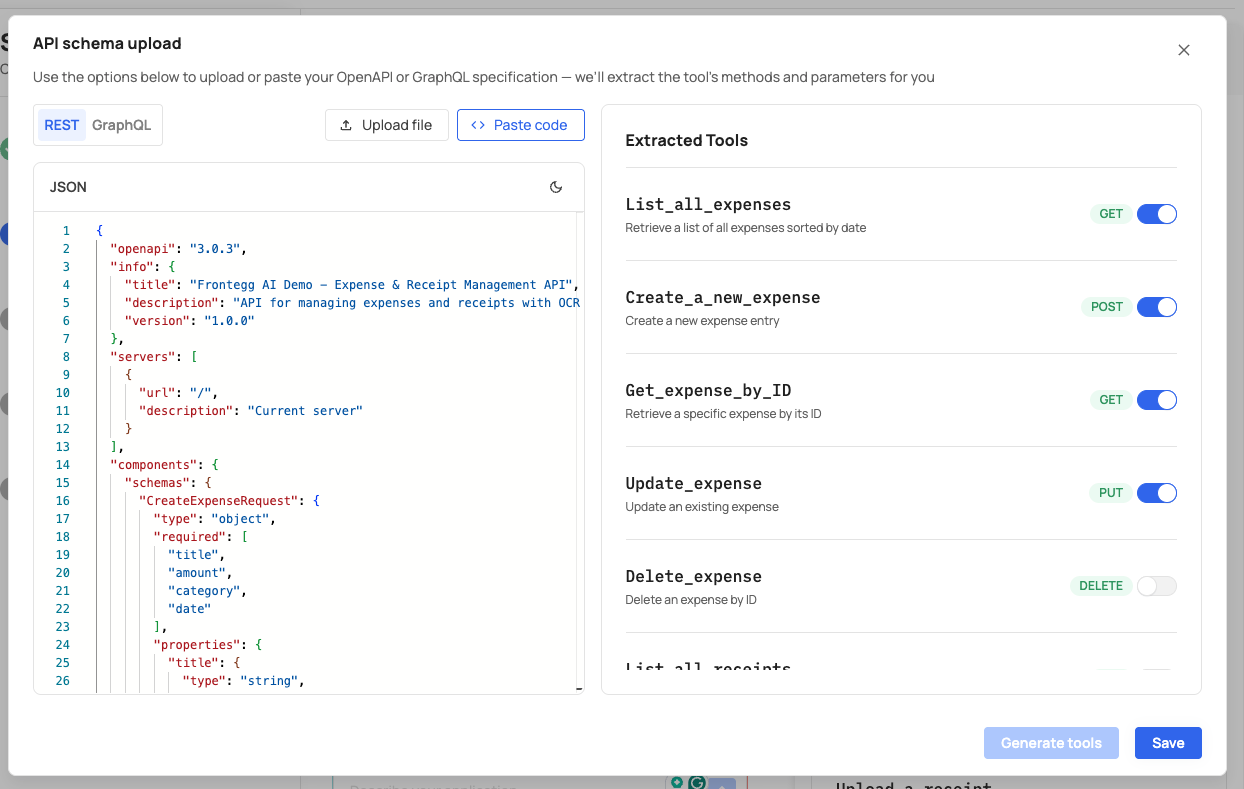
Next, you’ll upload your product’s API definition.
AgentLink supports both:
- OpenAPI (Swagger) specifications
- GraphQL schemas
This allows AgentLink to understand your endpoints and make them available as tools that AI agents can call.
After upload, you can review, enable, or edit each tool from the Tools screen.
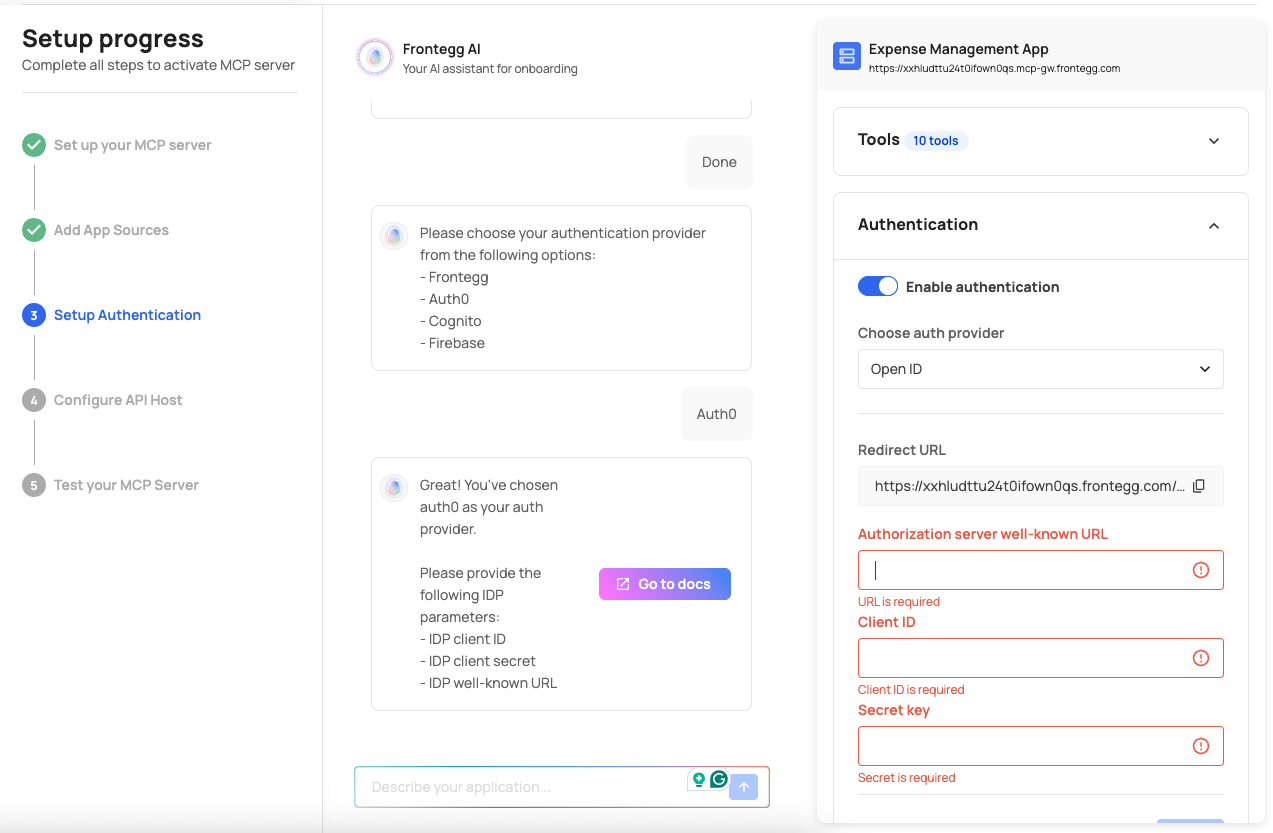
Choose how your application authenticates incoming API requests.
Supported options include:
- Frontegg
- Any OIDC compliant identity provider (e.g. Auth0, Amazon Congnito, Firebase)
Each option integrates seamlessly into your existing identity flow so you can control how AI-generated requests are verified.
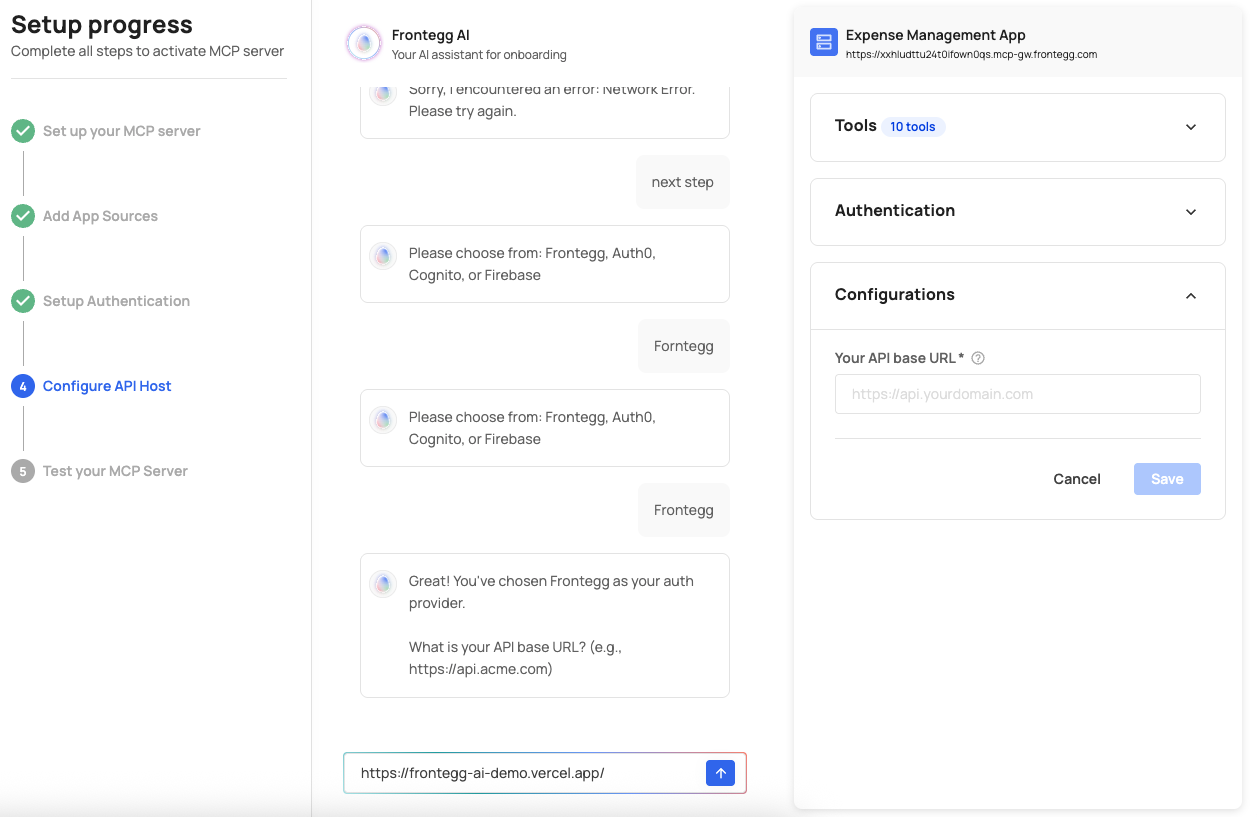
Provide the base URL where your API is hosted — for example: https://api.yourcompany.com
This tells AgentLink where to forward tool requests from connected AI agents.
You can also define custom domains and API timeouts later under the Configuration screen.
Once configuration is complete, you can test your setup using the AgentLink Chat Portal — a built-in testing environment.
The onboarding chat will provide you with a unique URL to your test portal.
There, you can:
- Interact with your newly created MCP server
- Validate that tools respond correctly
- Confirm authentication and permissions
If everything looks good, your MCP server is ready to go.
After onboarding, you can continue in one of two ways:
Test it in the Chat Portal
Use the out-of-the-box chat portal link provided at the end of onboarding to simulate how AI agents will use your APIs.Connect to AI Platforms
Integrate your MCP server with AI platforms like ChatGPT, Claude, or Gemini — follow the steps in
Connect to AI Platforms →.
Your SaaS product is now connected through AgentLink and ready for AI-native interaction.
From here, you can explore:
- Tools – manage your imported endpoints
- Access Control – control which users or tenants can use which tools
- Policies & Approvals – set up guardrails for sensitive actions
- Overview Dashboard – monitor AI usage and platform adoption
Continue to Connect to AI Platforms →