Approval Flows in AgentLink let you ensure that critical or sensitive actions are reviewed by the right people before being executed.
They are typically used when a policy specifies an action such as Request approval.
For example, you can require approval from finance admins before allowing an AI agent to submit an expense above $5,000.
When an agent triggers a policy with the Request approval action:
- The MCP Gateway pauses the operation.
- An approval request is sent to designated approvers.
- Approvers receive a notification (via Email or SMS).
- Once approved or rejected, the request is resumed or denied automatically.
The Approval Flows screen lists all configured flows along with:
- Flow name
- Description
- Used channels (Email, SMS)
- Last modified date
You can search by name or filter by notification channel.
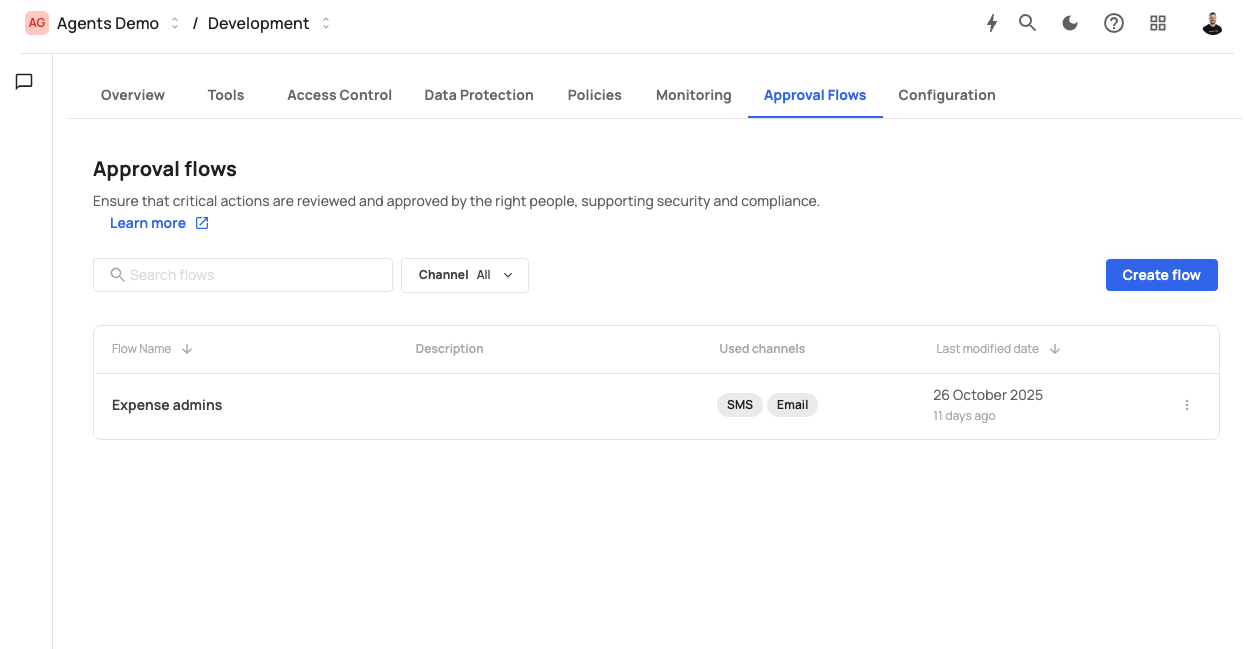
- Click Create flow on the top-right of the Approval Flows page.
- Complete the guided setup process consisting of four steps:
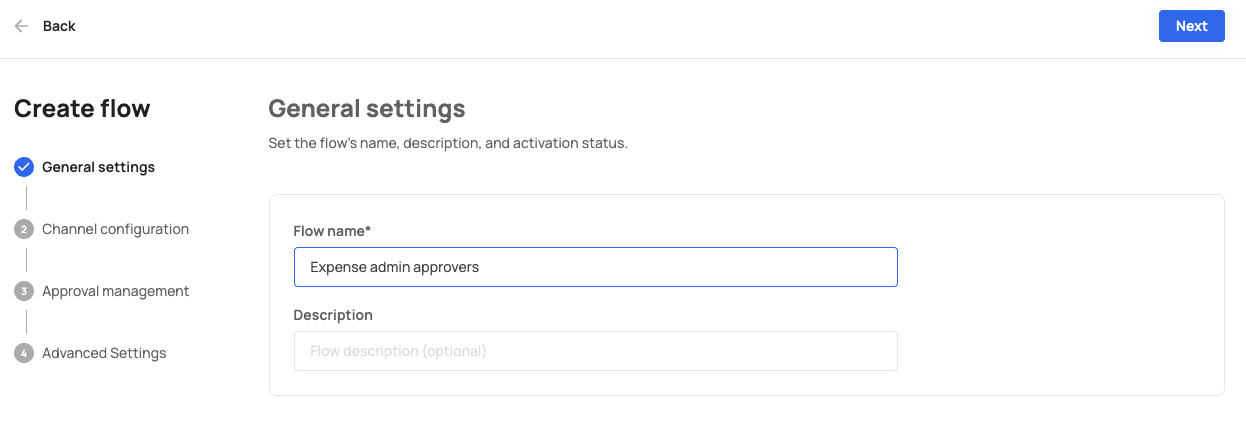
Define the basic information for your approval flow.
| Field | Description |
|---|---|
| Flow name | A unique name describing the flow (e.g., “Expense Admin Approvals”). |
| Description | Optional summary of what this flow is used for. |
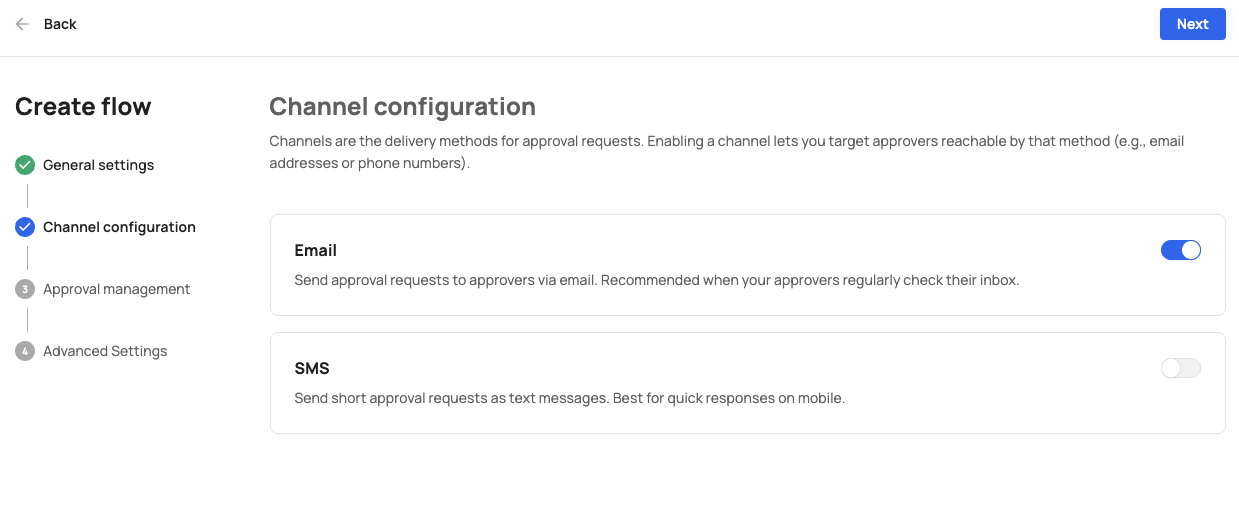
Select which communication channels will be used to notify approvers.
| Channel | Description |
|---|---|
| Sends detailed approval requests via email (recommended). | |
| SMS | Sends short approval requests as text messages (ideal for quick mobile responses). |
You can enable one or both channels. Approvers will receive notifications through all selected methods.
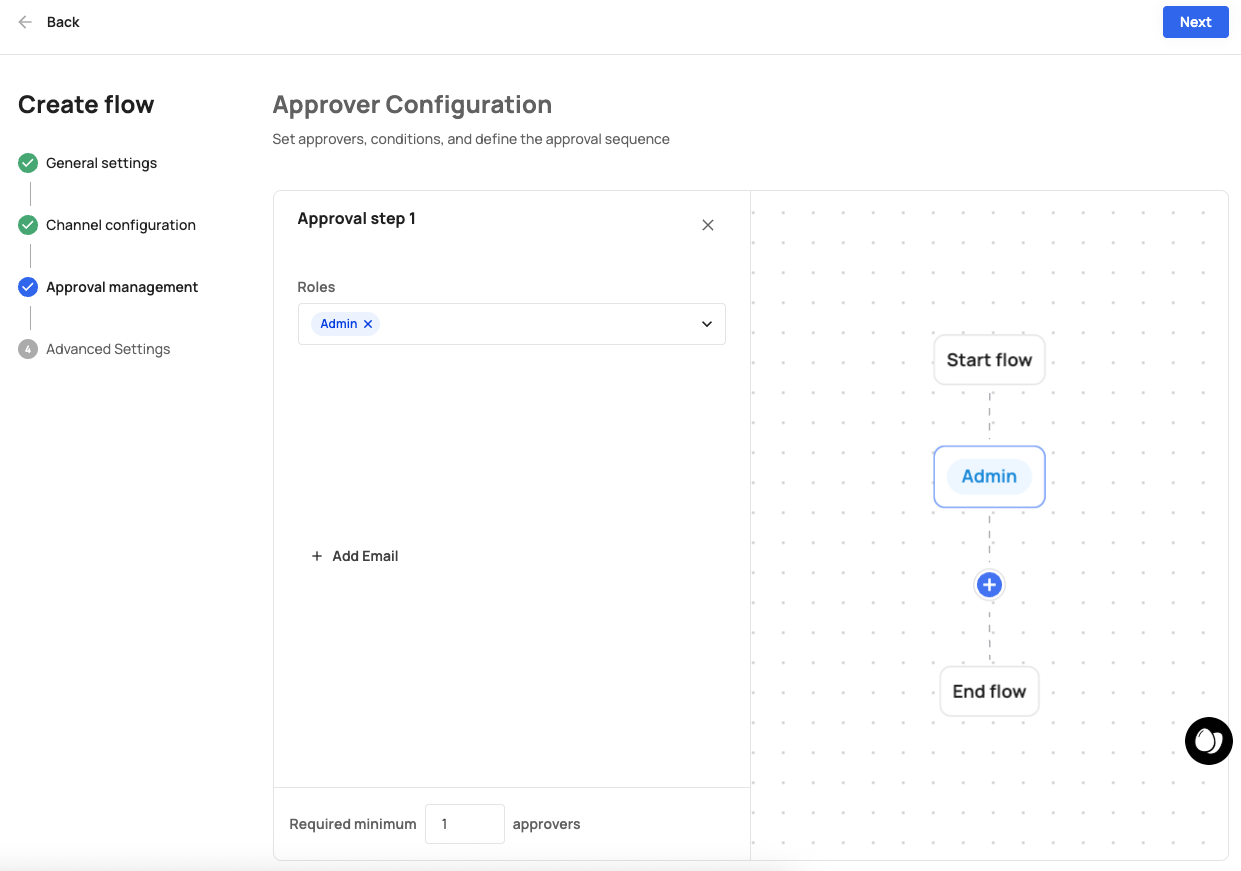
Define who can approve requests and the approval requirements.
| Option | Description |
|---|---|
| Roles | Select approvers by their role (e.g., Admin, Finance, Security). |
| Emails | Add specific approver email addresses if needed. |
| Minimum required approvers | Set how many approvals are needed before the action proceeds. |
You can visualize the approval path using the flow diagram on the right-hand side.
Fine-tune automation, notifications, and integrations.
| Setting | Description |
|---|---|
| Auto-approve timeout | Automatically approve if no response within a specified duration. |
| Send reminder | Send follow-up notifications to approvers for pending requests. |
| Notify requester on decision | Notify the original user when a decision is made. |
| CC traditional recipients | Copy additional stakeholders on every approval decision. |
Click Create to finalize and activate the flow.

- Click any existing flow to view or modify its settings.
- You can edit the approvers, channels, or webhook configurations at any time.
- Use the status toggle to enable or disable a flow temporarily.
Policy: "Expenses above $5000 require approval."
Flow: “Expense Admins”
Channels: Email and SMS
Approvers: Finance Admins
Auto-approve timeout: Disabled
When triggered, the system sends approval notifications to all finance admins and waits for at least one approval before proceeding.