This guide is a walkthrough on how to integrate Frontegg’s authentication magic into your app using the Frontegg Android Kotlin SDK. Whether you need to add secure sign-ups, logins, multi-factor authentication, or even social logins, this guide has you covered with simple, step-by-step instructions to get things rolling in no time.
Prerequisites
Prerequisites
Frontegg Hosted Login is required, and setting a custom domain is highly recommended.
Android ≥ 26
Java ≥ 8
Android SDK 26+
Set defaultConfig's minSDK to 26+ in build.gradle:
android {
      defaultConfig {
          minSdk 26
      }
  }
Java 8+ Set target java 8 byte code for Android and Kotlin plugins respectively build.gradle:
android {
      compileOptions {
          sourceCompatibility JavaVersion.VERSION_1_8
          targetCompatibility JavaVersion.VERSION_1_8
      }

      kotlinOptions {
          jvmTarget = '1.8'
      }
}Enable buildconfig feature:
- Add the below line to your gradle.properties:
android.defaults.buildfeatures.buildconfig=true
- Add the below lines to your app/build.gradle:
android {
    ...
    buildFeatures {
        buildConfig = true
    }
    ...
}If minifyEnabled and shrinkResources is true, follow the instruction below:
# Gson relies on generic type information stored in class files when working with fields.
# ProGuard removes this information by default, so we need to retain it.
-keepattributes Signature

# according to https://stackoverflow.com/a/76224937
# This is also required for R8 in compatibility mode, as several optimizations
# (such as class merging and argument removal) may remove the generic signature.
# For more information, see:
# https://r8.googlesource.com/r8/+/refs/heads/main/compatibility-faq.md#troubleshooting-gson-gson
-keep class com.google.gson.reflect.TypeToken { *; }
-keep class * extends com.google.gson.reflect.TypeToken

# Retain GSON @Expose annotation attributes
-keepattributes AnnotationDefault,RuntimeVisibleAnnotations
-keep class com.google.gson.reflect.TypeToken { <fields>; }
-keepclassmembers class **$TypeAdapterFactory { <fields>; }

# Keep Frontegg classes
-keep class com.frontegg.android.utils.JWT { *; }
-keep class com.frontegg.android.models.** { *; }

# Retain Tink classes used for shared preferences encryption
-keep class com.google.crypto.tink.** { *; }Navigate to Frontegg Portal Settings, If you
don't have application follow integration steps after signing up. Copy FronteggDomain for future steps
from Frontegg Portal Domain
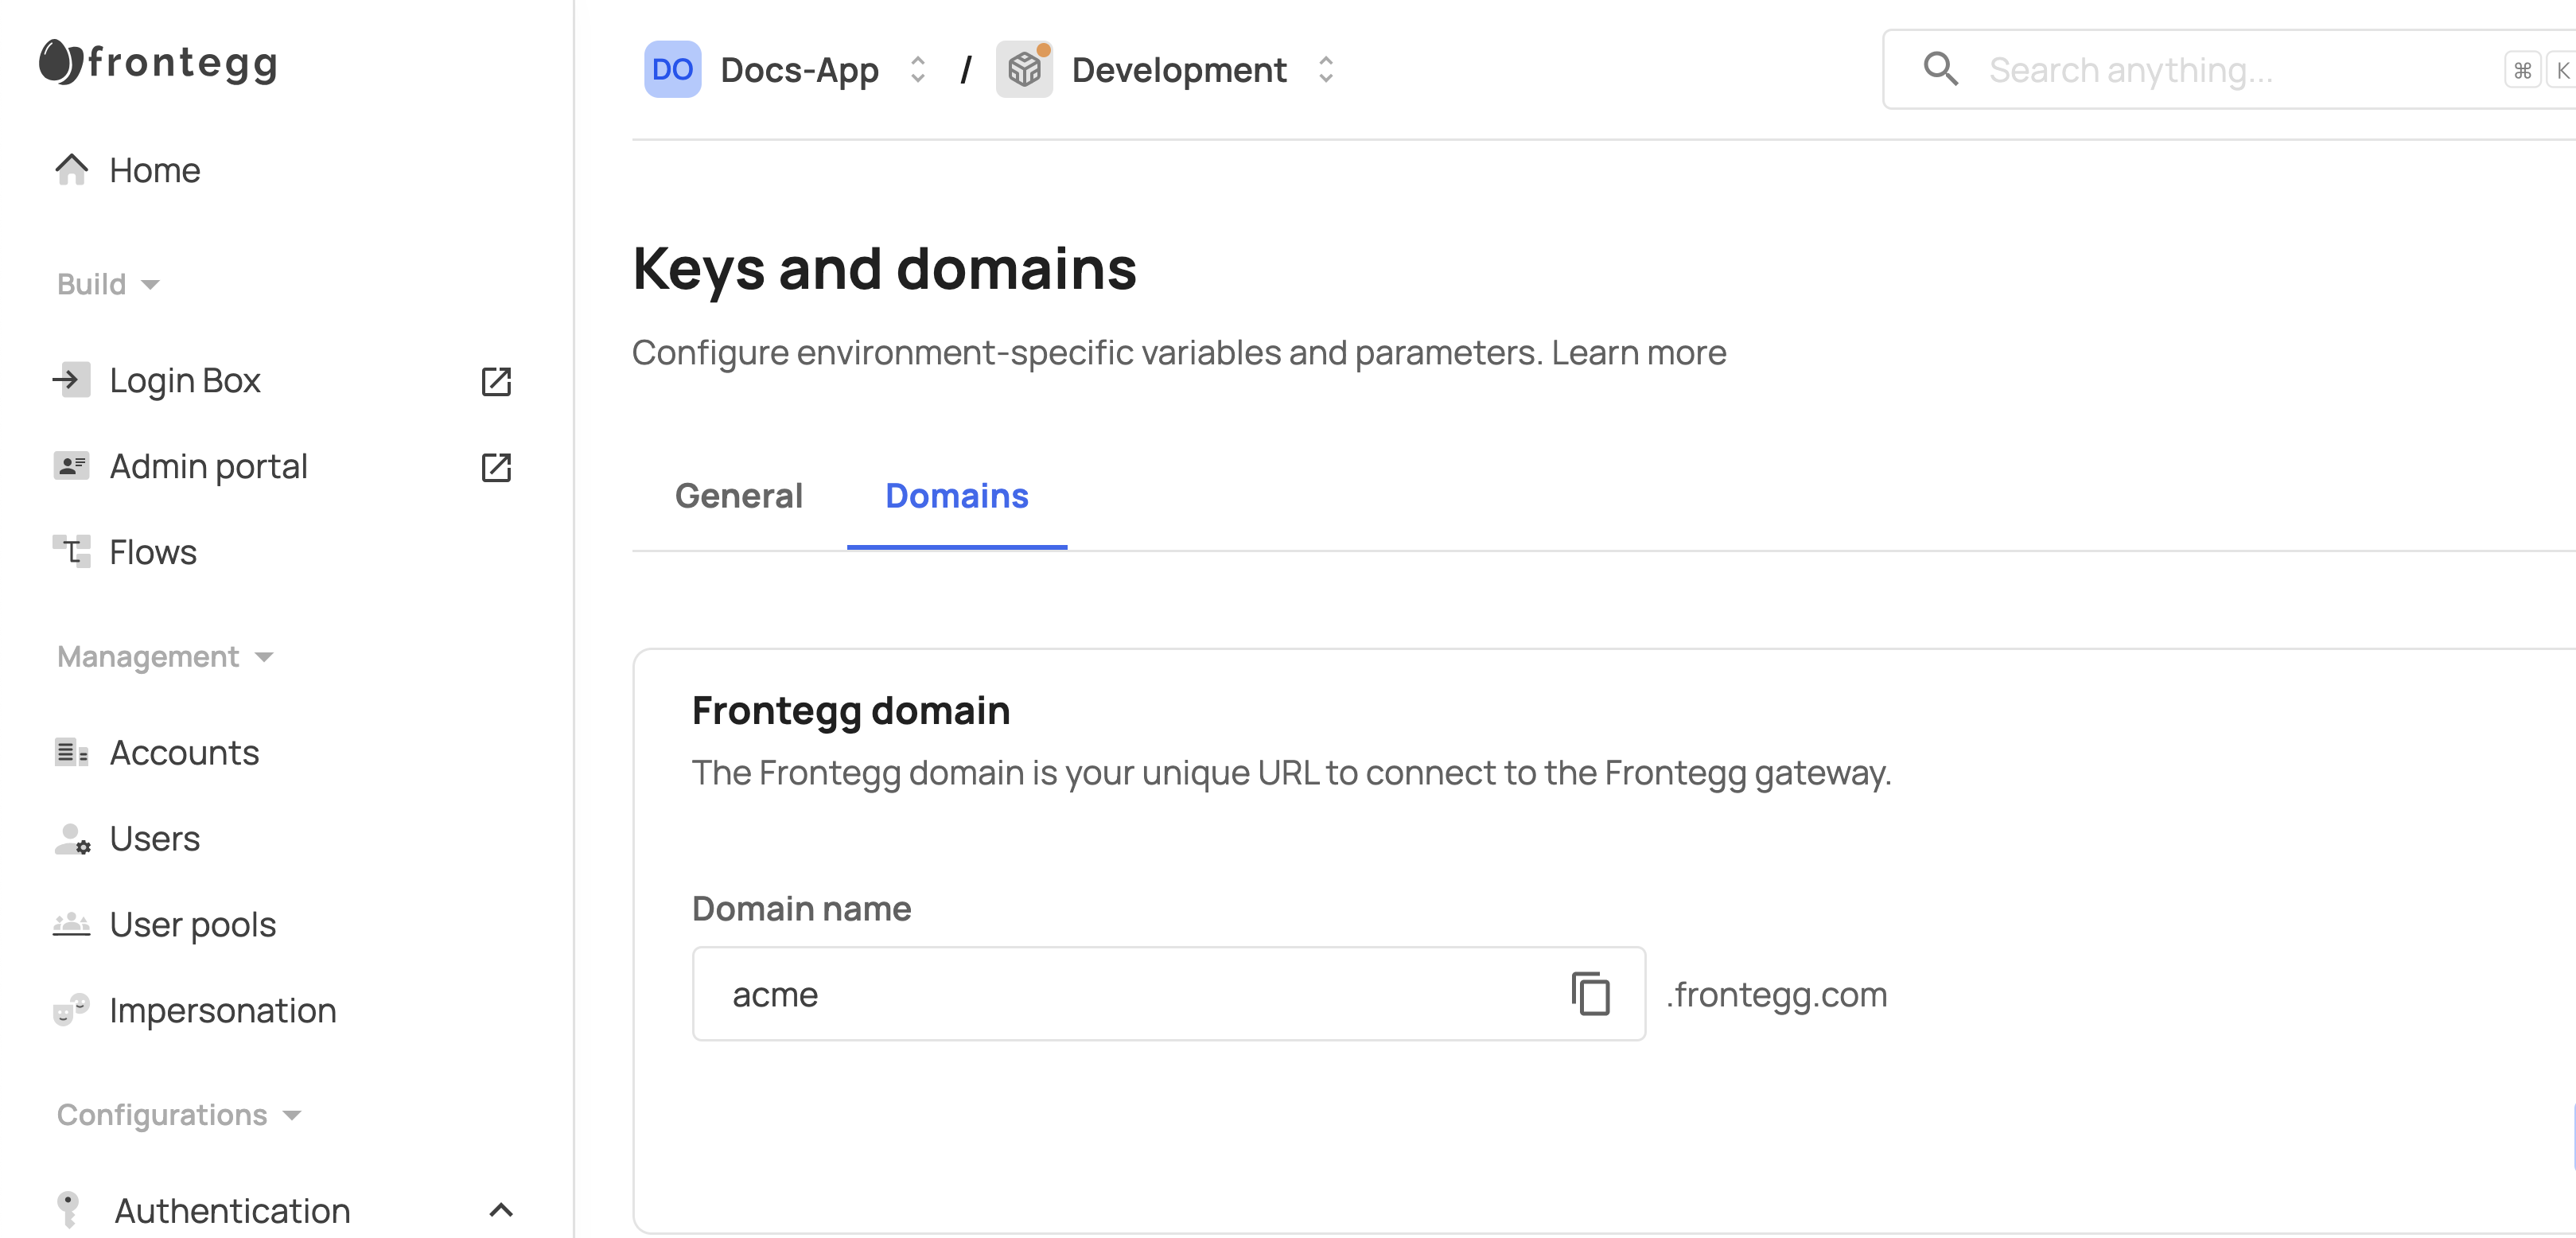
Navigate to Login Method Settings
Toggle on Hosted login method
Add
{{ANDROID_PACKAGE_NAME}}://{{FRONTEGG_BASE_URL}}/android/oauth/callback(for custom scheme)Add
https://{{FRONTEGG_BASE_URL}}/oauth/account/redirect/android/{{ANDROID_PACKAGE_NAME}}(for assetlinks)Replace
ANDROID_PACKAGE_NAMEwith your application identifierReplace
FRONTEGG_BASE_URLwith your Frontegg base url, without https, i.eFronteggDomain.
- Open you project
- Find your app's build.gradle file
- Add the following to your dependencies section:
dependencies {
    // Add the Frontegg Android Kotlin SDK
    implementation 'com.frontegg.sdk:android:1.+'
    // Add Frontegg observables dependency
    implementation 'io.reactivex.rxjava3:rxkotlin:3.0.1'
}To set up your Android application on to communicate with Frontegg, you have to
add buildConfigField property the gradle android/app/build.gradle.
This property will store frontegg hostname (without https) and client id from previous step:
def fronteggDomain = "FRONTEGG_DOMAIN_HOST.com" // without protocol https://
def fronteggClientId = "FRONTEGG_CLIENT_ID"

android {
    defaultConfig {

        manifestPlaceholders = [
                "package_name"      : applicationId,
                "frontegg_domain"   : fronteggDomain,
                "frontegg_client_id": fronteggClientId
        ]

        buildConfigField "String", 'FRONTEGG_DOMAIN', "\"$fronteggDomain\""
        buildConfigField "String", 'FRONTEGG_CLIENT_ID', "\"$fronteggClientId\""
    }
}
Add bundleConfig=true if not exists inside the android section inside the app gradle android/app/build.gradle
android {
    buildFeatures {
        buildConfig = true
    }
}Prerequisites
Prerequisites
The use of this feature requires minimum @frontegg/android-kotlin@1.2.19
This guide outlines the steps to configure your Android application to support multiple applications.
- Modify the
Build.gradlefile
def fronteggApplicationId = "your-application-id-uuid"
...
android {
    ...
    buildConfigField "String", 'FRONTEGG_APPLICATION_ID', "\"$fronteggApplicationId\""
}- Modify the
Appfile
Add BuildConfig.FRONTEGG_APPLICATION_ID to FronteggApp.init.
Example App.kt code:
class App : Application() {

    companion object {
        lateinit var instance: App
    }

    override fun onCreate() {
        super.onCreate()
        instance = this
        FronteggApp.init(
            BuildConfig.FRONTEGG_DOMAIN,
            BuildConfig.FRONTEGG_CLIENT_ID,
            this,
            BuildConfig.FRONTEGG_APPLICATION_ID, // here
        )
    }
}Add INTERNET permission to the app's manifest file.
<uses-permission android:name="android.permission.INTERNET"/>
<uses-permission android:name="android.permission.POST_NOTIFICATIONS"/>Configuring your Android AssetLinks is required for Magic Link authentication / Reset Password /
Activate Account / login with IdPs.
To add your AssetLinks to your Frontegg application, you will need to update in each of your
integrated Frontegg Environments the AssetLinks that you would like to use with that Environment. Send a POST request to https://api.frontegg.com/vendors/resources/associated-domains/v1/android with the following payload:
{
    "packageName": "YOUR_APPLICATION_PACKAGE_NAME",
    "sha256CertFingerprints": ["YOUR_KEYSTORE_CERT_FINGERPRINTS"]
}
Each Android app has multiple certificate fingerprint, to get your DEBUG sha256CertFingerprint you
have to run the following command:
For debug mode, run the following command and copy the SHA-256 value
NOTE: make sure to choose the Variant and Config equals to debug
./gradlew signingReport

###################
#  Example Output:
###################

#  Variant: debug
#  Config: debug
#  Store: /Users/davidfrontegg/.android/debug.keystore
#  Alias: AndroidDebugKey
#  MD5: 25:F5:99:23:FC:12:CA:10:8C:43:F4:02:7D:AD:DC:B6
#  SHA1: FC:3C:88:D6:BF:4E:62:2E:F0:24:1D:DB:D7:15:36:D6:3E:14:84:50
#  SHA-256: D9:6B:4A:FD:62:45:81:65:98:4D:5C:8C:A0:68:7B:7B:A5:31:BD:2B:9B:48:D9:CF:20:AE:56:FD:90:C1:C5:EE
#  Valid until: Tuesday, 18 June 2052
For Release mode, Extract the SHA256 using keytool from your Release keystore file:
keytool -list -v -keystore /PATH/file.jks -alias YourAlias -storepass *** -keypass ***This guide outlines the steps to configure your Android application to support multiple regions.
- Remove buildConfigFields from your
build.gradlefile:
android {
    //  remove this lines:
    //  buildConfigField "String", 'FRONTEGG_DOMAIN', "\"$fronteggDomain\""
    //  buildConfigField "String", 'FRONTEGG_CLIENT_ID', "\"$fronteggClientId\""
}- Modify the
Appfile
First, adjust your App.kt/java file to handle multiple regions:
Modifications:
- Remove the existing
FronteggApp.initfunction. - Add Call
FronteggApp.initWithRegionswith array ofregions. This array will hold
dictionaries for each region.
Example App.kt code:
class App : Application() {

    companion object {
        lateinit var instance: App
    }

    override fun onCreate() {
        super.onCreate()
        instance = this

        FronteggApp.initWithRegions(
            listOf(
                RegionConfig(
                    "eu",
                    "auth.davidantoon.me",
                    "b6adfe4c-d695-4c04-b95f-3ec9fd0c6cca"
                ),
                RegionConfig(
                    "us",
                    "davidprod.frontegg.com",
                    "d7d07347-2c57-4450-8418-0ec7ee6e096b"
                )
            ),
            this
        )
    }
}- Add
AssetLinksfor each region
For each region, configuring your Android AssetLinks. This is vital for proper API routing and
authentication. Follow Config Android AssetLinks to add your Android domains to your
Frontegg application.
- Add Intent-Filter in
Manifest.xmlThe first domain will be placed automatically in theAndroidManifest.xmlfile. For each additional
region, you will need to add anintent-filter. Replace${FRONTEGG_DOMAIN_2}with the second domain from the previous step.
NOTE: if you are using Custom Chrome Tab you have to use android:name com.frontegg.android.HostedAuthActivity instead of com.frontegg.android.EmbeddedAuthActivity
<application>
    <activity android:exported="true" android:name="com.frontegg.android.EmbeddedAuthActivity"
              tools:node="merge">
        <intent-filter android:autoVerify="true">
            <action android:name="android.intent.action.VIEW"/>

            <category android:name="android.intent.category.DEFAULT"/>
            <category android:name="android.intent.category.BROWSABLE"/>

            <data android:scheme="https"/>
            <!-- DONT NOT COMBINE THE FOLLOWING LINES INTO ONE LINE-->
            <data android:host="${FRONTEGG_DOMAIN_2}"
                  android:pathPrefix="/oauth/account/activate"/>
            <data android:host="${FRONTEGG_DOMAIN_2}"
                  android:pathPrefix="/oauth/account/invitation/accept"/>
            <data android:host="${FRONTEGG_DOMAIN_2}"
                  android:pathPrefix="/oauth/account/reset-password"/>
            <data android:host="${FRONTEGG_DOMAIN_2}"
                  android:pathPrefix="/oauth/account/login/magic-link"/>
        </intent-filter>
    </activity>

    <activity android:exported="true" android:name="com.frontegg.android.AuthenticationActivity"
              tools:node="merge">
        <!-- DONT NOT COMBINE THE FOLLOWING FILTERS INTO ONE LINE-->
        <intent-filter>
            <action android:name="android.intent.action.VIEW"/>

            <category android:name="android.intent.category.DEFAULT"/>
            <category android:name="android.intent.category.BROWSABLE"/>

            <data android:host="${FRONTEGG_DOMAIN_2}"
                  android:pathPrefix="/${package_name}/android/oauth/callback"
                  android:scheme="https"/>
        </intent-filter>
        <intent-filter>
            <action android:name="android.intent.action.VIEW"/>

            <category android:name="android.intent.category.DEFAULT"/>
            <category android:name="android.intent.category.BROWSABLE"/>

            <data android:host="${FRONTEGG_DOMAIN_2}" android:scheme="${package_name}"/>
        </intent-filter>
    </activity>
</application>- Implement region relection UI
The final step is to implement a UI for the user to select their region. **This can be done in any
way you see fit. The example application uses a simple picker view to allow the user to select their region.
Important Considerations
- Switching Regions: To switch regions, update the selection in Shared Preferences. If issues
arise, a re-installation of the application might be necessary. - Data Isolation: Ensure data handling and APIs are region-specific to prevent data leakage
between regions.
| Select EU Region | Select US Region |
|---|---|
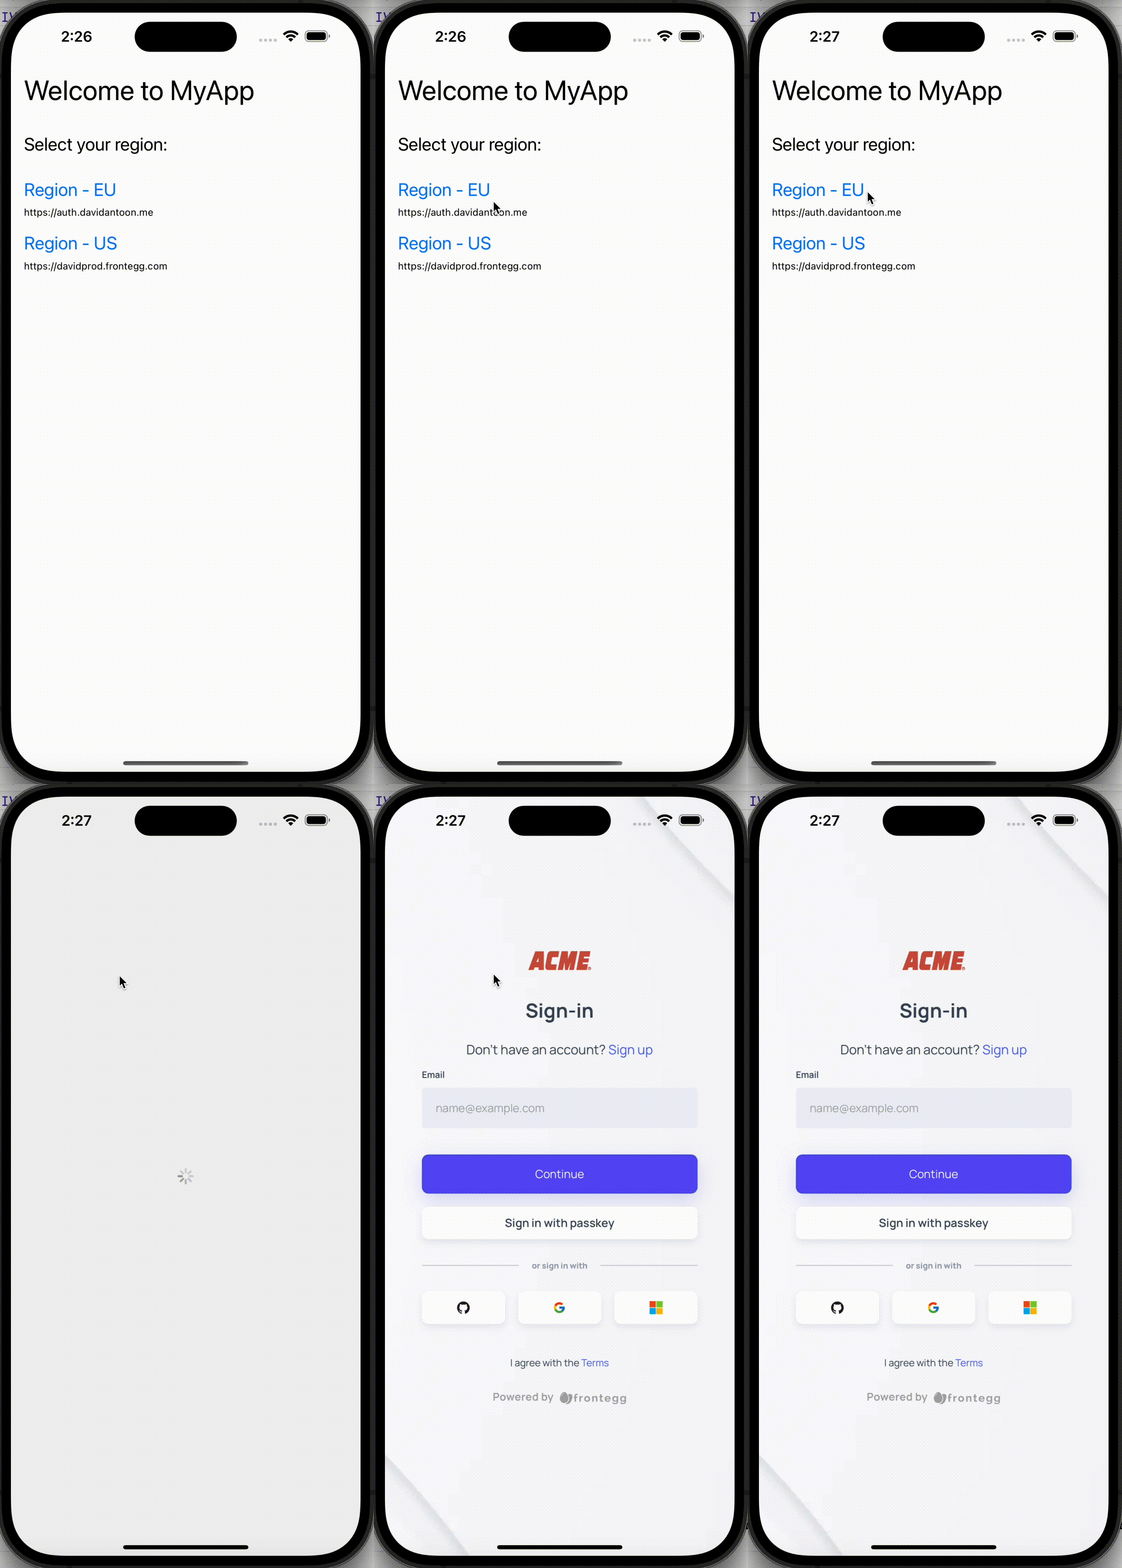 | 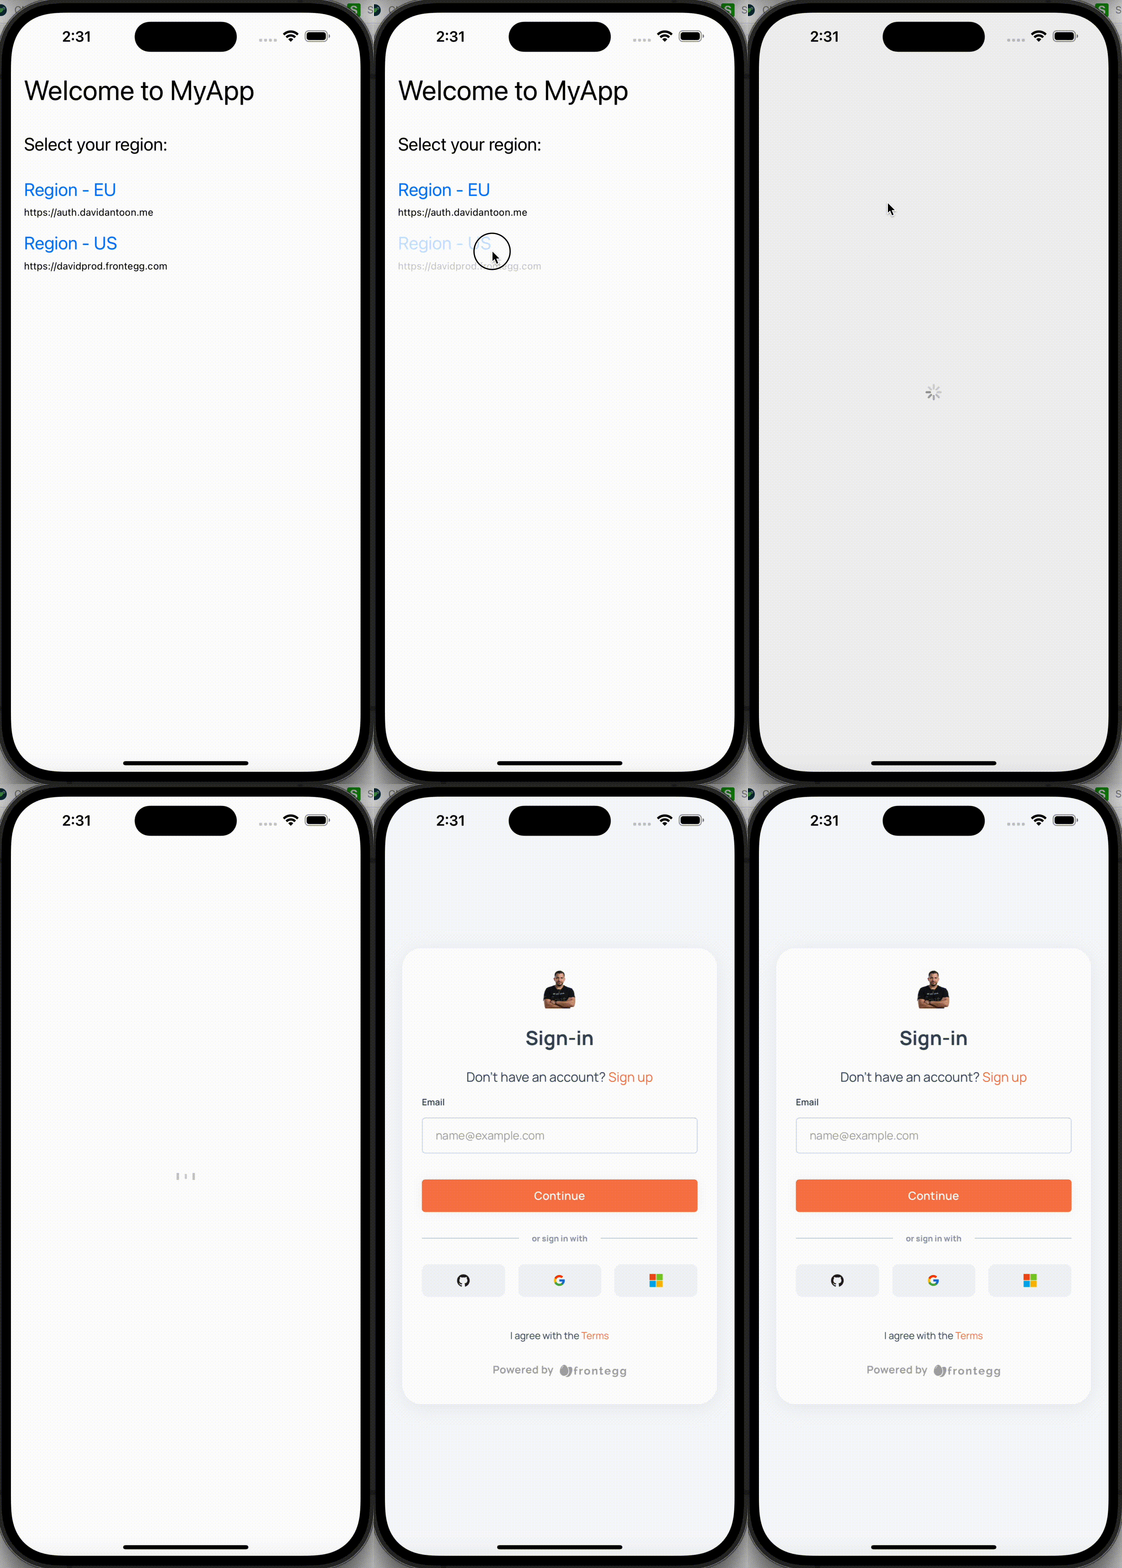 |
Example Region Selection
UI: example code
package com.frontegg.demo

import androidx.appcompat.app.AppCompatActivity
import android.os.Bundle
import android.widget.LinearLayout
import com.frontegg.android.FronteggApp

class RegionSelectionActivity : AppCompatActivity() {
    override fun onCreate(savedInstanceState: Bundle?) {
        super.onCreate(savedInstanceState)
        setContentView(R.layout.activity_region_selection)
    }


    override fun onResume() {
        super.onResume()

        val euButton = findViewById<LinearLayout>(R.id.euButton)
        val usButton = findViewById<LinearLayout>(R.id.usButton)

        euButton.setOnClickListener {
            FronteggApp.getInstance().initWithRegion("eu")
            finish()
        }

        usButton.setOnClickListener {
            FronteggApp.getInstance().initWithRegion("us")
            finish()
        }
    }
}Frontegg SDK supports two authentication methods:
- Embedded Webview
- Custom Chrome Tab
By default Frontegg SDK will use Embedded Webview, to use Custom Chrome Tab you have to set remove
embedded activity by adding below code to
the application manifest:
<manifest xmlns:android="http://schemas.android.com/apk/res/android"
          xmlns:tools="http://schemas.android.com/tools">
    <application>
        <!-- ... -->

        <activity android:name="com.frontegg.android.EmbeddedAuthActivity"
                  tools:replace="android:enabled" android:enabled="false"/>
        <activity android:name="com.frontegg.android.HostedAuthActivity"
                  tools:replace="android:enabled" android:enabled="true"/>

        <!-- ... -->
    </application>
</manifest>Create a custom App class that extends android.app.Application to initialize FronteggApp:
package com.frontegg.demo

import android.app.Application
import com.frontegg.android.FronteggApp

class App : Application() {

    override fun onCreate() {
        super.onCreate()

        FronteggApp.init(
            BuildConfig.FRONTEGG_DOMAIN,
            BuildConfig.FRONTEGG_CLIENT_ID,
            this, // Application Context
        )
    }
}
Register the custom App in the app's manifest file
AndroidManifest.xml:
<application android:name=".App">
    <!--  ... -->
</application>To enable social login via Chrome Custom Tabs, set the useChromeCustomTabs flag to true during the
initialization of FronteggApp. By default, the SDK uses the Chrome browser for social login.
FronteggApp.init(
      BuildConfig.FRONTEGG_DOMAIN,
      BuildConfig.FRONTEGG_CLIENT_ID,
      this, // Application Context
      // ...
      useChromeCustomTabs = true
)In order to login with Frontegg, you have to call FronteggAuth.instance.login method
with activtity context. Login method will open Frontegg hosted login page, and will return user data after successful login.
import com.frontegg.android.FronteggAuth

class FirstFragment : Fragment() {
    // ...

    override fun onViewCreated(view: View, savedInstanceState: Bundle?) {

        binding.loginButton.setOnClickListener {
            FronteggAuth.instance.login(requireActivity())
        }
    }
    // ...
}In order to logout user, you have to call FronteggAuth.instance.logout method.
Logout method will clear all user data from the device.
import com.frontegg.android.FronteggAuth

class FirstFragment : Fragment() {
    // ...

    override fun onViewCreated(view: View, savedInstanceState: Bundle?) {

        binding.logoutButton.setOnClickListener {
            FronteggAuth.instance.logout()
        }
    }
    // ...
}In order to switch tenant, you have to call FronteggAuth.instance.switchTenant method
with activity context.
import com.frontegg.android.FronteggAuth

class FirstFragment : Fragment() {
    // ...

    override fun onViewCreated(view: View, savedInstanceState: Bundle?) {

        val tenantIds = FronteggAuth.instance.user.value?.tenantIds ?: listOf()

        /**
         *  pick one from `tenantIds` list:
         */
        val tenantToSwitchTo = tenantIds[0]

        binding.switchTenant.setOnClickListener {
            FronteggAuth.instance.switchTenant(tenantToSwitchTo)
        }
    }
    // ...
}